Interface and application programming
Group members
Week 14 group work: Interface and application programming
This week was done as one group to cover multiple options.
Processing
Processing is a flexible software sketchbook and a language for learning how to code.
It is open source and available for macOS, Windows, and Linux. Its free, libre, open-source status encourages the community participation and collaboration that is vital to its growth. Contributors share programs, contribute code, and build libraries, tools, and modes to extend the possibilities of the software.
You can start with downloading and opening the 'Processing' application.
There are a lot of text and video tutorial on the Learn -tab to get going. You can find beginner, intermediate, and advanced topics.
Processing is built on Java, so Processing source code has similar syntax to Java. On Documentation - Reference there'a a vast list of used functions and their explanations.
Working with Processing
Meter
Petra demonstrated the using of a meter in Processing in her own assignment of the week. individual assignment.
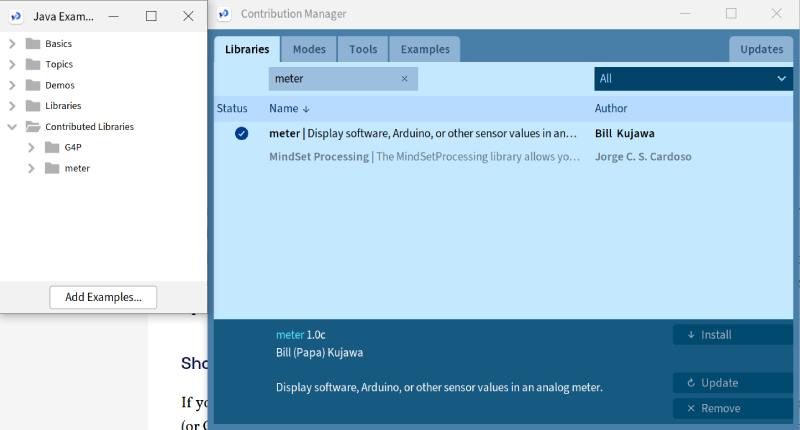
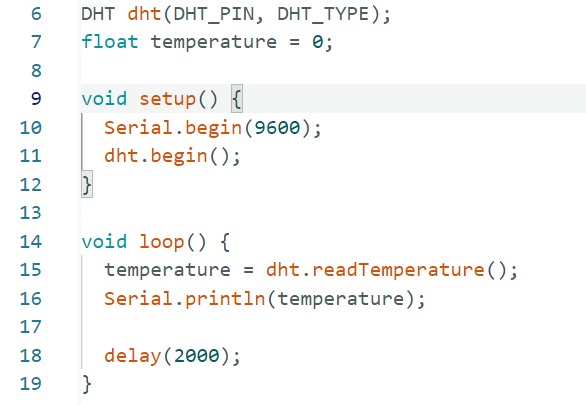
Open the Processing and start a new sketch. The first thing you need to do when planning to use a meter is to add a library for it.
You go to Sketch -> Import library -> Manage libraries. Type in 'Meter' and install the found library.
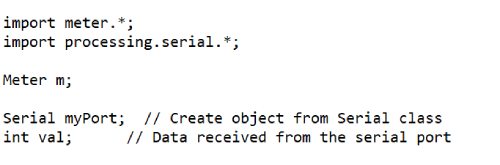
When you are using a meter in the sketch, you need to first import the library with import meter.*;
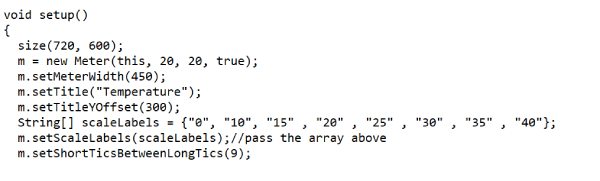
On void setup you can define the looks of the meter.
The meter is either a half circle or full circle when created: m = new Meter(this, x, y, true/false); where x and y are the meter upper left corner. True/false creates a full/half circle meter.
You can set a title with m.setTitle("yourtitle");, and add offset with m.setTitleYOffset(youroffset);
The scale labels are what the user sees. They rotate clockwise, starting from zero degrees (3:00 Oclock) to 360 degrees (again at 3:00 Oclock). The default meter is 180 degrees (9:00 Oclock) to 360 degrees (3:00 Oclock).
You can also set the tics. The long tic marks point to each scale label. You can also add short tics with m.setShortTicsBetweenLongTics(number);.
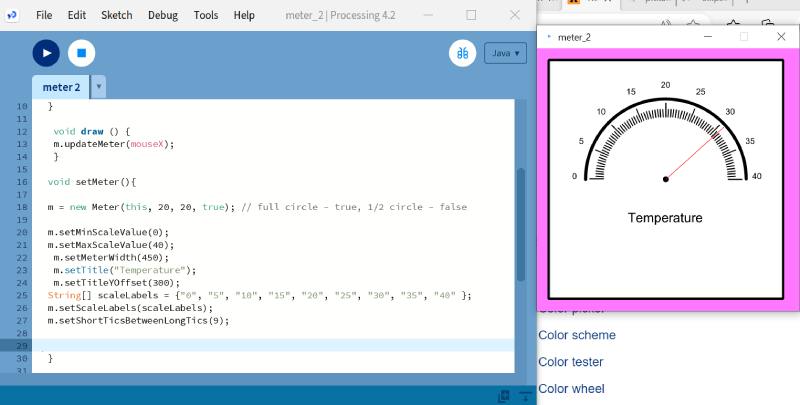
You can see an example of the setup in Petra's example below.
There are a lot of good examples to use while learning to use the sketchbook. You can try to modify your own meter and start with the example that simulates data in File -> Examples -> Meter -> FullCircleMeter.
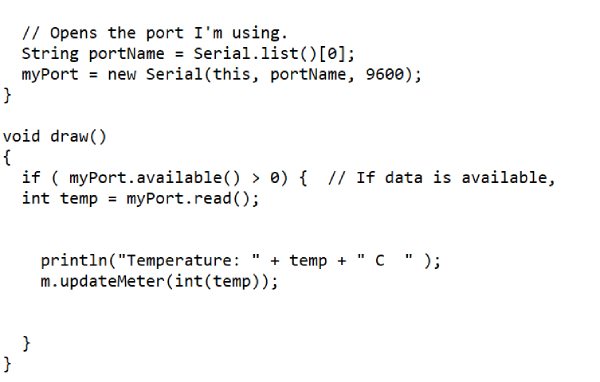
When you want to bring actual information to Processing from Arduino IDE, you need to open the Serial Port. In File -> Examples -> SimpleRead you are shown how to do that.
First you add the library for serial with import processing.serial.*;. In void setup you open the port. Write the portName you are using as follows:
String portName = Serial.list()[0]; myPort = new Serial(this, portName, 9600);
On void draw you read the data if it is available. In Petra's assignment of the week you also print a line of the result and update the meter.
Petra also made meters that read two values from a sensor. You can see the work on her own pages.
G4P GUI builder
Essi demonstrated the using of a G4P GUI builder tool in Processing in her own assignment of the week. Individual assignment.
The GUI builder tool provides a visual environment for the rapid creation and editing of user interfaces using GUI controls in the G4P library. Controls can be buttons, sliders, labels, textfields, etc.
More about the G4P GUI builder tool and G4P library can be read on the developer's page.
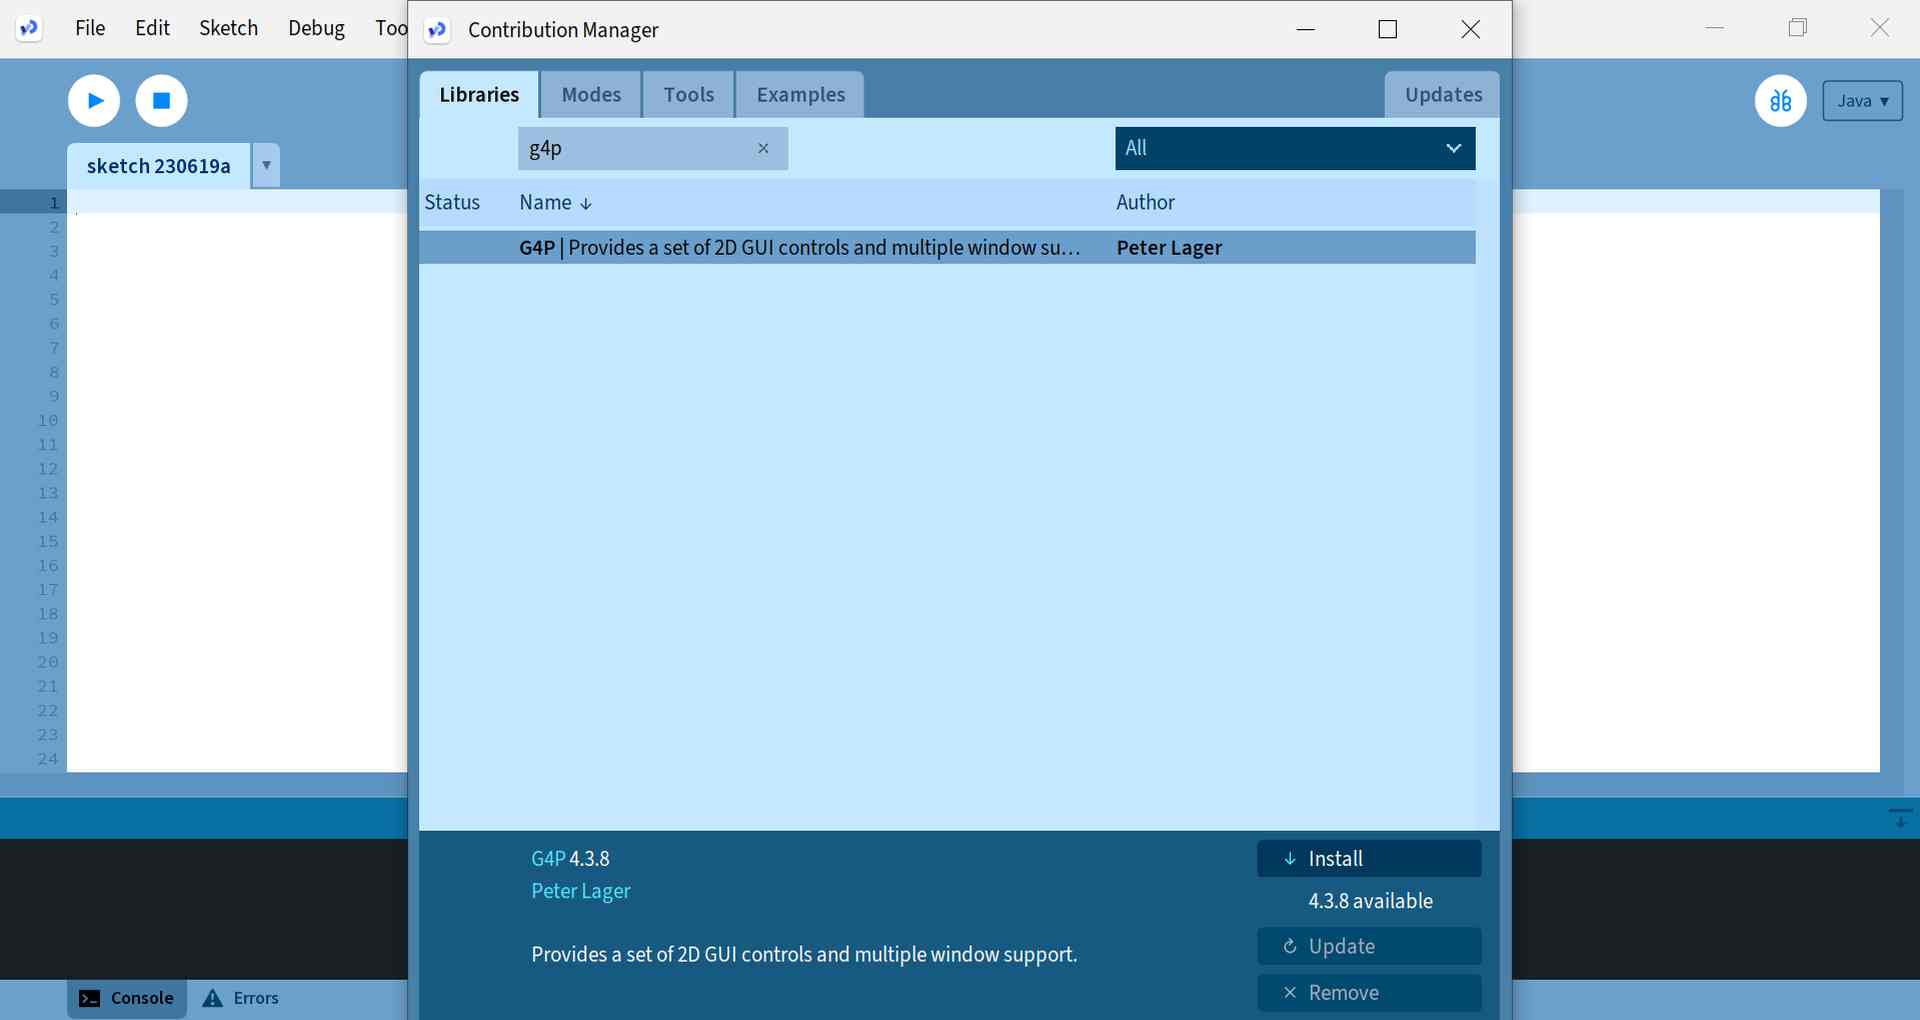
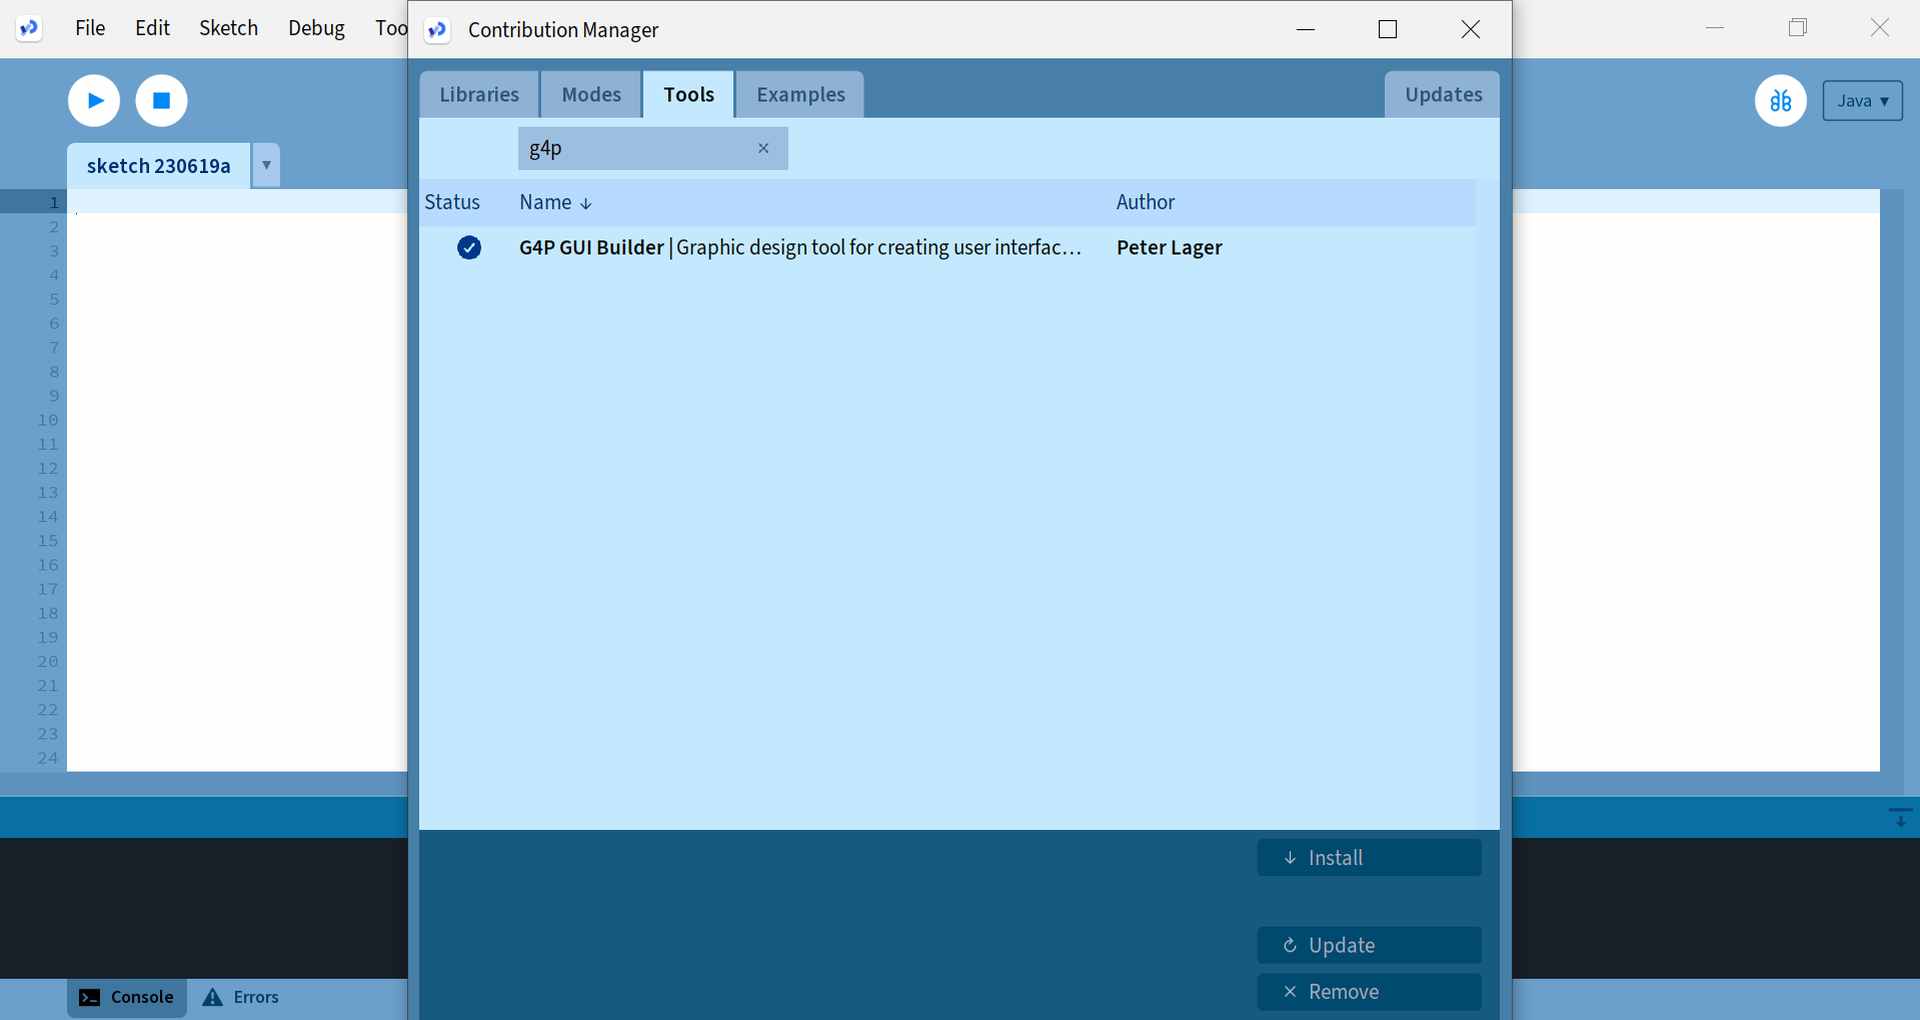
To start working with the G4P GUI builder in Processing, first you need to install the tool and the library for it. From the Sketch menu, open "Import Library..." and "Manage Libraries". Search for g4p to find the right library and install it.
In the same window, there is also a Tools tab where you can search for the right tool using the g4p search term.
Next, you can open the G4P GUI builder from the Tools tab and it will open in a new window. In the right menu, under Main window, you can change the properties, such as the size of the Main window. From the top you can change the settings of the grid. From the top menu you can add controls, of which there are many different types. In the example below I have added a textfield to the Main window.
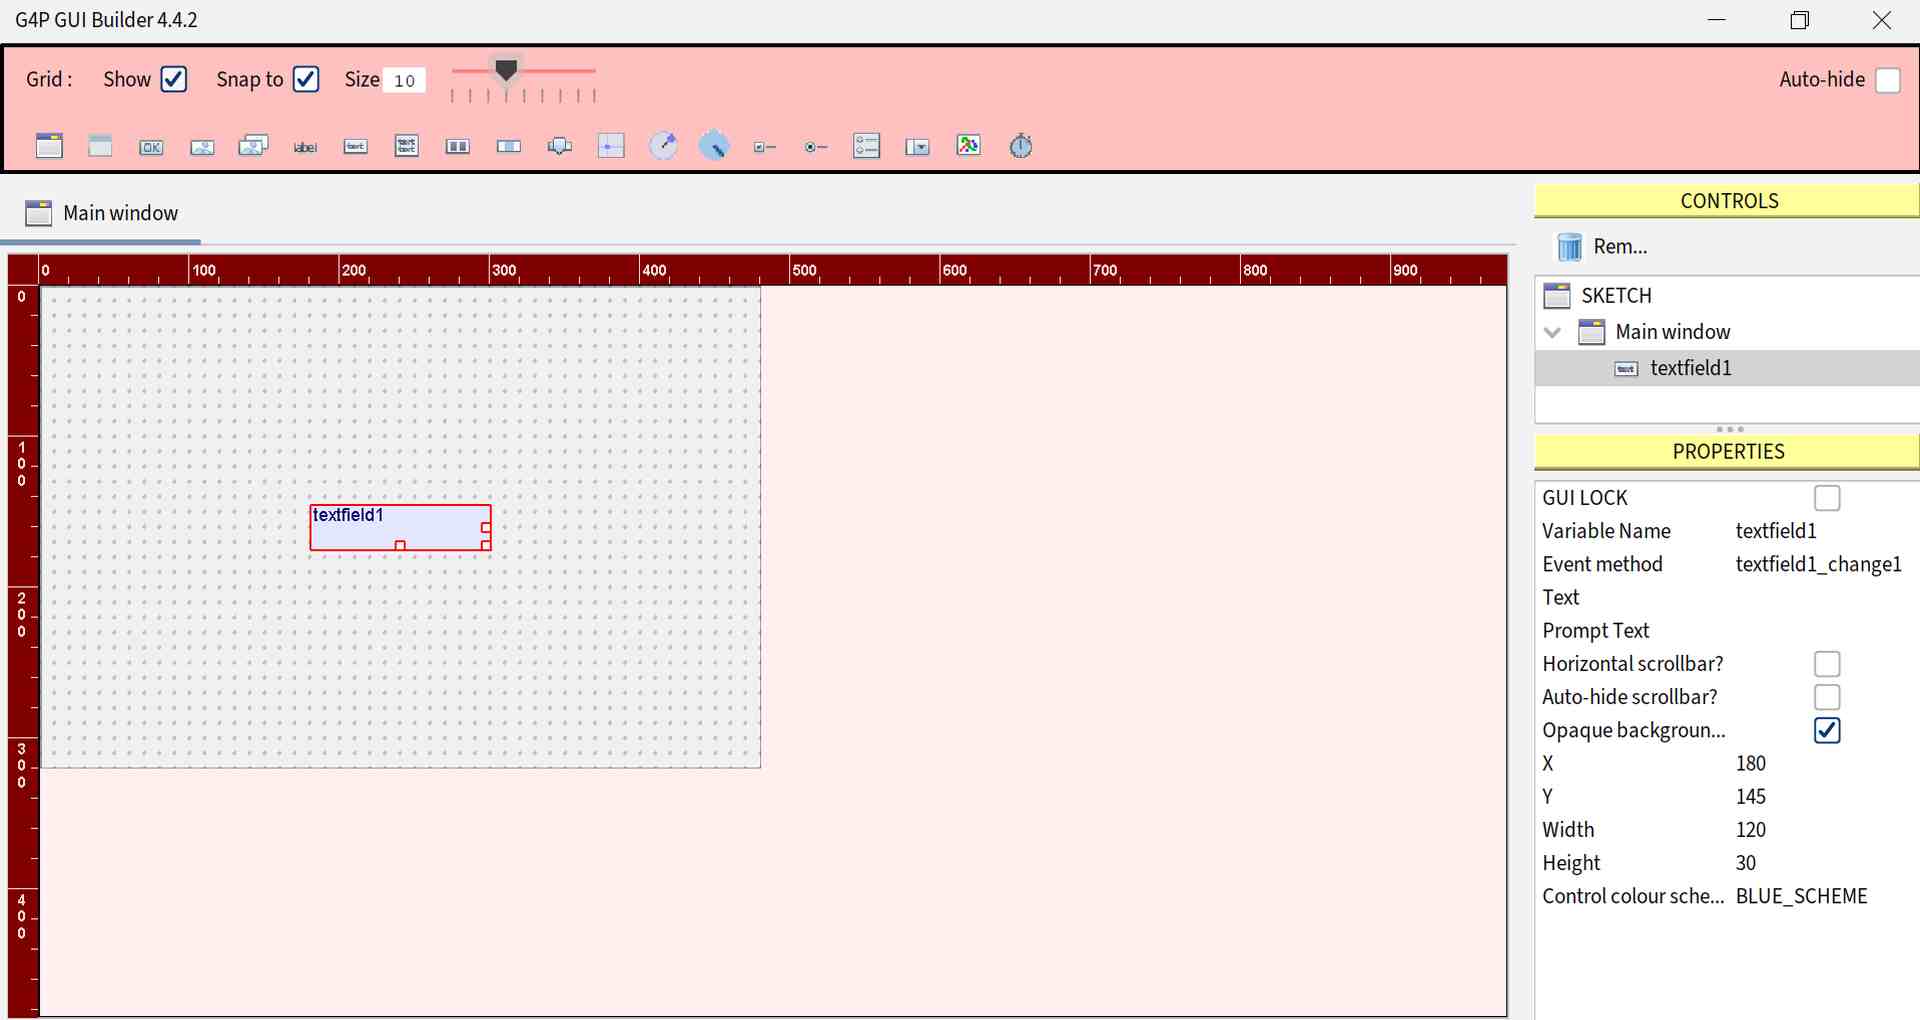
When you click from the right to open the textfield you have just created, you can change its properties. Under the Sketch tab, you can edit the text properties of the controls, for intance. Small examples of how to use the properties can be found in the Essi's documentation.
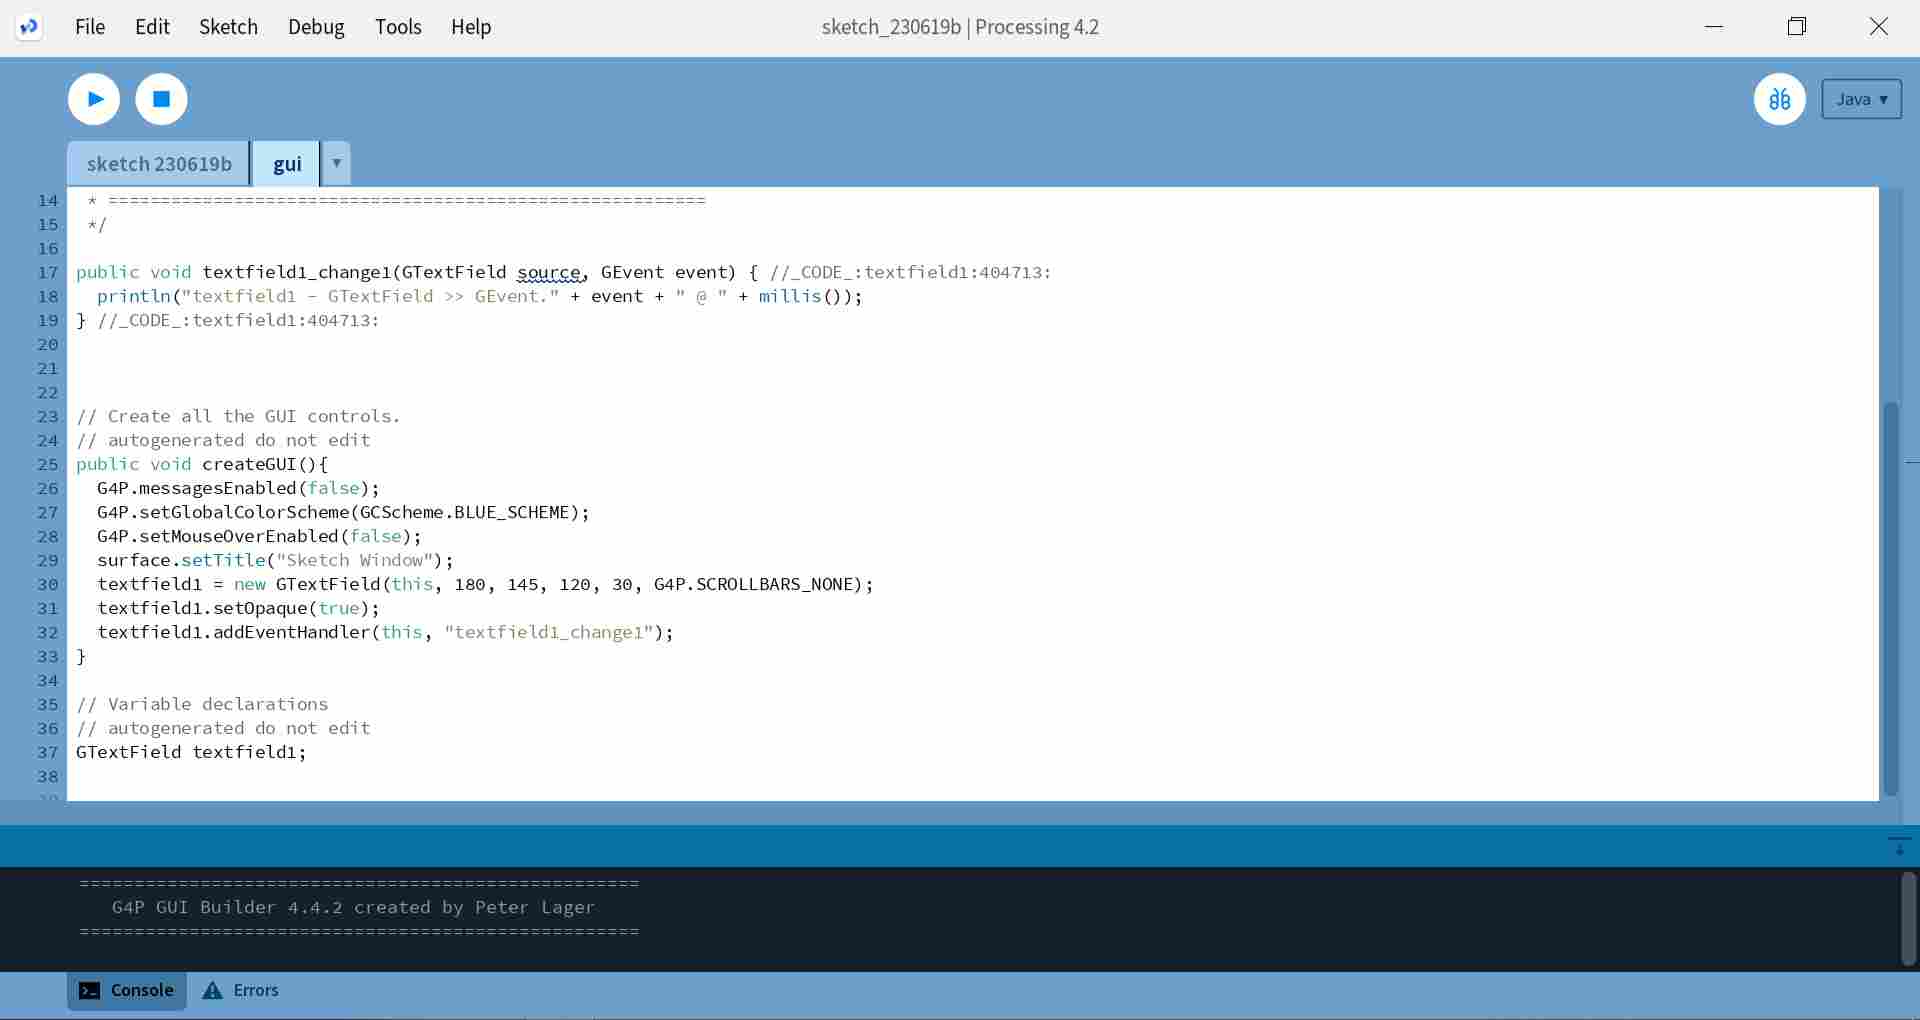
This tool has a code generator, that generates the code necessary to create the interface. So when you add a control in the G4P GUI builder, the Processing automatically creates a gui file with the generated code for the GUI controls:
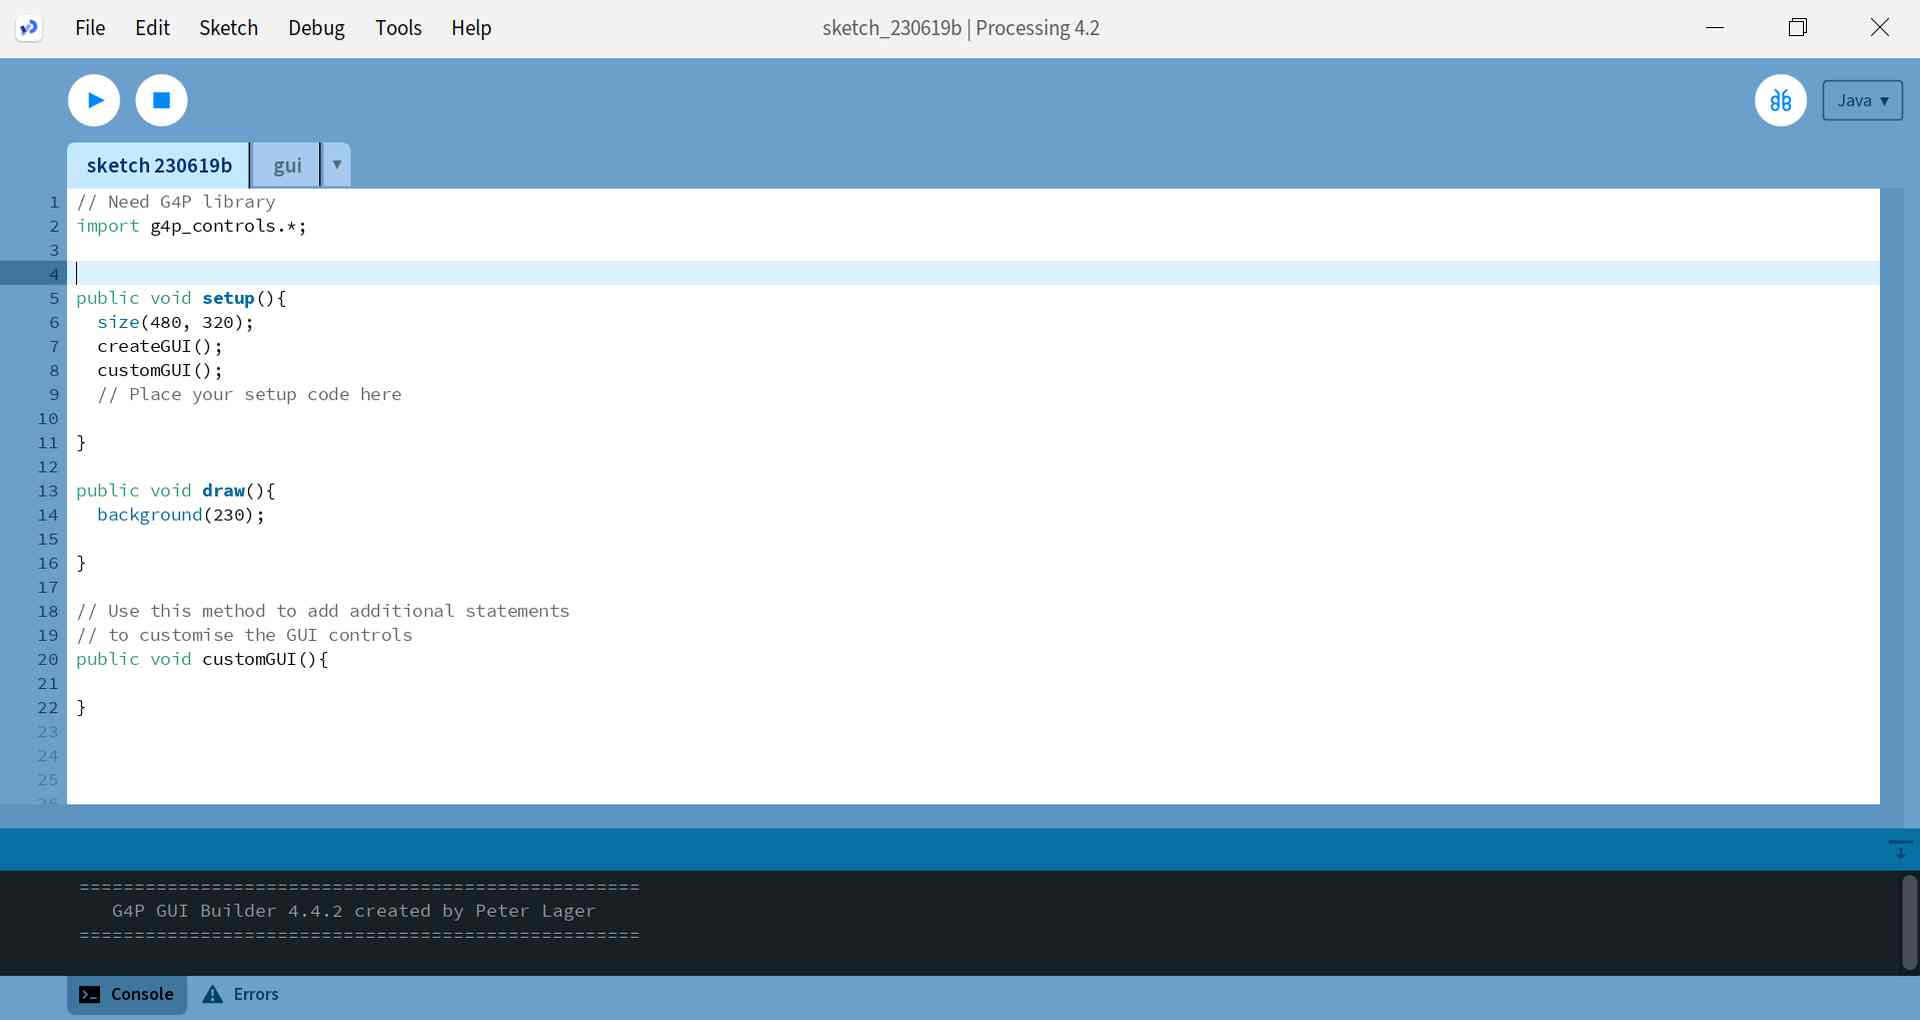
Also the sketch file is updated with the g4p.controls library, which is required for the controls to work. The initial public void setup (), public void draw () and in this case also the public void customGUI (), which I did not use in my test, are also updated in the file:
These files are then modified according to the features and properties you want. Small examples can be found in the Essi's documentation.
Bringing information from the Arduino IDE to the Processing is done in the same way as in Petra's example above. So in the code you have to import the processing.serial library, create an object from the serial class and in the void setup() you can use lines like Petra mentioned to open the port.
The message that the Arduino sends and how to read it in Processing depends on the specific communication protocol you have implemented between the Arduino and Processing.
For example, below Arduino sends a temperature value as a text message, float means data type for floating-point numbers.
And the Processing reads it using the serialEvent() function:
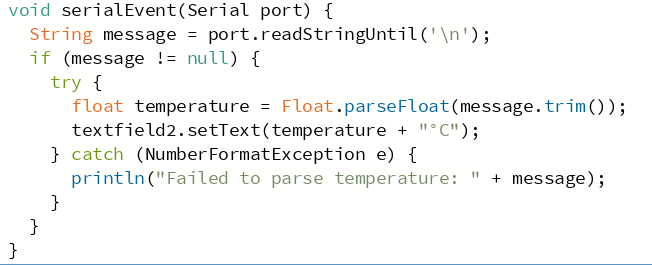
Processing receives temperature data from the serial port, parses it as a float, and updates a textfield (textfield2) with the temperature value.
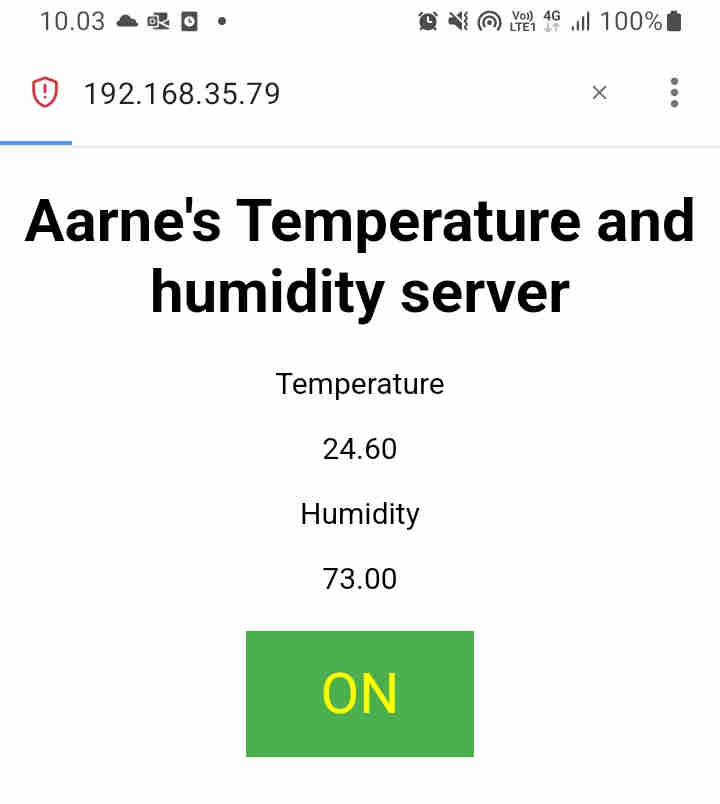
Esp32C3 webhost
ESP32C3 microcontroller can be used to serve a webpage. This can be convenient way to provide a user interface for a project, and it enables interaction with the microcontroller. During this week Aarne experimented with the ESP32C3 web server by trying out the Random Nerd tutorial by Rui Santos, and modified it to display readings from DHT22 temperature humidity sensor and a web button to light up a LED, as documented on his page.
 .
.
The tutorial of the Random nerd tutorial provides an example code, which can be modified to set up the server. The key points of using the code are shown below.
The web server on the ESP32C3 MCU utilizes the WiFi library, which is available for this microcontroller. The library is taken in to use by including the following lines in the Arduino IDE code:
// Load Wi-Fi library
#include <WiFi.h>
After this, the code that is used to define the access to the local wifi hotspot:
// Replace with your network credentials
const char* ssid = "here is the wifi hot spot name";
const char* password = "here is the password of the hotspot";

// Set web server port number to 80
WiFiServer server(80);

// Variable to store the HTTP request
String header;
In the setup loop, the ESP32C3 is set to connect to the wifi. The main command to achieve this is the WiFi.begin(ssid,password):
// Connect to Wi-Fi network with SSID and password
  Serial.print("Connecting to ");
  Serial.println(ssid);
  WiFi.begin(ssid, password);
  while (WiFi.status() != WL_CONNECTED) {
    delay(500);
    Serial.print(".");
  }
  // Print local IP address and start web server
  Serial.println("");
  Serial.println("WiFi connected.");
  Serial.println("IP address: ");
  Serial.println(WiFi.localIP());
  server.begin();
..
Python and PyQt
Python is rather easy languange to learn even for beginners. Qt framework is a set of cross platform C++ libraries for building desktop and mobile applications.
To make an application with Python using Qt you need the following libraries:
- PyQt5
- Graphical User Inteface (GUI)
- PySerial
- Serial communication with the microcontroller
- PyInstaller
- Building an executable
Akseli demonstrated the process in his individual assignment.
Here is an example of what the resulting application looks like:

It's done using the default graphics and not changing anything like even colors.
While the Qt framework is really powerful tool to know it can be quite overkill for this kind of application. However, if you have experience with Python and want to make an application using it, PyQt is a very attractive option and it was not too hard for this simple application.
PySerial was intuitive to use for the serial communication. It even has a tool to list ports:
> python -m serial.tools.list_ports
COM1
COM4
COM5
3 ports found
>
One thing that wasn't figured out is how to use this tool in the program.
Building an executable file with PyInstaller didn't bring any issues.
The command for that is pyinstaller --onefile aplikaatio.py.