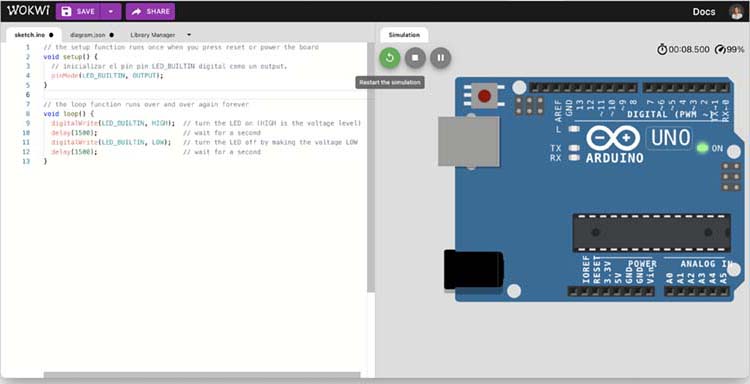
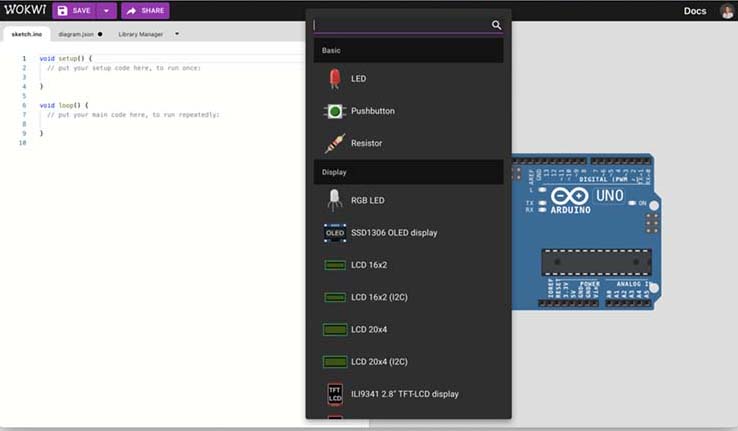
As a first experience with Arduino, I used the Wokwi simulator. Here, I am sharing my experience.
Firstly, I wrote the code using programming materials, in this case, C++.
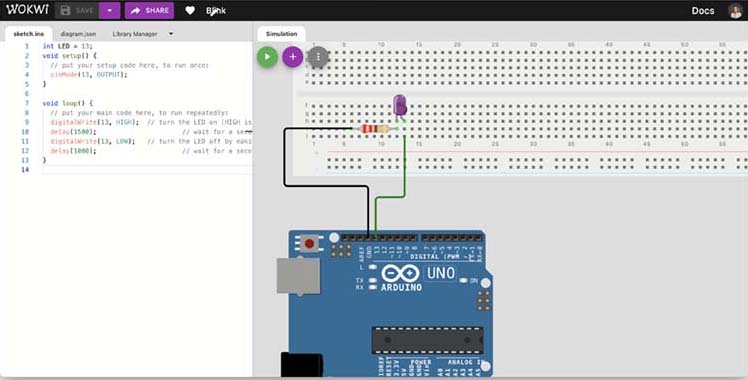
Then, I added an external LED and a resistor to the simulator.
Based on the blink code for the internal LED, I replaced some data:
Before the line void setup(), the corresponding pin for the LED (pin 13) is declared.
Then, in the pinMode() and digitalWrite -high and low- lines, we can indicate the number 13 that we assigned to the LED.
I made the connections: Pin 13 to the anode and the GND pin to the cathode. 🤩 Awesome!!
Code
                                    int LED = 13;
                                    void setup() {
                                    // put your setup code here, to run once:
                                    pinMode(13, OUTPUT);
                                    }

                                    void loop() {
                                    // put your main code here, to run repeatedly:
                                    digitalWrite(13, HIGH);  // turn the LED on (HIGH is the voltage level)
                                    delay(1500);                      // wait for a second
                                    digitalWrite(13, LOW);   // turn the LED off by making the voltage LOW
                                    delay(1000);                      // wait for a second
                                    }
 Blink LED OUTPUT Simulation - Arduino UNO - on Wokwi.
A second practice in the Wokwi simulator with Arduino was a classic instruction programming: print ‘Hello world’. For then, I was a start a new project Arduino UNO from Scratch.
I write a code for the ‘Hello world’, and ‘voilá’… in the virtual terminal was print the phrasse 😎.
With our fellows, we named the controllers with compound names, as a way to have fun and get fond of the microcontrollers 😊. Now, Arduino UNO is 'Arduardo' 🥸 and my Raspberry Pi Pico is ‘Raul Ricardo Pico’ 😎.
Code
                                    void setup() {
                                        // put your setup code here, to run once:
                                        Serial.begin(9600);
                                        Serial.println("Hello Arduardo!");
                                      }

                                      void loop() {
                                        // put your main code here, to run repeatedly:
                                      }
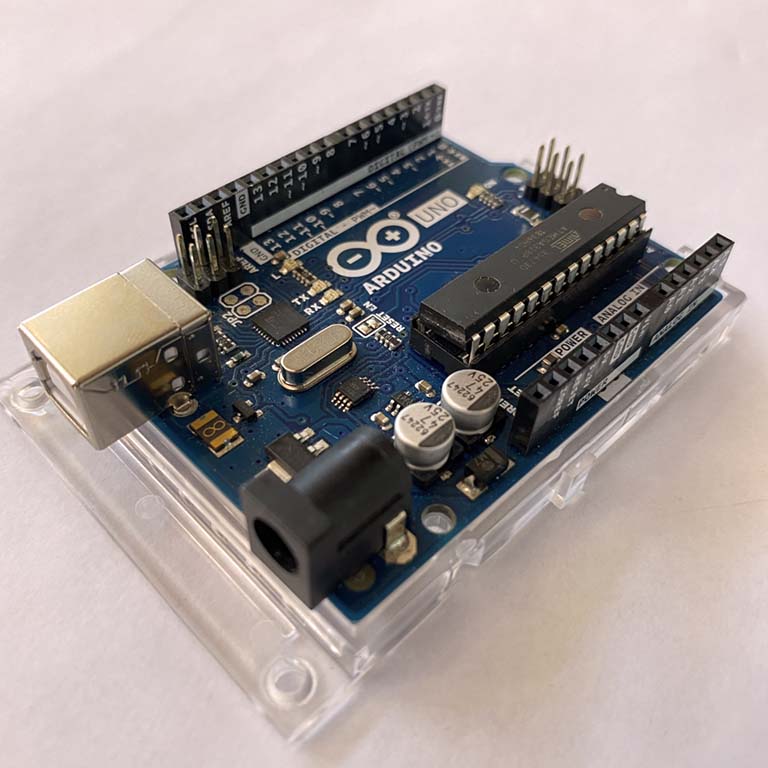
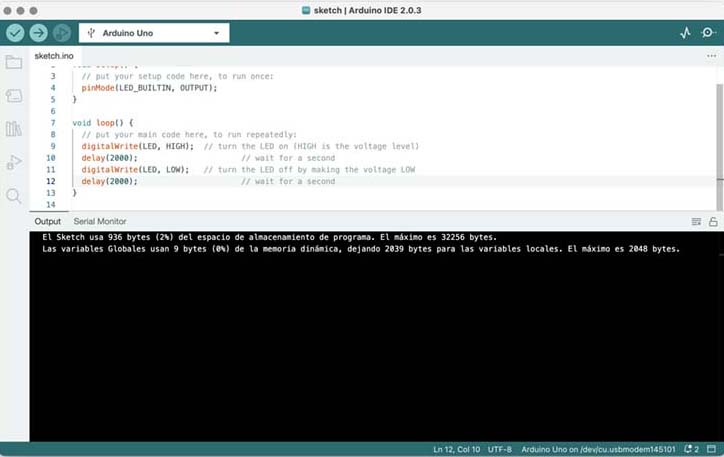
For the external communication test, I used the Arduino IDE and a USB type B connection.ardware with a USB conection.
In the Arduino IDE, I pasted the same code written in Wokwi, uploaded it, and then observed that the light is on 🤩.
Blink code

Hello 'Arduardo' code
Video 'blink' reply.
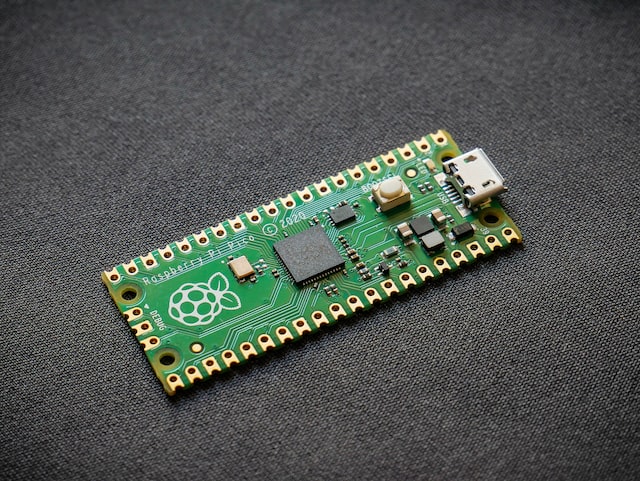
Raspberry Pi Pico
In the site Raspberry.com, we was read about the Raspberry Pi Pico, that is a range of tiny, fast, and versatile boards built using RP2040, the flagship microcontroller chip designed by Raspberry Pi in the UK.
Programmable in C and MicroPython, Pico is adaptable to a vast range of applications and skill levels, and getting started is as easy as dragging and dropping a file.
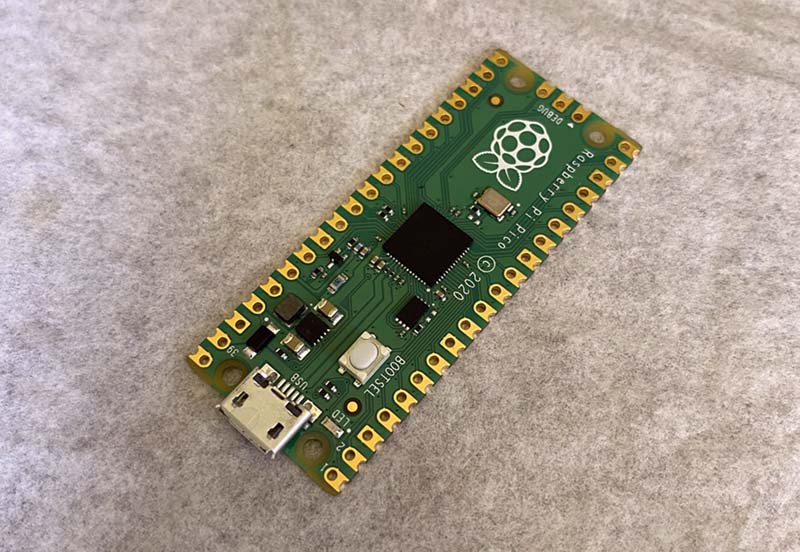
Raspberry Pi Pico micro-controller. Source: Own photograph
Some of the features
- Dual ARM Cortex-M0+ @ 133MHz.
- Power supply for digital GPIOs, nominal voltage 1.8V to 3.3V.
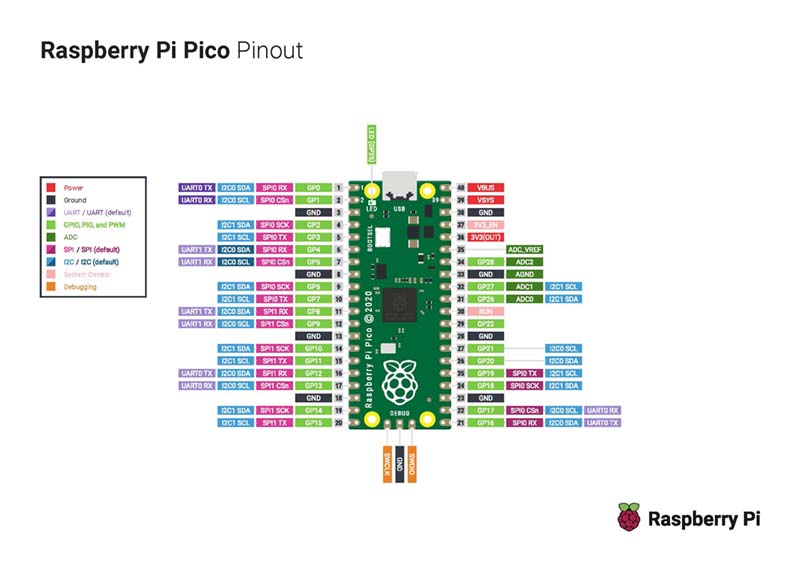
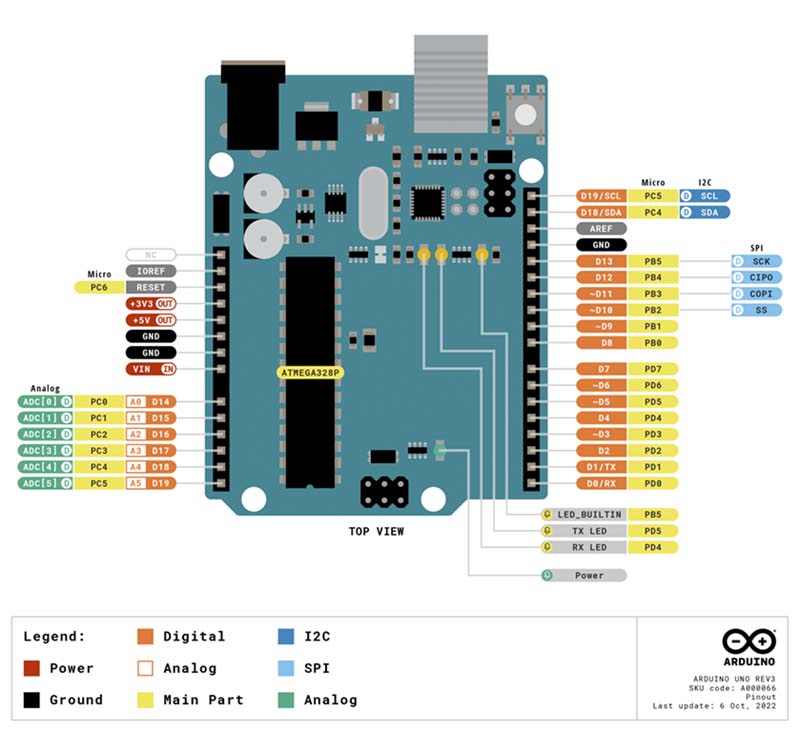
Pinout of Raspberry Pi Pico. Source:https://datasheets.raspberrypi.com/pico/Pico-R3-A4-Pinout.pdf
Another piece of information that I found interesting about Raspberry, is that the post-fix numeral on RP2040 comes from the following:
- Number of processor cores (2)
- Loosely which type of processor (M0+)
- floor(log2(ram / 16k))
- floor(log2(nonvolatile / 16k)) or 0 if no onboard nonvolatile storage
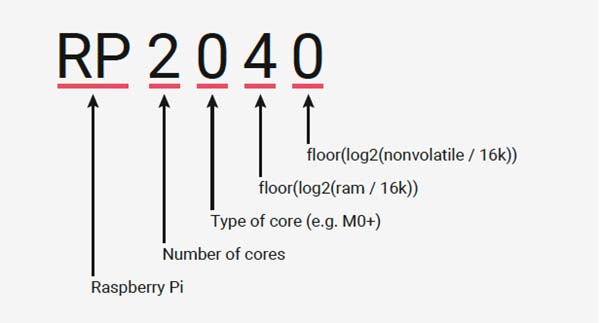
Why is the chip called RP2040?. Source: https://www.raspberrypi.com/documentation/microcontrollers/rp2040.html
Practice with Raspberry Pi Pico
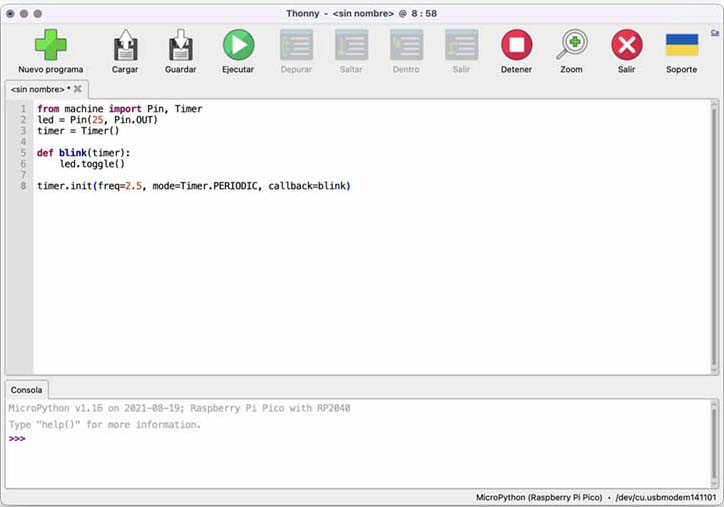
For the RP Pi Pico practice, I used the Wokwi simulator and Thonny IDE again for peripheral communication. Here is my experience:
On Wokwi, I started a new project, this time using the MicroPython on Pi Pico option. Then, I started writing the 'Blink' code first, and then 'Hello World'. Both were successful 😎
Code Blink
                                        from machine import Pin, Timer
                                        led = Pin(25, Pin.OUT)
                                        timer = Timer()

                                        def blink(timer):
                                            led.toggle()

                                        timer.init(freq=2.5, mode=Timer.PERIODIC, callback=blink)
Then I run the Code, and the light is connected!!! I like this
Blink Simulation - Raspberry Pi Pico - on Wokwi.
Here, I used the same code, in Thonny IDE
An here, the reply in RP hardware, connected with a micro USB:
Code Hello World
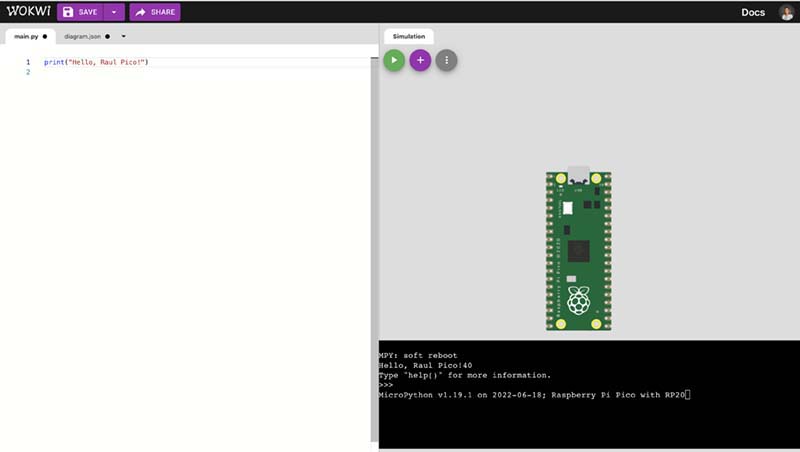
print("Hello, Raul Pico!")
Code used in Wokwi simulator
                                            import utime

                                            while True:
                                                print('Hello, Raul Ricardo Pico');
                                                utime.sleep(1.5);
Code used in Thonny IDE
Then I run the Code, and the light is connected!!! I like this
Hello World Simulation - Raspberry Pi Pico - on Wokwi.
And a 'Hello world' reply in a virtual terminal of Thonny IDE:
What I learned
🤯 The complex or simplicity of the programming languajes.
😳 What is a Micro-controllers and its applications.
😳 Diferences with sitaxis of languajes C and Python (MicroPython).
How I learned it
By the guidance of the local instructors and colleagues 🙌🏼
Through the lectures of micro-controllers datasheets
Through wikis and blogs of programming languages
What I should avoid
🙈 I have trouble staying focused on one subject because I am easily distracted by my curiosity and tend to switch to other topics.
What I should do
Continue the lecture, practicing anad exploring especific codes for my project.
To learn more about microcontrollers to choose the right one for the project.