2D tools
I'm pretty good with Adobe Illustrator, Corel Draw and Inkscape when it comes to 2D CAD software (In my early years of being a graphic designer, I used Freehand 🙌🏼 -I kinda miss it ☹️-).
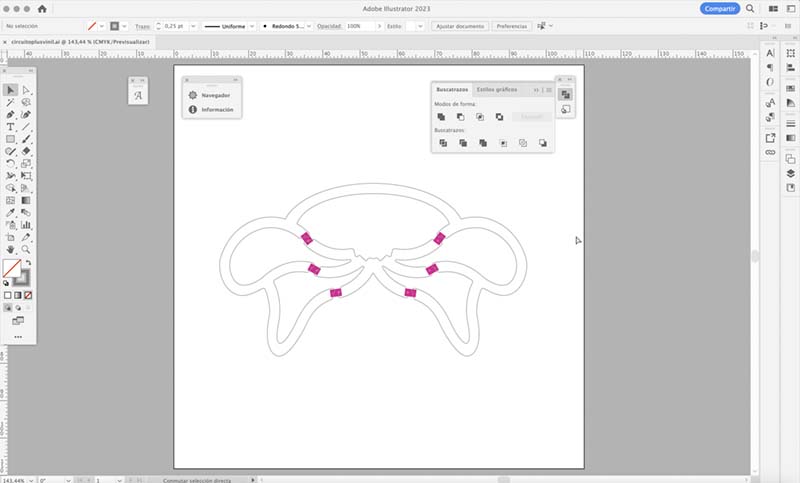
Adobe Illustrator
Adobe's software is super popular in the visual creativity industry. It can be used to create digital art and for printing purposes. It has both desktop and iPad versions, and I'm using version 27.2 -2023 update- on my desktop.
I use this application all the time for my graphic projects that need vector graphics, like .ai or .svg files, or even for distributing as .pdf files ready for industrial production. It's really handy because it lets you set up the workspace according to the project you're working on, so all the tools you need are right there.
Watch a video to see how I use Adobe Illustrator.
InkScape
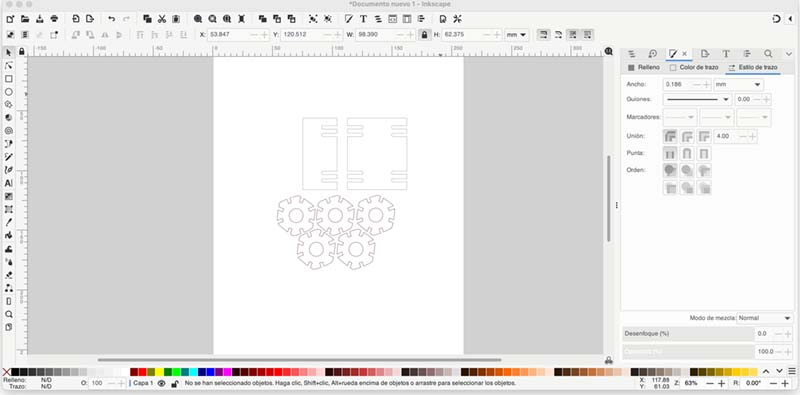
I'm running the latest version of this open source software, 1.2.2, which works great on macOS up to Monterrey 12, but not on the newer Ventura (13) version. It's a really powerful free tool for design, illustration, vector graphics and web layout -with plenty of flexible tools for drawing, plus compatibility with a bunch of file formats.
I've been using this app to take the place of Corel Draw for tasks that need to be done in that program. It's also the software I use for my Digital Design classes in Clothing Design –my students use it to create their drawings of figures and garment patterns they're designing.
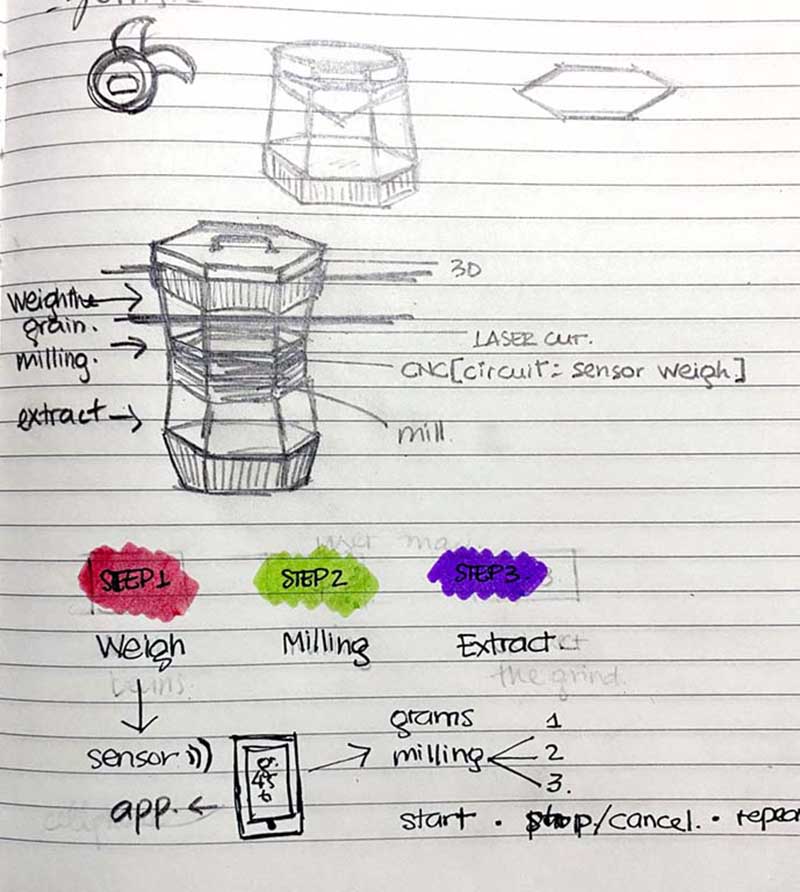
Drawing of shapes using vectors for a system of components.
Bitmap image editing
My experience with software for bitmap image editing is mainly marked by Adobe Photoshop, but for academic and accessibility purposes, I also use GIMP.
Adobe Photoshop
Adobe Photoshop and Illustrator are both incredibly popular software programs that are used by professionals and amateurs alike for image editing. I happen to have version 2023 (24.1.1), which has a commercial license. It offers a range of features for image editing, 3D, motion, painting, photography and web graphics, as well as application options for mobile devices like smartphones and tablets. So cool! 😎
Watch a video to see how I use Adobe Photoshop.
GIMP
Gimp's website says it's a free and open source image editor that works on a bunch of different platforms, like GNU/Linux, macOS, Windows and more. You can use it for graphic design, illustration, and even technical-scientific stuff. Plus, you can customize it however you want, and there's tons of third-party plugins available.
3D tools
3D tools are my Achilles heel 😅, so I set out to learn them this week and during the course 🙌🏼. I already mentioned that my experience with CAD is better related to 2D (and also with text layout tools like Adobe InDesign, Scribus and Affinity Publisher, which I use to edit books and magazines ✌🏽).
Well, in the global class a lot of tools were listed 🤯. Of all those, I have explored two so far: Blender and Fusion 360 (when I finish the course, I'm sure I'll try the others 🫡).
Blender
According to Wikipedia, Blender is a free and open-source 3D computer graphics software toolset used for creating animated films, visual effects, art, 3D printed models, motion graphics, interactive 3D applications, and computer games.
Check out all the cool features of this software: 3D modelling, UV mapping, texturing, digital drawing, raster graphics editing, rigging and skinning, fluid and smoke simulation, particle simulation, soft body simulation, sculpting, animation, match moving, rendering, motion graphics, video editing, and compositing!
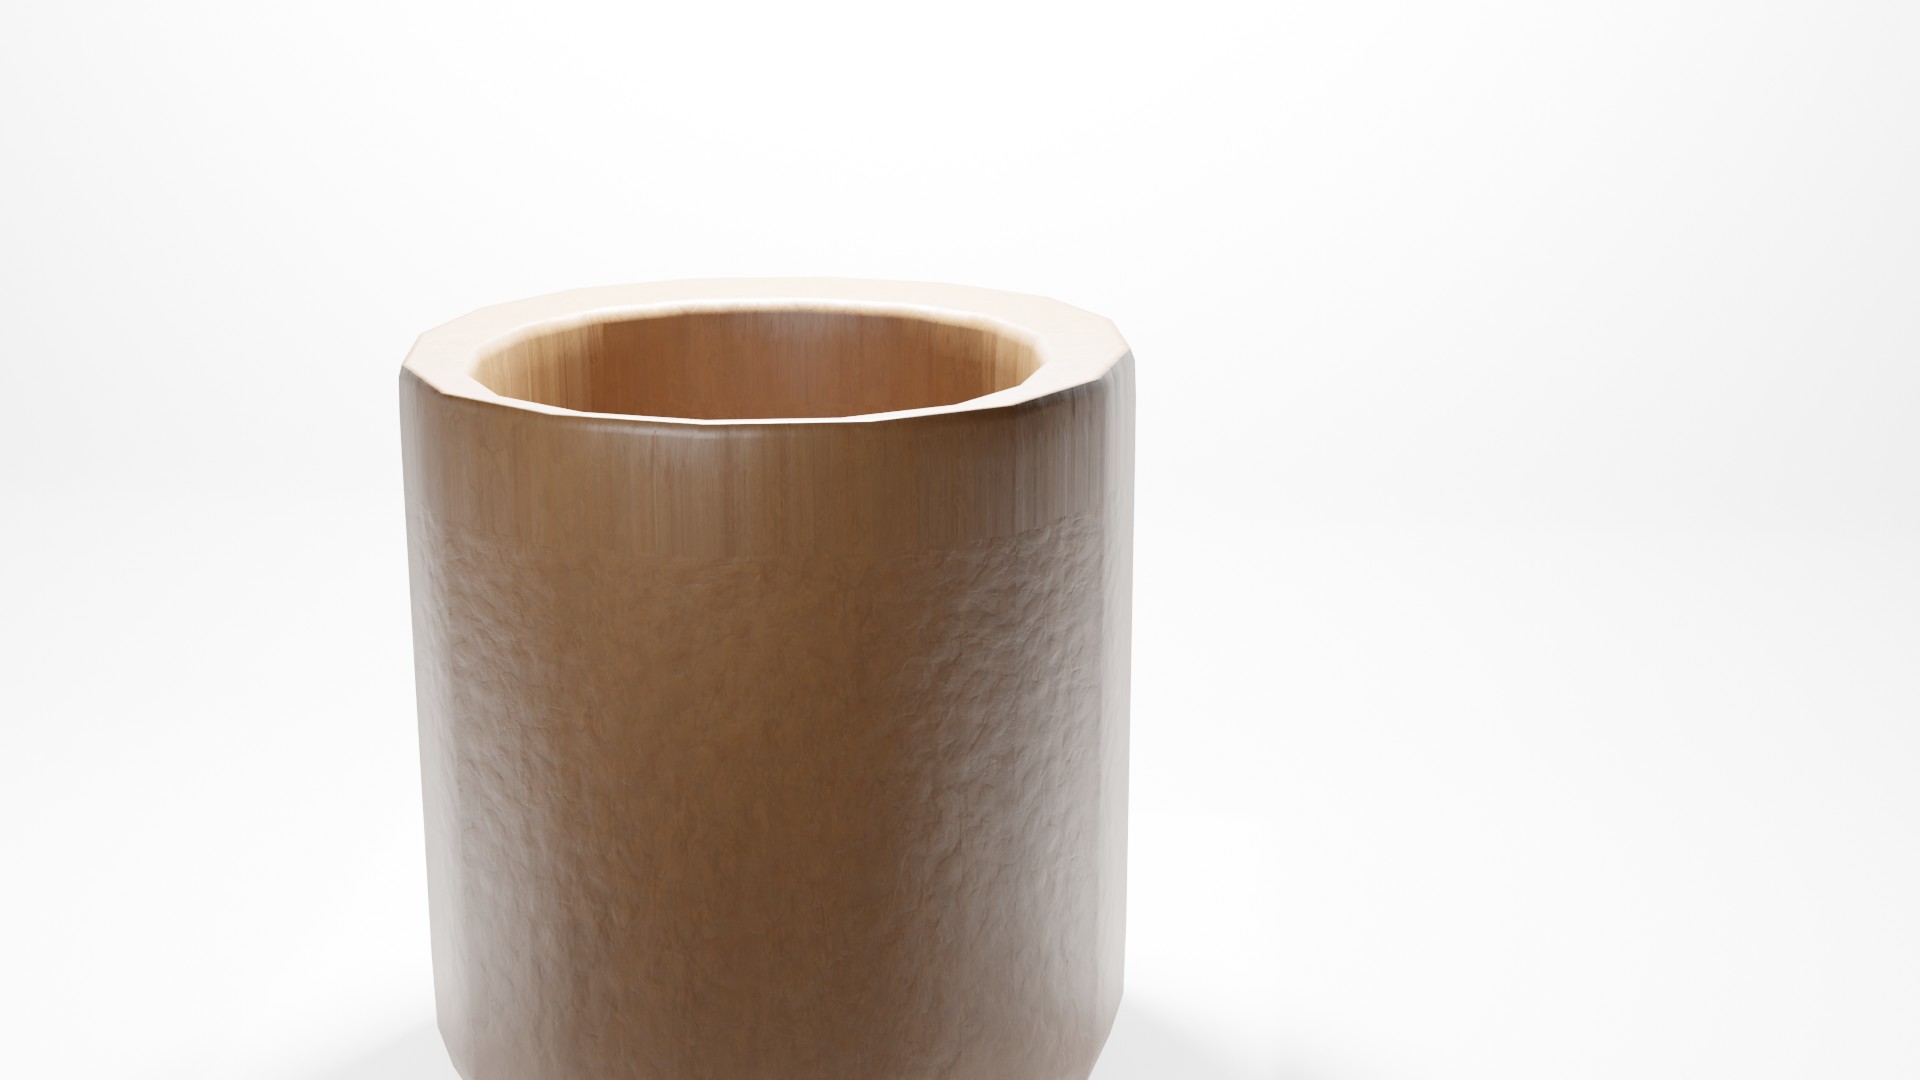
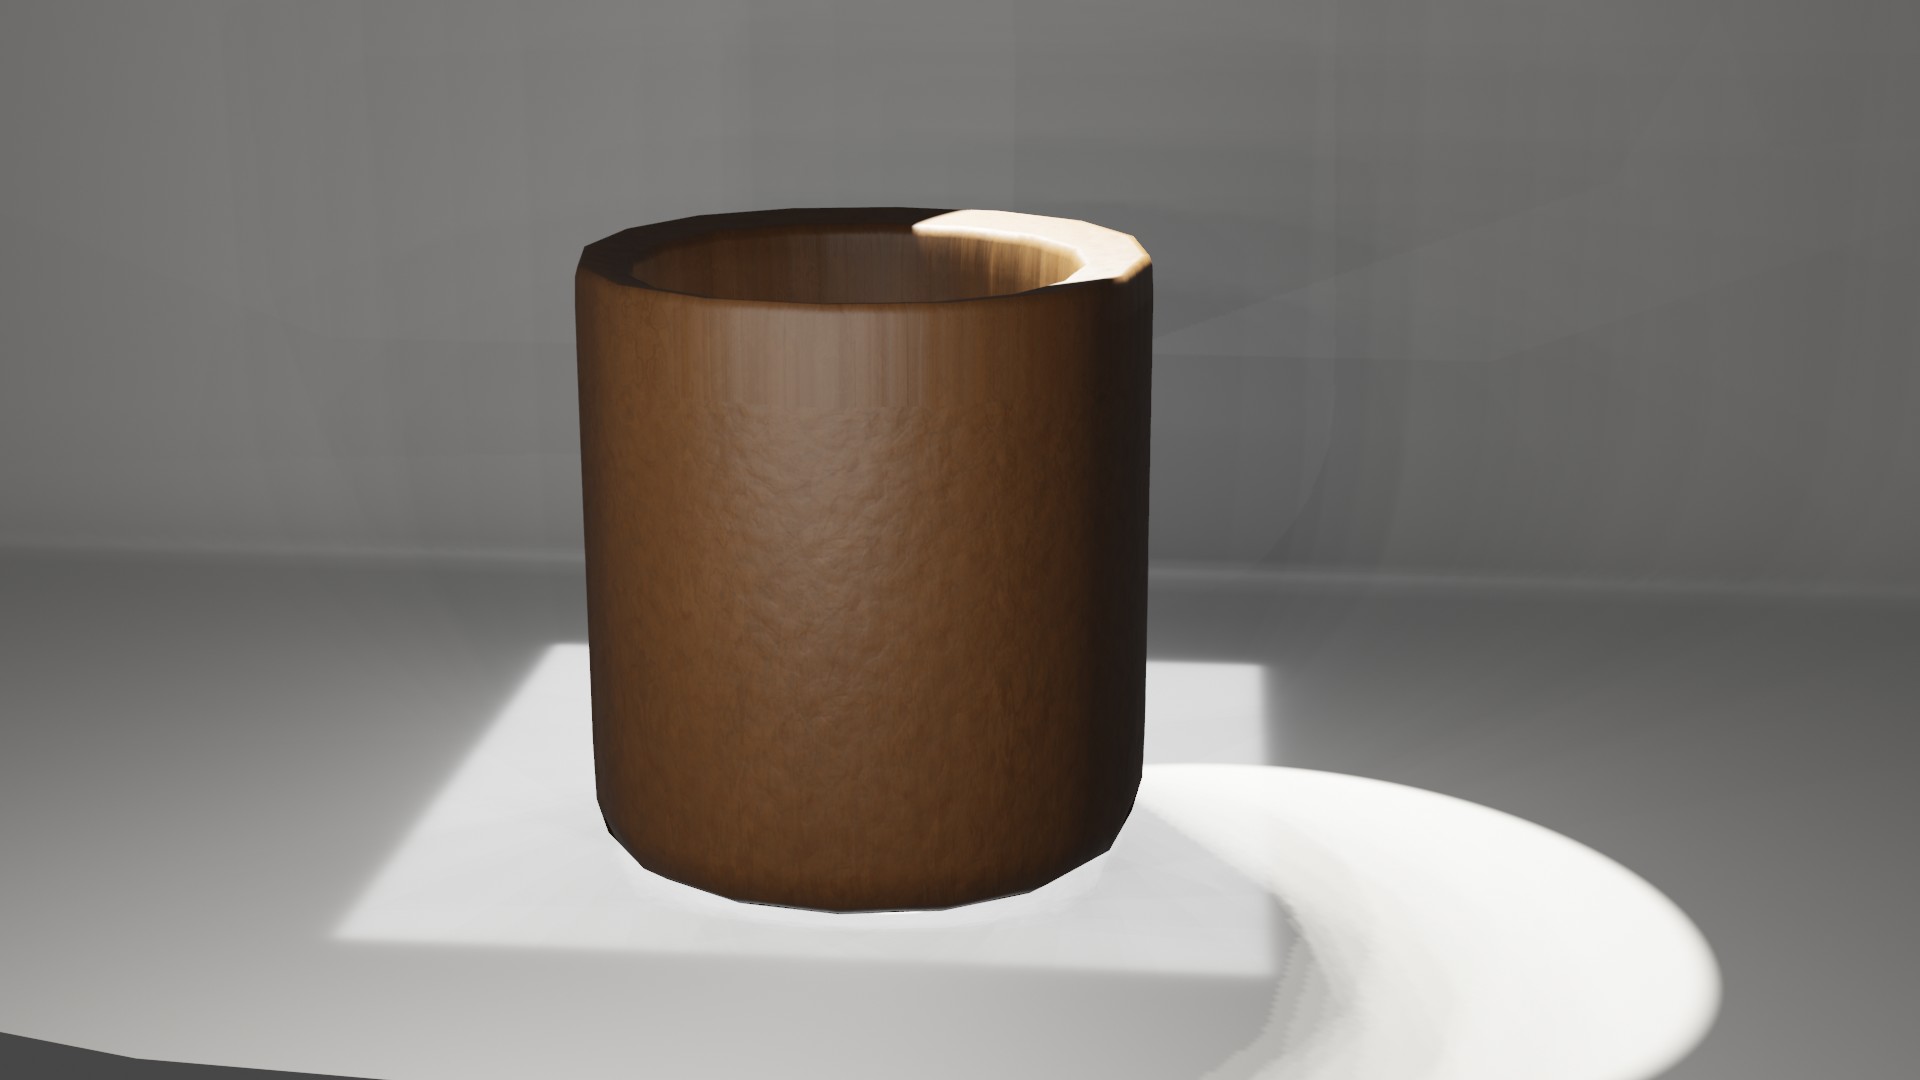
In the local class, with Silvia Lugo (one of the instructors 🙌🏼) I explored the basic and necessary aspects to start using this 3D software 😅 and I was able to make my first object. It was great! 😅.
This was my first job done with Blender! 😅
Fusion 360
Fusion 360 It is a product of Autodesk; it is commercial, and for this course we have the educational version... free ✌🏽, for one year ☹️. Its website describes it as an awesome software platform for product design and manufacturing. It saves time and money because you can design and project products. It is full of useful features, such as a flexible 3D CAD, integrated CAD/CAM processes, generative design tools for exploration and an online data manager. It also allows for smooth 3D simulation and unifies printed circuit board design! 🤯
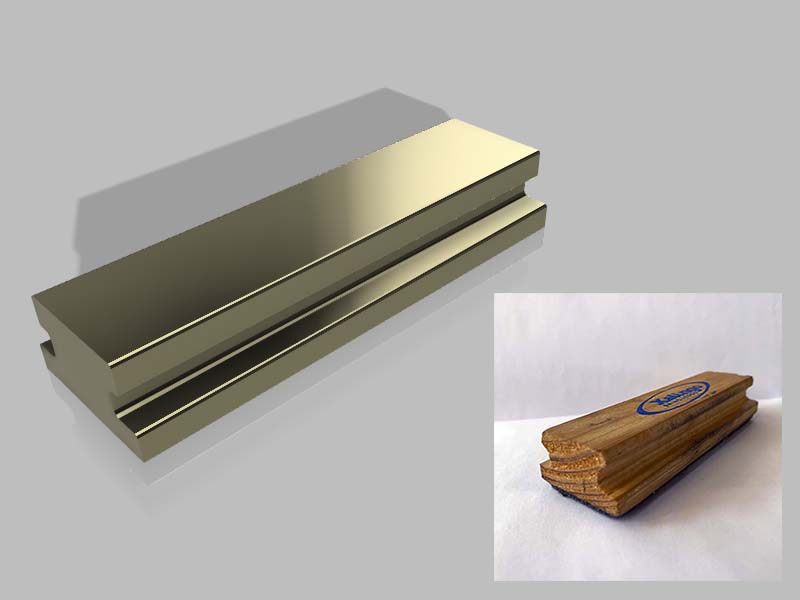
To learn how this software works, it was Abdón Troche's turn (the other instructor! 🙌🏼), with whom I could explore the application and make two objects: one of a rectangular prismatic body and another of a revolution body. Incredible! 🤯 Thus I could get my second and third 3D objects.✌🏽.
I share with you my first works done with Fusion 360 😰.
AI VR tools
I got excited about AI-based tools! I tried three of them and it was amazing to see how they worked. Those tools are: Replicate, MidJourney y DreamStudio (beta).
Well, in the global class a lot of tools were listed 🤯. Of all those, I have explored two so far: Blender and Fusion 360 (when I finish the course, I'm sure I'll try the others 🫡).
Stable Diffusion
The Robin Rombach and Patrick Esser text-to-latent image diffusion model is incredible. You can easily use it from their website. It's great!
Stable Diffusion is a latent text-to-image diffusion model capable of generating photo-realistic images given any text input. He experimented with the Replicate platform, which uses stable-diffusion as the image generator.
MidJourney
Its own site describes it as an independent research laboratory that studies new ways of thinking and increases humanity's imagination.
You join the community through the Discord application, follow certain instructions to activate the bot in the prompt /imagine, enter the description of your idea and that's it, wait a few moments and get four variants. It's amazing what we can get from a description, general or very specific!
DreamStudio (beta)
As we read on the DreamStudio site itself, it is described as a great place to tell stories, develop ideas and show results.
They are researching how to integrate Stable Diffusion, DreamStudio AI, MidJourney and OpenAI. All you need is an account to access!
To experience these tools, we use three tools to see how they work and the results we get. Stable Diffusion lets you enter a description in the input prompt field and change some of the data displayed. Midjourney has semantic tags to set parameters. DreamStudio also lets you enter the description in a prompt, even with simpler words, also associating artistic styles of expression.
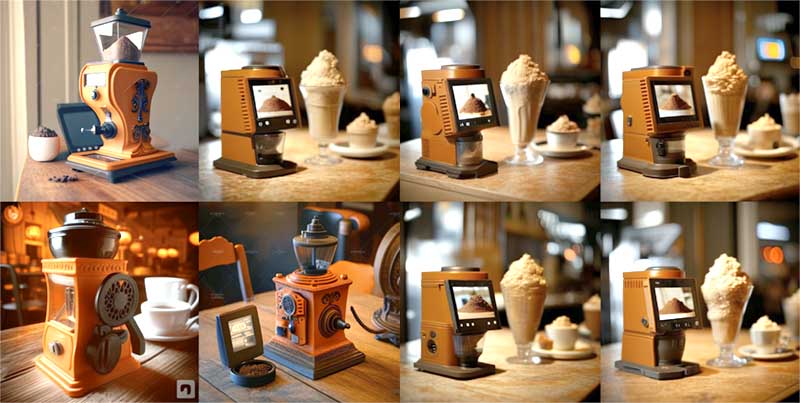
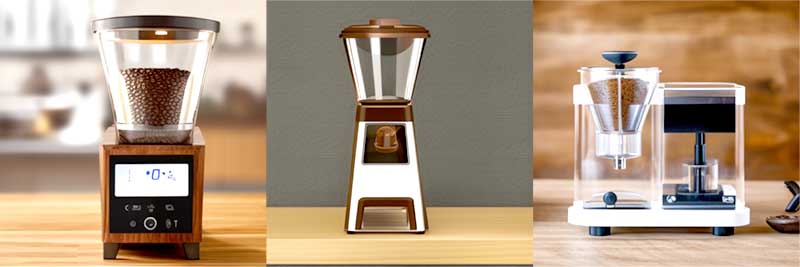
I made two descriptions:
A coffee grinder, made of wood, with plastic details, with a touch screen, in the foreground, on a table in a Parisian café, hd, with soft orange focal illumination, detailed.
A coffee grinder, with a touch screen, made of transparent acrylic, with the mechanism of the grinder in sight, with details in wood and brown plastic, minimalist style, on a white table, with warm lighting, hd
Results obtained with the various tools to generate images using Artificial Intelligence. Top, Stable Diffusion; middle, Midjourney; bottom, Dream Studio.