Embedded programming
1. Group assignment
-Compare the performance and development workflows for other architectures
-Document your work to the group work page and reflect on your individual page what you learned
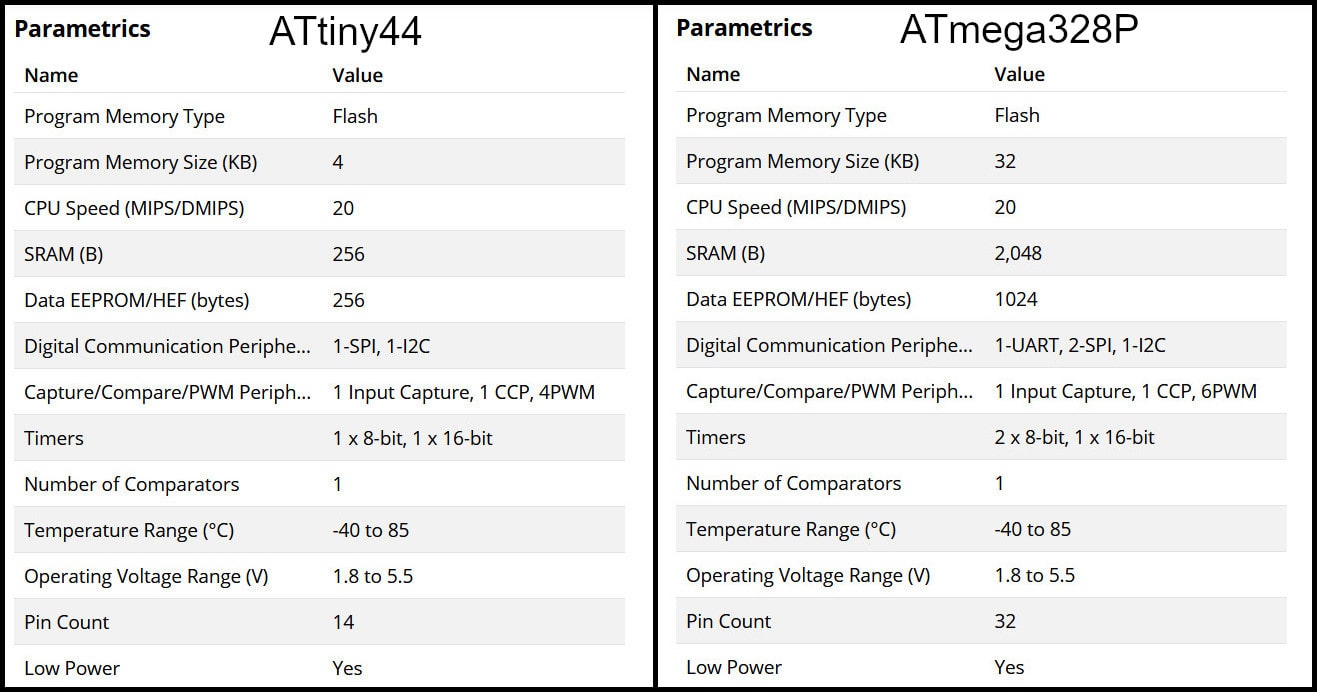
We will compared two AVR families in this section: ATtiny44 from the tinyAVR family and ATmega328P from the megaAVR family.
1.1. Feature Comparison
The table below compares the two microcontrollers. "tinyAVR microcontrollers (MCUs) are tailored for applications that require performance, power efficiency, and ease of use in a small package," and "megaAVR microcontrollers (MCUs) are the appropriate choice for designs that require a little more muscle." For applications that require a lot of code."
1.2. Programming using avr-dude
Using the Notepad++ or any text editor, write the program in C. Define options like programmer, target MCU, clock rate, and lfuse in the Makefile. Create the hex file that will be uploaded to the target MCU with the "make" command. Connect the programmer to the USB port and the target board to the ISP cable. Program the lfuse to the target MCU using the Makefile command "make program-avr-fuses." Upload the hex file to the target MCU using the "make program-avr" command given in the Makefile.
1.3. Programming Using Arduino IDE
Use the Arduino IDE to write code. Select the type of board, processor, clock, and programmer. After attaching the programmer to a USB port, upload the coed.
1.4. avr-dude Vs. Arduino
Programming in C gives users more control and allows for faster execution. The code written in C takes up less memory than the Arduino code. In addition, programming written in C runs faster. Keep in mind that if you're programming in C, the MCU shouldn't have a bootloader burned into it, as this saves flash memory.
2. Individual Assignment
Read the datasheet for your microcontroller
Use your programmer to program your board to do something
2.1. Download File
2.2. Aatiny 44 Data Sheet
Aatiny 44 Data Sheet
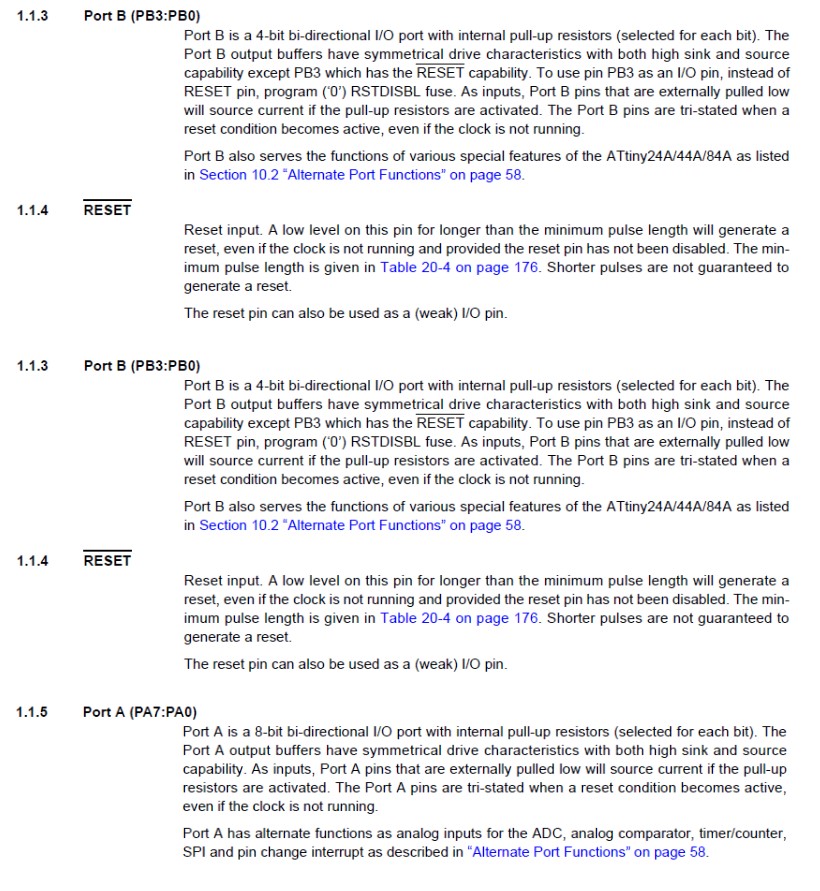
AVR Microcontroller's ATtiny44 is a microcontroller in the AVR Microcontroller family. It's an 8-bit microcontroller with high performance and low power consumption. It is built using powerful RISC architecture.The chip has two ports , PORT A and PORT B. Port A has 8 pins and Port B has 4 pins

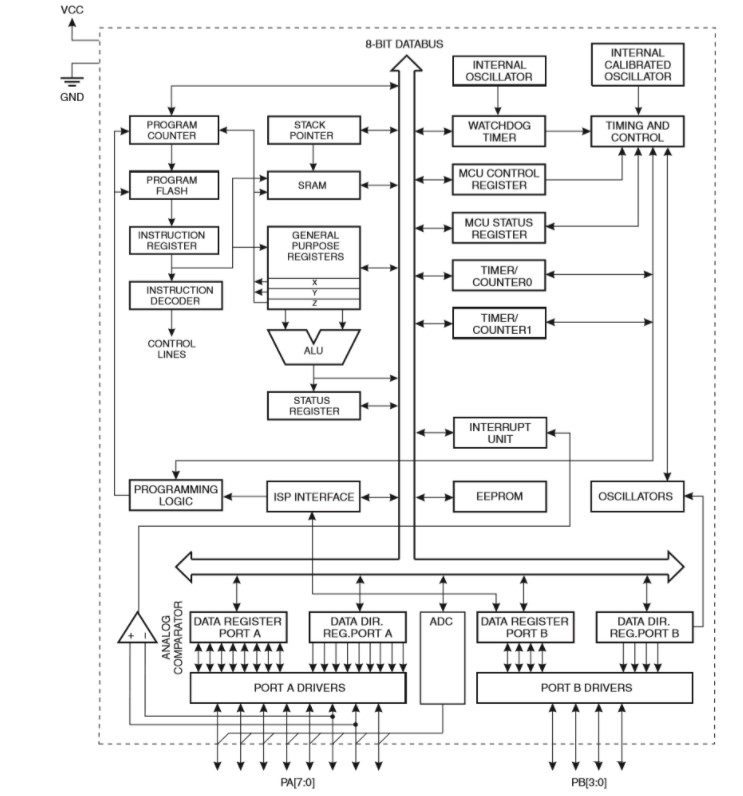
Block Diagram of the ATtiny 44
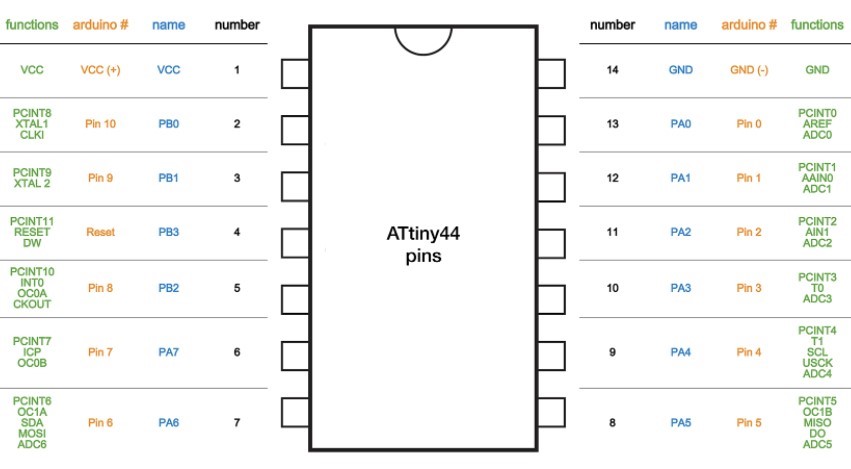
To define pin numbers according to language that use a look at attiny44 pinout in picture below .
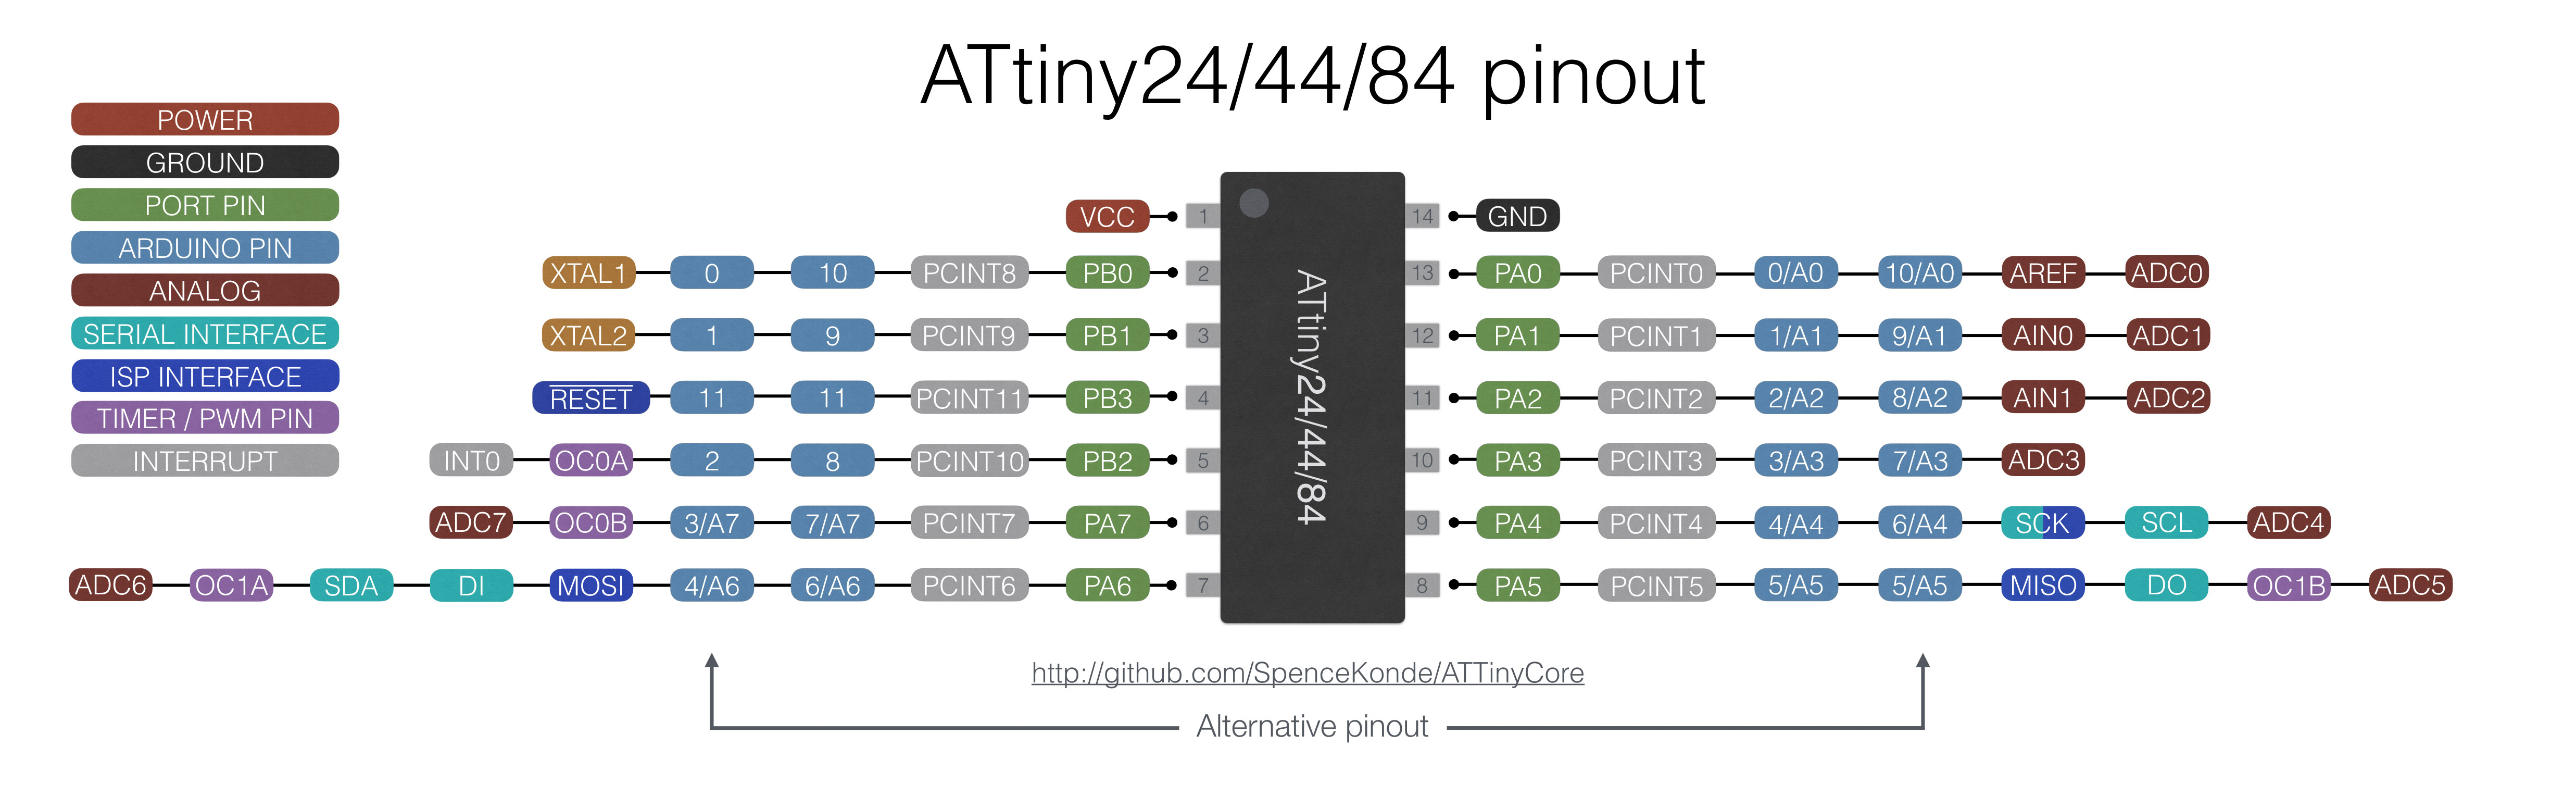
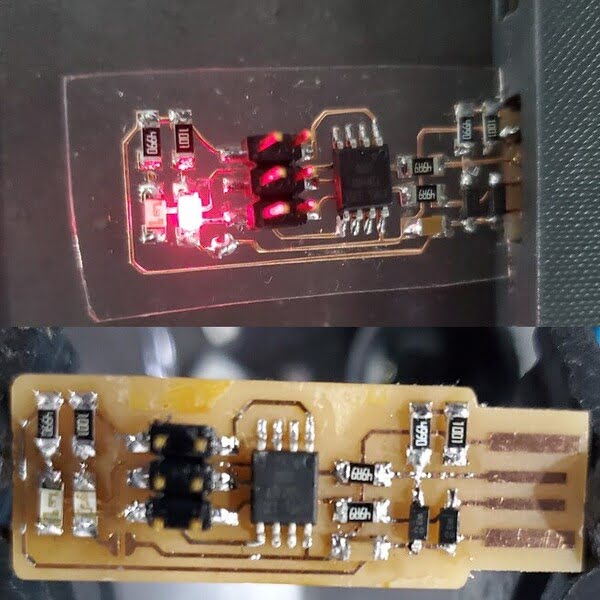
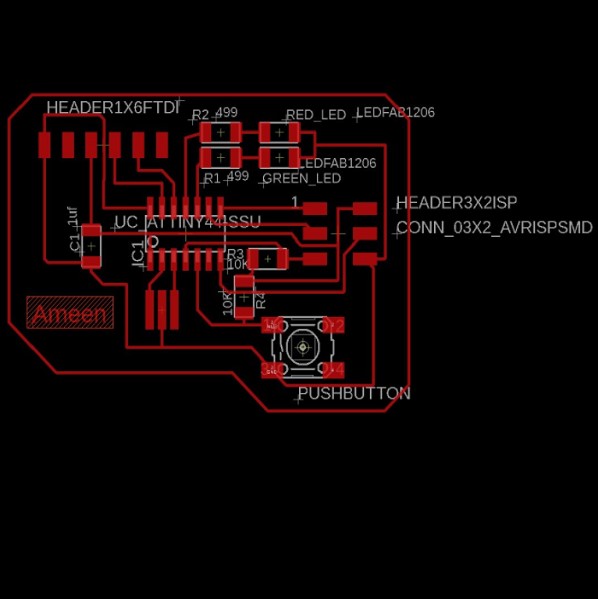
In my connection leds are connected to PIN 10(PA3) and PIN 11(PA2) and switch is connected to PIN 5 (PB2).
2.3. Areduino IDE & wiring
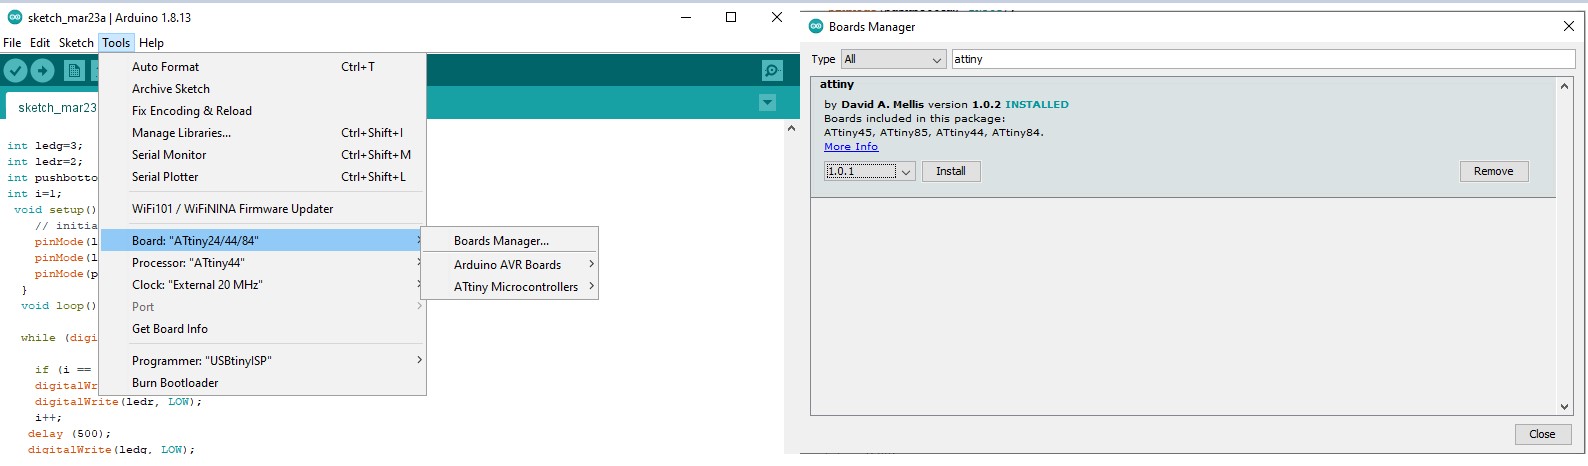
Step 1: Select board mange from tool menu > board then search about Attiny library and install it
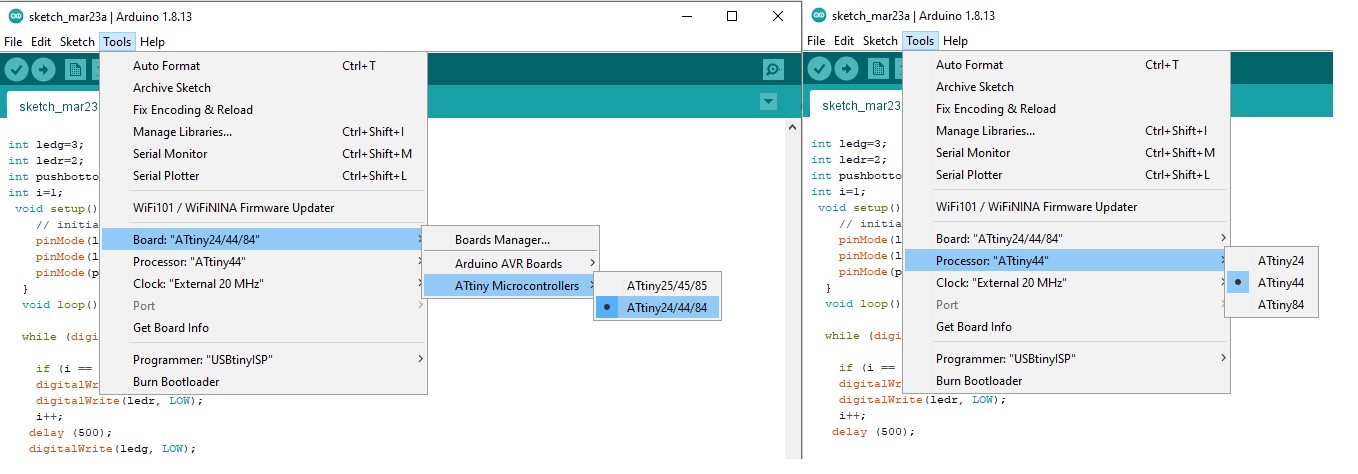
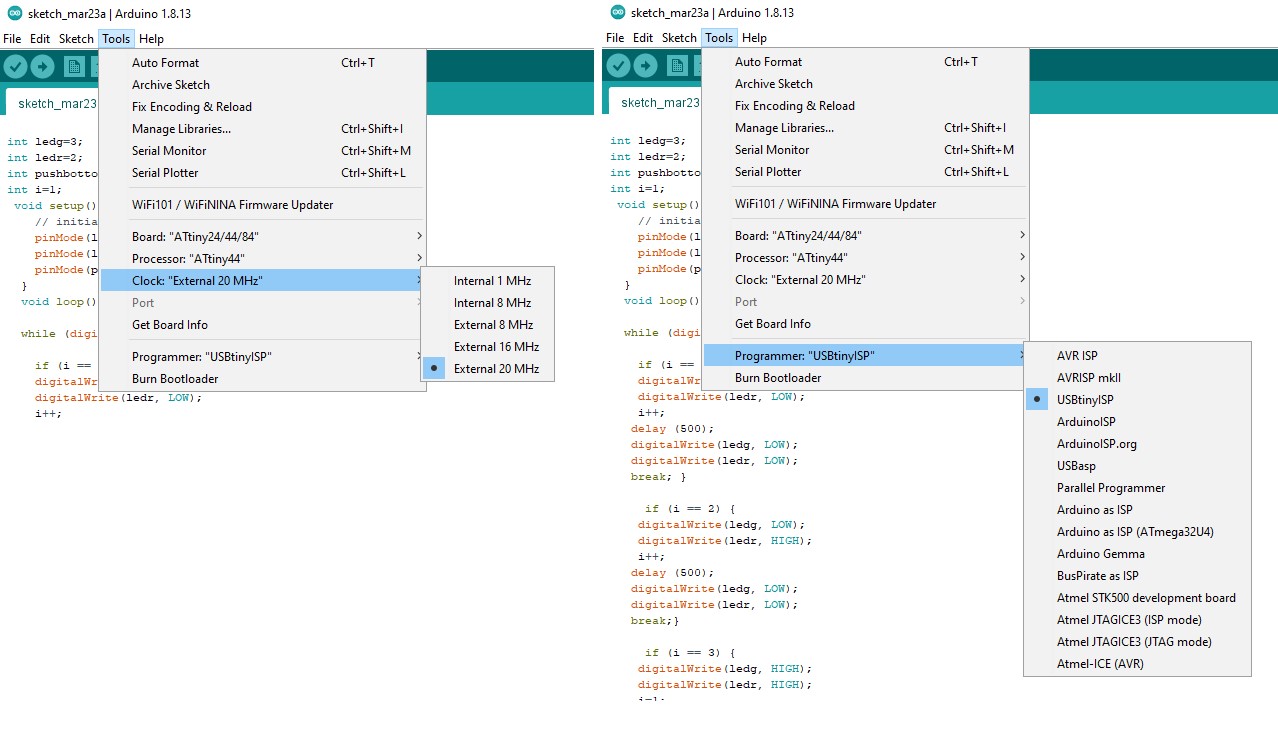
Step 2: Select the "ATtiny 24/44/84" as board, "ATtiny 44" as processor, "External 20 MHz" as clock, and "USBtiny ISP" as programmer.
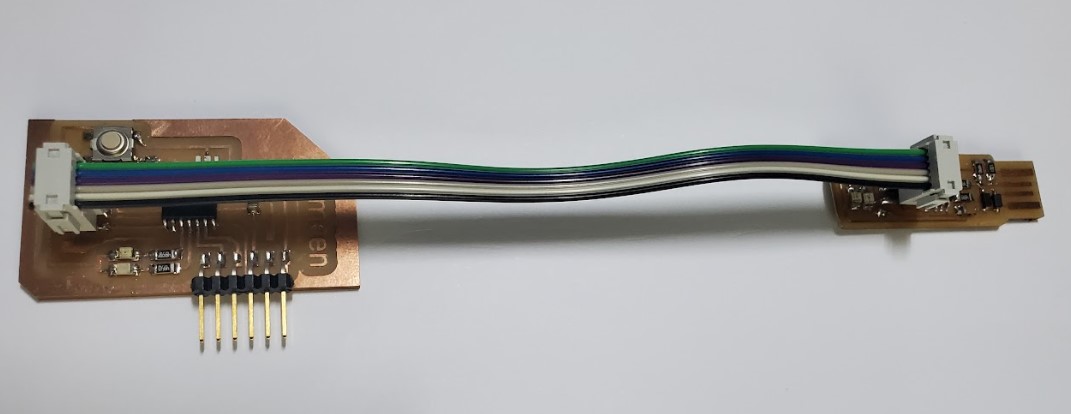
Step 3: Connect the board and programmer make sure that pin1 in board is with pin 1 in programmer, after that attach the programmer to the USB port.
2.4. programming
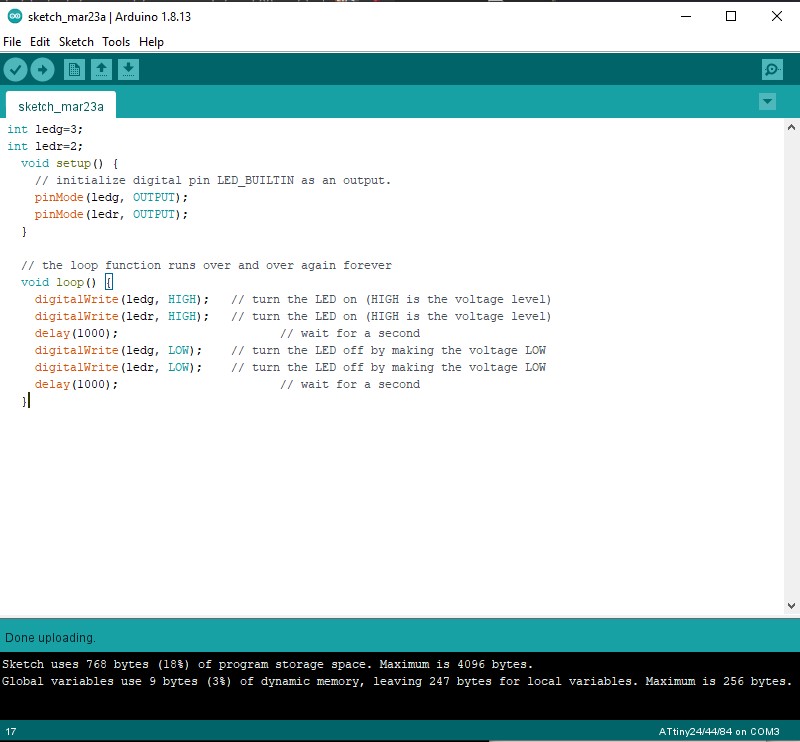
Code#1
To test the connections, the upload process, and the board, I built a Blinking code .
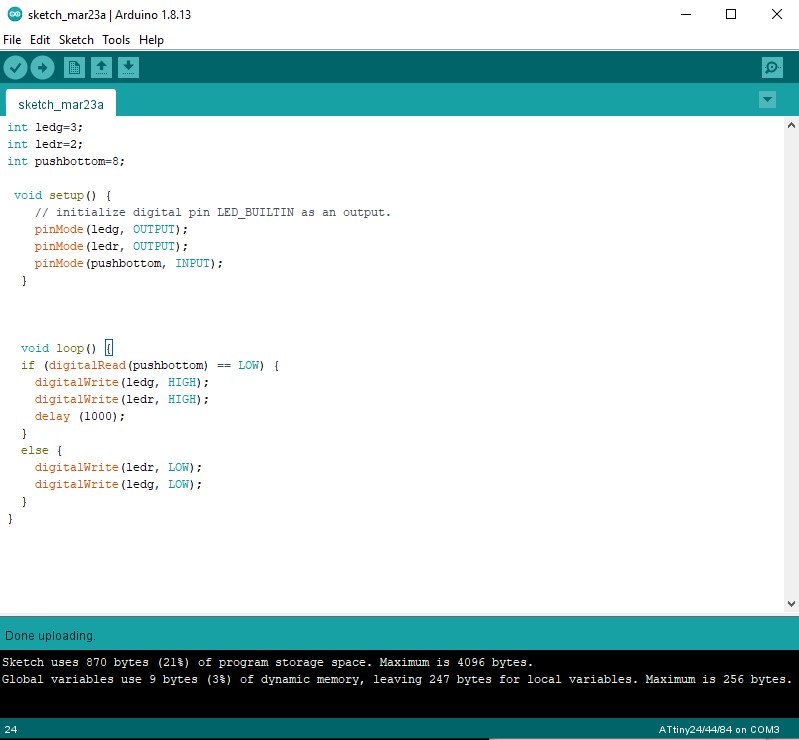
Code#2
The code below will turn on the light for short time when push button is pressed.
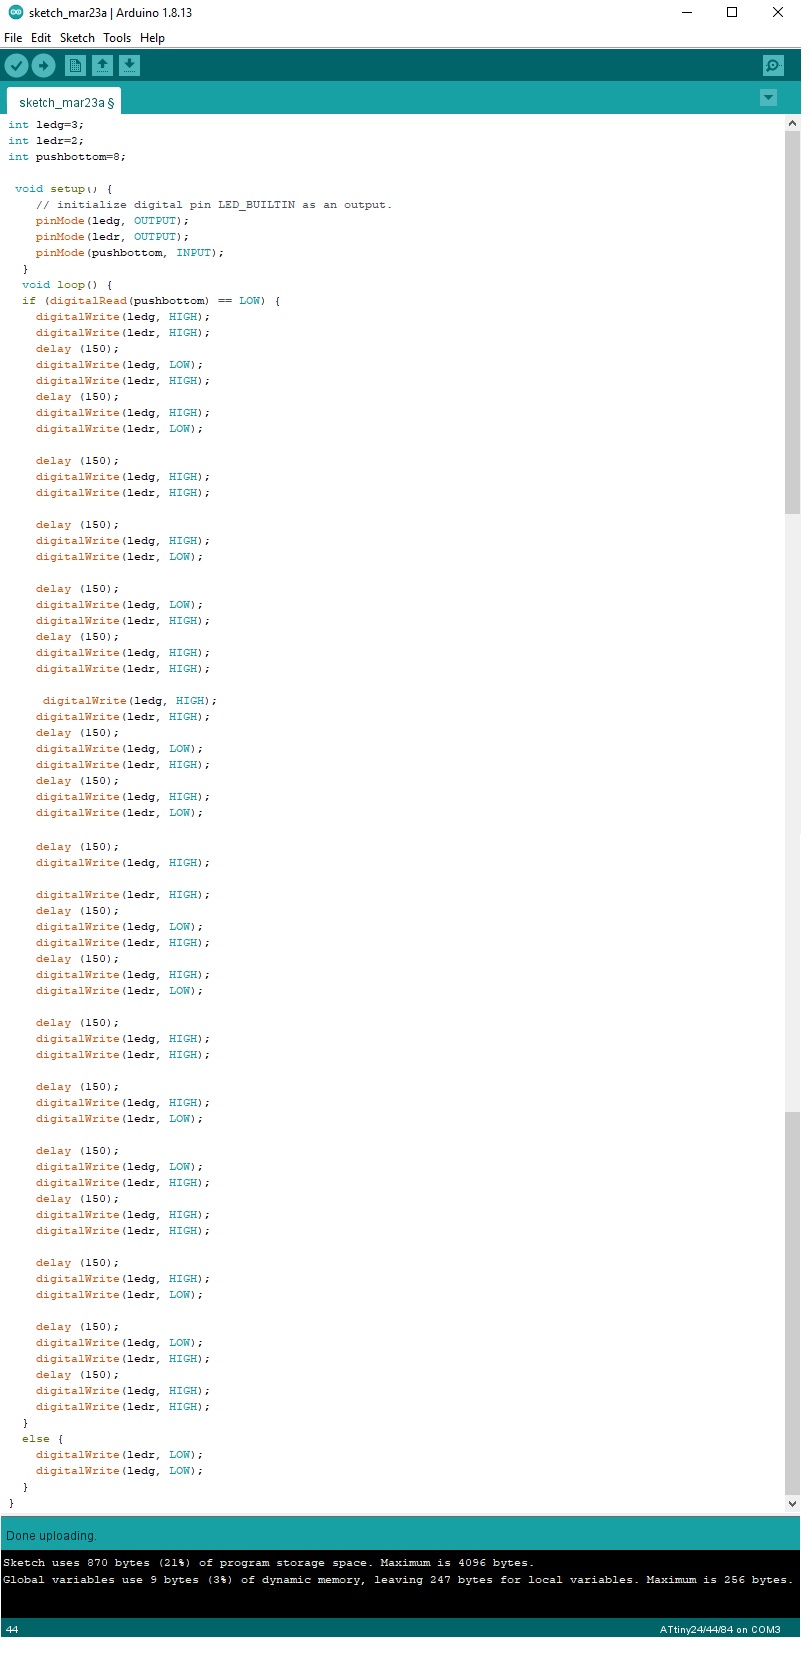
Code#3
The code below will turn on the light in multiple ways when the pushbutton is pressed.
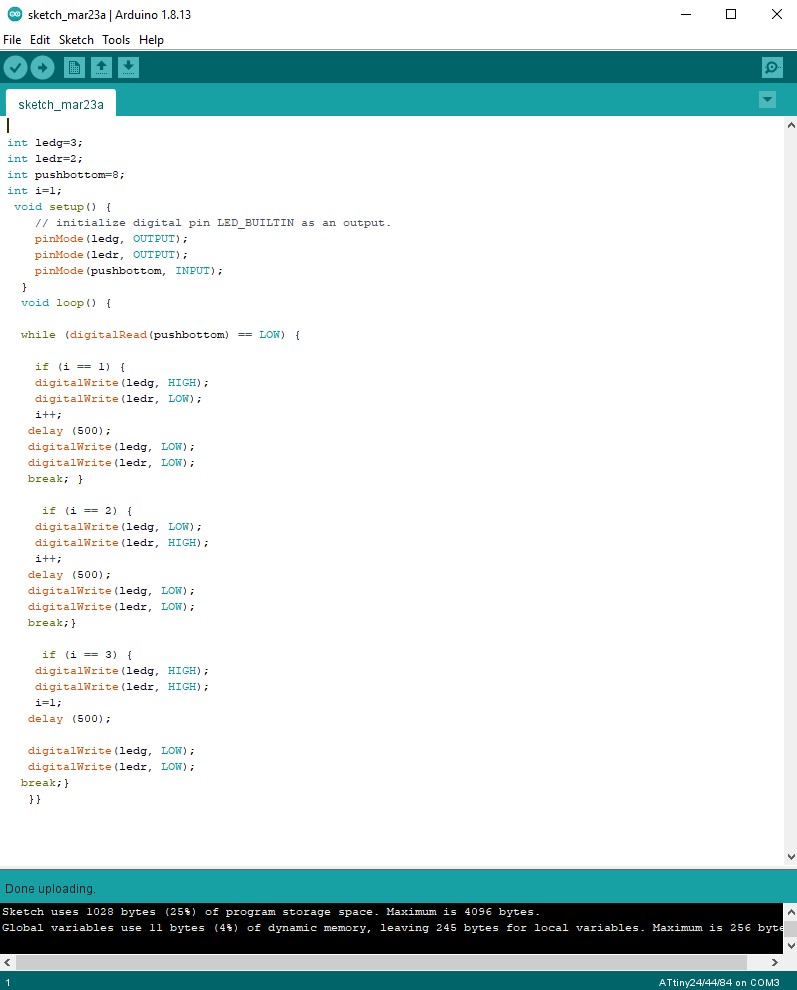
Code#4
The code below will turn on the light in different ways for each press in the pushbutton.