Molding & Casting
1. Group Assignment
-Review the safety data sheets for each of your molding and casting materials -Make and compare test casts with each of them
1.1. Material
The image and table blow show the material we have in the labs.

| Material | OOMOO™ 30 | OOMOO™ 25 | Mold Max™ 60 | SORTA-Clear™ 18 | Smooth-Cast® 305 |
|---|---|---|---|---|---|
| Category | Silicone Rubber-Tin Cure | Silicone Rubber-Tin Cure | Silicone Rubber-Tin Cure | Silicone Rubber-Platinum Cure | Urethane Resins |
| Series | OOMOO™ | OOMOO™ | Mold Max™ | SORTA-Clear™ | Smooth-Cast® |
 The Image depicts the fundamental distinctions between the four types of liquid rubber. Operational variations, such as pot life and cure time, and finish variances, such as end product color, ..
1.2. Safety and Technical Datasheet
Each material's technical and safety datasheets are linked. The technical datasheet contains operating information such as technical specifications and processing suggestions. The safety datasheet outlines the various risks and risk levels associated with the material. It should be noted that SORTA-ClearTM 18 is the only food-safe material.
OOMOOTM30
Technical datasheet
Safety datasheet
OOMOOTM25
Technical datasheet
Safety datasheet
Mold MaxTM60
Technical datasheet
Safety datasheet
SORTA-ClearTM18
Technical datasheet
Safety datasheet
Food safety technical datasheet
Smooth-Cast® 305
Technical datasheet
Safety datasheet
2. Individual assignment
Design a 3D mould around the stock and tooling that you'll be using, mill it (rough cut + (at least) three-axis finish cut), and use it to cast parts.
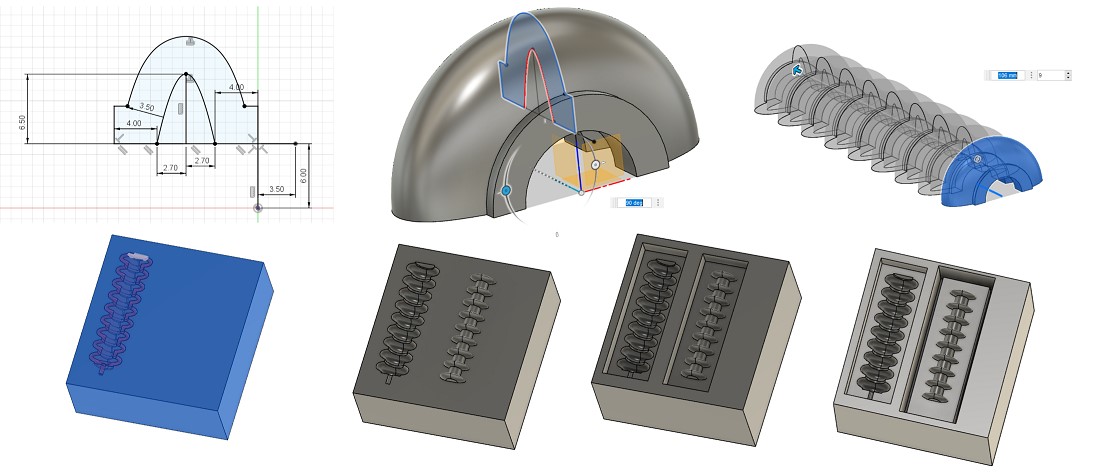
2.1. The 3D Design
File to Download
STL File
CAD File
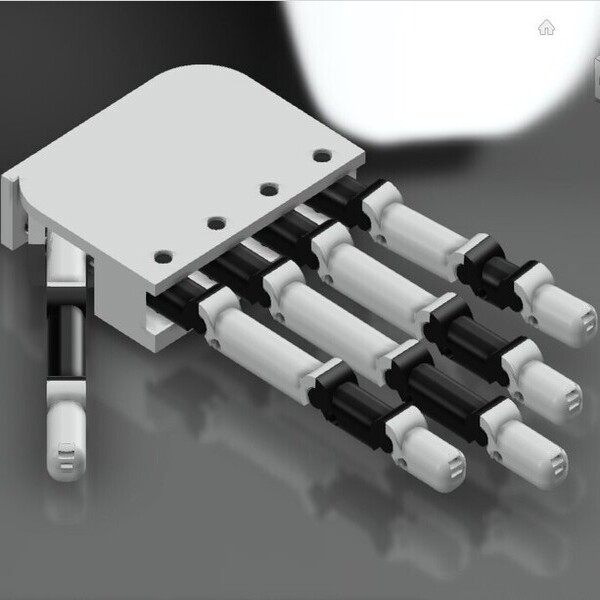
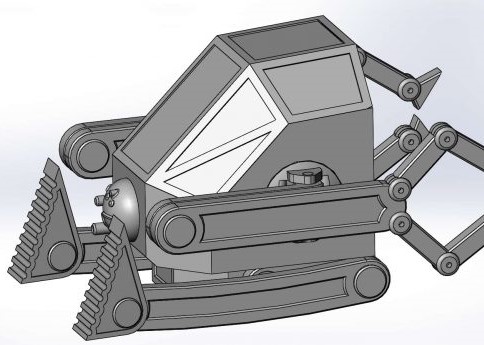
This week I decided to prepare the parts needed to make soft robots in wiledcard week, to make soft robots we need a two-piece mold, so casting the top piece as an assingnment for this week and preparing the bottom of the mold for wiledcard week.
In the beginning, the soft robots rooms must be drawn with the channel and then repeated according to the appropriate length. When you get the desired soft robotic shape, draw a piece of wax and subtract the soft robotics from both sides as shown in the figures below
2.2. Milling the First Positive Mold Using Wax Block
We'll have two pieces in this section: one for molding and casting week, and the other for the wild card week .
File to Download
Mold.crv
Mold.sbp
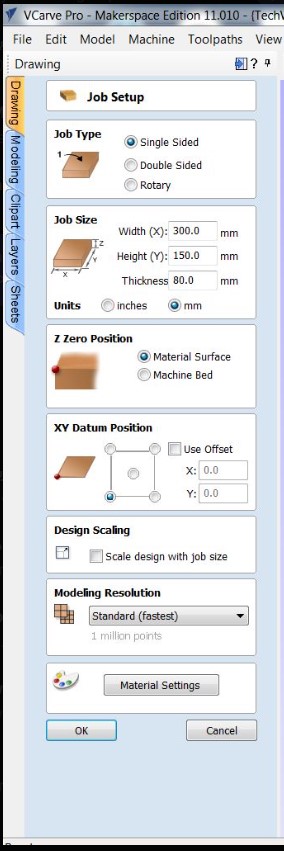
Step 1: Open VCarvePro and select "Open an existing file" from the File menu. Locate and open the Soft Robotics.stl file. The stl file is shown, and the "Job Setup" menu appears. Click "Ok" after you've entered the job settings. The board I used measures 300mm x 150mm and is 80mm thick.
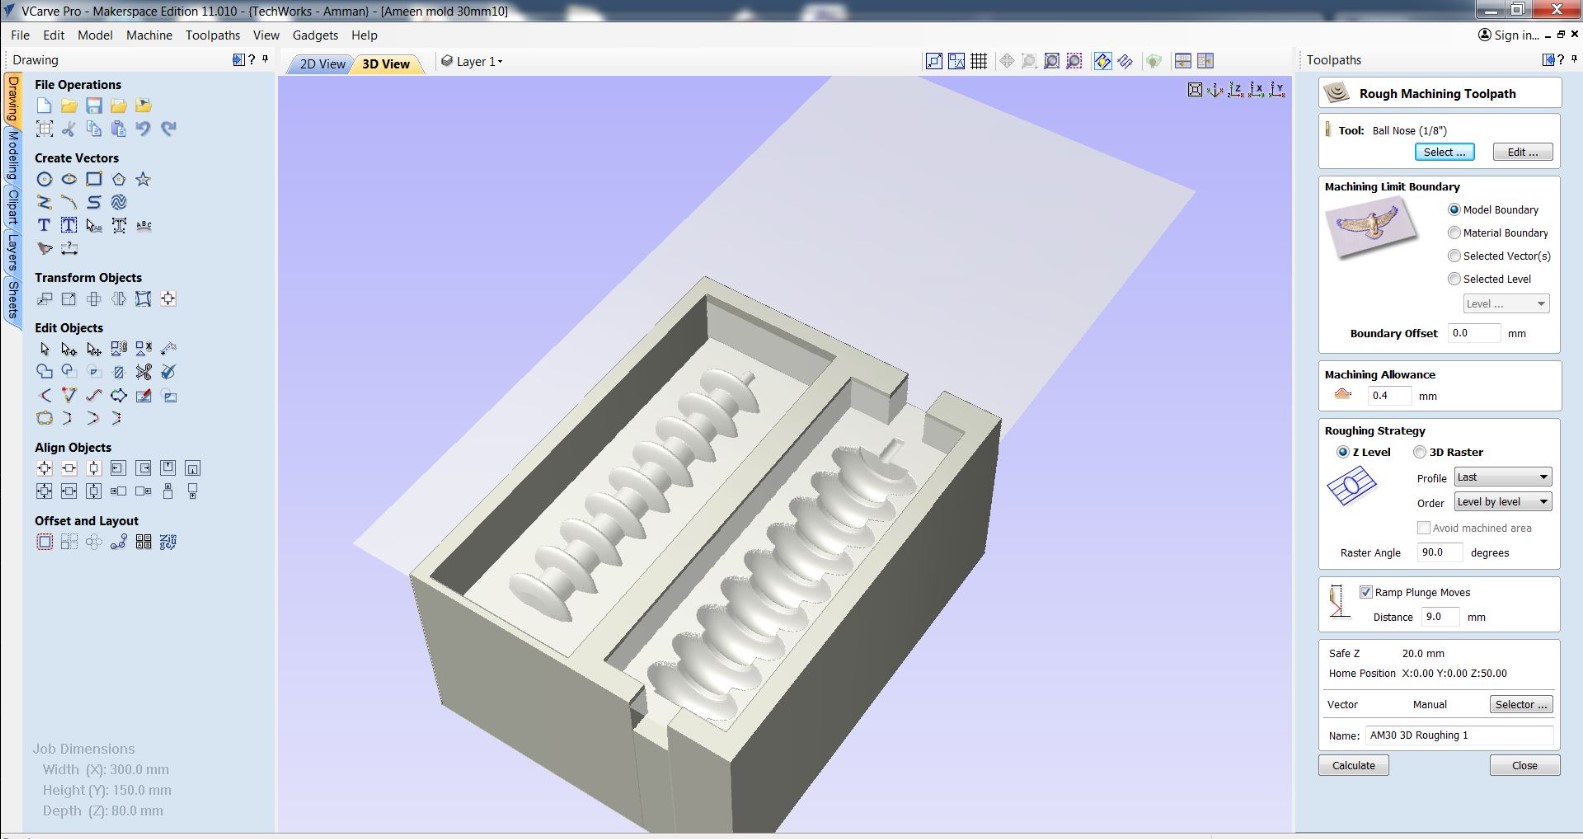
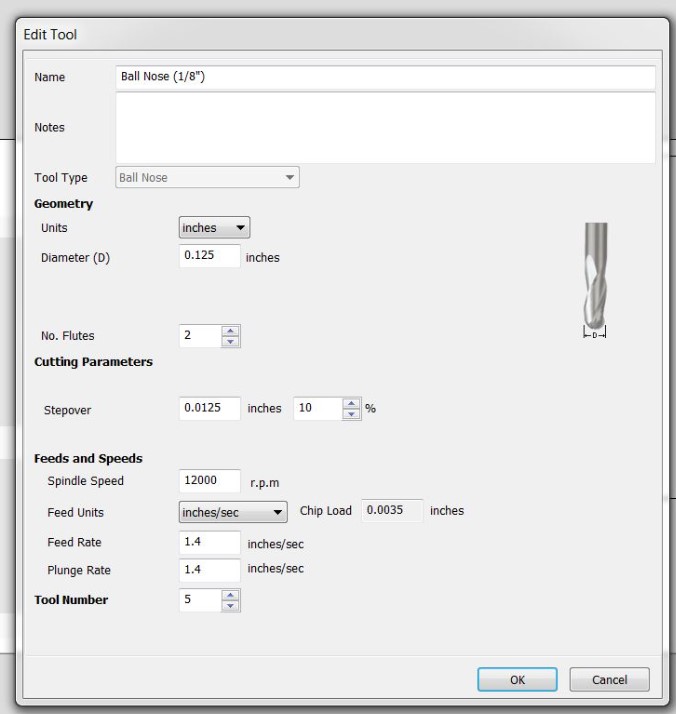
Step 3: Click "Rough Machining Toolpath" from the "Toolpath Operations" menu. If the endmill is defined in the database, select "Select" in the "Tool" menu and look for "Ball Nose (1/8")" in the list. Otherwise, you can select "Edit" and set the endmill for this job locally to be like next picture. select model boundary and then click "Calculate" on the "Table" tab.

Step 4: Now it's time to work on the finshing. Select "finishing Machine Toolpath" from the "Toolpath Operations" menu. Make sure you're using the "Ball Nose (1/8")". select model boundary and then click "Calculate" on the "Table" tab.
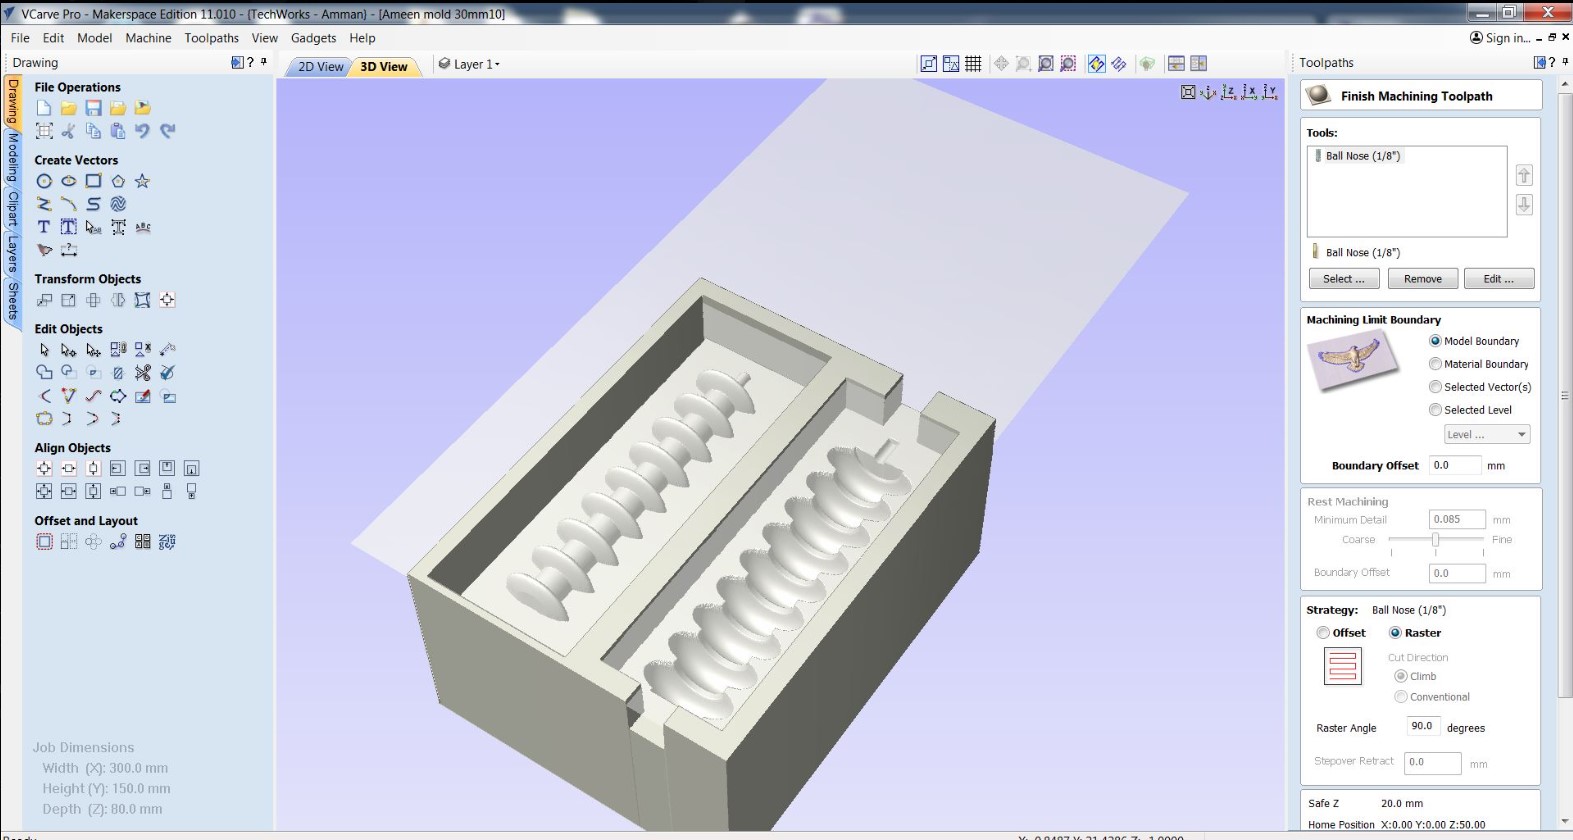
Make sure that the work is one pass and the stepover is 10%
After job previews if everything is good start saving the tool path by select all tool path and click on save tool path.
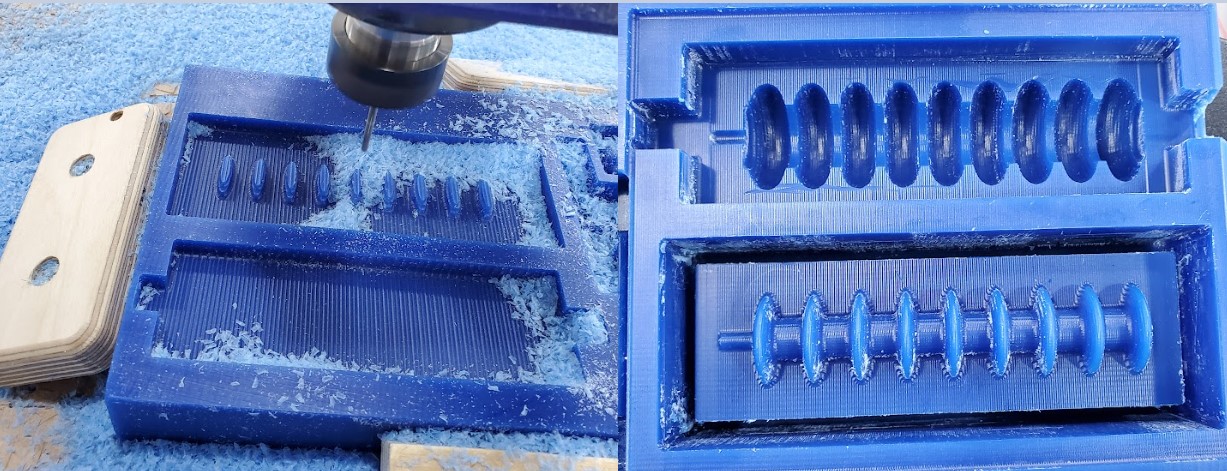
Milling
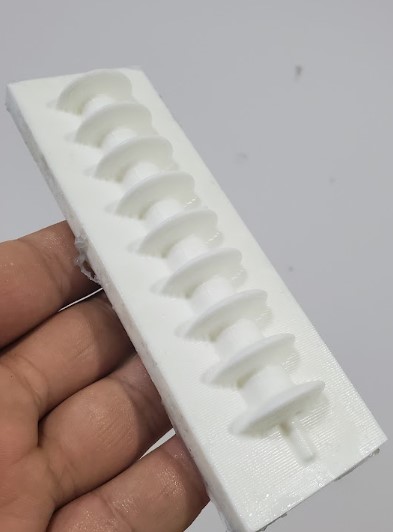
I made my mold out of machinable wax stock (150 mm x 300 mm x 40 mm). We used wood pieces and wood screws to secure the block to the ShopBot table.
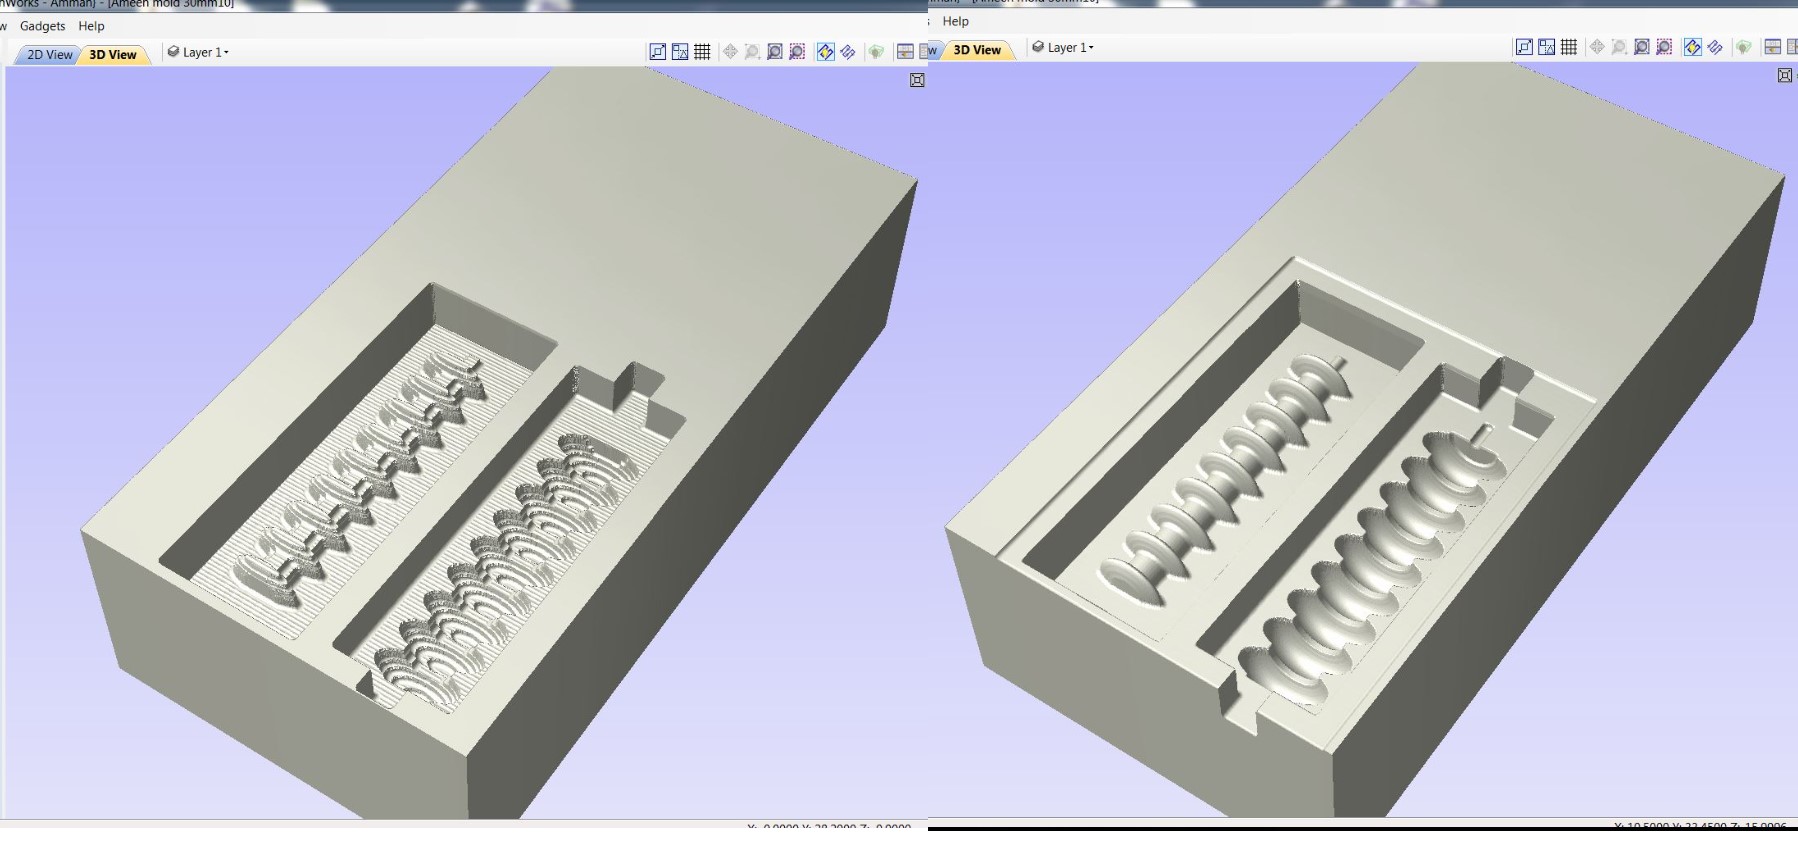
It took 45 minutes to rough out the 3D model and 75 minutes to finishing. Some of the wax chips that were left over after 3D roughing were linked to the block in some way. Excessive heat appears to have melted both the chips and the block surface. That is how surface flaws in the final product, particularly color differences, are explained. In any case, such chips were eliminated during the 3D finishing process
2.3. Molding the Negative Mold Using Silicone
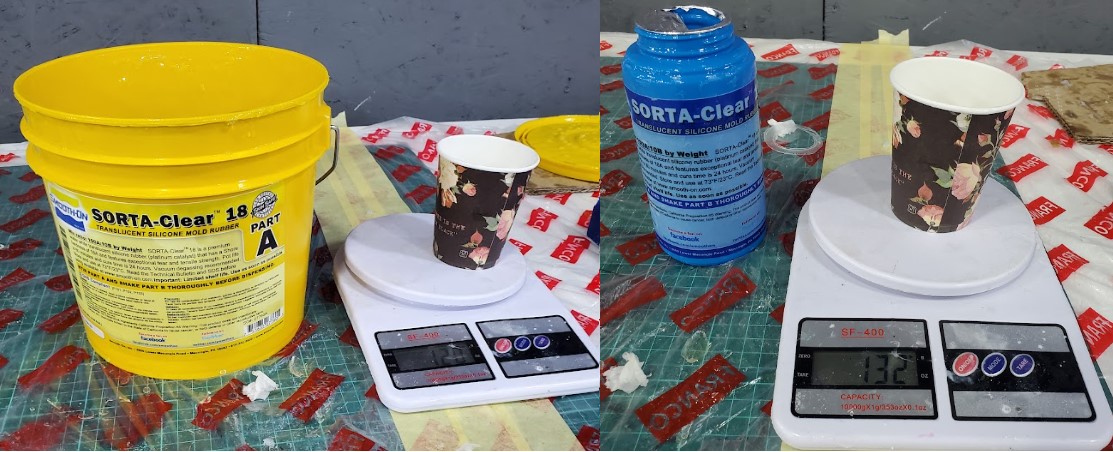
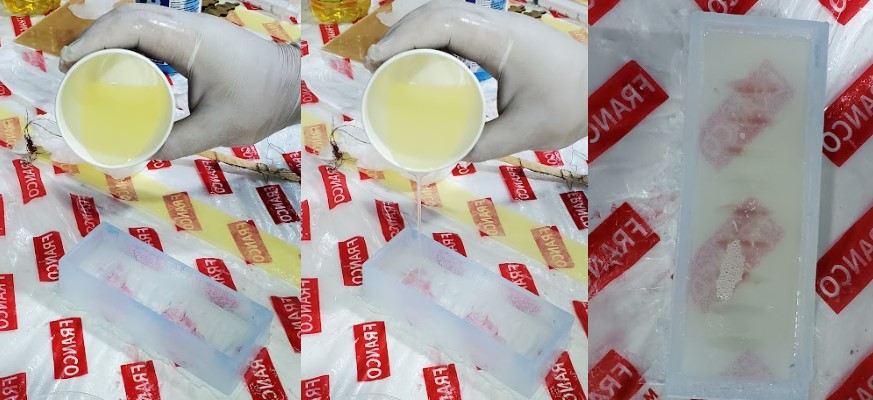
Before mixing, I added release agent (oil) to the wax mold and completely mixed the contents of the A and B material containers. The weight-ratio is 10A:1B, according to the technical datasheet. First, I combined 120 gm of material A with 125 gm of material B, mixing for several minutes until the mixture was homogeneous.
I began carefully casting material to the lowest position in order for it to make its way inside the mold. This will help to lessen the number of trapped air bubbles within.
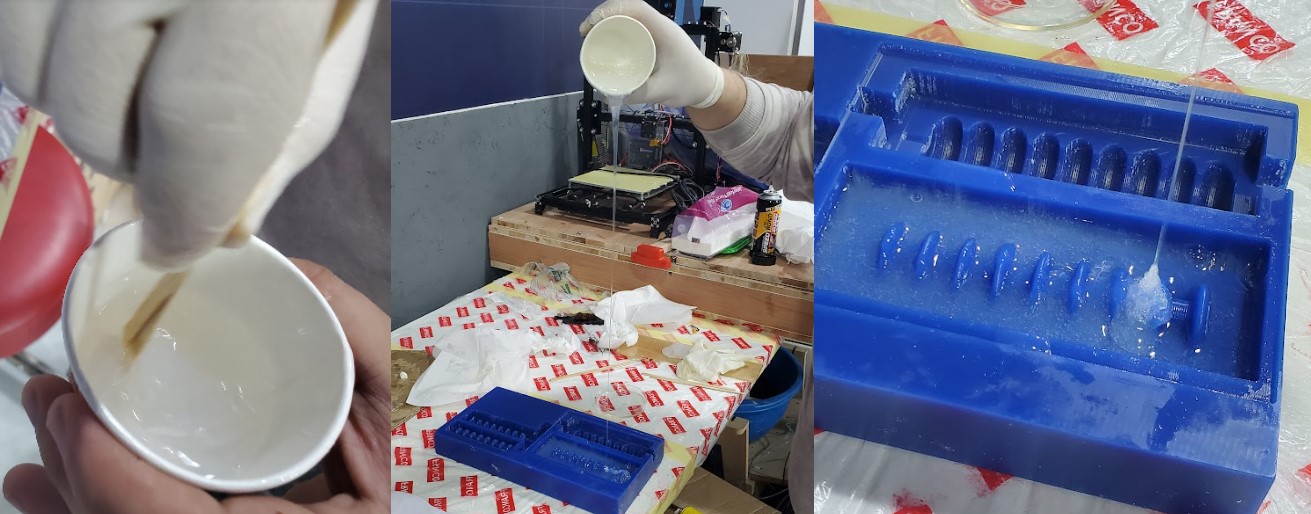
I slammed the mold on the table to release trapped air bubbles. This worked because air bubbles rose to the surface. The smoth curing time for silicone is 24 hours. I put it in the lab for the following day.
For easy removal of silicone molds, you can inject air using the needle as shown below
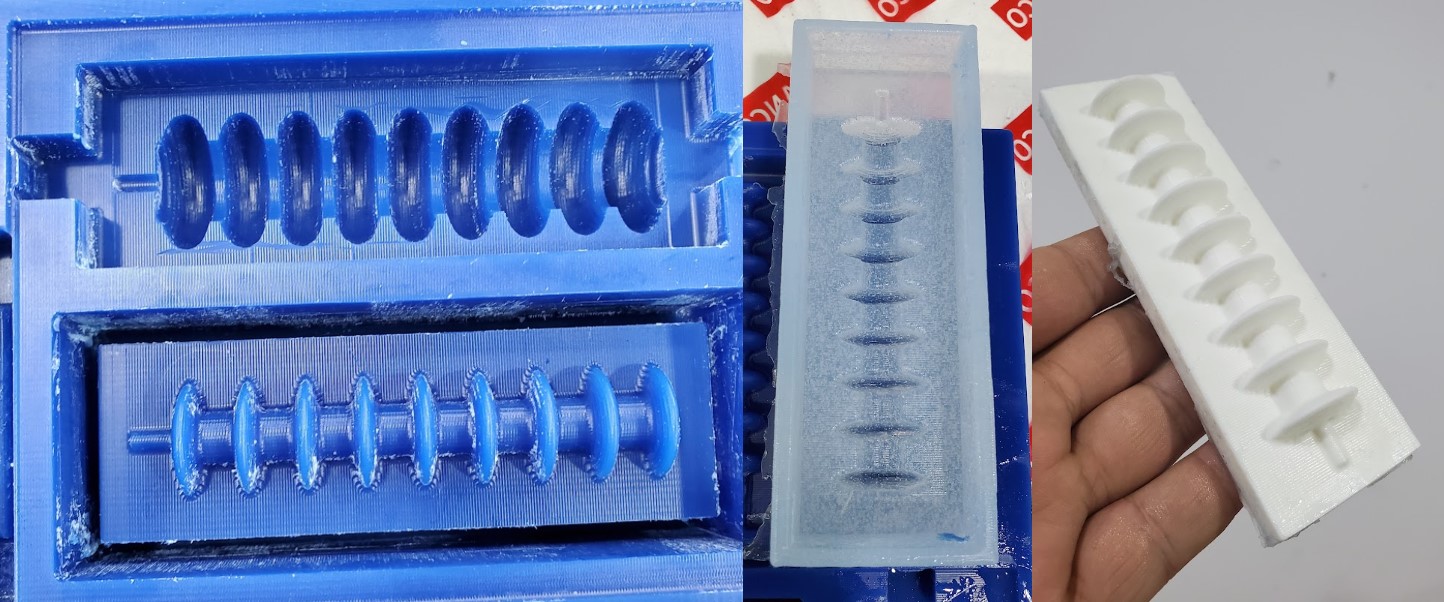
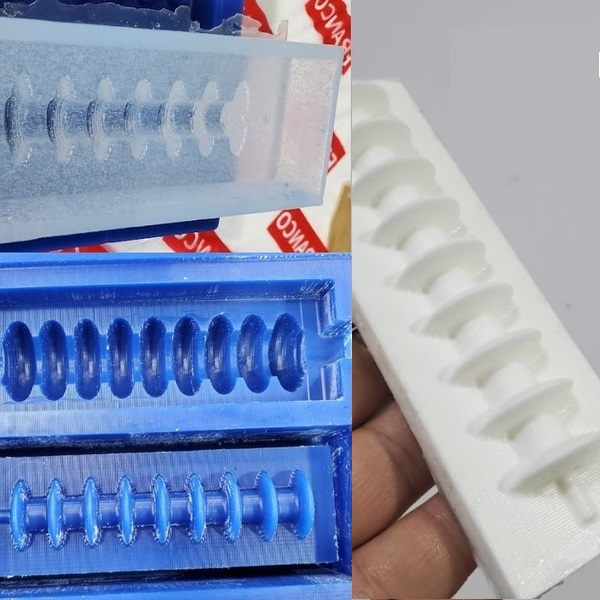
The result of producing the negative silicone mold is shown in the image below.

Problem
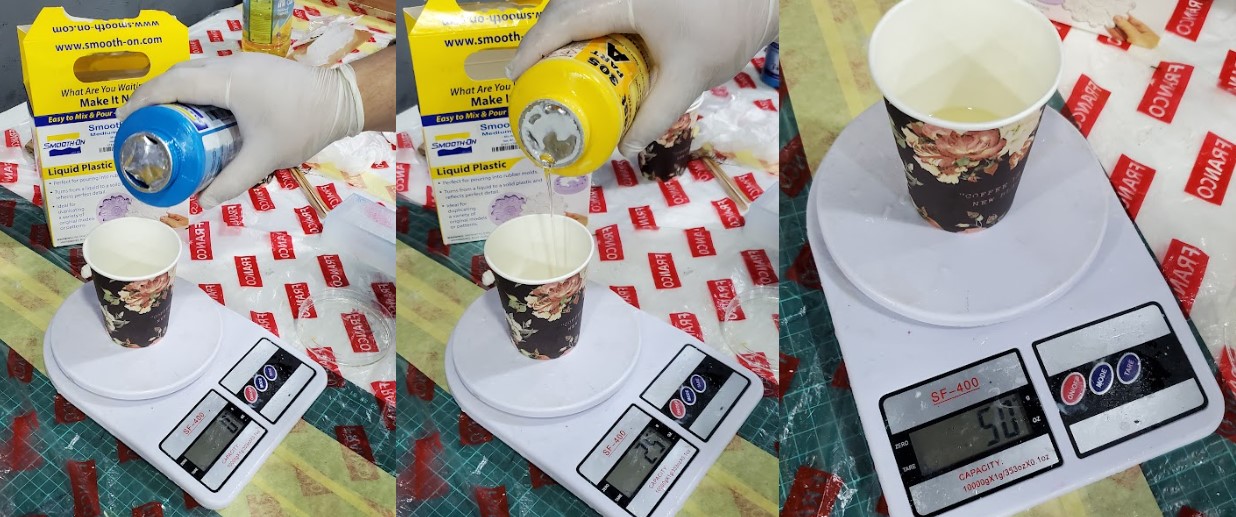
I tried Entropy Resin One with ONF first, but it was astonishing how long the resin stayed liquid within the mold (it took more than a day to solidify, whereas the resin that remained in the cup solidified in less than a quarter of an hour), so I switched to liquid plastic.2.4. Molding the Second Positive Mold Using Liquid Plastic
Before mixing, I added release agent (oil) to the silicone mold and completely mixed the contents of the A and B material containers. The mix ratio is 1A:1B by weight, according to the technical datasheet. I combined 25 gm substance A with 25 gm material B for a few minutes until the mixture was homogeneous.
I disassembled the silicone mold after it had cured for a while. I cleaned the liquid plastic mold with a utility knife and sandpaper.
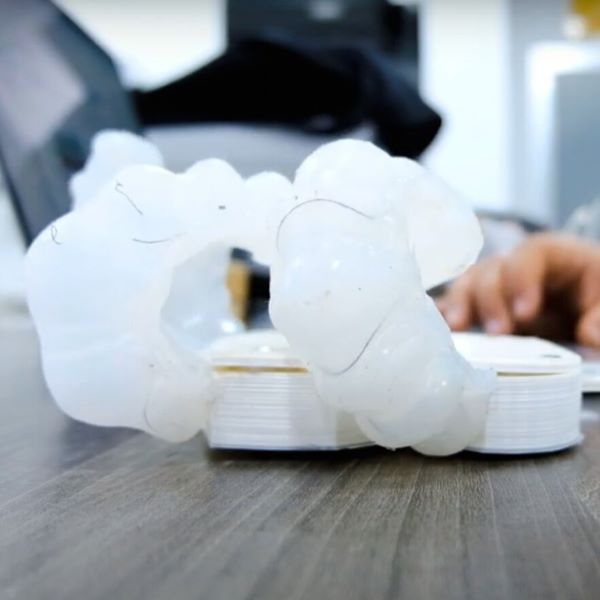
2.5. Hero Shoot!
Visit a wild card week to see how soft robots are made.