Mechanical Design
Clay Forming MSachine
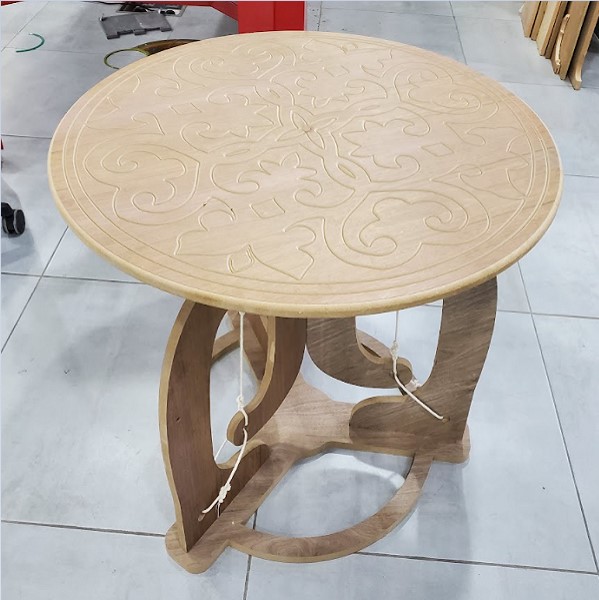
Clay forming machine is a 4 axis CNC which designed with the motive of automating the process of forming clay, which will give this industry many advantages, the most important of which is accelerating the production process and increasing accuracy, in addition to the possibility of forming clay in ways that cannot be done by human hands . this machine did by 3 of fabacademy students This machine was designed, manufactured and programmed by the efforts of these students
Ameen Yousef: design & fabrication
Ismail Qashoue : fabrication & assembly
Aybak Al-daamsa: programing & assembly
1. The Design
text text
First conceptual design
Second conceptual design
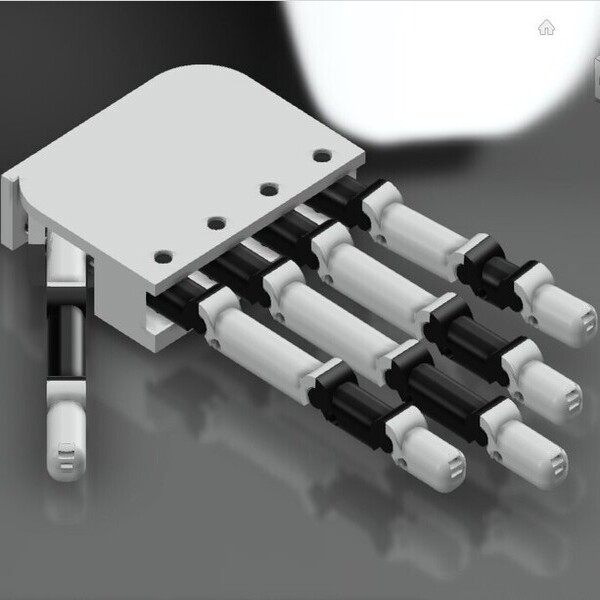
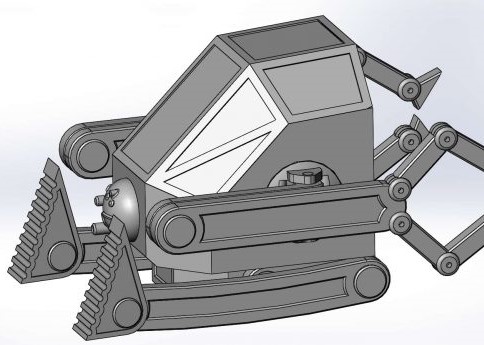
Final Design
3D Printed Part
First mechanism horizontal axis support 1

Download part
First mechanism horizontal axis support 1.f3d
First mechanism horizontal axis support 1.stl
First mechanism horizontal axis support 2

Download part
First mechanism horizontal axis support 2.f3d
First mechanism horizontal axis support 2.stl
First mechanism horizontal axis slaiding part

Download part
First mechanism horizontal axis slaiding part.f3d
First mechanism horizontal axis slaiding part.stl
First mechanism vertical axis sliding part

Download part
First mechanism vertical axis sliding part.f3d
First mechanism vertical axis sliding part.stl
First mechanism vertical axis support

Download part
First mechanism vertical axis support.f3d
First mechanism vertical axis support.stl
First mechanism tool spport

Download part
First mechanism tool spport.f3d
First mechanism tool spport.stl
Second mechanism horizontal axis support 1

Download part
Second mechanism horizontal axis support 1.f3d
Second mechanism horizontal axis support 1.stl
Second mechanism horizontal axis support 2

Download part
Second mechanism horizontal axis support 2.f3d
Second mechanism horizontal axis support 2.stl
Second mechanism horizontal axis slaiding part

Download part
Second mechanism horizontal axis slaiding part.f3d
Second mechanism horizontal axis slaiding part.stl
Second mechanism vertical axis sliding part

Download part
Second mechanism vertical axis sliding part.f3d
Second mechanism vertical axis sliding part.stl
Second mechanism vertical axis support

Download part
Second mechanism vertical axis support.f3d
Second mechanism vertical axis support.stl
Second mechanism tool spport

Download part
Second mechanism tool spport.f3d
Second mechanism tool spport.stl
Second mechanism tool

Download part
Second mechanism tool.f3d
Second mechanism tool.stl
Big motor support

Download part
Big motor support.f3d
Big motor support.stl
CNC part
Big bearing support

Download part
big bearing support.f3d
big bearing support.stl
Disk

Download part
Disk.f3d
Disk.stl
Disk support

Download part
Disk support.f3d
Disk support.stl
arc

Download part
Arc.f3d
Arc.stl
Turning & Miling

Download part
Shaft.f3d
Shaft.stl

Download part
Shaft.f3d
Shaft.stl
Mechanical part

Download part
BIG Bearing .f3d
BIG Bearing .stl

Download part
Sprocket.f3d
Sprocket.stl

Download part
SCROW NUT.f3d
SCROW NUT.stl

Download part
Block bearing.f3d
Block bearing.stl

Download part
Linear Bearing.f3d
Linear Bearing.stl

Download part
Secrw 600/500/400 mm.f3d
Secrw 600/500/400 mm.stl

Download part
Rod 500/470/400.f3d
Rod 500/470/400.stl

Download part
Aluminum frame.f3d
Aluminum frame.stl
Electrical part

Download part
Big motor .f3d
Big motor.stl

Download part
Steppar motor.f3d
Steppar motor.stl

Download part
Limit swich .f3d
Limit swich.stl
2. Fabrication


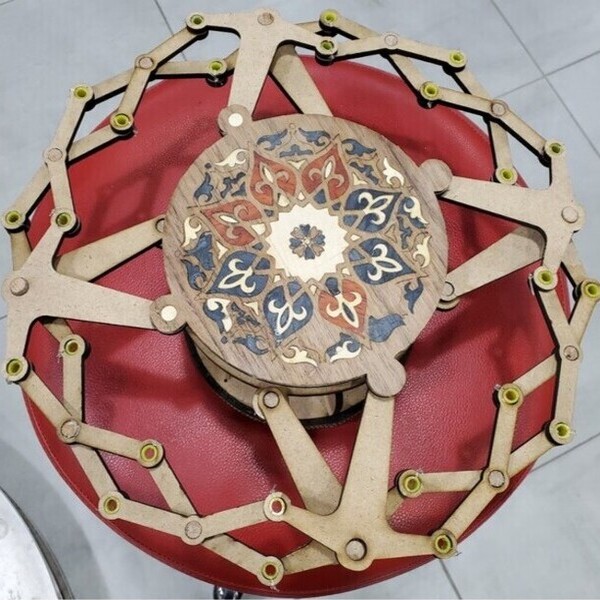
 Assimbly


3. Electronics part
this is the bill of material for electronics components from a local supplier
- ARDUINO CNC SHIELD V3
- ARDUINO UNO - R3
- STEPSTICK A4988 STEPPER DRIVER
- STEPPER MOTOR ( NEMA17 ) 17HS4401
- ENDSTOP MECHANICAL LIMIT SWITCHSTEPPER MOTOR
- DC MOTOR MY6812 24VSTEPPER MOTOR
- 43A H-BRIDGE DRIVE BTS7960
- 24V 15A POWER SUPPLY
- 12V 15A AC DC ADAPTER POWER SUPPLY
wiring
basically we have two separate systems, one for outer geometry and the other for inner geometry so we need two controllers (Arduino UNO) with shields and 4 stepper motor drivers.
to control the disk speed we use a DC motor driver and this driver is capable to deal with 27V 43A which is the best choice for our system because we have a 24V 8A DC motor so this driver will handle the starting current safely which is 4 to 8 times the normal current
so let's start with the inner and outer axis we connect the stepper motors to the X and Z axis and the stepper driver to the same place so but make sure that the stepper driver is connected with the right orientation otherwise it will damage ( match the enable pins to each other and all the pins will be matched by automatically )
then connect the power supply cables to the 12V power supply, repeat this process for the inner and outer axis

4. Programing
Based on the CAD we have 4 axis machine, 2 axes for inner geometry and 2 axes for outer geometry also we have a high-speed DC motor for the clay disk.
GRBL
in order to program this machine, we consider the inner axis is separated from the outer axis. the DC motor will be controlled by PWM and adjusted by a variable resistor to provide the proper speed as needed.
so let's start with the main firmware for the system we use GRBL firmware which is a no-compromise, high-performance, low-cost alternative to parallel-port-based motion control for CNC milling. It will run on a vanilla Arduino (Duemillanove/Uno) as long as it sports an Atmega 328.
to install GRBL go to this GitHub repository then download the ZIP file

then we have to extract the ZIP and go to Arduino IDE to add the GRBL library go to sketch>>include library >>add .ZIP library then chose the file that you extracted it with name grbl

now let's upload the firmware on Arduino Uno go to file>>examples>>grbl>>grbl upload

upload the firmware

UGS
to control the CNC shield we need a software that gives instructions to the motors and by sending the g-code line by line to the Arduino Uno, there are several we choose Universal Gcode Sender UGS because is a self-contained Java application that includes all external dependencies and can be used on most computers running Windows, MacOSX or Linux.
so go to download page and install the UGS based on your operating system

after file extracting go to the bin folder then start ugsplatform64.exe and the UGS will open up


now let's connect to the Arduino so select GRBL firmware then select the COM number for your Arduino and the baud rate must be 115200

if the Arduino connected you will see the following lines on the console

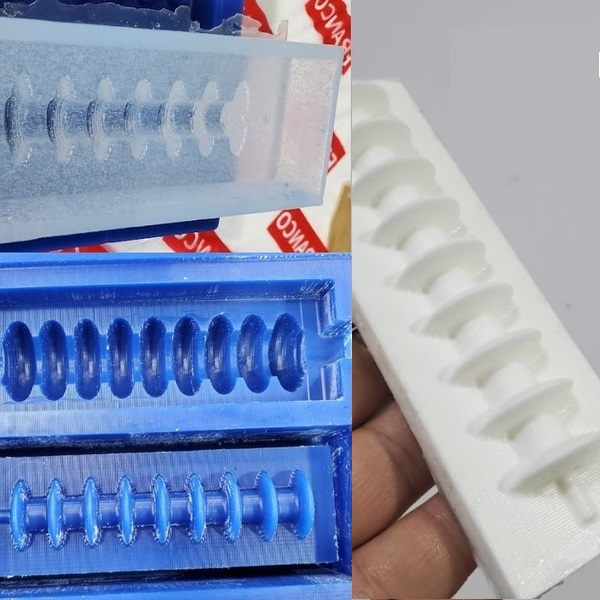
Testing


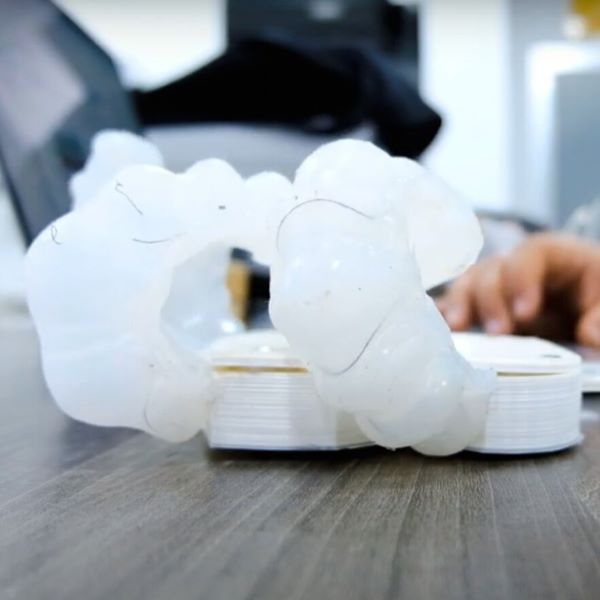
6. Masterpiece