WEEK 05
ON THIS PAGE WE WILL FIND A BRIEF DESCRIPTION OF MY JOB THROUGHOUT THE FIFTH WEEK
GENERALITIES
Well, I really like this week's topic, so I'll try to explore more about 3D design for printing, scanning and production with PLA filament. The 3D printer that we intend to use is a machine capable of making replicas of 3D designs, from a design made by computer. They arise with the idea of converting 2D files into real or 3D prototypes. Commonly, it has been used in the prefabrication of parts or components, in sectors such as architecture and industrial design. The most common materials are the following filaments of PLA, ABS, TUVALU, Nylon,... (thermoplastic plastic filament), these melt the plastic building very thin layers superimposed with it to create the object.
| Day | Wenesday | Thursday | Friday | Saturday | Sunday | Monday | Tuesday |
|---|---|---|---|---|---|---|---|
| 09:00 | |||||||
| 10:00 | Meeting CT | Assigments | Assigments | Local Review | |||
| 11:00 | Meeting CT | Assigments | Assigments | Local Review | |||
| 12:00 | Assigments | Assigments | |||||
| 13:00 | Assigments | Assigments | Regional Review | ||||
| 14:00 | Assigments | Assigments | Regional Review | ||||
| 15:00 | Fabacademy | Practice | Practice | Assignments | |||
| 16:00 | Fabacademy | Practice | Practice | Assignments | Review Documents | ||
| 17:00 | Fabacademy | Practice | Practice | Assigments | Assignments | Review Documents | |
| 18:00 | Fabacademy | Practice | Practice | Assigments | Assignments | Review Documents | |
| 19:00 | Practice | Practice | Assigments | Assinments | Review Documents | ||
| 20:00 | |||||||
| 21:00 | Tutorial | Tutorial | Assigments | write Documents | |||
| 22:00 | Tutorial | Tutorial | Assigments | write Documents | Write Documents | ||
| 23:00 | Tutorial | Tutorial | write Documents | Write Documents | |||
| 24:00 | Tutorial | Tutorial | write Documents | ||||
| 01:00 | |||||||
| 02:00 |
Well, after a generic part that helps introduce us to the subject, we move on to the work carried out throughout the week. The only problem that I have had throughout this week is the execution time of the printing that is always high.
DESIGN AND 3D PRINT AN OBJECT
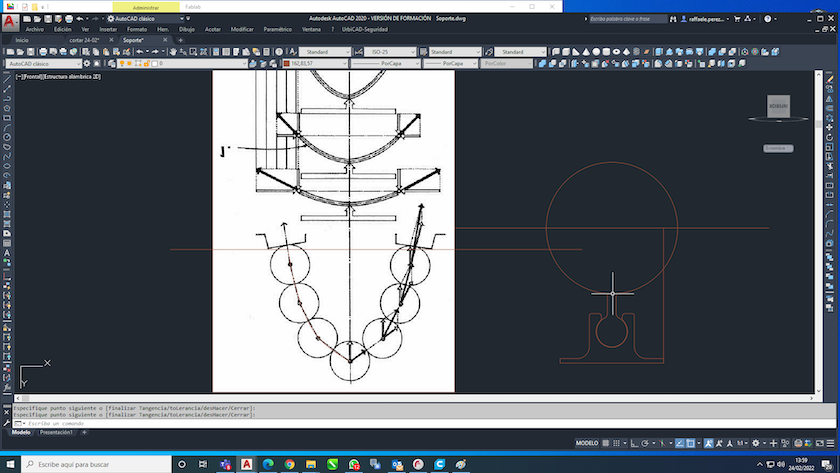
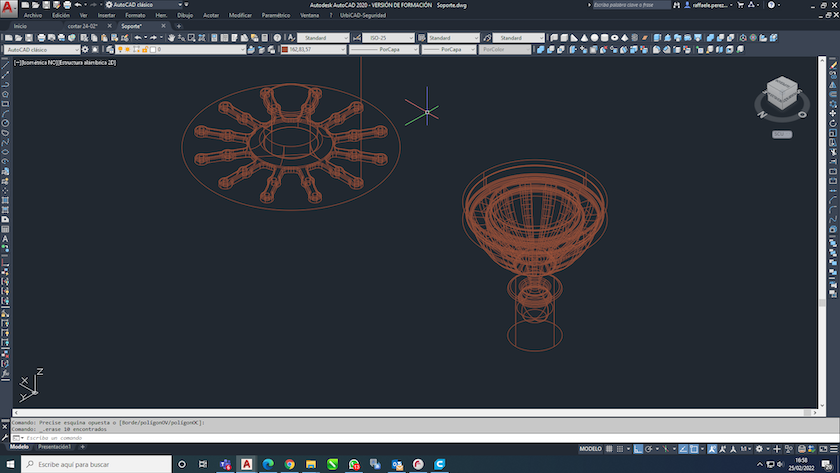
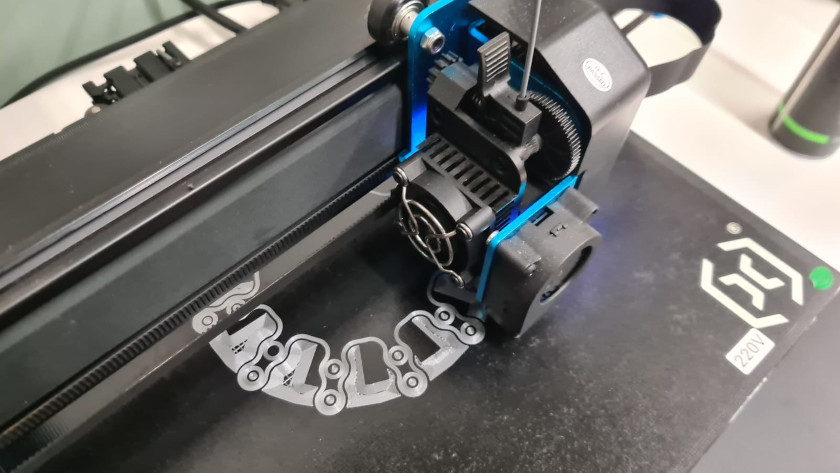
The main work this week is to make a fixed articulated. The main characteristic of this piece is that it is produced in a single impression. To make such an object I will use the knowledge acquired this week about the tolerances and characterization of my printer. The choice of printer, the artillery sidewinder x1, is due to the size of the print.
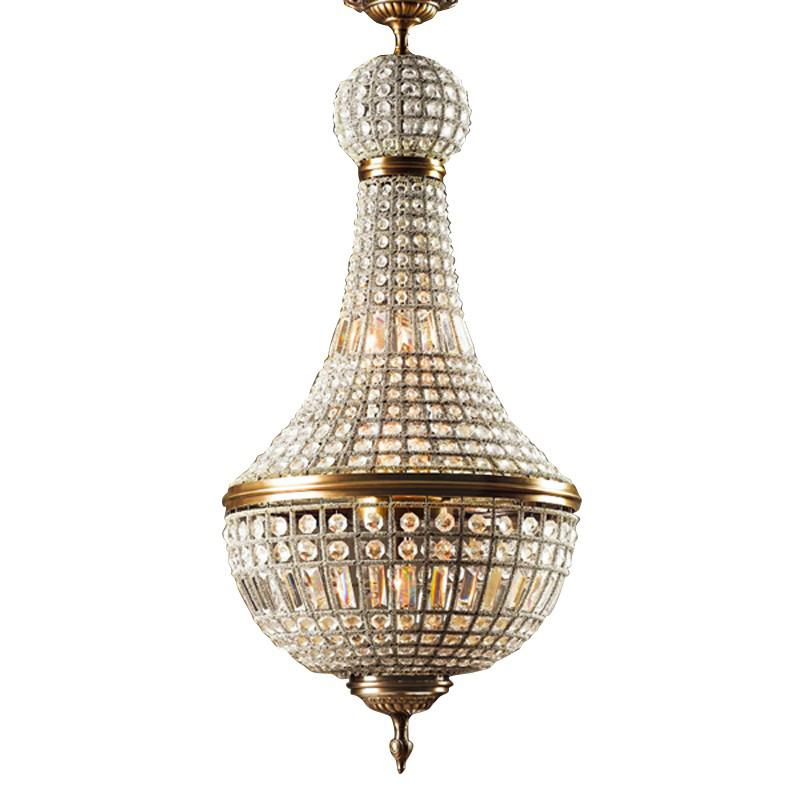
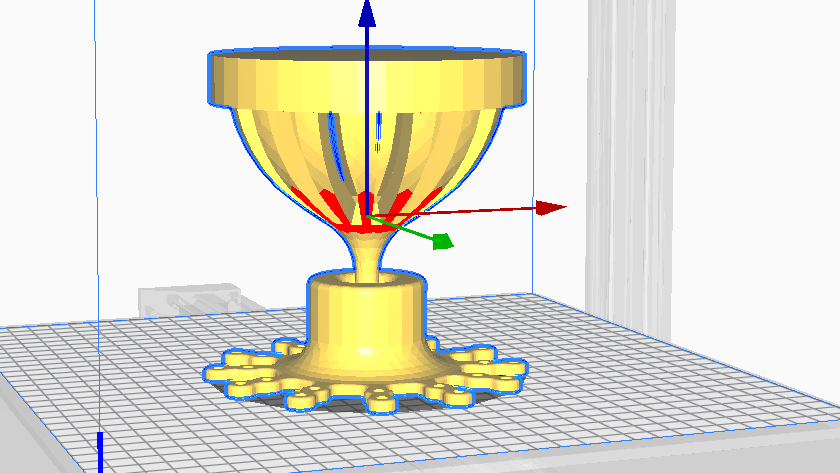
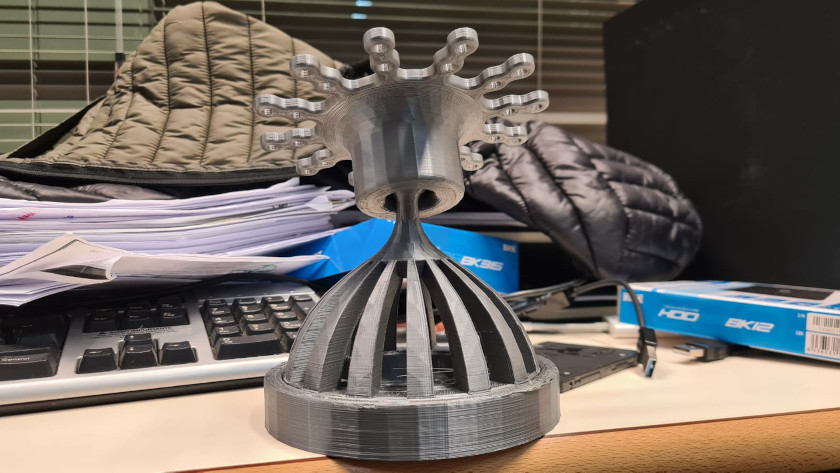
For the production of this practice we are going to design a support for a lamp that is functional for different reasons. First of all I want it to have a central articulation so that in the case of blows it can move without feeling the impact. To this I would like to add a rotation of the support to make it easier to mount the support to the ceiling.
 Step 1: Go to the link where the instructions are
 Step 2: Find the two images of the circuit
 Step 3: Indoor Image
 Step 4: Outside Image
In the design of the support, the chain of pressures and the studies carried out by Heyman have been taken into account. Although it must be said that many architects of the time already knew such an effect from the dome of San Pietro in Rome.
 Selecting the jpeg in Cura
 upside down
 Normal
 upside down
I have thought about the use of the pressure chain to optimize the shape design on the strength of the material that to be PLA could be affected by the weight of the materials and the size of the lamp. To speed up the printing I will choose to reduce the internal density of the object. After having done it, I would like to do a load test to help me get an answer to my fear of it breaking.
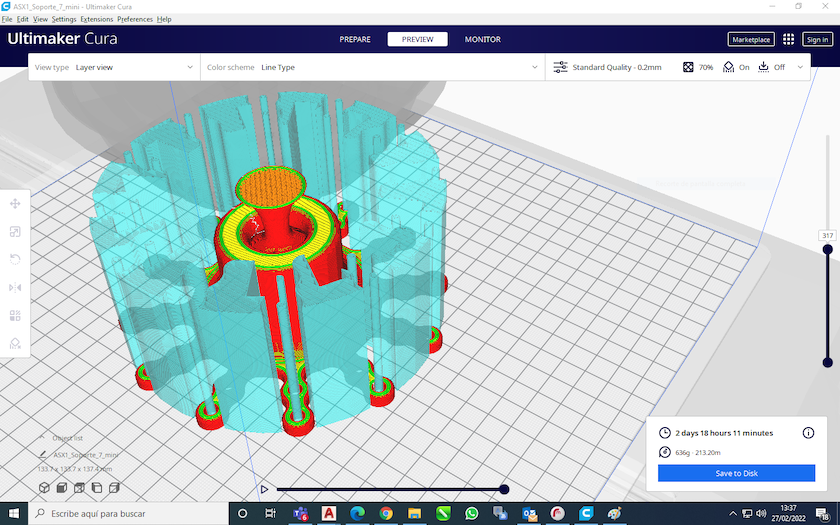
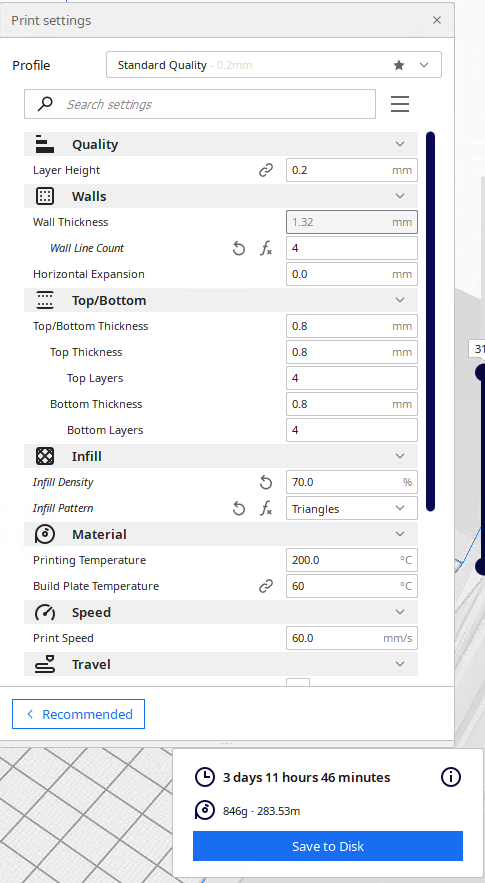
The first problem that I have encountered when I have finished my drawing is that the print size was larger than the base of the digital printer. It was not the only one, the printing took 4 days and approximately 5000g of filament was needed to finish the operation. The only solution was to reduce the size.
 Print
Print
 Print finished
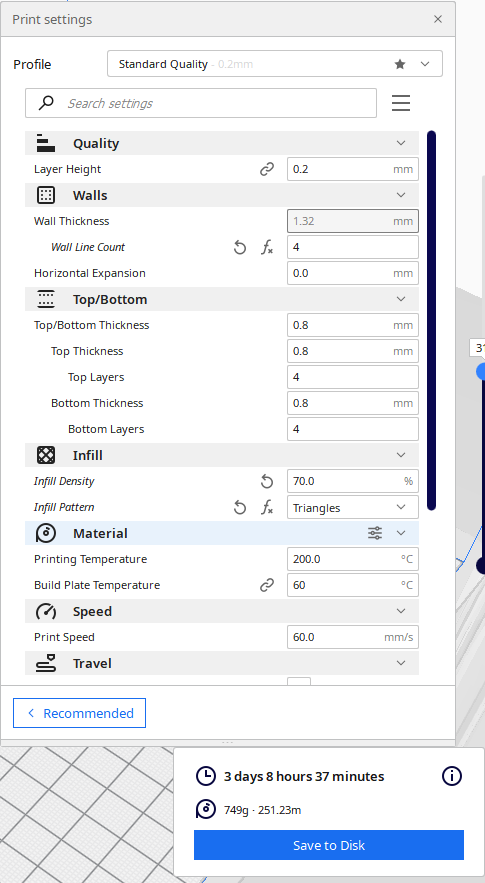
To solve the problem, it was not only necessary to reduce the print scale but also to maintain the distance parameters that made my design a functional prototype. Fortunately, winding down and ending the operations didn't take long.
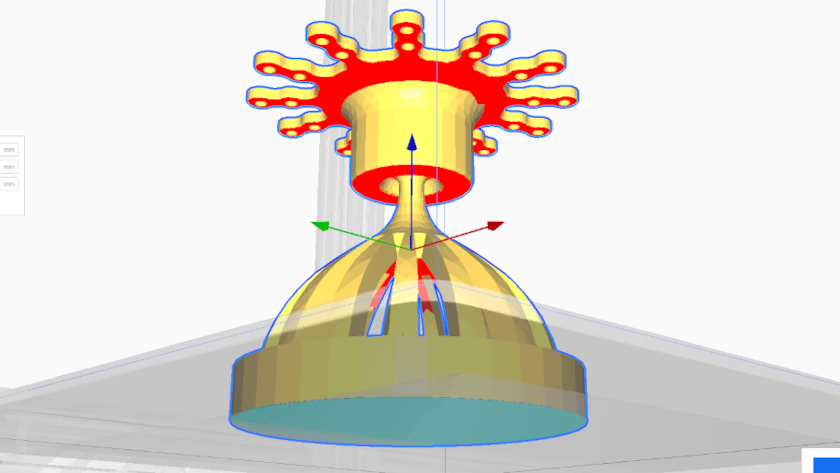
 Articulated knot detail
 Z axis rotation
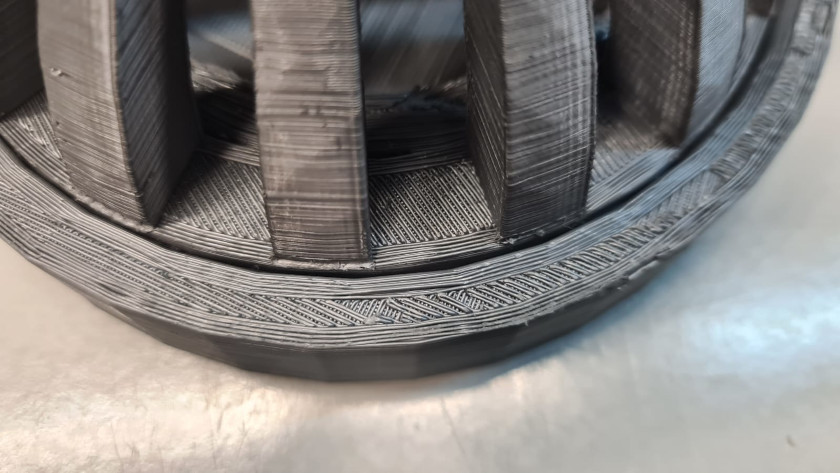
Observing the model in cura, I made sure that everything printed had the desired characteristics. As the interior filling had to undergo efforts, I made it out of triangles, which usually works quite well in distributing the interior tensions.
Well here I have the model in my hands and I hope it serves my purpose.
ASSEMBLY TEST
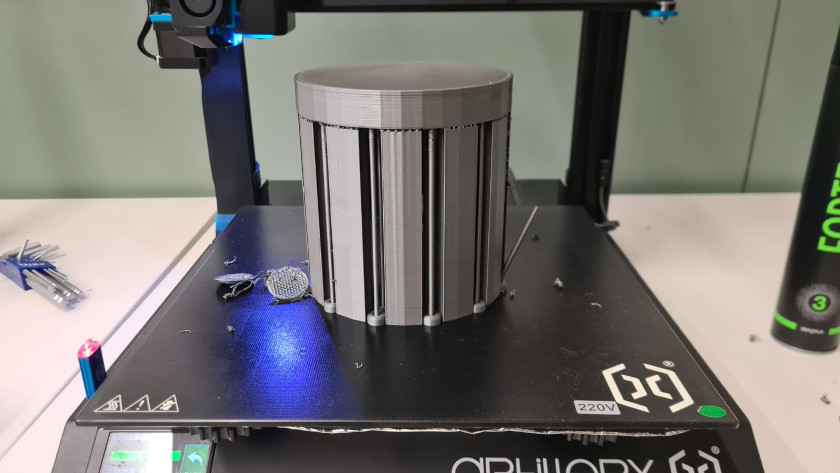
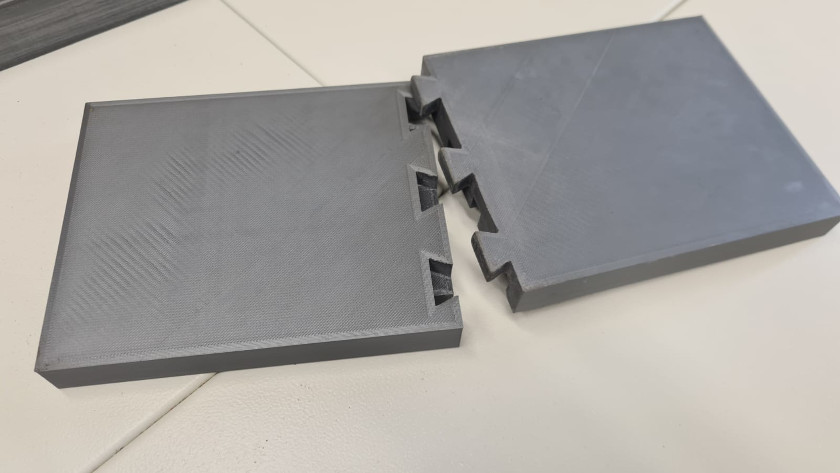
To finish understanding more about my printer, I did an assembly test. From the department they proposed to me to prepare some molds that they need to carry out some concrete tests.
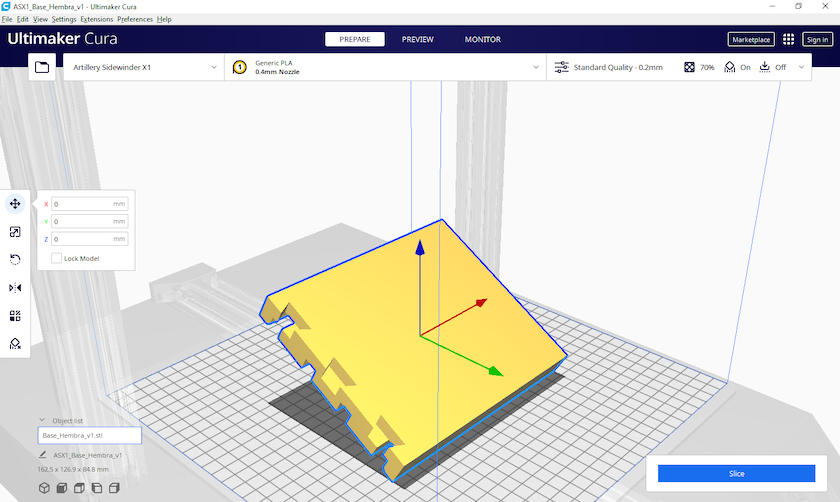 Part 1 of 4
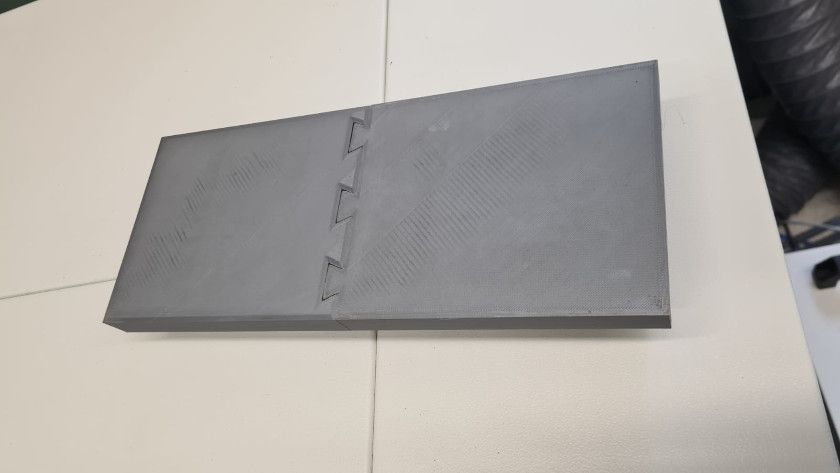
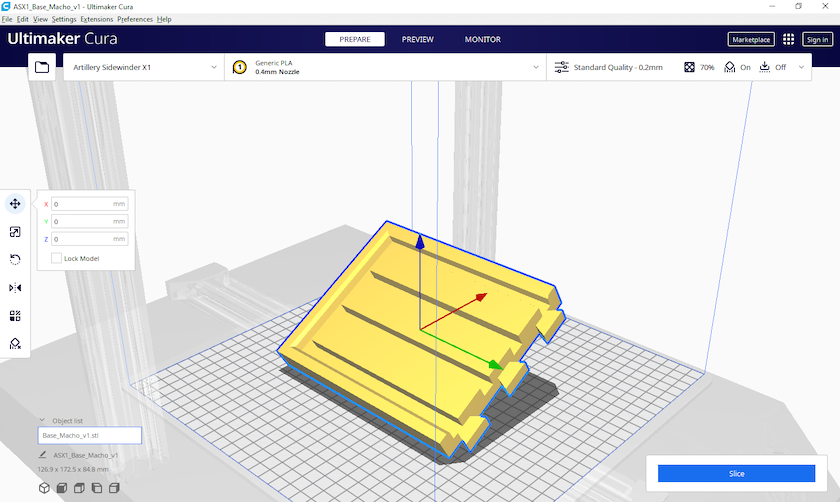 Part 2 of 4
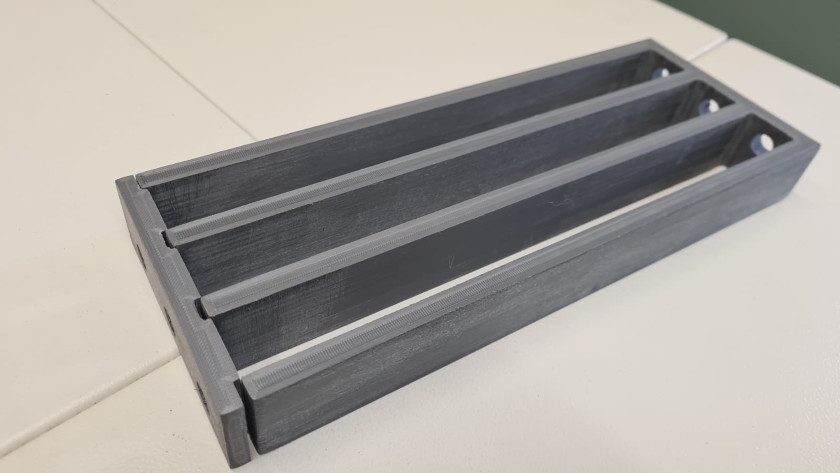
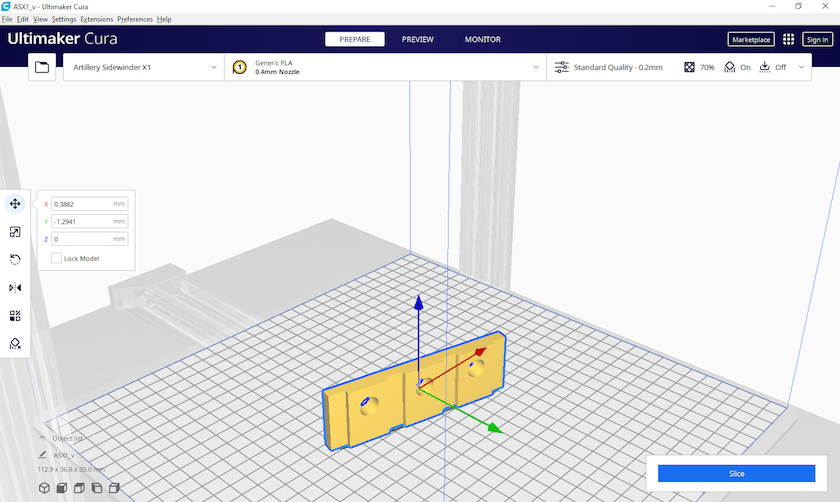 Part 3 of 4
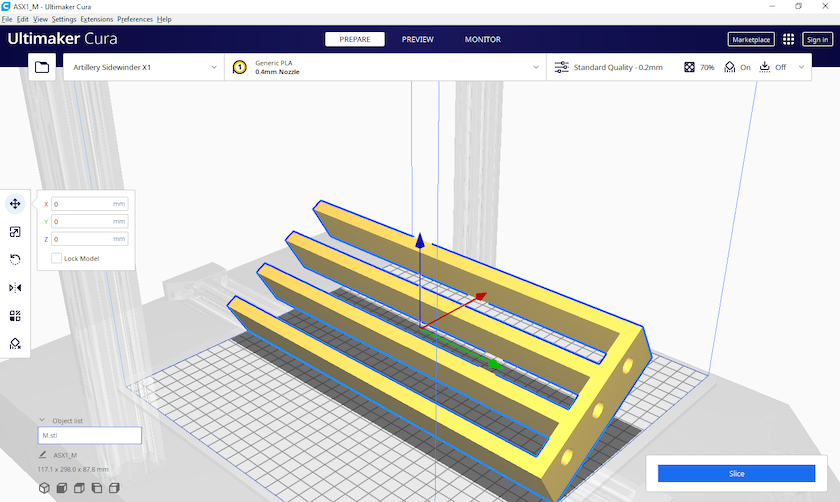 Part 4 of 4
 Assembly of parts
 Assembled parts
 Assembled tops
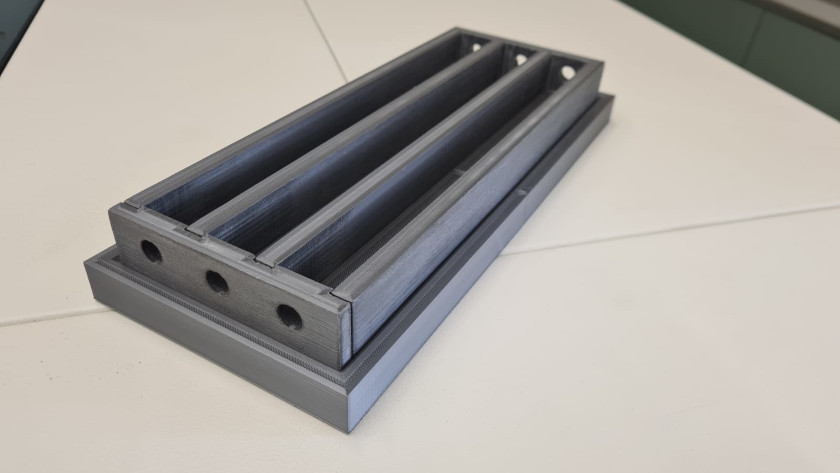 Finished mold
The difficulty of making the molds was their size. Its size was larger than the print base. To solve the problem, I have drawn some assemblies diagonally. The purpose is that the impact so that the concrete does not press and slide the mold.
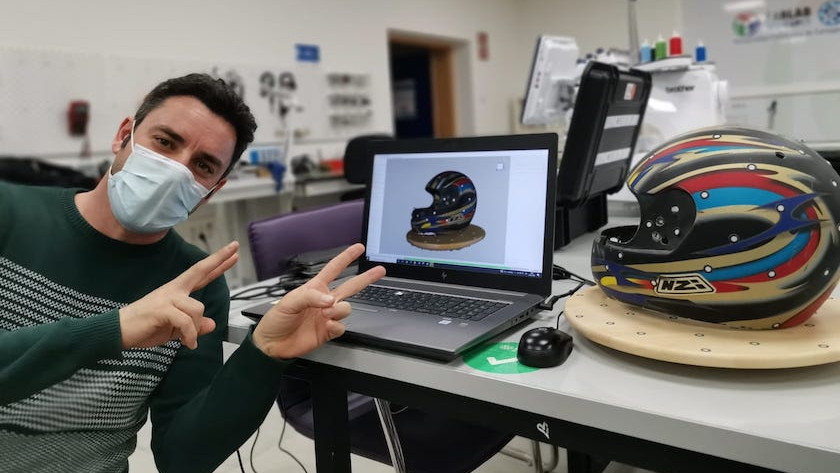
SCAN AND PRINT
To test the work with a scanner, we made a scan of me with Artec Eva Scanner and then later printed. It wasn't difficult at all. To have a good scan, the scanner has management and editing software.
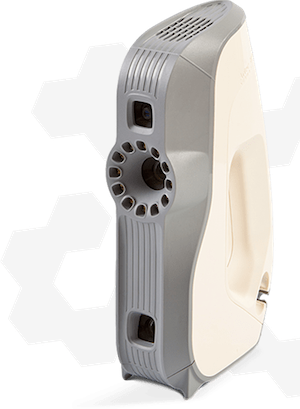
| Scanner type | 3D point accuracy | 3D resolution | 3D accuracy over distance | HD Mode | Hybrid geometry and texture tracking | Data processing algorithms | Working distance | Volume capture zone | Linear field of view, H×W @ closest range | Linear field of view, H×W @ furthest range | Angular field of view, H×W | Ability to capture texture | Texture resolution |
|---|---|---|---|---|---|---|---|---|---|---|---|---|---|
| Handheld | 0.1 mm | 0.2 mm | 0.1 mm + 0.3 mm/m | Yes | Yes | Geometry and texture based | 0.4 – 1 m | 61,000 cm³ | 214 × 148 mm | 536 × 371 mm | 30 × 21° | Yes | 1.3 mp |
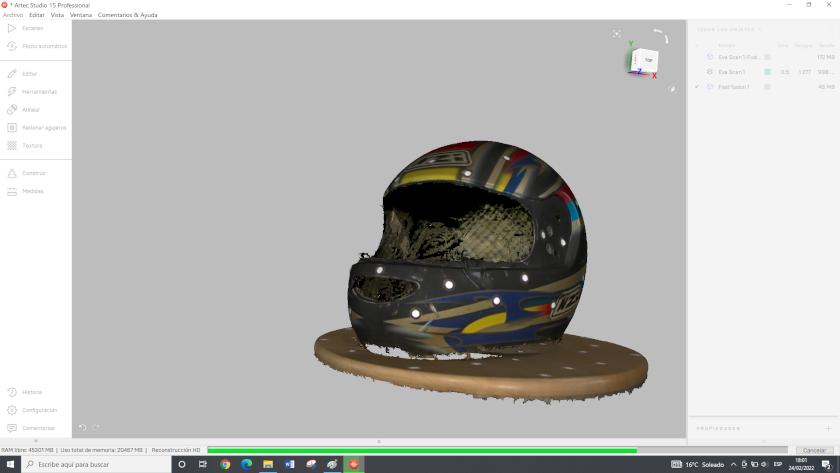
In the management section there is a preview that indicates the quality of the scan. For the scanning to be optimal, the data must be in the central band.
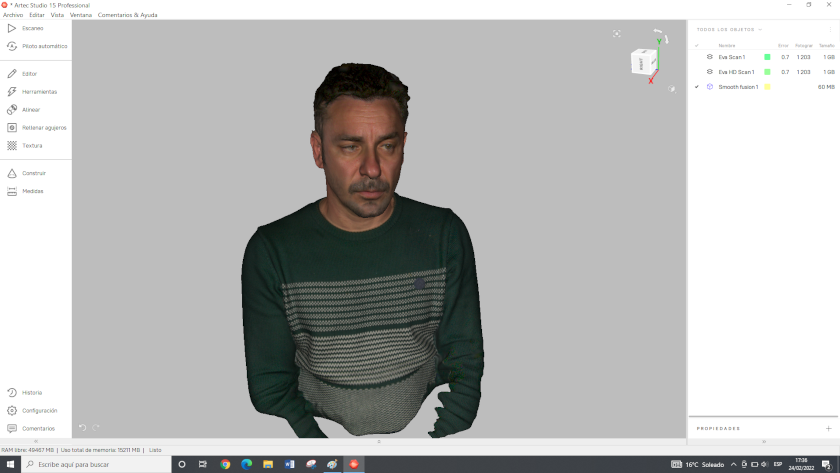
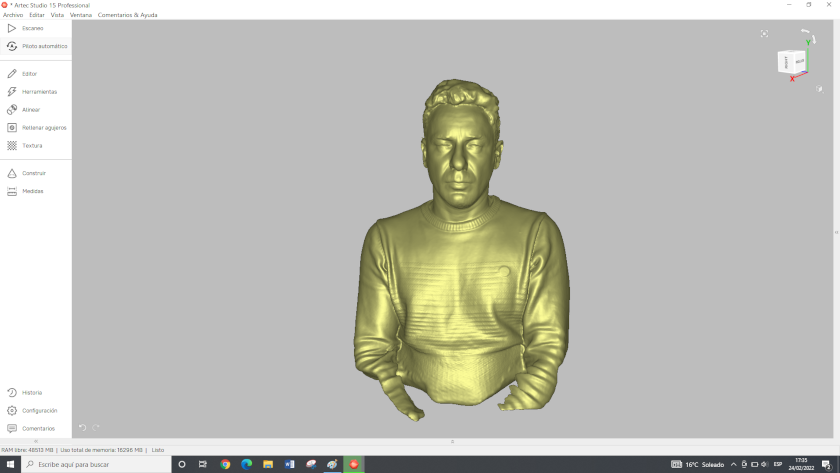 Scanned image
 Scanner Preview
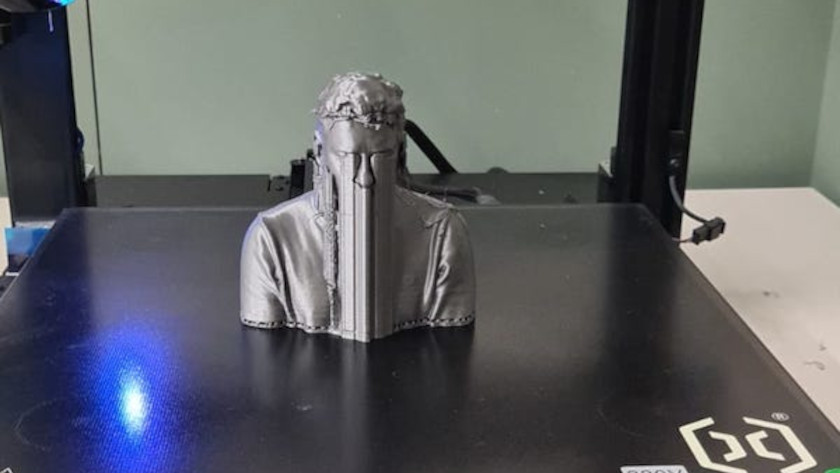 Image with support
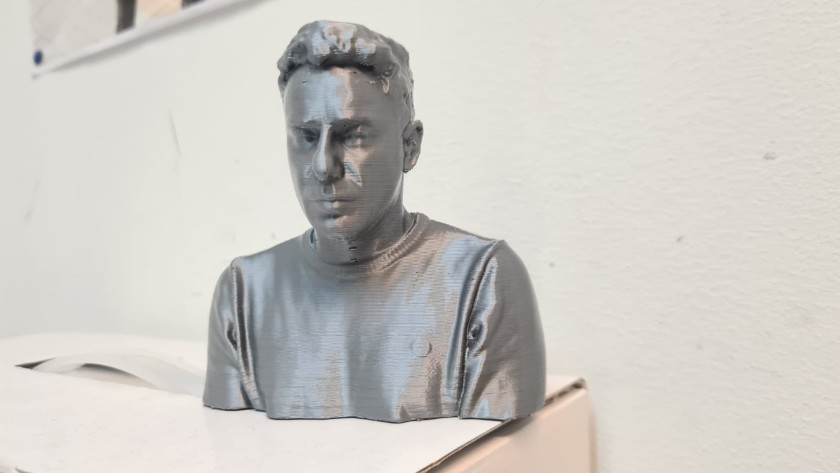 Image without support
 Scan finished
 Scanner Preview
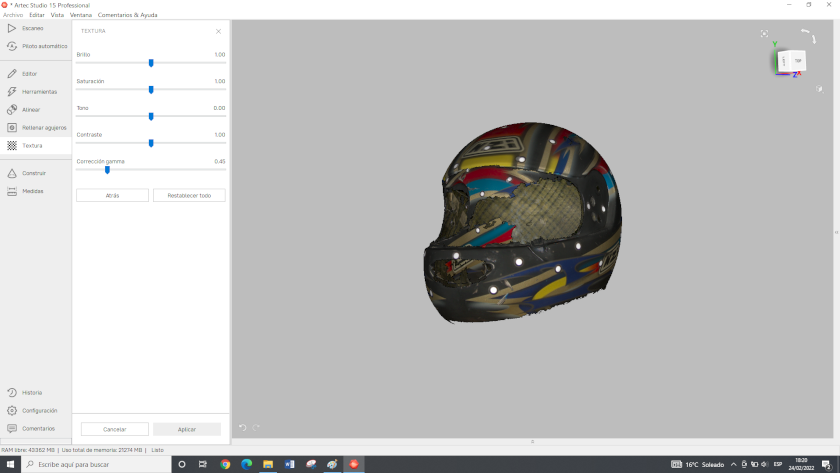 Editing: Cut and scan cleanup
CONCLUSIONS OF THE WEEK
This week has been quite entertaining for me, I have really enjoyed the printing work and the characterization tests that have helped me understand more about my 3D printer.
The artillery sidewinder x1 is a printer that gives excellent sensations, the finish is excellent, and it has a good resolution. What I don't like about it is that it doesn't have a z-axis safety anchor. If I had a box I think the top print planes would be better.
What I liked least about working with the 3D printer is the slowness. They are very slow and it is not enjoyable, it is impossible to repeat to improve and if you have little experience, things do not always go well.
Well, let's go for the next week that will surely not be easy, I have to travel to see my family and I will have to optimize the times so that everything goes well.
MY FILES
All files used are available with direct download links.


