Useful Links
comments
- Practical Arduino Ebook ✔
- Arduino as Virtual USB ✔
- Git Virtual USB Arduino Library ✔
- Git USBKeyboard Library ✔
- HID usage Table (pdf) ✔
other comment
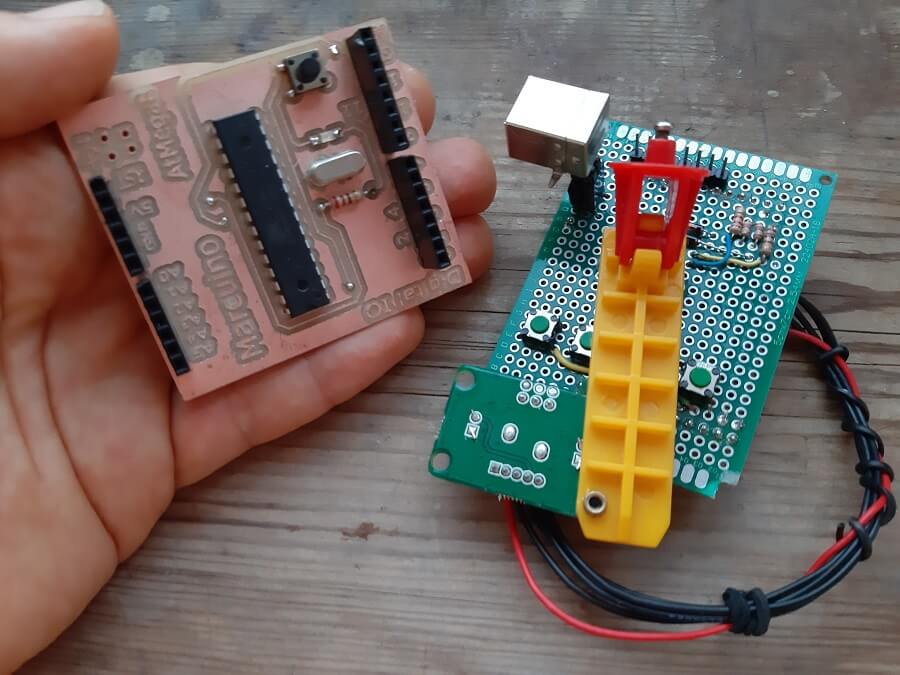
This project is an Human Interface Device (HID) Virtual USB Keybord. Basically I created an arduino shield board that when connected both to an Arduino (a Marcuino in my case) and a general Computer (regardless of the OS), I can manage to control it and make it doing different a complex sequence of actions, such as surfing the browser, open videos and changing volume, turn OFF the computer , etc. just pushing a button.
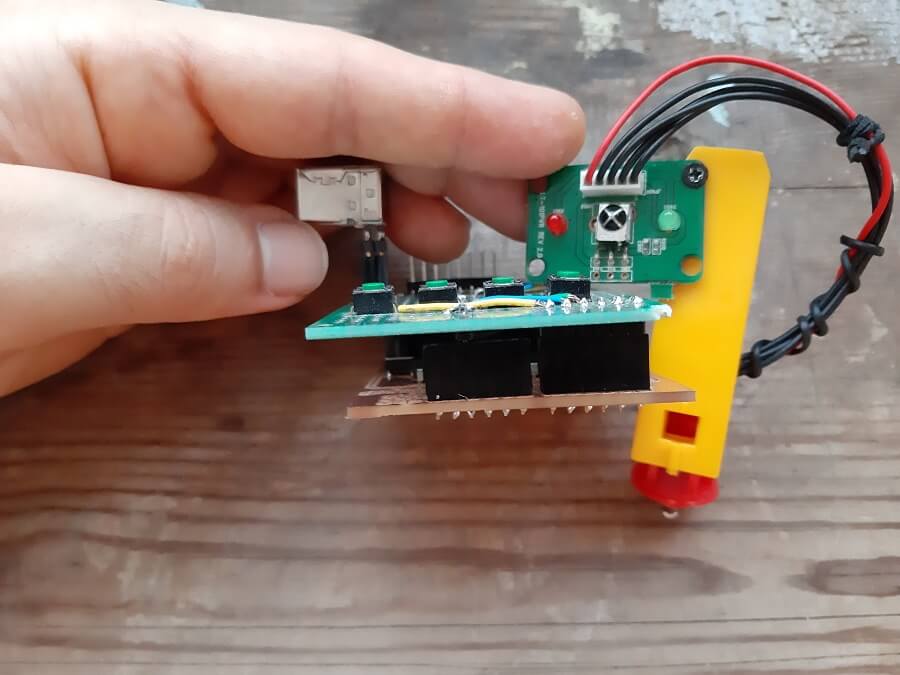
I then improved the system installing an IR receiver in order to do the same actions remotely with a remote.
As you can see in the video below, once my device is connected to the PC (Note Arduino UNO is NOT connected to the Computer, JUST my shield is) then I can execute the following actions:
I took inspiration from a book, called Practical Arduino.

Specifically from the chapter about creating a Virtual USB Keyboard.
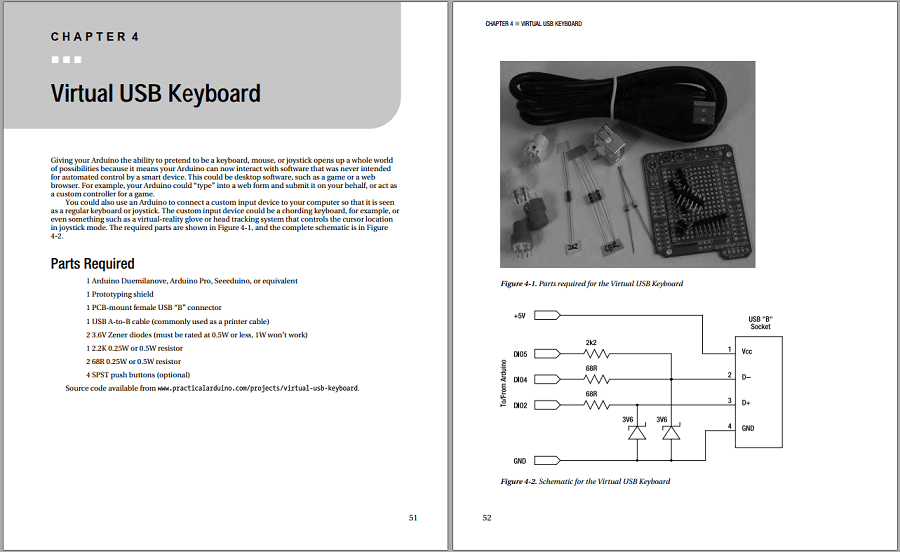
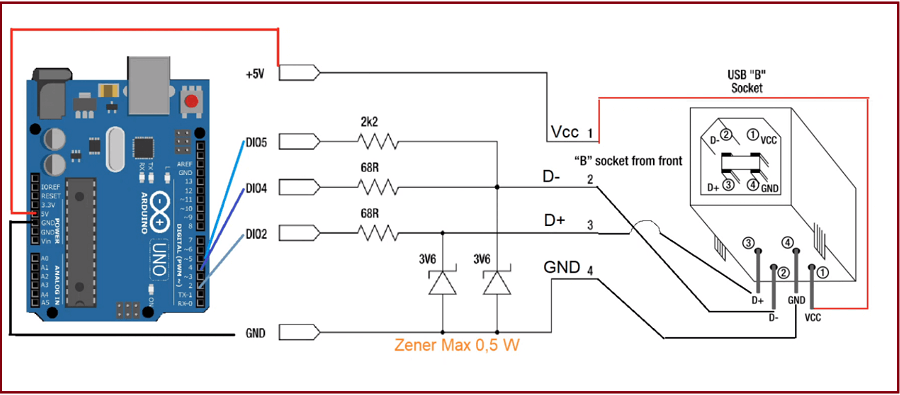
The chapter gives the schematic of the circuit to connect to the Arduino, so I decided to make a shiled out of it.
These are the necessary components:
| Resistor | 68 Ohm | x2 |
|---|---|---|
| Resistor | 2,2 Kohm | x1 |
| Zener | 3.6V | x2; max 0.5W |
| USB socket | Type D | preferably |
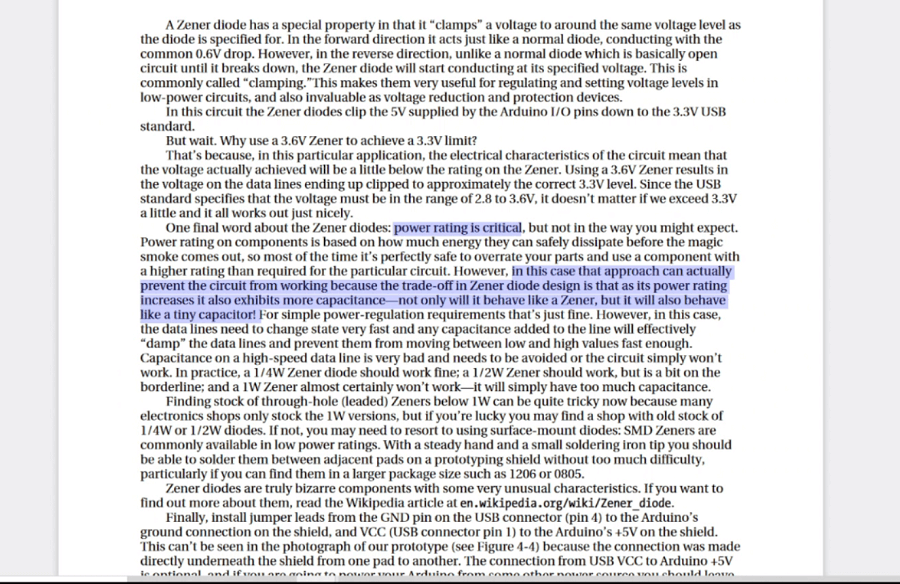
Why use a 3.6V Zener to achieve a 3.3V limit?
That’s because, in this particular application, the electrical characteristics of the circuit mean that the voltage actually achieved will be a little below the rating on the Zener. Using a 3.6V Zener results in the voltage on the data lines ending up clipped to approximately the correct 3.3V level. Since the USB standard specifies that the voltage must be in the range of 2.8 to 3.6V, it doesn’t matter if we exceed 3.3V a little and it all works out just nicely.
        Warning about the Zener diodes: power rating is critical, but not in the way you might expect.
        Power rating on components is based on how much energy they can safely dissipate before the magic
        smoke comes out, so most of the time it’s perfectly safe to overrate your parts and use a component with
        a higher rating than required for the particular circuit. However, in this case that approach can actually
        prevent the circuit from working because the trade-off in Zener diode design is that as its power rating
        increases it also exhibits more capacitance, not only will it behave like a Zener, but it will also behave
        like a tiny capacitor. For simple power-regulation requirements that’s just fine. However, in this case,
        the data lines need to change state very fast and any capacitance added to the line will effectively
        “damp” the data lines and prevent them from moving between low and high values fast enough.
        Capacitance on a high-speed data line is very bad and needs to be avoided or the circuit simply won’t
        work. In practice, a 1/4W Zener diode should work fine; a 1/2W Zener should work, but is a bit on the
        borderline; and a 1W Zener almost certainly won’t work—it will simply have too much capacitance.
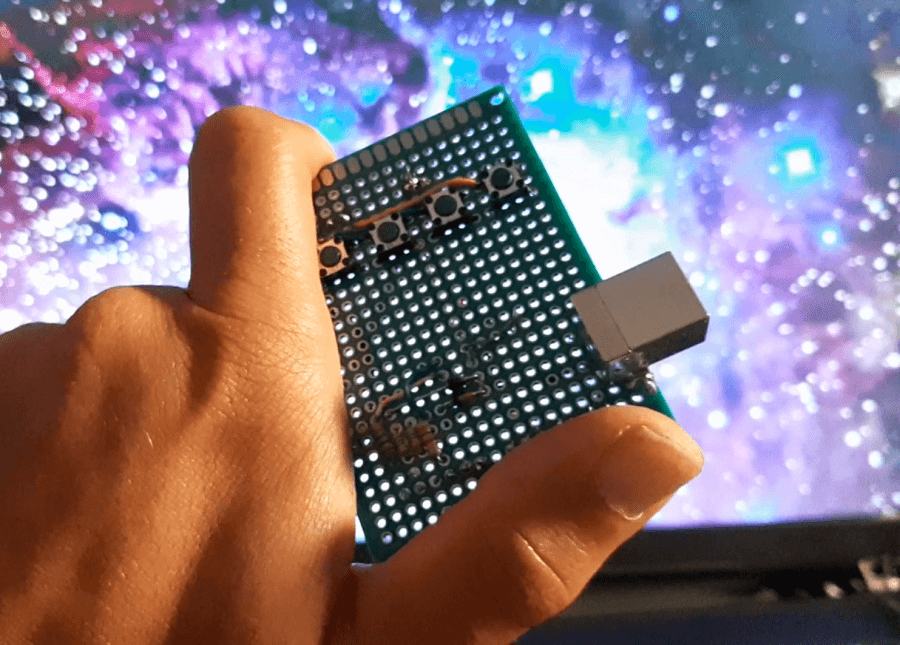
And below, you can see the shield I made, adding 4 buttons as Inputs.
I then proceded downloading the USBkeyboard library and install it.

Unfortunately the library was not updated to the latest version of the Arduino IDE, but after searching for solution I found the following advice:
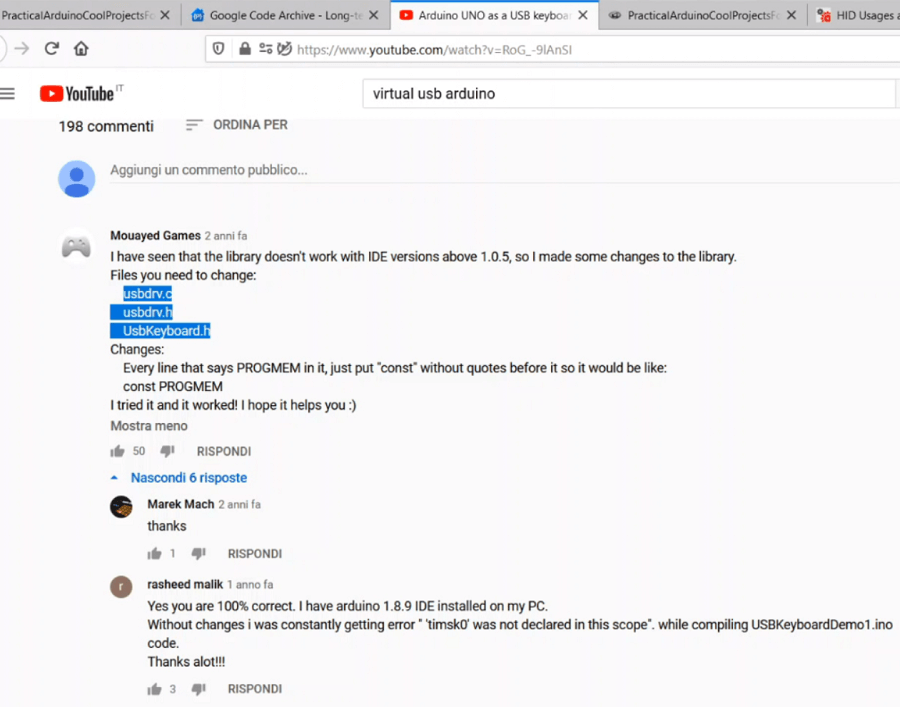
And just changing minimal part of the library code helped me using it with my version of the IDE.
So after that I started working with the Source-Code from the book.
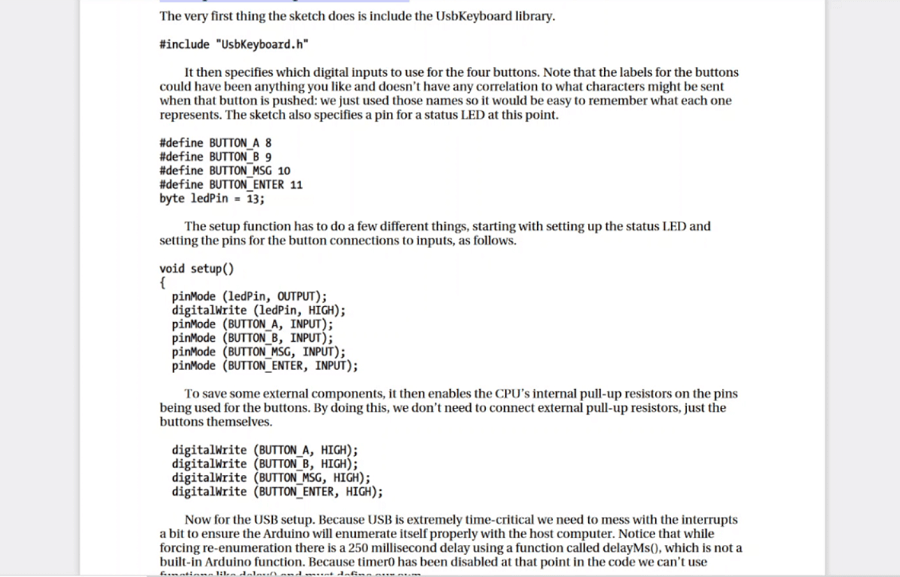
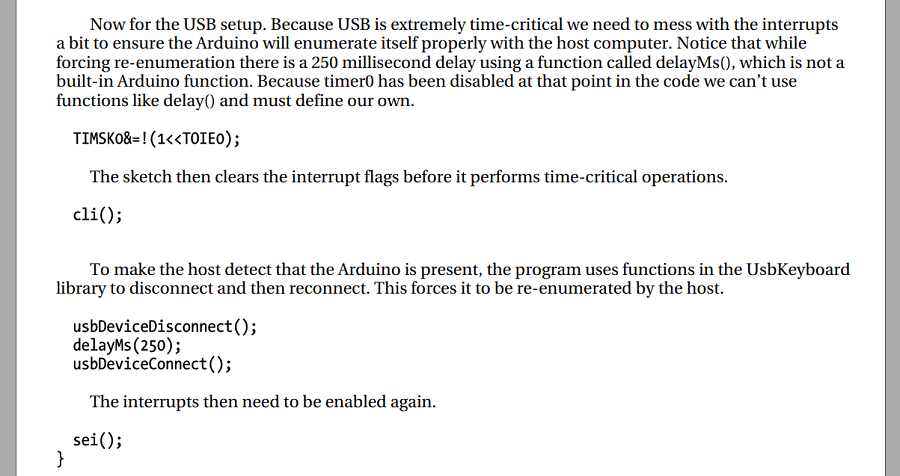
The code is very simple, most of the work is done by the library. There is only a Timer related istractuion that prevent the use of the delay() function.
So instead, it is define a fuction with the same purpose delayMs() that doesn't require any timer.
The main part of the code, in the loop() function is fundamentally based on the UsbKeyboard.sendKeyStroke( ) istruction, that accept as parameters the Keyboard buttons.
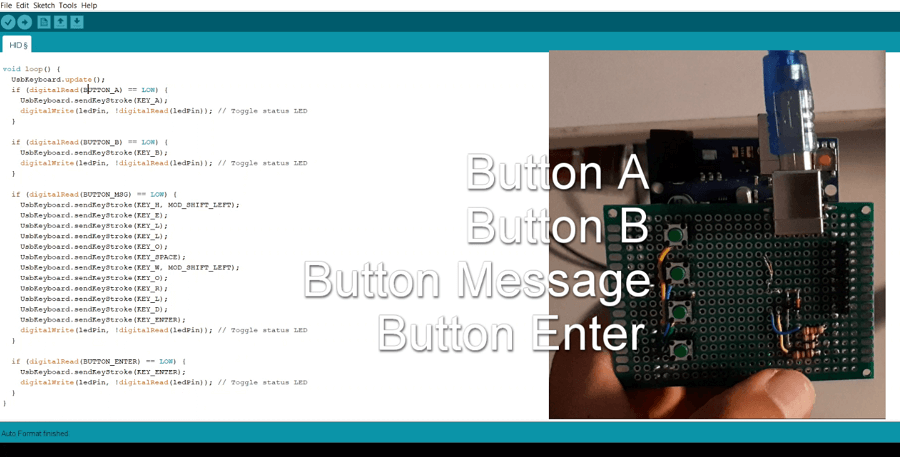
In my case, the code execute a different action for each button pressed:
| Shield Button | KeyBoard Button |
|---|---|
| Button A | a |
| Button B | b |
| Button MSG | Hello World (newline) |
| Button Enter | (newline) |
Anyway until now you are limited on the library about the amount of Key strokes you can use.
What if I want to you a more complex command like closing an application? In Windows you can do that by simpling pressing Alt + F4.
In the following paragraph I explain how I managed to do the same with my device.
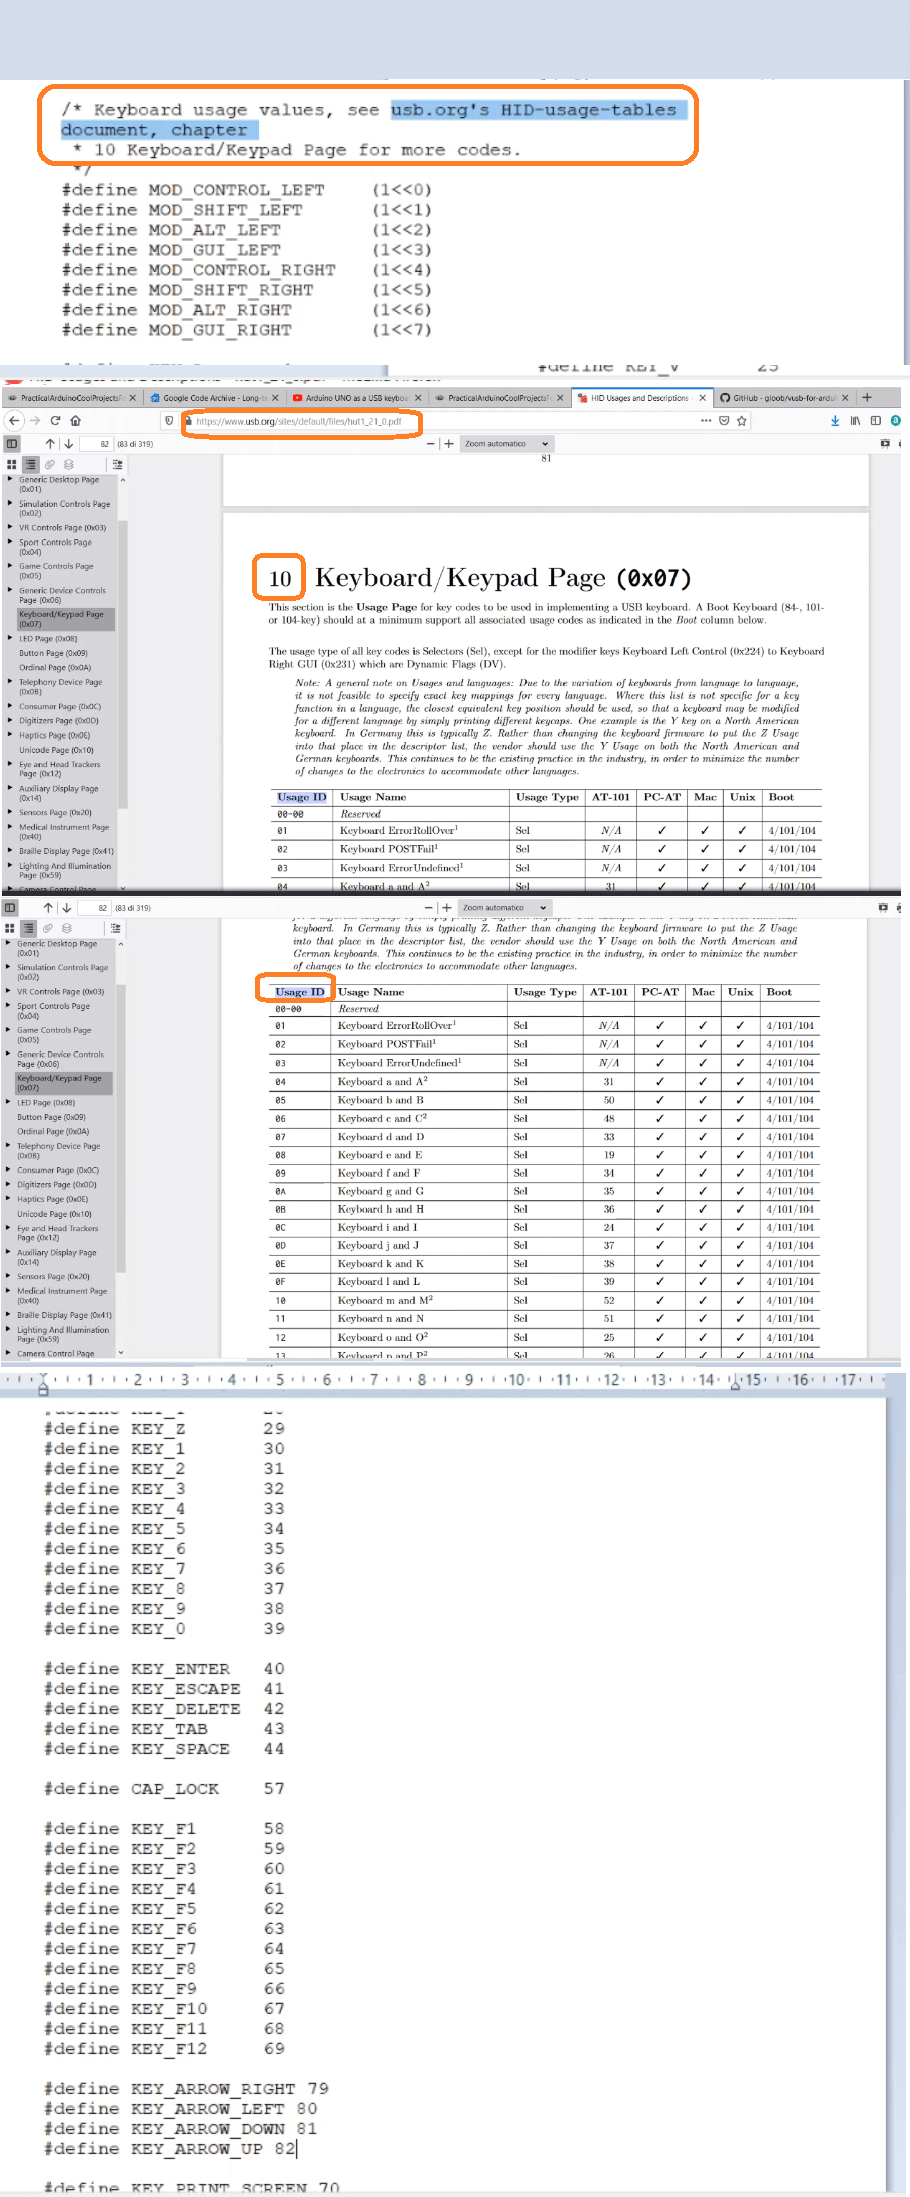
I firstly checked the library code to understand it better, you can see how the Keyboard strokes are coded, basically each keyboard button corresponds to an Exadecimal number that the computer recognizes as a command.
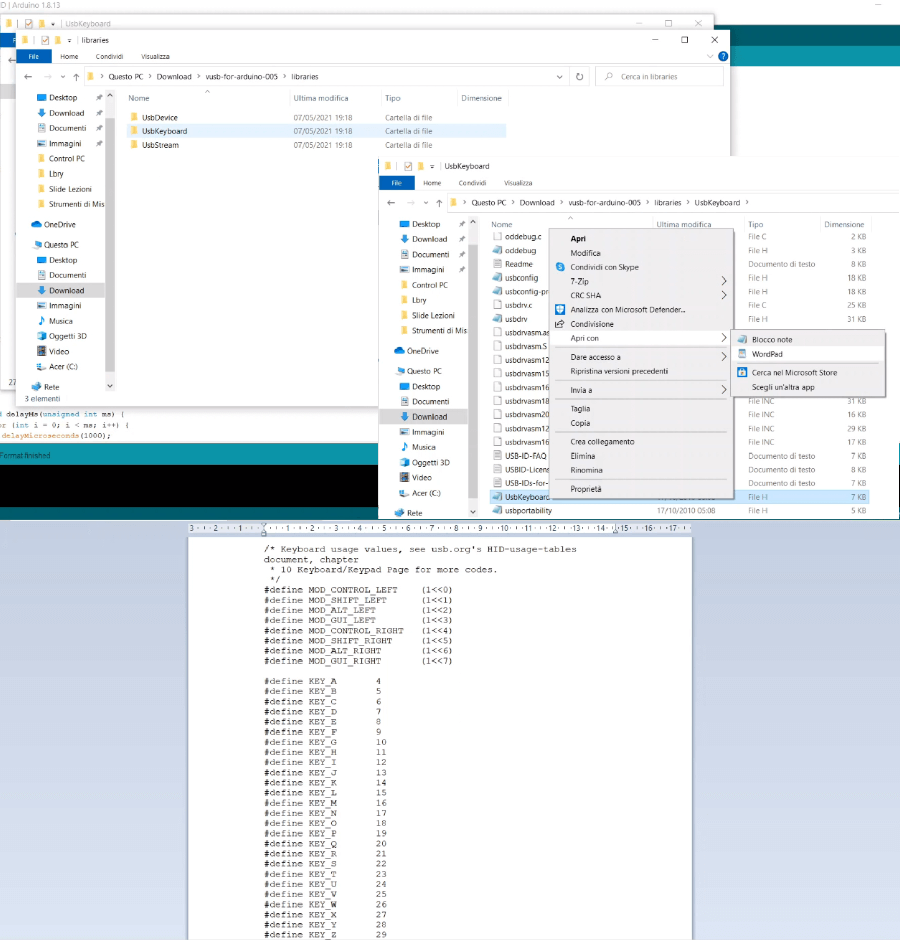
I noticed there was a comment that explained exactly what I wanted and the document to check to add more keystrokes commands.
The document is about the HID usage table.
I then could finally edit one of the previously button action to the one I wanted.
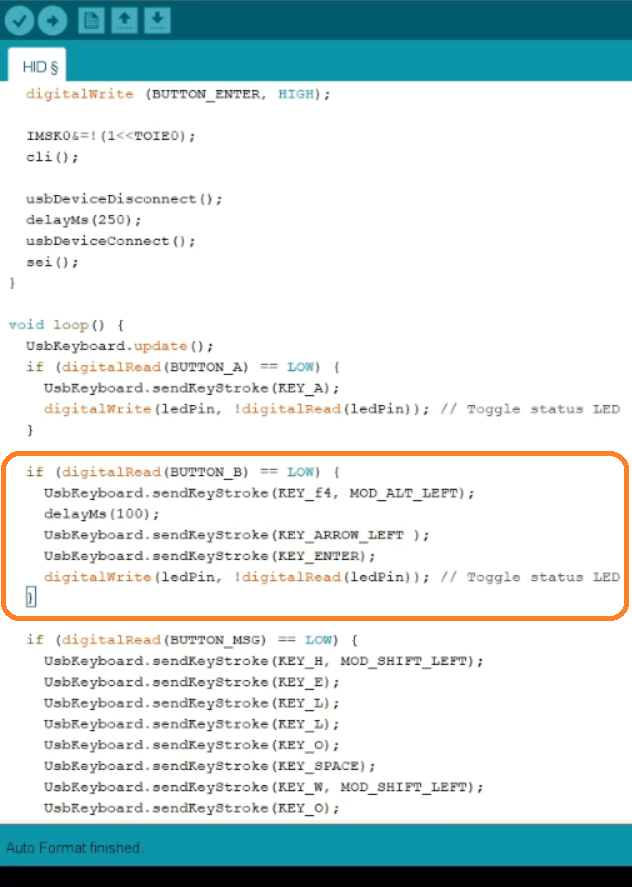
I replaced the action of simply outputting a "b" char with the action of closing an application.
In details, when pressing the Button_B on the shield, it will simulating as the buttons Alt + F4 are pressed,
so if an application is open it will close, but before close it the computer will pop up a window and ask to save it, that's why in code I programmed it to wait some time before simulating the right Arrow + Enter.
This way I am sure it will select the No option on the Pop-up window and confirming the closing of the application with out save anything.
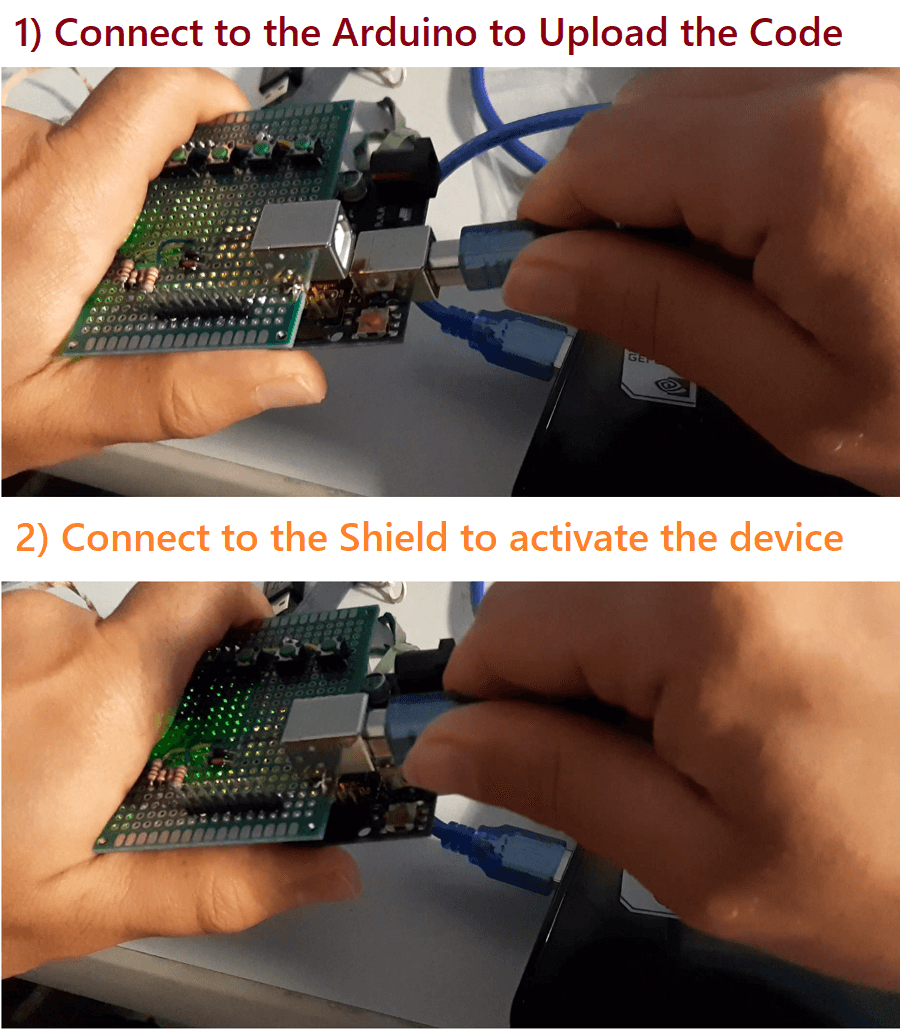
Before showing the video of how this work, I want to point out that the connection is not between the Arduino and the Computer, but between the shield (that powers Up the Arduino board )and the Computer.
And this is how the device works with the previously modification:
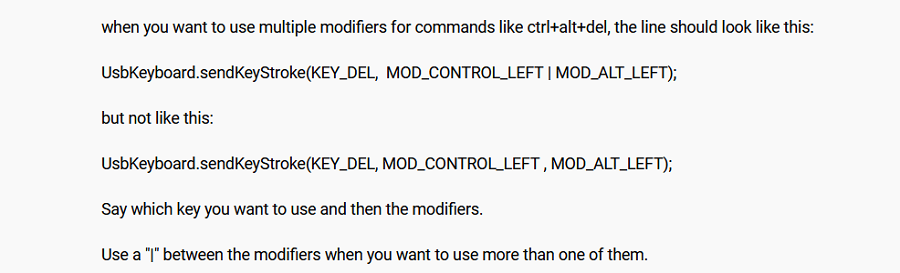
It is important to note there is even a way to define more complex actions in one instructions, as shown below:
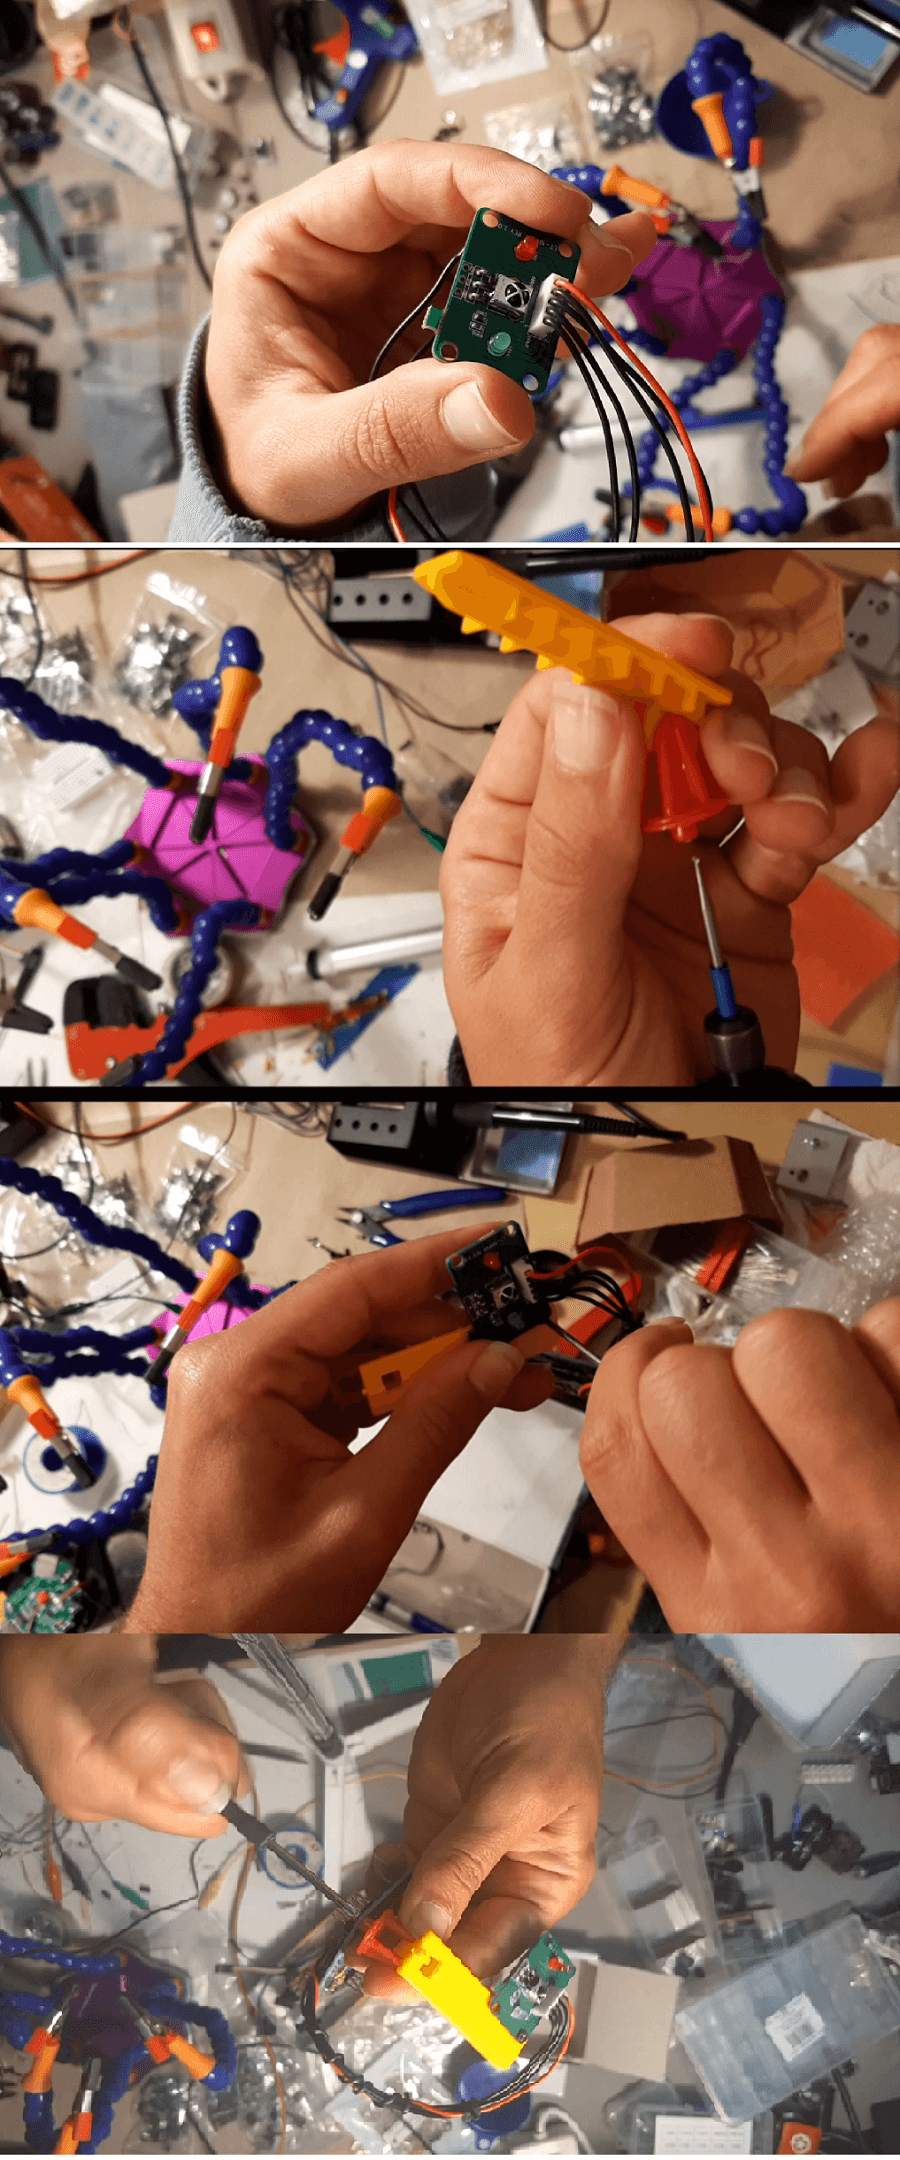
The next step was then adding an IR receiver to control the whole device remotely, I savaged that IR rx sensor from an old TV, while that movable plastic support was part of a Toy I found on the street.
Hence, I upgraded the code inserting the possibility to control the computer through the remote.
I am not gonna explain the whole code, but just shoe the main part.
I added the function remoteButtonPC with a Switch statemente where every button pressed from the remote consisted in a specific action for the Computer (Like, opening the Browser Firefox or the VLC media player).
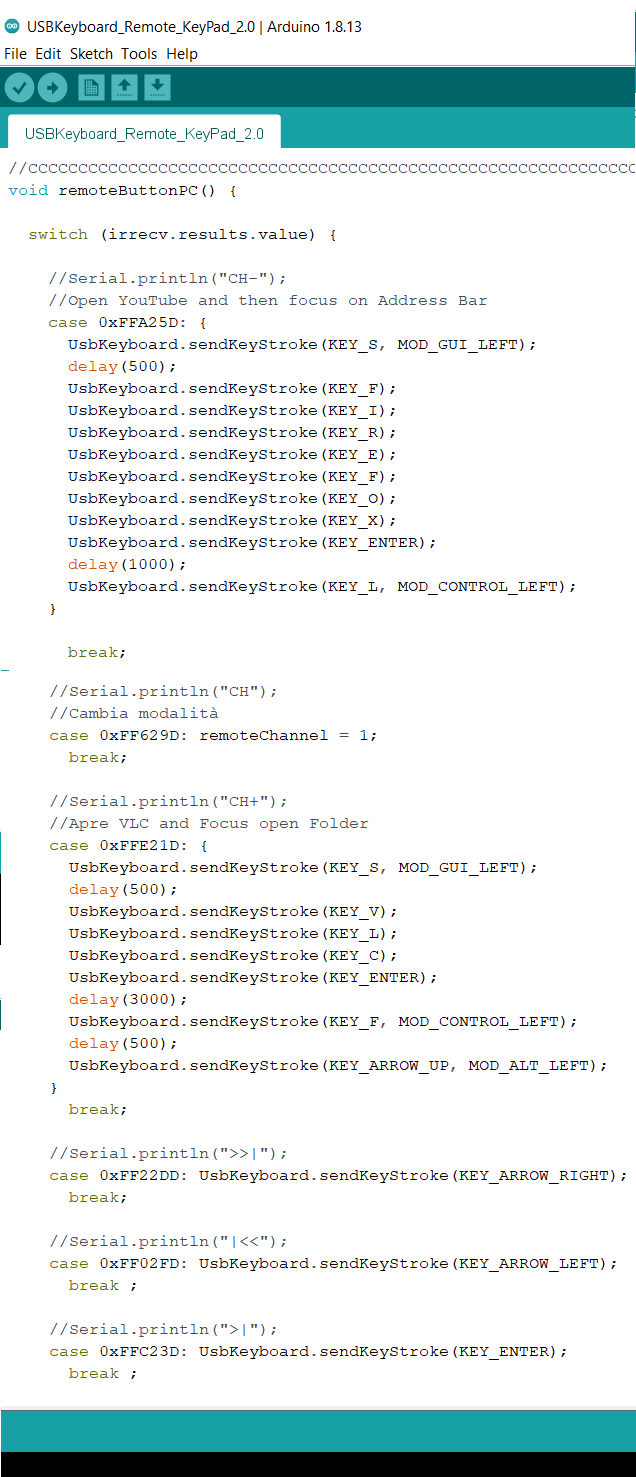
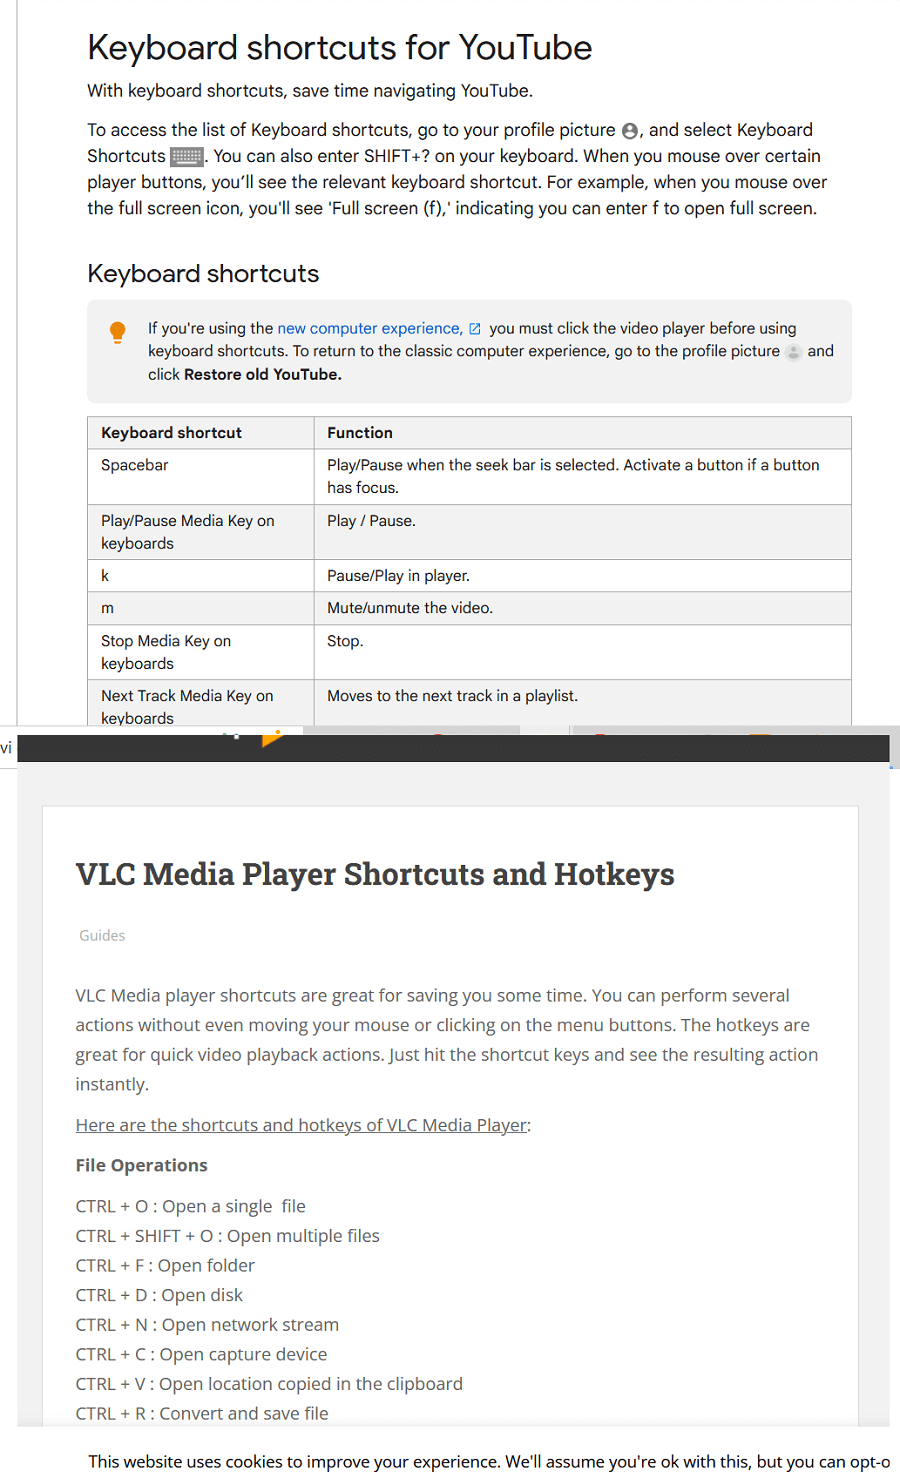
In order to effectively control the PC through my Remote Virtual USB Keybord, I researched for a lot of ShortCut.
This is a kinda easy task that can be accomplish by a search on internet:
I want to point out an interesting trick to open specific videos directly through the browser with out first searching for them.
This can be very useful in my project when I want to listen periodically video I liked or Music Playlist.
So whenever you save a page or a video in your Favorites, Firefox has an option to associate a keyword to it in order to directly open that specific page/video typing the Keyword in th Url.
And this is how I maneged to directly open the Youtube videos in the presentation video at the beginnig of the page.
Copyright © 2018 - All Rights Reserved - Domain Name
Template by OS Templates