Useful Links
- FabAcademy 2022 Schedule ✔
- MatterMost BNC node Chat group ✔
- GIT Cheat Sheet and other Week Tutorials ✔
- Iaac FabLab Booking System ✔
- Iaac FabLab Booking System ✔
Git Fab Pub 2022, Info about all the week assignments
Learning the basics of Git and creating a website in order to document my future works in this course, these are the assignments of this first week.
Let's get started.
As a start, FabAcademy has prepared a site for us that we will use as a diary to document our future projects during the course. The template website is made in Markdown.

Traditionally, to format text on web pages, people used Hypertext Markup Language, better known as HTML. HTML is one member of the family of markup languages, along with eXtensible Markup Language (XML) and Standard Generalized Markup Language (SGML). To format text with HTML, you put tags around the text. When your web browser “reads” a web page, it interprets the HTML tags and applies the relevant formatting.
HTML can be quite complex, with dozens and dozens of tags. Markdown, on the other hand, is meant "to be as easy-to-read and easy-to-write as is feasible".
In short, Markdown makes it easier to format text for web pages because its tags are simpler than HTML, and they convert to HTML automatically. This means you don't have to know HTML to write something for a web page because Markdown translates your tags into HTML for you.
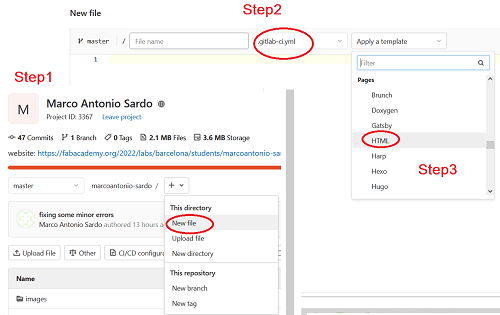
As soon as I saw the website, despite not having enough knowledge about GIT, I tried to modify it through the Web IDE, even though I know it is not the most efficient way to do it. At first I tried to edit basic things, like my personal information and add some pictures.
Although some changes were made, however, I began to notice some errors, specifically called pipeline errors, confirmed by the notifications sent to my email.
This happens because every repository must have a file called .gitlab-ci.yml which defines a pipeline. This is a set of tasks that are run by GitLab every time you make a change and push that change to GitLab. The contents of .gitlab-ci.yml define exactly what commands are run, and under what circumstances. To find out what caused your pipeline failure, you have to click on the pipeline notification in GitLab that will take you to a log of the build job.
In any case, the default template of the website did not satisfy me, I wanted to create something more personal.
This is my very first experience of managing a complete website, a part from using some simple HTML commands I learned when practicing with the ESP32 web server funtionality.
At the beginning I was "a bit" stressed out about this task, so I tried to find some ispiration randomly watching student's websites of the past year.
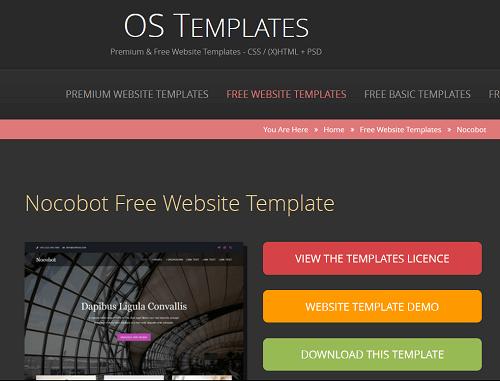
I came across to the Xiaolin (Linda) Zhen's, I really want to credit this girl and the amazing work she did explaining in details how she managed to make her website. She "simply" used a free template, downloaded from OS Template.
So I did the same, the template I choosed is called Nocobot.
That's was very very helpful, because this way I totally shifted my problem from creating a cool website to just modify a very good made template.
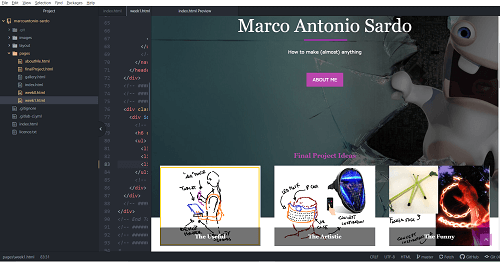
That was not a big deal. I used Atom software to open this ready-to-use template. This way I could see how the site would look whenever I changed some code in realtime. Even though I still don't understand every HTML and CSS instructions, in few hours I've gotten quite familiar with the code and be able to change the template to my desire. Boom! Done!
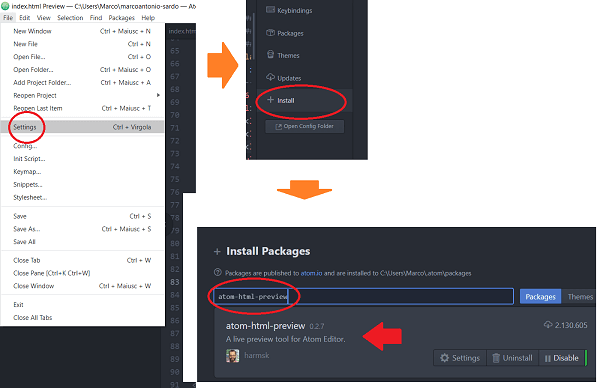
Warning: Despite Atom comes with the Markdown Preview funtionality, that's not true for HTML. You need to install a package directly from Atom, That's an easy task. Just go to Setting --> Install , then write Atom-HTLM-preview in the box that appears and finally install the first of the list.
One of the most common mistakes I did in managing a web page are links, to the sub-pages as well as to the images.
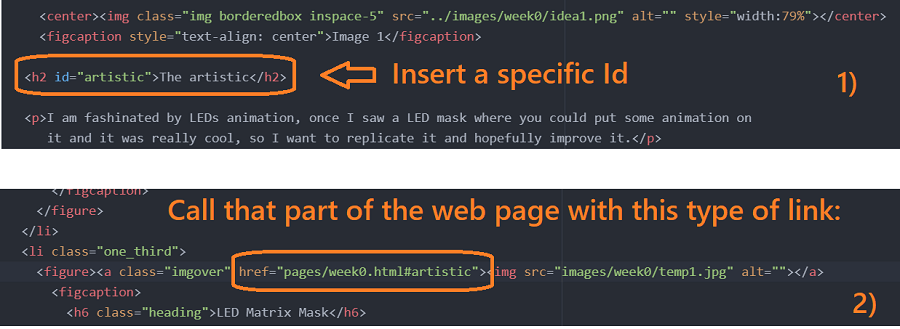
However, I discovered that it is also possible to link directly to a PART of a sub-page of the website.
Indeed if you create an ID in the tag of the reference paragraph, then you can insert that ID (preceded by the # sign) in the link.
With the website managing in control I could pass to the second part of the assignment: Learning Git.
So what is Git?
As far as I understand, the purpose of Git is to manage a project, or a set of files, as they change over time. Git stores this information in a data structure called repository.
How to use Git? I won't lie to you, I still have to clearly figure it out.
My first step was to navigate throught some tutorials. I found a very useful one about Git and GitBash on my machine (OS Win 10) and also creating an SSH key in order to clone the repository on my local device.
Then it's just a matter of playing and get used with the basic commands. Here is a list of the commands I've been using:
| cd /c/Users/Marco/marcoantonio-sardo | To navigate in to a specific folder |
|---|---|
| pwd | To know in which folder you're located |
| ls | List the objects inside the folder |
| git clone | This command copies your repository from GitHub to your local computer |
| git add -A | Takes all the modified files in your working directory and places the modified version in a staging area |
| git commit -m "comment" | Takes everything from the staging area and makes a permanent snapshot of the current state of your repository that is associated with a unique identifier |
| git push | To finally add the changes to your git repo files |
| git rm -r [file] | Remove single file |
| git rm -r --cached [folder] | Remove entire folder |
| exit | Close git Bash |
The most tricky part tho, was resetting my .gitlab-ci.yml file.
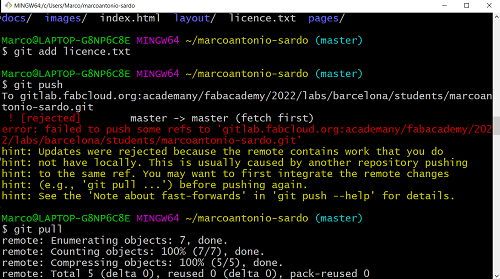
The .gitlab-ci.yml file is a YAML file that you create on your project's root. This file automatically runs whenever you push a commit to the server, and in my case it had to be resetted because I intentionally deleted all the files regarding the default website in my repo in order to replace it with the modified template I created before.
since I didn't created the new .gitlab-ci.yml file locally but through the web IDE, you have to remember to pull your repository otherwise appears this error if you try to push some changes, reminding that your repository has files you don't have locally.
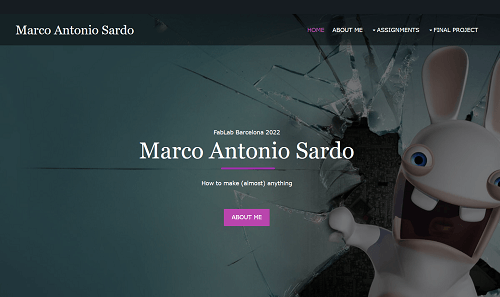
With all these steps completed the worse is passed, and my website is finally LIVE!! Very happy with the result so far.
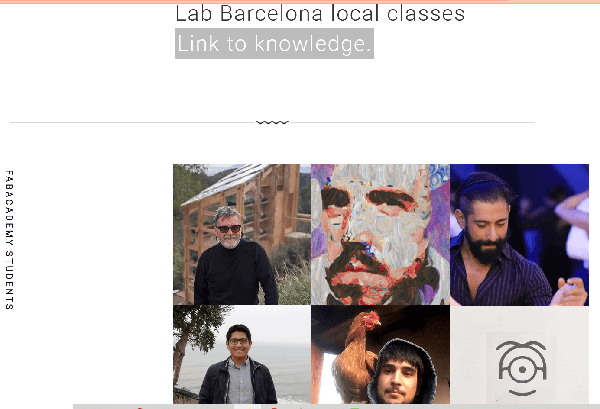
On the main page of the Barcelona fablab there are profile pictures of all students, and the same page then has a repo on gitLab, similar to that of our students' personal sites.
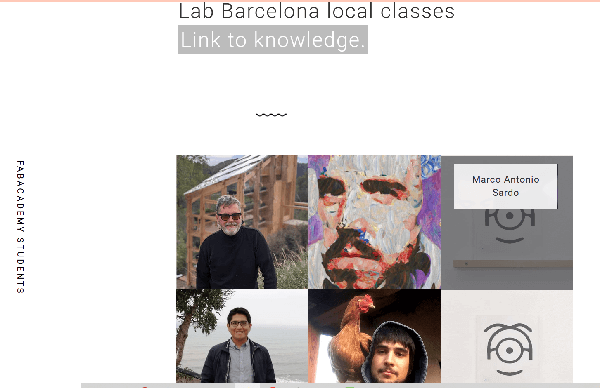
Now to upload a photo of me too, I had to send it to an instructor who would then proceed with the upload, but being still in my home country I did not know about that.
I then tried to explore a way to do it by myself through GitLab, but avoiding to clone the entire repository just to change a single image, so I attempted to do it via web IDE.
Indeed I succeded doing my first unaware MERGE Request. where I asked the repo manager the permission to upload my profile pic.
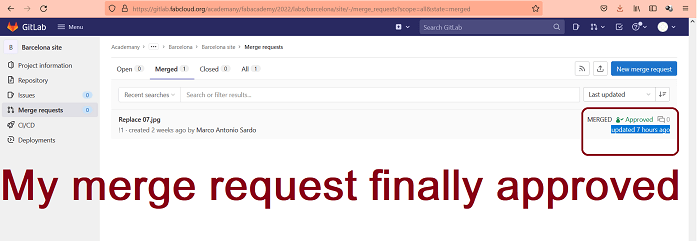
Permission that was ignored for several days, until I arrived in Barcelona where I made my instructor notices that there was a pending request yet, he finally proceeded to accept it. And now I am also part of the group.
There is an upper limit on files size that you are not allowed to exceed during a commit, that is 10MB. If that happen, on your terminal screen, something like this should be displayed:
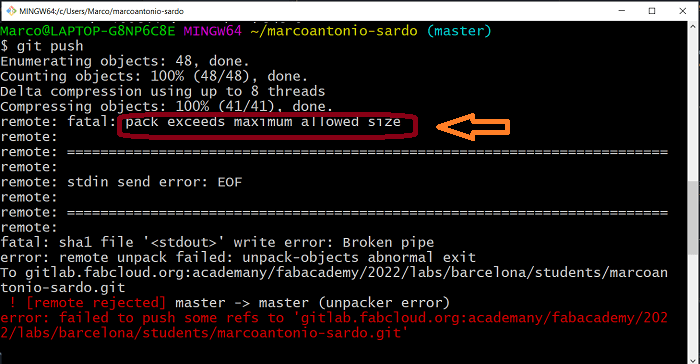
In this case you cannot push anything else unless you revert this last commit. To do that I followed this guide, in my case I just used the command:
git reset --soft HEAD~1
Copyright © 2018 - All Rights Reserved - Domain Name
Template by OS Templates