15. Interface and application programming
Individual Assignment
For this week, we must program an user interface that it links with one board done during the Fab Academy. Therefore, I decided to create an interface for the board have been made during the input devices week.
During week 13 I designed a capacitive sensor board and I program it using the Arduino IDE. So, the next step is to decide which tool uses for programming. After some research, I realized that it is better to start with Processing.
Arduino Code
First of all, the capacitive sensor board detects something conductive or that has a significantly different permitivity than air, like a human body or hand. So, in a resistor-capacitor circuit board is measured the time it takes to go form one state to the other. So, this is the code to programm a capacitive sensor board:
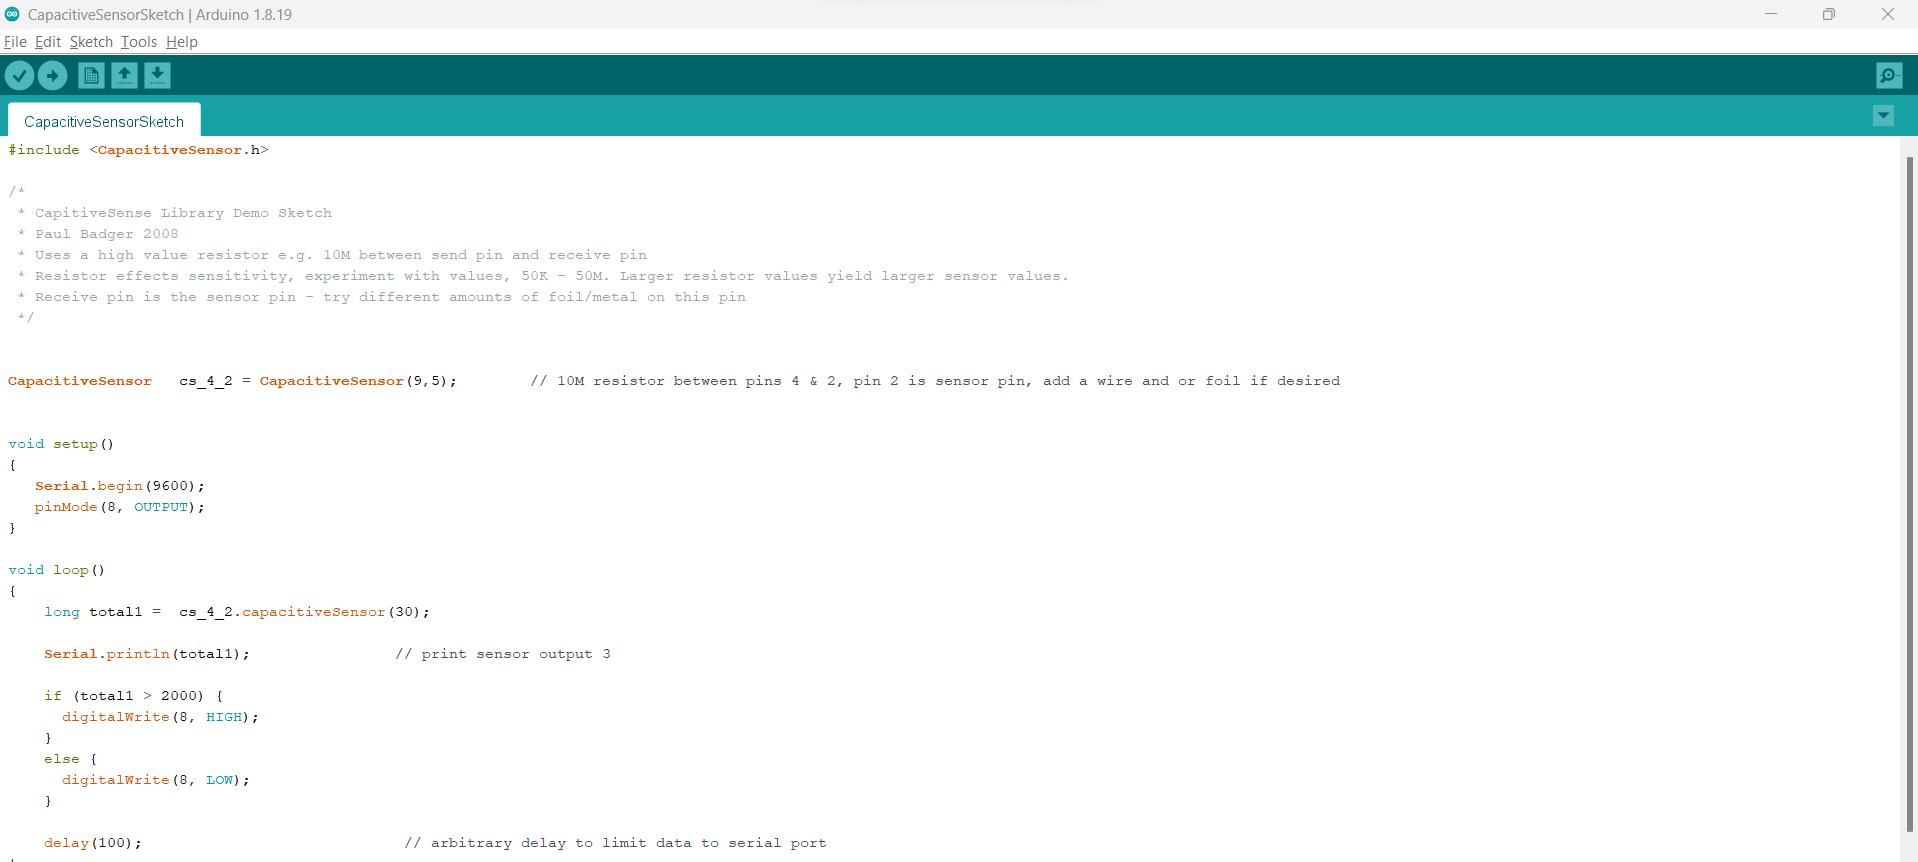
So, all the values that are being read by the board must communicate through a serial port to Processing for showing it in a interface with graphics.
Processing
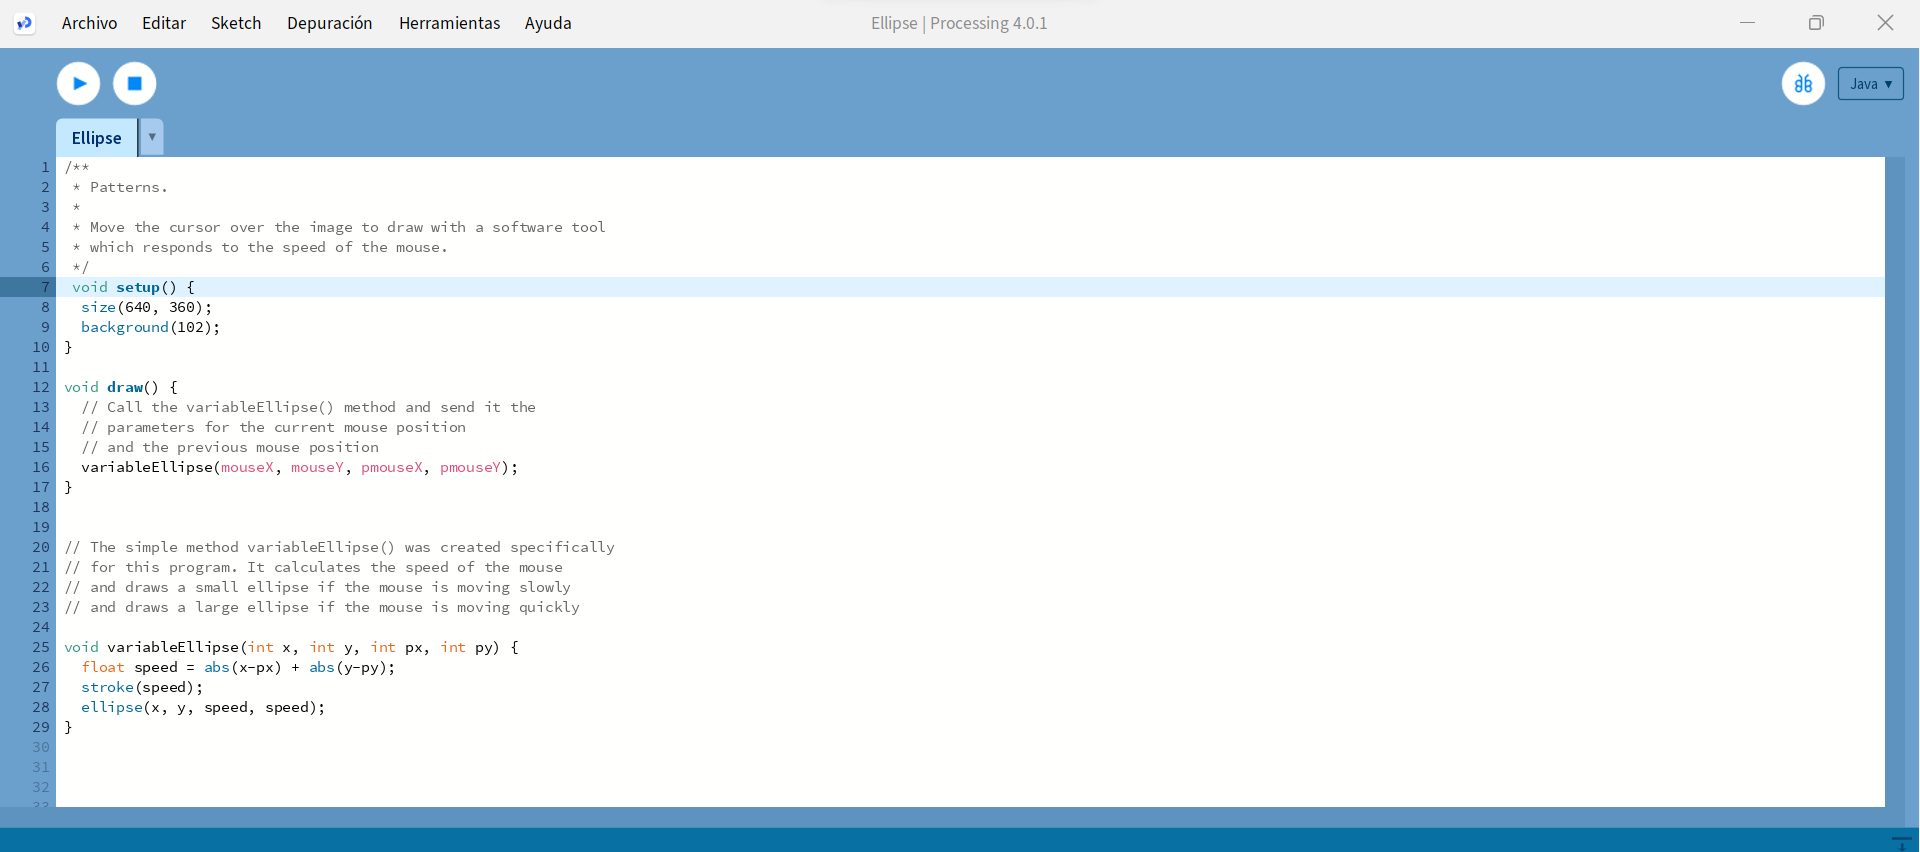
Processing works similar to the Arduino IDE because the first thing we do is declare some variables and libraries. Afterwards, we have the void setup and the void draw that functions as the main loop. First of all, We must download Processing in this link. In my case, I did some tutorials to analize and understand the commands. These are the basic processing commands:
- Setup() : Runs only once and we specify the work area.
- Size() : the size of the window in pixels.
- Background() : Background color of the window. By default it is gray, but RGB colors can be used.
- Draw() : Draws the elements that we define in the interface. It works pretty similar to arduino loop() function and runs repeatedly.
Besides, The platform has many examples to practice and allows us to do many things. For example, I tried to create some ellipses. Here is the code:
This is a video to observe how works:
Processing-ScreenEllipses from Angel Erazo on Vimeo.
Programming Using Processing
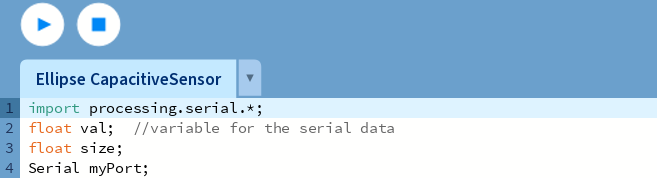
Now, it is time to connect the capacitive sensor board with processing to create the user interface. First, we must define the variables (in the the previous example, I did not declare variable at the beginning directly I wrote “void setup”) because we need to read the values from the serial port of the board. That is why, I wrote “import processing.serial.*” , “Serial myport” and “float val” create the communication between the board and Processing. In my case, the variable called “val” will save the data from the serial.
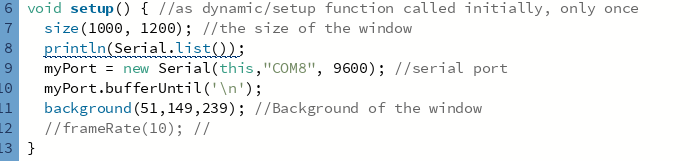
Afterwards, we must define the void setup where I specified the number of the port that I am using to transfer the data. Remember that this port you can find it in the Arduino Screen. In the following picture you can see how we have to use this command. Also, you will be able to see how I define the size of the window and its background.
Then, in the void draw part I defined all the size and shapes of the ellipses.
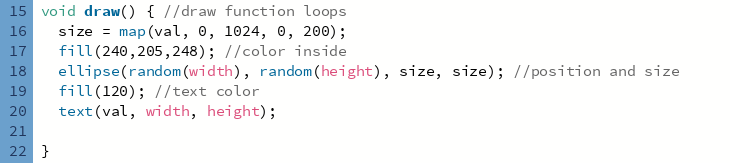
Finally, in the last code paragraph allows us to read the serial data which have been transfered from the serial port.
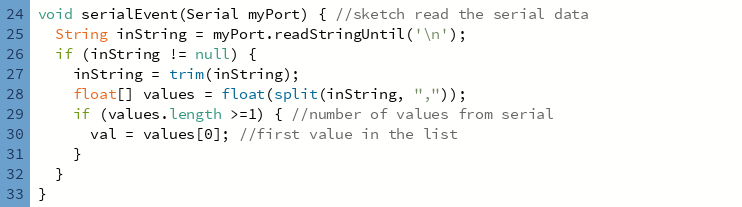
Here you can see how the Processing reading the values which are generating when I press the capacitive sensor and transforming those values in a graphic.
Processing-Interface from Angel Erazo on Vimeo.
Group Assignment
Here is the link