2. Project management
Assignment
- Build a personal site describing you and your final project.
- Upload it to the class archive.
- Work through a git tutorial.
Hello! This week I was learning about how develop my website, we can use Markdown or HTML, but to be honest, I’m not really good with technology.
One of the things I find the hardest in the world is adapting to new technologies, I grew up in a place without electricity and in order to watch TV we had to use a car battery and recharge it every week to be able to use it, I didn’t grow up surrounded by computers and other gadgets. Programming was not something I thought I would ever need, but here I am Taking the bull by the horns!
I decided to use Markdown in my website because it is very easy to use. I also wanted to use HTML, but one week is not enough to get it right for me.
If you have no programming knowledge and you are afraid to do this assignment and fail, this is for you!
1. PLATFORMS
This year we have 4 platforms available at the Fab Academy, each with a different purpose. Check your email and click on the links to access, if you still have doubts, I leave more information below, you can click on the names and access the website of each one:
-
Fablabs.io : Online social network of the international Fab Lab community.
-
Git Repository - Fabcloud : Software infrastructure for projects in the global Fab Lab Network, here you upload your documentation.
-
Mattermost : Fab Academy chat server, you can ask questions and the community will answer you.
-
Nueval : Student evaluation platform, website to track your weekly assignments and remarks by your evaluators.
To login on each platform use the next option Sign in with: FabLabs it will redirect you to the Fablab.io website and you will use your email/username and password (Check your email from Fab Academy coordination).
With Mattermost you have an additional step, first click on Sign in with: GITLAB and then Sign in with: FabLabs.
2. DON’T BREAK YOUR WEBSITE!
Laughing after the disaster so as not to cry 😅

Follow the tutorial instructions and read carefully the tips and recommendations I left at the end. If you had a similar problem, this will help you a lot.
3. GIT TUTORIAL
After Neil’s class, we had a short regional review of what to do this week. Every Thursday we are holding a virtual workshop to learn how to do our assignments and resolve doubts, thanks to Fab Lab Esan.
In order to use GitLab correctly and Markdwon, you can check these tutorial, I used it as a guide and it has helped me a lot:
And in the virtual workshop, the instructor guided us with the following tutorial:
So let’s get started!
SIGN IN TO GIT LAB FABCLOUD
If this is your first time logging in, you must change the password in FABLABS.IO and then log in to GITBLAB FABCLOUD, follow the instructions:
-
Enter the following URL: FAB LAB.IO.
-
Enter your email or Username and click on Forgot password, then you must enter your email and click on the green button that says Reset your password.
-
You will receive an email with a link to change your password, click on it and follow the steps, that’s all, to enter any page mentioned above you must use the same email or username and password.

Once you have changed your password, you do not need to change it again unless you forget it.
To sign in to the GitLab Fabcloud:
-
Enter the following link: GITLAB FABCLOUD.
-
You must login by clicking on FABLABS, do not click on the other options.
-
This will take you to a new window where you will have to sign in with Fablab.io, put your email or username and password.
-
Finally it will take you to your Gitlab repository, you will be able to access it, make any changes and add your documentation.

GITBASH
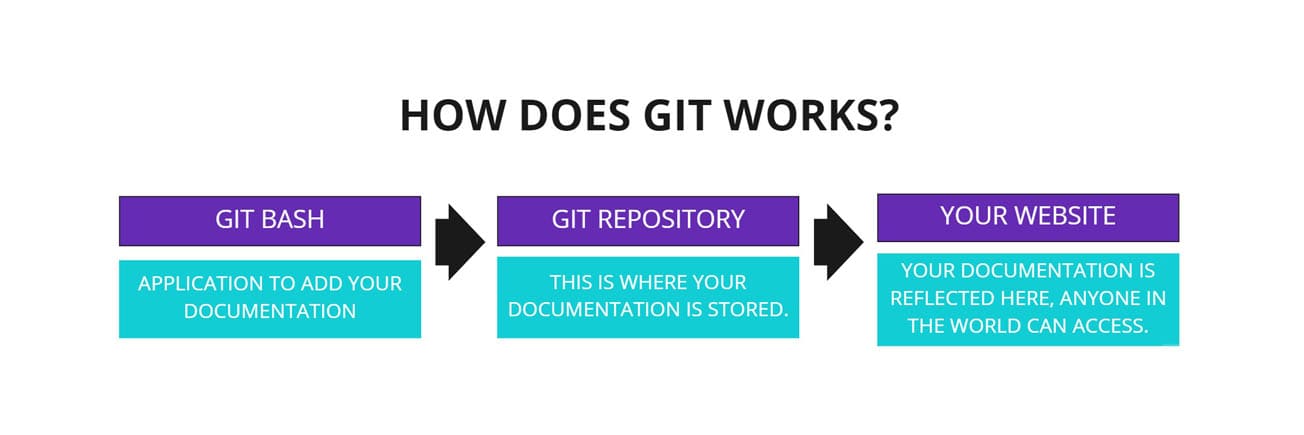
This is how GIT works:
Download
First, you need to download Git and choose the correct for your operating system(Linux, Windows or Mac) :
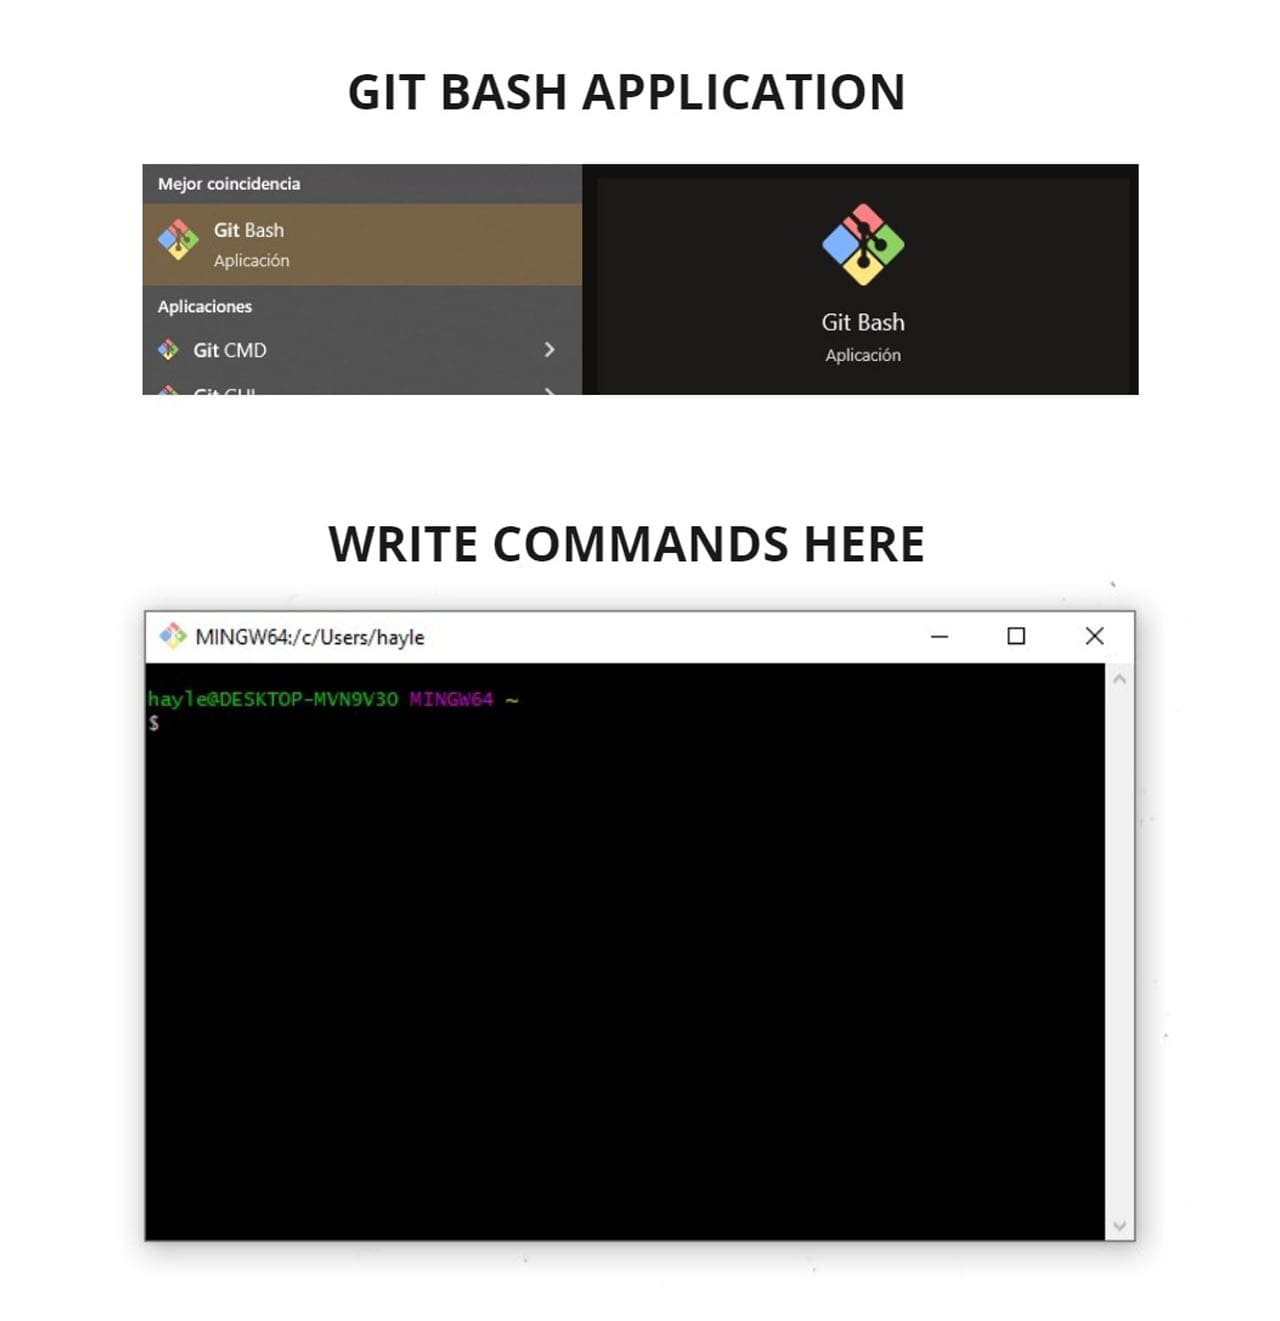
After you install the program, you will find it in your pc with the name GIT BASH, like the next image.
If you click on the application, you will see a new window, here you can write commands.
Connecting your computer and the repository
Now, follow the commands below to configure the connection between Gitlab and your computer.
-
You will write:
git config --global user.name "YOUR_USERNAME". In my case I wrote:git config --global user.name "lesly.ramirez" -
Type the following command and put your email, I put mine:
git config --global user.email "hayley_12_05@outlook.es" -
To verify If you had a key before:
cat ~/.ssh/id_rsa.pub. -
If you do not have a SSH KEY, you should write :
ssh-keygen -t rsa -C "your_email". Click onENTERuntil you see the codes like the following image calledGenerating SSH KEY. -
Write:
cat ~/.ssh/id_rsa.pub, click on enter and you will visualize a code from SSH KEYS. -
To copy it type:
clip < ~/.ssh/id_rsa.pub.

-
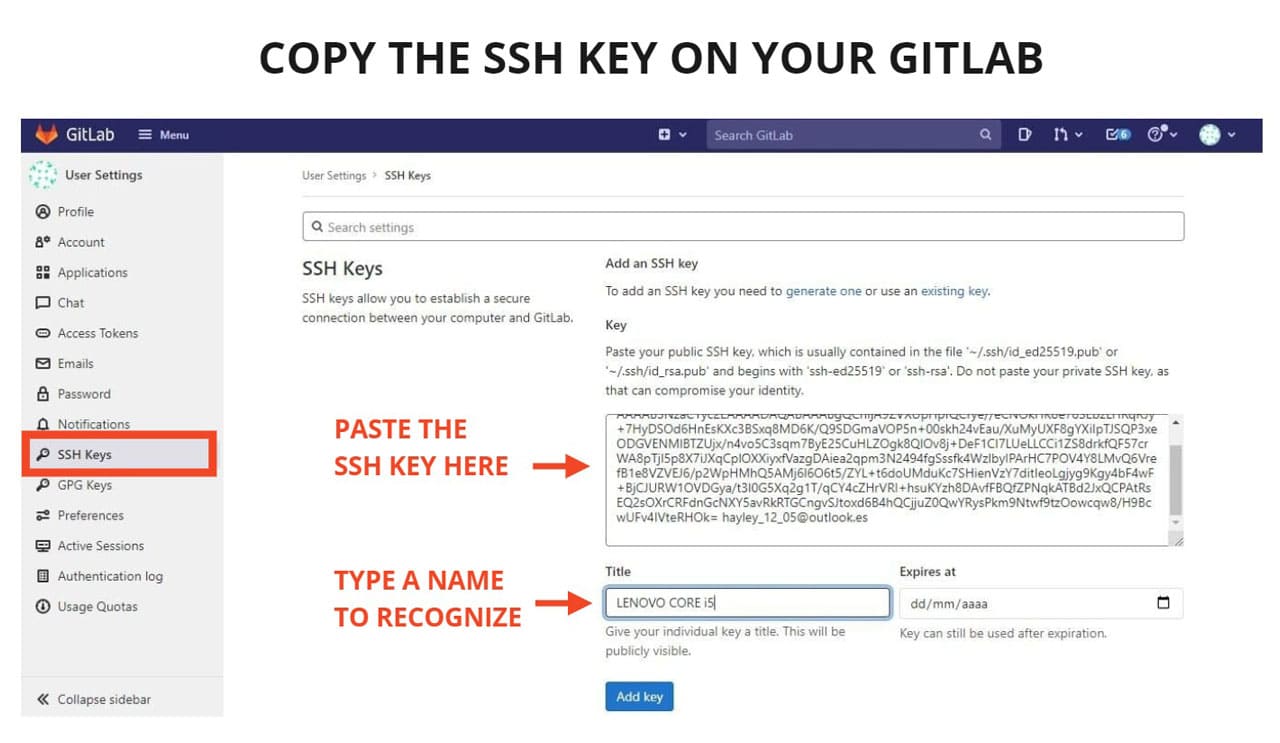
Go to your Gitlab account and click on your profile, choose
PREFERENCES, then go to the left bar and clickSSH KEYs. -
Make a
CTRL+Vin the empty box indicated in the following picture and put a title, I put itLENOVO CORE I5.
Git clone on your computer
After this is done, you must create a folder on your computer where the GITLAB files will be stored.
- I opened a folder inside
Documents, namedFAB_ACADEMY -
Then I went to the
GIT BASHand continued typing with the commands: -
ls: Allows you to see the files inside a folder. -
cd: Allows you to enter a folder. -
This is the order I followed:
ls>cd Documents>ls>cd FAB_ACADEMY>ls -
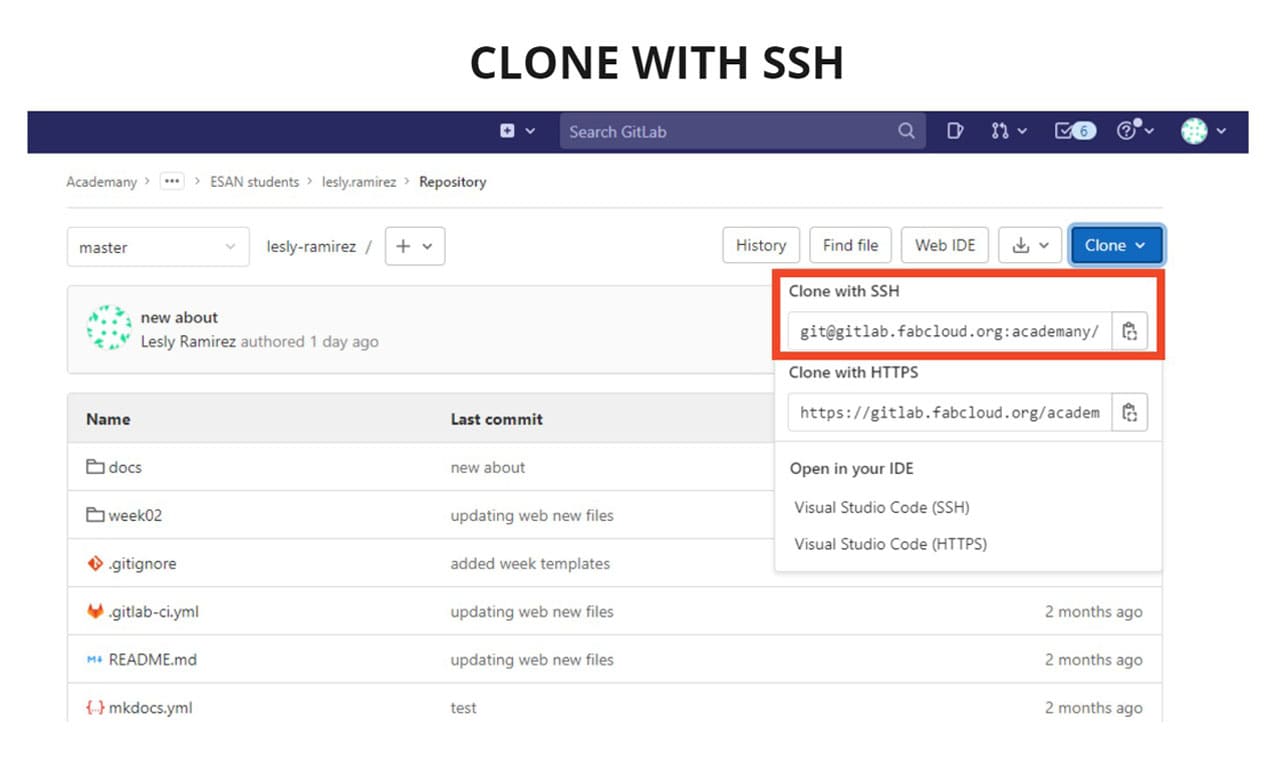
Then go back to
GITLABgo to your directory and click onCLONE, copy the one that saysCLONE WITH SSH -
Return to
GIT BASHand writegit cloneand copy the URL usingSHIFT + INS(only this command works to copy in Git Bash). I did it and this is how it looks:
git clone git@gitlab.fabcloud.org:academany/fabacademy/2020/labs/esan/students/lesly-ramirez.git
And that’s it, your folder is ready on your computer and you can add new information.

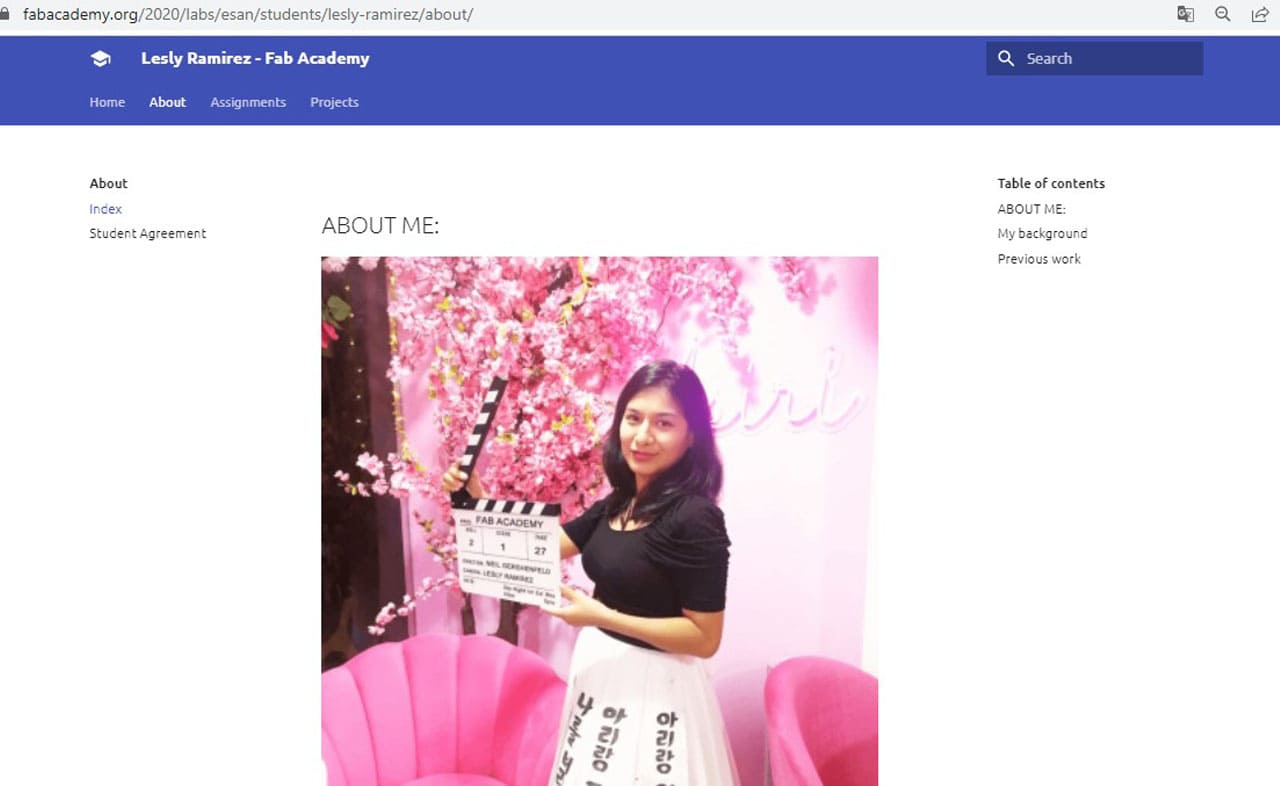
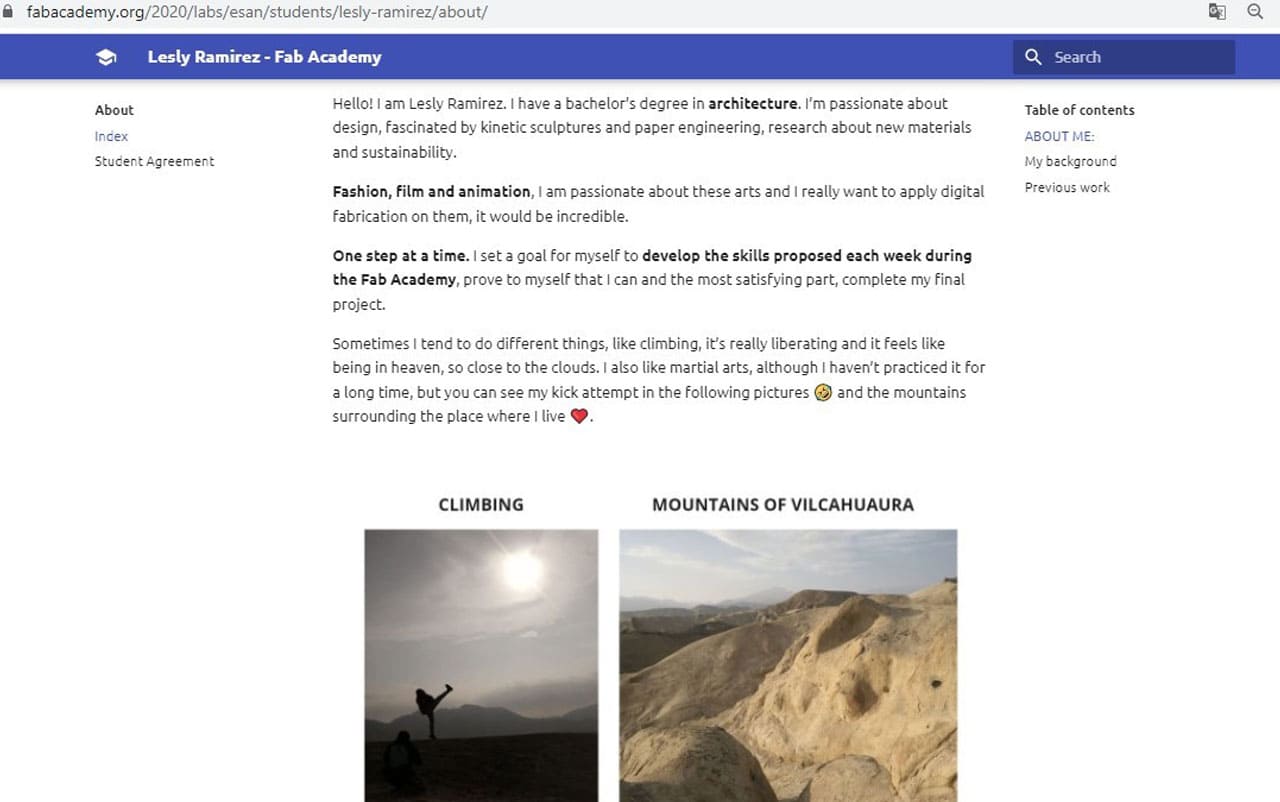
4. HOW DID I BUILD MY WEBSITE?
With the above explained, creating and modifying your website will be a piece of cake!
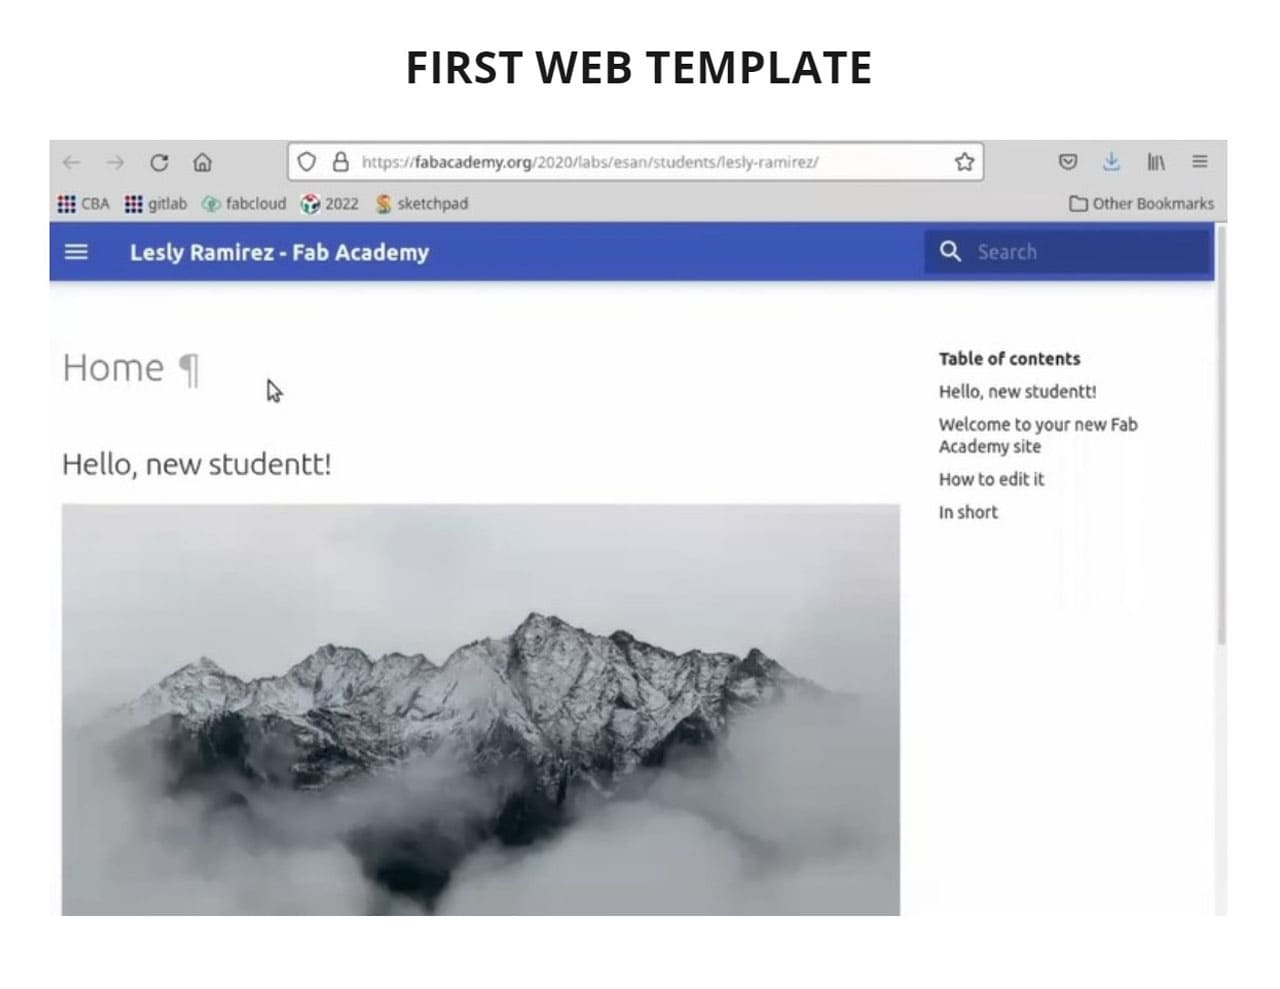
Each Fab Academy student is assigned a website as a template to start uploading documentation and customizing it.
This is what mine looked like before I set it up:
How can we edit it?
If you have followed the steps above, the folder you have on your computer contains all the information in your Gitlab repository as it has been cloned.
I show you a comparison of my folder and the gitlab repository:


I will continue using the Markdown language to upload the information, for this I have used the NOTEPAD++ application, you can use the download link below:
In order to edit each file in the repository, I preferred to do the following:
-
Copy to a new folder as a backup, I named it DOCS_BACKUP and there I started to make the edits with Notepad++.
-
Once everything is ready and typed correctly, open GIT BASH, indicate the commands, add the information to the correct folder and upload it with PUSH.
Next I show you how I did it:
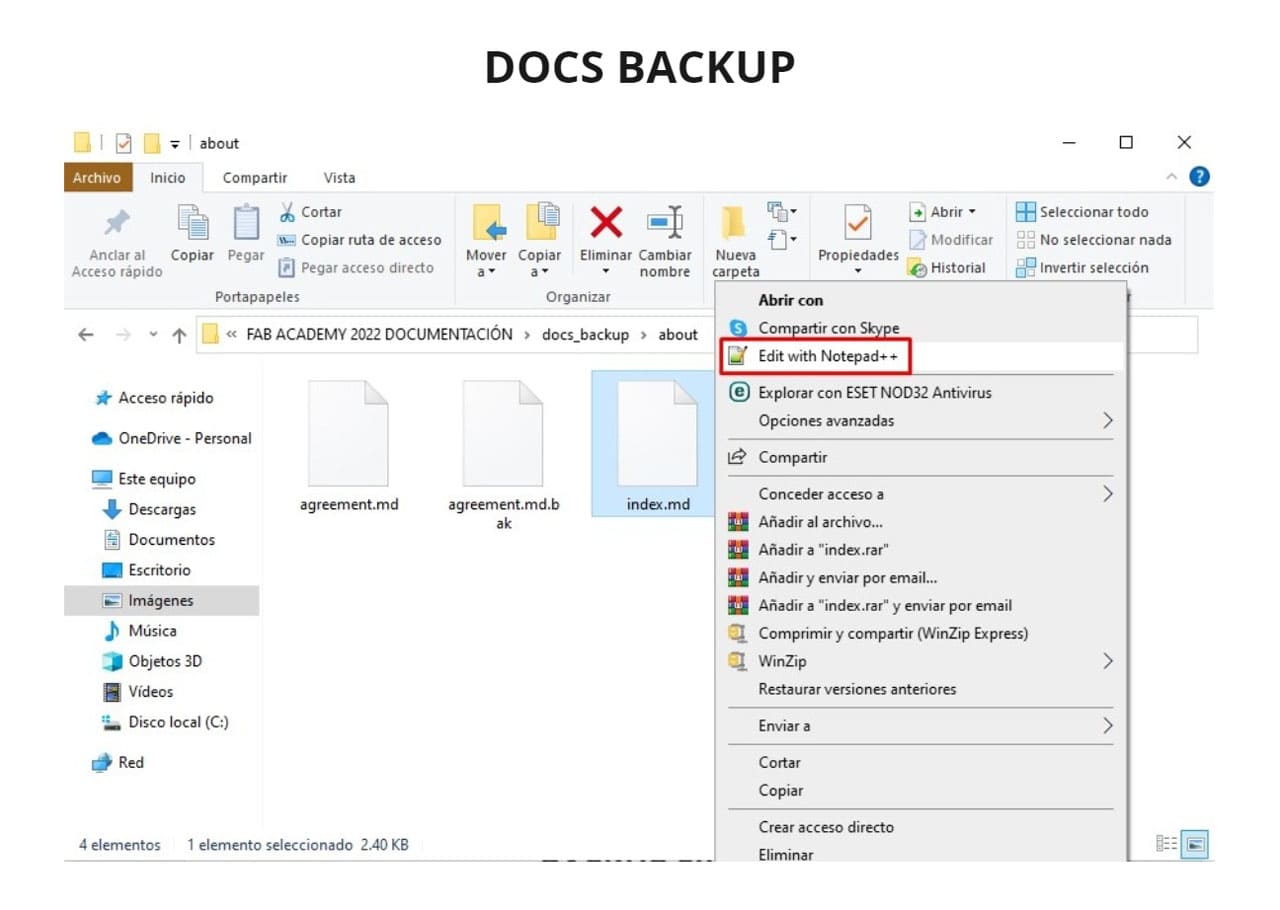
- STEP 1: Enter the
DOCS_BACKUPfolder, open the file of the week and start editing in Markdown language.
I chose the ABOUT file, right click on INDEX and choose EDIT WITH NOTEPAD ++.
- STEP 2: Start editing in Markdown language, you can review again the tutorial MARKDOWN BASIC SYNTAX
I added symbols according to usage:
#: Add this symbol before titles and subtitles.
**word**: For words in bold type,instead of word, you would put the words you want to see in bold.
: This is the code for the images, instead of name you would put the name of your image, for example I put about.
This is the result:

I have recently started to use an application called MIRO to be able to organize the images and text in a general way, which allows me to:
- To have an overview.
- Make modifications as if it were on a board.
- Better structure the topics.
- Have a chart to follow up on goals and see the progress in the same board.
- Manage a personalized monthly planner in the same board according to what is going to be developed.
So I recommend it 👍. Here I organize everything and write it in Markdown before copying it to Notepad:

Remember that besides needing the text in Markdown language, you also need the images and compressed files, in this example I am showing an image in .JPG, which is the recommended format and the file must be compressed, with the smallest possible weight but not to the point of losing the necessary quality.
For each update you are going to upload with PUSH command, it must be less than 10mb.
Compress images
To compress you can use programs like GIMP or use online programs like ILOVEIMG , this last one I see very practical because you can pass many images at the same time and compress them or resize them to ratio convert to .JPG, etc, it is very useful and is the one I use the most.
You only have to upload the image you want to compress, after it is processed, download it and it is ready.
Sometimes I use photoshop, for example to adjust all the images to the same width, that way no matter how long they are, they will all look centered on the web.
Once you have all your images and text ready to be moved to your repository, you will follow the next steps:
Upload your documentation
Always follow the following commands in this order:
-
Enter Git Bash and type
ls -
Write
cd Documents(Type the folder in which you have saved it). -
Write
ls -
Write
cd ACADEMY(I created a new folder because I had problems with the old one, read the tips and recommendations section to find out why). -
Write
ls -
Write
cd lesly-ramirez -
Write
ls

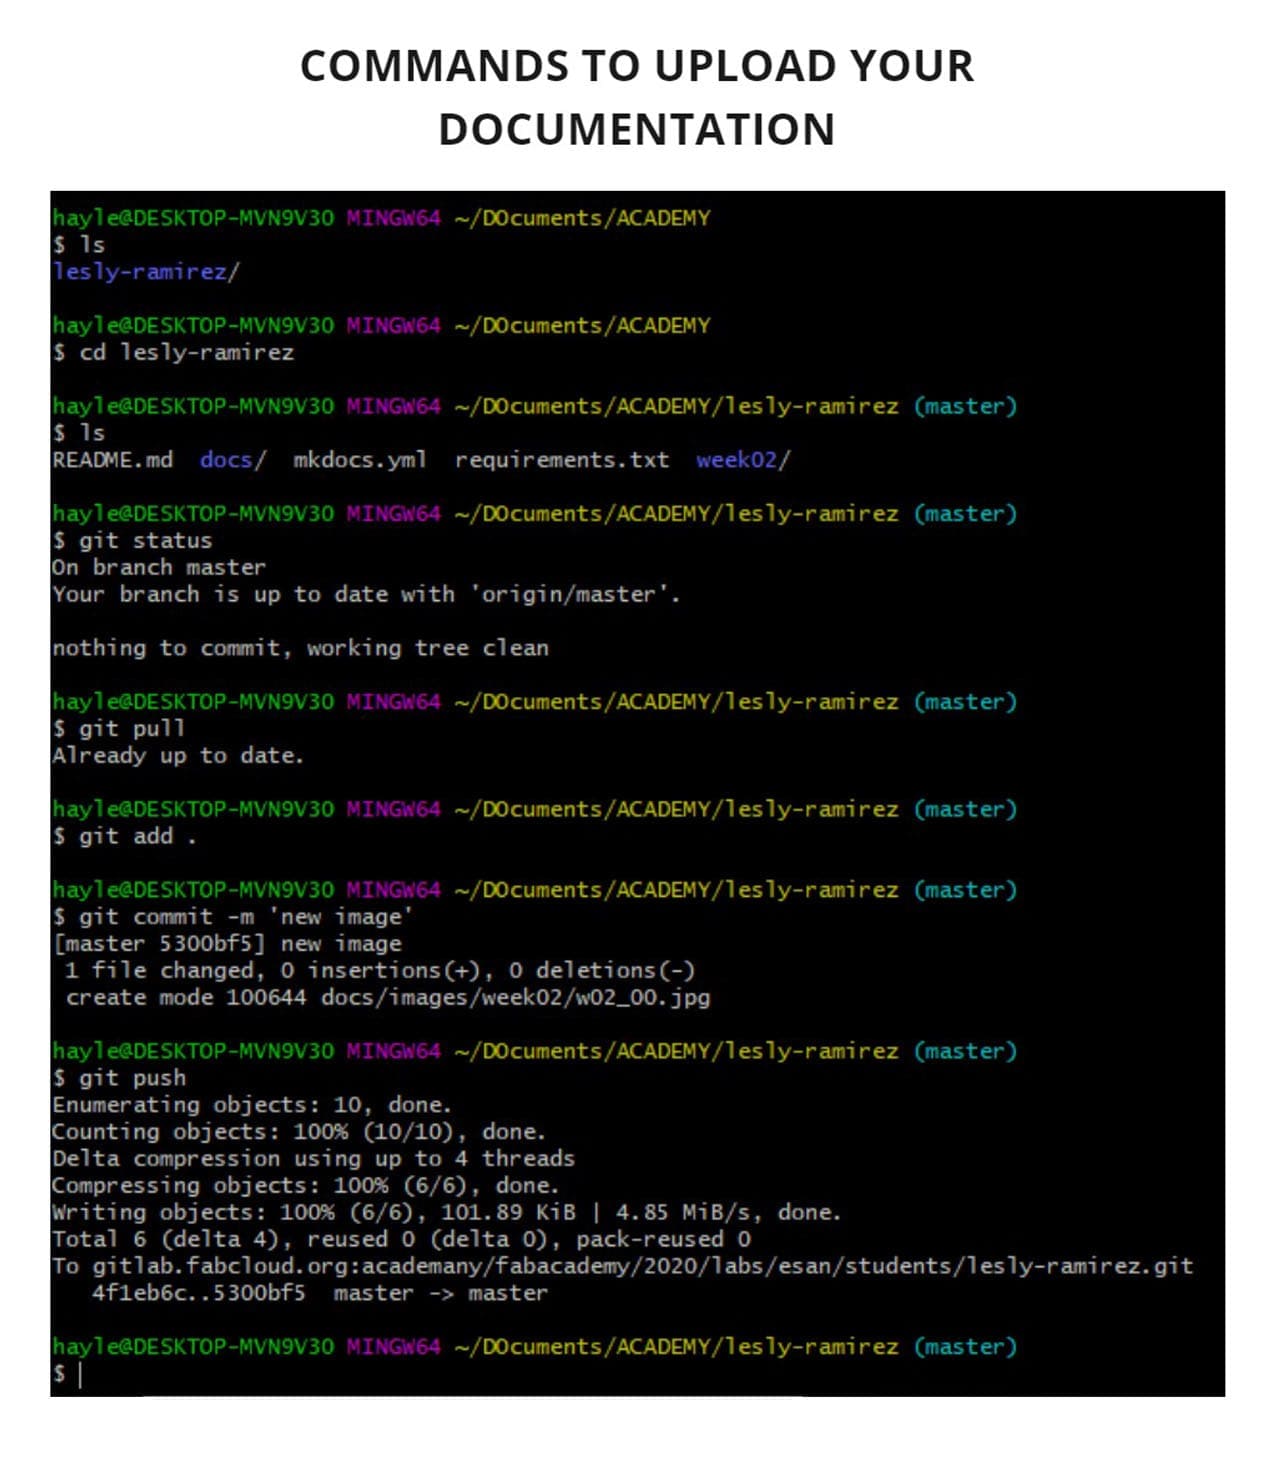
The following commands are very important to upload your documentation, read carefully.
-
First, have the information ready to be uploaded but do not modify anything yet.
-
Write
git status: It will tell you the current status of the origin/master to see if there have been any modifications or errors. -
Write
git pull: It will tell you if all isAlready up to date, in this step that you start uploading your information. -
Write
git add .: With this command the information that is already uploaded will be recognized and added correctly. -
Write
git commit -m 'texto': Each time you perform this process, you must place a name related to what you have updated in the area where I have placed: text. This will appear in your repository in the Commits area, when you click on the name, you will be able to see the changes that were made in that action. -
Write
git push: This is the final command to upload your documentation to the repository.
At this point your data has been uploaded and you should get a similar text after the git push, as you can see in the following picture, everything is 100% done and there is no error.
You can close the Git Bash if you have finished uploading your information or you can add more information by following the same steps.
This is the result, it takes a few minutes for the changes to be reflected on the web, so don’t despair, just be patient.
You can review all the changes in GITLAB in the area called COMMITS, there you will see all the changes made every time you have used the PUSH command.
I am satisfied for the first time using programming. I hope this tutorial has helped you.
5. TIPS AND RECOMENDATIONS
According to my mistakes, I will show you why I ruined my web twice…
Please pay close attention and read carefully:
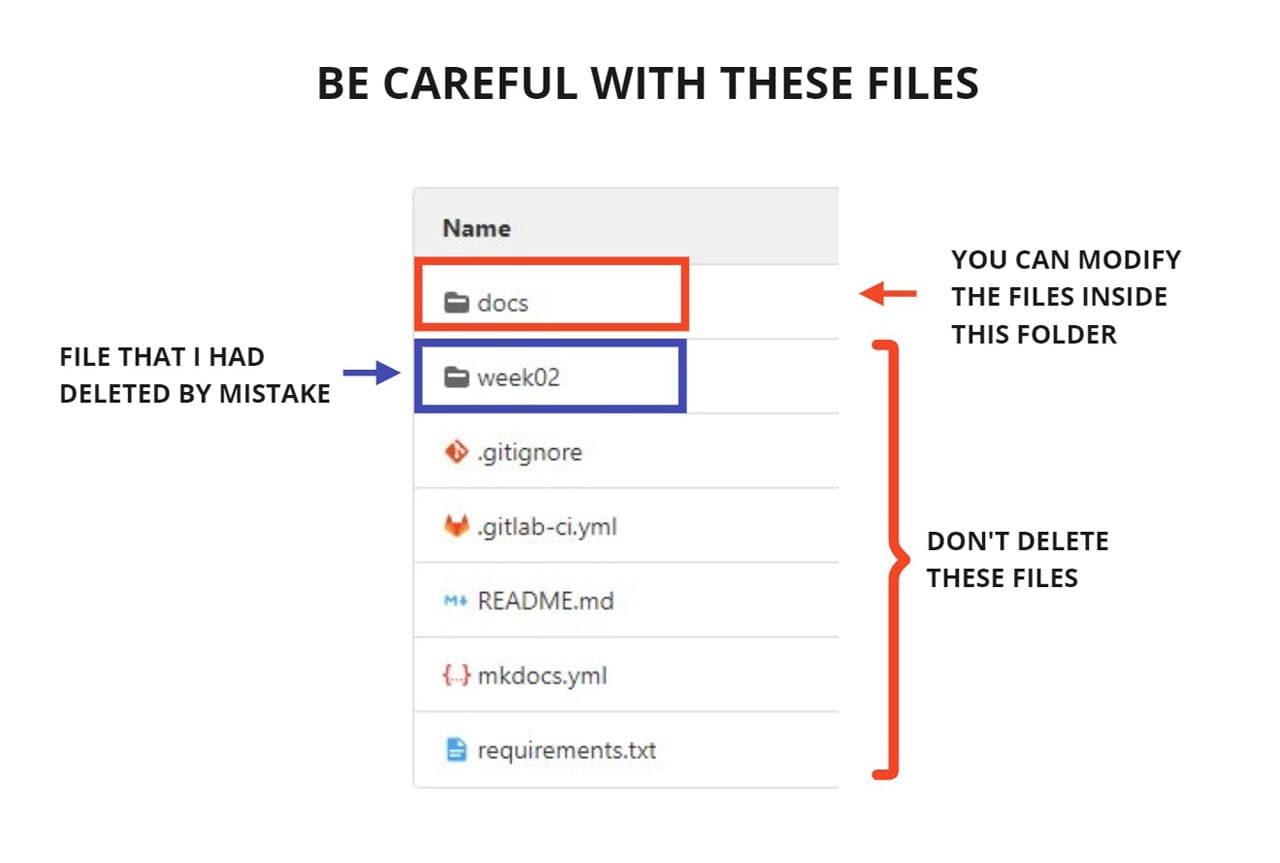
DON’T ELIMINATE THESE FILES
-
You can modify the elements inside the docs folder, but never touch the rest of the folders.
-
By accident I deleted the folder week02 that is under the docs folder, this happened because inside this last one, there is a folder with the same name, where the information of week 02 is uploaded, but they do not contain the same information.
-
If this happens and you delete it by mistake, everything you want to upload to your repository, will not be displayed on your public website and after every push command, you will get ERROR.
How did I fix it?
My instructor replaced all the folders in my repository with an empty template, so I was finally able to upload my information.
FOLLOW THE COMMANDS STEP BY STEP
This happened to me in week 3.
What happens if you don’t follow the step-by-step? You can upload the wrong information and cause some ERROR all over your site, chaos! And here I am, for the second time…
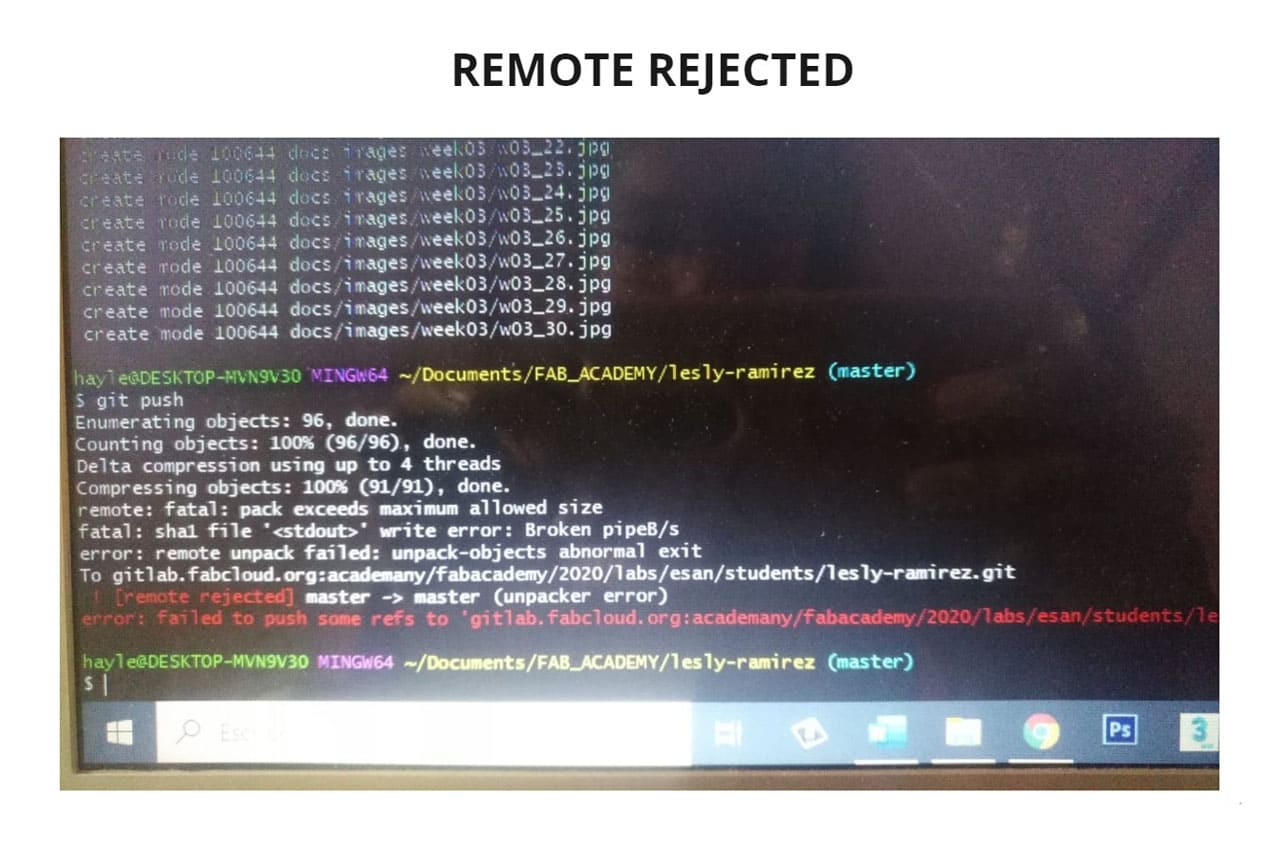
All files uploaded to the repository must have a very low weight, less than 10mb per week and preferably the images must be in .JPG.
I checked everything, except that the files I had designed, weighed more than allowed and automatically when I did PUSH, a message in red came out REMOTE REJECTED , UNPACKER ERROR.
The worst of all is that I tried to upload so many times, that information was not even in the PIPELINE, it was information flying in cyberspace 😅.
How did I fix it?
Not knowing how many times I wrote PUSH, because I tried to upload the information again and again. The only solution was to create another folder and clone the information I had in the repository using Git Clone , it was not necessary to create a new SSH KEY since I used the same computer. My new folder is called ACADEMY and that is where I am updating my documentation. You can check how to clone your folder above in my documentation, in the section: Git clone on your computer
RECOMENDATIONS
-
Upload less than 10mb per push command, if you try to upload more, it will be a problem because the repository will not be able to support it and it will show ERROR.
-
Ask your instructor first if you have any questions about a step or command.
-
Always have a backup, especially if you have documentation done in Git, if your folder is replaced it will appear blank, it happened to me, happily I had a backup of everything I had advanced.
-
Follow step by step, if you skip any command, you may be in trouble.
-
Don’t eliminate certain files, the files that I indicated you in an image in my documentation, should not be deleted or it will cause an error in all your web.
WHAT I LEARNED?
At the beginning it seemed like they were talking to me in another language and I didn’t understand anything, so I had to research terms and review tutorials several times.
I learned how to use Markdown, the workflow in GitLab and to take recommendations very seriously, especially for the mistakes I made. In the future I will learn how to use HTML to develop a website, for now I have learned Markdown and I feel very satisfied.
Every time I forget how to do something, I will go directly to my web and see which step is the next one or the correct order. My instructors helped me a lot to correct the mistakes in my web, so if I have doubts I know I should go to them immediately. Thank you FAB LAB ESAN and FAB ACADEMY!
6. USEFUL LINKS: