Final Project
Week 0: Digital Fabrication Principles and
Practices
Week 1:
Collaborative Technical Development, Documentation and Project
Management
Week 2:
Computer Aided Design
Week 3:
Computer Controlled Cutting
Week 4:
Electronics Production
Week 5:
3D Scanning and Printing
Week 6:
Electronics Design
Week 7:
Moulding and Casting
Week 8:
Embedded Programming
Week 9:
Computer Controlled Machining
Week 10:
Input Devices
Week 11:
Composites
Week 12:
Interface and Application Programming
Week 13:
Output Devices
Week 14:
Networking and Communications
Week 15:
Mechanical Design and Machine Design
Week 16:
Applications and Implications
Week 17:
Invention, Intellectual Property and Income
Week 18:
Project Development
Week 19:
Final Project Presentation
|
Embedded Programming
This
weeks assignment was to program the hello world board using as many
different programming languages and environments. Initially, I
set my FabISP to program within the Arduino enironment using the
tutorial found here.
For installing all FTDI drivers for OSX you will need to alter some of
the terminal instructions given to you by the installation manual of
the D2XX driver, as the directory pathways it states are slightly
different to the ones they actual are in reality. Additionally,
the link for the ATtiny board files given in the Fab Academy tutorial
are incomplete and the correct link is here, otherwise the tutorial given provides a sound set of instructions to follow for setting up the FabISP in Arduino.
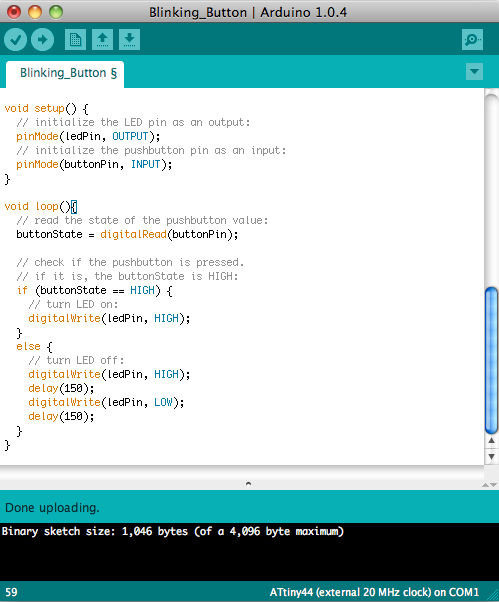
Using Arduino IDE:
Using
the suggested example file in Arduino (i.e. 'Button') I changed the
relevant pin legs designation in the file for the ATtiny chip (this is
found in the datasheet
for the chip) and upload the program to the board. To begin to
understand the process of programming through Arduino, I began playing
around with the functions within the program particularly with the 'if'
statement. I altered the program so that when I pressed the
button it blinked, so if you held down the button, the LED acted like a
flashing light so outline of the program is shown below.
Arduino is useful, once you have it set up correctly as the sketch
examples have good explainations within the files themselves.
Once the program is drawn up it can be easily uploaded to the
helloworld board by a click of a button, and will give you a fairly
clear description of any errors in the program making troubleshooting
and debugging more straightforward.
Using C programming language:
After using Arduino I
decided to use the process of programming we used to program the
FabISP, which was using AVRdude via crosspack to upload the hex files
etc. Roughly following the Fab tutorial "Echo
Keyboard Input Using C" I connected my FabISP and Hello World board to
each over through the headers (using a ribbon cable) and individually
to the power (through the USB and FTDI cable). By using the
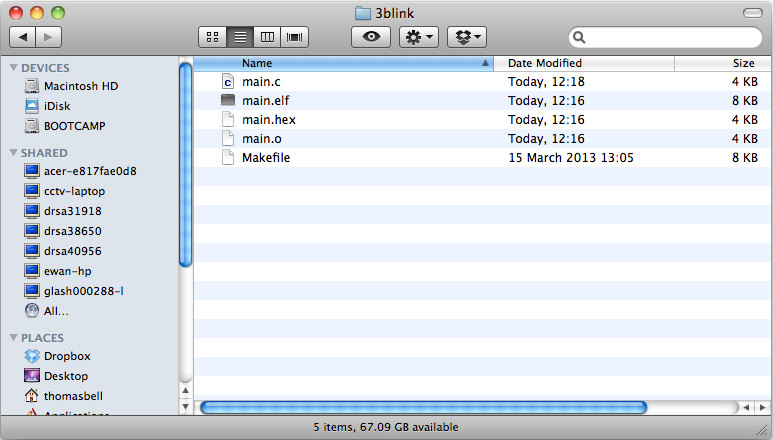
Makefile and the .hex file, main.o and main.elf that we used to program
the FabISP, I copied them over to different folders and began altering
the main.c file for use with the Hello World board an example layout of
a folder for the light to blink 3 times when the button is pressed is
shown below.
This
arrangement allows me to navigate to the folder above within Terminal
and simply type make program to upload the main.c file to the Hello
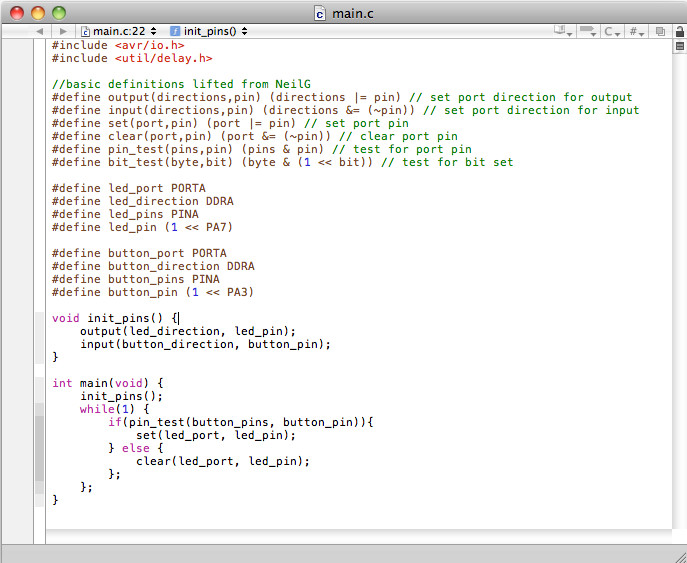
World Board. I began by iteratively developing the main.c file to
do similar to the Example 'Button' in Arduino (i.e. when you press the
button the light turns off). Looking through the picture below,
you will notice that you have to define the layout of the chip prior to
constructing the code.
C Code for making a press of the button turn off the LED:
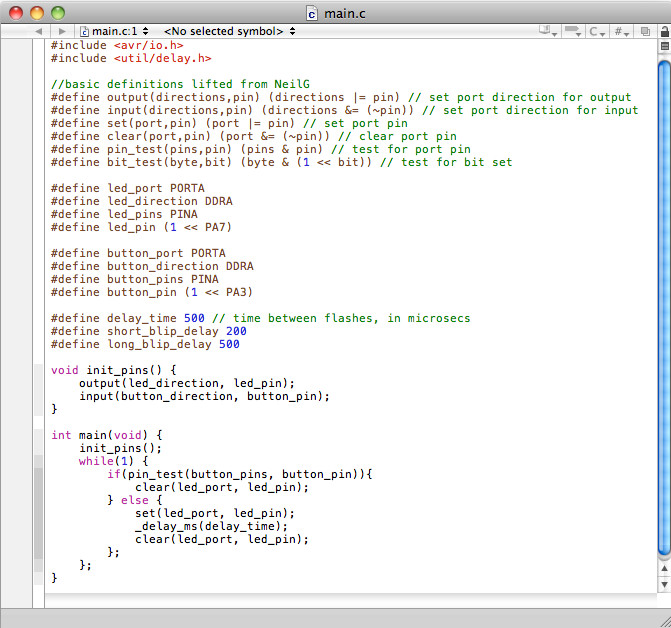
From
this I began developing the C code to blink the light for a second when
you press the button. Note that within the C code you have to
additionally define the delay times so that when the delay times are
referenced in the code they have figure to use.
C Code for making a button press blink the LED for half a second:
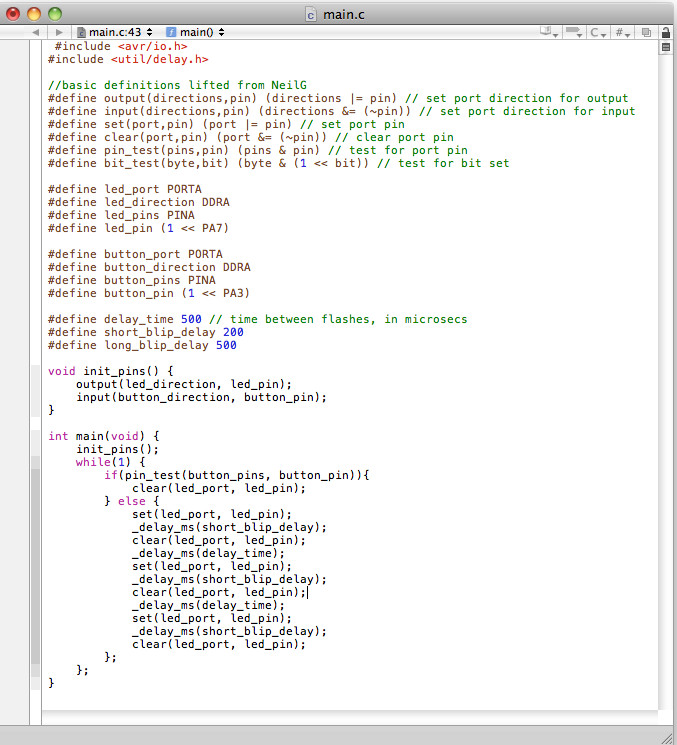
Using
these delay times, you can construct any manner of signals for the LED
to shine. The program below was developed to blink the LED three
times after the button was pressed. Looking closely at the code
after the 'else' command near the base of the file you can witness how
the arrangement of these commands inconjunction with altering the delay
time could lead infinite number of signal patterns to be developed.
C Code for making a button press blink the LED 3 times:
Overall I found the C code to be easier to understand initially as I
was aware of many of the logic functions it uses. I can see
clearly that Arduino uses these functions in a similar fashion but was
in an arrangement that I am initially uninitiated with, hopefully after
a short while experimenting with the process it will become easier and
more familar to use.
|