Final Project
Week 0: Digital Fabrication Principles and
Practices
Week 1:
Collaborative Technical Development, Documentation and Project
Management
Week 2:
Computer Aided Design
Week 3:
Computer Controlled Cutting
Week 4:
Electronics Production
Week 5:
3D Scanning and Printing
Week 6:
Electronics Design
Week 7:
Moulding and Casting
Week 8:
Embedded Programming
Week 9:
Computer Controlled Machining
Week 10:
Input Devices
Week 11:
Composites
Week 12:
Interface and Application Programming
Week 13:
Output Devices
Week 14:
Networking and Communications
Week 15:
Mechanical Design and Machine Design
Week 16:
Applications and Implications
Week 17:
Invention, Intellectual Property and Income
Week 18:
Project Development
Week 19:
Final Project Presentation
|
Collaborative
Technical Development, Documentation and Project Management
In order to monitor and update my progress throughout the course, the
first week assignment is to design and build a personal website to
catalogue my progression through the course by regular updates.
Build a
personal website:
Being a
complete beginner to the world of HTML language I found it initially
quite daunting to create a website from scratch! Thankfully, the
Internet provided me with a myriad of open source web authoring systems
such as Sea Monkey, and Kompozer. I even considered a trial version of Dreamweaver but
considered it potentially too memory hungry for the basic website that
we needed to provide (something that Neil had specifically warned us
students against) and given that the trial period would probably end at
a pivotal point of the course and I'd be stuck without enough knowledge
of HTML to update the files manually I opted to stay well clear.
Using the tutorials provided by W3 Schools I
began getting to grips with the language of HTML and then began pulling
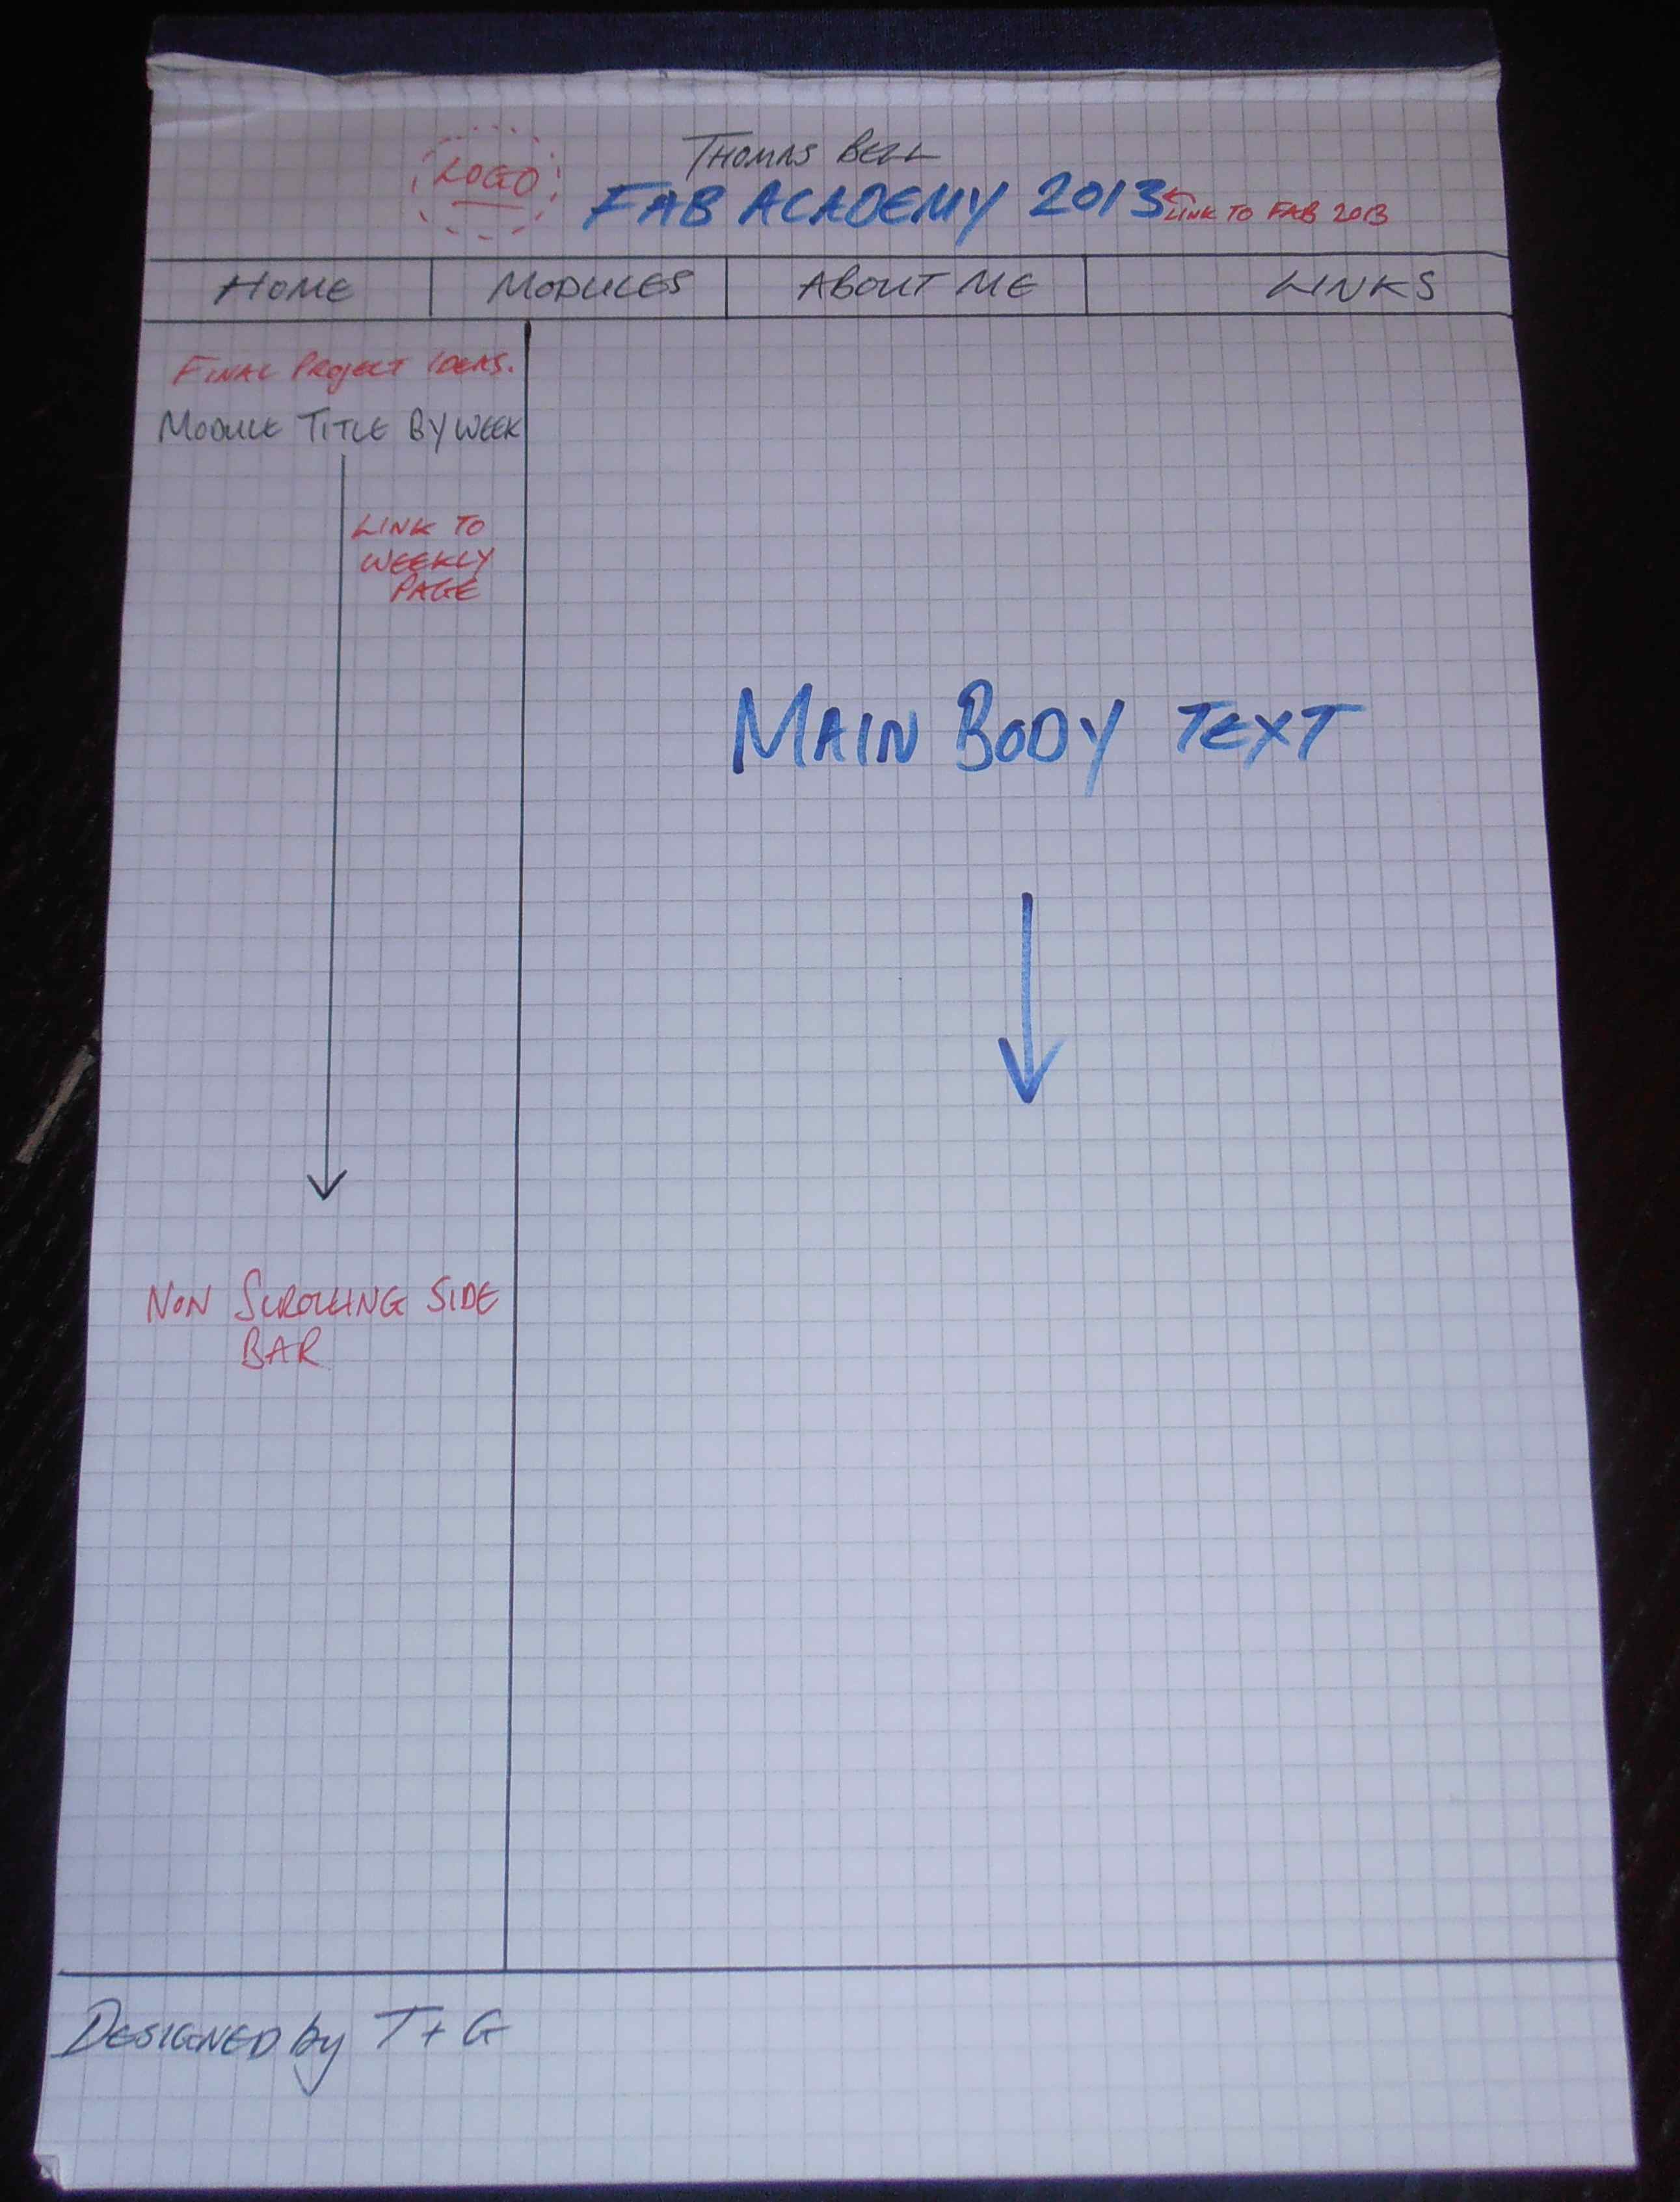
in ideas from the Internet on how I wanted my site to look. I sketched
a fairly simplistic layout of what I wanted the website to look like,
amount of individual pages I thought I needed.
I began using a
simple WYSIWYG web package (I had to Google this acronym, this may be a
reoccurring theme for me) in this case I chose Kompozer to build up the basic elements of the layout.
Once I had
become familiar with the HTML language I began looking at fairly basic
websites whose ideas I liked and started viewing the source code of the
website (Ctrl + U in Firefox) to try and spot the elements of HTML code
that applied to the elements of interest.
An element that
I particularly liked was the non-scrolling sidebar – due to my limited
knowledge of HTML this proved a bit of a journey into the further world
of web development and HTML website coding. To achieve this needs the
use of linked CSS (Casading Style Sheets) files, and setting and
orientating areas of the page within the .CSS file. I played
around with this, but was unable to get the coding to work in the time
available, this is something I may work on later in the project – but
for now I just implemented a ‘Back to the top’link at the base of the
page for easier navigation.
Project and control management:
Once the
overall skeleton of my website was set up, it was time to upload the
site from my working directory to the repository at the super node
server who then will upload to the master FabLab repository. To
enable this to occur it is necessary to use Mercurial as
a distributed source control management tool. Mercurial can be
operated from a command line or from a third party graphical interface,
I decided to try and install the graphical interface because my
knowledge of coding is fairly basic and I thought initially using the
GUI would be beneficial for using the program.
Initially I started by downloading the correct Mercurial program
for the operating system (in this instance Mac OS 10.6.8) and the two
.ssh keys academy and academy.pub that were provided by the lab manager
and placed them in my home user directory (~/). Afterwards I
installed the program through its installer and checked that it was
installed by opening up terminal and typing hg version in the command
prompt, if Mercurial was correctly installed the version information of
the program should be displayed. Due to the fact that we are
connecting to our local labs repository and not the main repository
some of the protocols were different then what has been previously
described in some tutorials so I will briefly describe my steps for
successful connection to the local repository.
Once Mercurial
was installed the .ssh keys need to be properly located and create the
correct config file. Within the home directory in Terminal create
the /.ssh directory by typing mkdir .ssh and then creating a directory
for the keys by typical mkdir .ssh/keys. Both .ssh keys should be
in the home directory so they can be moved into the /.ssh /keys
directory by the move command in Terminal (i.e. mv academy .ssh).
These directories will be hidden in Finder, so to confirm that the
files are in place (and for future reference) I opted to have Finder
show me all hidden files by entering in the command defaults write
com.apple.Finder AppleShowAllFiles TRUE and then relaunching Finder by
using the command killall Finder. Now by checking the directories you
should see the keys are in the /.ssh/keys directory – and if not you
can move them graphically through Finder.
Permissions for the private keys is achieved by accessing the /.ssh/keys directory that was just created and typing:
sudo chmod 600 ~/.ssh/keys/academy
sudo chmod 700 ~/.ssh/keys/academy.pub
To set the
permissions, that the local lab are extending to you. The local lab
should send you through the correct commands for this process.
Configuration files:
To ensure that
when you connect to the super node repository you connect to the
correct URL and port it is necessary to create a configuration file to
direct this operation. To enable the creation of a configuration
file use the nano text edit function in Terminal by using the command
nano config, whilst in the /.ssh/keys directory (otherwise you will
need to use the move command) and adding host (your local lab network
URL)
port (the number port, supplied by your local lab).
The host number
and the port should be supplied by the local lab or super node.
Then save the file (press Ctrl+O and then press enter) and then exit
the editor (press Ctrl+X).
Cloning the archive:
Now you should
be ready to clone the archive through Terminal by typing hg clone -e
"ssh -p 22 -i ~/.ssh/keys/academy"
ssh://fab@82.109.119.66:/fabacademy/academy.2013 academy.2013 this
command will vary depending on the connection protocols by the local
repository that you are connecting too. Once cloning has finished
find the directory that the cloning procedure created and locate the
configuration file found in .hg/hgrc directory and edit it using Text
Editor to additionally include (note the username should be your own)
[ui]
username = First Last <user@machine.domain>
ssh = ssh -p 22 -i ~/.ssh/keys/academy -C
[hooks]
changegroup = hg update >&2
Now you are
ready to update the archive by typing hg pull in the home directory and
hopefully you should receive a message saying no changes found.
Indicating that you have successfully updated completely.
At
the same
time I tried to investigate using a third party GUI, but found when I
tried to clone the archive it asked for a password, which I thought was
the password for my own computer but it proved not to be the
case. I will return to this, to see whether I can make the GUI
work, but for the time being I have been able to use command lines in
Terminal to installed and enable push and pulling to occur. I
started being able to use a native GUI interface with Mercurial after I
put additional permissions into the configuration file. The
graphical interface I used was MacHG (as I was using Mac OS 10.6.8),
and had to additionally install Diffmerge, to allow all the programs to
talk to one another effectively. The guru provided me with
additional protocols, that allowed me to connect to the super node
repository - these included the necessary host and port identities for
the super node. I additionally copied the keys (academy.pub and
academy) to the root directory /.ssh to ensure the necessary keys were
in the correct location for the MacHG program.
Cloning of the archive was then achieved by adding:
short name - academy.2013
server url - ssh://mfl/fabacademy/academy.2013
Afterwards you can use the graphical interface to pull and push to the
central repository, by mirroring the protocols set out in the various
Mercurial tutorials using command lines.
|