Final Project
Week 0: Digital Fabrication Principles and
Practices
Week 1:
Collaborative Technical Development, Documentation and Project
Management
Week 2:
Computer Aided Design
Week 3:
Computer Controlled Cutting
Week 4:
Electronics Production
Week 5:
3D Scanning and Printing
Week 6:
Electronics Design
Week 7:
Moulding and Casting
Week 8:
Embedded Programming
Week 9:
Computer Controlled Machining
Week 10:
Input Devices
Week 11:
Composites
Week 12:
Interface and Application Programming
Week 13:
Output Devices
Week 14:
Networking and Communications
Week 15:
Mechanical Design and Machine Design
Week 16:
Applications and Implications
Week 17:
Invention, Intellectual Property and Income
Week 18:
Project Development
Week 19:
Final Project Presentation
|
Mechanical and Machine Design
From
now until the end of the Fab Academy course the class is required to
fabricate and develop a machine. We can either modify a machine
from the project archive, or develop an entirely new machine from
scratch using Fab Inventory components. After much deliberation
we decided to build a 3D scanner as the lab we are starting within the
University did not have any specific 3D scanning facilities.
There are several different iterations of 3D scanner projects published
online, after chatting through the options we decided to try mimicking
and altering the FabScan
project developed by Francis Engelmann as there was continuing support
on this project and a Google Group for a discussion forum.
To begin with as a group we decided which elements of the machine we
could modify to meet the requirements of the assignment. We
decided that we could create a snap fit case to reduce the amount of
screws necessary to reduce components in the case manufacture,
additionally we decided to try and add a light to provide constant
lighting to improve scanning quality.
We then broke the project into sections which we could analyse and
break down into manageable components. These were the structure,
mechanical and electronic components.
Developing the electronics:
I was tasked with creating the electronic elements, I immediately began developing an Arduino out of Fab Lab Inventory components to provide the processing for the FabScan
- this was due to the fact that we should develop the machine from
scratch and buying an Arduino like the one shown in the project files
would not have been allowed. Therefore I decided to try and use
the Hello Arduino detailed in the embedded programming class notes in Week 8.
This posed several problems as we were additionally developing the
breakout broad for the stepper motor so we needed to ensure that we
could connect all the boards correctly. Therefore, as I was
unaware how the breakout board would be manufactured I decided to use
the modified the Hello World Arduino that had headers for every pin on
the chip so compatability and alignment was assured.
Additionally, I need to realign the pins within the Arduino software when I upload the sketch to match up with the pin outs for the ATTiny mega chip.
|
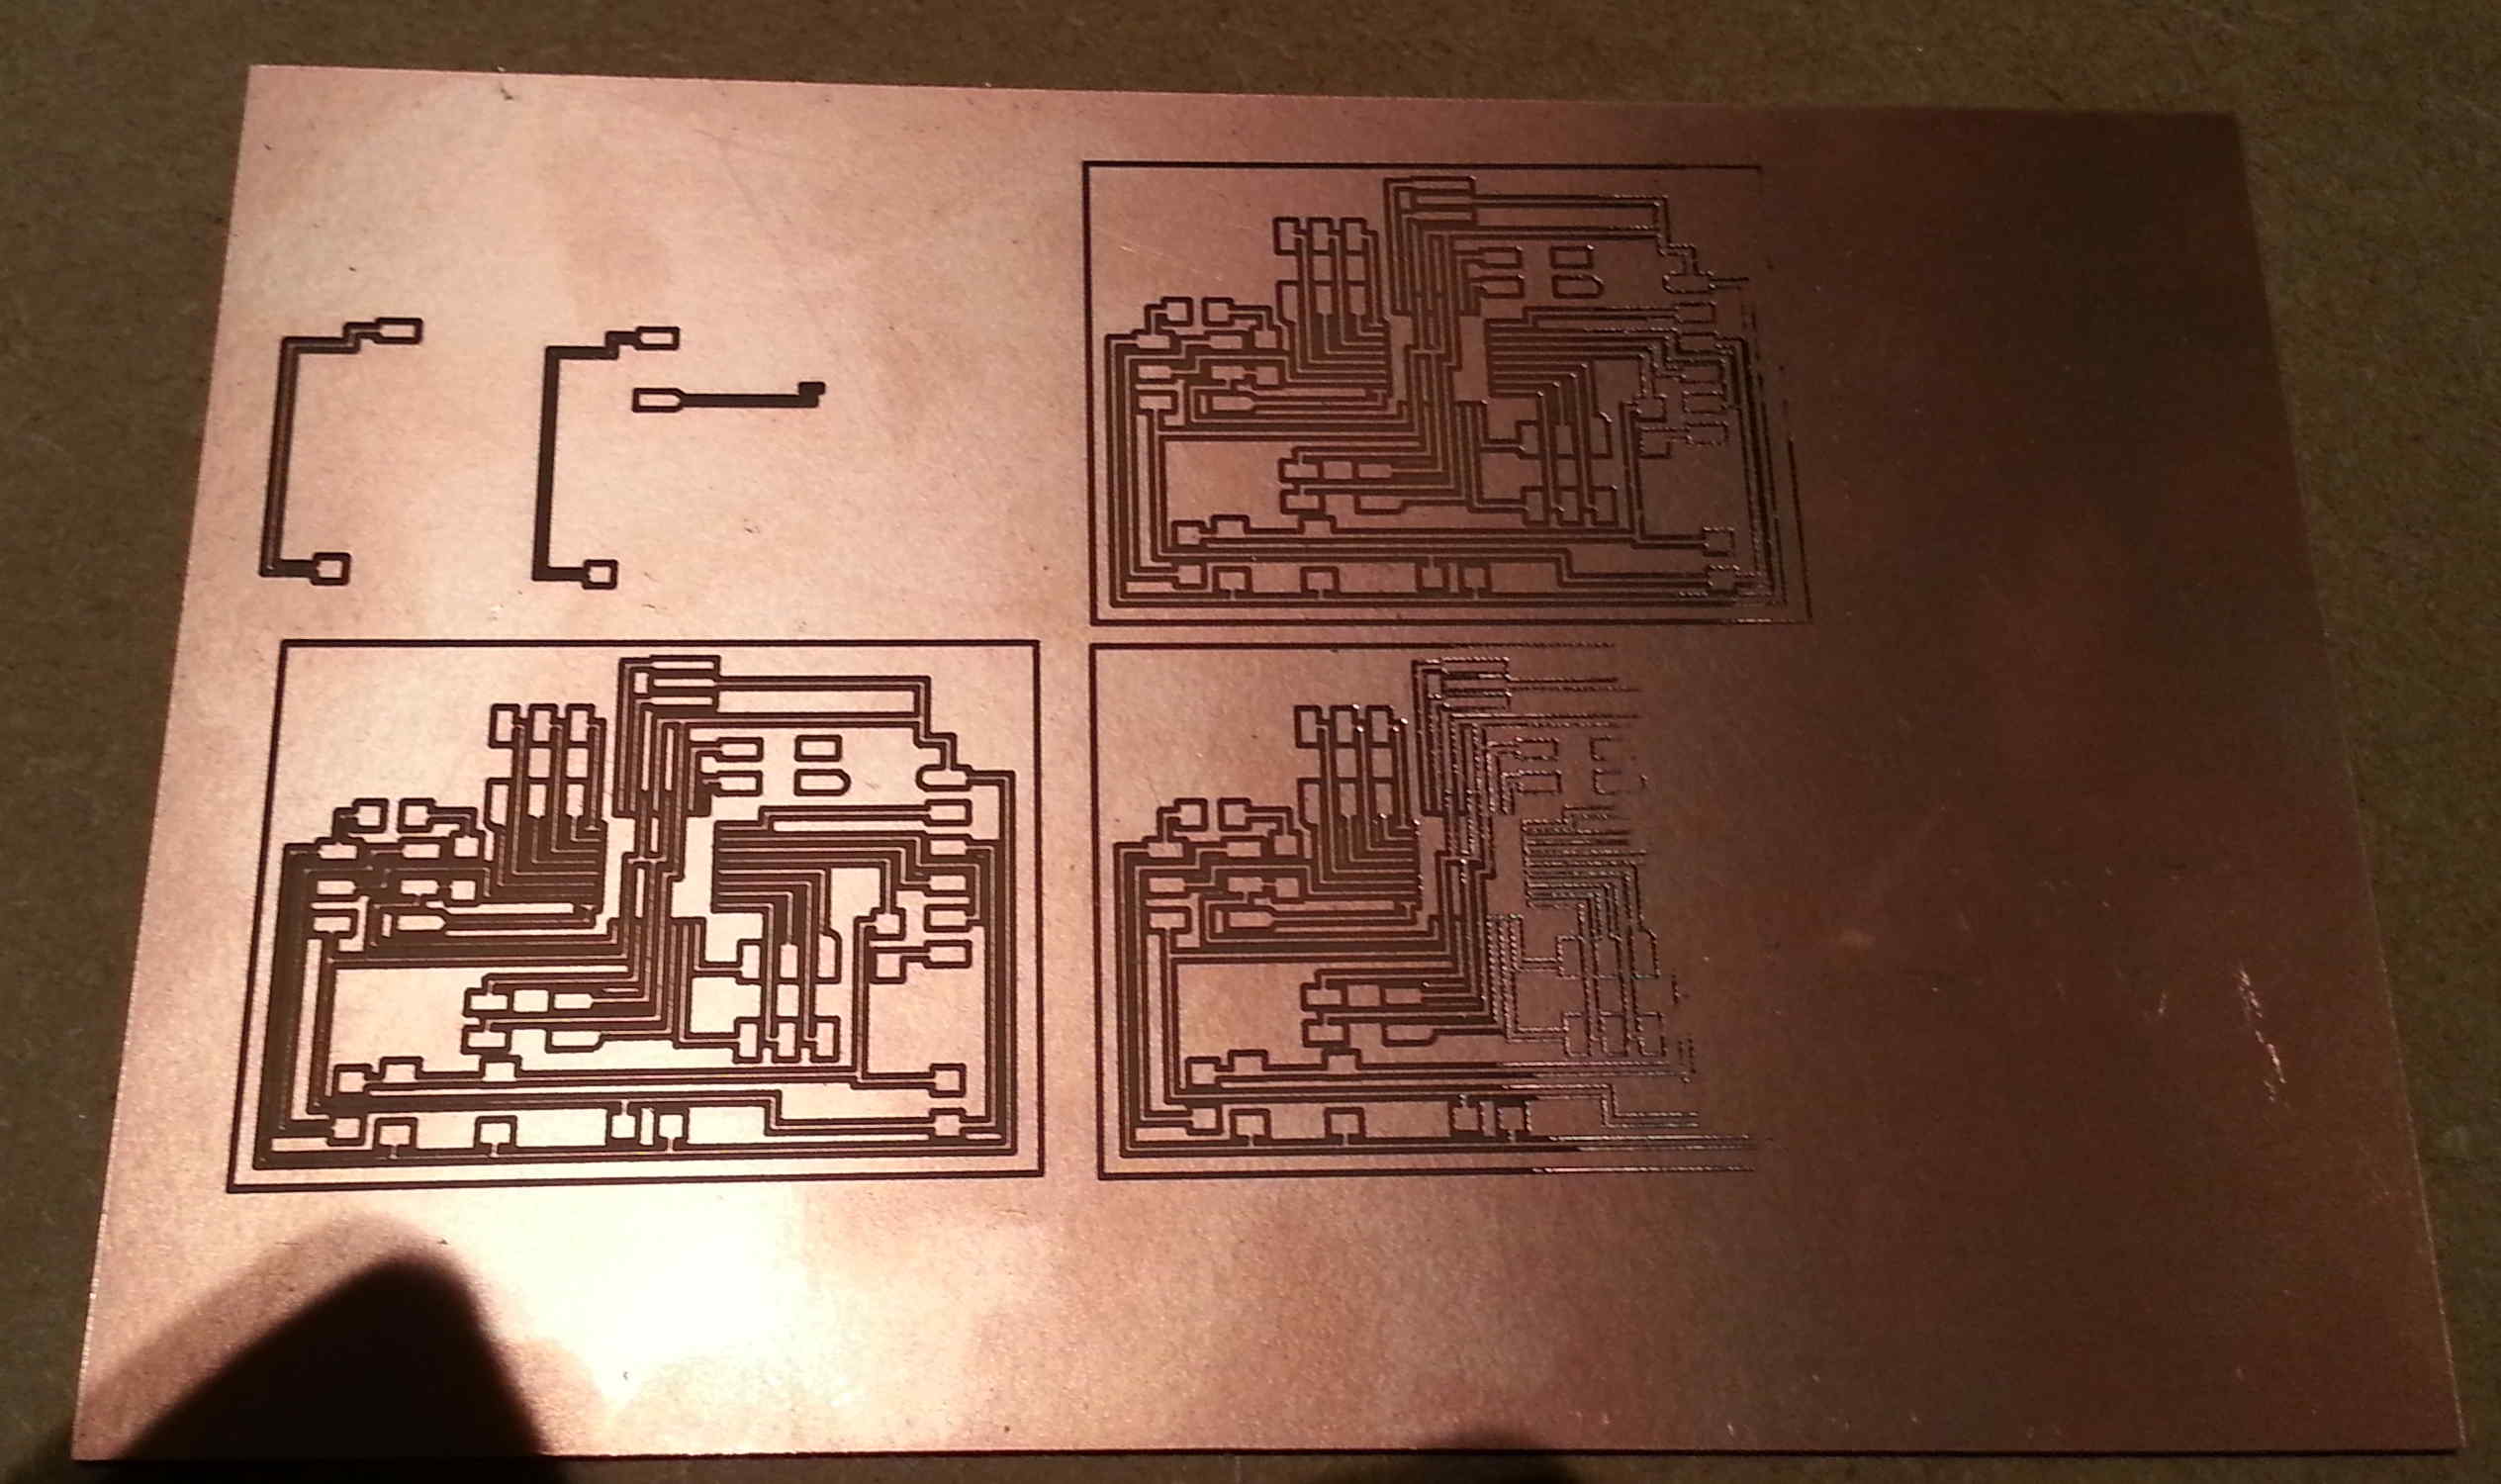
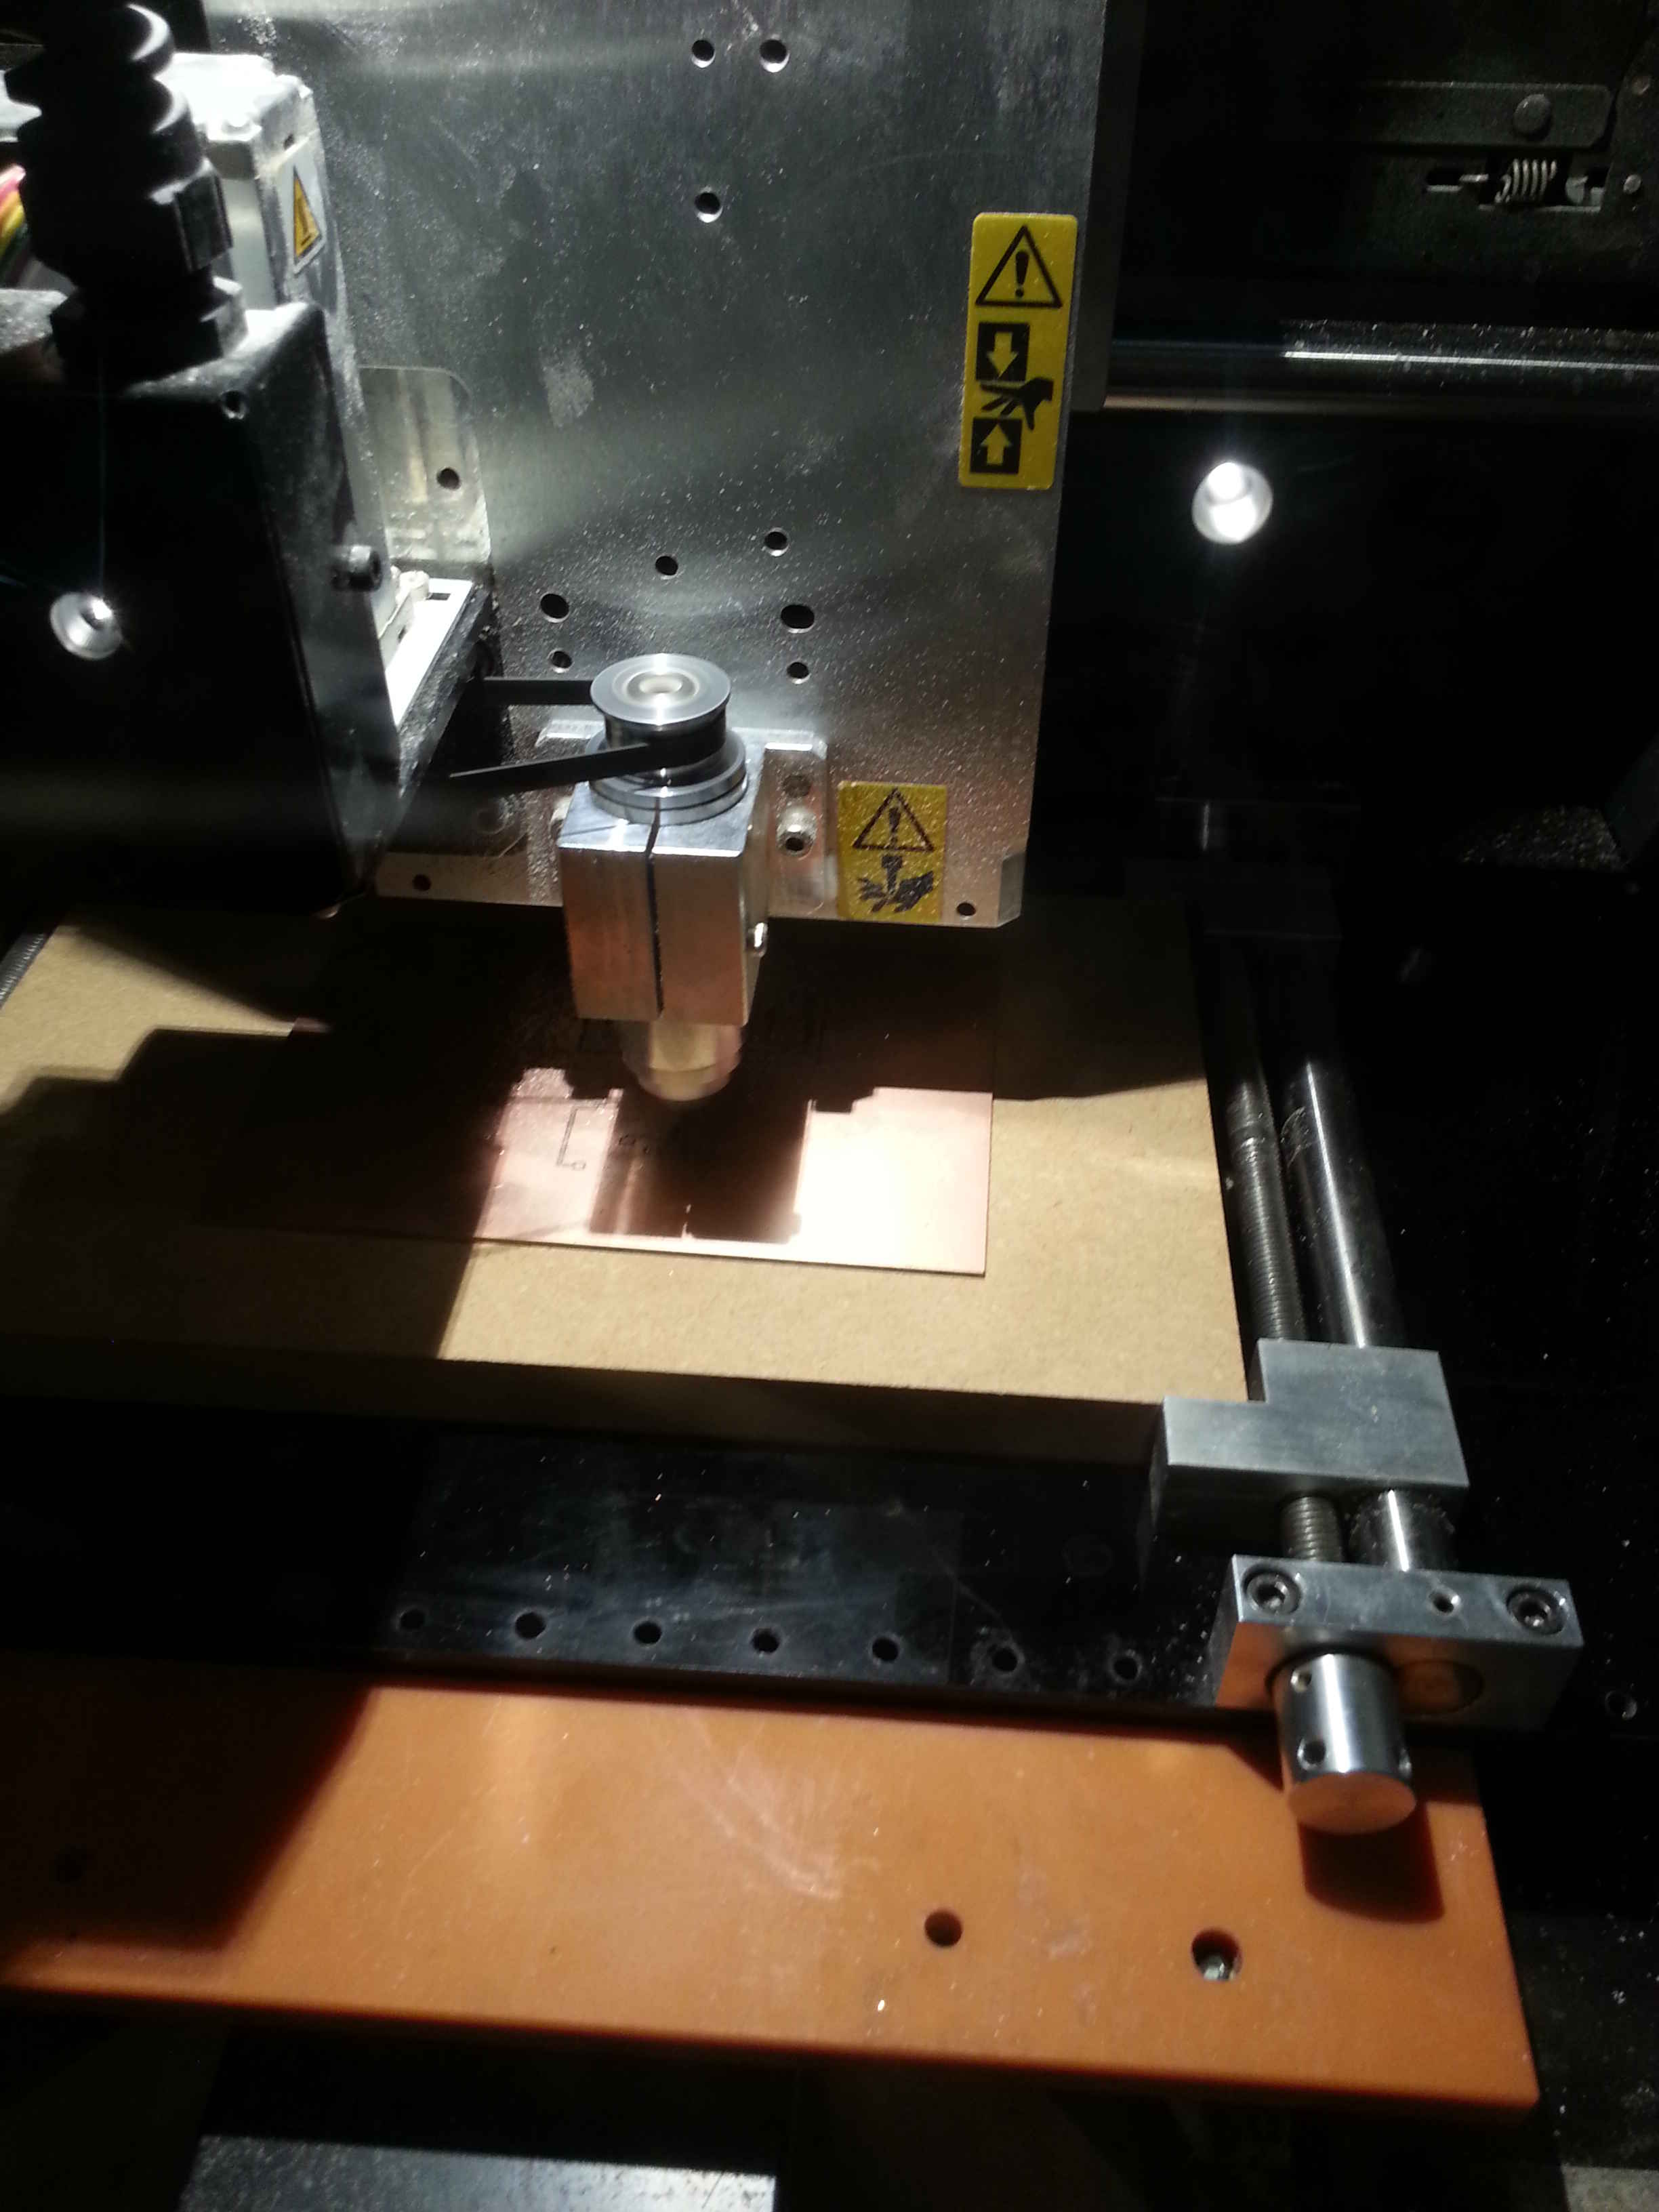
I began milling the board, this
proved troublesome as the bed of the lathe/milling machine wasn't
completely flat so some areas of the board was milled too deep and in
others not milled at all. After milling 7 different boards none were
perfect to solder on so I decided to press ahead by using a scalpel to
scrape out the areas of the board that weren't milled and attempt to
solder the component.
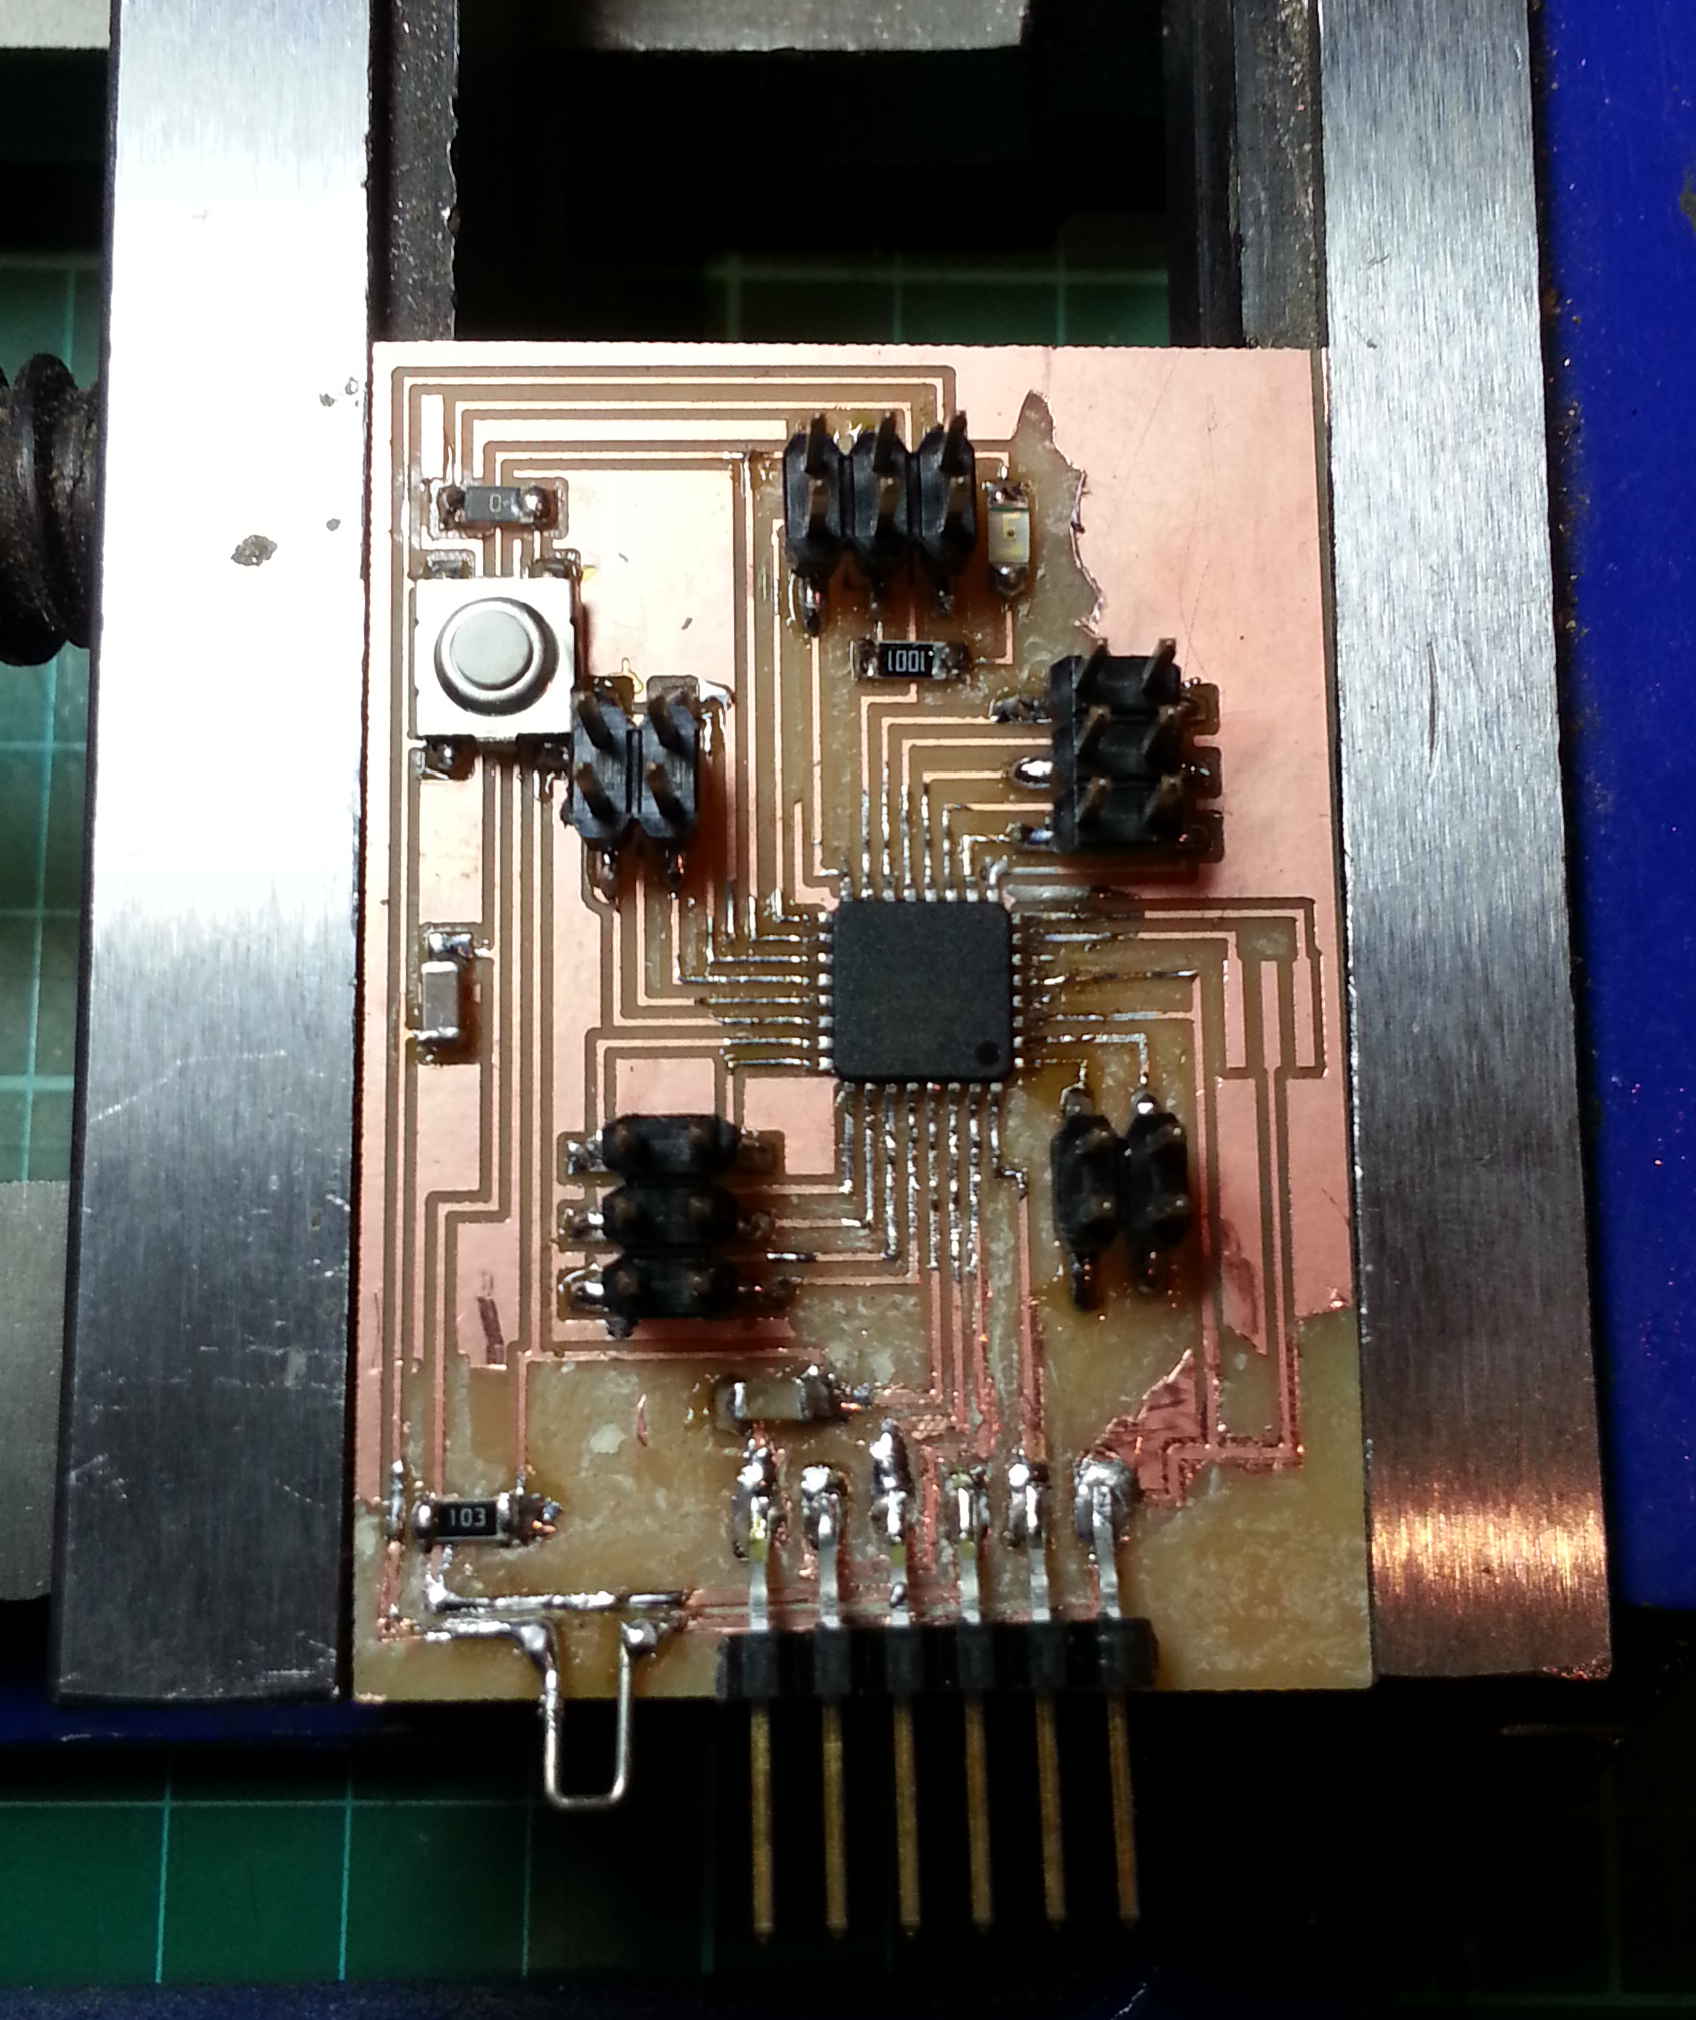
After
several attempts at soldering the board, the traces kept lifting
because they were too small to continue being adhered to the board. I finally managed to get the board soldered.
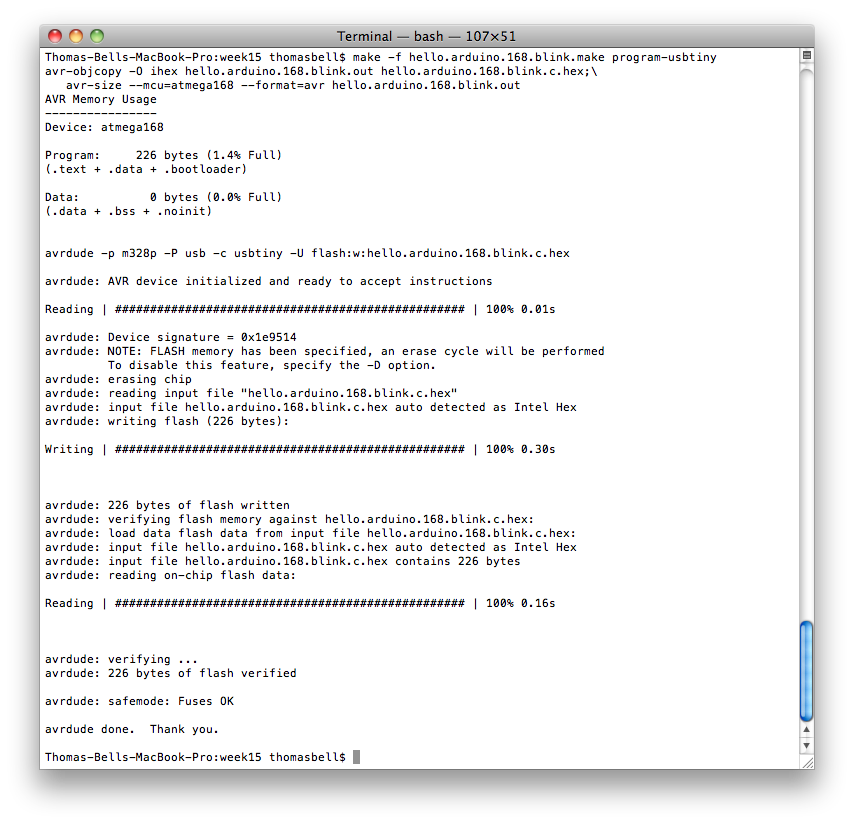
Before commencing with the programming for the Hello Arduino, I tried
to upload the sketch example given to us in the embedded programming
section of the course notes. I tried to program the board through
he AVR-Dude protocols - unfortunately first time this didn't work
because I was using the ATmega328 chip and not the ATmega 128 as
specified in the .make file. I altered the .make file to the
necessary descriptor, although the correct type of chip was not
specified in the library and I got a chip signature error. As a
work around I located the avr.config file within Terminal and altered
the chip signature manually to mimic the installed chip
signature. Once I had altered the file the board programmed
successfully.
Now, I have to alter the programming for the Hello Ardiuno so it
correlates with the protocols specified within the FabScan Project.
|