This assigment conts in Production of a composite.
It was done by using Resin with the adding of Raschel mesh that gives flexibility to the composite.
Single-Task
======= Pencil Holder =======
For this assignment I found it confusing, at first I thought it was making something with cardboard something huge. but then my instructor and seeing neil's class made me see that it was not what he thought.
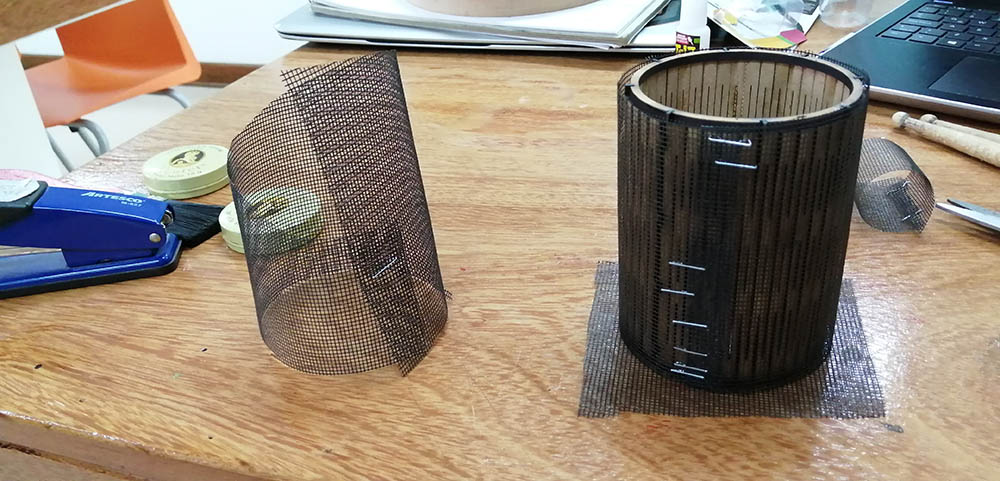
So looking at my options around me, I have decided to laser cut a 3mm MDF pencil holder but I am going to prepare a Raschel mesh fiber composite with Resin as the cover of the pencil holder.
So as a first step I'll have to design it in Rhinoceros and then cut it.
Material
Measures
EPOXY RESIN
80gr
Catalyzer
80 drops
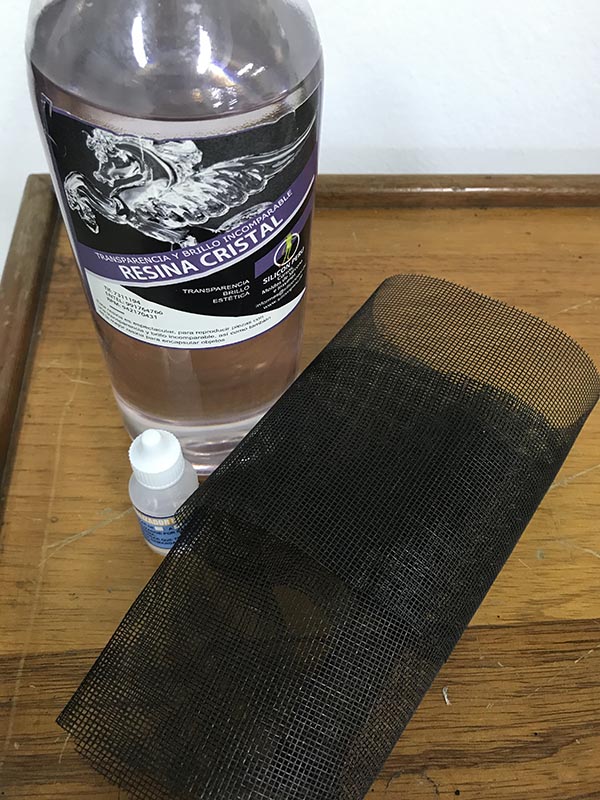
Raschel mesh fiber
x1 mesh 30cm x 30cm
MDF 3mm
x1 board 300mm x 300mm
Vacelin
x1 knob
In the image below I show the materials I use for this project. Since it was easy to access and practical for me to use.
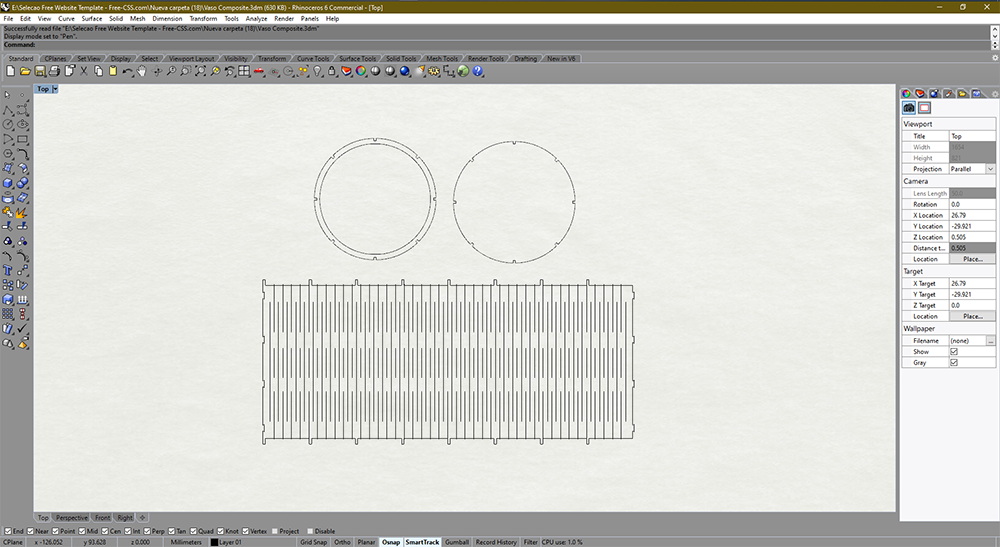
STEP 1. Draw my design on Rhino Picture 86.
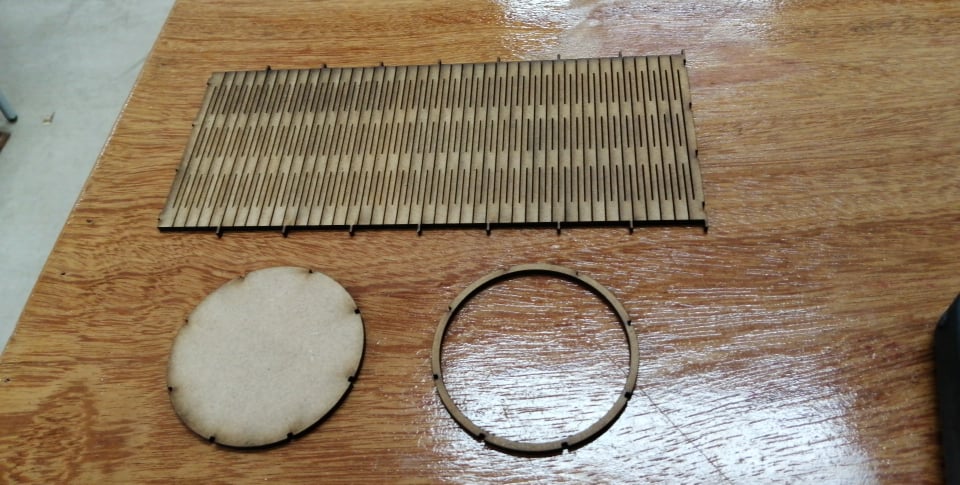
STEP 2. Once i finished I export in DXF my design and cut it in the laser cutter Boss Laser LS 1630. After cutting the MDF I go on to build the resin cover.
Picture 86. Picture 86. Picture 86. Picture 86.
STEP 3. I need to use vacelin to facilitate the take of the composite from my moldPaste the raschel mesh over the object.
Picture 86.
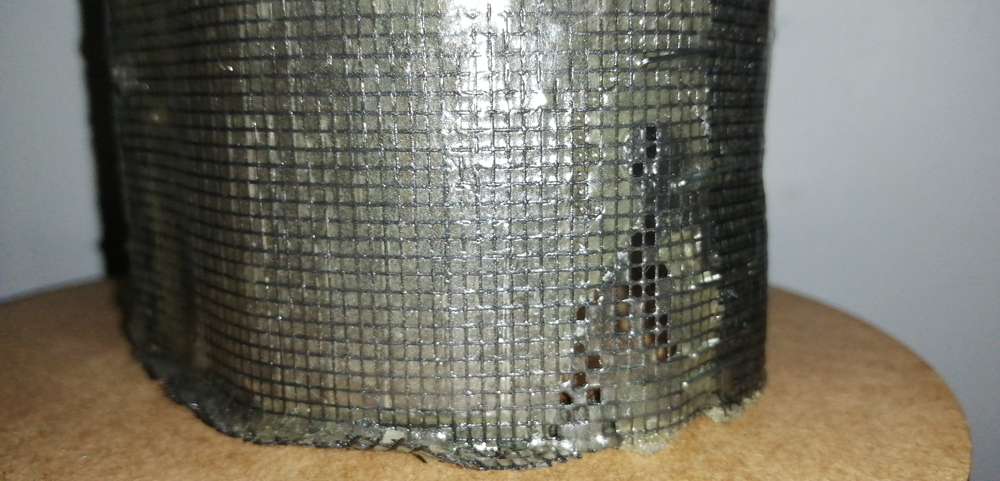
STEP 4. Verter resin over all object. And wait left to dry for 24 hours.
Picture 86. Picture 86.1.
STEP 5. Finally I only brushed 3 times resin over my pieze and wait to dried. Picture 86. Picture 86. Picture 86.1.
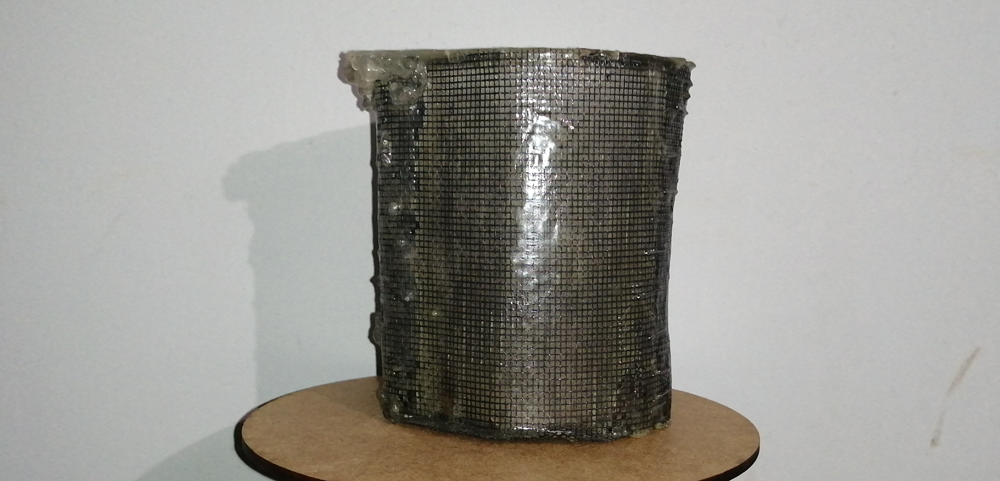
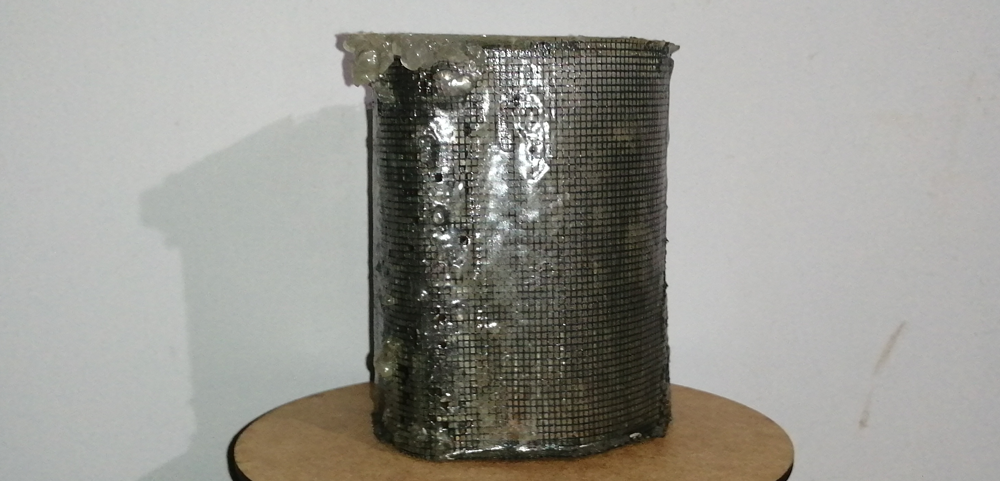
Final View
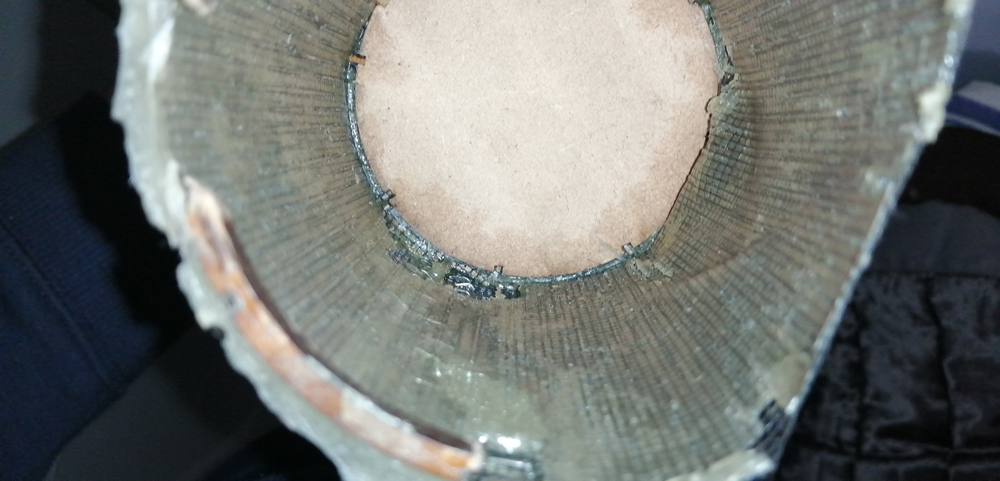
This is the result of what I did. The cover worked, the mesh adhere very well with the resin, only one tip that you have to be quick to apply the resin. that's why I stay as a peak at the top that at the end I take advantage to give it a more passable shape. What would improve the drying place would be, I failed to put it glued to a container, that's why that peak was created, what I would do to improve this would be to place a cylindrical support that only holds it from the inside of the coaster. In summary, this technique that I used works and I think that even more great and experimental things could be done.
======= ICE-GLASS Holder =======
For this assignment, I had a finishing problem. So I decided to do it again but taking the previous observations that I placed previously. So as a first step I'll have to design it in Rhinoceros and then cut it.
This is the table of materials
Material
Measures
EPOXY RESIN
270gr
Catalyzer
120 drops
Raschel mesh fiber
x1 mesh 30cm x 30cm
MDF 3mm
x1 board 300mm x 300mm
Vacelin
x1 knob
In the image below I show the materials I use for this project. Since it was easy to access and practical for me to use.
STEP 1. Draw my design on Rhino Picture 86.
STEP 2. Once i finished I export in DXF my design and cut it in the laser cutter Boss Laser LS 1630. After cutting the MDF I go on to build the resin cover. Following the previous observations, I made a manufacturing plan to achieve a glass-like finish.
Picture 86. In the image below I show uploading my file my dxf to cut it in 3mm MDF.
Picture 86.
Picture 86. Lasercut!
Picture 86. Lasercut!
STEP 3.Then I went on to make the resin blasting stand.
Picture 86.For this use a disposable cardboard plate and a long cardboard cylinder.
Picture 86. Step to stick it with liquid silicone.
Picture 86. Making sure that the cylinder remains in the center.
Picture 86. I verify that it is well glued to proceed to manufacture the Pencil Holder of MDF.
Animacion. This is less my design of my plan than it will be when I get to apply the resin on my MDF base.
STEP 4. Then I go on to make the Pencil-Holder MDF.
Picture 86. We used the mdf cut and first we assembled the side faces, for this I made some special joints in my design so that the assembly can be easier.
Picture 86. In the image below in the green circles I show the joints I made.
Picture 86.
Picture 86. Finally he went on to glue the base and edge.
STEP 5. I need to use vacelin to facilitate the take of the composite from my moldPaste the raschel mesh over the object.
Picture 86.
Picture 86. I scoop out some resin with my fingertip.
Picture 86.1. And I happen to rub it, spreading it all over the surface of the base.
Picture 86.
Picture 86.1.
Picture 86.1.
Picture 86. Check that everything is very short of Vaseline.
STEP 6. Then I go on to make my mold Paste the raschel mesh. Picture 86. First I made my plan a fabrication diagram of the mesh base.
Picture 86. I go on to cut step 2 from my diagram above.
Picture 86.1. I go on to cut step 3 from my diagram above.
Picture 86. Then I go on to fold all the cuts into a plate shape.
Picture 86.1. Then I glue the mesh base with little silicone to the base of the MDF Pencil-Holder.
Picture 86. Next step is to stick with little silicone and running your finger on each side of the cuts leaving it as the images below.
Picture 86.1.
Picture 86.Then I go on to glue the side face but without letting the silicone touch the mdf. For this I use a trick, I glue the lower corner with the mesh base and as a kneading bread I roll it up and then I glue the two upper corners very carefully.
Picture 86.1. To give it more precision, I decided to press it for a few minutes so that it would not cause problems for me to detach while I get in the way of pouring the silicone.
Picture 86.1.
STEP 7. After making my mold Paste the raschel mesh, I put the resin layer on it. Picture 86.1.
Picture 86.1.
Picture 86.1.As in the animation that I show you here, I am going to place my base on the cardboard support in official fashion.
Picture 86.1.
Picture 86.1. Then I go on to prepare the mixture. For the resin layer, it is necessary to apply several layers of resin, for this subject I will use 4. for each one I will use 90gr of resin two jets of blue glass ink and 140 drops of catalyst.
Picture 86.1. Happened to mix it well!.
Picture 86.1.
Picture 86.1. Once the mixture is obtained, we pour it over the base.
Picture 86.1. Happened to mix it well
Picture 86.1. I let it dry for 3 hours and let the resin drip by gravity.
Picture 86.1.
Picture 86.1. After three hours, I put on a second layer and let it dry for another 3 hours.
Picture 86.1.
Picture 86.1.
Picture 86.1.
Picture 86.1. After three hours, I put a third layer on and let it dry for 1 hour. For this I let him close to a window.
Picture 86.1.
Picture 86.1.
Picture 86.1.
Picture 86.1.It is already looking great!
Picture 86.1.
Picture 86.1. Finally, after the waiting hour, I put the last layer of resin. But for this layer I will go to dry for a full night.
Picture 86.1.
Picture 86.1.As you can see, it is already having a greater visual impact!
Picture 86.1.
Picture 86.1.
Picture 86.1.
STEP 8.The next day I carefully remove the MDF base, for this I use two tools: a flat metal bar and a long flat nose pliers. Picture 86.1.
Picture 86.1.
Picture 86.1.
Picture 86.1.
Picture 86.1.
Picture 86.1.
Picture 86.1.
Picture 86.1.
Picture 86.1.
Final View
This is the result I so satifact for this!
========== learned/conclusions ==========
Well, in all this assignment it was a great experience because it strengthened my resin application techniques and also allowed me to put into practice some manufacturing criteria. At first it was difficult for me how I was going to glue or join the mesh to the MDF structure, but when I experimented for the first time it helped me to realize in a graphic way and from lived experience that it failed and how I can correct it. I really enjoyed this assignment very much.

.jpg)
.jpg)
.jpg)
.jpg)
.jpg)
.jpg)
.jpg)
.jpg)
.png)
.png)
.png)
.png)
.png)
.png)
.png)
.png)
.png)
.png)
.png)
.png)
.png)
.png)
.png)
.png)
.png)
.png)
.png)
.png)
.png)
.png)
.png)
.png)
.png)
.png)
.png)
.png)
.png)
.png)
.png)
.png)
.png)
.png)
.png)
.png)
.png)
.png)
.png)
.png)
.png)
.png)
.png)
.png)
.png)
.png)
.png)
.png)
.png)
.png)
.png)
.png)
.png)
.png)
.png)
.png)
.png)
.png)
.png)
.png)
.png)
.png)
.png)
.png)
.png)
.png)