* Design a machine that includes mechanism+actuation+automation
* Build the mechanical parts and operate it manually
* Document the group project and your individual contribution
* Actuate and automate your machine
* Document the group project and your individual contribution
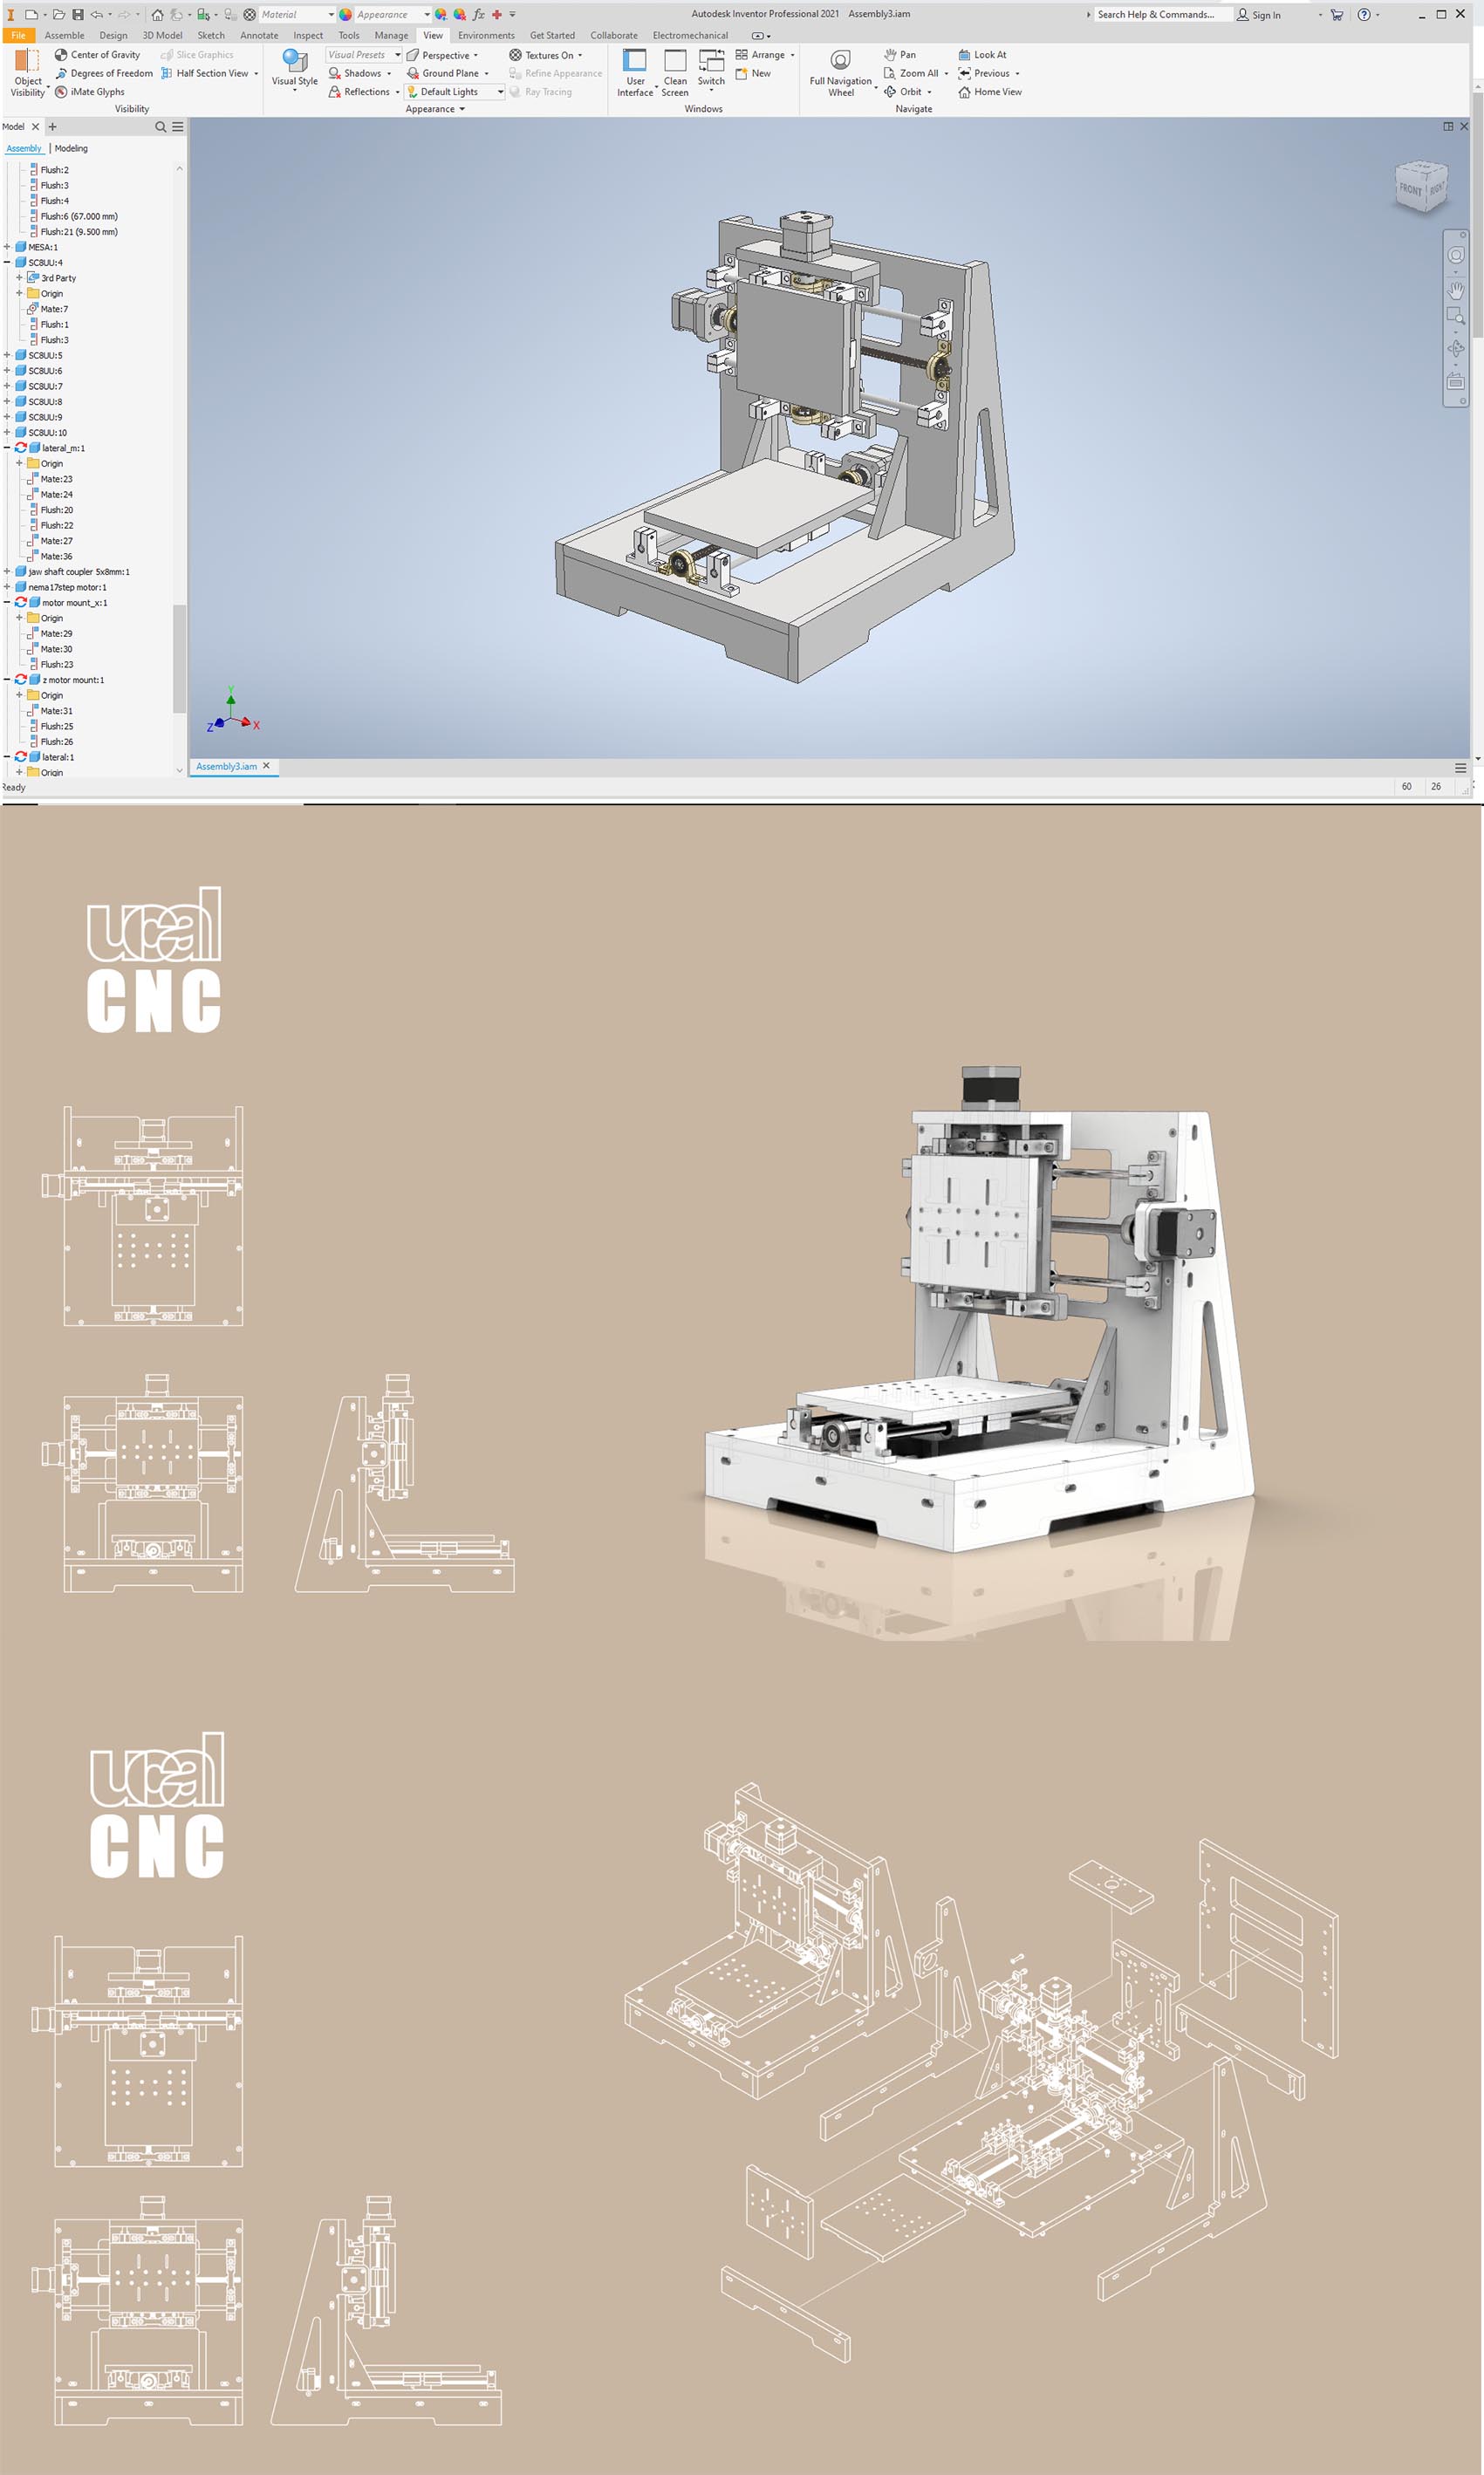
This Mini drawing machine will draw geometric figures or letters.
| Electronics |
Mechanical Materials |
| .Arduino UNO |
Stainless steel rods |
| .03 Drivers DRV 8805 |
T8 Load screw and nut |
| .12v Power Supply |
T8 Nut support |
| .Servo motor |
Lineal bearings |
| .Grbl CNC Shield |
SK8 |
| 100mm Stepper motor |
Stepper motor |
|
Flexible coupling |
|
Washer |
|
Bolts |
|
Lock nuts |
In summary
I participated in the design of the structure of this CNC machine together with Manuel and with the help of my instructor,
Wilhelm Schütze. I was in charge of the assembly, of course Manuel also helped, I designed several iterations for the pencil holder, I also helped with the installation of the electronics and wiring and finally I also participated in the tests of the machine.
 STEP 1.
 MATERIALS MILLED IN HDPE AND BOUGTH in a hardware store.
Picture 86..jpg) Picture 86.
Picture 86..jpg) STEP 2.
STEP 2. The Model unfix.
Picture 86.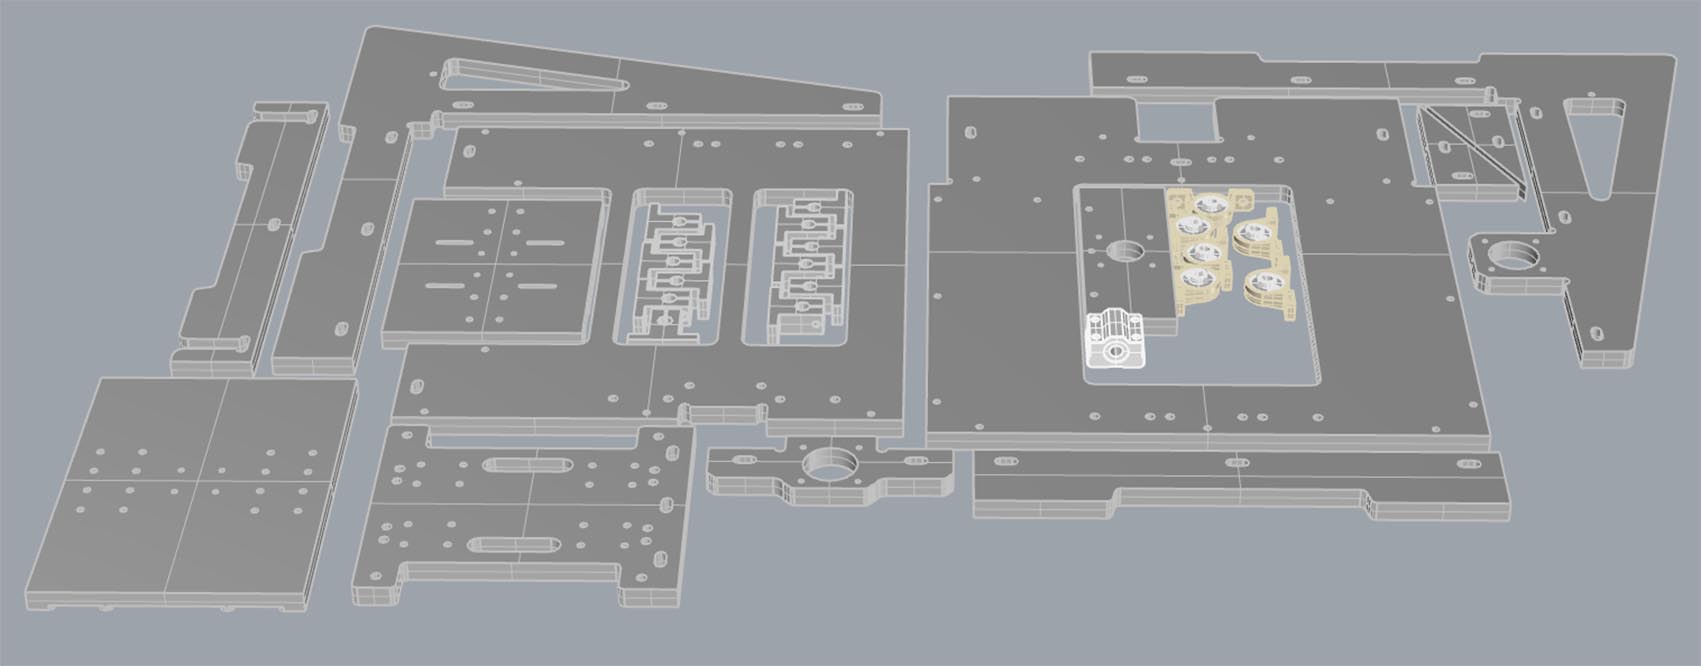
Then we start the cutting process using the Shopbot and HDPE Plastic board. This process was done at UCAL.
Here starting the assembling of the CNC Machine, my partner worked on the design of it due to his ability to work on the CAD Software.
The puzzle of the CNC Machine ready to be assembled.
STEP 3. View of
Picture 86.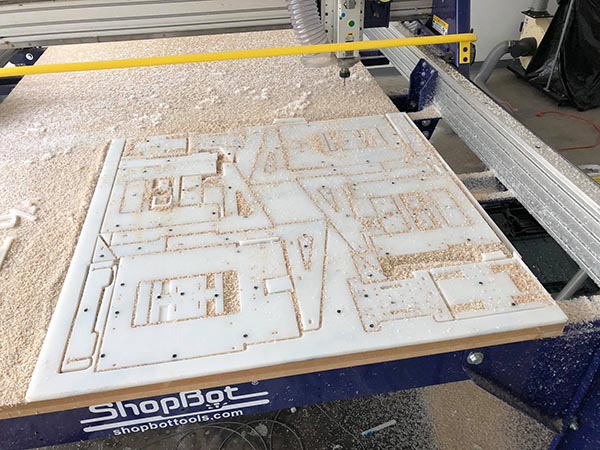
After cutting it in the shopbot we start assembling and we notice some problems to deal with like the order to assemble the different parts.
Picture 86.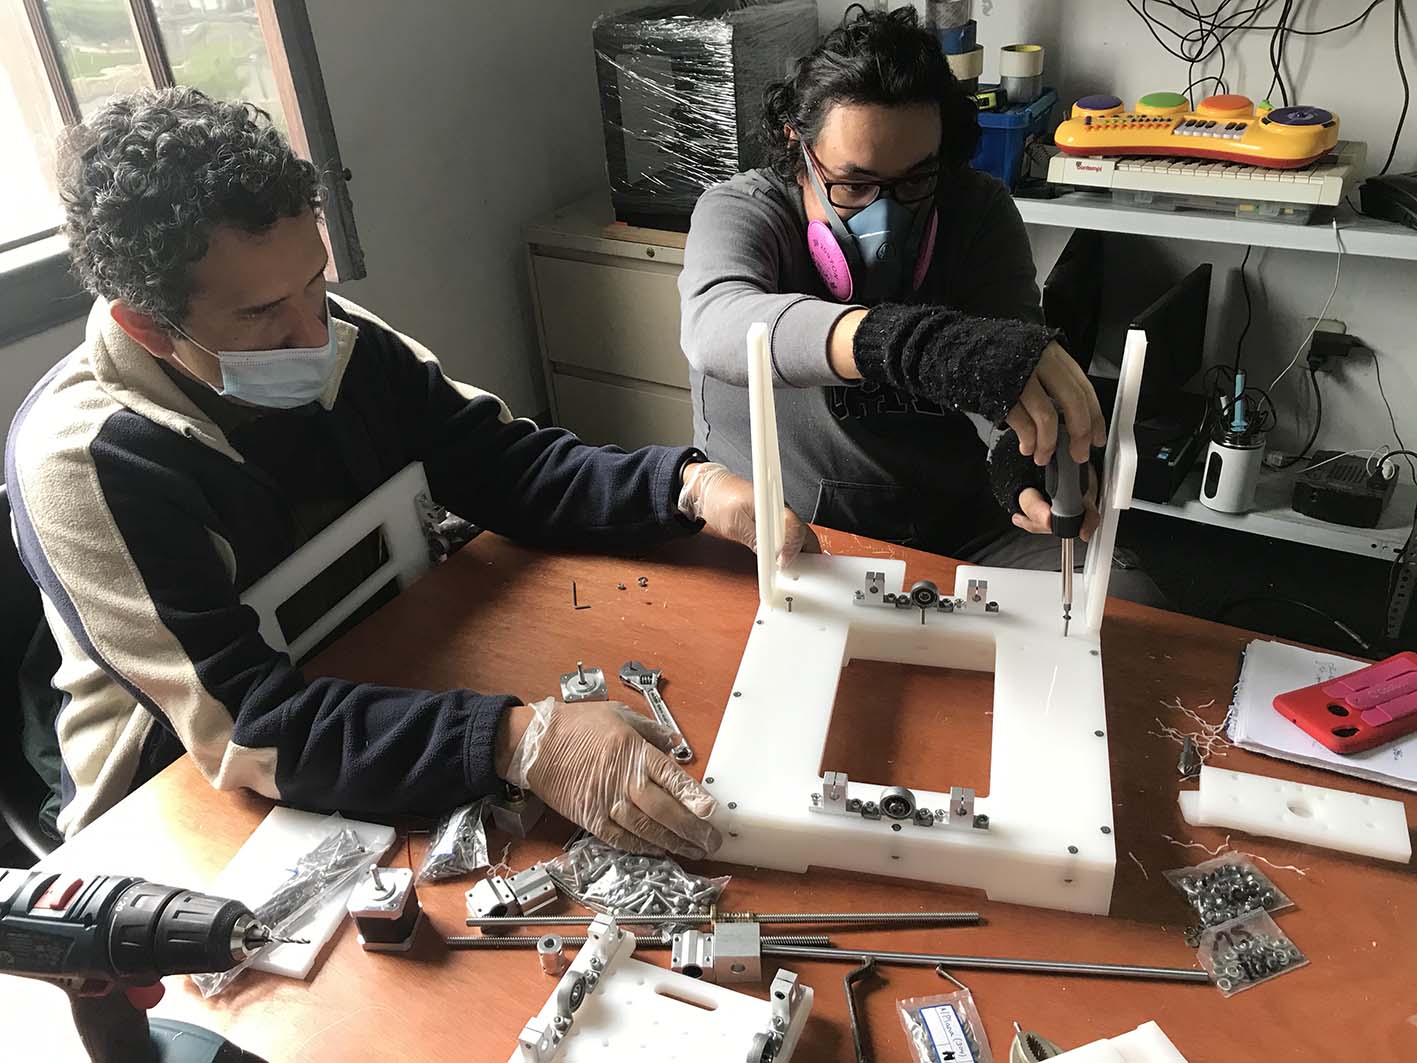 Picture 86.
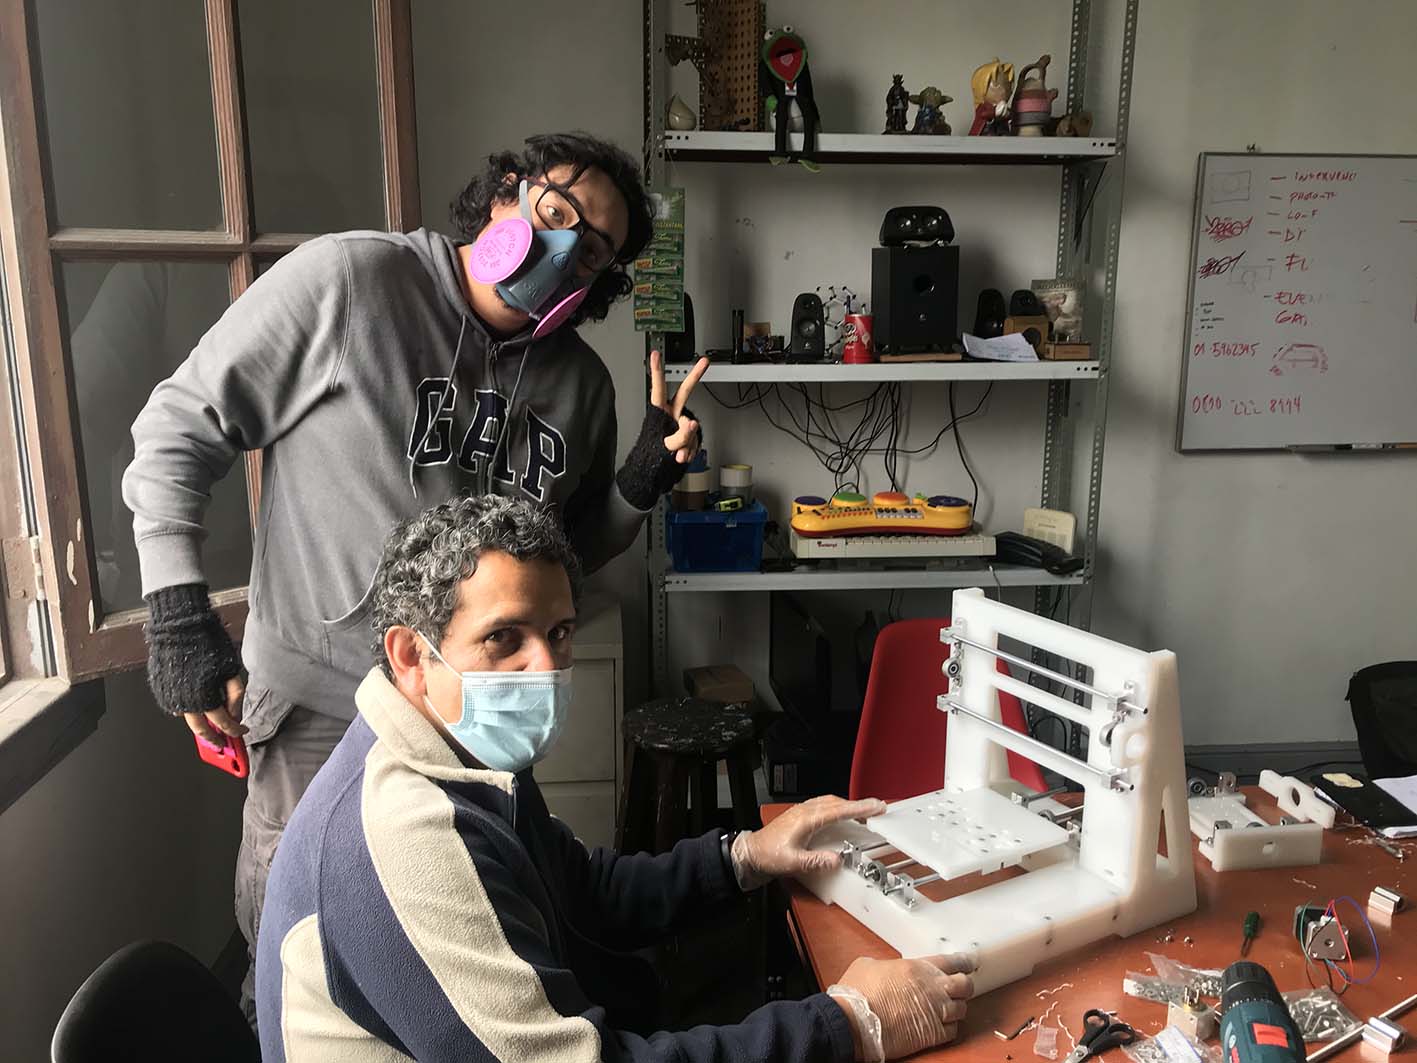
Sometimes we have to disassemble the machine to put it back together properly.
Picture 86..jpg) Picture 86.
Picture 86..jpg) Picture 86.
Picture 86..jpg) Picture 86.
Picture 86..jpg)
As we continue to fix the machine, i found the importance of fix in a specific direction otherwise we used to unfix several times due to some order we need to locate each component of the machine.
Then we need to use an acrylic device to increase the surface in order to screw with the nut. I designed and cut the acrylic pieces.
Picture 86.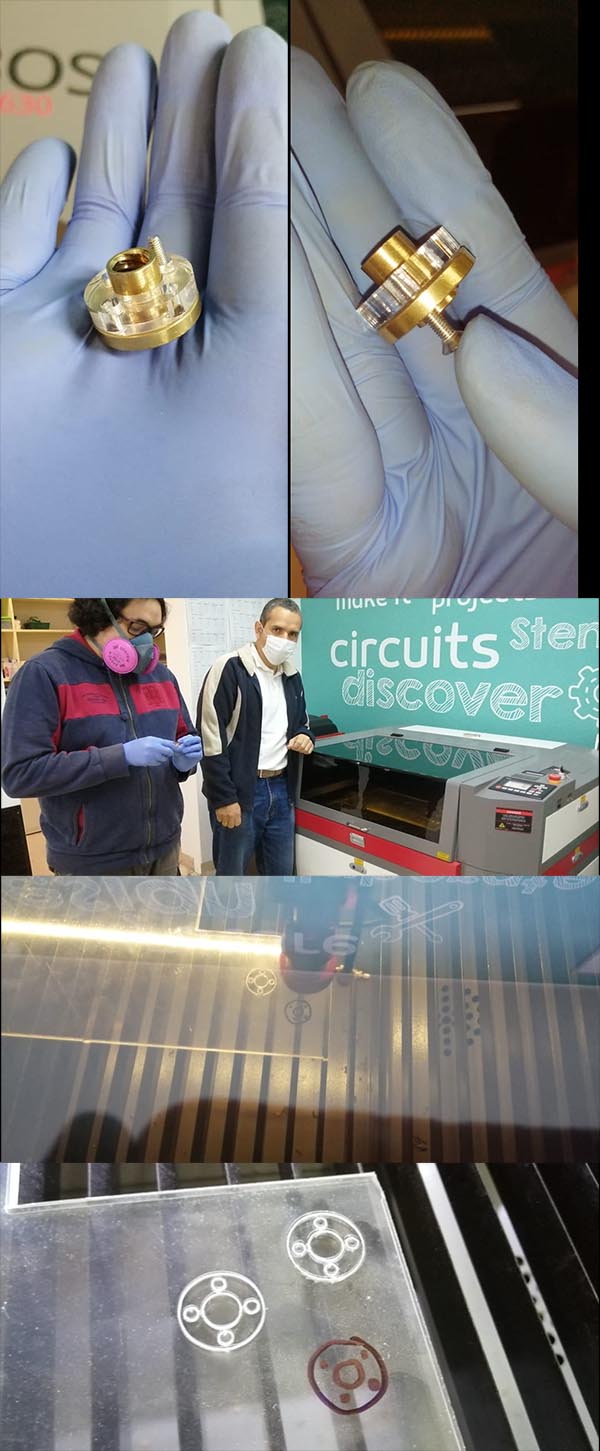
Finally here the Mechanical structure complete. It took aproxomately 3 days to assemble it.
I design the arm 1 that hold the pen. but i need to change the base of the holder in order to attache to the platform of the CNC.
Picture 86..jpg)
New design using Rhino.
Picture 86..jpg)
Printing the pencil holder in a Makerbot Replicator 2.
Picture 86..jpg)
We tried different models of pencil holders to fit with the CNC Machine.
Picture 86..jpg)
Finally the model we chose for the CNC Machine.
Picture 86.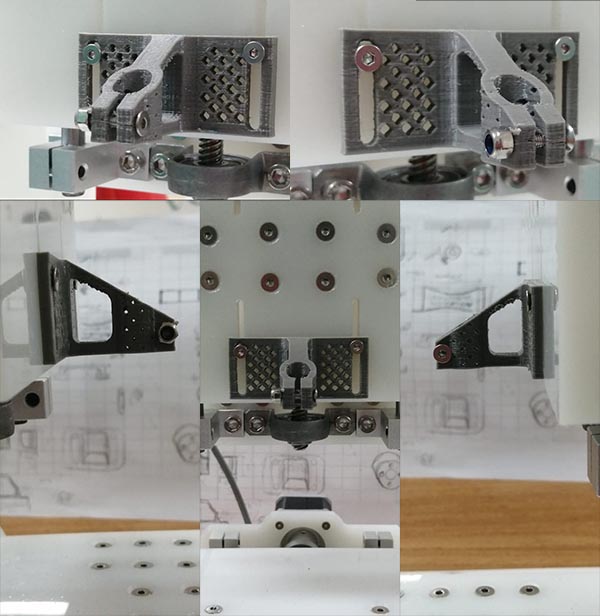
I share you the Pencil-Holder file:
Pencil-Holder-STL
Then we need to program the CNC Drawing machine using the Universal GCODE Sender Java software.
Universal G-Code Sender
Picture 86.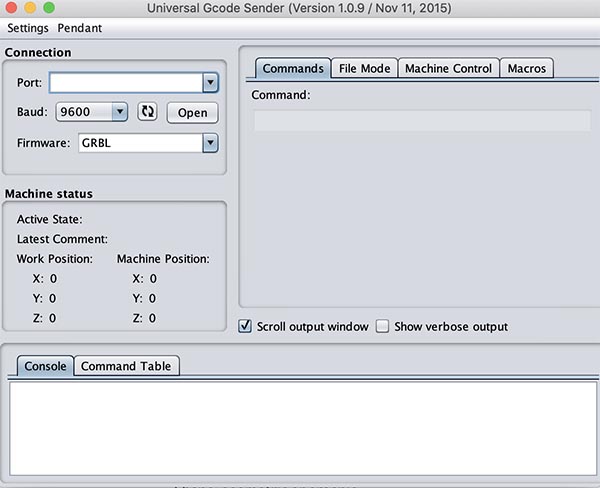
I have to connect the CNC Machine to a port in my Macbook, then setup the zero.
BAUD RATE: 115200.
I used the FABLAB Logo of UCAL to make the drawing.
Here the image of the first drawing with the logo of FABLAB UCAL.
Picture 86.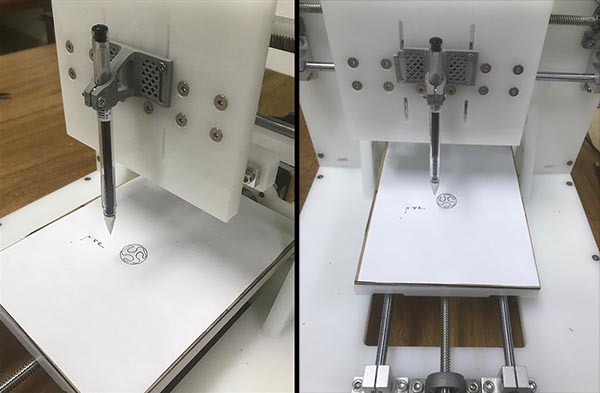
Finally how it works.
========== learned/conclusions ==========
In this course I learned a lot about the use of tools and assembly tricks.
I also learned to enjoy failing! and get this lesson flawlessly there is no learning.
The difficult thing was when we had to connect the moving parts to each other and see that they worked well. calibration and the controller to work, I tell you that we burned drivers when installing them and we learned that they are extremely delicate. Some issues that were encountered while working on the mechanical design were that some of the bolts were two large so we had to cut with a grinder to reduce bolt length and some rods. Another way is to buy screws and rods of the right size.
Problems solved, Some problems solved in group was the design of the pencil / pen holder. Each one decides to design a different one but then we run into some problems considering the diameter of the pencil and how to hold it, if we use a screw or something like a paper clip. We finally decided to use a screw.
This machine can be used by anyone who wants to start learning how it works, the parts it contains and the different elements that can be attached to it such as dremel, cutter, etc.
This was an amazing job for me because it was the first time I built a machine and let it run. It gives me many opportunities to discover how to plan a future machine of my own design and manufacture it at my university, then donate it to the UCAL fablab for posterity.
This task was completely cool for me because of the ability to design a machine and see it working. The assembly of the machine was laborious, but in a group we move faster, it was a unique experience. And I am very grateful to my instructor (sensei) Billy for starting this adventure of making this machine in his workshop and accompanying us step by step from start to finish.
=============== FILES ===============