Nice if we can control Arduino using some GUI controls (eg buttons) or represent sensor results on screen in graph or slider or text box or knobs. It would be very good. It's not like that?
In this week I will learn to create my own GUI using the Processing program and I will be able to control output devices or even more amazing things with Arduino!
WHY I USE PRCESSING?
I use processing because is a flexible software sketchbook and a language for learning how to code within the context of the visual arts. Processing is very useful platform for hobbyists, researchers, students for learning and prototyping. Some of the features are:
- Free and open source
- For all platforms (GNU/Linux, Mac OS X, Windows, Android, and ARM)
- Well documented
- Many libraries
- Good community
So I download the both software for Win-64 and install it. Processing is a software that uses the processing language that is based on Java and its interface is very similar to that of the arduino ide.
Below are the steps to downdload and use Processing.
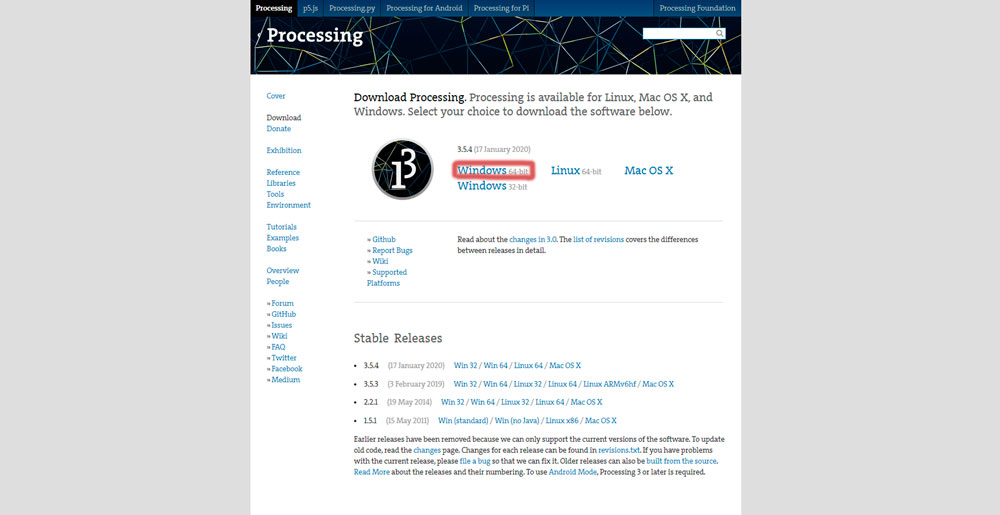
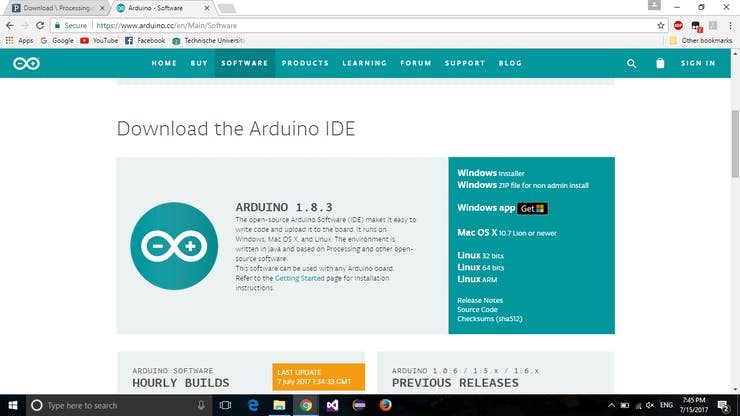
STEP 1. Downdload the Processing IDE
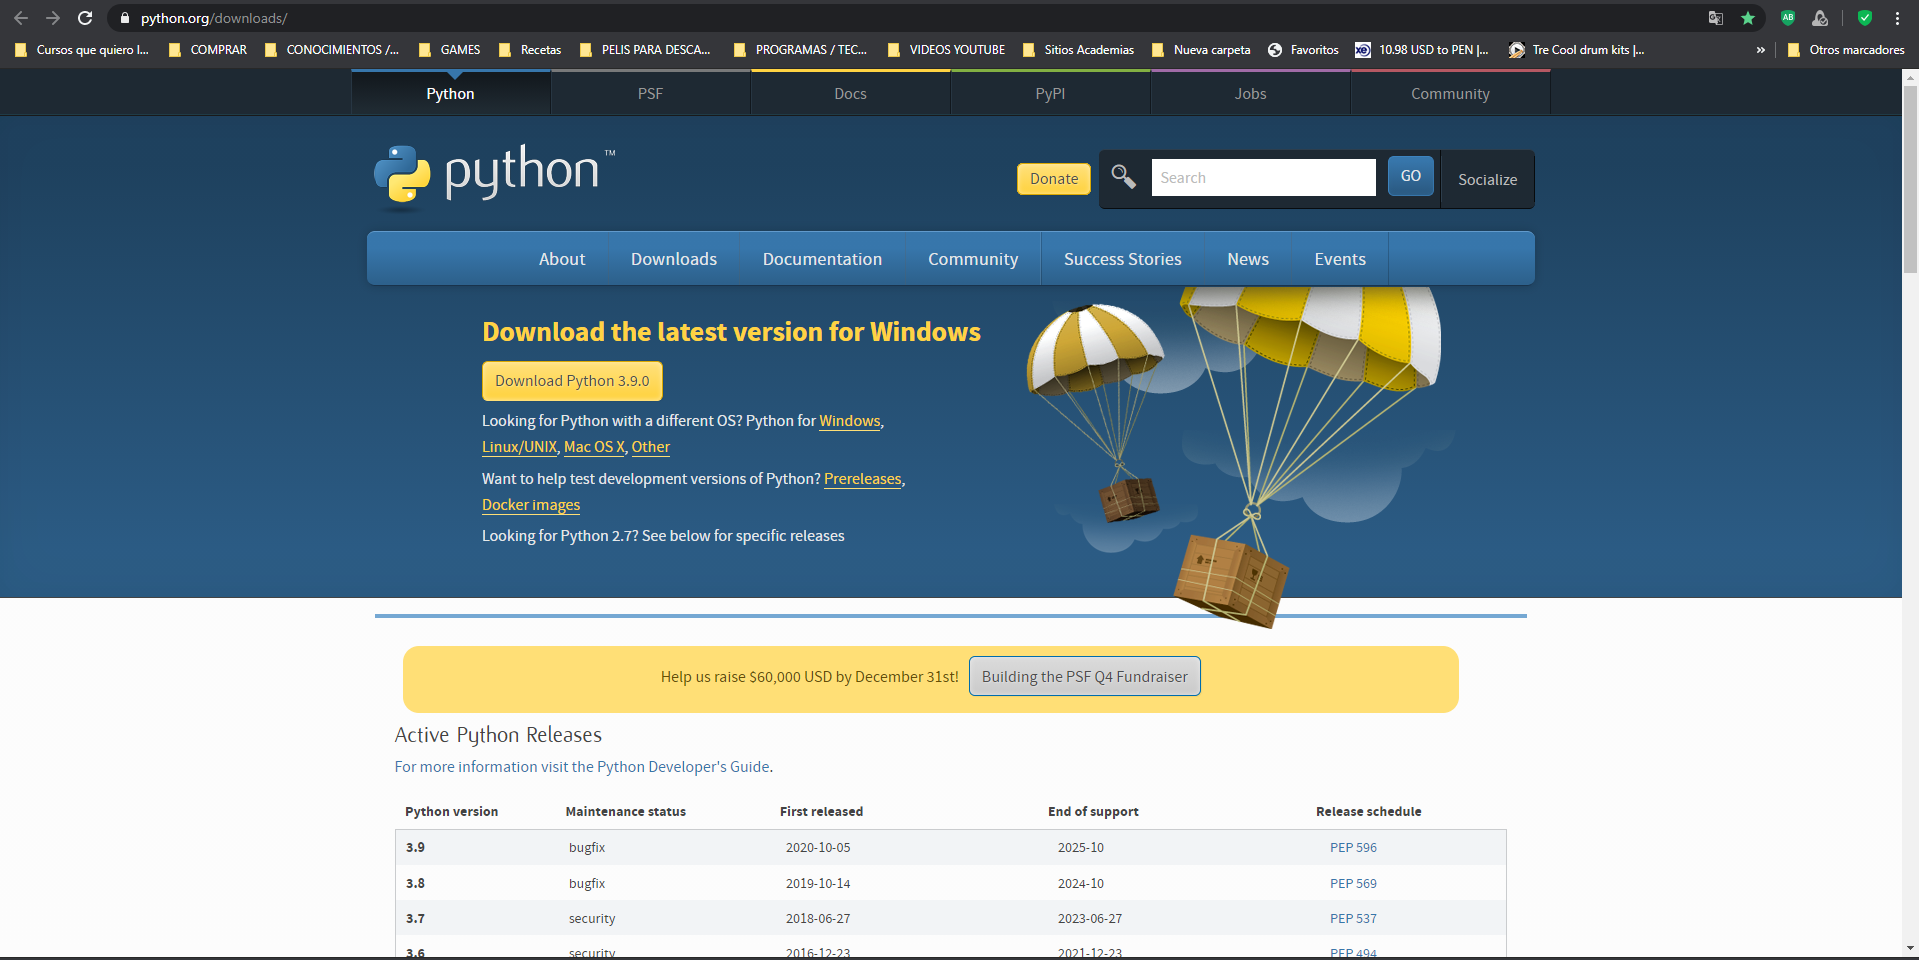
Downdload the last version of Processing IDE and in my case Win-64 and proceed to install, in the zip file that you download it has all the necessary files and libraries so that it can work well in the software Picture 33. This picture shows the website to download the latest version of the software. In my case Win-64
STEP 2. Running Processing
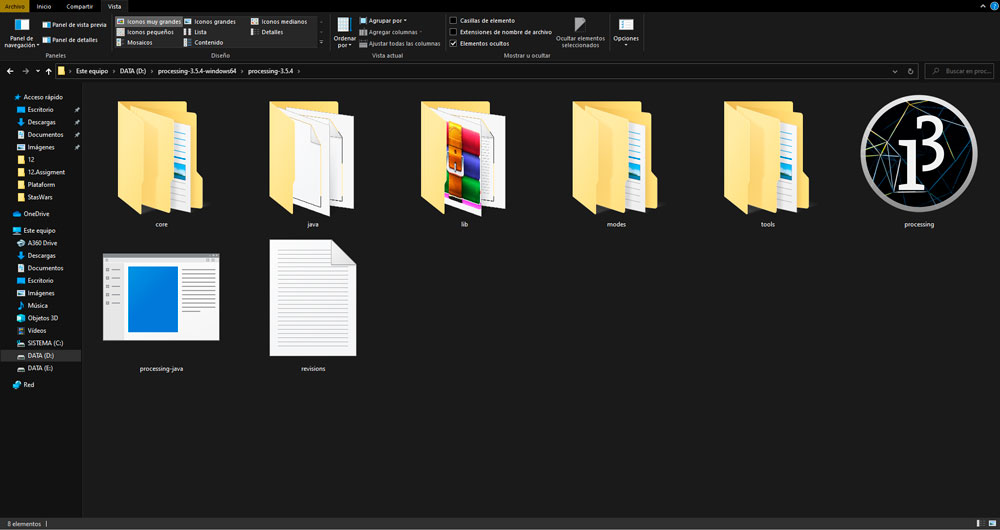
When you click on download Processing, it downloads one zip file. Unzip that file and inside the unzipped folder you will find Processing application (see the following image). And to run Processing, double click on the icon that says Processing. Picture 33. Double click on this icon.
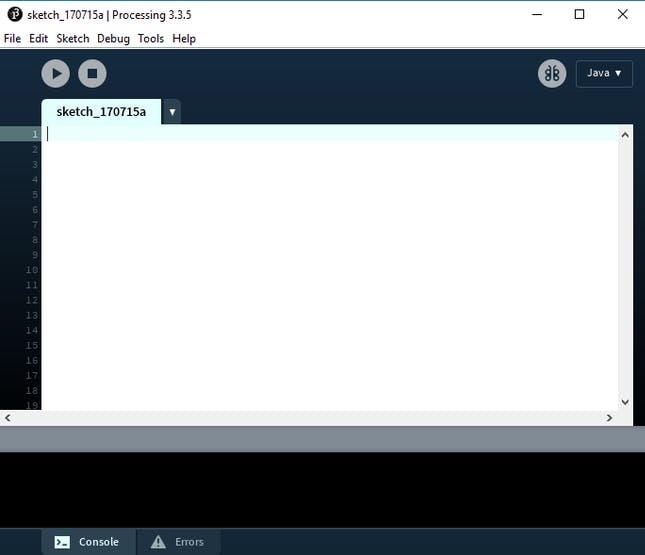
Picture 33. This will have to come out. Welcome to Processing IDE!.
STEP 3. Downdload a library
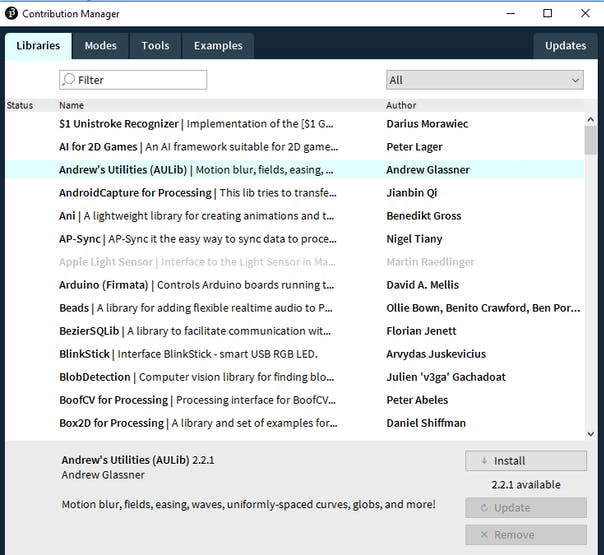
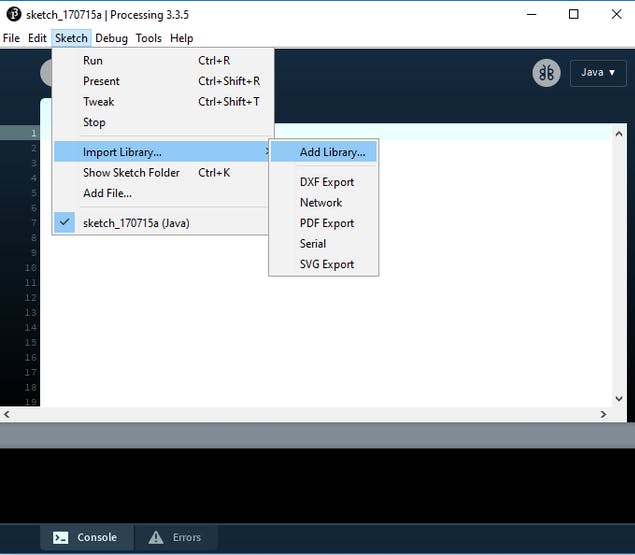
There are many libraries for different applications. You can also install some extra libraries manually or directly from the menu. I show you. Picture 33.1. To install new library from menu, go to: Sketch -> Import Library... -> Add Library...
STEP 4. Learn to design in Processing IDE
I open the Processing IDE and looking at tutorials I will try to learn how to use it. Following the video tutorial I start to create and practice what I can do in Processing.
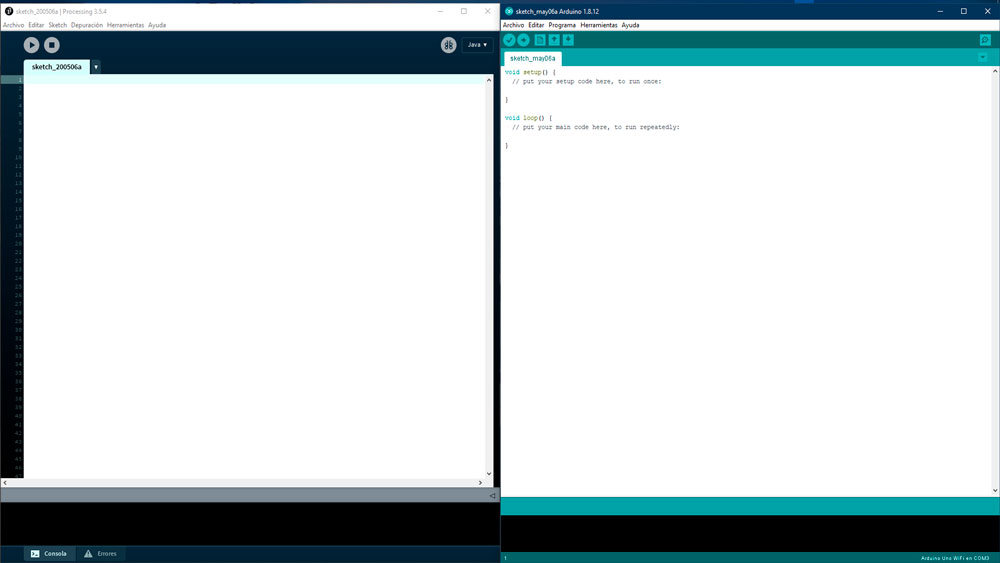
Picture 34. I open Processing and see that the program is similar to the Arduino IDE. Picture 34.1. Well I think to do a simple exercise for practice and learning
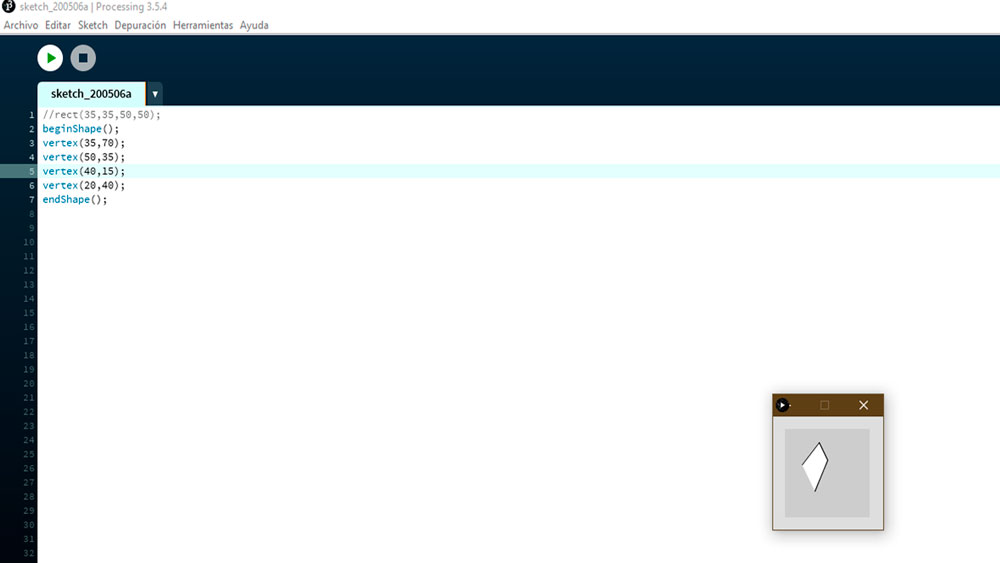
First I write this code to create some shape or geometry in Processing, in my case I decide to draw a random geometry to have a little fun, in the photo below you can see my figure that I draw.
To draw a rectangle: rect(a,b,c,d);
To draw an ellipse: ellipse(a,b,c,d);
a — X (horizontal) location of the shape's upper-left corner
b — Y (vertical) location of the shape's uppper-left corner
c — width of the shape
d — height of the shape
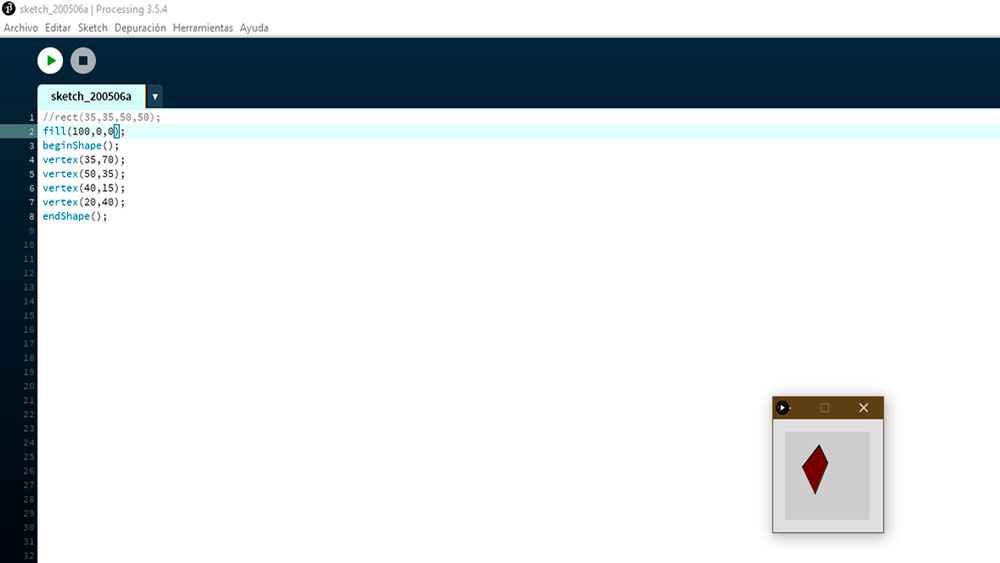
Set the background color: background(r,g,b);
Set the outline color: stroke(r,g,b);
Set the interior color: fill(r,g,b);
Don't forget, you need to call stroke() and fill() before you draw the shape!
r — amount of red, from 0 (none) to 255 (maximum)
g — amount of green, from 0 (none) to 255 (maximum)
b — amount of blue, from 0 (none) to 255 (maximum)
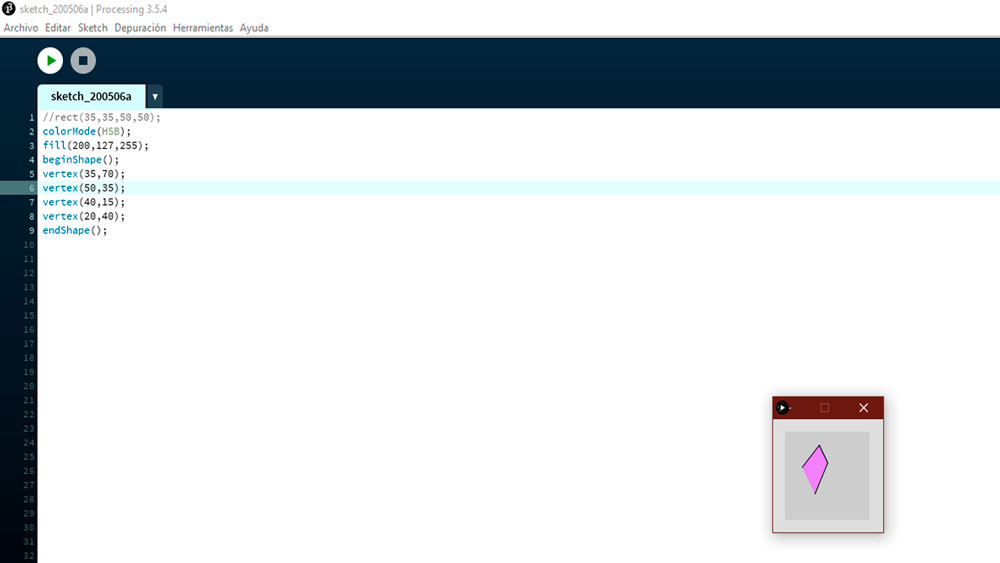
I in this step I learn to put color in my draw.
Picture 35. Picture 35.1.
> In this part, I learn to change the dimension to the canvas (the canvas is the small window that appears after clicking to preview your drawing) and put a some text to.
Picture 35.2.
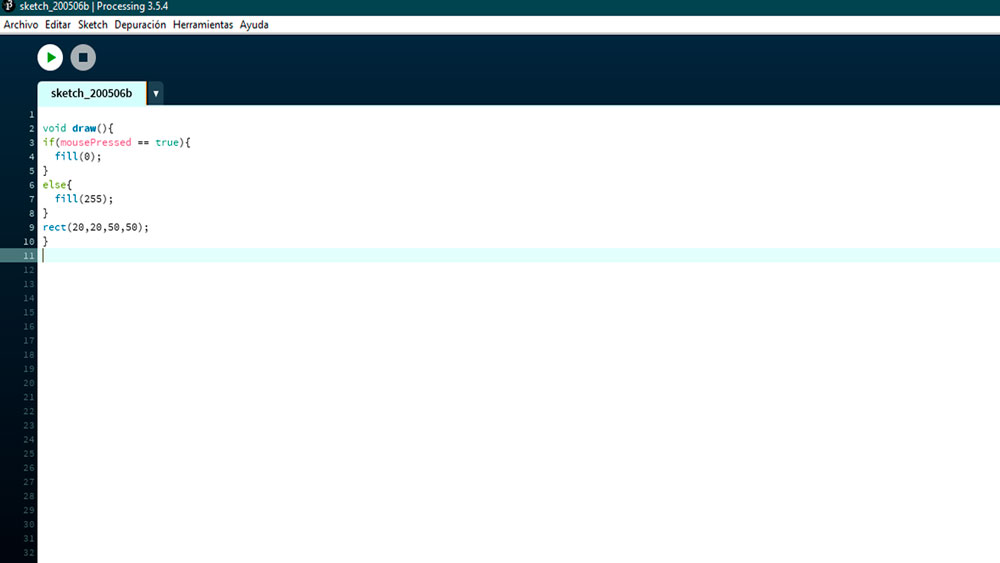
I learn my first interaction, This interaction const in click over the square for to the square change it's color.
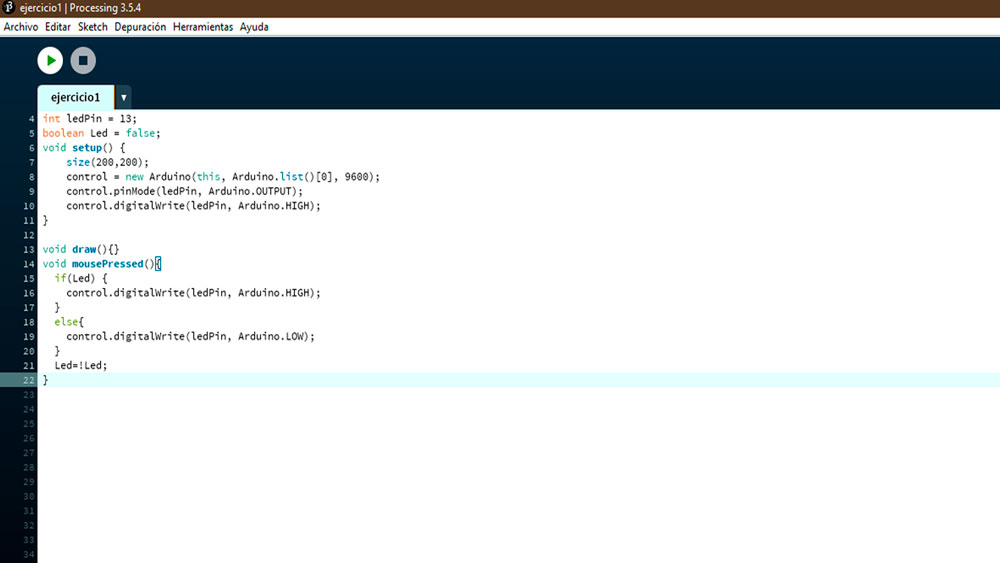
In this part I learn to conect an Arduino and Processing. This example const in blink a LED when I click over the canvas.
Picture 37.
Process to link both programs.
Video
========= Exercise 1 =========
For a practice for me to learn more efficient this program Processing; I draw an alien creature with made of ellipses and rectangles.
I write a code in processing and draw my alien idea. View of my alien.
-the files are at the end of this page.
========== Exercise 2 ==========
After learning to use and create in Processing I decided to do an interaction, I draw a lightsaber and if you over it and click on the blade this change it's color. Below are the steps.
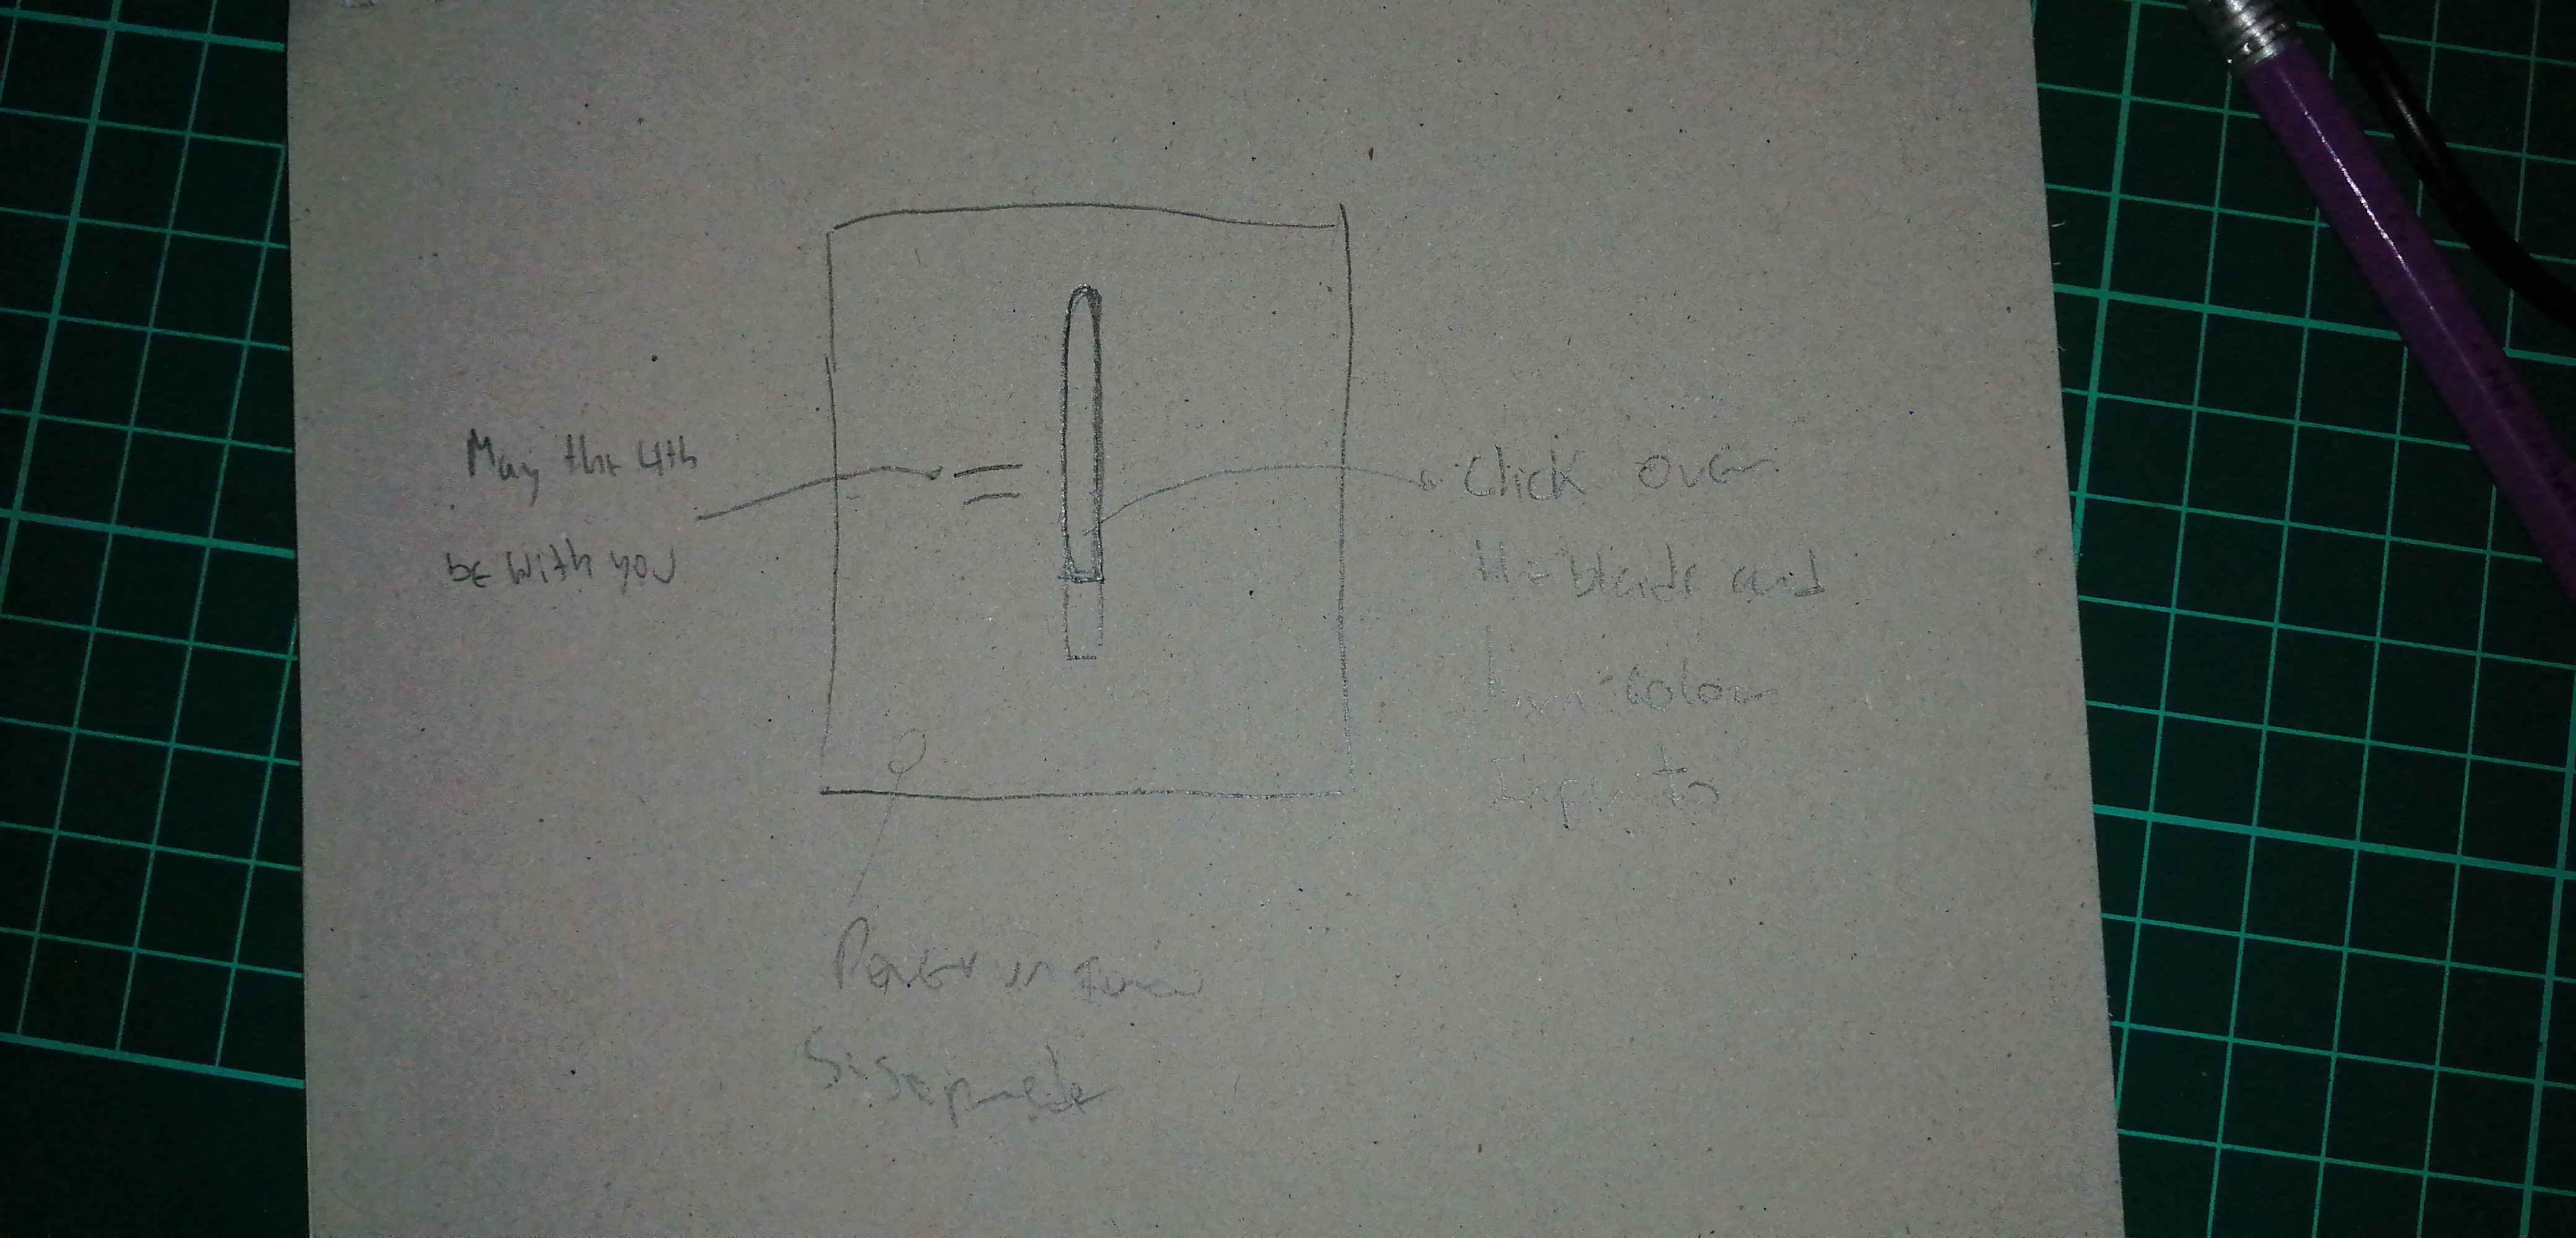
STEP 1. Draw my design in a paper
Picture 40.
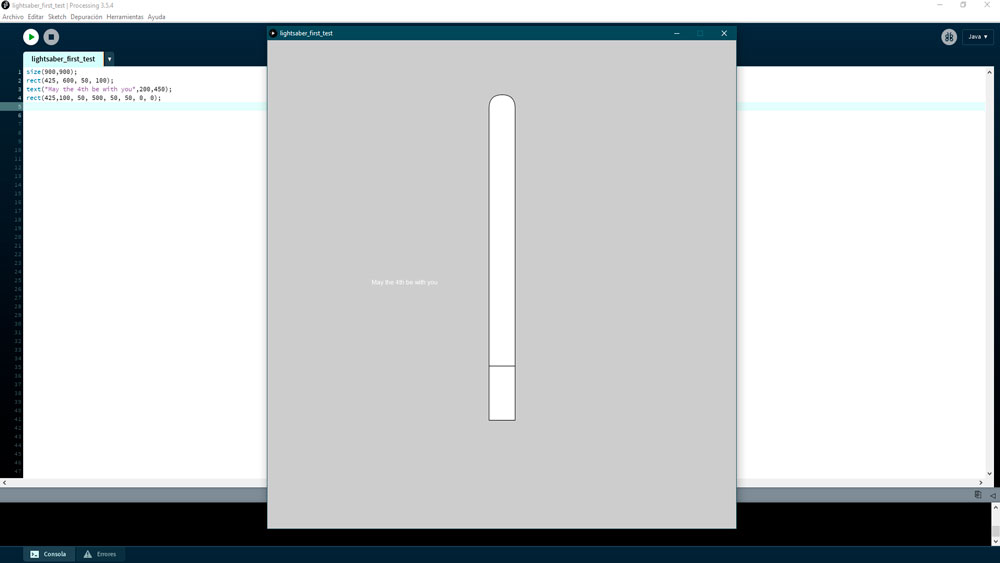
STEP 2. Draw in Processing based in to my paper draw. First I write the size of the canvas. then I type rect (450, 600, 50, 100) 450 is the X position and 600 is the Y position. 50 and 100 are the dimension of my lightsaber hilt rectangle, and finally, I drew the sheet for this, I thought how can I do to draw it and finally it occurred to me to write this code rect (425, 200, 50, 500, 50, 50, 0, 0) calculate the position based on the location of the grip and at the tip of the leaf I rounded it for that reason I put 50, 50,0,0; 50 50 is for the tip to be rounded and 0 0 for it to be straight and fit perfectly with the handle.
Picture 40.1.
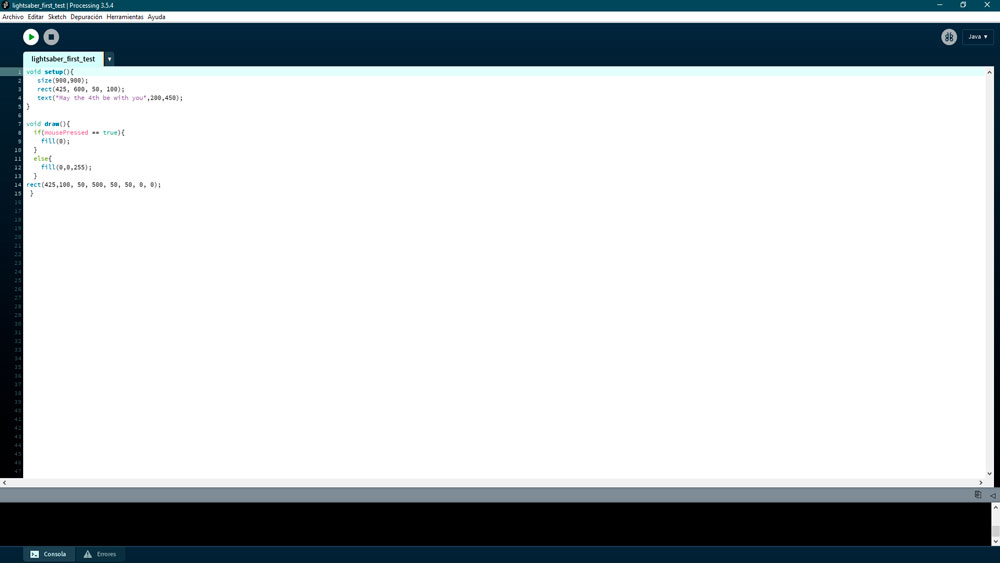
STEP 3. Finish the Draw and codify to the interectuation. Similar than Arduino Processing use the variable void setup, in this variable I put the objects and detail it dont have move orr interectuat. but in the variable voit draw I put all the objects interactuat.
Picture 40.2.
-the files are at the end of this page.
Video
Processing using mouse for change the color of the blade of this Lightsaber from LUIS TOLENTINO.
Group-Task
Research: Compare as many tools as possible GUI.
TASK 1: GUI turn on three LED's with Processing.
For this part, I decid to do a GUI in processing to turn on and turn off three LEDs with Processing.
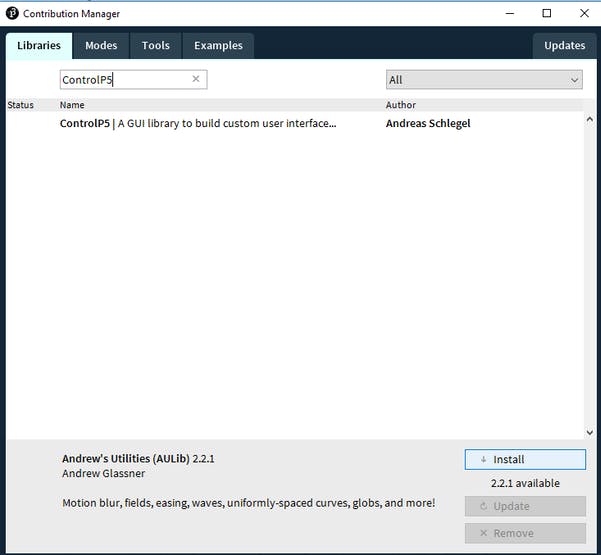
STEP 1. Download and install the libray IP5
But at the moment we are only interested in GUI design. And there is a very nice library called "ControlP5" available to create our project. ControlP5 is a library written by Andreas Schlegel for the Processing programming environment.
Picture 41.0.
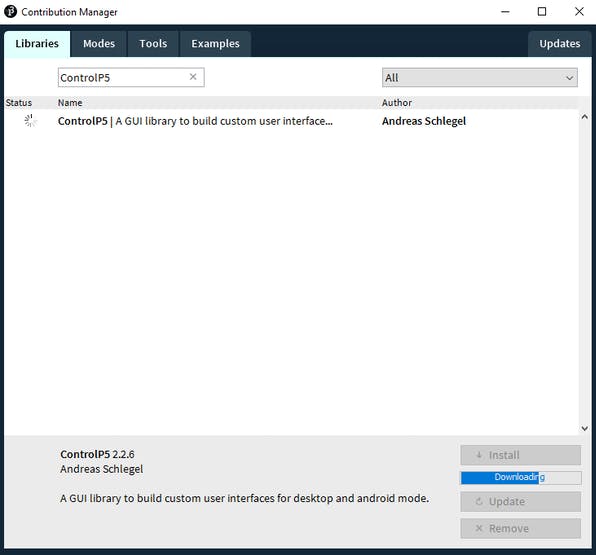
Picture 41.0. To add the ControlP5 library to Processing, just follow the process of adding library and search for ControlP5 and then click install.
Picture 41.1. Now you are ready to create your GUI application.
Once you have installed ControlP5, start with creating simple window.
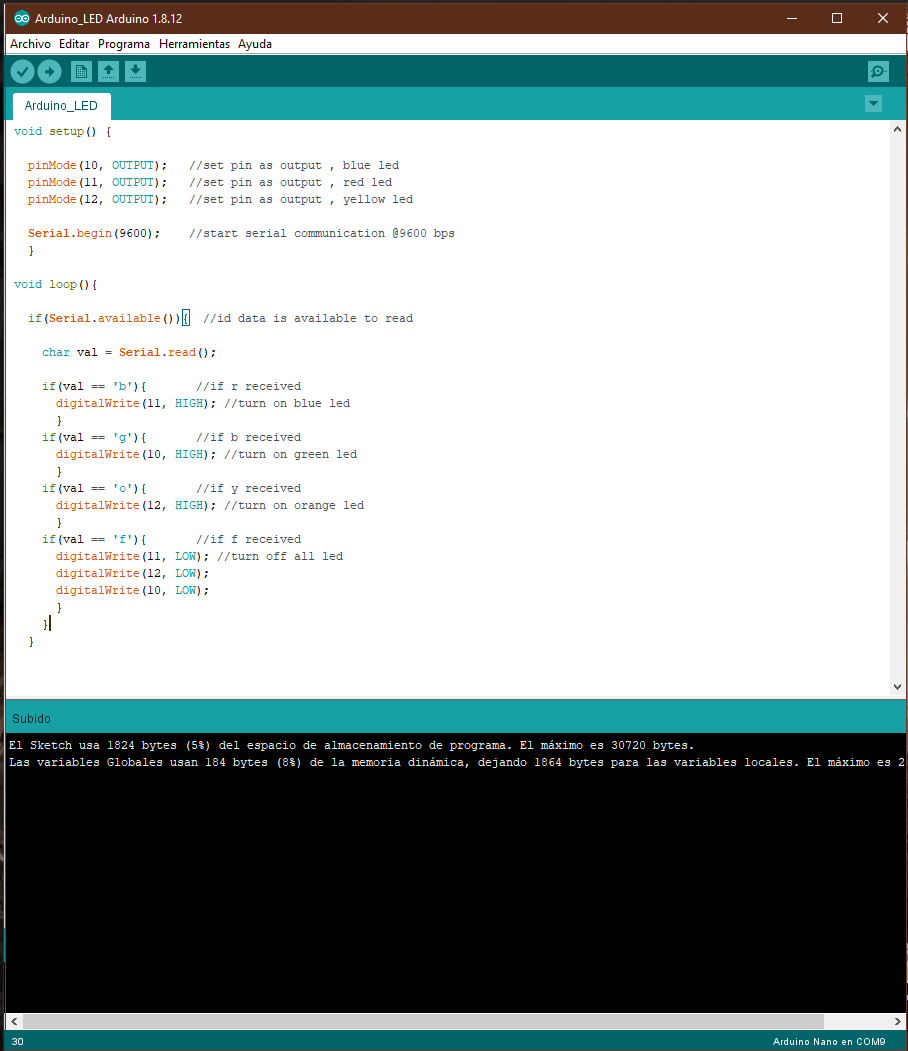
Next step is to write a Arduino sketch. Write a code in such a way that when Arduino receives any character over serial port, it performs some particular task. For example
   if(val == 'r'){           //if r received
                   digitalWrite(11, HIGH); //turn on pin 11 (red led in our case)
                   }
So when Arduino receives char 'r', it sets pin 11 to High. Please check the codes in code section below to get exact idea.
Now comes the Processing part. There is a Serial library in the Processing and we can use that to read and write to the serial port. So what we do now is we assign a function to each of the buttons to send some character to serial port, so when you press any button, it send particular char to the serial port. For example suppose we have a button called red, when you press button red it sends char 'r' to the serial port.
voidred(){
port.write('r');
}
At the other end, Arduino receives that char 'r' and according to the received char it changes state of the pins.
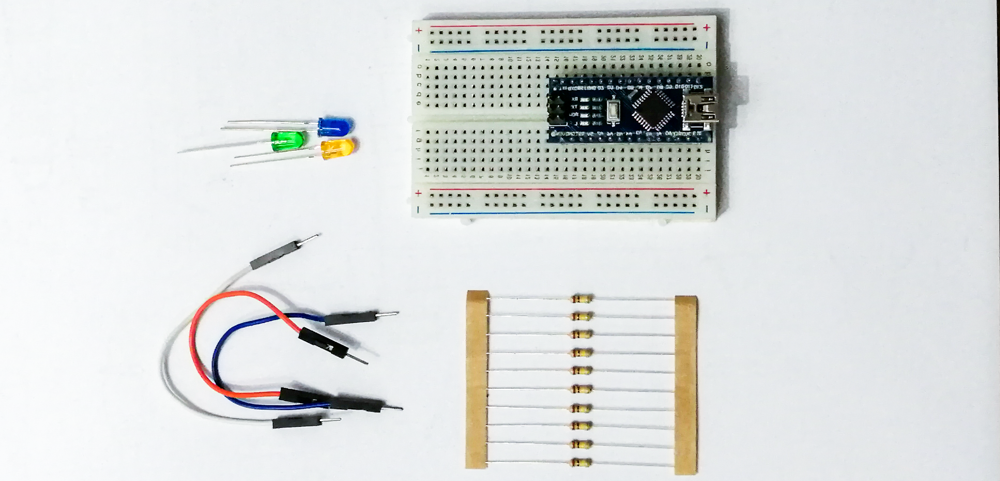
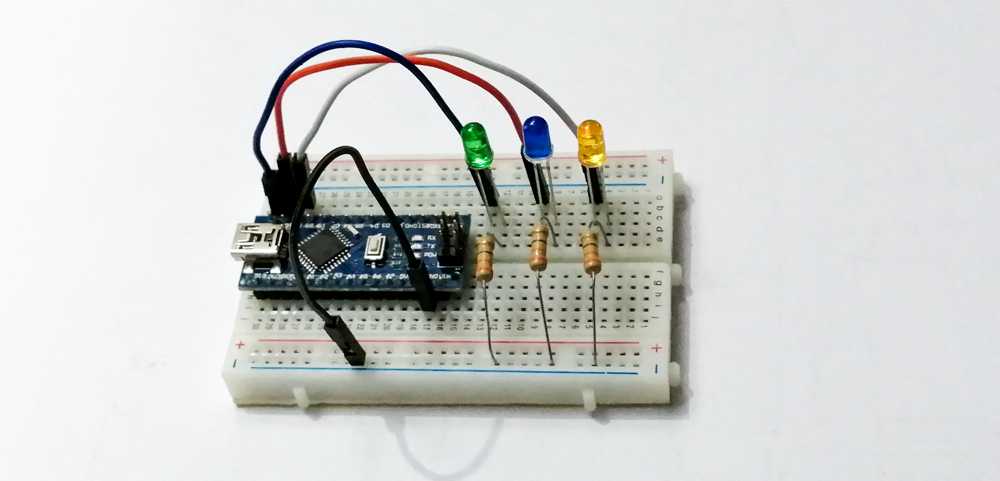
Components and CircuitThis are the materials i used on thes task.
Material
Measures
Arduino NANO
x1
Breadboar (generic)
x1
LED
x3
Resistor 100 ohm
x1
Jumper Wires
x4
Picture 41.2. This are the componets i need to use on this project.
The code is in the File section at the end on this page. There you will find code for both, Arduino and Processing.
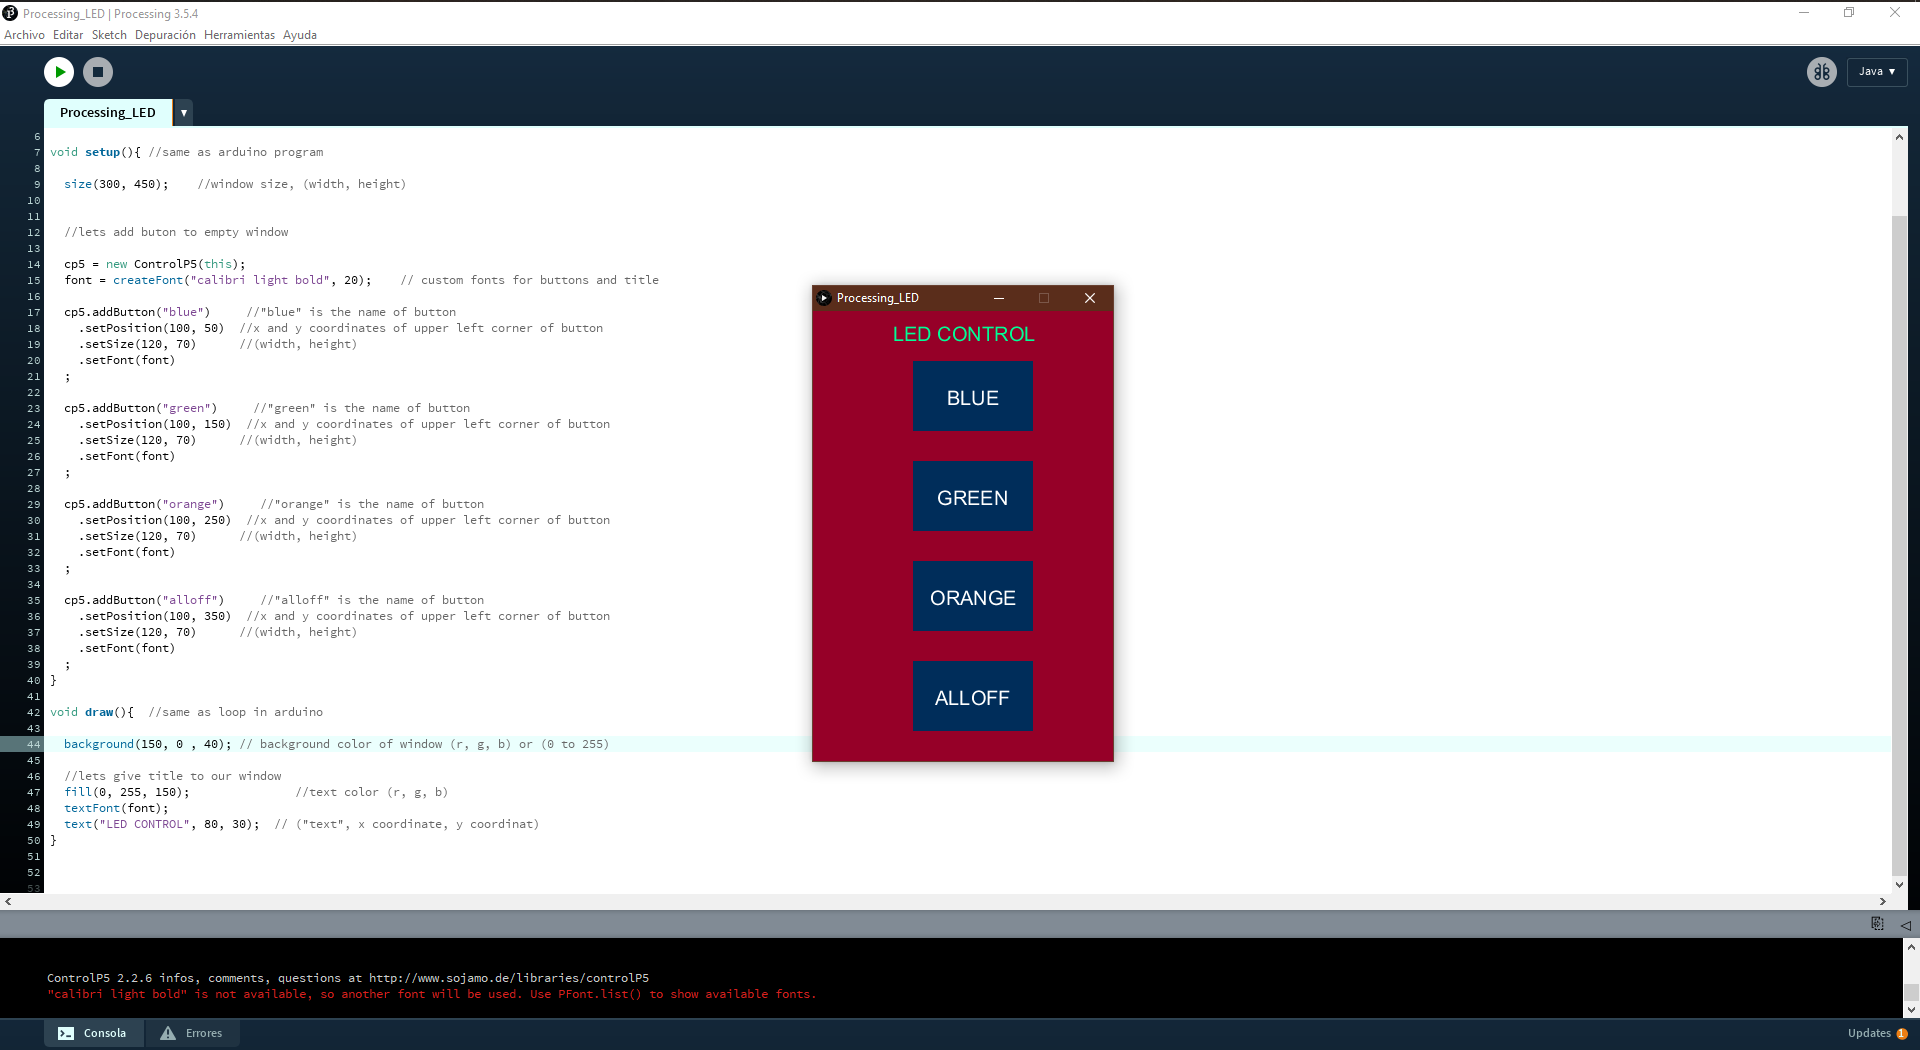
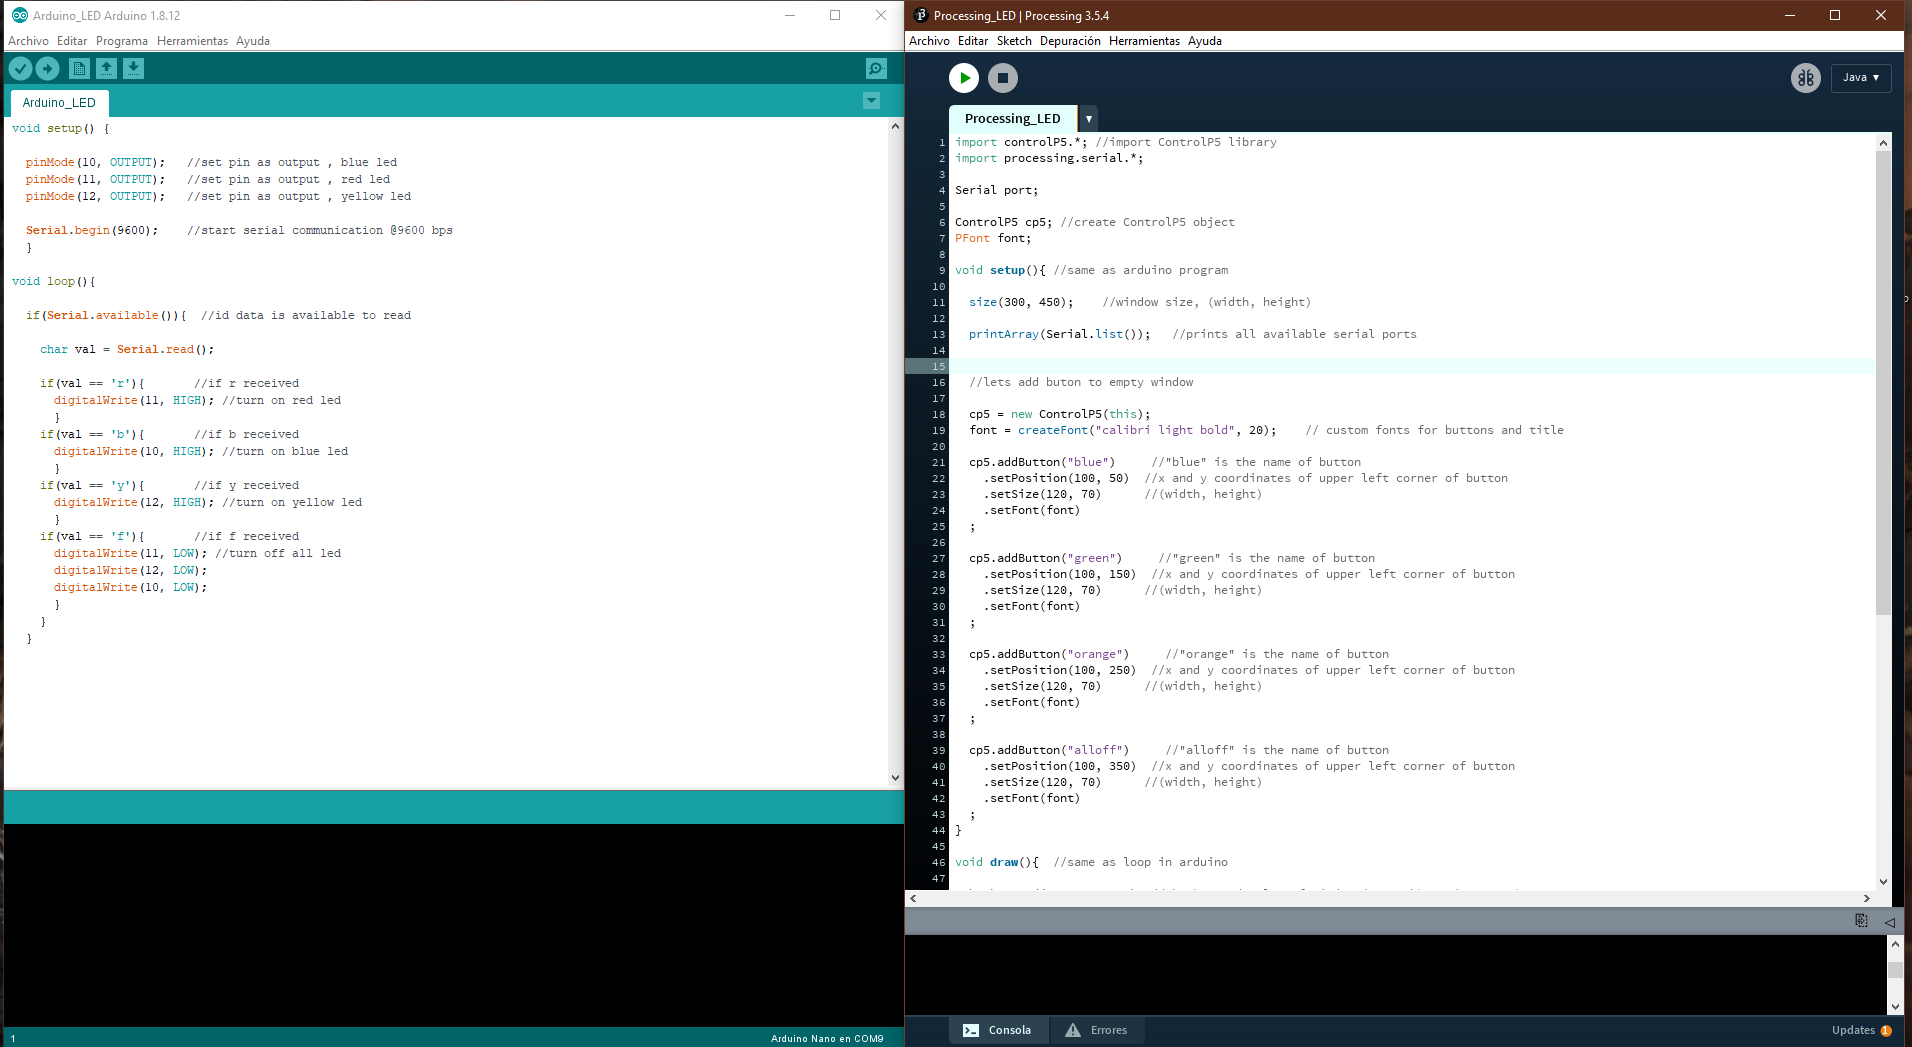
STEP 1. First I write the Processing code, beacuse you create here the names to link the processing to the arduino.
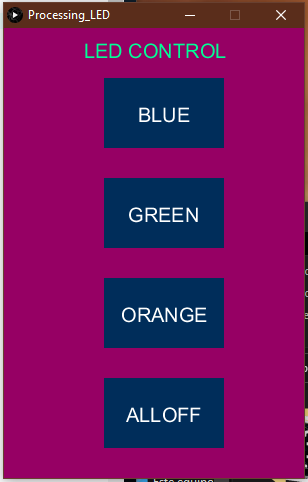
Picture 42.3. This part is the most diffult. Because you design the GUI used the library IP5.
Picture 42.3. The processing window will look like the image below.
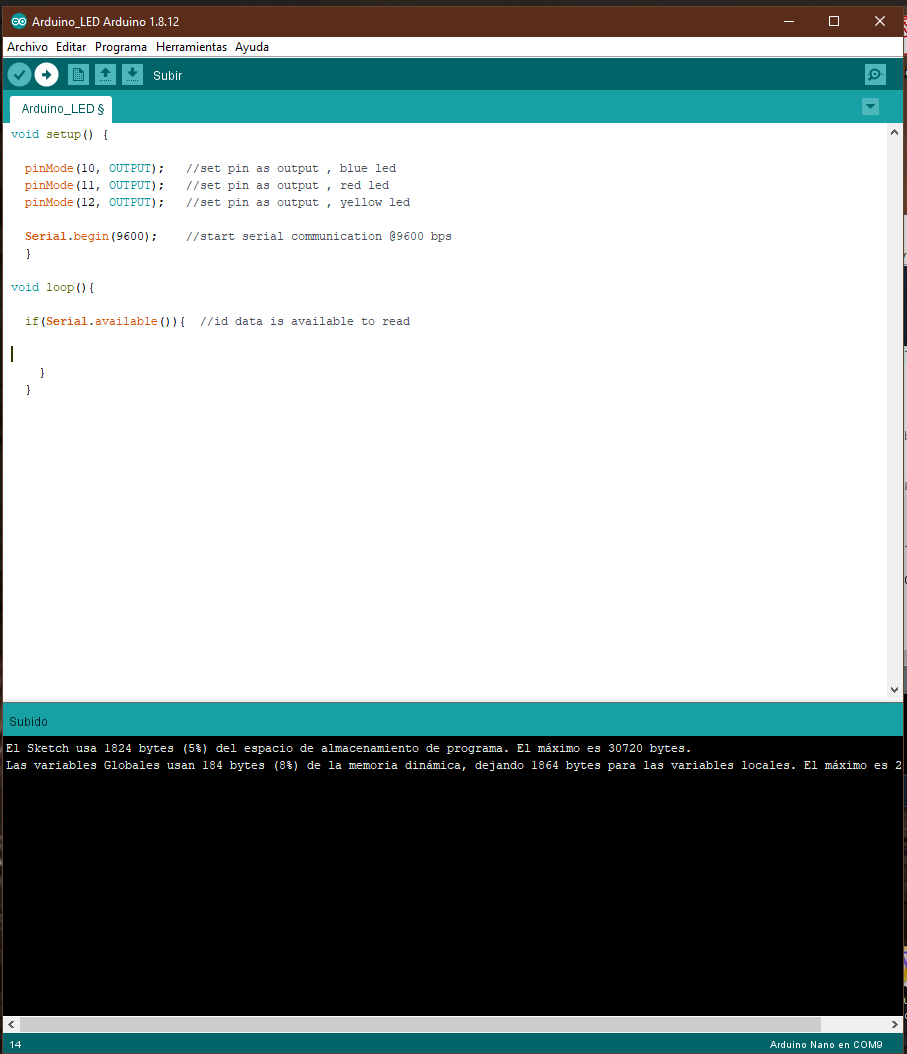
STEP 2. Second is write the Arduino code.
Now I link the Processing code to the arduino to control the circuit.
Picture 42.3. Create a Arduino sketch so that we can control Arduino pins by sending some characters throgh serial. This part is more easy.
Picture 42.3. When I finish I upload the code to the Arduino Nano.
STEP 3. Add functions to each other.
Add functions to each button when we click any button, it sends a particular Character to the serial port, so when Arduino receives that char, it turns on or off LEDs based on char.
Picture 42.3. I link it both IDE's.
STEP 4. Creating Circuit. Picture 42.3. I assemble the circuit.
This are a view of my interaction. Video 1*.
TASK 2: GUI controled Servo Motor with Python.
I research the interface between Python and Arduino.
For this part, I decid to do a GUI in Python to control the direction of a servo motro with Python.
Before starting I download Python to my computer. Then I open Visual Studio IDE here I will also have to install Python. With which I can control the Arduino and do this tutorial for install the serial command to python.
Picture 41.1. First I download the latest version of Python
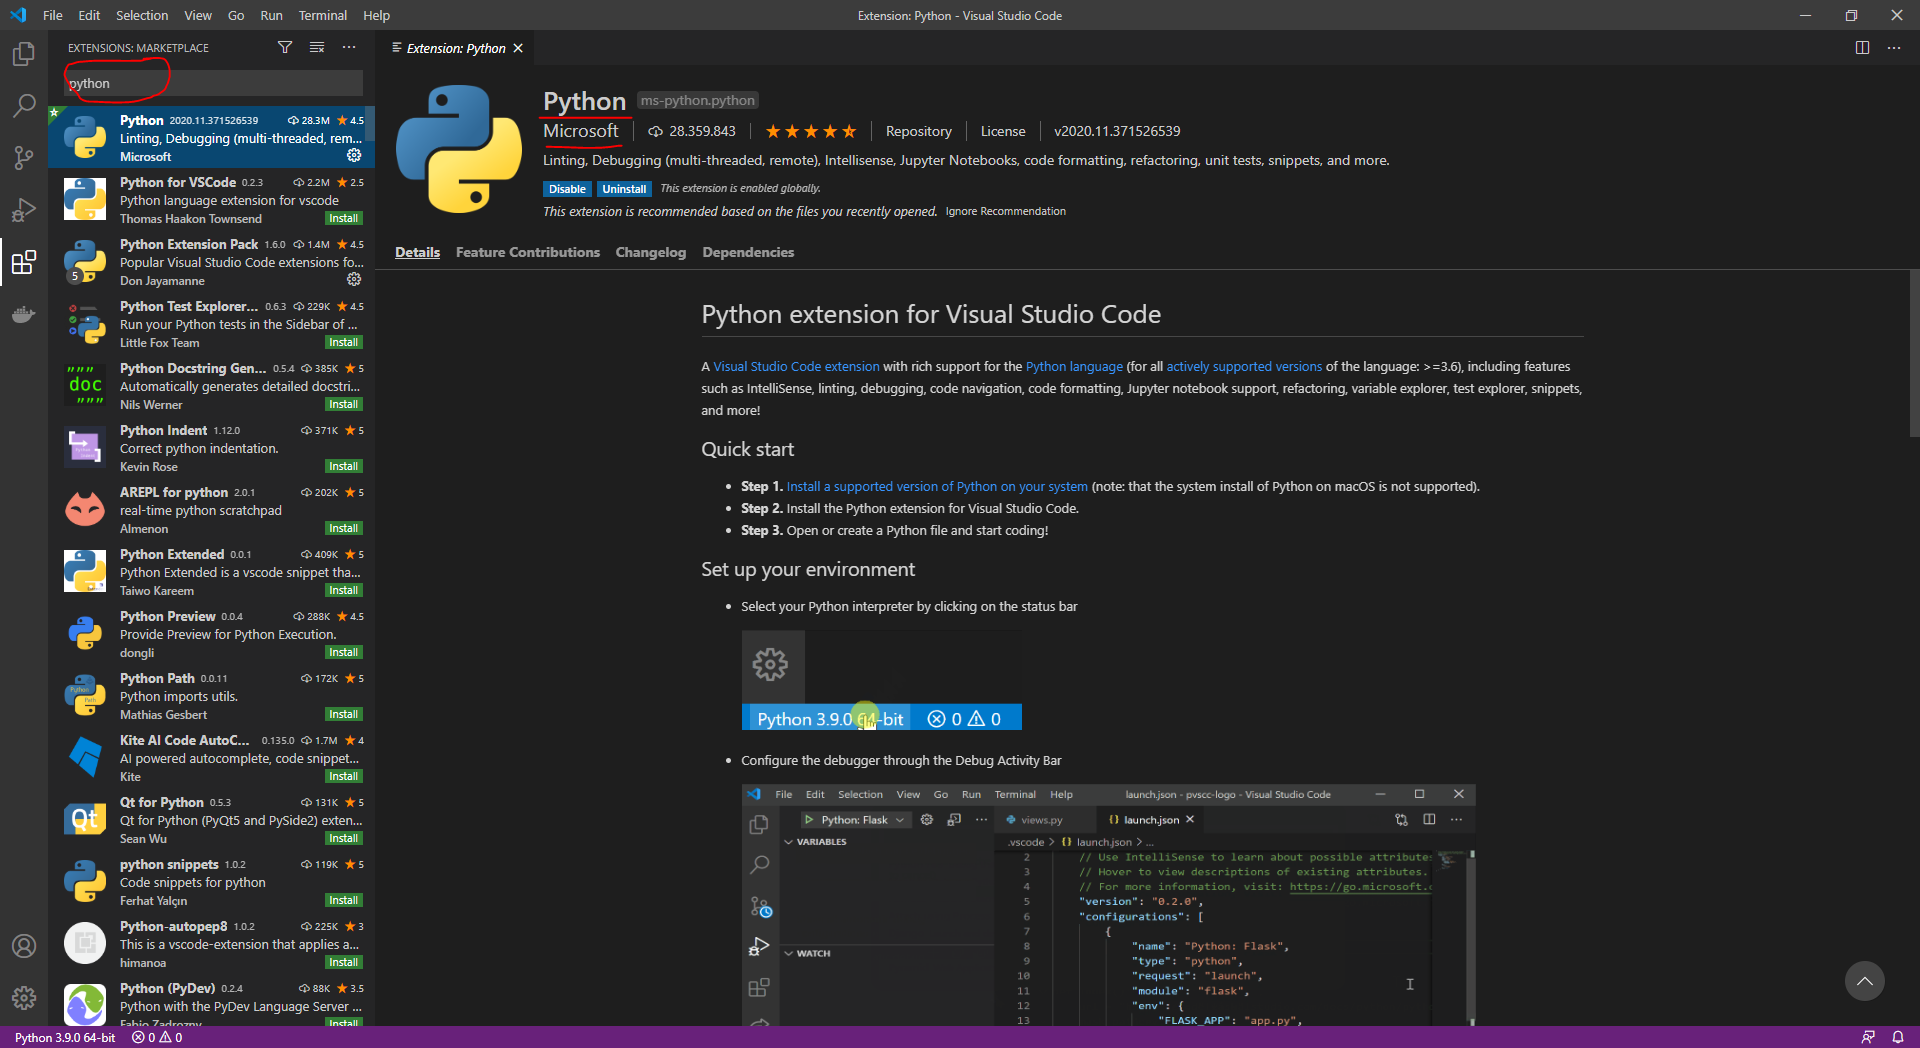
Picture 41.1. Next I open Visual Studio and search the extencion Python. Like the Picture below.
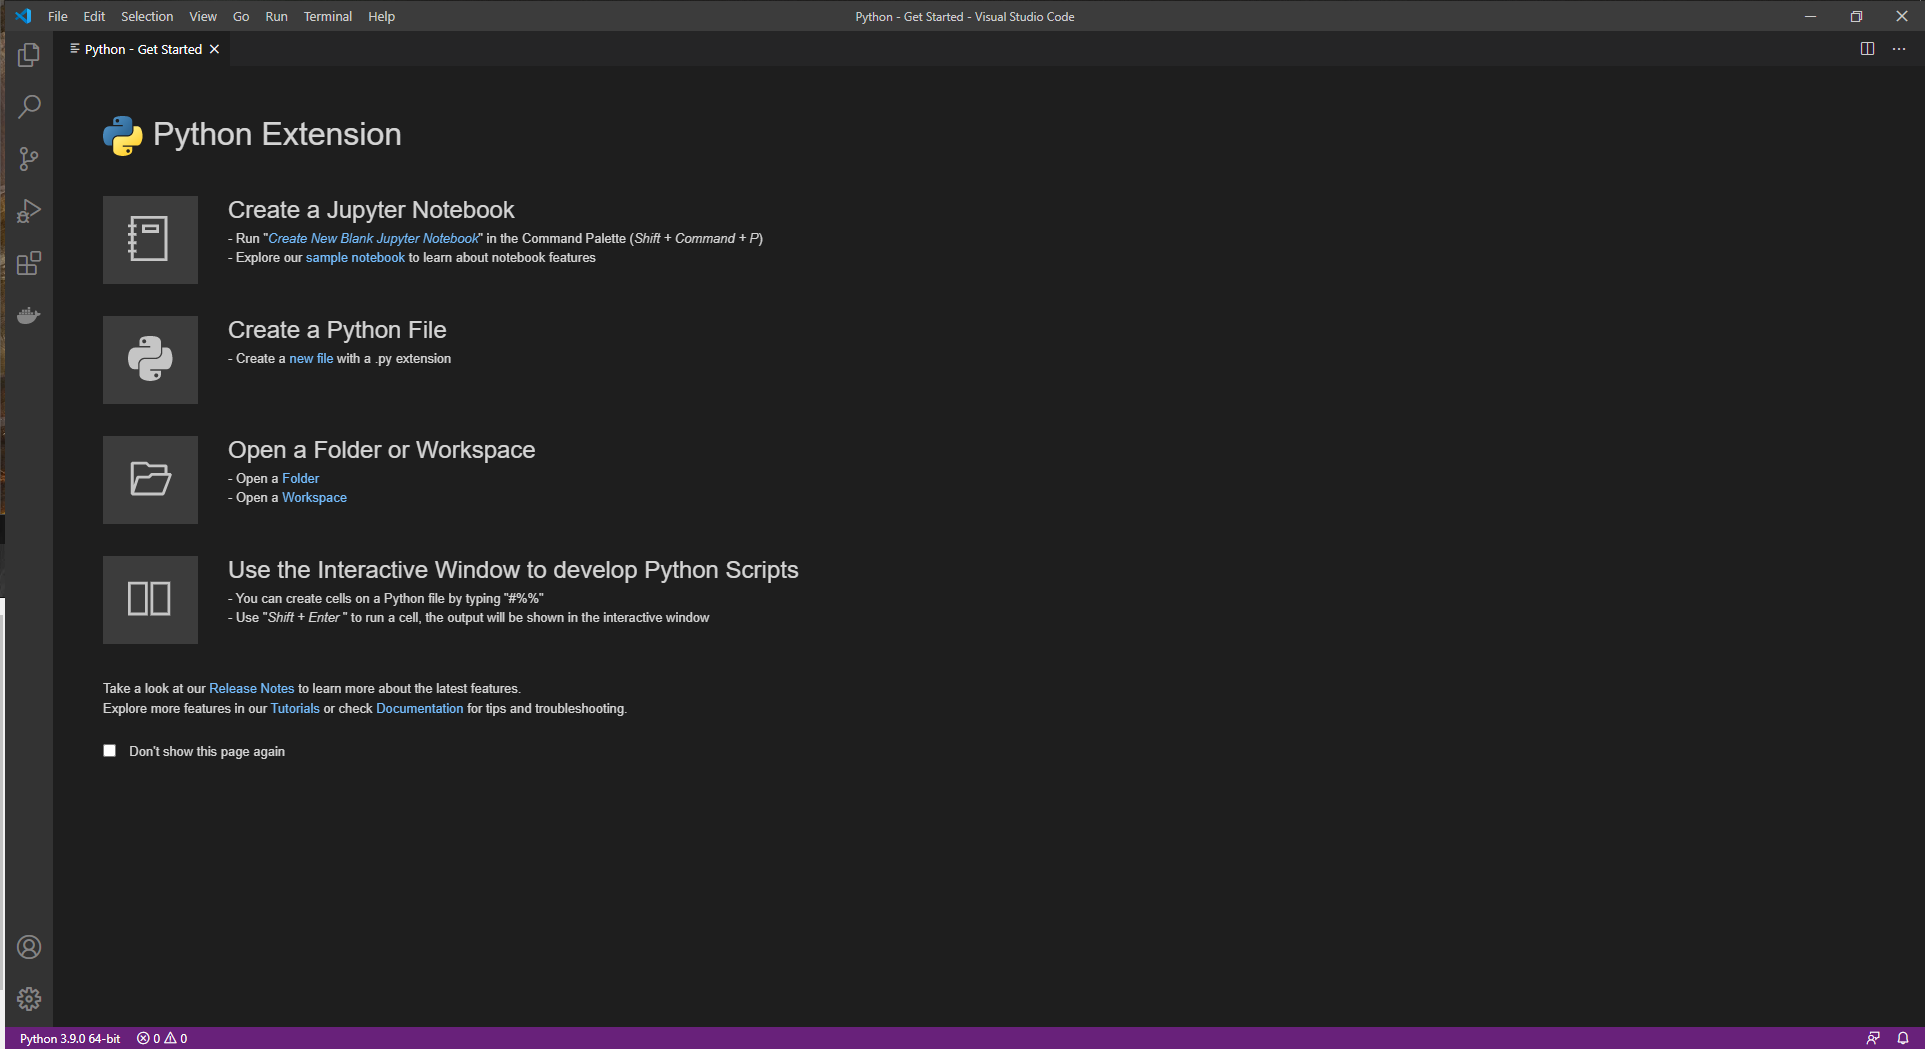
Picture 41.1. Now you are ready to write the code for controled the servo.
Next, I prepared Arduino IDE to then write the code in for comunicate with the servo and the LED in serial. I leave the steps below
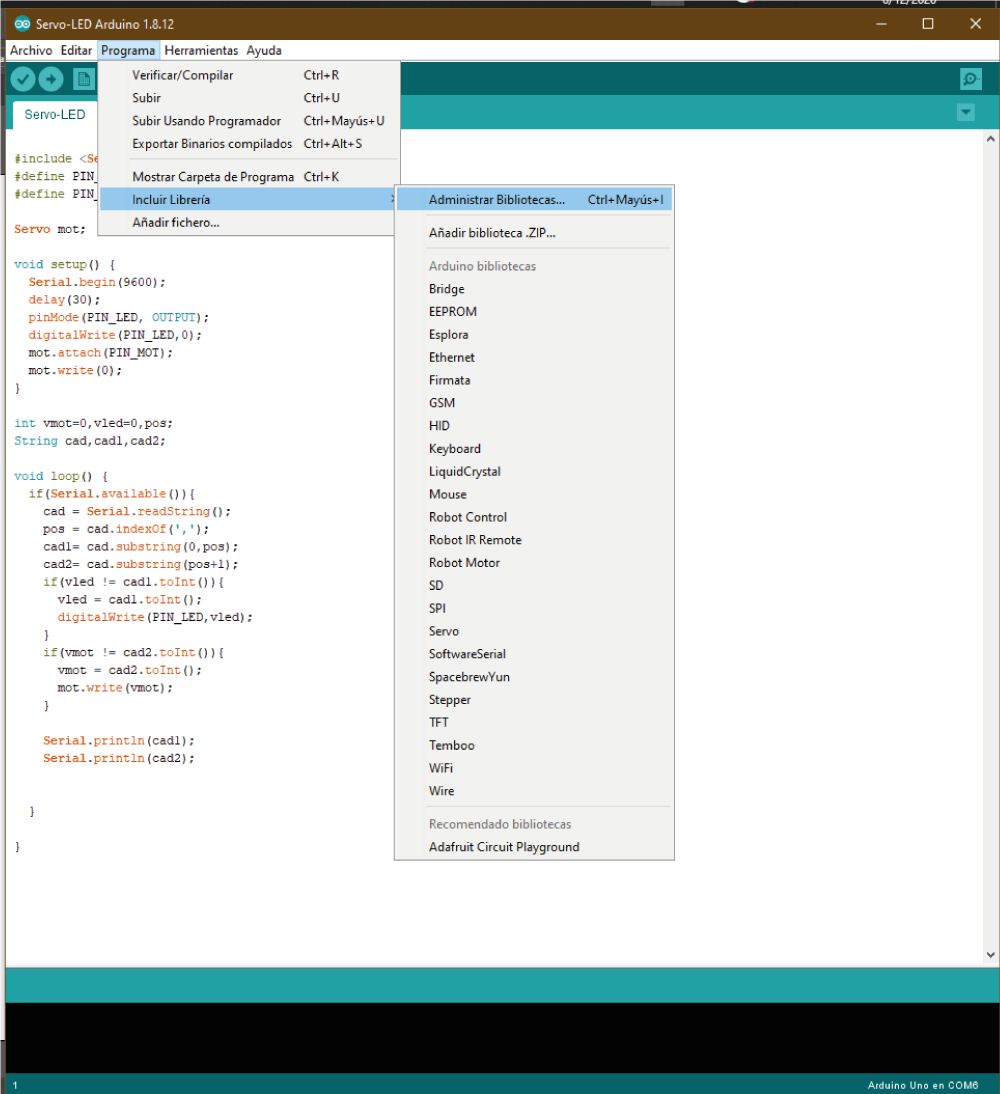
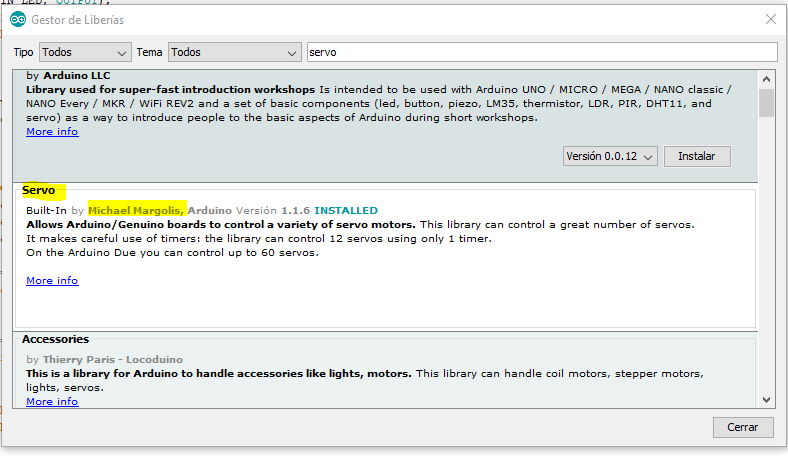
STEP 1. Downdload and install the libray servo
But at the moment we are only interested in GUI design in python. So I will use a library called "Servo" available to create our project. Servo is a library written by Michael Margolis for the Arduino programming environment.
Picture 41.0. To add the Servo library to Processing, simply follow this process: Program - include library - manage library - search for "Servo" - finally then click install.
Picture 41.1. Now you are ready to write the code for the servo.
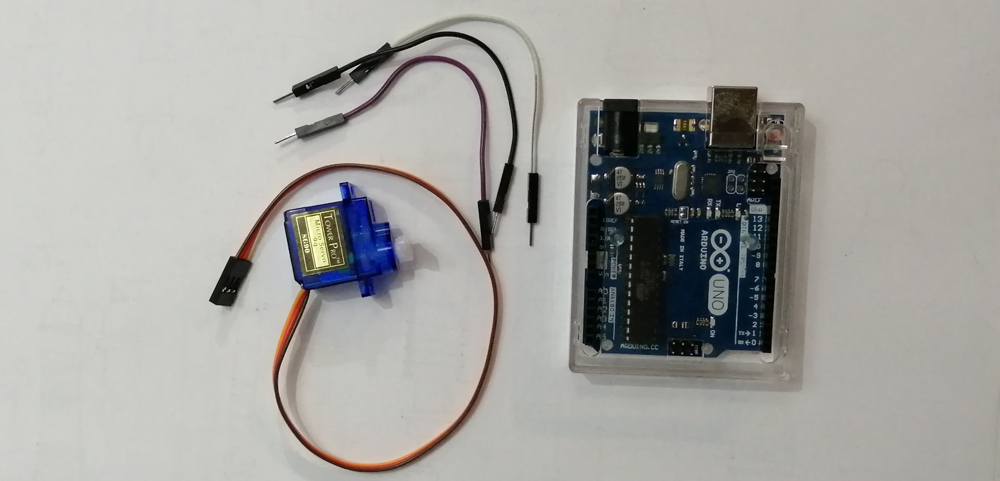
STEP 2. Creating the Circuit.
This are the materials i used on thes task.
Material
Measures
Arduino UNO
x1
Servo SG90 1.5k
x1
Jumper Wires
x3
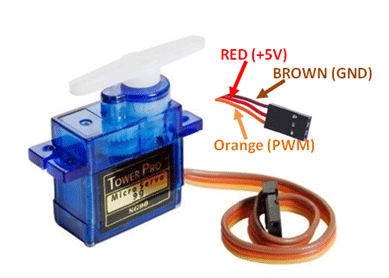
Picture 42.3. This are the componets i need to use on this project. > Picture 42.1. First I need to now the servo pinout. Picture 42.3. Then I continue to assemble the circuit.
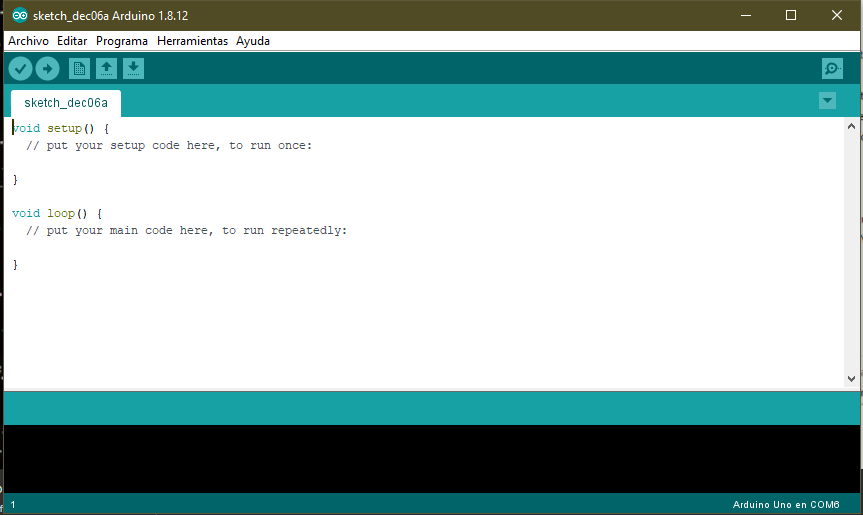
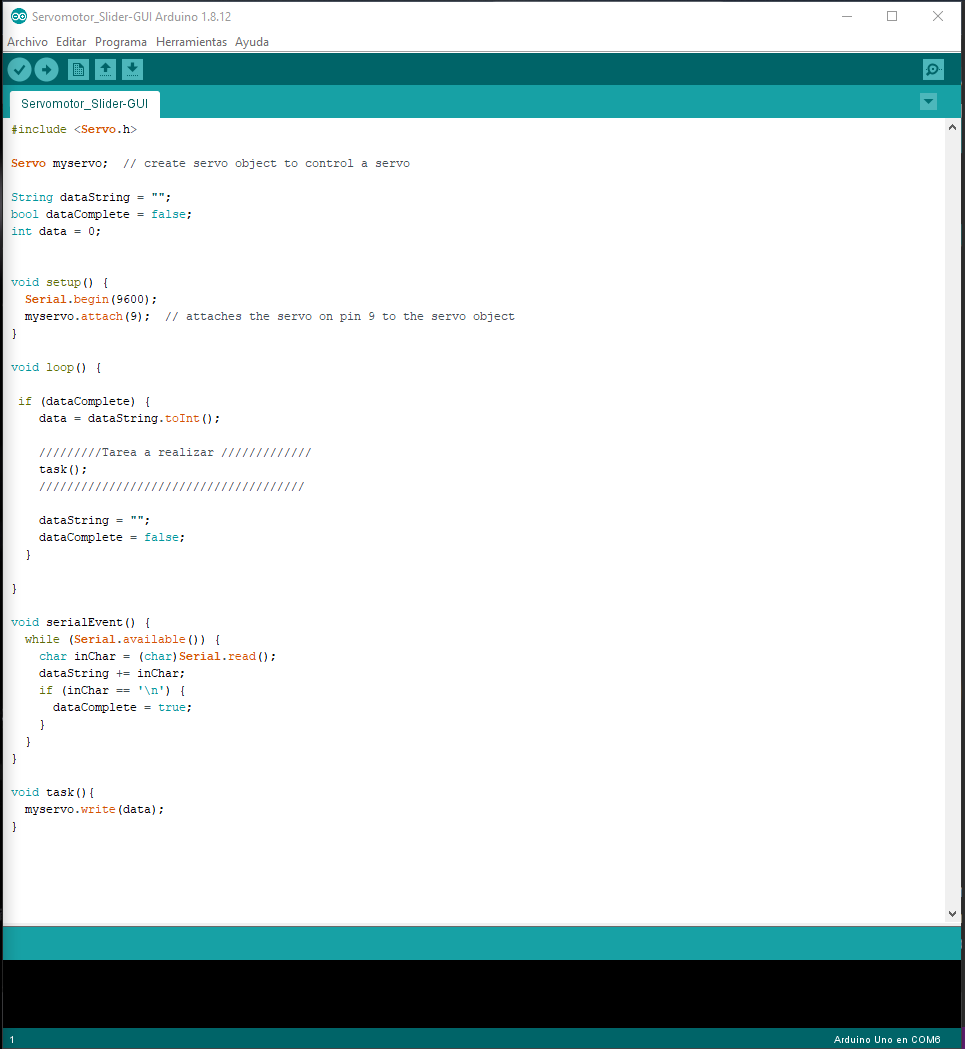
STEP 1. Write the Arduino code.
I write the code of the servo motor command.
Picture 42.3. Create a Arduino sketch so that we can control Arduino pins by sending some characters throgh serial. This part is more easy.
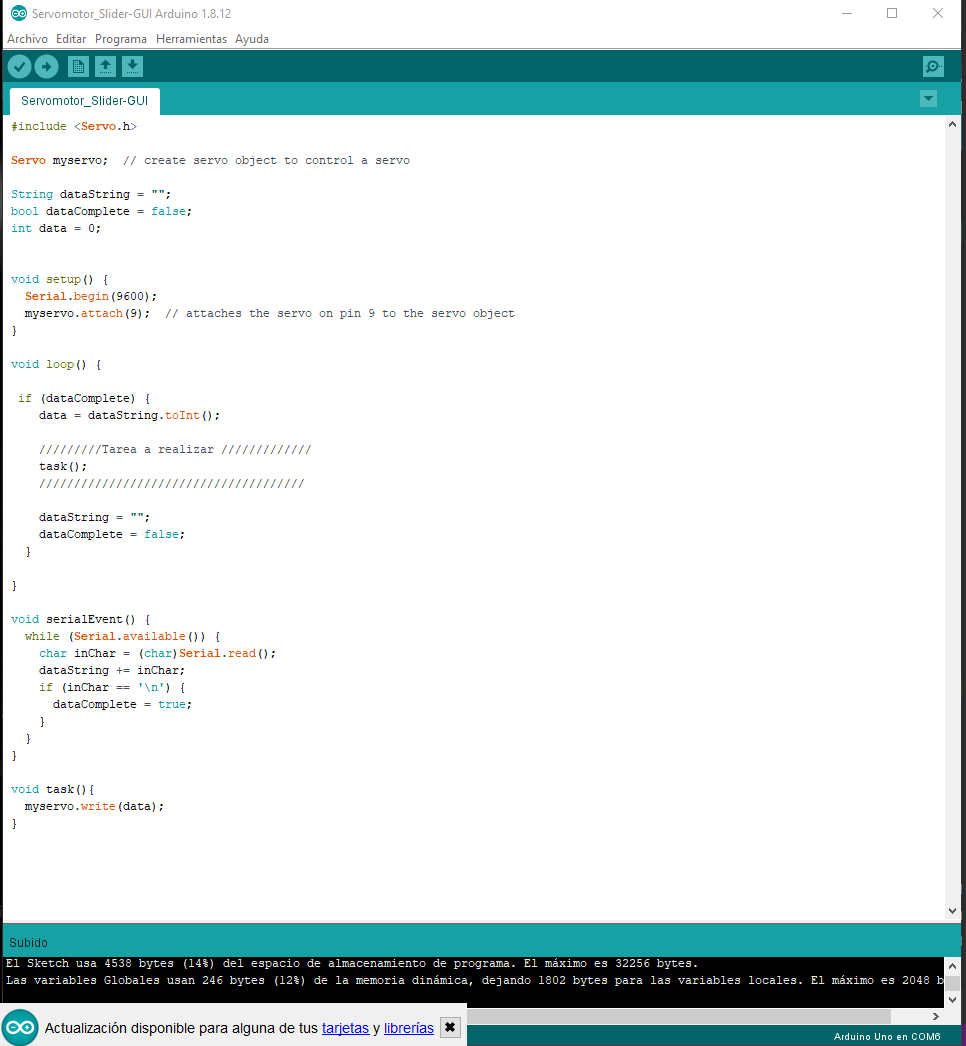
Picture 42.3. When I finish I upload the code to the Arduino UNO.
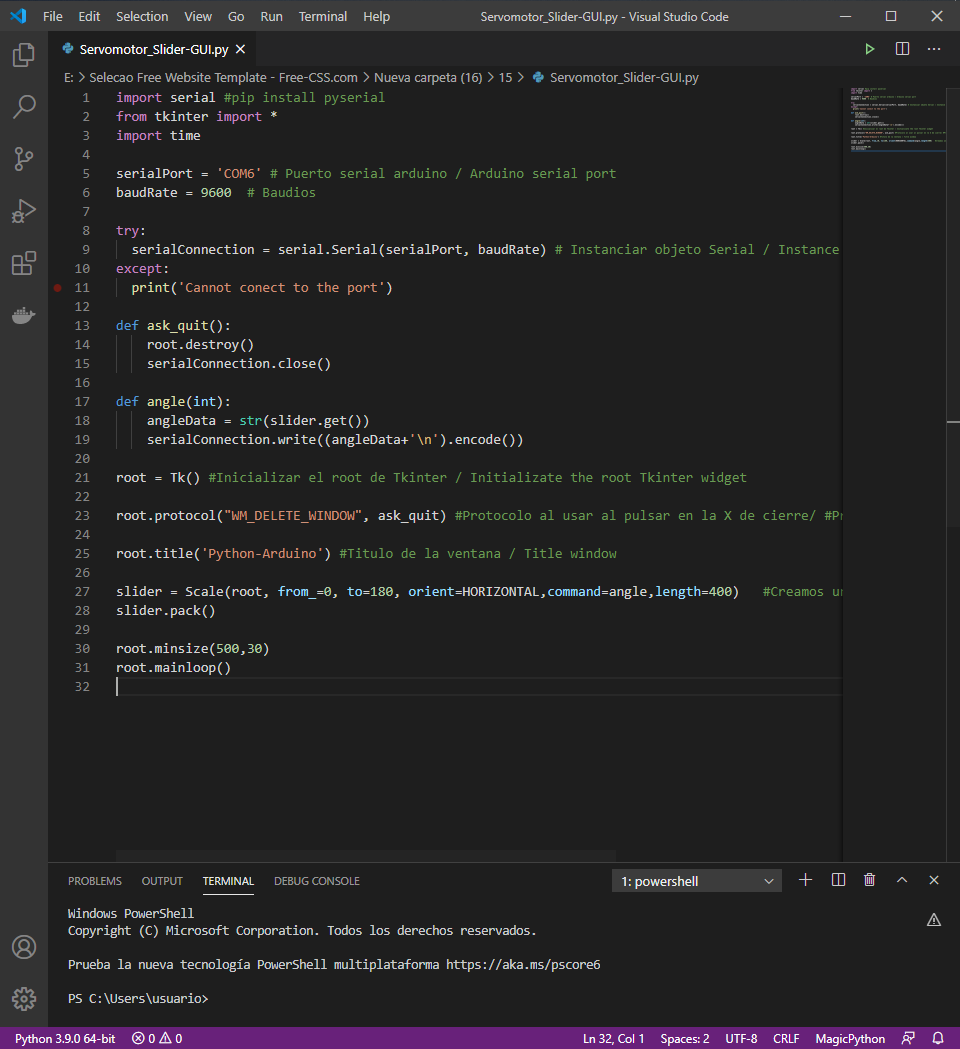
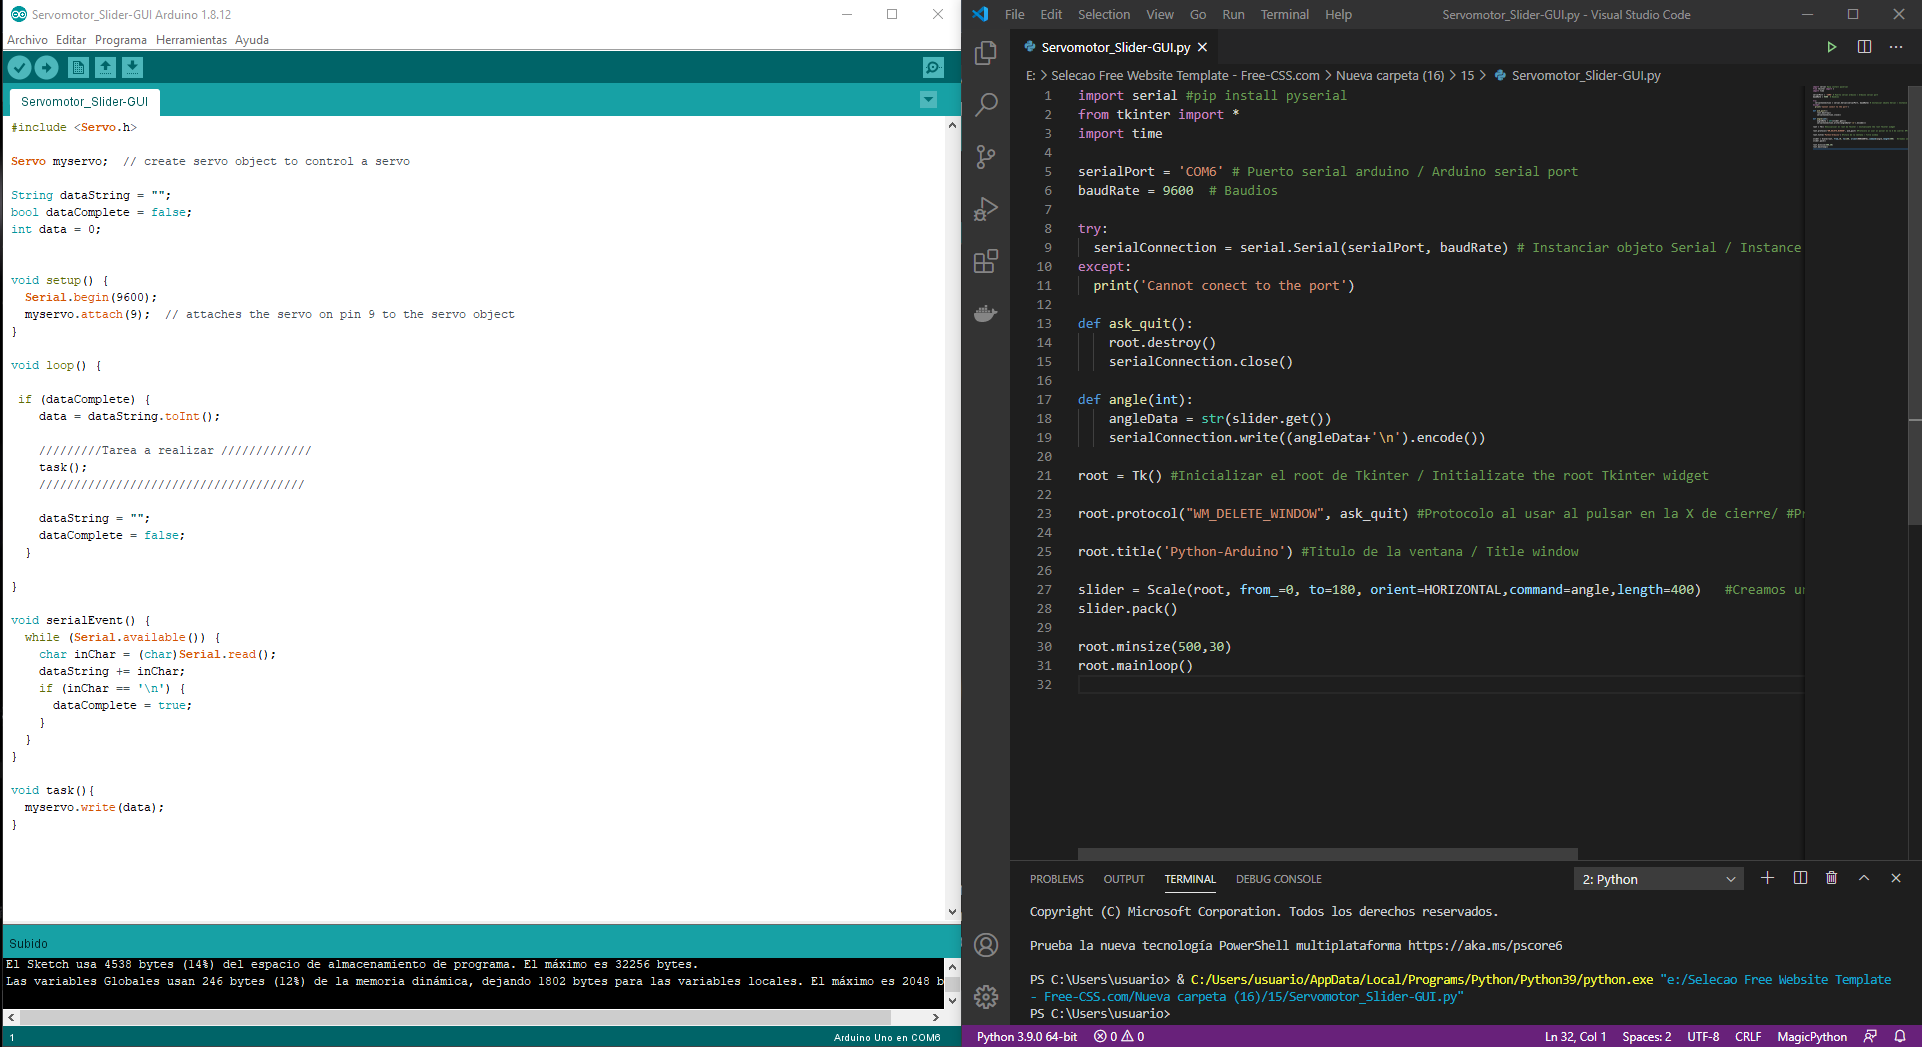
STEP 2. Then I write the Prython code.
This part is the most difficult. Because is my first time using Python but I enjoyed this experience because you create here the GUI to control the Servomotor.
Picture 42.3.
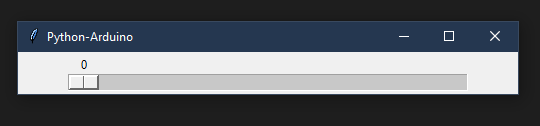
Picture 42.3. The python window will look like the image below.
STEP 3.Add functions each other.
Here I link my python slider with the Arduino code, with which it sends a particular character to the serial port, so when Arduino receives that character, it moves the Servo to a certain angle, within the 180 degrees that allows us to rotate the Servo.
Picture 42.3. I link it both IDE's.
The code is in the File section at the end on this page. There you will find code for both, Arduino and Python.
This are a view of my interaction. Video 1*.
========== learned/conclusions ==========
This assignment was the most difficult for me since I had to program in two IDEs that maintain similarities but in general it was difficult for me to understand the labels and syntax when writing them. Because I had to design in process and then make it communicate with arduino and that is where I have my doubts. I still have learned this part well.
=============== FILES ===============
- Alien-Processign:
Here are the Alien file:
. I share you my Processing File: Alien.pde
. This is the Alien_Code file: Alien Code.txt
- Lightsaber-Processing:
Here are the Lightsaber file:
. I share you my Processing File: Lightsaber.pde
. This is the Lightsaber_Code file: Lightsaber Code.txt


.png)
.png)