Idea: Mini printer
After discussion with our instructions, we made 2 Teams for this week assignment, so we continued to work together with
Zhengya Gong, Yazan Barhoush, Noora Nyberg and Xinhui Hu.
Thinking of the machine to create, while brainstorming we decided to make some type of the drawing machine. Everyone one of us has searched for existing projects to be used as a reference. Considering time limitations, we had only one week to implement the project and Covid-related restrictions, we chose to go for the mini printer project found by Xinhui Hu. The main steps of the project implementation are posted on Our group page.
Project management
- Project management. I made the list of responsibilities for our group, taking into account the wishes of each member:
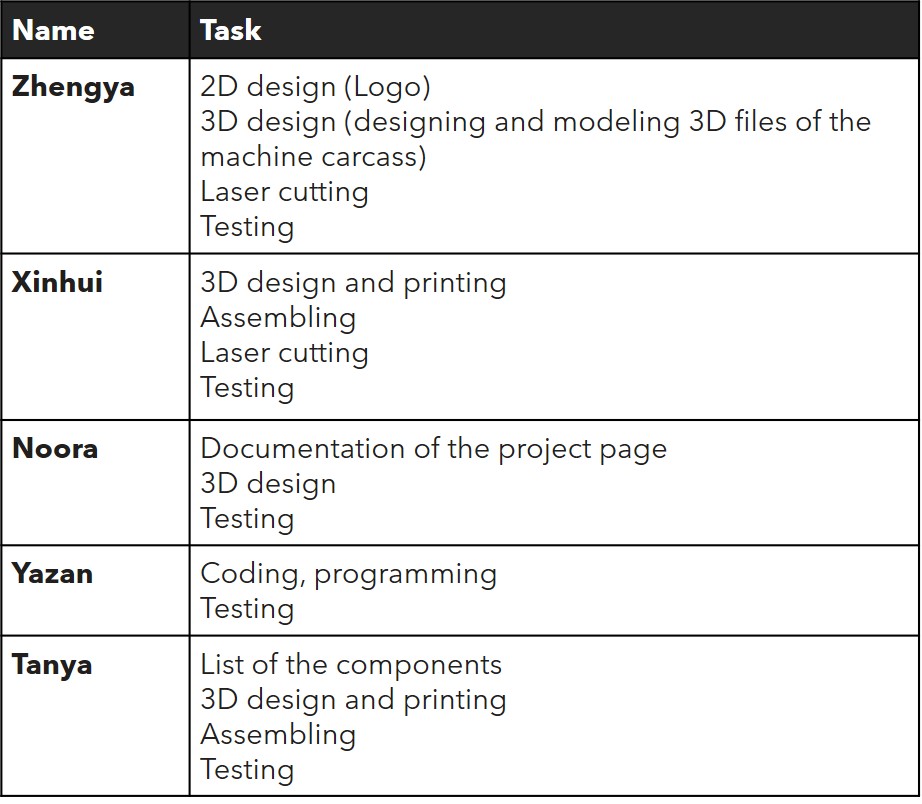
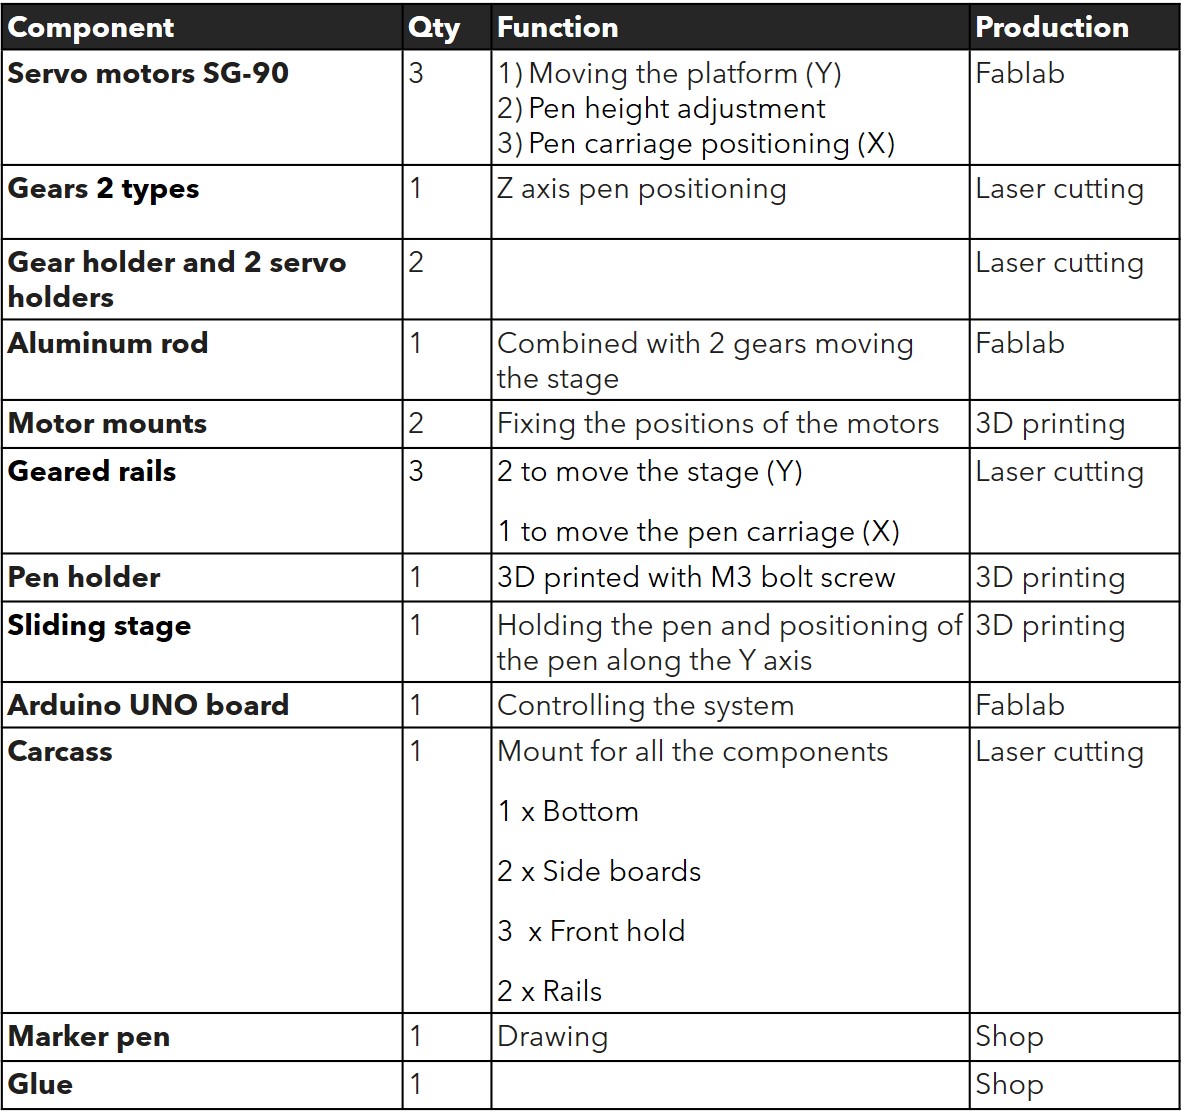
- List of components for the project:
3D design and printing
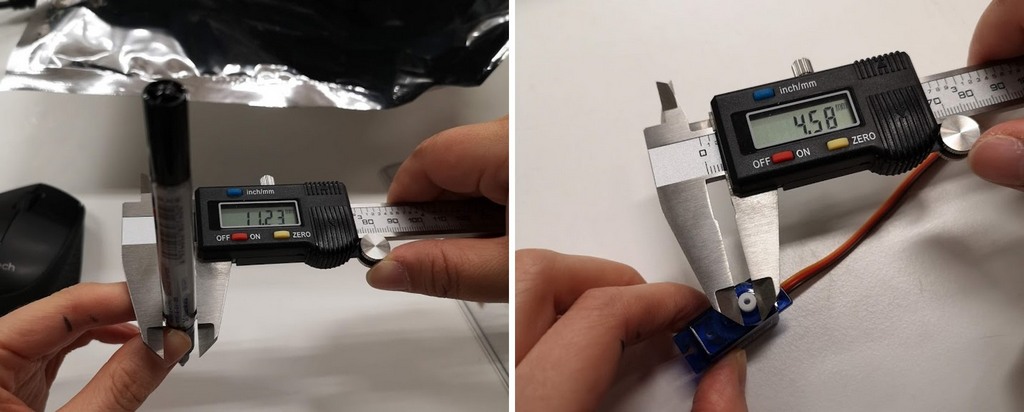
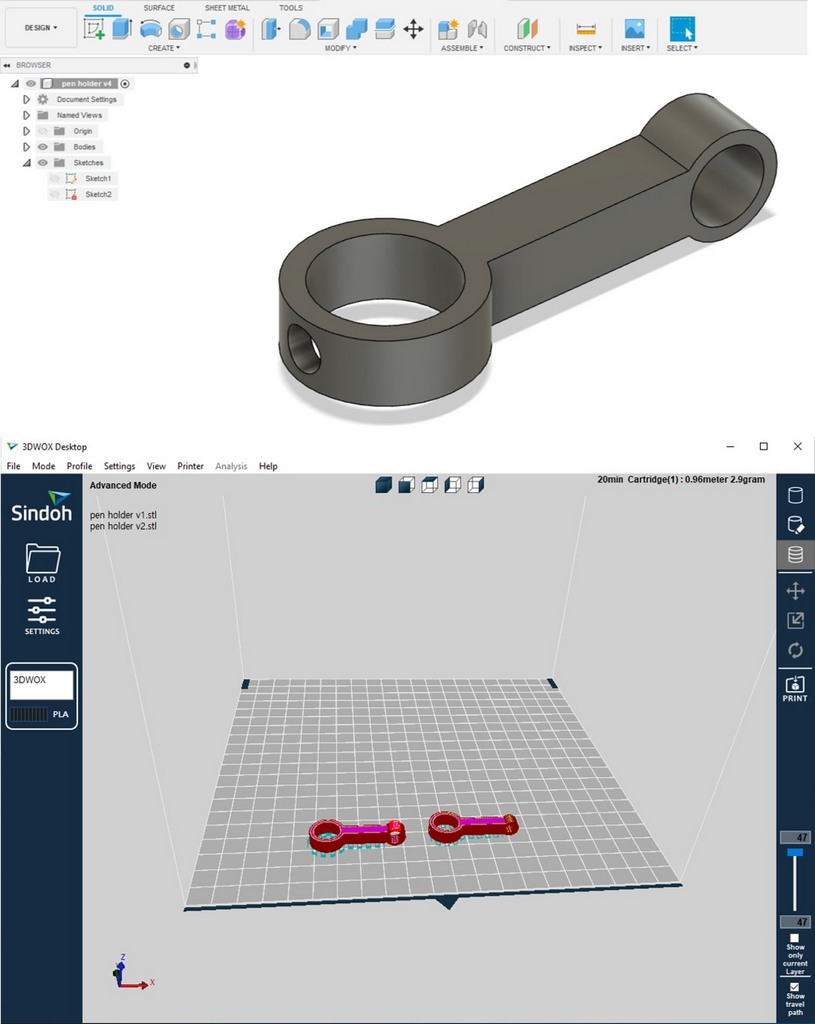
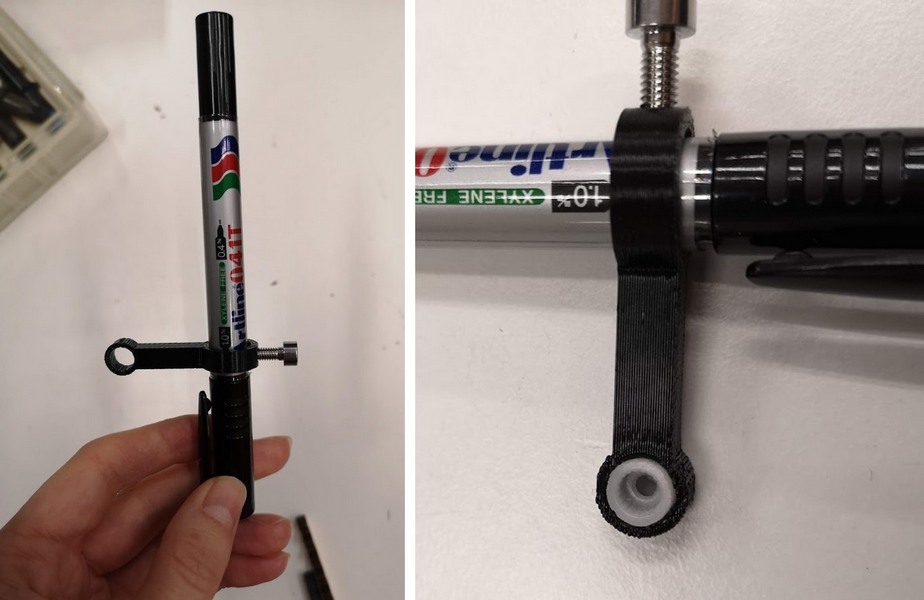
- Pen holder. I took the measurements of the marker pen and shared it with Noora. She made a very nice design of the pen holder, however we didn't have time to print it, and used my draft version, which worked anyway. I made 3D design in Autodesk Fusion 360 and printed it with Sindoh 3D printer.
Fig 1. Pen holder development steps.
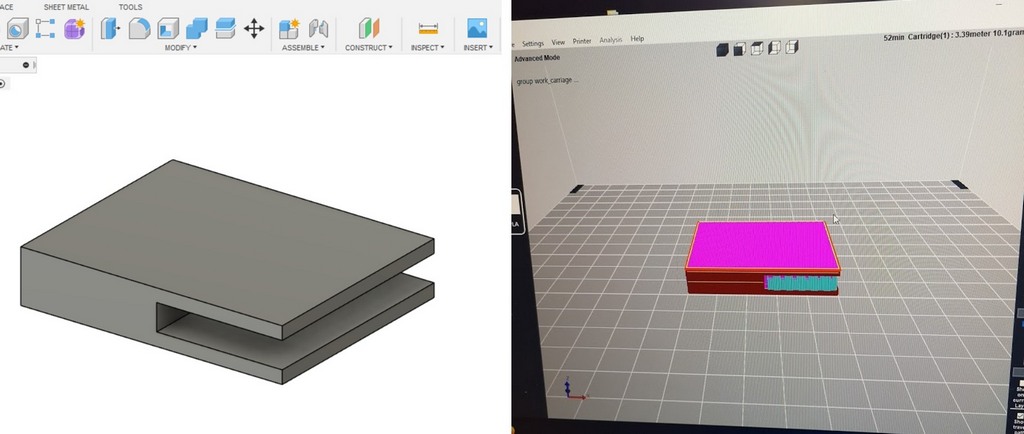
- Sliding carriage. Same steps were done to make the sliding carriage, where the pin with a servo motor should be attached.
Fig 2. Sliding carriage development steps.
Assembling and testing
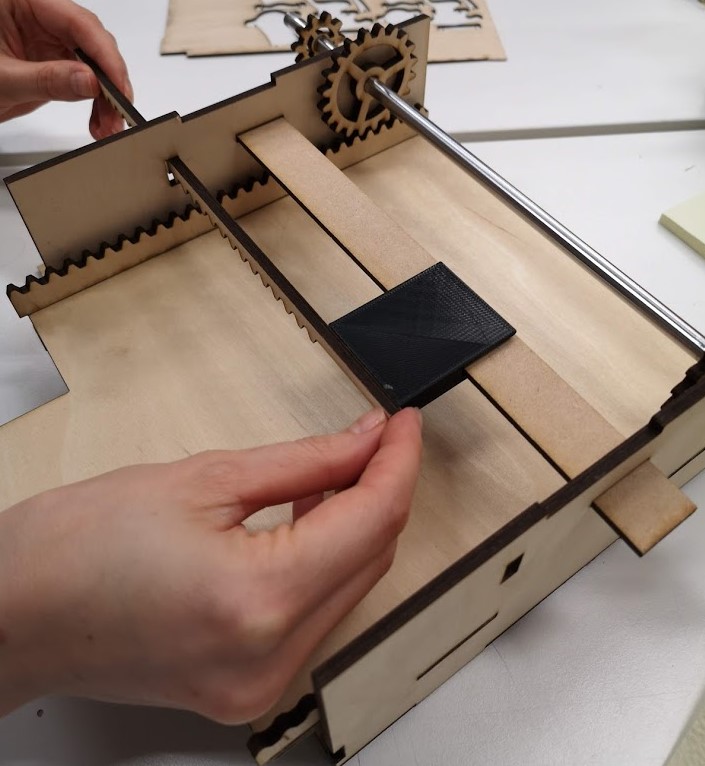
- Assembling. During the assembling we faced many troubles, sometimes we had to change the design, sometimes to improvise.
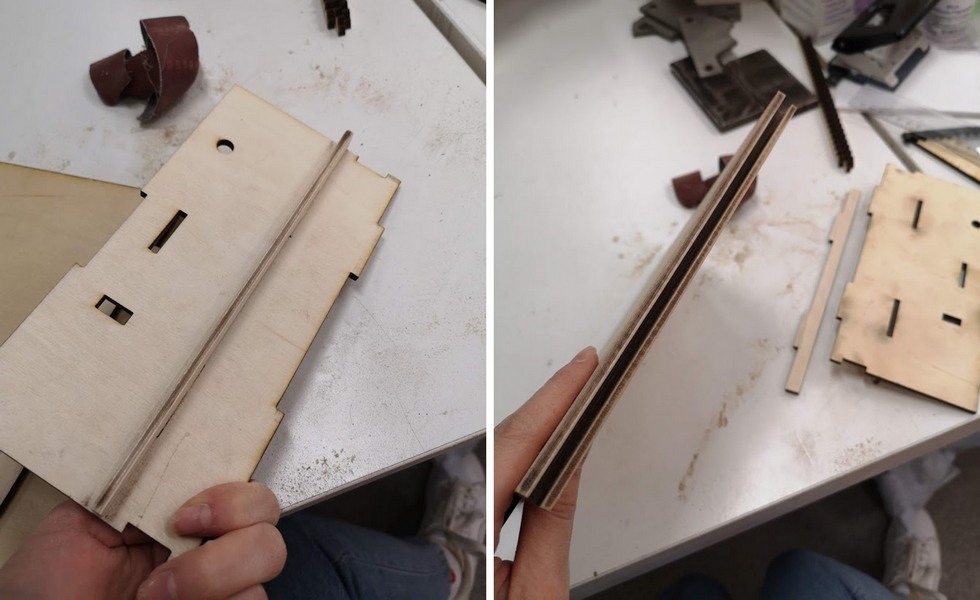
Fig 3. Sliding platform was getting stuck, instead of smooth sliding. Wherefore we had to sand the parts a lot.
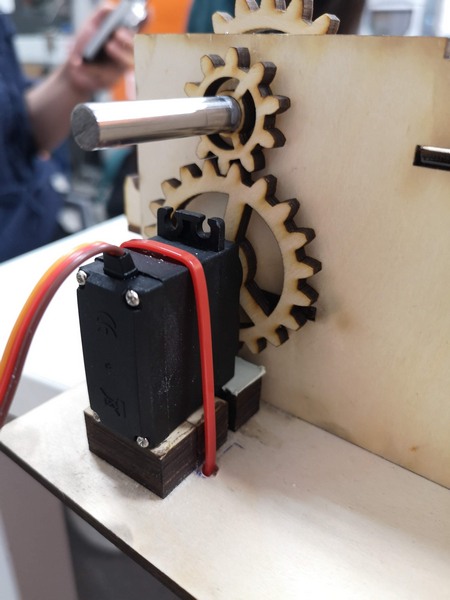
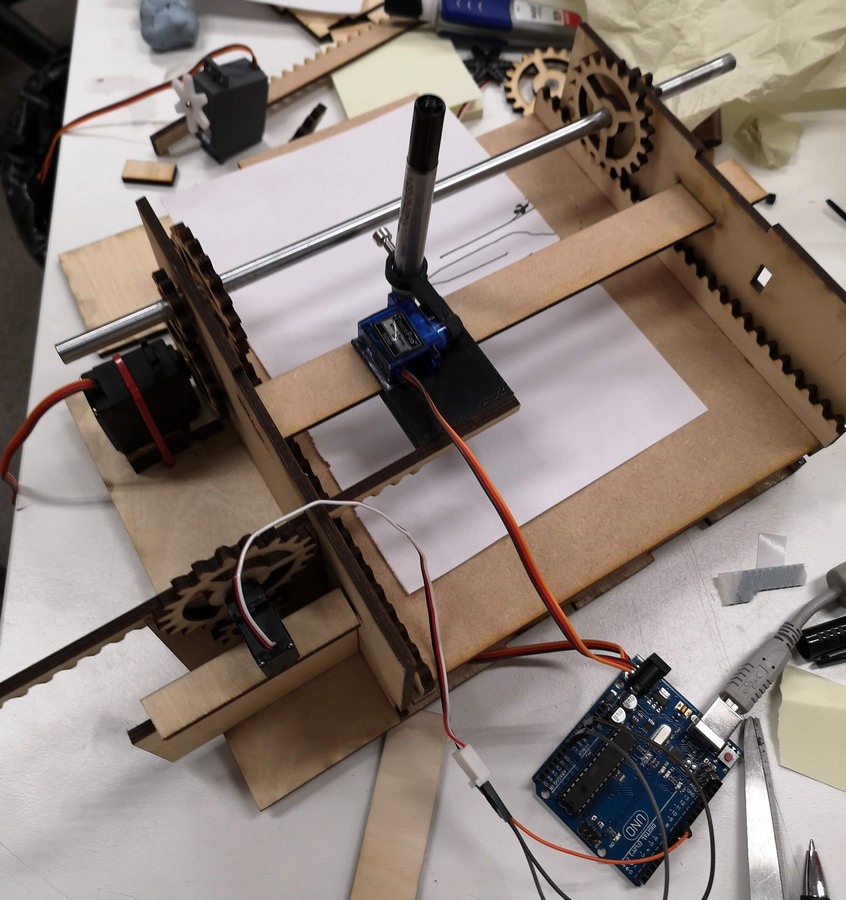
Fig 4. Rotation of the gear is initiated by the servo-motor. Since the platform was large and heavy, rotation didn't go well from the first attempt. We had to drill the holes and secure the motor with glue and tie it with plastic lock belt.
Fig 5. Final assembly of the printer.
Testing. Using the simplest example codes for the servo motor, we checked if the generated tork is enought to rotate the gears and sliding the stage. We had to adjust the speed and secure the motor's positions before running the final code.
FILES:
Reflection
Week was kind of stressful, challenging, but it was nice to work in a team, and learn together.