Molding and casting

  • assignment: design a mold around the stock and tooling that you'll be using, mill it (rough cut + (at least) three-axis finish cut), and use it to cast parts

    Blender #Autodesk Fusion 360 #Modela PLayer 4# #SRM 20 #OOMOO 30

  • group assignment: review the safety data sheets for each of your molding and casting materials, then make and compare test casts with each of them individual

Group Assignment


I was in the group with Zhengya Gong, Yazan Barhoush, Noora Nyberg and Xinhui Hu.

  • Mold made with OOMOO 30 was the best choice, if there is no requirement for food safety, fast curing, no scales, no degassing
  • Dragon Skin™ 10 FAST
  • Smooth-Cast® 305 is not suitable for casting in Dragon Skin™ 10 FAST mold
  • Smooth-Sil™ 940: food safe
We splitted the tasks for the assignment and published it here Group assignment for Molding an Casting week.

Design: Blender


As the steps to create the mold suggested by our instructor were clear, the design only should be chosen for the task. The requirement is the double-sided mold. My first idea was to create the low-polymesh Venus de Milo (Aphrodite of Milos) statue. I downloaded the 3D model of the statue and modified it in Blender. However, despite the major modifications of the model, it was hard to make suitable for double-sided mold.

I decided to use more simple model - the hand with a thumb up. I used this 3D model and modified it to a low poly mesh style in Blender.

...
...
...
...
...
...

Fig 1. Design of the 3D model in Blender

Positive mold design: Autodesk Fusion 360


The next step was to create a positive mold for casting the model. Below are the steps of designing the mold in Autodesk Fusion 360.

...
...
...
...
...
...
...

Fig 2. The steps of positive mold design in Autodesk Fusion 360

Machining: Modela Player 4 and SRM 20


During quarantine days in Fablab our instructors were helping us remotly. When I was generating prn files for Roughing and Finishing of the mold in Modela Player 4, I called to our instructor Ari Vuokila, so he was helping me to make the correct prn files in Modela Player 4. Below are the steps to generate the prn files for the milling process. For both Roughing and Finishing I used 3.18 mm milling bit. Before creating new processes it is important to set the Material setting to Modelling Wax.

...
...
...
...
...
...
...
...
...
...
...
...
...
...
...
...

With Ari's help we made the Finishing process, estimated time was 50 mins.

...

Milling process was run V panel on SRM 20 same way as we used the machine to mill the PCB outlines. I set the origin and then Cut and Output.

...

Wax stock was fixed on the milling platrorm with double-sided tape.

...

A lot of wax flakes are coming from the milling, therefore to control the process, I paused the process sometimes to remove the flakes and checked the milling. It is also recommended to remove the flakes, as they can start melting from the heat of the rotating milling bit. On the right photo: half of the Finishing process is milled after Roughing.

...

Final positive mold:

...

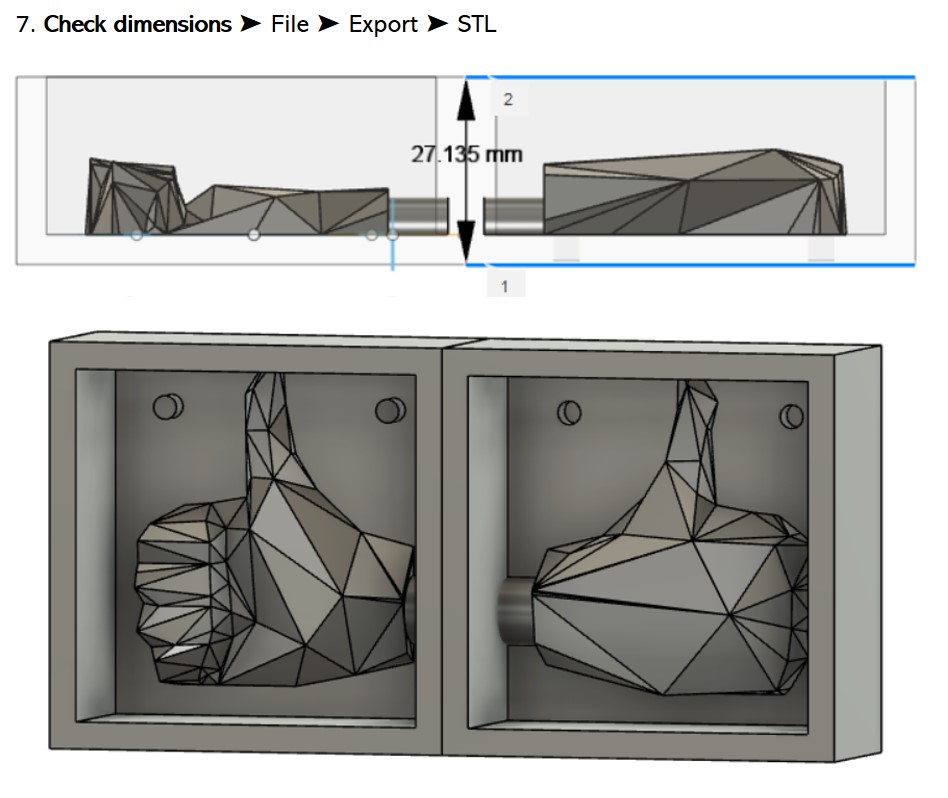
Negative mold casting


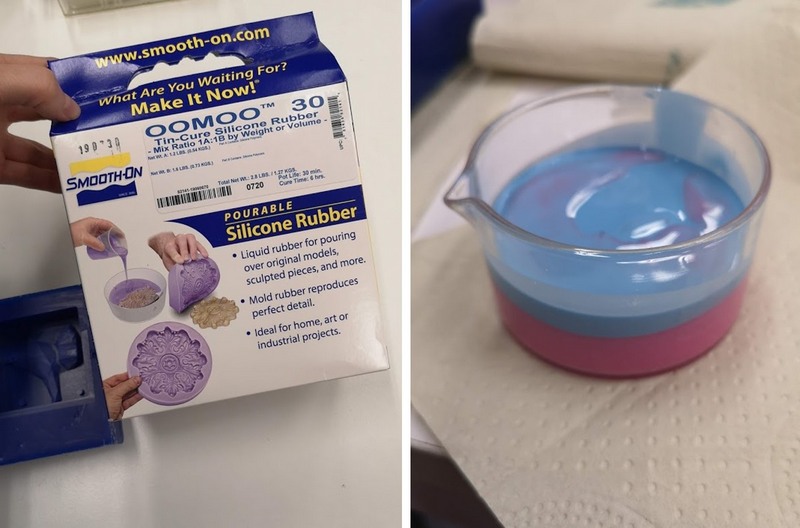
I planned to cast the candle in the mold, therefore my choice was the OOMOO 30:

  • 1:1 by volume mix ratio (no scale necessary)
  • Vacuum degassing is not necessary
  • 6-hour cure time

The process is quite simple. I just mixed part A and part B by volume ratior 1:1 withouе even using the scales.

...

Though the Vaccum degassing is not neccessary according to the instructions, I used degassing for about 2 mins, when most of the bubbles apppeared on the surface.

...

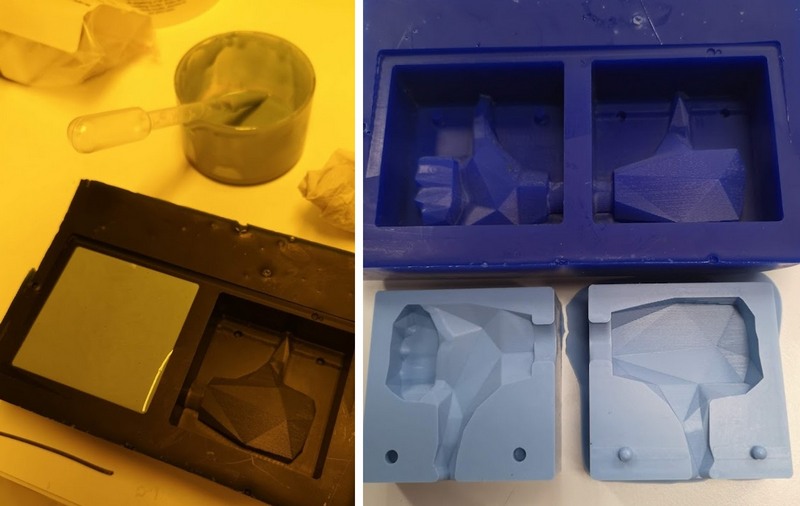
Then I carefully poured the mixture in to the mold and left for curing for 6 hours. Negative mold then was easily removed from wax positive mold. Surface was perfect - detailed print of the was mold without any bubbles.
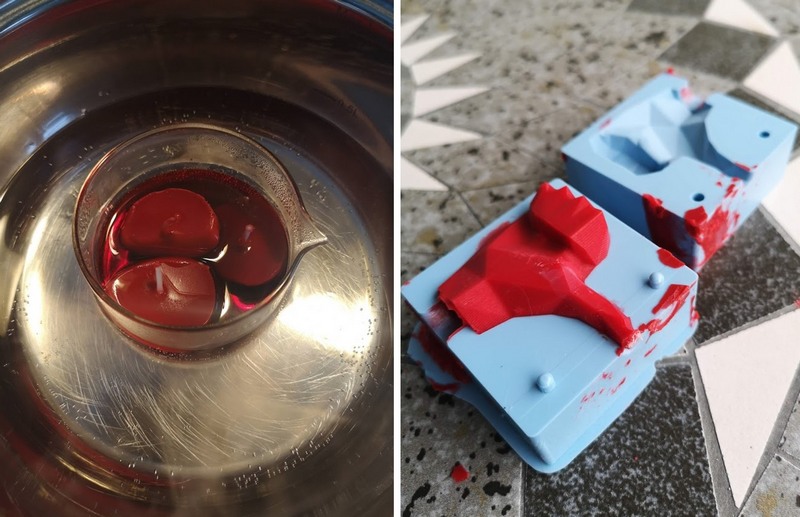
...

Casting


Final and the most exciting step: casting. For casting I used couple of small candles. I removed the aluminium case and melted candles on a water bath. Thread from the candle I used for my own candle by inserting it in the upper hole of the mold. Wax cured in about 1 hour and the candle was ready.

...

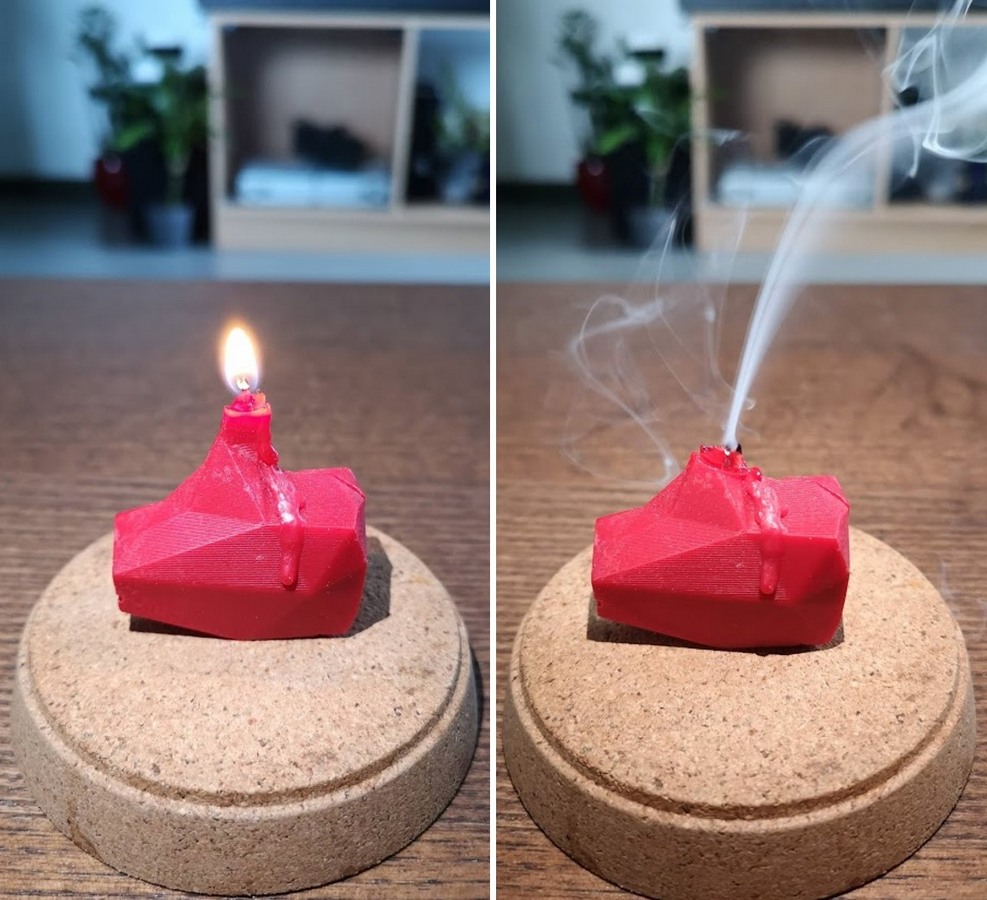
Since the scale of the candle was quite small the pleasure was fast.

...
Responsive image

I'LL BE BACK.


FILES:

Reflection

Casting is a lot of fun! Next time I would definietly go for more complicated model to cast, there is a unlimited room for creativity. I would like to cast something from metal.