Project management
- Getting started with GitLab
GitLab#GitBash#GitKraken
- Website development
Brackets#w3schools.com#Bootstrap#GIMP#Fastone
GitLab#GitBash#GitKraken
Brackets#w3schools.com#Bootstrap#GIMP#Fastone
Fabacademy has a centralized storage for all the projects, which can be accessed any time from anywhere. Becoming a Fabacademy student means that now we should have an acceess to all the projects and start our own. This will help to track our progress in Fabacademy. For the easiest access to the shared projects and general project maintains we are going to use Gitlab (Version Control system). In simple words our projects will be stored locally and remotely, so even if something happens to the local repo, it can be always available through the Gitlab in the remote repo. As I was not much familiar with workflow I used this tutorial https://rubygarage.org/blog/most-basic-git-commands-with-examples.
After the lecture on Wednesday I had some general vision how it all works, however I start panicking deeply inside, as most of the information was completely new for me. Luckily during the local lecture on Friday some questions were claryfied and we were good to go to work during weekend :)
Following the instructions given on our GitLab Wiki page and with a help of local instructors, we started with a registration links sent to all the students. After registration I had to get the access to Fabacademy repository. For that I installed the Git Bash application (since I'm using Windows). Once I opened Git Bash, according the instructions I set my user name and email by typing these commands:
$ git config --global user.name “Tatiana Avsievich"
$ git config --global user.email "tatiana.avsievich@oulu.fi"
Thorough explanations on how to begin working with Git I found in this youtube Git tutorial. For example, after setting my name and email I typed the command git config --global --list which shows my data to be added in Git. Also, since I'm not used to work with Git Bash, I have checked the Options to use the hotkeys.

Fig 1. Starting Git Bash
Later on I have discovered GitKraken, which seems to offer more convinient way to manage the files, however since I started with GitBash and found it later, so I decied to try it and see in a future, which one I prefer.
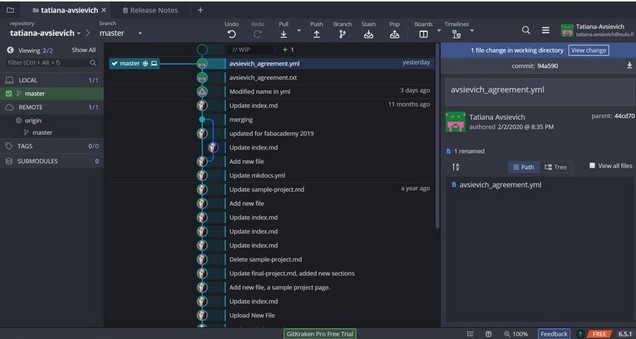
Fig 2. GitKraken menu
Then by running ssh-keygen -t rsa -C "tatiana.avsievich@oulu.fi" I have generated the public and private SSH (Secured Shell) key, which can be found in a folder your_home_directory/.ssh. Then I just copied the public key and pasted it in to the Gitlab account https://gitlab.fabcloud.org/profile/keys.
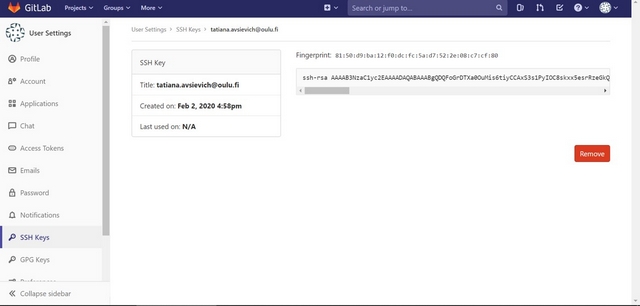
Fig 2. Generating the SSH key to connect with Git.
At first I set the local repository on my computer. Using Git Bash I went to Fabacademy folder, I found myself ofthen forgetting to change the path to my git directory, so this command is useful /cd folder_name.
Next, I needed to understand how the most common commands worked for the Project management. Git uses a transition state to list all the modified files, so first you need to add the files you modified to this list. Then you compile the list of changes with a commit. And finally you push the changes on the repository, which basically uploads the files.
Once I was connected to GitLab, I created a local copy of my Fabcloud repo on my computer using git clone.
There is a list of the main commands in Git Bash, which should be used in the following sequence to create the standard GitLab workflow:
cd c:/git/"your_folder_name" - path to your local repo
git clone - creates the local copy of the remote repo
git status - checking the changes made in your repo
git pull - downloads the files from the remote repo
git add - adds the changed files ("git add -A" adds all the changed files)
git commit -m 'comment' - commits the changes
git push - updates the remote repo with the content of the local repo
git lfs track '*.file_type' - Git Large File Storage (LFS) for files >500KB
Using these basic commands I pushed a new document "avsievich_agreement.yml" at my local repo. git status indicates the new file red for untracked files to be add, and with green for the added files to be commited. After git add -A was performed, I ran git commit -m and git push for my Agreement, and I could see it appeared in my GitLab remote repo.
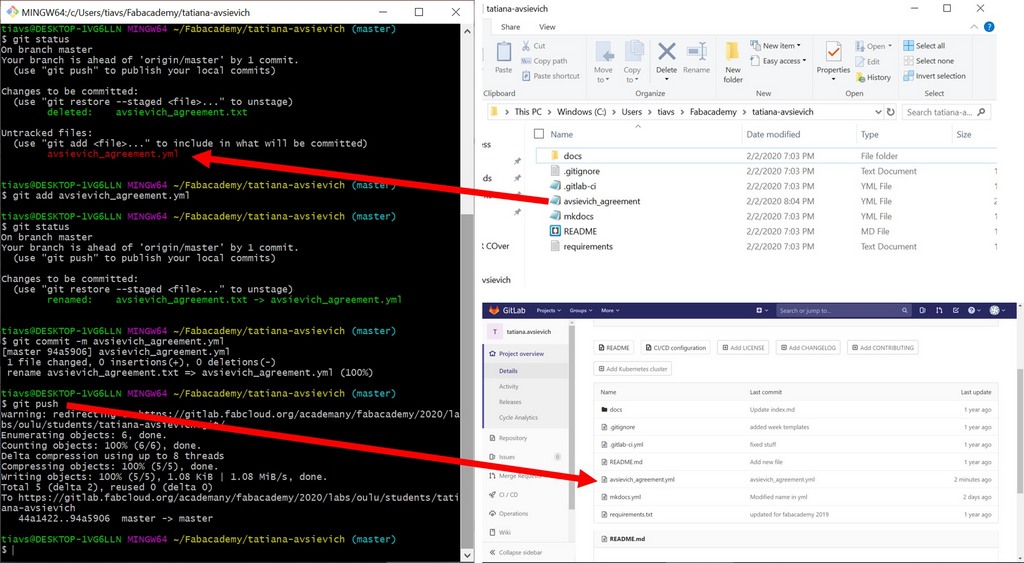
Fig 3. Generating the SSH key to connect with Git.
Browising websites of previous Fabacademy students, I found a few basic templates I liked. Thanks for inspiration to Leon Wittwer. As I didn't know anything about website development before, I had no idea how to start with both tasks together, meanwhile documenting all the steps. So my advice, make any website, and then while developing it, it will be much easier with documentation.
I started to look for simple structured templates which do not require deep programming knowledge. I found one simple template on https://startbootstrap.com/ and downloaded it. Bootstrap 4 is HTML, CSS, and JavaScript framework which does not require advanced knowledge in programming, plus it automatically adjusts the content for phones, tablets, and desktops. I had to go through the Bootstrap 4 tutorial on a w3schools, which I found to be very useful for beginner, because the code can be seen in render in the browser. In this way I was acquiring some features for my website while constructing it.
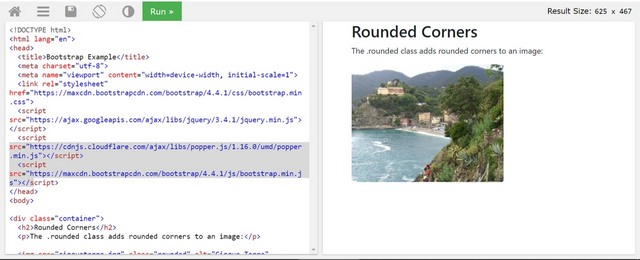
Fig 4. Function "Try it" on w3schools
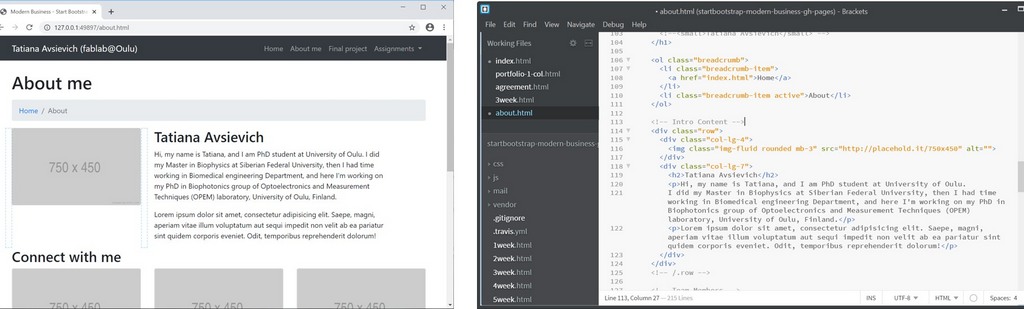
Fig 5. Template from https://startbootstrap.com/ and framework Brackets
To keep up with image sizes I started with using GIMP, but then I switched to FastStone photo resizer as I found it to be faster, when I could see the directories and process few files at once (batch mode).
Below is a FastStone interface. The steps to change the size of an image: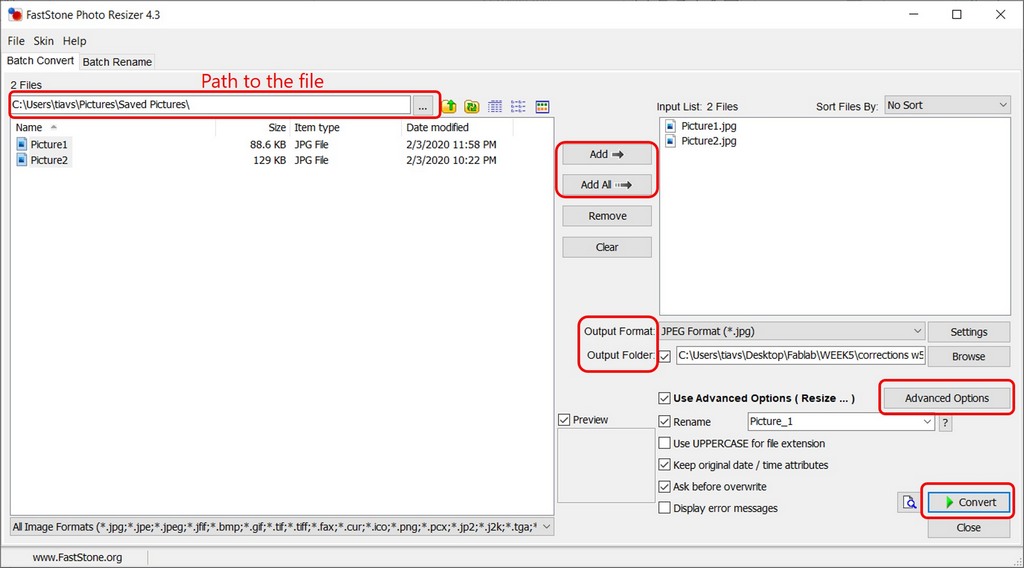
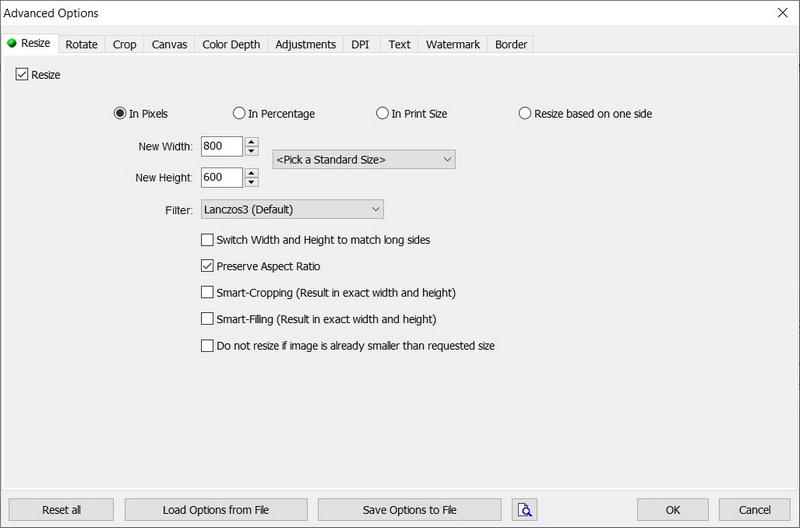
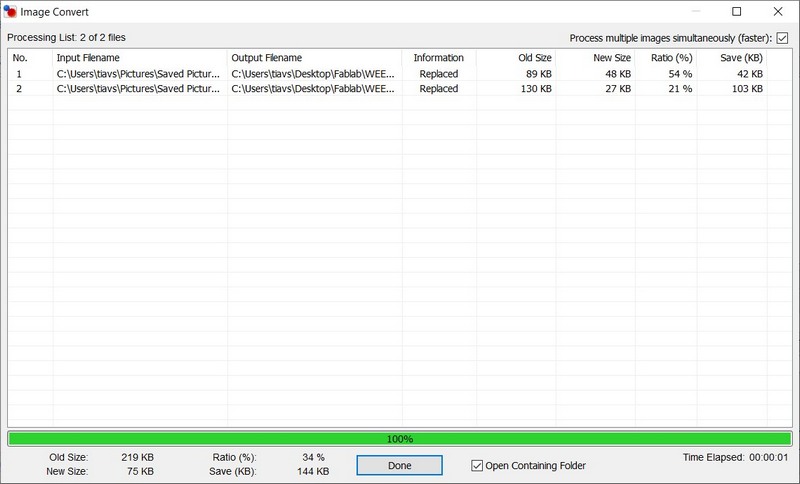
Fig 6. Simple FastStone resizer interface, Advanced Options window and Processing list.
I was advised to use Brackets by Gleb, to be able to see the changes in the browser, while modifying website. I found the application very useful, and was able to define the site structure, change the navbar, create the new pages for weekly assignments, "About", "Final project", and finally got my first webpage. I liked the Scrollspy on the page by Arash Sattari, so I used his instructions and modified it for my page. The scrollspy is the side bar with buttons on my website, each button is linked to the active viewport, it will ease the navigation, because my page is narrow, but the descriptions can be very long.
Here is the code I used to make the Sidebar with Scrollspy:
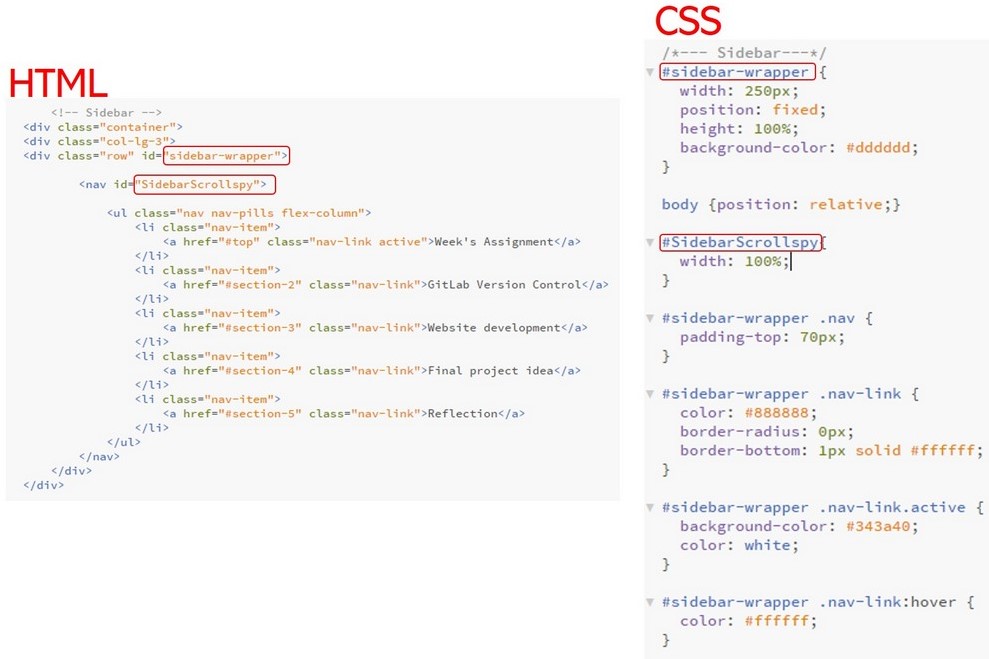
Fig 7. Sidebar HTML code and CSS.
On the Bootstrap website, from where I was learning how the code works, I found the nice styles I wanted to apply. For that I had to include HTML and CSS code. So at first, by clicking the right mouse I chose Inspect, so the code of the page appeared on the right. I found the needed element, learned the name "bd-callout" and CSS style, and then сopied the part of the code on the right (select > right click > Copy > Copy element), and then adapted it for my page. The style is applied to the Reflection section.
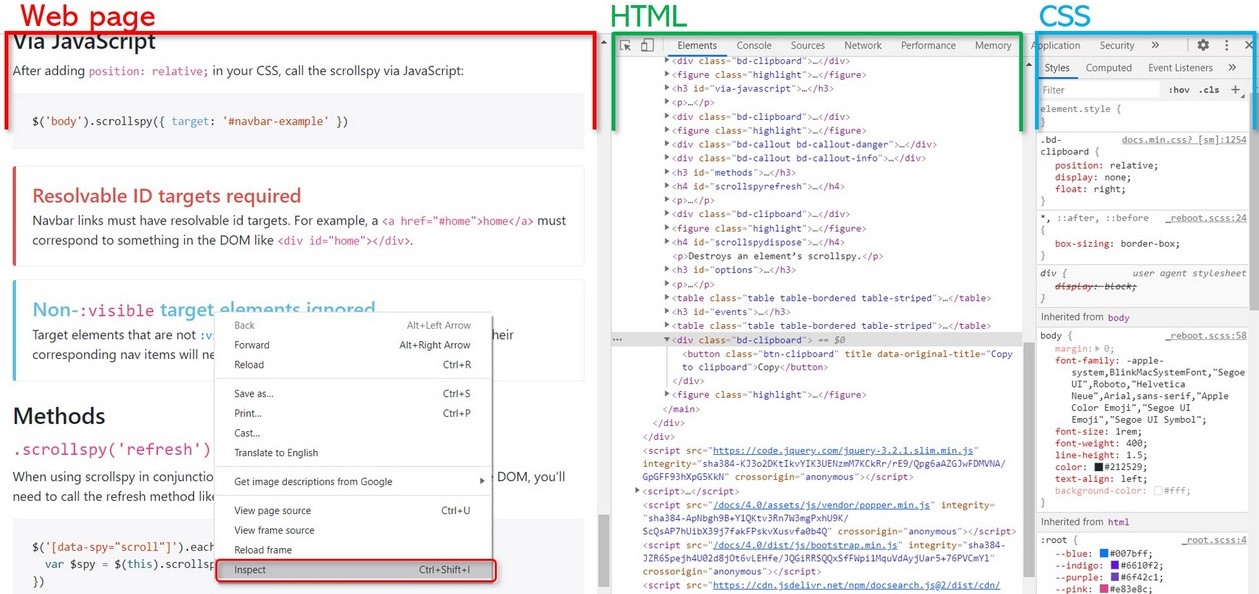
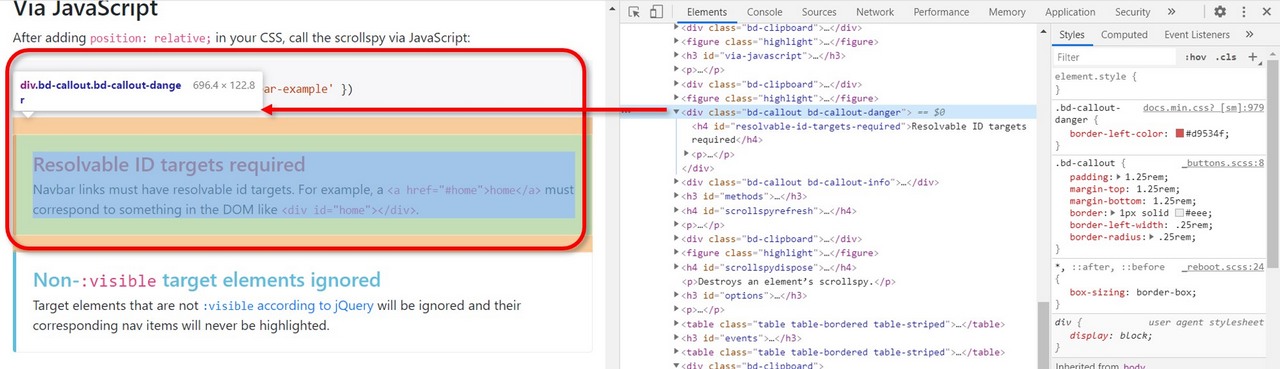
Fig 8. Inspecting the code and styles on the web page.
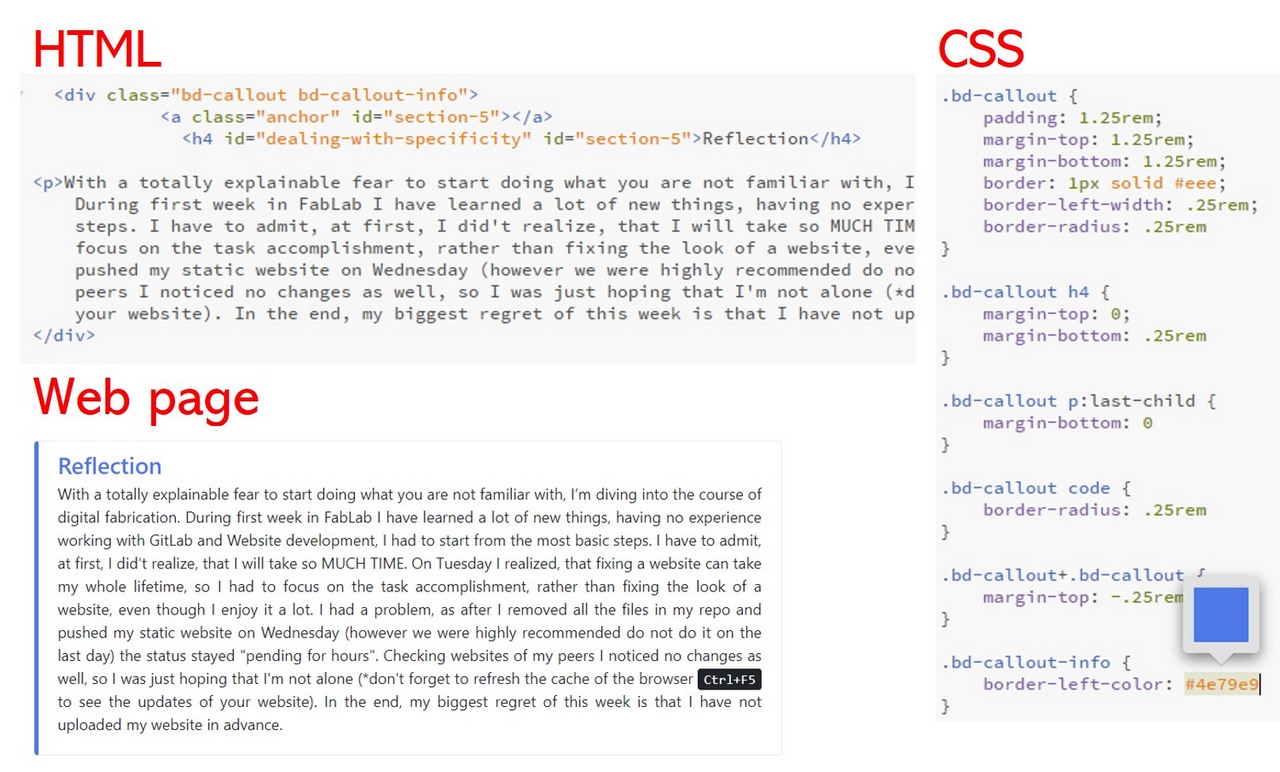
Fig 9. Adding "bd-callout" on my website.
Having my website ready, I ran the command git rm * -rf to remove all the files from my repo. Then I copied website files into my git folder. git status showed all the new files in the directory, so I ran git add -A , git commit -m 'comment' and git push . Then I was able to see these files in my remote repo in GitLab. I have created new .gitlab-ci.yml in my root directory (master), which is needed for deploying website.
I placed the final project idea on the Final Project page and the first Inital idea section.
With a totally explainable fear to start doing what you are not familiar with, I’m diving into the course of digital fabrication. During first week in FabLab I have learned a lot of new things, having no experience working with GitLab and Website development, I had to start from the most basic steps. I have to admit, at first, I did't realize, that I will take so MUCH TIME. On Tuesday I realized, that fixing a website can take my whole lifetime, so I had to focus on the task accomplishment, rather than fixing the look of a website, even though I enjoy it a lot. I had a problem, as after I removed all the files in my repo and pushed my static website on Wednesday (however we were highly recommended do not do it on the last day) the status stayed "pending for hours". Checking websites of my peers I noticed no changes as well, so I was just hoping that I'm not alone (*don't forget to refresh the cache of the browser Ctrl+F5 to see the updates of your website). In the end, my biggest regret of this week is that I have not uploaded my website in advance.
