15. Molding and Casting
Group assignment:
● Review the safety data sheets for each of your molding and casting materials, then make and compare test casts with each of them
Individual assignment:
● Design a mold around the stock and tooling that you’ll be using, mill it (rough cut + (at least) three-axis finish cut), and use it to cast parts
Research
Group assignment
Group:
● - Xinhui Hu
● - Zhengya Gong
● - Yazan Barhoush
● - Noora Nyberg
The task was to review the data sheets and safety data sheets for the molding and casting materials and compare test casts made with each of materials.
Prior to the group work, our instructor Ari gave us a rundown of molding and casting. Ari presented the process of creating molds, the available materials and the safety requirements when molding and casting as contact with any of the materials may cause irritation to the skin and eyes. It is important to work in a well-ventilated room, to use safety gloves (vinyl gloves only), glasses and a lab coat. He also emphasized the importance of going through the safety data sheets and the safety instructions for the different materials prior to molding and/or casting.
As always, safety is the number one priority (especially this week, because we are working with different types of material)! So, we made sure that the ventilation worked properly, and we wore safety gloves (chemical-resistant) to prevent skin irritation. In all cases, if the skin or the eye are exposed to the material, the following first aid procedures should be applied quickly: “Flush eyes with water for 15 minutes and seek immediate medical attention. Remove from skin with water-less hand cleaner followed by soap and water.” Then, we went through the datasheets and safety instructions of the four different material available to us. Here is a short summary of what we learned:
Date-sheet
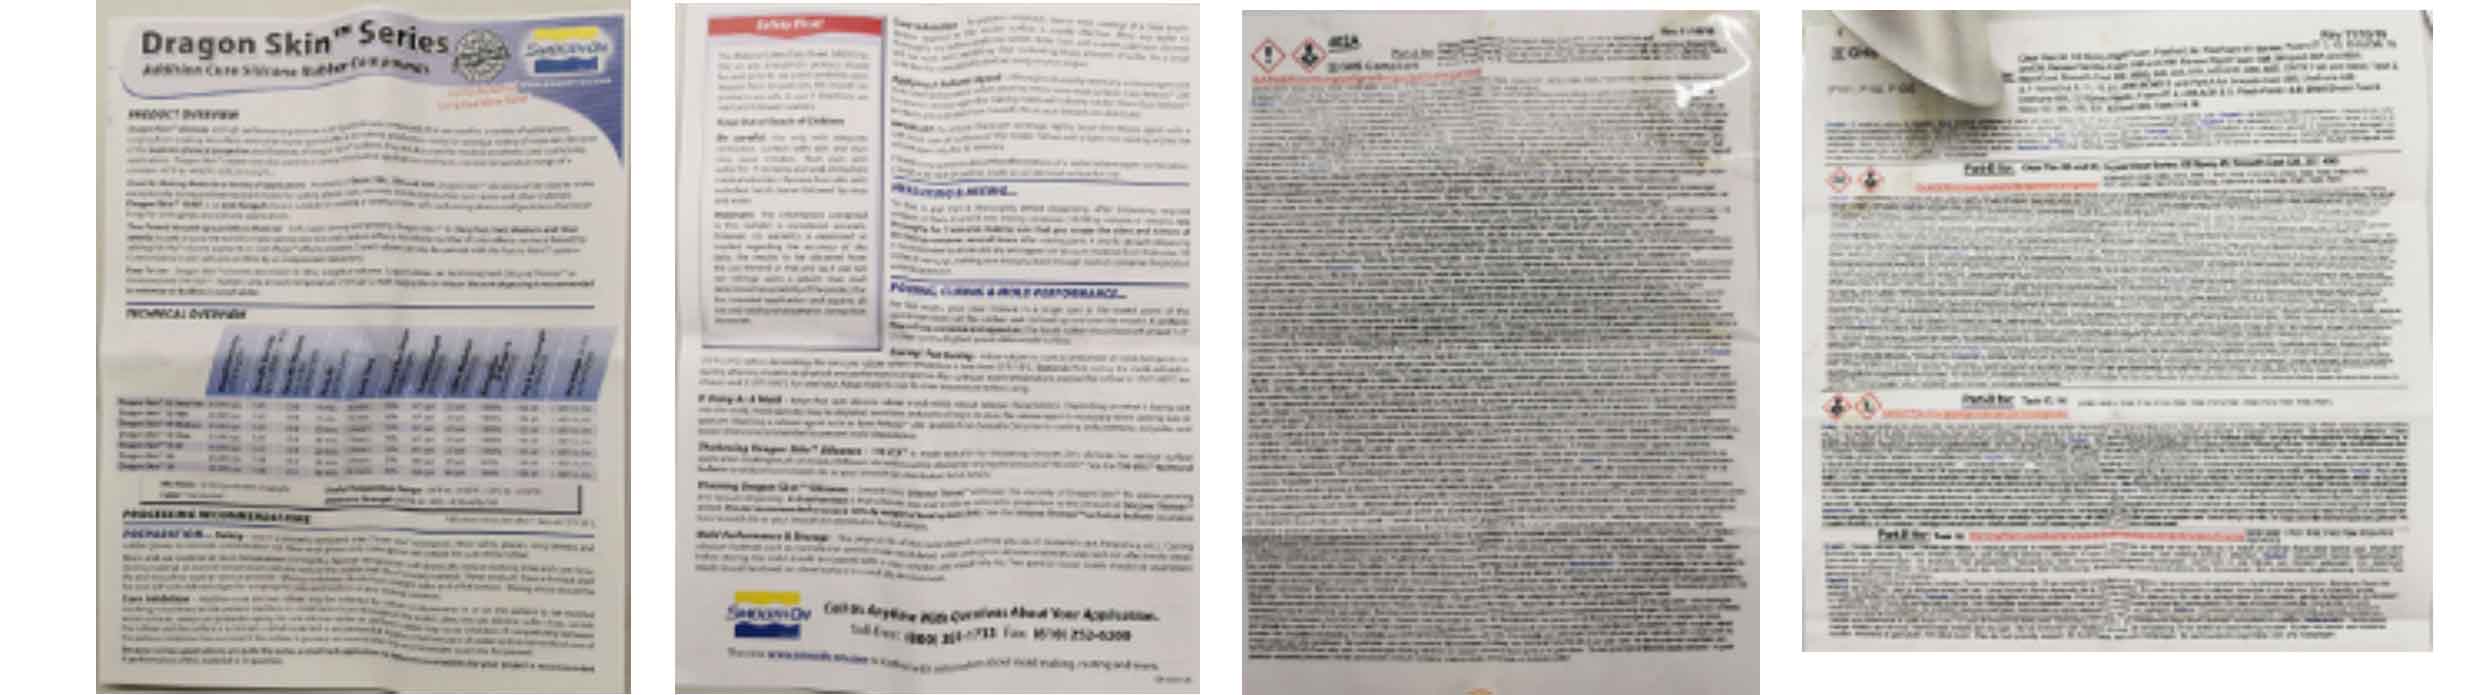
Dragon Skin™ 10 FAST

Dragon Skin™ silicones are high performance platinum cure liquid silicone compounds that are used for a variety of applications ranging from creating skin effects and other movie special effects to making production molds for casting a variety of materials. Because of the superior physical properties and flexibility of Dragon Skin™ rubbers, they are also used for medical prosthetics and cushioning applications. Dragon Skin™ rubbers are also used for a variety of industrial applications and have a service temperature range of a constant -65°F to +450°F (-53°C to +232°C)
Smooth-Cast® 305

The Smooth-Cast® 305 Series of liquid plastics are ultra-low viscosity casting resins that yield castings that are bright white and virtually bubble free. Vacuum degassing is not necessary. They offer the convenience of a 1A:1B by volume or 100A:90B by weight mix ratio. The differences between them are pot life and demold time.
These resins readily accept fillers (such as URE-FIL® 3 from Smooth-On) and can be colored with SO-Strong® or Ignite® color tints (Smooth-Cast® 325 series accepts pigments better than the Smooth Cast® 300 series). Fully cured castings are tough, durable, machinable and paintable. They resist moisture and mild solvents. Applications for Smooth-Cast® 300 Series Liquid Plastics include reproducing small to medium size sculptures, making prototype models, special effect props and decorative jewelry.
OOMOO™ 30

OOMOO™ 30 is suitable for a variety of art-related and industrial applications including making one and two-piece block molds for sculpture and prototype reproduction, casting plaster, resins and wax. OOMOO™ silicones are also suitable for electrical potting and encapsulation applications.
Smooth-Sil™ 940

Smooth-On Smooth-Sil™ Platinum Silicones cure at room temperature with negligible shrinkage. With different hardnesses to choose from, Smooth-Sil™ products offer tremendous versatility and are suitable for making production molds of any configuration, large or small. These silicones exhibit good chemical, abrasion and heat resistance. Materials such as plasters, concrete, wax, low-melt metal alloys or resins (urethane, epoxy or polyester) can then be cast into these silicone rubbers without a release agent.
Smooth-Sil™ Platinum Silicones are used for rapid prototyping, wax casting (foundries and candle makers), architectural restoration and for casting concrete. Smooth-Sil™ 940 is suitable for food related applications.
Through the datasheets and safety instructions of the three different material available to us (technical bulletins: OOMOO 30, Smooth-SilTM 940 and Smooth-castTM 300 Series). Safety data sheets for OOMOO 30 and Smooth-Sil 940 and Smooth-Cast 300 were also studied. Here is a short summary of what we learned:

Molding
For molding, we used the mold made by Xinhui Hu.
Smooth-Sil 940.
● Step1. Mix components in a correct proportion. we mixed the 100A and 10B in weight.

● Step2. Put them in the vacuum chamber for a few minutes to pull out air bubbles.

● Step3, pouring the Mixed A and B into the mold. The surface was very nice.

After 24 hours, the mold was taken out.

OOMOO™ silicones
● Step1. Mix components in a correct proportion. we mixed the 100A:130B.

● Step2. pouring the Mixed A and B into the mold. The surface was very nice.

After 6 hours, the mold was taken out.

Dragon Skin™ 10 FAST
● Step1. Mix components in a correct proportion. we mixed the 100A:100B.

● Step2. pouring the Mixed A and B into the mold. The surface was very nice.

After 6 hours, the mold was taken out.

Casting
Smooth-Sil 940.
For the Smooth-Sil 940, because it can be used for food, we used water to make ice for drinking.
We also used Coca-Cola to fill in the container to make cola ice.


Smooth-Cast 305
We also tried a very interesting test. We used the 2 typesof mold, half of the Dragon Skin™ 10 FAST and half of the OOMOO™ silicones, to compare the difference, and poured the Smooth-Cast 305 inside the mold. The results are significantly different and interesting.
● Step1. Mix components in a correct proportion. we mixed the 100A:100B.
● Step2. pouring the Mixed A and B into the mold, then We used tape to wrap the mold so that the material inside would not overflow.

● Step3. After 30 mins, we took out it.

•The Smooth-Cast 305 can corrode the Dragon Skin™ 10 FAST mold but would not corrode the OOMOO™ silicones mold. Also, the surface of Smooth-Cast 305 in Dragon Skin™ 10 FAST mold is not smooth, on the contrary, it is smooth in the OOMOO™ silicones mold.

Individual assignment:
Design a bear mold
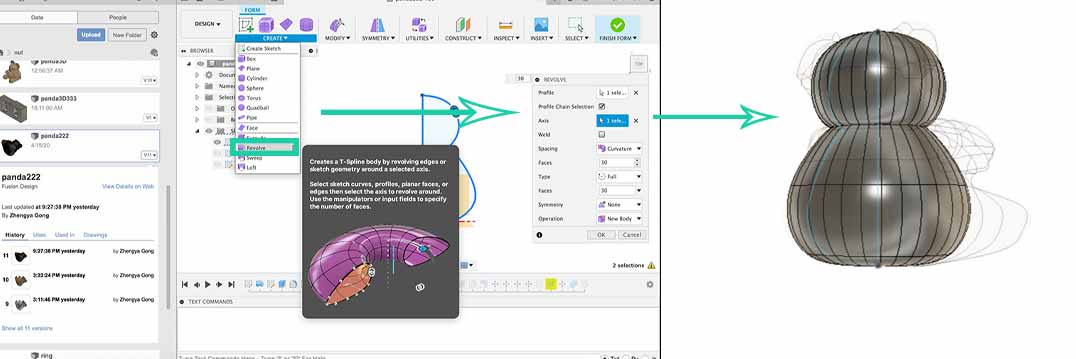
● Step1. Create the sketch >> fit point spline

● Step2. Create form >> revolve
● Step3. Create Symmetry >> mirror
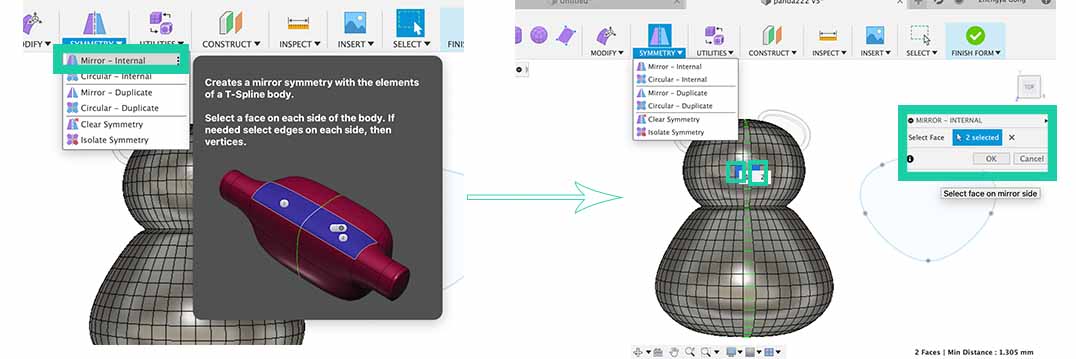
● Step4. Select faces >> edit form

● Step5. Using the same way to pull and push other parts to get the model
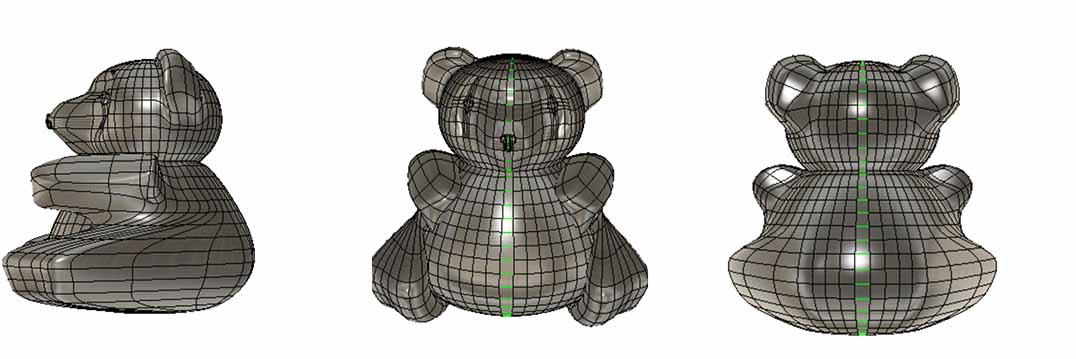
● Step6. After render

● Step7. Create cylinder >> create 3 cylinders

● Step8. Create box

● Step9. Move box outside the bear
● Step10. Modify >> combine >> cut the bear

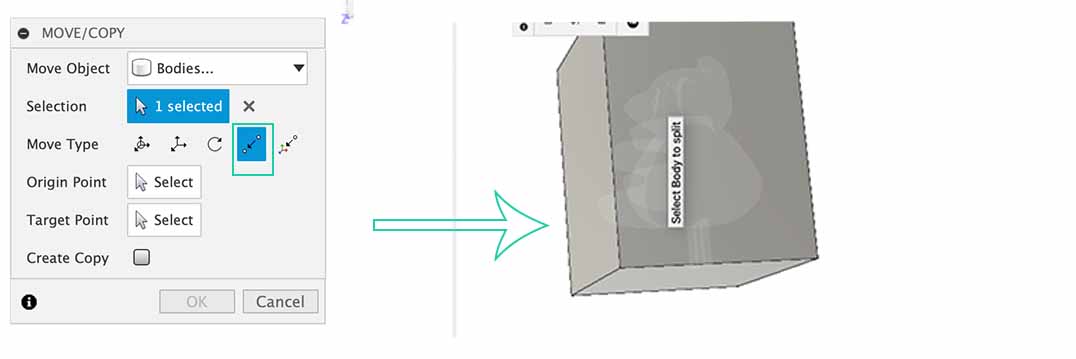
● Step11. Modify >> split body and move it

After asking Ari, I realized my file is not correct and complicated to molding and casting, then I designed a new bear using the same method.

The different steps as following.
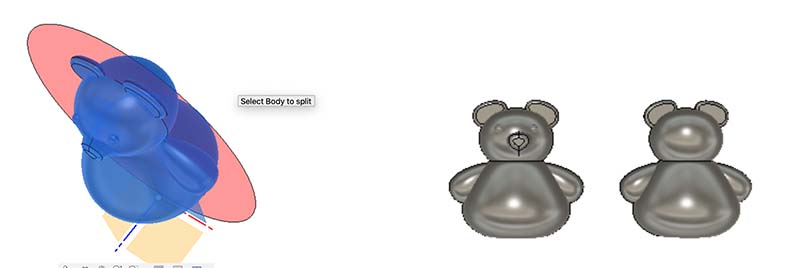
● Step12. Modify >> split body
● Step13. Create >> box, Modify >> shell.

● Step14. Create >> cylinder and move it.

● Step15. Finally.

Milling the Mold Design
We used MODELA Player 4 to set the file configurations for milling, to mill out the NEGATIVE space and leaving the POSITIVE behind. We also used VPanel to position the wax mold along the XY Z axes in Roland SRM-20 CNC-milling machine. The selected material from the Modela was milling wax. It presets the values for the milling process.
● Step1. Import the STL file into MODELA.
● Step2. Set the origin to match the setting of the milling machine by: Set > Model > Origin. Make sure that the size and orientations are correct.

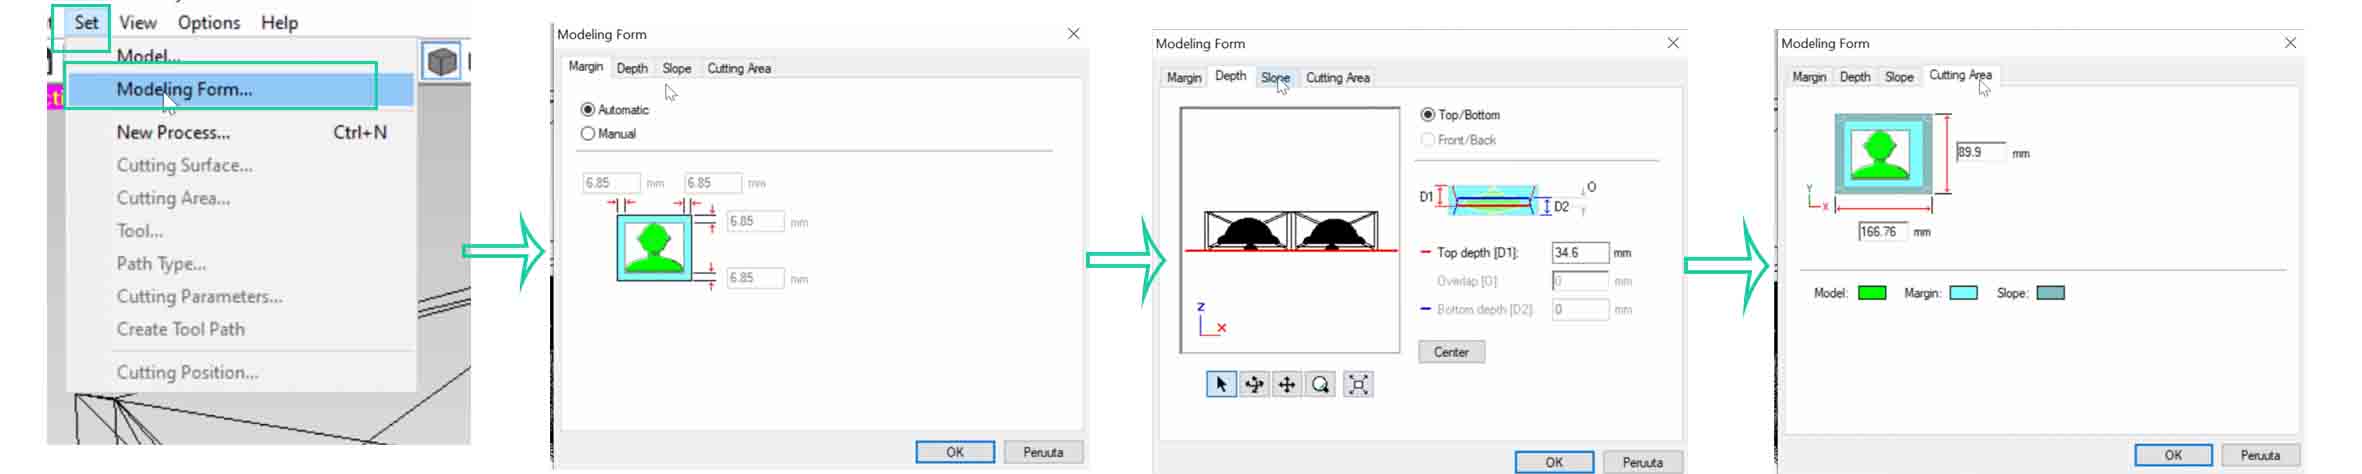
● Step3. Set the margins by Set > Modeling Form > Margin. Just check that the margin is zero and leave the other parameters to their default values.
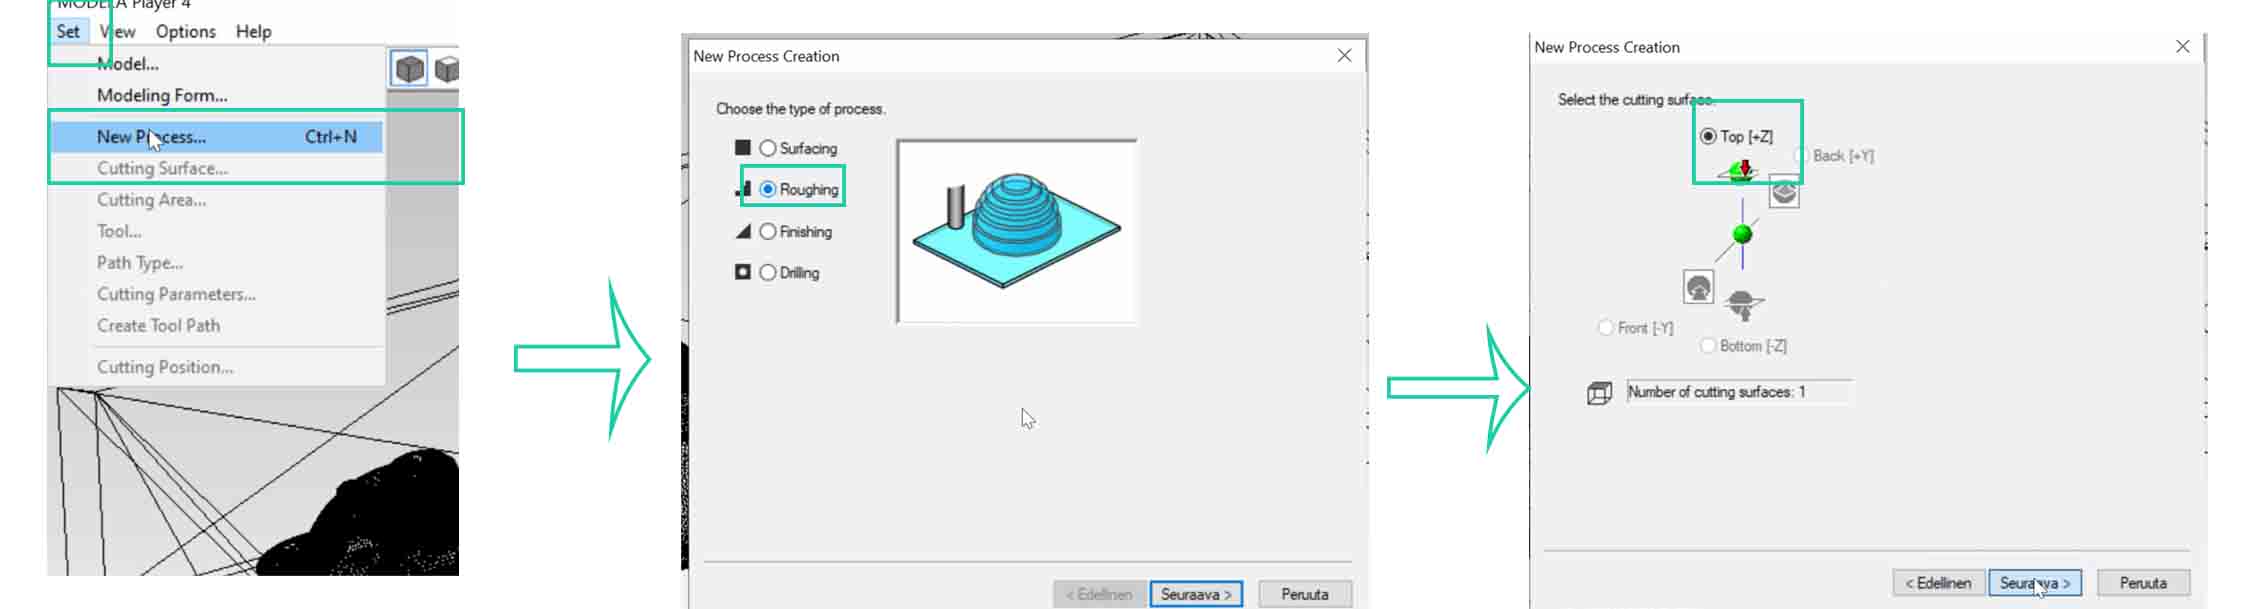
● Step4. Create a new process by: Set > New Process. Here, you select the tool and set the cutting parameters for the milling process.
● Step5. Roughing process: click next. You are shown the selection of cutting surface.
● Step6. Choose the tool for cutting, however I can not find the 3.18mm tool, so I added a new tool.

● Step7. Check if the cutting area and depth for the design are correct.
● Step8. Choose the tool path to create (I chose Scan Lines (X + Y) and Cutting Start Position as lower left).
● Step9. Set the cutting parameters: XY Speed, i.e. the horizontal speed of the milling tool (30 mm/s), Cutting-in Amount, i.e. the depth of the cut (1 mm) and Path Interval, i.e. offset between parallel cuts (1.5 mm).
● Step10. Create the tool path for the roughing process.

● Step11. Create a new process again Set > New Process. The process is same as the roughing process.
● Step12. This time select Finishing for creating a smooth surface.
● Step13. Set the cutting parameters: XY Speed (19.49 mm/s), Z speed (19.49 mm/s), Spindle: 7000 rpm, cutting-in Amount: 0,2 mm, path Interval: 0,2 mm and the Finish Margin (0 mm).
● Step14. Create the tool path for the finishing process.
Because I had to control the machine remotely (COVID-19), and hence a Fab Lab instructor (Mikko) had to change the milling bit and fix the material in the following steps.
● Step15. Change the milling bit to flat 3.18 mm tool for roughing and finishing (Mikko did this).
● Step16. Place the wax mold on the base of the milling machine (Mikko did this).
● Step17. Use VPanel for SRM-20 to position the axes (Mikko did this).
More details about manipulating the SRM-20 machine can be found in Week 4 and Week 6 assignments.
The three steps, to secure the wax stock in the machine, that need put masking tape on the bottom of the brick and on the building plane in the machine. Then, using hot glue gun, to secure the wax stock inside. This system worked better than double-sided tape Using V-panel he set zero X,Y,Z. And started the milling process.
● Step18. In MODELA Player, press the cut button in the bottom right corner.


After milling, the bear looks nice. but it is not that perfect, cos it is more big. Therefore, I made the bear smaller.

Then I redo the steps, and finally it is perfect.

Negative Mold
From my wax mold I decided to make a food-safe silicone mold from Smooth-Sil 940. To make it food safe you need to cure it for 24 hours.
● Step1. Mix components in a correct proportion. I mixed the 100A and 10B.
● Step2. Put them in the vacuum chamber for a few minutes to pull out air bubbles.
This is a kind reminder. Never pour the mixed Smooth-Sil 940 more than half the container. Otherwise, you should pay more time to clean everything as me.

● Step3, pouring the Mixed A and B into the mold. The surface was very nice.

● Step3, 24 hours later…my silicone mold was ready. I left it in the oven on 60°C (140°F) to make it a little bit harder, cut the shafts a little bit bigger, and the mold was ready to pour something inside.

After I cleaned my mess, I got my bear and a new cup.
Casting
I had a dark chocolate bar, silicone mold and a kitchen just for me. And I wanted a chocolate in constant width shape.
To melt the chocolate I put chocolate in a plastic bag in a pot with water. So the chocolate won’t hit up more than 99°C. Then, I poured it into the negative model.

Although, I made the bear using the whole week, I just need 5min to eat it.

Finally.... the bear was disappear.