5. 3D Scanning and Printing
Week’s Assignments
Group Assignment:
● Test the design rules for your 3D printer(s).
Individual Assignments:
● Design and 3D print an object (small, few cm3, limited by printer time) that could not be made subtractively
● 3D scan an object (and optionally print it)
Group assignment
Group:
● - Xinhui Hu
● - Zhengya Gong
● - Yazan Barhoush
● - Noora Nyberg
The details of group assignment
Individual assignment
3D Printing
● Explain about the object that you are going to design.
My idea is from a traditional artwork in China shown in figure.
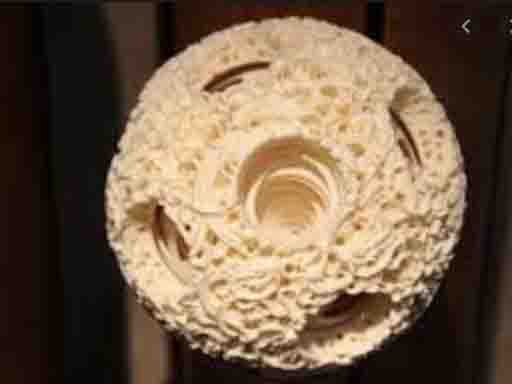
The traditional artwork
And also cos the object from the wikis that Behnaz shared to us.
The showing object
● Information about the software that you used for design.
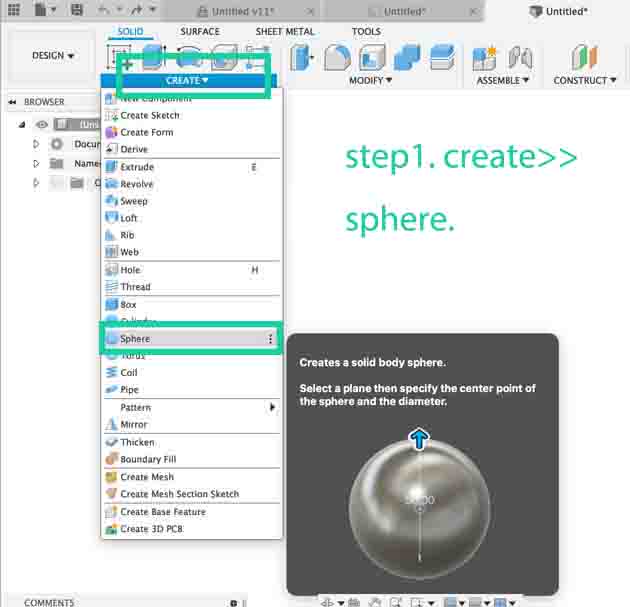
I choose Fusion 360 to design the object because I am familiar to it and it is easy to use.
Step1. create >> sphere.
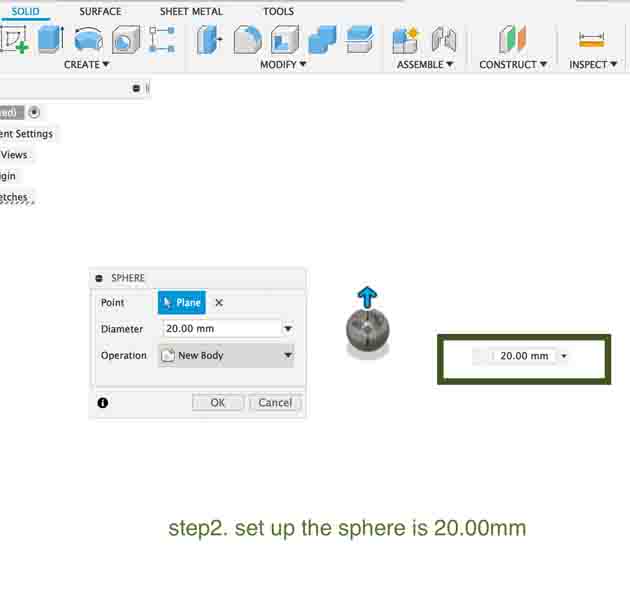
Step2. Set up the sphere is 20.00mm.
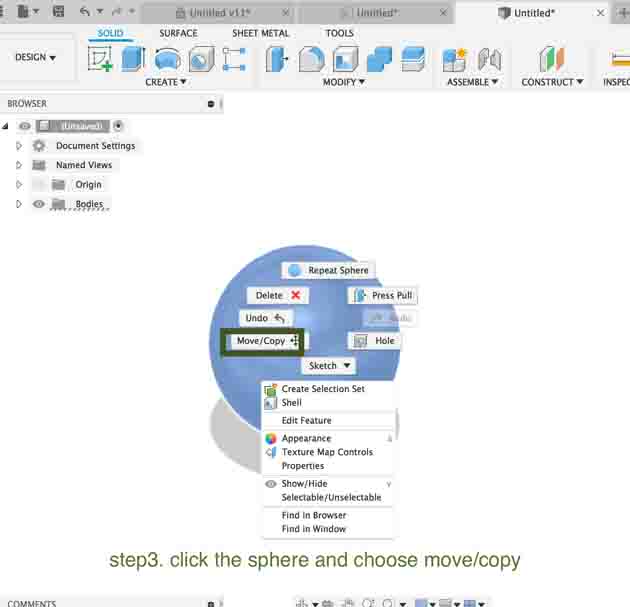
Step3. Click the sphere and choose move/copy.
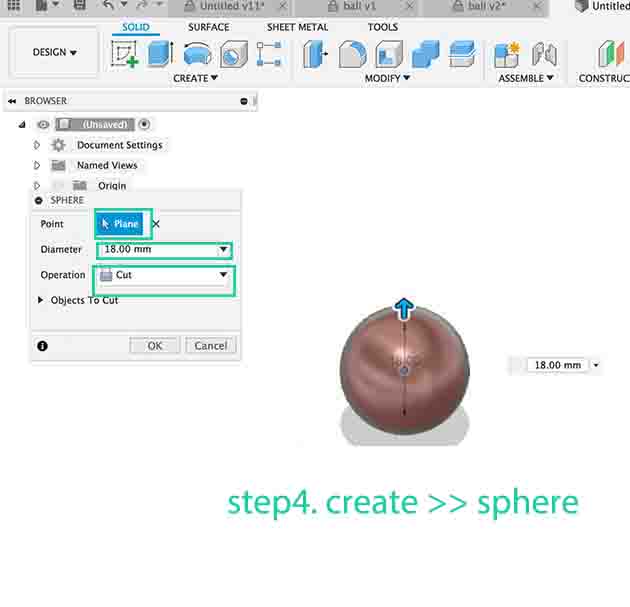
Step4. Create >> sphere and setting 18.00mm.
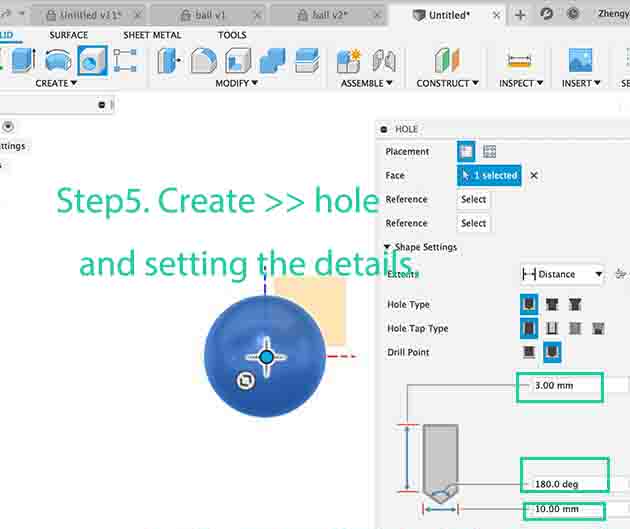
Step5. Create >> hole and setting the details.
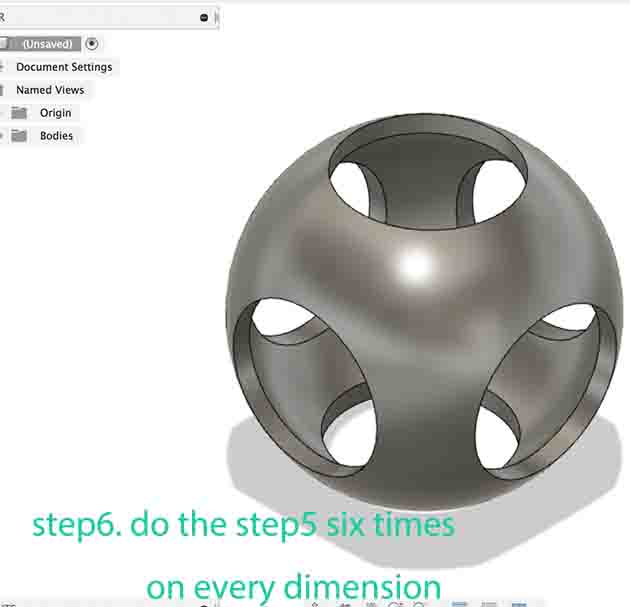
Step6. Do the step5 six times on every dimension.
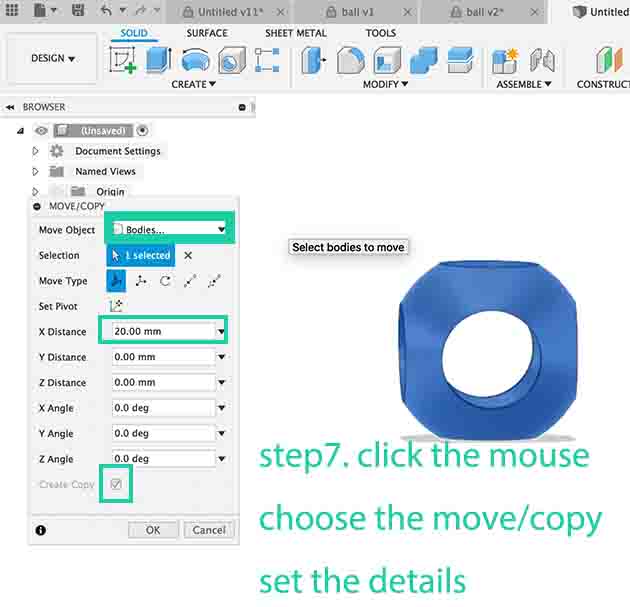
Step7. Click the mouse and choose the move/copy, then set the details.
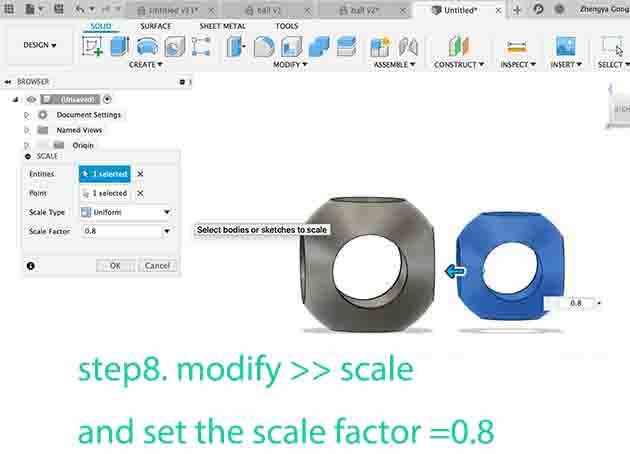
Step8. Modify >> Scale and set the scale factor =0.8
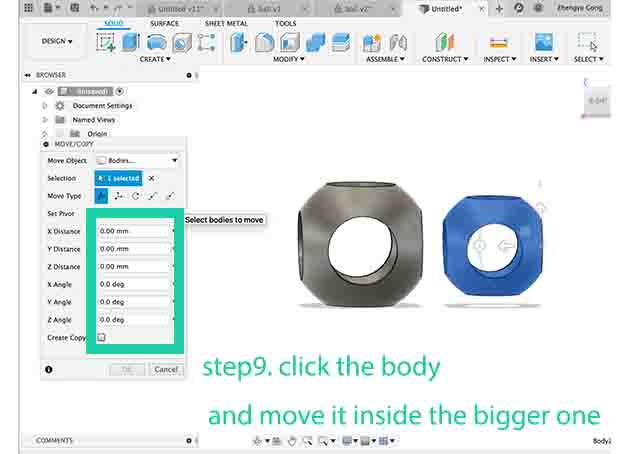
Step9. Click the body and move it inside the bigger one.
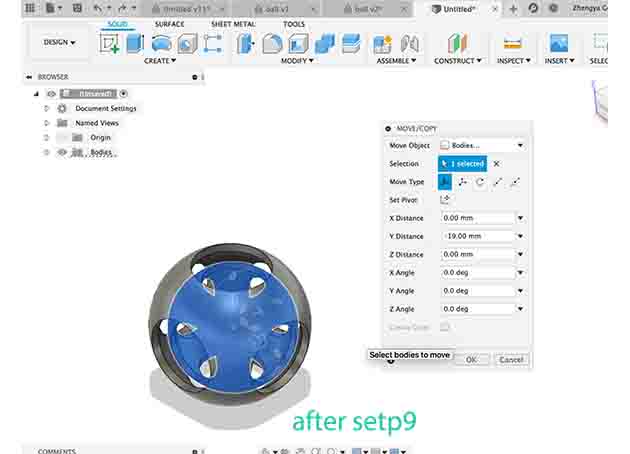
After step9.
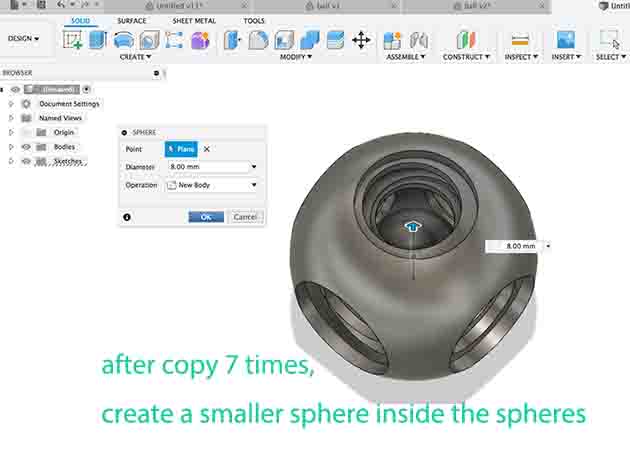
After copy seven times, create >> sphere and put it inside the spheres.
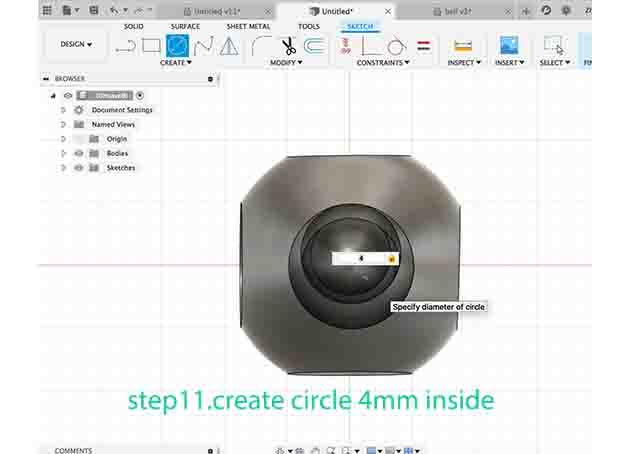
Step11. Create >> sketch >> circle 4.00mm insede.
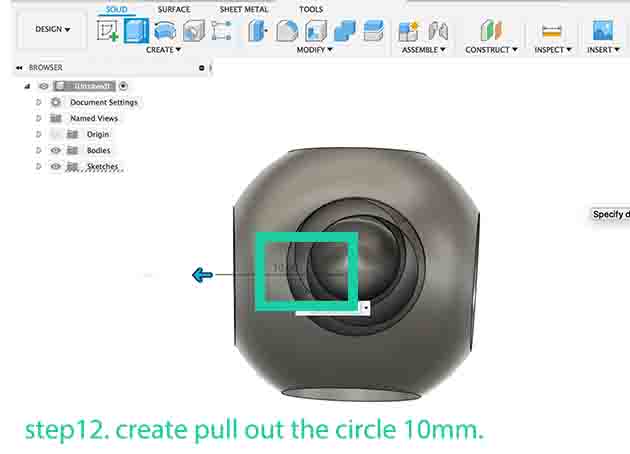
Step12. Create >> pull out 10.00mm.
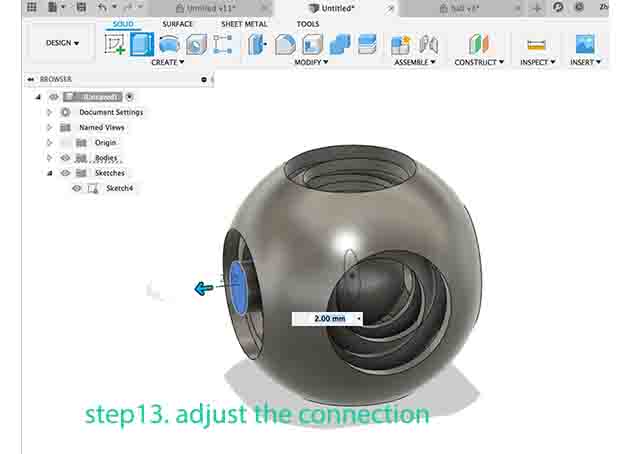
Step13. Pull out the circle again, cos it was short than I need.
Step14. Create >> torus, and set up the details.
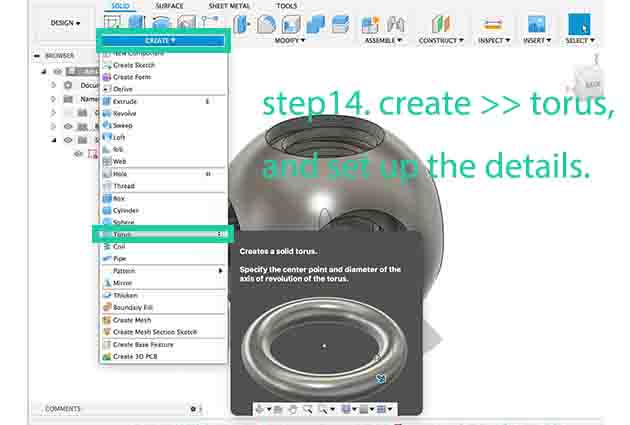
Step15. The details of the torus.

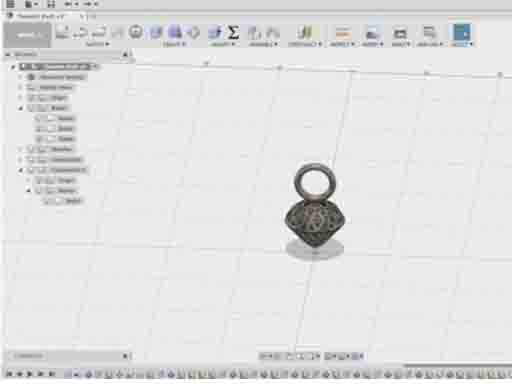
Then save it as stl.
● Clear explanation and the reason of why the object could not be made subtractively.
Set ball also known as “concentric ball”, “ghost work ball”, take the meaning of uncanny workmanship, the production is quite complicated, the craft requirements are very high. This process was lost until 1966, when the first modern jade ball in China was successfully trial-produced. This is an eight-layer rotating jade ball with a diameter of 12.8 centimeters. For example, my object have the sphere (S1), then the smaller sphere (S2)around it, then bigger sphere (S3)slightly bigger than (S2) around (S2), and so on. And also all of the spheres are floating inside one another instead of touching each other. Now it can be made easily with 3d printing instead of subtractively.
Set ball
● In your group work assignment, you found the design constraints for the 3D printers, explain how did you applied the result in your individual task for designing your object.
In my group assignment, I found there is a big different between the machines, and because my project is small and needs support material. I used the Stratasys Fortus 380mc 3D to print my project.
● The steps of preparation for 3D printing and working with the 3D printer
First, I opened the .stl file in Insight. Next, I set the Part interior style to “Sparse”, Visible surface style to “Enhanced” and Support style to “Smart” properties from the main window, the green frag that made each layer and supports visible, then click File>Export CMB. Also, open control center and insert CMB and remove it, then click Build Job. Third, a sheet should be placed into the printing chamber, so I wore gloves to place a base sheet on top of the 3D printer’s work base, to place the sheet it’s better to align it with the pins on the corners of the printer so that the printer recognizes it, once the sheet was placed I closed the door of the printer, and waited for a while until the sheet gets heated and flattened. Finally, I elected the place for my 3D printing and pressed on the Build menu and the details of my design and the time estimate for my print shown on the screen, then I pressed on the Play sign, and the printer started printing.
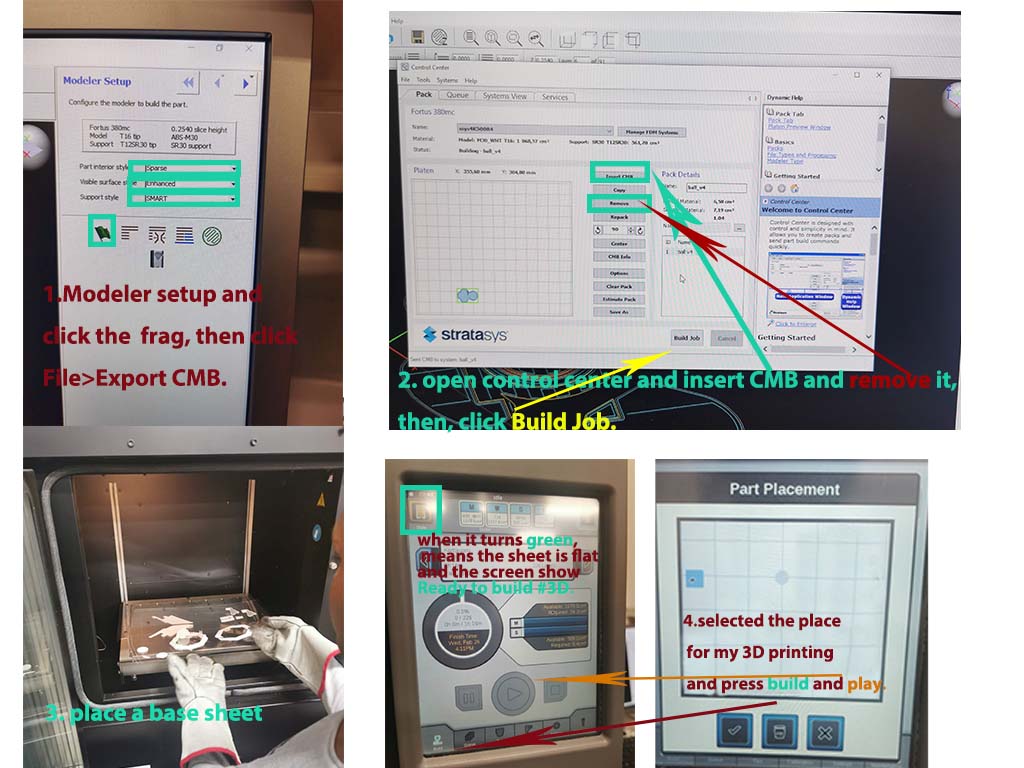 set up the 3D printer
The process of 3D printing
● The steps of removing your object from the 3D printer
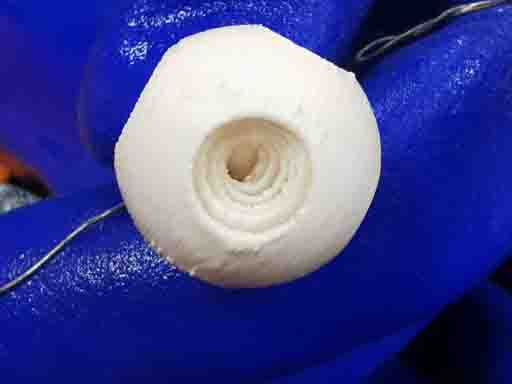
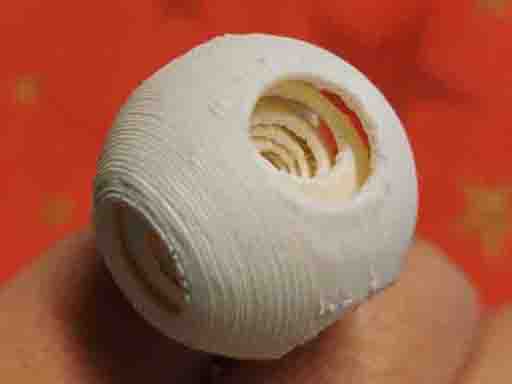
After printing my object, I cleaned the support material on the bottom of the ball by hand.
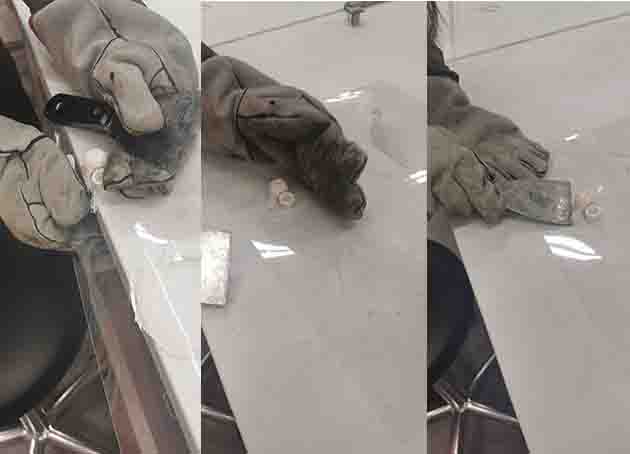 Remove the support materal
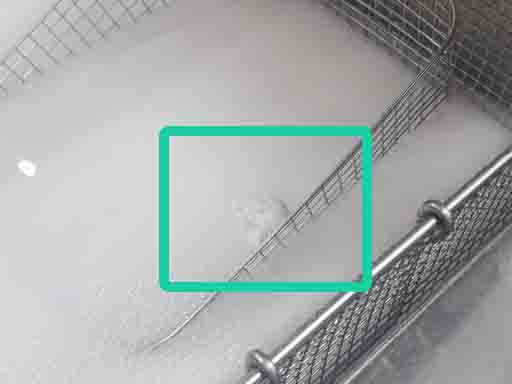
Since in my design, the ball was inside the ball, it could not have been built without using support material. To remove the support material, I put the printed object into the cleaning tanks full of Sodium Hydroxide (NaOH) liquid. So, I only needed to wait for the existing detergent in the tank to do the job. Everyday, I went to Fab Lab to check the object and after three days, my object was done and looks well.
● Reflection on your 3D printing experience, what you have learned, how you overcame the problems that you faced.
Also, because the printed object is smaller, it was always floating on the surface, so I attached a wire to a metal and sank it into the box. After removing the object from the cleaning tank, wash it and your hands carefully. Touching eyes with a detergent smeared hand can cause burn and damage to your eyes.
The ring is floating
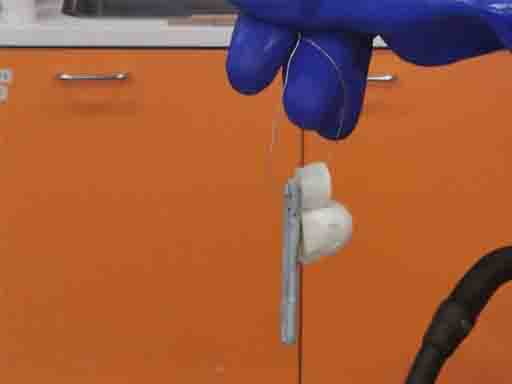
The ring attached with metal
The ring after cleaning
Also, I did a toy according this ring because the suggestion from Behnaz, she said the bigger one will be better.
 The big ball
3D Scanning
The method used for 3D scanning (e.g., scanner or photogrammetry)
I used MakerBot Digitizer for 3D scanning.
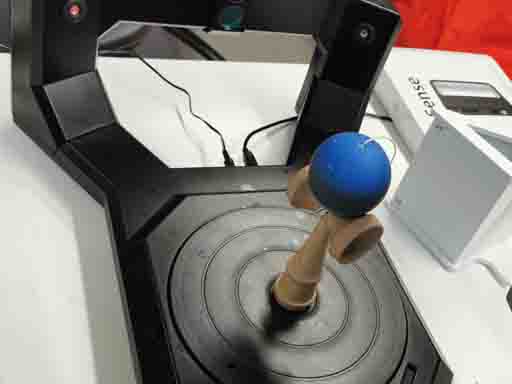
The toy inside the 3D scanner
● Explanation about the process used for 3D scanning! How it generally works.
First, I turned on the three switch and put my toy inside the scanner, but a part of the toy cannot be scanned, because my toy included two parts and connected by lines. And, I found the background is important, otherwise the 3D machine can not recognize the different between my object and the background. Also, the light is crucial for the 3D scanning, I turn on the light that make the room bright, also the light switch was hard to find, and I even pressed the wrong switch, which turn off the light on the first floor.
The first scanning
Then, I tried to put it in a different way and it worked.
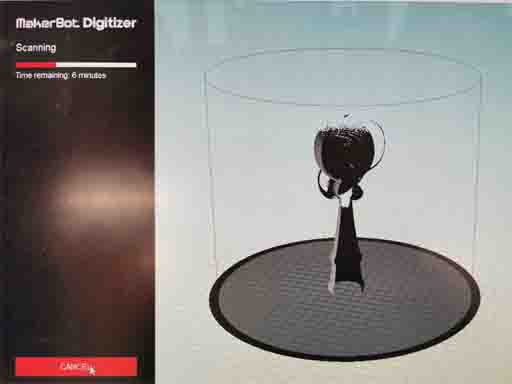
The second scanning
This machine is easy to use, just put toy inside the machine, open the software-WakerWare for Digitizer, and click scan.
I printed a clock image but the clock image is useful for photogrammetry method so I did not use it for MakerBot Digitizer.
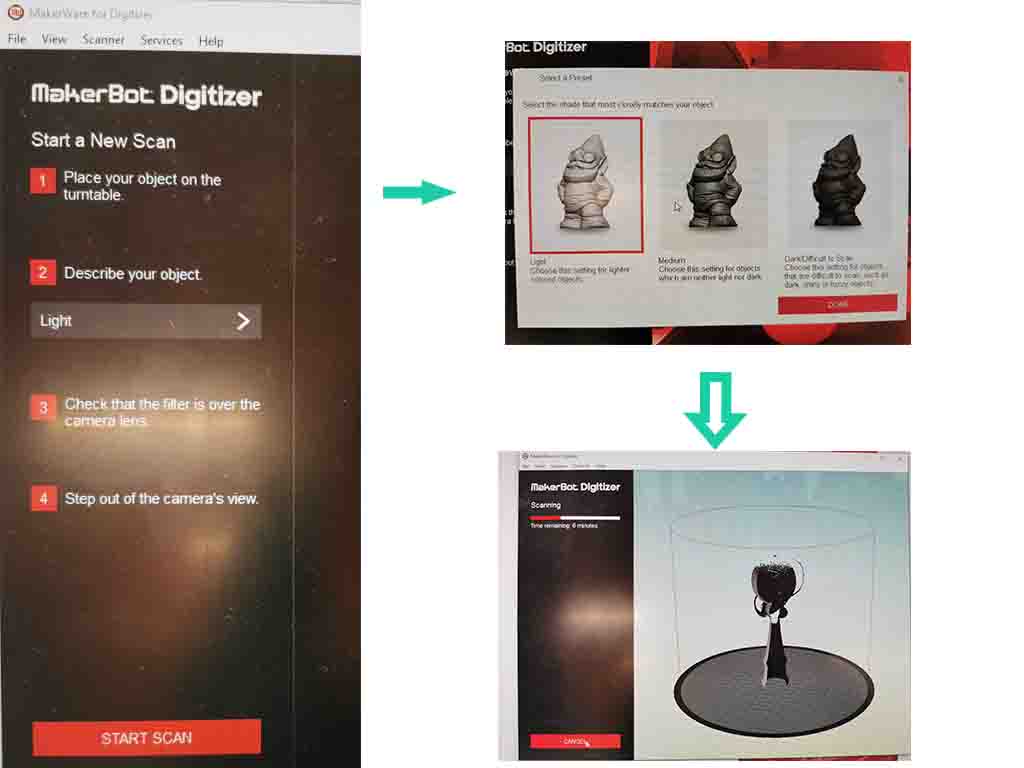
The steps of scanning
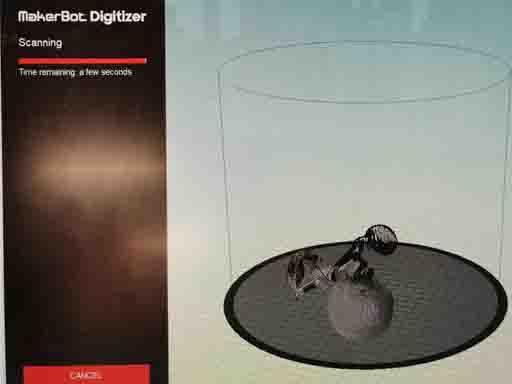
When the scan finish, I save it as .thing file, and open it again using MakerBot making the file smaller.

The result of 3D scanning
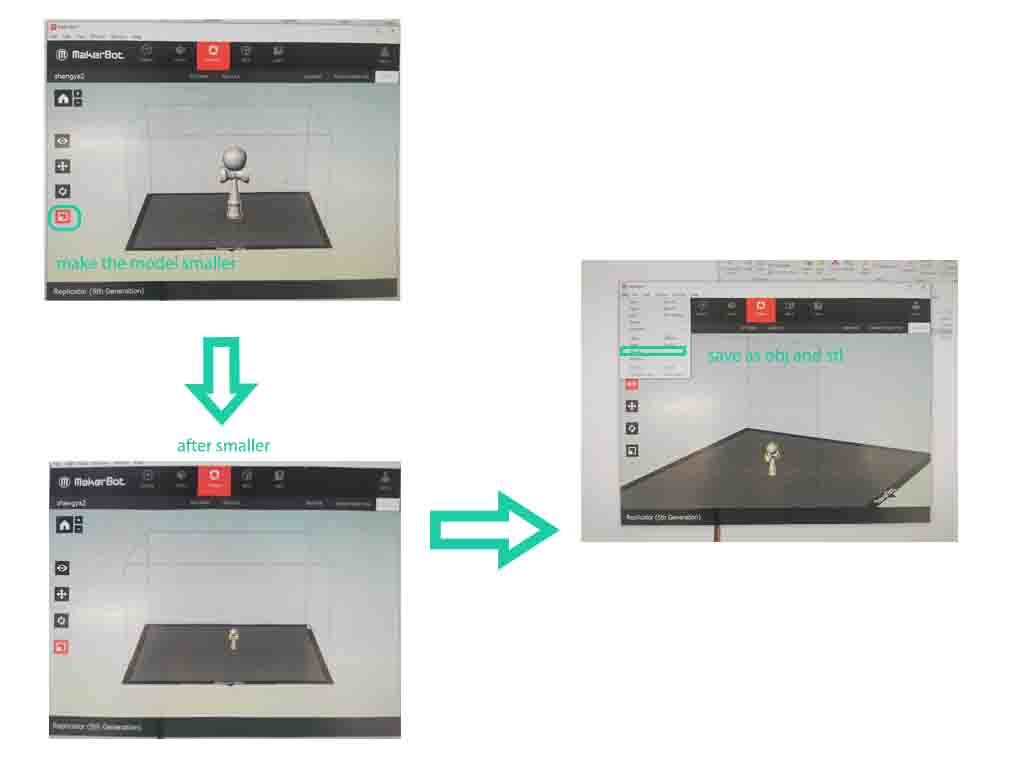
The steps of reduce the file size
Reflection
In this week, it is my first time to print an object. So I learned about different 3D printing technologies, and how to work with different 3D printers that are in FabLab Oulu to print object that could not be made subtractively. It was also my first 3D scanning. We were scanning each other and our object, it is so funny and interesting. I like 3D printing and scanning.
Files