Week 12: Output Devices
During the twelve session dated April 3 2019, I was introduced to many types of output devices:
- RGB LED,
- LED Array,
- LCD,
- Video,
- Speaker,
- Solenoid,
- DC Motor,
- Servo Motor,
- Brushless DC Motor,
- Stepper Motor,
- Motor Control,
- Solid State Relay,
- Piezo
- Shape Memory,
- Inflatable,
- Hydraulic.
The individual assignment is to add an output device to a microcontroller board I have designed, and program it to do something.
The group assignment is to measure the power consumption of an output device.
During the tests, I will use the Arduino Uno "Open Source" electronic hardware because it has the same microcontroller I will be using later on.
Connecting the Arduino to the laptop:
Inside Tools/ Board/ "Arduino/Genuino Uno" I will specify "Arduino/Genuino Uno",
When the board is connected:
Inside Tools/ Port/ "COM3(Arduino/Genuino Uno)" I will specify COM3(Arduino/Genuino Uno).
Output Devices:
I watched several youtube video to be able to write and test the different Arduino Code.
I designed my board based on the Arduino Uno's connections and according to my need for my final project "Dehumidifier".
I will test the below sensors because I will need them for my final project:
- Relay,
Relay Wiring:
- I connected the - Pin to GND,
- I connected the + Pin to +5v,
- I connected the S Pin to Pin 10 on the Arduino Board.
Dht-22 Wiring:
- I connected the + Pin to +5v,
- I connected the - Pin to GND,
- I connected the Out Pin to Digital Pin3.
I tested the relay by using the below simple code as beginning.
As a second test I connected the Humidity Sensor Dht-22 and by using the below code I commended the relay to turn On and Off according to the Humidity level.
I will use the Relay to turn on the "Dehumidifier", when the humidity exceeds the 50% according to the PVA requirement.
Practically, I arranged the limit humidity to 70% so that when the room humidity reached or exceed the 70% the relay will turn On the Dehumidifier.
As you can see in the above picture when the Humidity was 66% the relay's LED was Off, I blowed some fresh air towards the Dht-22 the humidity reached 99% and you can see the relay's LED turned On.
- LCD 16 x 2 Digital display,
I connected the Serial LCD Display 16 x 2 to the I2C Backpack to minimize the number of connections to only four. The I2C is equipped with a potentiometer to adjust the brightness of the LCD display.
I conected the LCD-I2C with the Arduino according to the below wiring:
- VCC to +5v
- GND to GND
- SDA to A4
- SCL to A5
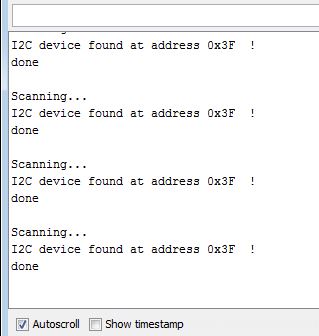
I checked the LCDI2C type by pressing Tools/Serial Monitor. As you can see in the picture the LCD type is "0x3F". I will insert it to commend the LCD.
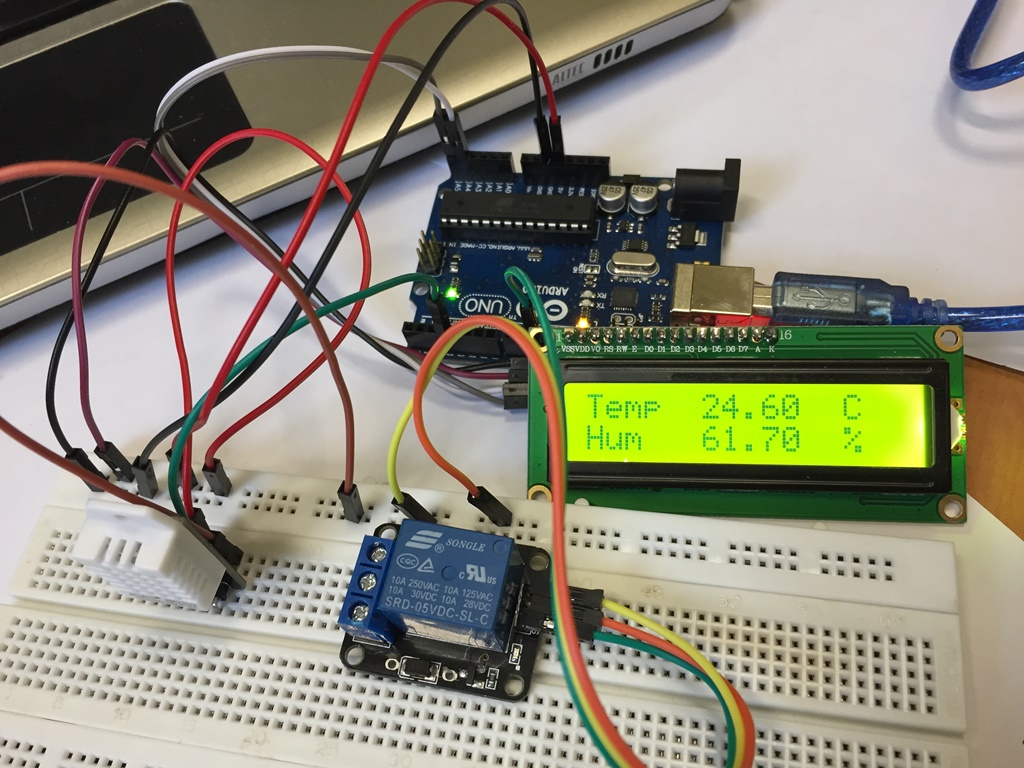
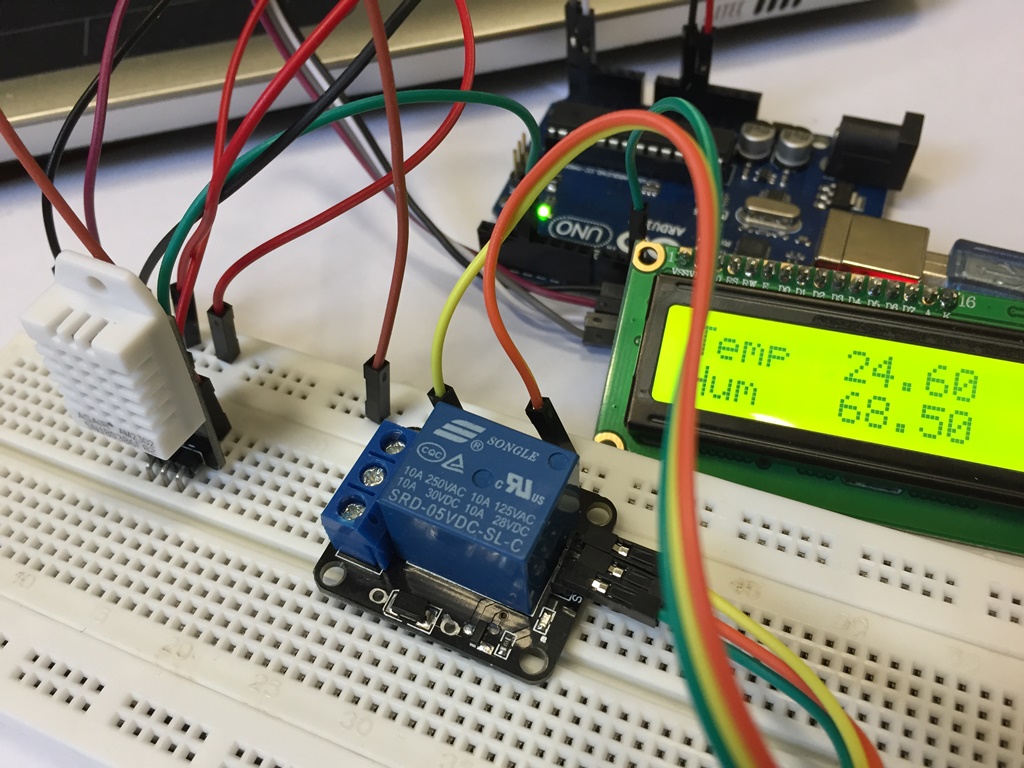
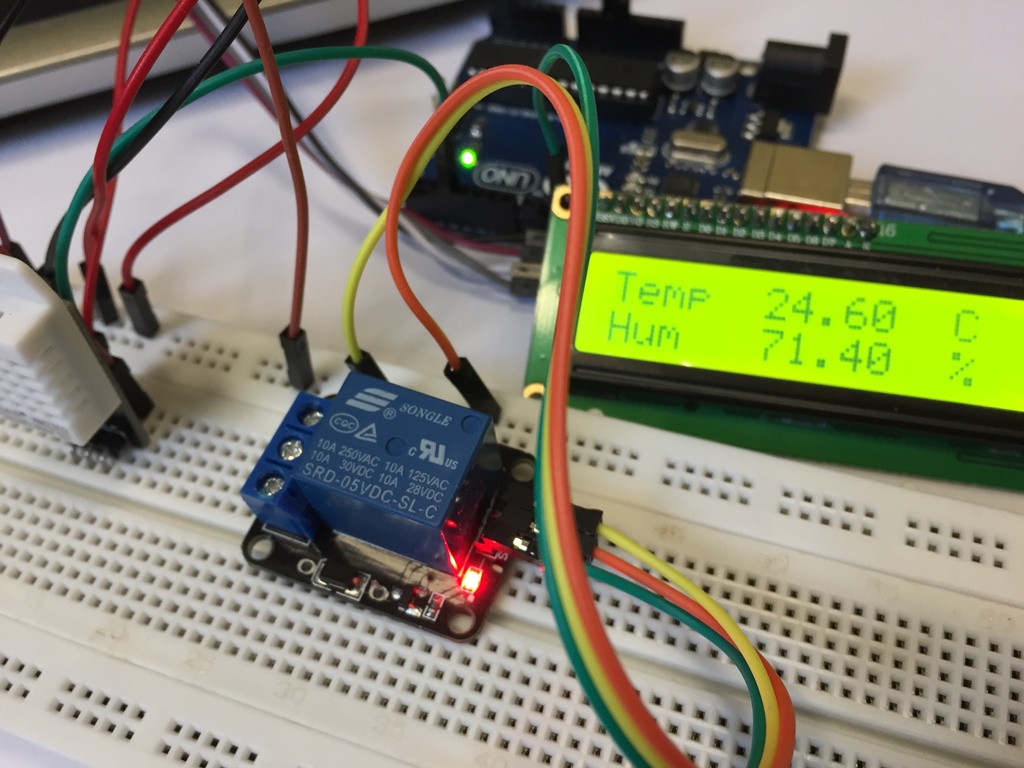
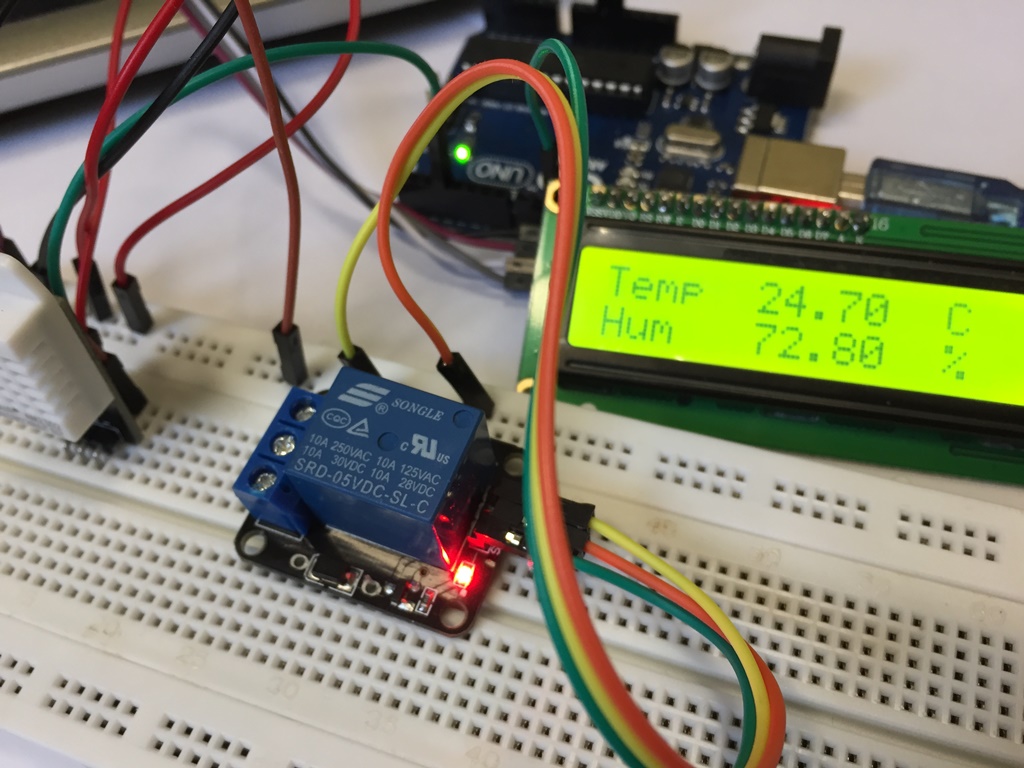
As displayed on the LCD when the room Humidity was 61.7% and 68.5% the Relay's LED was Off, I blowed some fresh air towards the sensor the Humidity reached 71.4% and 72.8% at that time the Relays LED was On.
Testing my board:
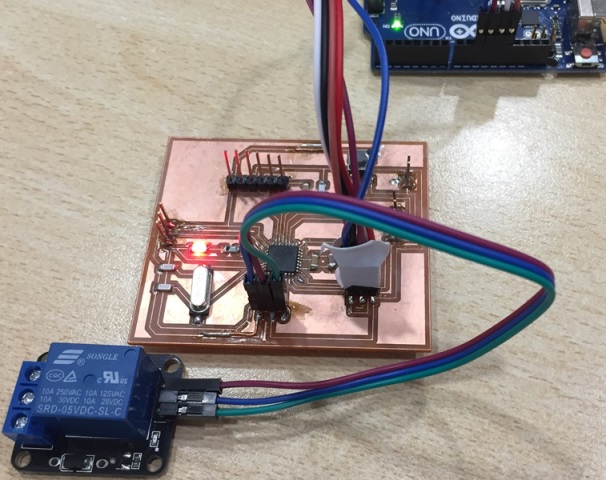
As for the Input sensor, I sketched the ATmega and according to the remaining Pins and by selecting the easiest path I selected Pin 14 to commend the external "Peltier" kit through the Relay.
Knowing that all the other Pins for the LCD, FTDI and ISP are immovable.
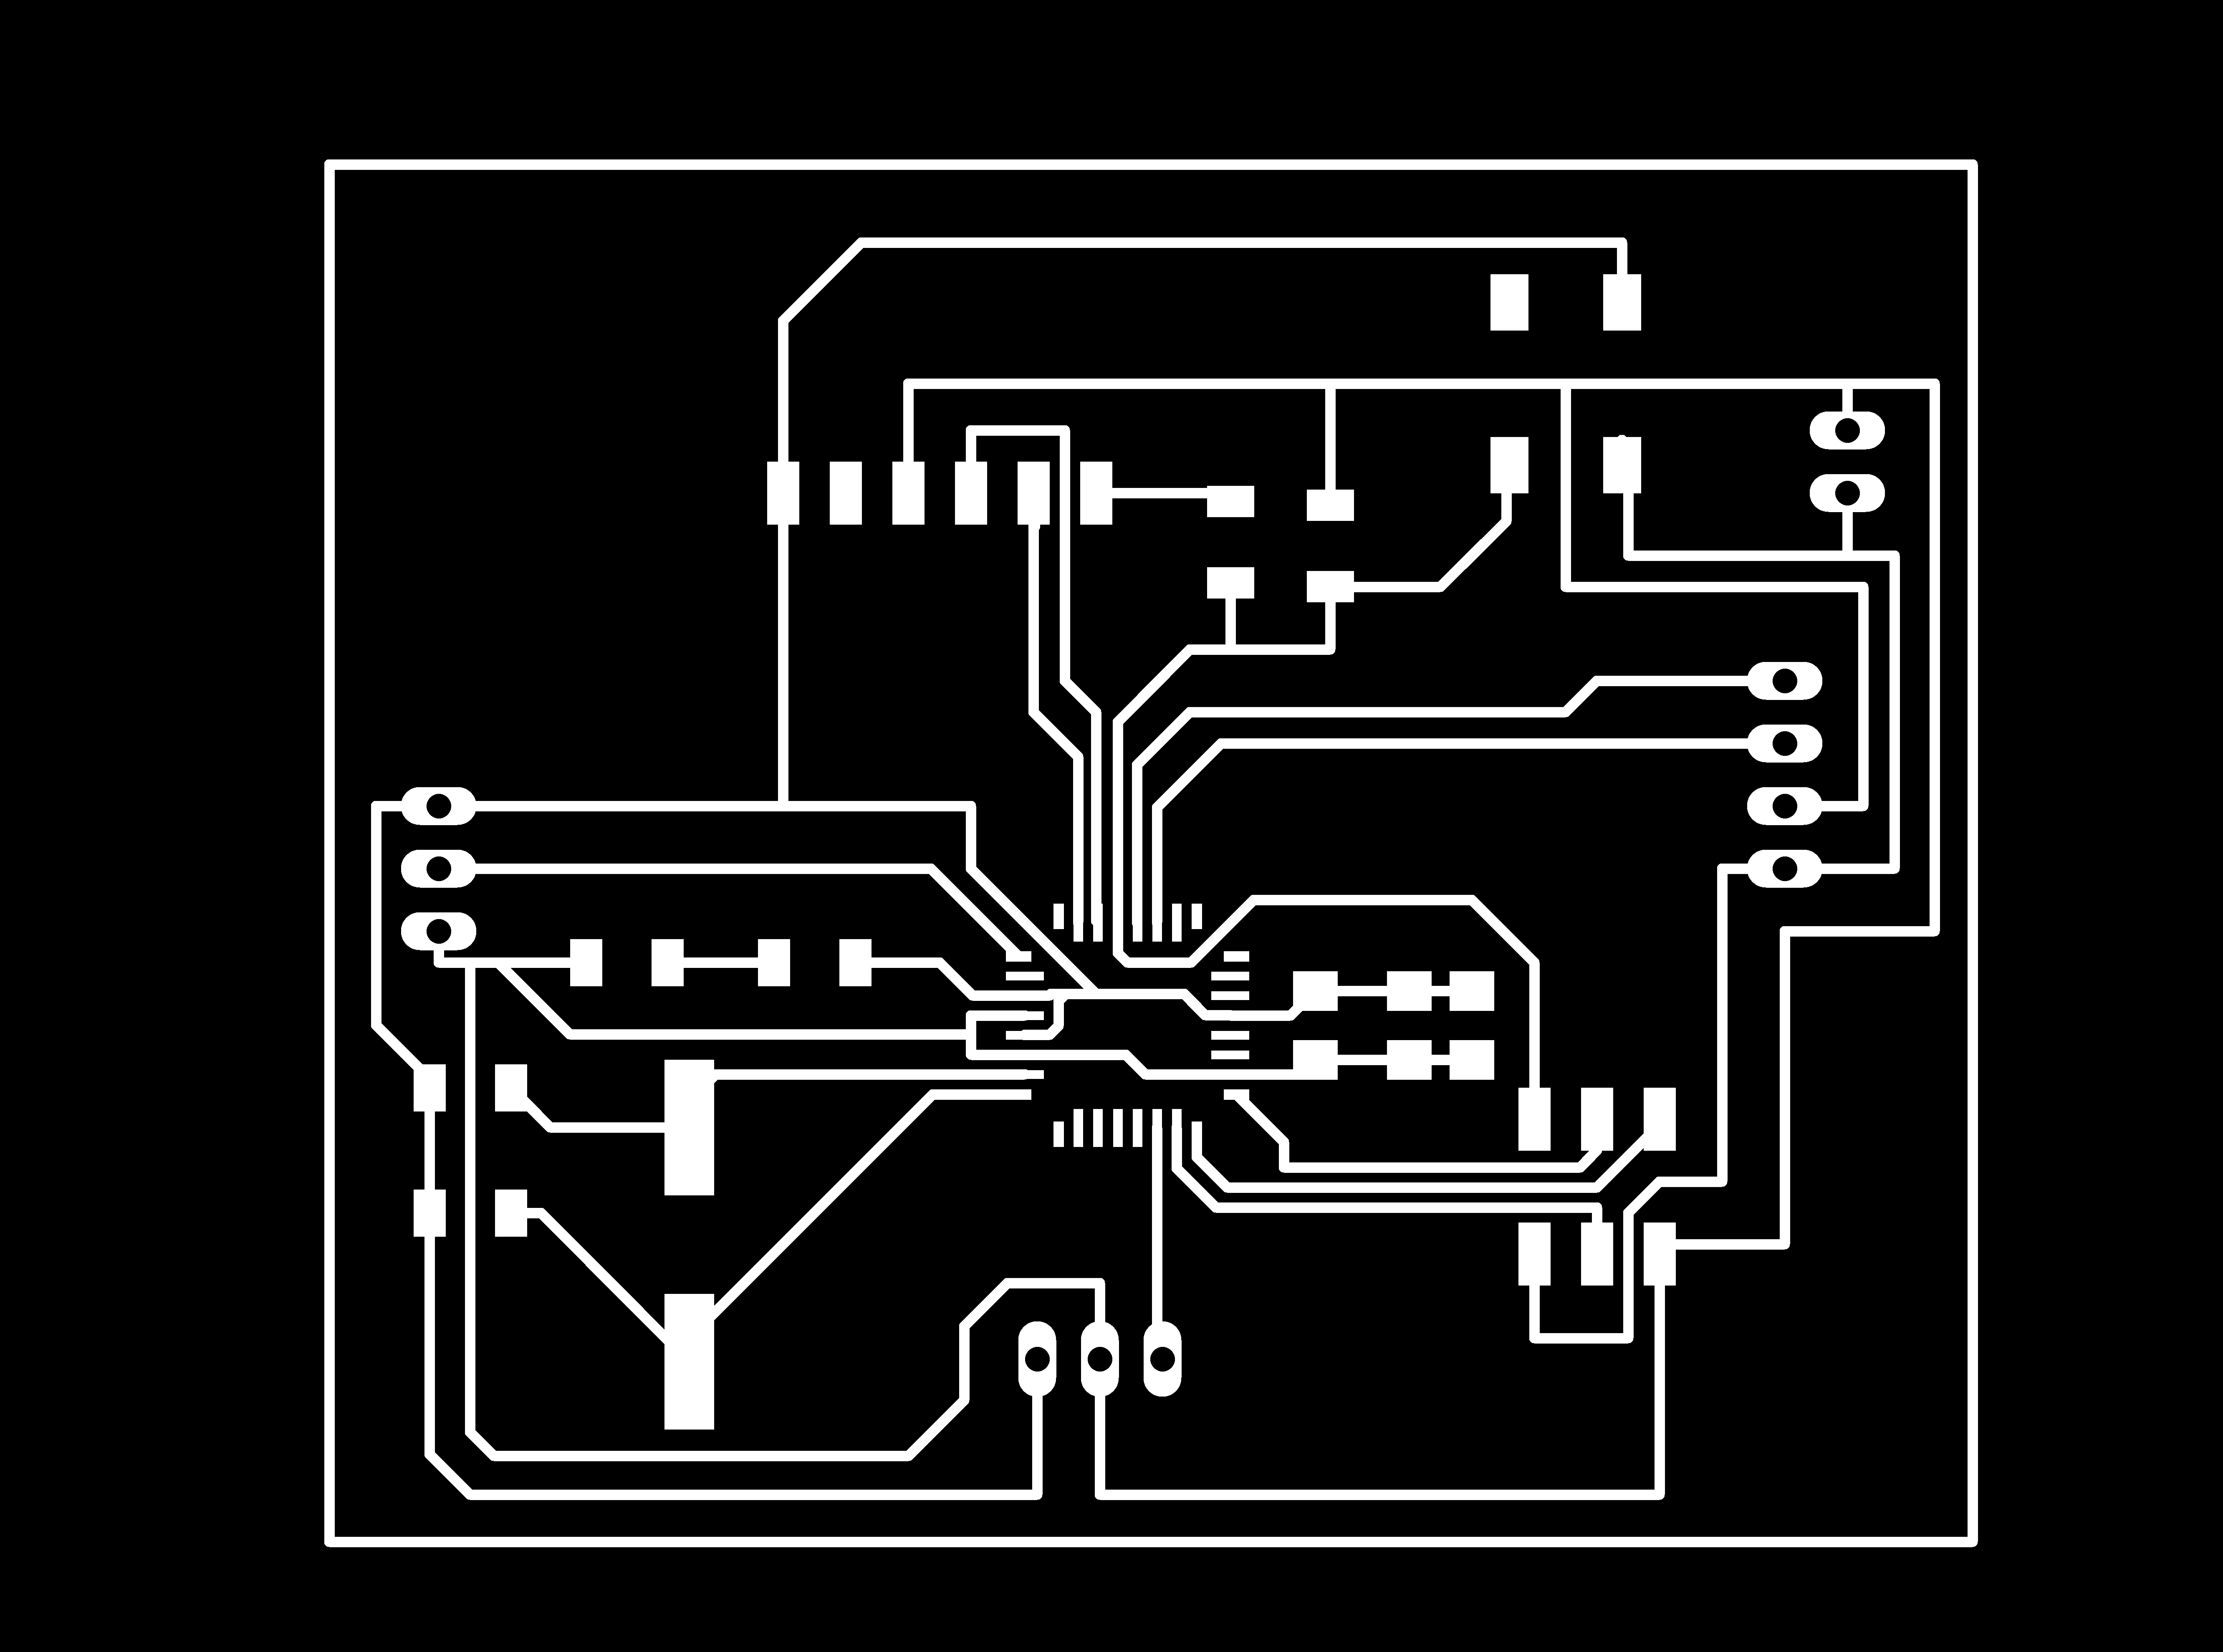
You can refer to Week 11 to check my PCB details.
Wiring Arduino to my PCB:
- 5v to Vcc,
- Gnd to Gnd,
- Pin 10 to Pin 2 on ISP RST,
- Pin 11 to Pin 3 on ISP MOSI,
- Pin 12 to Pin 6 on ISP MISO,
- Pin 13 to Pin 4 on ISP SCK.
- Relay On/Off,
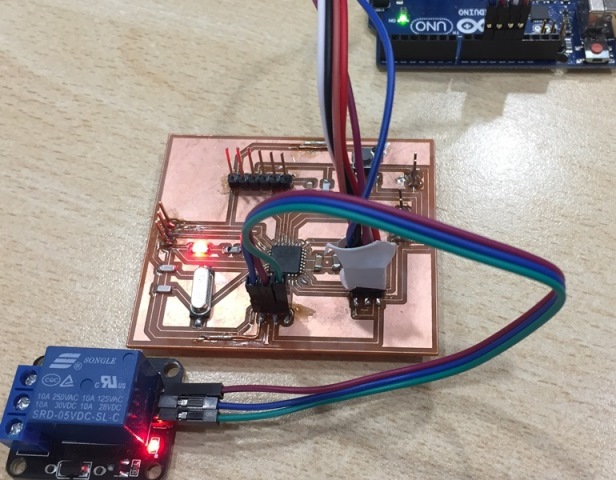
- LCD with I2C,
.JPG)
.JPG) Practically, I arranged the limit humidity to 60% so that when the room humidity reached or exceed the 60% as mentioned in Chapter 11 the relay will turn On the Dehumidifier. As you can see in the above picture when the Humidity was 55.6% the relay's LED was OFF, I blowed some fresh air towards the Dht-22 the humidity started exceeding 60.3% and you can see the relay's LED turned On.
Practically, I arranged the limit humidity to 60% so that when the room humidity reached or exceed the 60% as mentioned in Chapter 11 the relay will turn On the Dehumidifier. As you can see in the above picture when the Humidity was 55.6% the relay's LED was OFF, I blowed some fresh air towards the Dht-22 the humidity started exceeding 60.3% and you can see the relay's LED turned On.
Group Assignment:
The group assignment is to measure the power consumption of an output device:
We decided to measure the current and power consumption of one of the stepper motors that we used in the Machine Design week.
To do that we used a "Fluke" Amperemeter. As you can mention the current value is 561 mA, knowing that the we are using a battery of 12v.
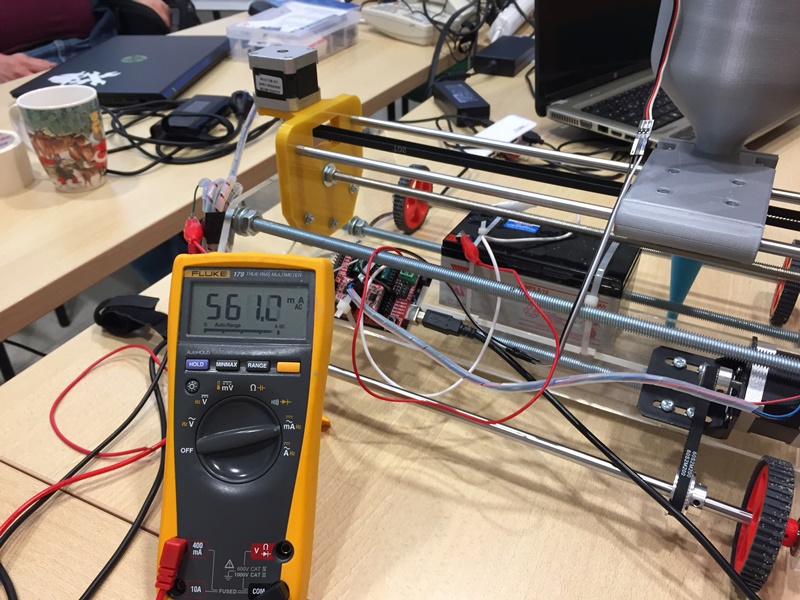
Power = Tension x Current.
P (W)= 12 (V) x 0.561 (A)
P = 6.732 Watts
Download Files:
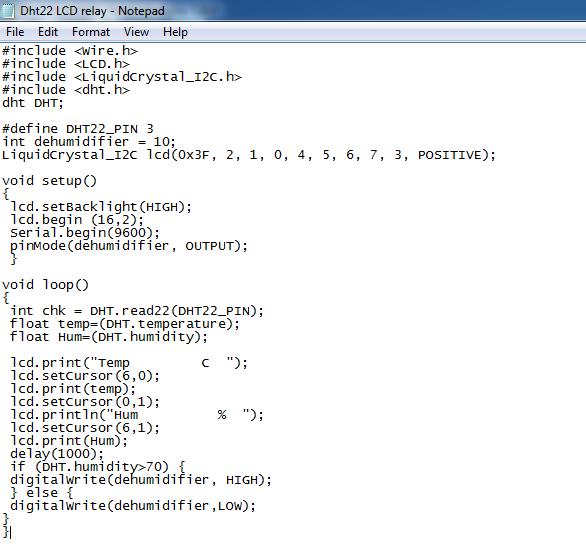
The Arduino code to commend a Relay.
The Arduino code to read the Dht-22 sensor and display the Humidity and Temperature values on the LCD and turn On/Off the relay.
The .gcode for milling.
The .gcode for drilling.
The .gcode for contour cutting.
My board in Eagle,
My Schematic in Eagle,
My board Cut out in PNG,
My board Final Design in PNG.

This work is licensed under a Creative Commons Attribution 4.0 International License.