- Week 1 : Project Management
- Week 2 : Computer-aided
- Week 3 : Computer Controlled Cutting
- Week 4 : Embedded Programming
- Week 5 :3D Scanning and Printing
- Week 6 : Electronic Design
- Week 7 : Computer Controlled Machining
- Week 8 : Electronics Production
- Week 9 : Input Devices
- Week 10 : Output Devices
- Week 11 : Networking and Communication
- Week 12 : Mechanical Design and Machine Design
- Week 14 : Molding and Casting
- Week 15 : Interface and Application Programming
- Week 16 : System Integeration
- Week 17 : Wildcard Week
- Week 18 : Applications and Implications, Project Development
- Week 19 : Invention, Intellectual property and Income
- Week 20 : FInal Project Requirements
Student Agreement
I am a Fab Academy student, responsible for- Attending class lectures and participating in reviews
- Developing and documenting projects assigned to introduce and demonstrate skills, in enough detail to be able to reproduce them
- Honestly reporting on my work, and appropriately attributing the work of others (both human and machine, including AI prompts)
- Being prepared to answer questions about my work
- Allowing the Fab Academy to share my work (with attribution) in the class for purposes compatible with its mission
- Working safely
- Leaving workspaces in the same (or better) condition than I found them
- Participating in the upkeep of my lab
- Ensuring that my tuition for local and central class costs is covered
- Following locally applicable health and safety guidance
- Recognizing limits on lab and staff time
- Promoting a respectful environment free of harassment and discrimination
Signed by committing this file in my repository
Muheshkumar R
Week 1: Project Management
This week describes my understanding of how to use Git and GitHub for version control. It also includes how to create a repository, how to create a branch, how to commit changes, and how to push and pull changes from the remote repository.About Final Project
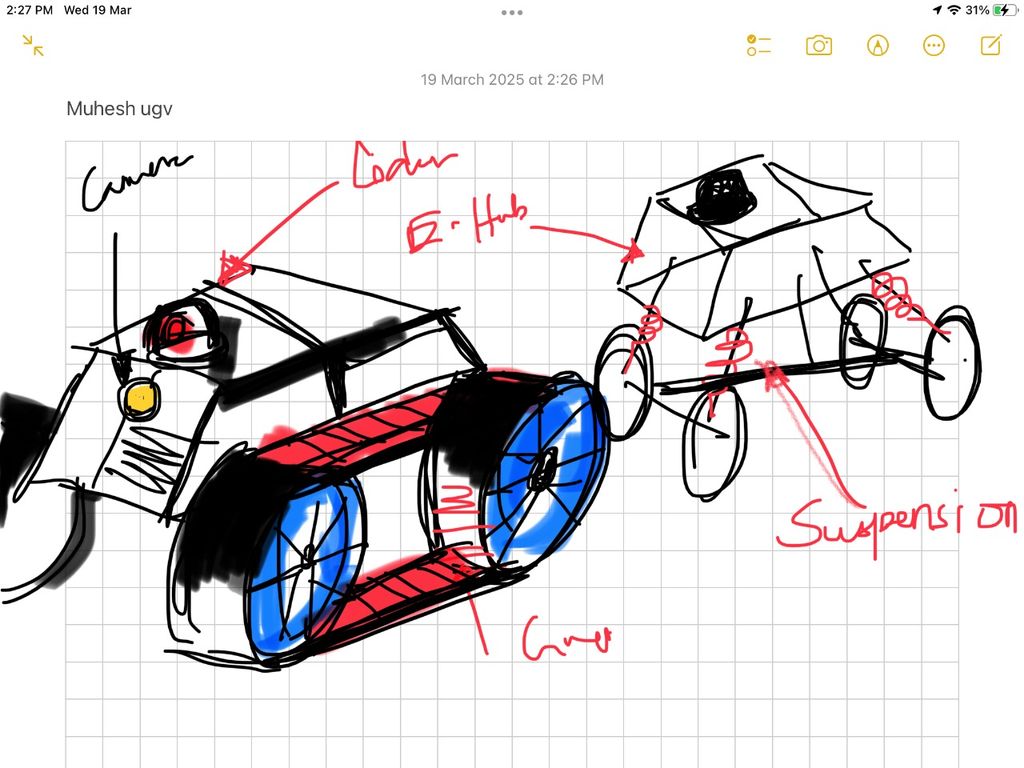
For more...Line Bot - Smarter Than Your Average Cart
- This is not just another industrial robot—it’s a campus logistics revolution on wheels.
- Designed to move small loads like waste bags, supplies, or anything people are too lazy to carry.
- It glides across the campus, tackling uneven terrain with independent suspension like an off-road champion.
- No unnecessary AI here—just a PlayStation joystick and pure mechanical efficiency.
- Who needs fancy automation when you can have full manual control and actually enjoy driving it?
- Built to be rugged, reliable, and resistant to questionable student experiments.
- Designed for efficiency but guaranteed to make heads turn as it rolls by.
- Powered by engineering, controlled by common sense, and driven by necessity.
- It’s not just a robot—it’s a smarter, tougher, and way more entertaining alternative to walking.
Final Project Conceptual Sketch
Git_Tutorial
What’s Git?
Git is a version control software that allows developers to develop the same project. It allows developers to track the changes to a set of files which is called “repository” or “repo”. Install Git.
How to install Git:
                # install git via winget on windows
                winget install --id Git.Git -e --source winget

                # install git via homebrew on mac
                brew install git

                # install git via macport on mac
                sudo port install git
1. Basic Git Configuration
After installing Git, I configure my username and email as Git attaches the information to the commits:
            git config --global user.name "my name"
            git config --global user.email "my email"
My name can be found as below:
2. SSH Keys
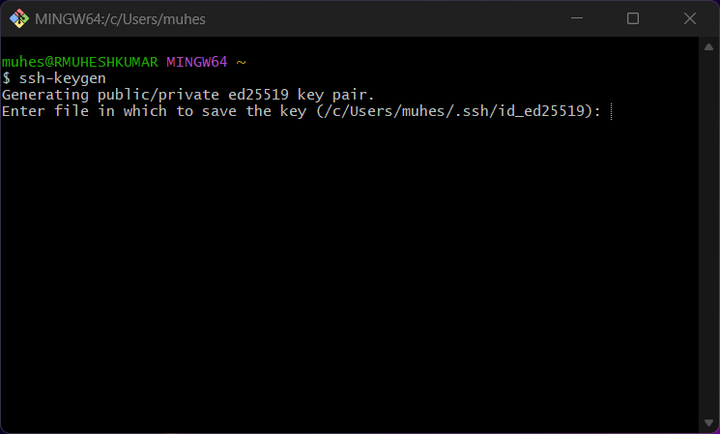
2.1 Generating SSH Keys
SSH keys are used to establish a secure connection between my computer and the Git server. Here’s how to set them up:
- Open a terminal or command prompt.
- Enter
ssh-keygenand press Enter to create a new SSH key. - When prompted, provide a file path to save the key, or just press Enter to accept the default location.
- Enter a secure passphrase when prompted or press Enter to continue without a passphrase (which is not recommended).

We need to enter the passphrase if we want to encrypt otherwise just press Enter
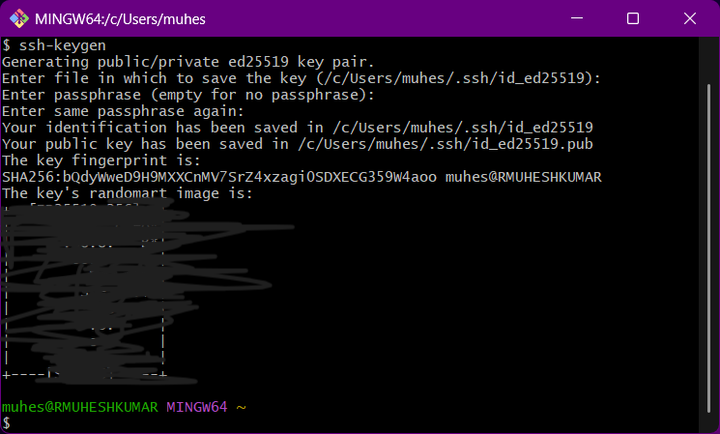
A Randomart will be generated as above shown
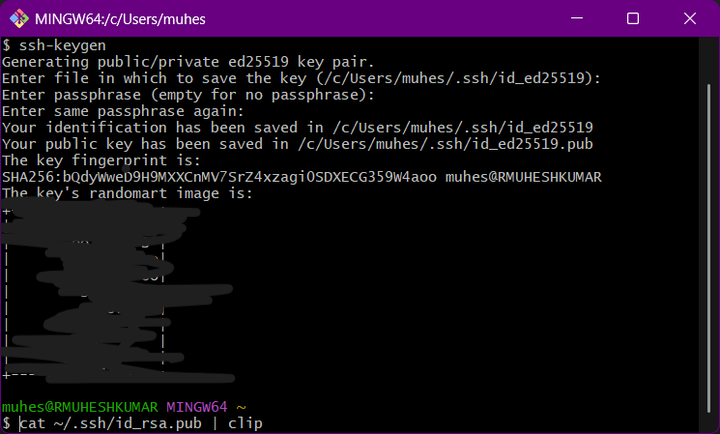
Finslly clip the key and paste it in the Git server
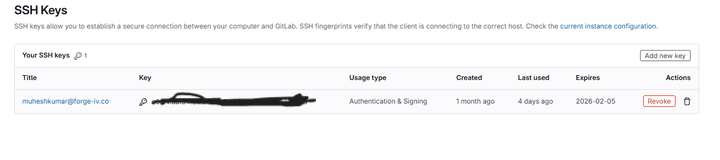
2.2 Adding SSH Key to the Git Server
Locate public SSH key file and open it with a text editor to copy its contents. In my case, the file is id_ed25519.pub. Go to Git server (e.g., GitHub, Bitbucket) and find the section where I can add SSH keys (usually in the account settings).
- Copy the contents of the public SSH key file.
- Paste the key in the SSH key section of the Git server.
- Enter a label for the key, e.g.
My Laptop. - Click
Add SSH keyto add the key to the Git server.
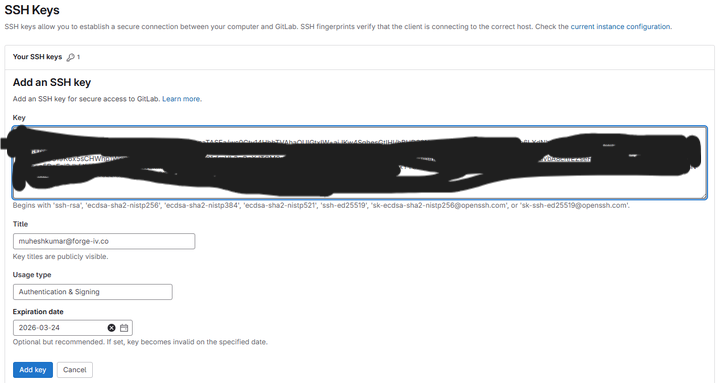
3.Paste public key into the appropriate area and save it.
4. Cloning a Repository
To start working on an existing project. The current repository needed to be cloned:
git clone https://gitlab.fabcloud.org/academany/fabacademy/2025/labs/nellai/students/muheshkumar-r.git
5. Basic Git Commands
Here are some basic Git commands I'll use:
            # Check the status of your files (modified, added, etc.)
            git status

            # Add all changes to the staging area
            git add .

            # Commit your changes with a message
            git commit -m "Your commit message"

            # Push your changes to the remote repository
            git push

            # Pull the latest changes from the remote repository
            git pull
Image Resizing
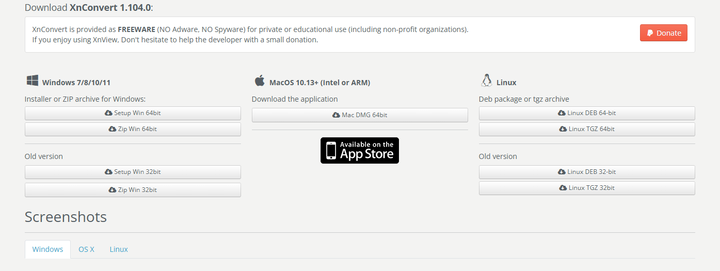
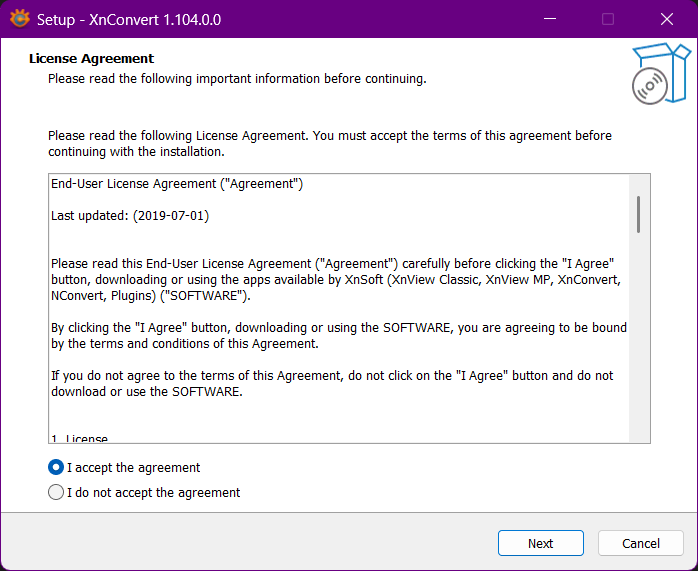
About Xnconvert Installation
Xnconvert is a free software for converting and resizing images. To install Xnconvert, go to the download page and download the appropriate version for your operating system. Follow the installation instructions to install Xnconvert on your computer.


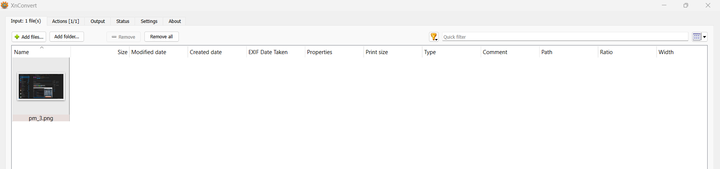
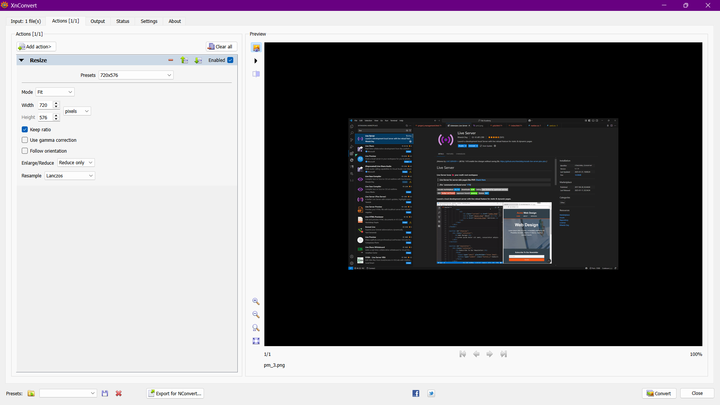
Importing and Resizing
Use Xnconvert to resize images
Import the images into Xnconvert and change the resolution to 800px in width
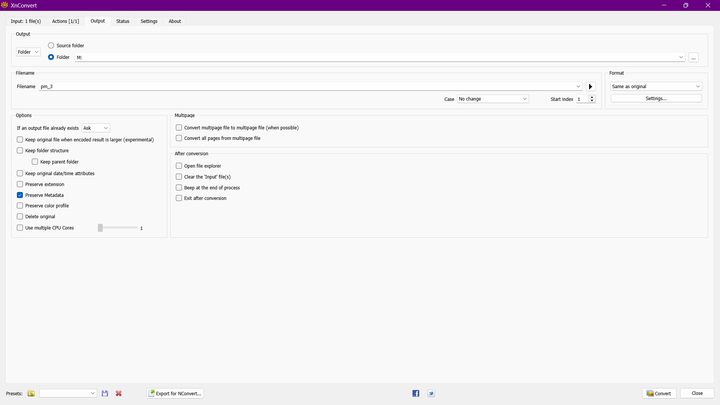
Exporting
Export the resized images to the folder with image containers
For adding images, use the image container provided
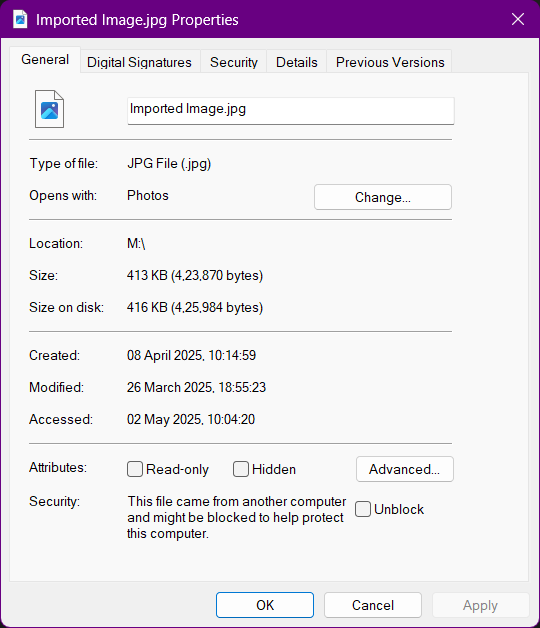
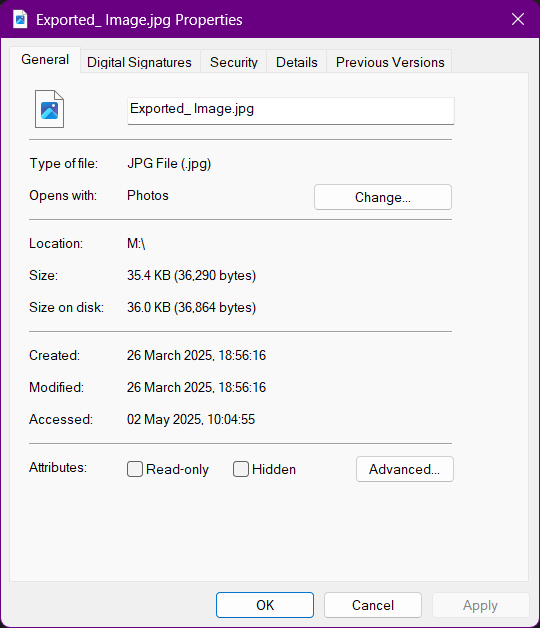
Final output
Before the Compression
After the Compression
Website Creation
A New beginning on HTML and CSS
Learmed many languages first time stepping into the HTML and CSS.
Learned by Experience, made many mistakes initially afterwards rectified those
Let me through the process
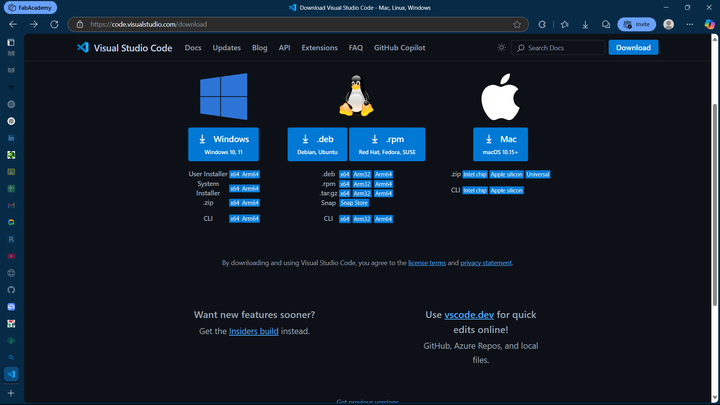
Step 1: Installing VS Code
Install VS Code from https://code.visualstudio.com/
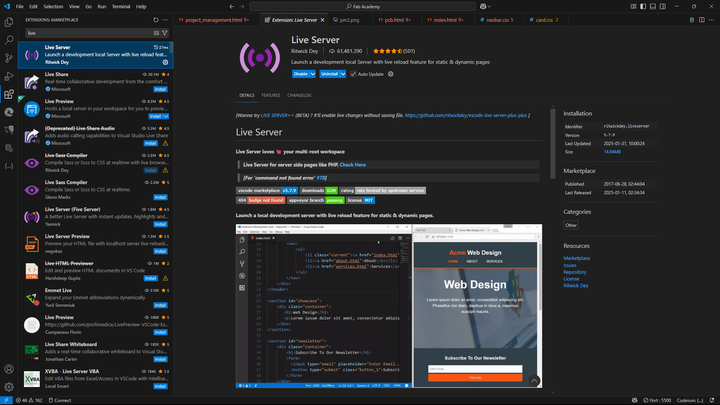
Step 2: Installing Live Server Extension
Install Live Server extension from https://marketplace.visualstudio.com/items?itemName=ritwickdey.LiveServer
Install the necessary extensions like Live Server, Auto Close Tag, Auto Rename Tag, Highlight, and Intellisense for CSS, HTML, JSON, and PHP.
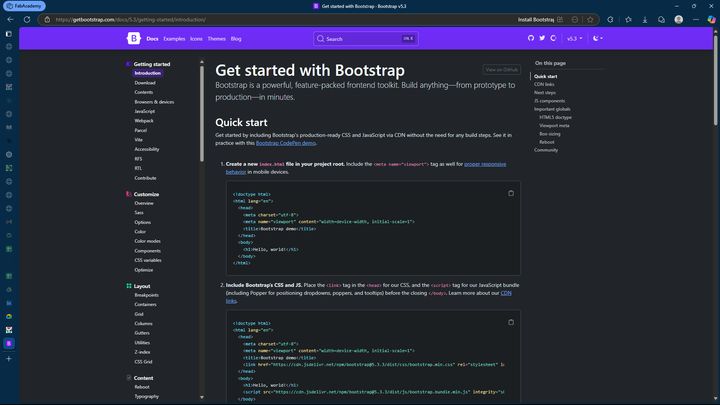
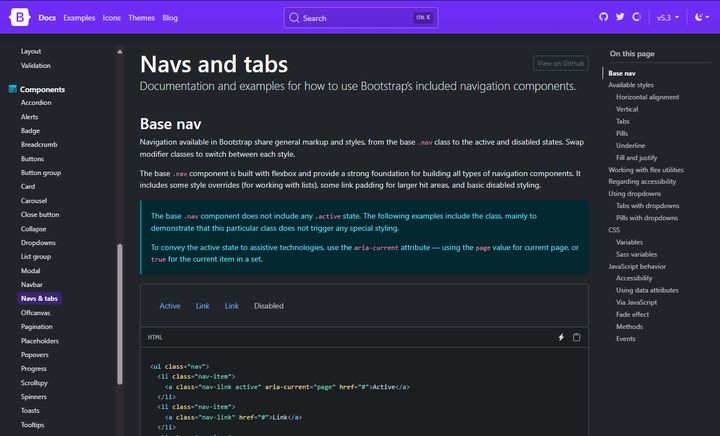
Step 3: Introduction to Bootstrap
For creating a responsive website, we are going to use Bootstrap. Bootstrap is a free and open-source CSS and JavaScript framework for building user interfaces. It is based on HTML, CSS and JavaScript. Learn more about Bootstrap here: https://getbootstrap.com/
For creating the website, we will be using Bootstrap's Card component to create the individual cards for each assignment. We will also be using Bootstrap's Navbar component to create the navigation bar. Refer to the documentation of Bootstrap for more details on how to use the components.
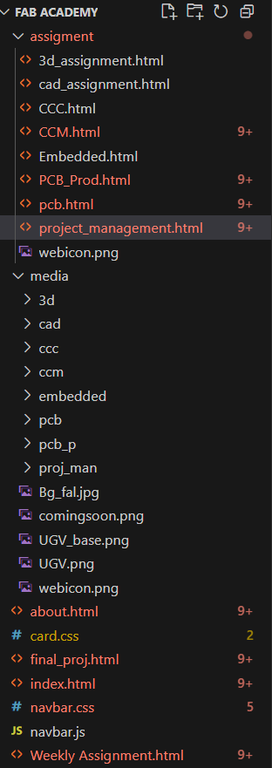
Step 4: Creating the Basic structures
Create the basic structures for your website using HTML and CSS:
- Create a new folder for your website and create the necessary files such as index.html, style.css, and script.js.
- Write the basic structure of HTML including the doctype, head, and body tags.
- Write the basic structure of CSS including the selectors, properties, and values.
- Write the basic structure of JavaScript including the variables, functions, and events.
Step 5: Creating the Navbar
Create the navbar for your website using Bootstrap:
- Create a navbar component using Bootstrap's Navbar component.
- Write the HTML and CSS for the navbar component.
- Configure the navbar to have the desired content and layout.
- Attach the navbar to the webpage.
Step 4: Creating the Cards
Create the cards for your website using Bootstrap:
- Create a card component for each assignment using Bootstrap's Card component.
- Write the HTML and CSS for the card component.

Step 5: Add the Footer
Add a footer to your website using HTML and CSS:
- Create a footer section using HTML.
- Style the footer with CSS to match your website's theme.
- Include links to important pages and social media profiles.
Step 6: Test the Website Thoroughly
Ensure that your website functions correctly and looks good across all platforms:
- Launch the website in various web browsers and check for any discrepancies.
- Verify the website's responsiveness on different devices, including tablets and smartphones.
- Conduct tests with diverse input scenarios to confirm expected behavior.
Step 7: Deploy the Website Using Git
I already mentioned about git in the previous step
Deploy your website to a hosting platform:
Learn more about Git.
- Choose a hosting service that supports Git deployment, like GitHub Pages or Netlify.
- Push your local repository to the remote server using Git commands.
- Follow the platform's instructions to set up deployment from your Git repository.