Assignments
Assignment:
- Plan a final project masterpiece that integrates the range of units covered in the
Fab Academy.
- Answer the following questions about your final project:
- Your project should include: 2D and 3D design, additive and subtractive
fabrication, electronics design
and production, embedded programming and interfacing, system integration, and
packaging. Where possible, make rather than buy.
- Demonstrate individual mastery of the skills and ensure your project is
independently operable.
Project Description
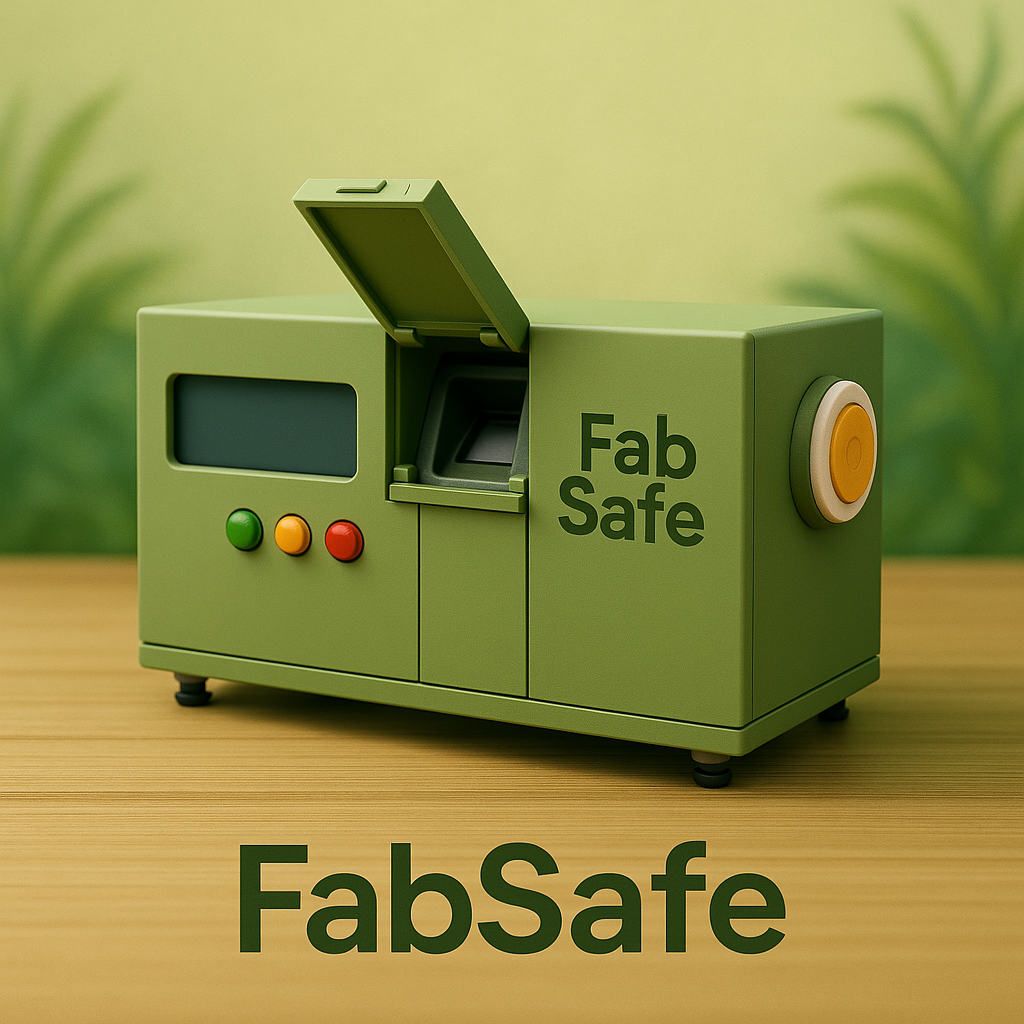
This project is a Safety and Access Control System designed to protect users when operating high-risk machinery such as a table saw. In a Fab Lab environment where many users of different skill levels share equipment, it's crucial to ensure that only trained and authorized individuals can power on dangerous tools. This system addresses that need with a biometric security layer that prevents accidents before they happen.
The device uses a fingerprint reader connected to an ESP32-S3 microcontroller. When the system is powered, it enters a standby state signaled by a yellow LED. A valid fingerprint switches the LED to green and activates a solid-state relay that powers the machine. If the fingerprint is not authorized, a red LED lights up and a buzzer alert is triggered — blocking power regardless of the main switch position. This guarantees that no unauthorized user can start the machine under any circumstance.
What makes this project essential for a Fab Lab is its ability to shift the culture from open but risky access to one based on trust, responsibility, and safety. It encourages proper training, equipment certification, and personal accountability. It's not just a tool — it's a system designed to care for people.
The system includes custom-designed electronics, a 3D printed case, a laser-cut acrylic screen protector, and a recycled power source, making it both technically robust and environmentally conscious. Additionally, it’s modular: all connections are made with headers for easy maintenance or future upgrades.
In future iterations, it will support Wi-Fi connectivity for online time validation and integration with Telegram API to send real-time access alerts and usage logs. This will allow Fab Lab managers to remotely monitor when and by whom machines are used.
Ultimately, this project reinforces one of the core values of a Fab Lab: empowering individuals while protecting their well-being. With this system, machines become not only more intelligent — but also safer for everyone.
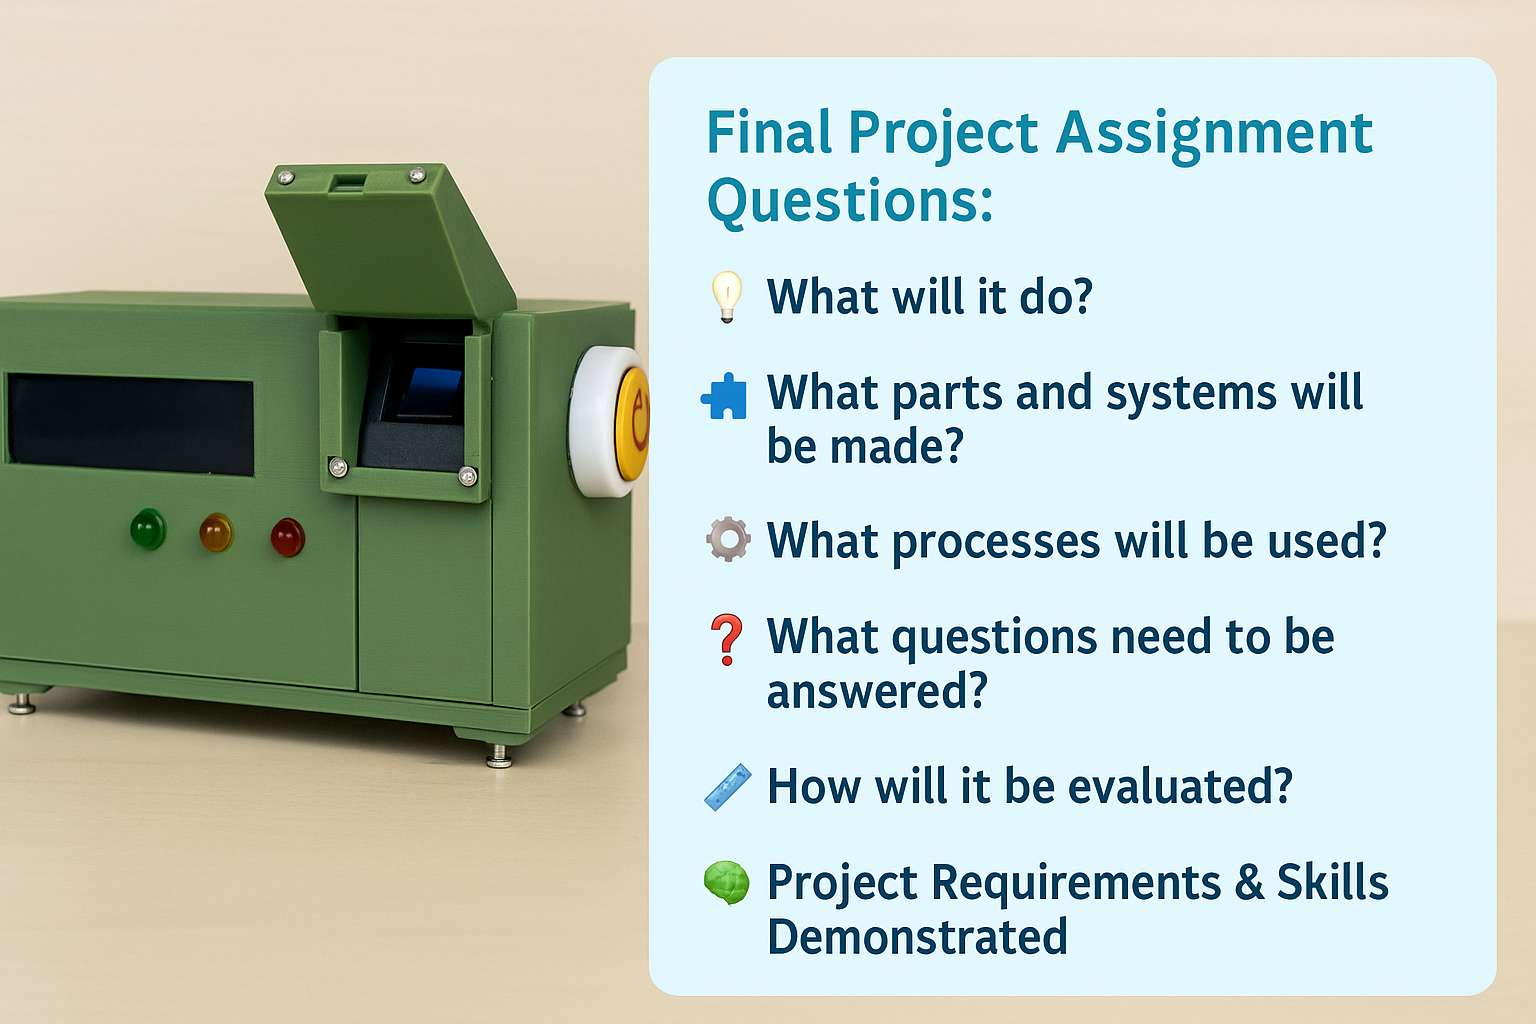
Final Project Assignment Questions:
🛠️ What will it do?
The system will prevent unauthorized individuals from using dangerous machinery (such as a table saw) in a Fab Lab. It works by validating a user’s fingerprint. If authorized, the machine powers on; if not, it stays off, and an audible and visual alert is triggered. This protects people and promotes a culture of responsibility and safety within shared working environments.
📚 Who's done what beforehand?
Many individual tutorials exist for components like fingerprint sensors, relays, and ESP32 programming. However, after reviewing the Fab Academy archive and general online sources, I found no complete project that combines all of these into a fully integrated, safety-focused machine access system.
The most related project identified was the Smart Door by Mansoor Soomro (2020) , which uses RFID and password protection for room access. However, it lacks machine-specific safety measures like time control, emergency stop, and biometric validation.
The idea for this project stems from my long-standing concern about safety in the Fab Lab. In shared environments, it’s common for dangerous machines to be unplugged and moved between rooms, making supervision and traceability difficult. Fabsafe addresses this issue by providing a system that ensures only authorized users can operate hazardous equipment, with clear time limits, visual indicators, and emergency shutdown capabilities.
Our goal is to create a culture of responsibility and prevention — empowering users while protecting them. With this project, we aim to set a new standard for safe machine usage within our Fab Lab and others.
🔍 What sources will you use?
I will reference:
- ESP32-S3 documentation and Arduino core libraries
- Datasheets and manuals for the fingerprint sensor, solid-state relay, and LCD module
- Fab Academy student projects, especially related to input/output devices and interface programming
- Online tutorials and GitHub repositories for biometric access and ESP32 integration
- Forums such as Stack Overflow and Reddit for troubleshooting and optimization tips
- ChatGPT Plus, which I actively use as a support tool to clarify technical doubts, explore programming alternatives, and speed up my development process.
🎨 What will you design?
I will design and fabricate an integrated access control system that includes:
- A custom PCB for interfacing sensors, actuators, and power control.
- A compact 3D printed enclosure that fits securely near the machine.
- A laser-cut acrylic shield to protect the LCD screen.
- Handmade wiring with headers and connectors to allow component replacement.
- Firmware for the ESP32-S3 to manage user authentication, safety logic, and feedback.
- A custom vinyl label for user instructions and warnings.
🧩 What materials and components will be used?
The system consists of both electronic and structural elements:
- ESP32-S3 microcontroller
- Fingerprint sensor
- LCD 16x2 display with I2C
- Solid-state relay (40A)
- RGB LED traffic light module (red/yellow/green)
- Buzzer
- Emergency stop button
- 5V recycled phone charger
- PLA filament for 3D printed parts
- Acrylic sheet for protective cover
- Headers, jumper wires, and handmade cables
📦 Where will they come from?
Most components were sourced from the Fab Lab’s internal inventory, including the ESP32, display, fingerprint sensor, acrylic, PLA filament, and wiring supplies. The only external purchase was the solid-state relay (40A), which was bought from a local electronics store due to the higher current requirements of the machine. To provide realistic documentation, a reference price list will be built using Amazon — a typical supplier for the Lab.
💰 How much will they cost?
Based on estimated prices from Amazon, the total cost of all required components is approximately $113.76 USD. This estimation assumes the use of only one unit per item and includes essential electronic, mechanical, and structural elements. Most materials were already available at the Fab Lab, reducing the real production cost.
| Component | Description | Used For | Price (USD) |
|---|---|---|---|
| ESP32-S3 DevKit | Main microcontroller that handles fingerprint validation and device control | Embedded programming, Wi-Fi sync, relay control | $9.99 |
| R307 Fingerprint Sensor | Biometric sensor to authenticate user access | Security and access control | $19.18 |
| LCD 16x2 Display (I2C) | Alphanumeric display to show system status and instructions | User interface output | $9.99 |
| Solid State Relay (40A) | Controls power to the machine safely and reliably | Power switching and machine control | $9.98 |
| Mini Traffic Light Module | 3-color LED module to indicate system states | Visual feedback | $4.49 |
| Buzzer (10-pack) | Audible alert when access is denied or system is triggered | Sound feedback | $5.99 |
| 5x LED Arcade Buttons | Used for emergency stop and potential manual controls | User input / stop button | $11.18 |
| JST-XH Connector Kit | Set of connectors and pins for modular wiring | Cabling and modular connections | $9.99 |
| PLA Filament (1kg) | 3D printing material for the system enclosure | 3D printed case | $18.99 |
| Acrylic Sheets (5"x7") | Transparent cover to protect the display and components | Laser-cut protector | $5.59 |
| PCB FR4 Boards (5-pack) | Boards used to fabricate the custom PCB layout | Electronics production | $4.39 |
| Jumpers & handmade cables | Cables for internal wiring and testing | Wiring and connections | $4.00 |
| Total Estimated Cost | $113.76 | ||
🧩 What parts and systems will be made?
I will personally fabricate and assemble:
- A custom PCB to connect the microcontroller with sensors, outputs, and power lines.
- A 3D printed case designed to securely hold and protect all components.
- A laser-cut acrylic shield to cover the display and fingerprint reader.
- Handmade wiring harnesses using jumper cables, headers, and connectors.
- Firmware developed for the ESP32-S3 to manage logic, access validation, and feedback.
- A vinyl label for safety instructions and user interaction guidance.
⚙️ What processes will be used?
This project combines a wide variety of digital fabrication and programming processes:
- 2D Design — For the vinyl label and laser-cut acrylic pieces.
- 3D Design & Printing — To create the case and internal supports.
- Subtractive fabrication — Laser cutting for precise protective parts.
- PCB fabrication and soldering — Custom circuit layout and assembly.
- Embedded programming — Writing logic and control firmware for the ESP32-S3.
- Microcontroller interfacing — Fingerprint reader, LCD, RGB LED, relay, and buzzer.
- Wi-Fi networking — For time synchronization and future Telegram alerts.
- System integration — Assembling all hardware/software into one operational unit.
❓ What questions need to be answered?
- How can this system be scaled to manage multiple machines in the same Fab Lab?
- What is the best method to store biometric data securely and responsibly?
- Can the case effectively resist sawdust and remain functional in a wood-based environment?
- How will future upgrades (like multi-device dashboards) be integrated?
🛡️ Fingerprint Data Storage
Fingerprint data in the Fabsafe system is securely stored directly inside the fingerprint sensor module. The sensor includes its own internal memory, where fingerprint templates (not raw images) are saved during registration. This means that even if the ESP32 controller is powered off or reset, the fingerprints remain available for future authentication. No biometric data is sent to external servers or transmitted over the internet, ensuring local, offline and privacy-focused storage.
📏 How will it be evaluated?
This project will be successful if it meets the following evaluation criteria:
- The machine activates only with an authorized fingerprint.
- Unauthorized access attempts trigger alerts (red LED + buzzer).
- The solid-state relay (40A) must reliably switch the machine's power.
- The case must be sealed and resistant to wood dust and environmental conditions.
- All components must be integrated cleanly and modular for future maintenance or scaling.
🧠 Project Requirements & Skills Demonstrated
This project fully integrates the following Fab Academy core requirements:
- ✅ 2D and 3D Design — Vinyl label, acrylic protector, 3D case.
- ✅ Additive and Subtractive Fabrication — 3D printing and laser cutting.
- ✅ Electronics Design and Production — Custom PCB with hand assembly.
- ✅ Embedded Programming and Interfacing — Code for ESP32-S3 and peripherals.
- ✅ System Integration and Packaging — Fully assembled and sealed unit.
🧩 Final Project Development & Reflections
✅ What tasks have been completed?
I have already completed the design and production of the custom PCB, along with the 3D printed case. The solid-state relay has been tested and works reliably without overheating. Initial integration and system-level tests are ongoing. About half of the wiring is finished, and some sections of the firmware are developed and functional.
🛠️ What tasks remain?
I still need to complete the rest of the wiring and finalize the code logic. I have yet to integrate the LCD messaging system, buzzer logic, and LED semaphore control together into a synchronized workflow. Further testing is required once the integration is complete.
🧪 What has worked? What hasn’t?
The fingerprint sensor, emergency stop button, buzzer, and power cutoff system via solid-state relay are all functioning as expected. The ESP32-S3 microcontroller has shown stable performance, with no issues related to power delivery or core execution.
However, one challenge occurred with the fingerprint sensor: during continuous reading cycles, it tends to overheat and begin producing false positives or erratic fingerprint detections. This behavior appears to stem from sensor saturation and thermal stress.
To resolve this, the software was optimized to limit unnecessary fingerprint scans by introducing idle periods and conditional activation of the sensor. Now, the system only performs fingerprint readings when necessary, significantly reducing sensor workload and improving accuracy.
Additionally, some handmade cables initially failed under mechanical stress or disconnection events. These were redesigned and reinforced to improve reliability and durability during field use.
🤔 What questions need to be resolved?
So far, I’ve managed to resolve all major technical questions thanks to the support of my Fab Lab coordinator and ChatGPT. I currently don’t have open technical concerns, but I will remain alert during final integration.
📅 What will happen when?
Although my original timeline was delayed, I’ve created an updated plan and checklist to track progress. This allows me to better manage integration, testing, and documentation in parallel with other Fab Academy tasks.
Below, you will find a detailed list of completed tasks under the Project Workflow Overview, followed by the Functional Testing Methodology, including short video clips showing each test.
Project Timeline & Progress
| Phase | Start | End | Status |
|---|---|---|---|
| 2D Design (screen shield) | May 01 | May 01 | Completed |
| 3D Design (main case) | May 02 | May 03 | Completed |
| 3D Design (sensor case) | May 04 | May 04 | Completed |
| PCB Design, fabrication & soldering | May 05 | May 07 | Completed |
| Wiring with connectors | May 08 | May 08 | Completed |
| Embedded programming | May 09 | May 10 | Completed |
| Web interface (AP mode) | May 11 | May 12 | Completed |
| Microcontroller interfacing | May 13 | May 17 | Completed |
| Cross-validation | May 18 | May 23 | Completed |
| Functional & FabLab tests | May 23 | May 25 | Completed |
| Security & documentation | May 26 | May 30 | In progress |
Project Workflow Overview
Design Phase
- ✔️ 2D Design (LCD shield)
- ✔️ 3D Design (Main & Sensor Case)
Electronics Production
- ✔️ PCB Design & Fabrication
- ✔️ Manual Soldering
- ✔️ Custom Wiring
Embedded Programming
- ✔️ Core System Logic
- ✔️ Emergency Protocol
- ✔️ AP Web Interface
System Integration
- ✔️ Fingerprint + LCD + Relay
- ✔️ Multicomponent Sync
- ✔️ Real-time Controls
Validation & Testing
- ✔️ Functional Tests
- ✔️ FabLab Deployment
- ✔️ Security Validation
Documentation
- 🟡 Final Report (ongoing)
- ✅ Weekly Logs
- 🟡 Video & Slide Prep
🧪 Functional Testing Methodology
The following table outlines the functional tests performed on the Fabsafe system. Each test is identified with a unique code (T01–T05) and will be referenced in the corresponding demonstration videos.
| Test ID | Function | Test Method | Pass Criteria |
|---|---|---|---|
| T01 | Fingerprint recognition | Scan an authorized fingerprint | Relay activates, green LED turns on, LCD shows user ID |
| T02 | Unauthorized fingerprint | Scan a non-registered fingerprint | Access denied, red LED blinks, buzzer sounds alert |
| T03 | Emergency stop | Press the emergency button | Relay deactivates instantly, red LED and buzzer activate, system blocks for 30 seconds |
| T04 | Timeout control | Wait 10 minutes after successful access | Relay deactivates, LCD returns to idle, system asks for fingerprint again |
| T05 | Lockout after failed attempts | Scan 3 invalid fingerprints in a row | System locks down for 30s, red LED and buzzer active |
🎥 Test Demonstration Videos
Below are the short video clips that demonstrate each functional test as described in the methodology above.
Test T01 – Authorized Fingerprint Access
Shows the system unlocking when a valid fingerprint is scanned.
Test T02 – Unauthorized Fingerprint
Demonstrates red alert and buzzer when an unregistered fingerprint is used.
Test T03 – Emergency Stop
Validates that the emergency button instantly stops the system and blocks it.
Test T04 – Timeout Shutdown
Confirms that after 10 minutes the machine auto-deactivates and resets.
Test T05 – Auto Shutdown After Timeout
After successful fingerprint access, the system remains active for 10 minutes. The LCD displays the remaining time in seconds. When the time expires, the relay shuts off and the system returns to standby mode, prompting for a new fingerprint.
🧠 How fingerprint data is stored
Fingerprints are not stored in the microcontroller itself, but directly within the sensor's internal memory. This means that once a fingerprint is registered, it remains saved even after a reboot or power cycle. This storage method allows the system to maintain access data securely and independently of the ESP32-S3.
During the development phase, all fingerprints were preloaded via a dedicated admin mode to ensure persistent availability and reduce risk of data loss. Additional features such as deletion explored through the web interface.
🎓 What have you learned?
I’ve learned the importance of designing for user safety, especially when dealing with dangerous tools. This mindset guided many design decisions. I also strengthened my understanding of automation and electrical protection systems. I had never worked with solid-state relays before, so I had to research and test extensively. The PCB design and fabrication process was a big milestone in the project’s success. On a personal level, I’ve improved my time management skills by handling multiple tasks at once without neglecting the Fab Academy requirements.