week 5. 3D-Printing and Scanning
This Week i made some changes on the design from Week 2
In our group assignment, we showed different desining rules for different Printers. I testet the Rules for my Creality K1
3D-Printing
For the designing and Printing task, i used the object i designed in Week 2. The object in question is the tile which is used for my final project. I can use this because its only produceable through adaptive Manifacturing, because it has the print in place swivel.
What changes did i made on the part?
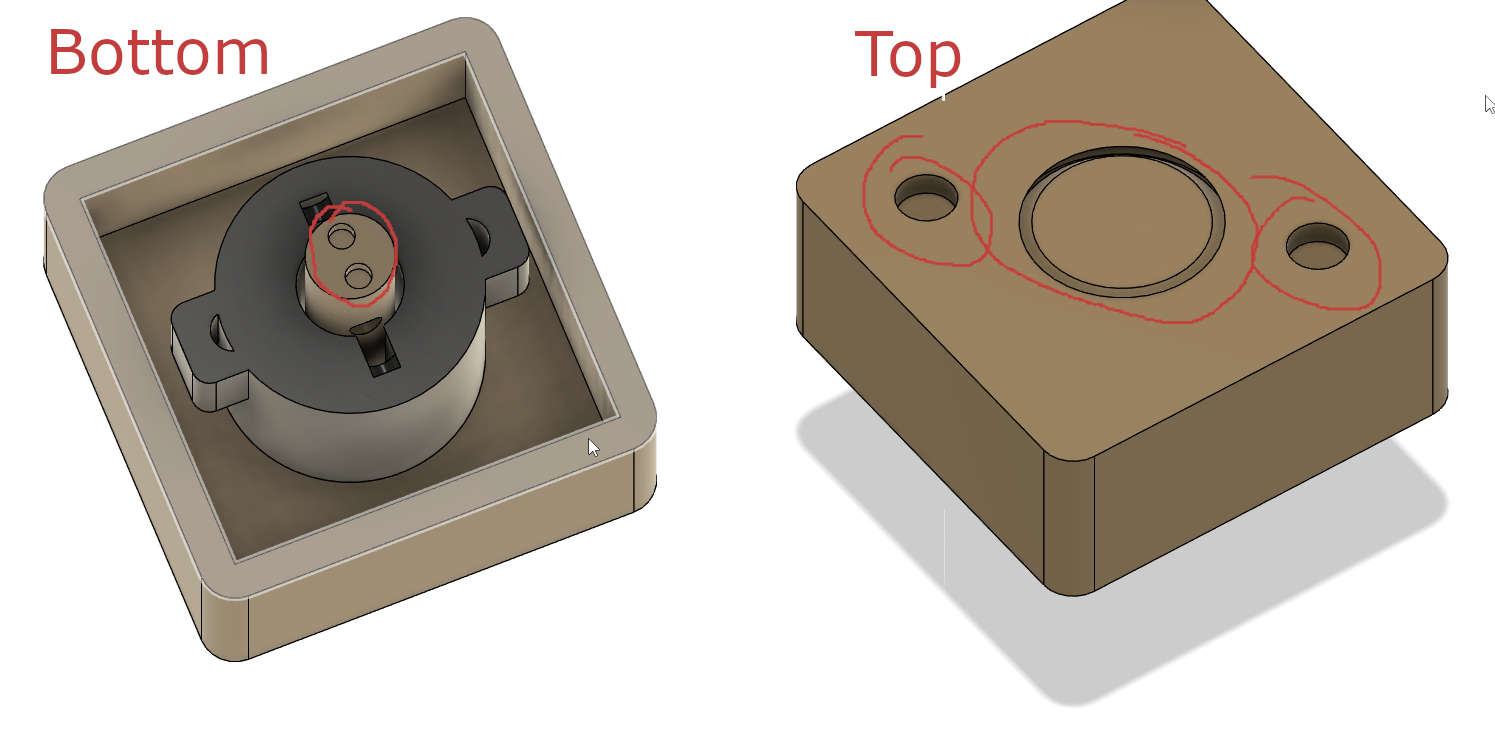
Top: I enlargened the swivel mechanism and gave it a tollerance of 0.5mm from stem to tile and added 2 3mm holes to accept magnets. Even so my printer can work with a tollerance of 0.25mm i opted for 0.5mm because i wanted some play to inject lubricant into the mechanism
Bottom: i changed the part, where the rotor interfers with the stem of the tile. I changed it to accept 2 1.5mm magnets
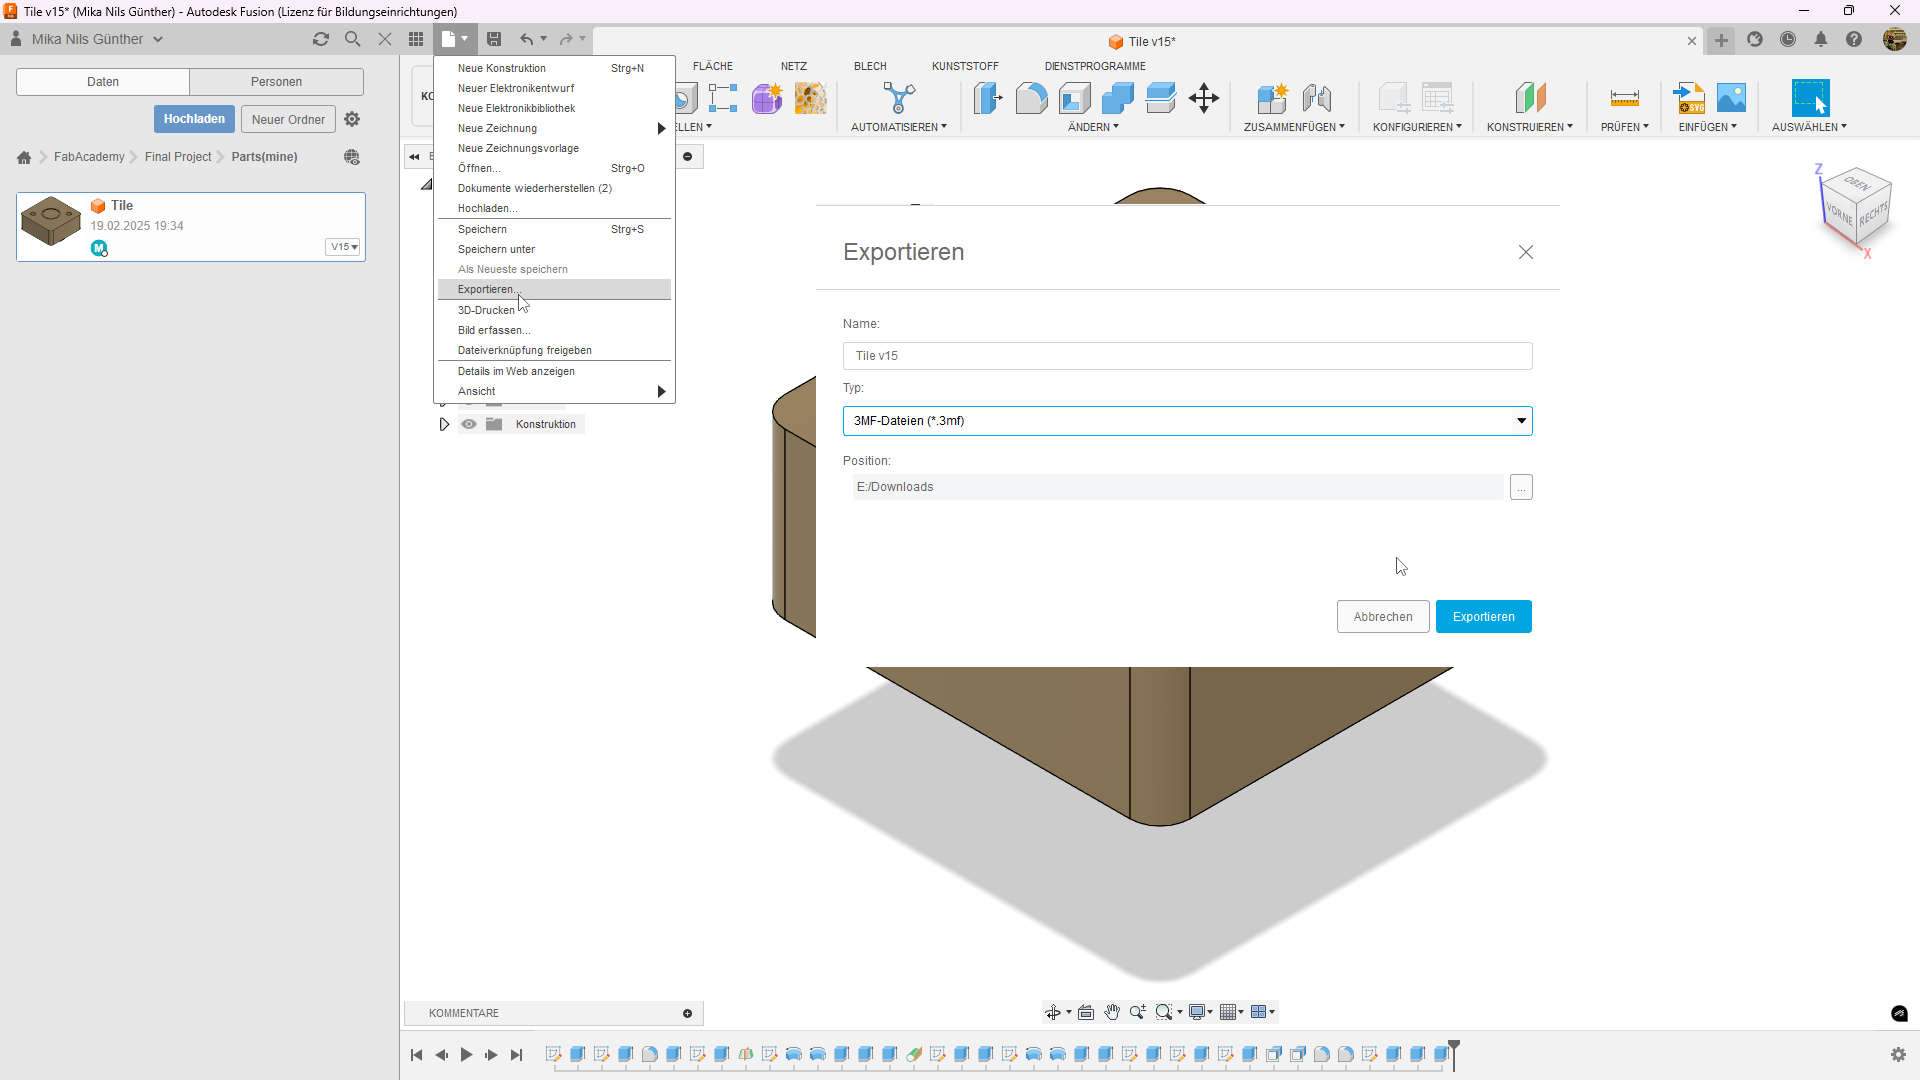
To be able to print the tile, i needed to exported it to 3mf. For that disabled the holder body with the guidrails, so that i can export the swivel and pin parts into one object. For exporting i clicked onto the file icon and selected export, gave the file a name, selected .3mf and choose a location. in my case the downloads folder.
Slicing the file
After exporting, i setted up orca, a slicer based on PrusaSlicer and BambuStudio, which combines the powerfull slicing from PrusaSlicer and the great UI from BambuStudio.
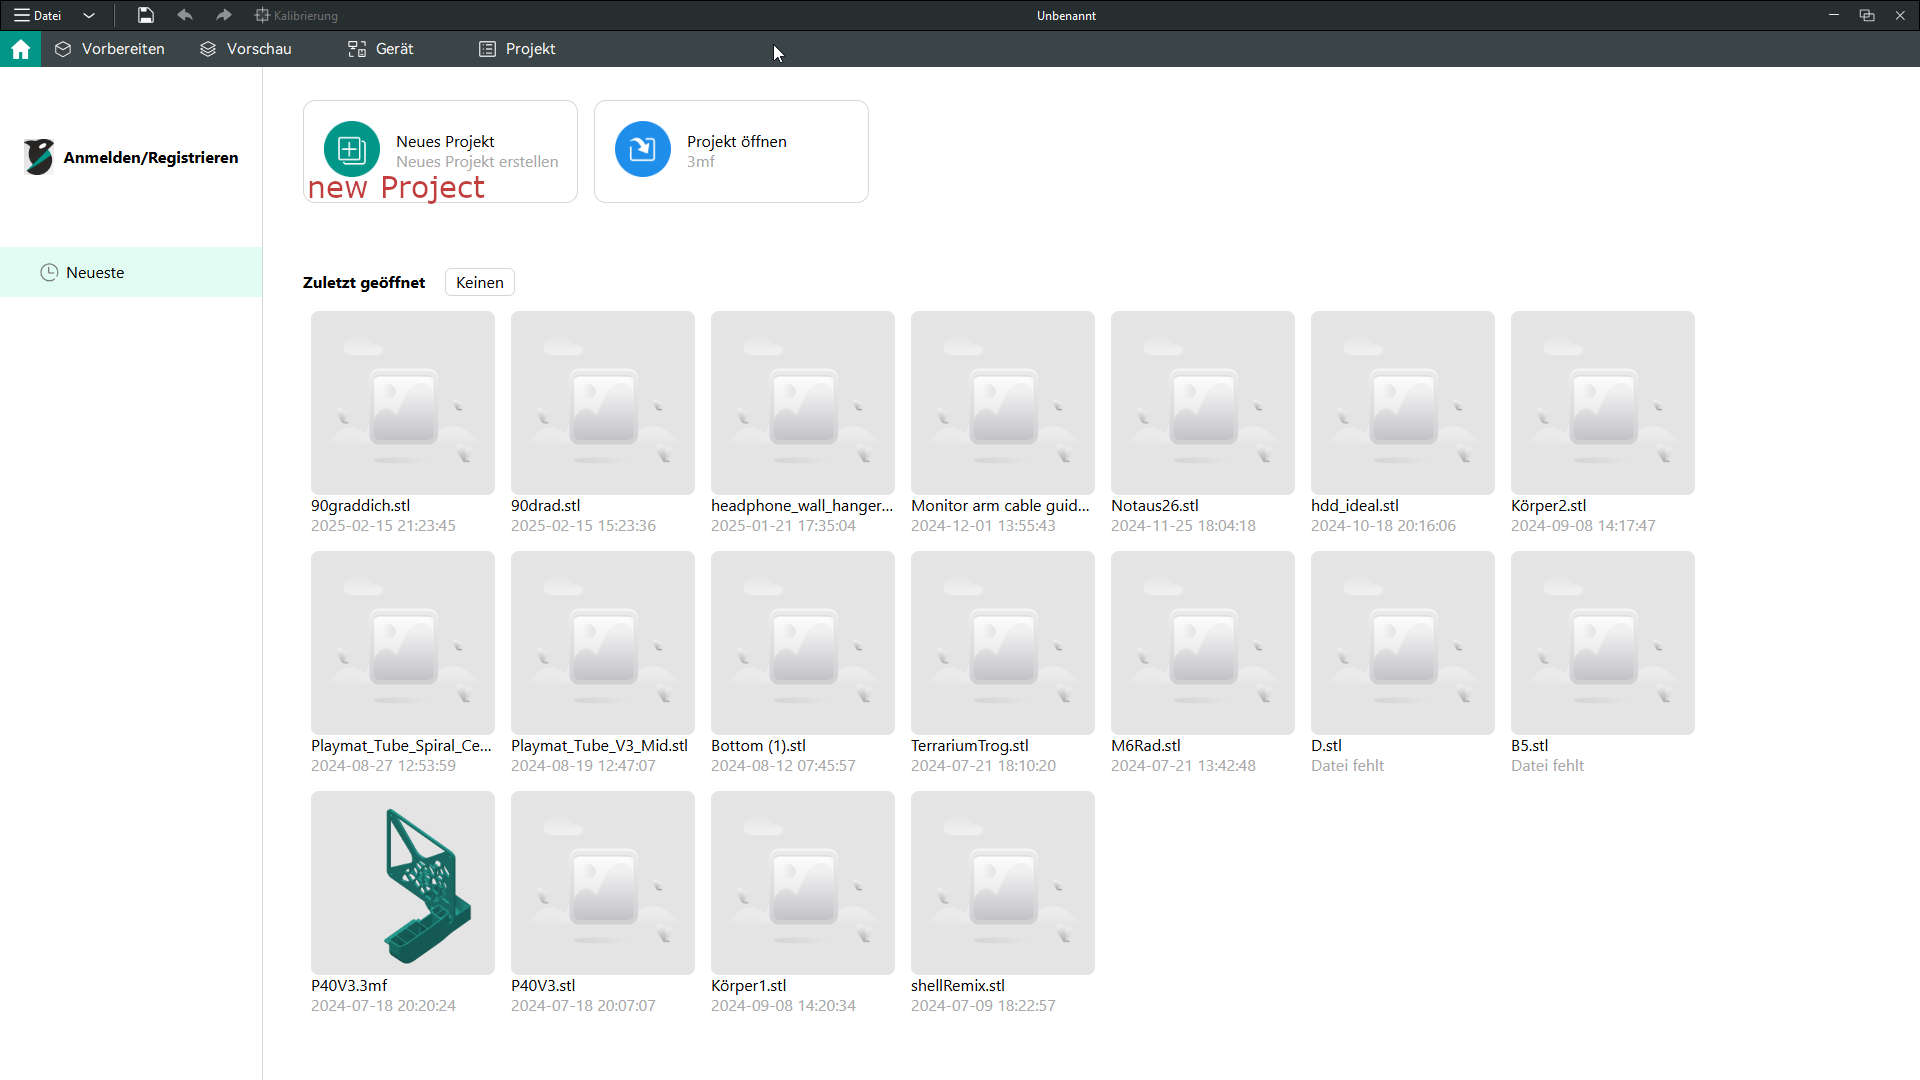
After orca opening i created a new Project
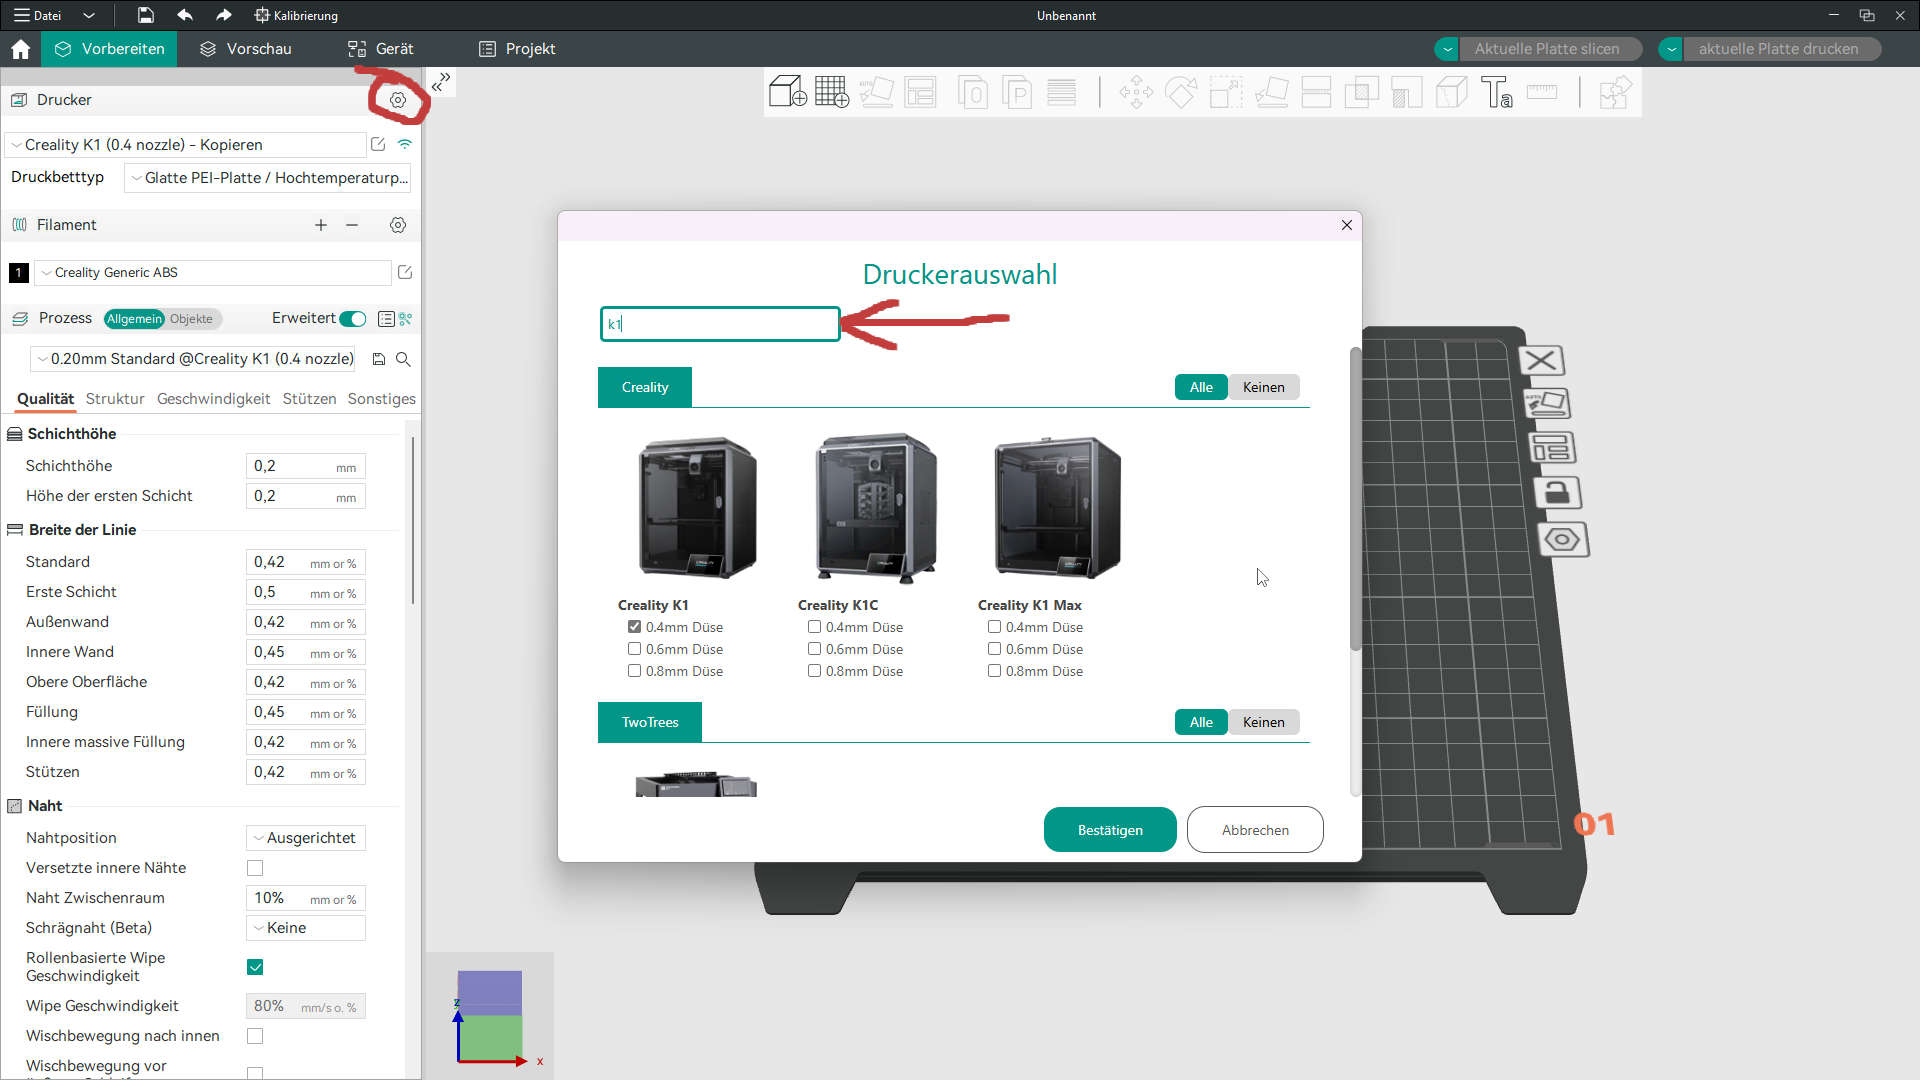
In the Project i opend the Printer settings. searched for the K1 added it with the 0.4mm nozzle an clicked accept
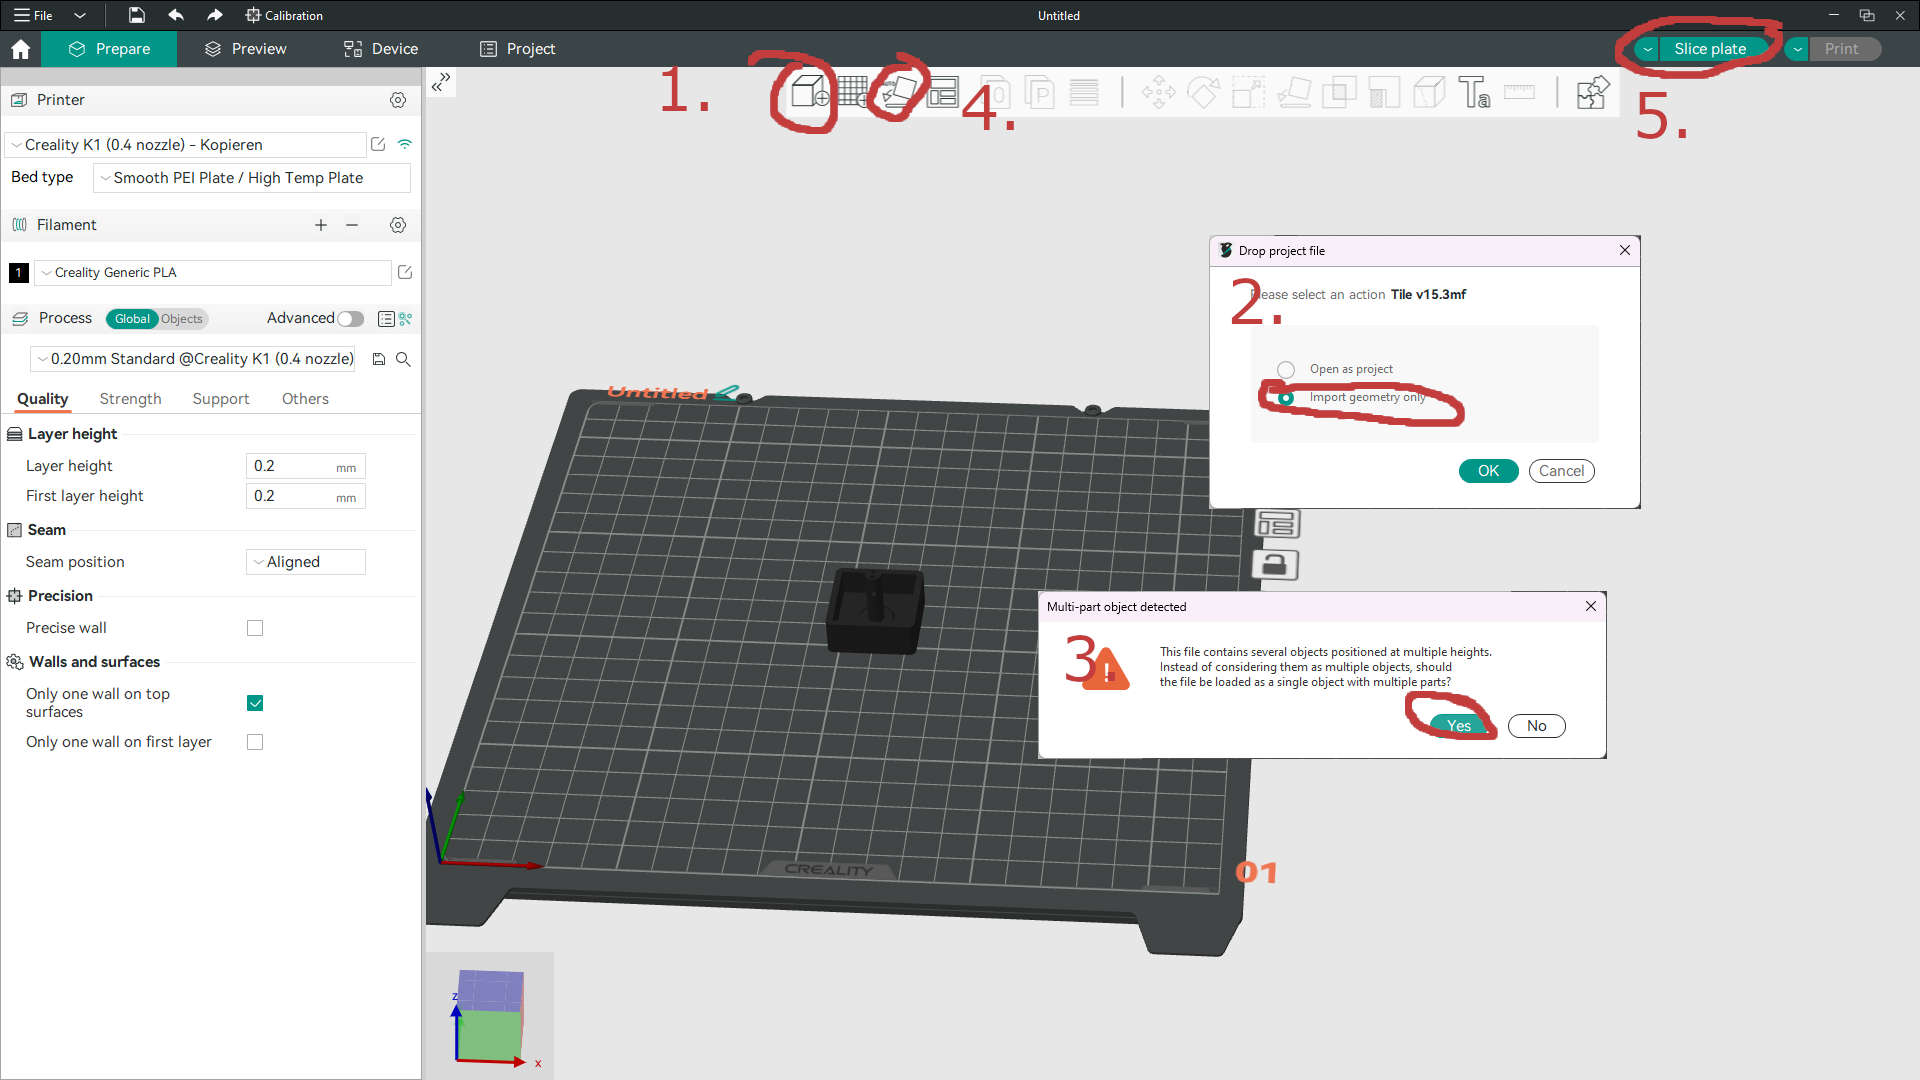
To import the my 3mf i opend the import(1.) and opend the downloads folder in the prompt which appears. I opend my exported file, selected "import geometry only"(2.) and imported my multi-part file as a grouped object(3.). Before slicing I auto oriented the tile(4.)
Slice Settings:
for my slice settings i opted for the standards orca provided: 0.2mm standard and creality generic pla. As Material i`m using Creality Ender PLA+ in orange
- Layer height: 0.2mm
- 15% cubic infill
- no supports
- no brim or other bed adhesion
- nozzle temp: 220°C
- bed temp : 60°C
Followed by clicking on "Slice plate"(5.)
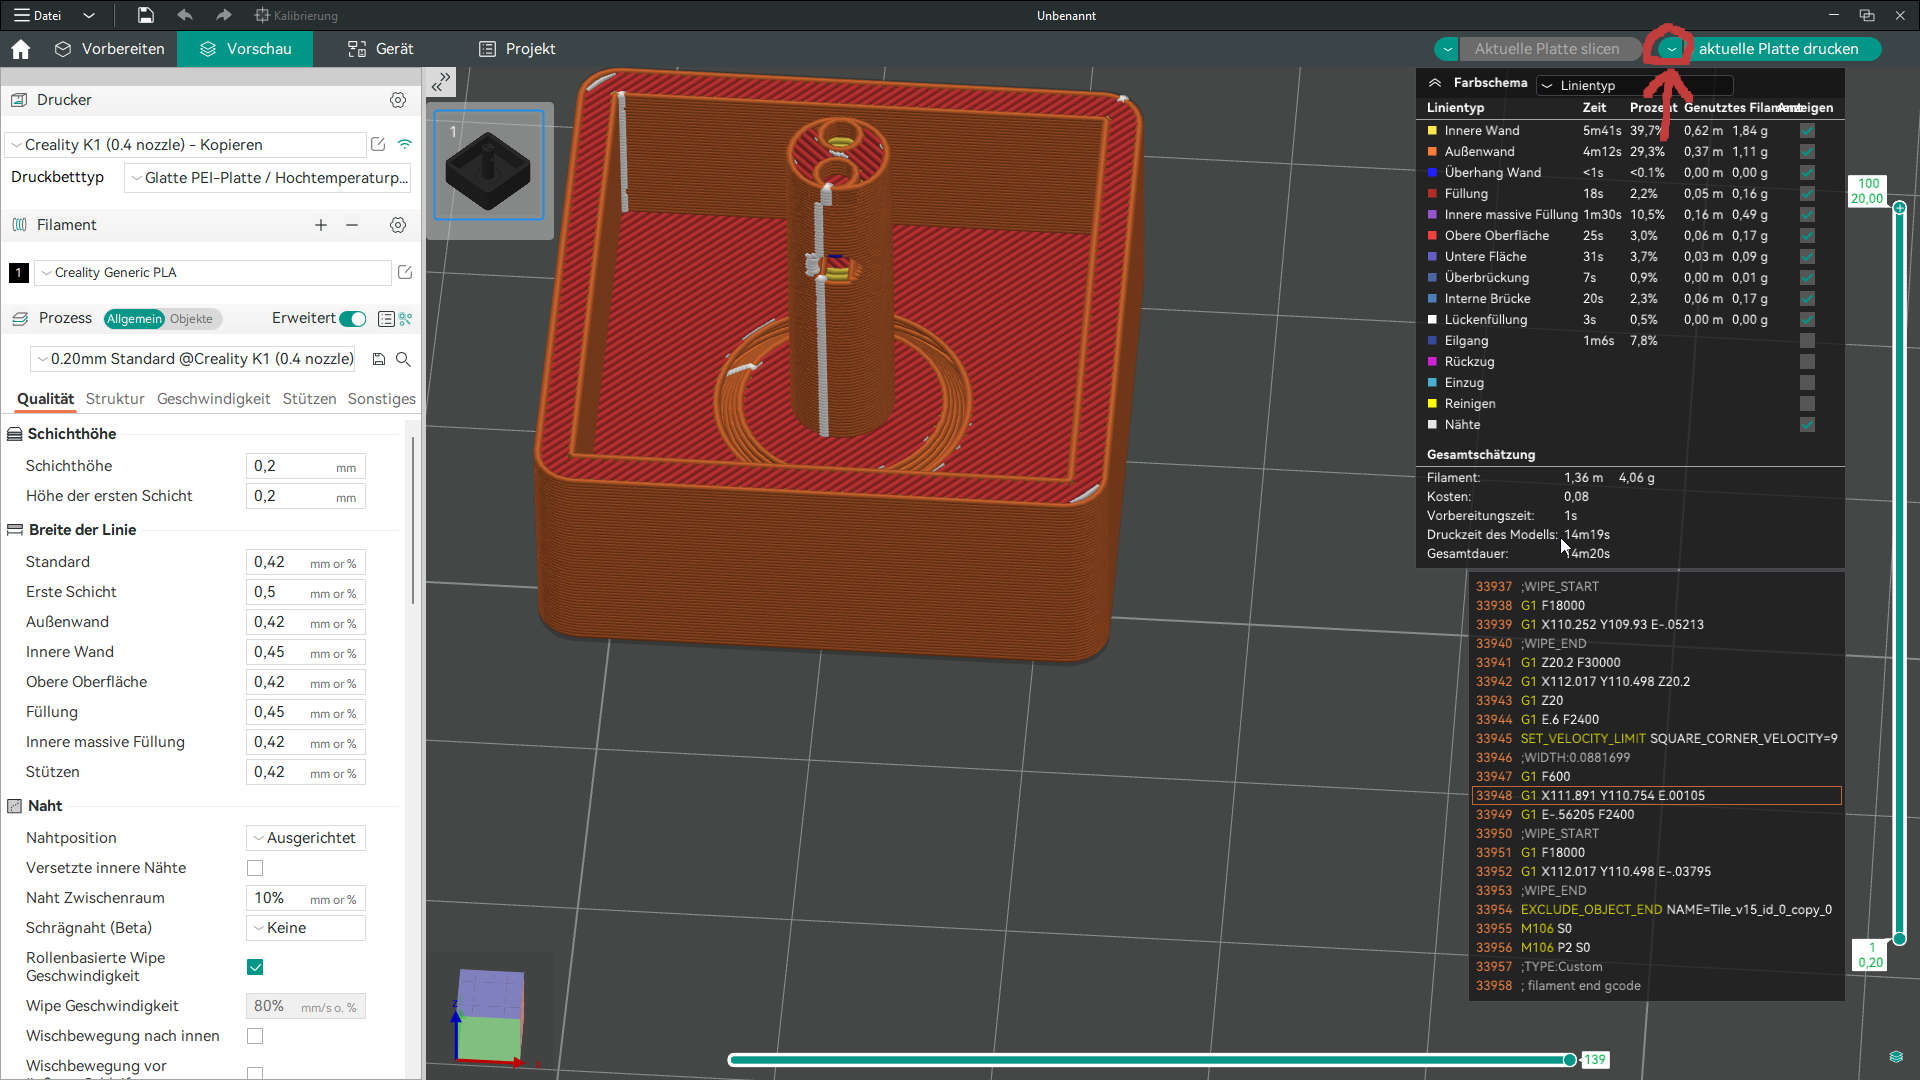
After Slicing i saw the printingtime: 14mm and 20s , aswell as the used filament: 4.06g. The last step in Orca was to export the g-code. For that i clicked on the small file between Slice plate and print file to get to export g-code. I saved it onto a USB stick.
Printing
As mentioned i`m using my Creality K1
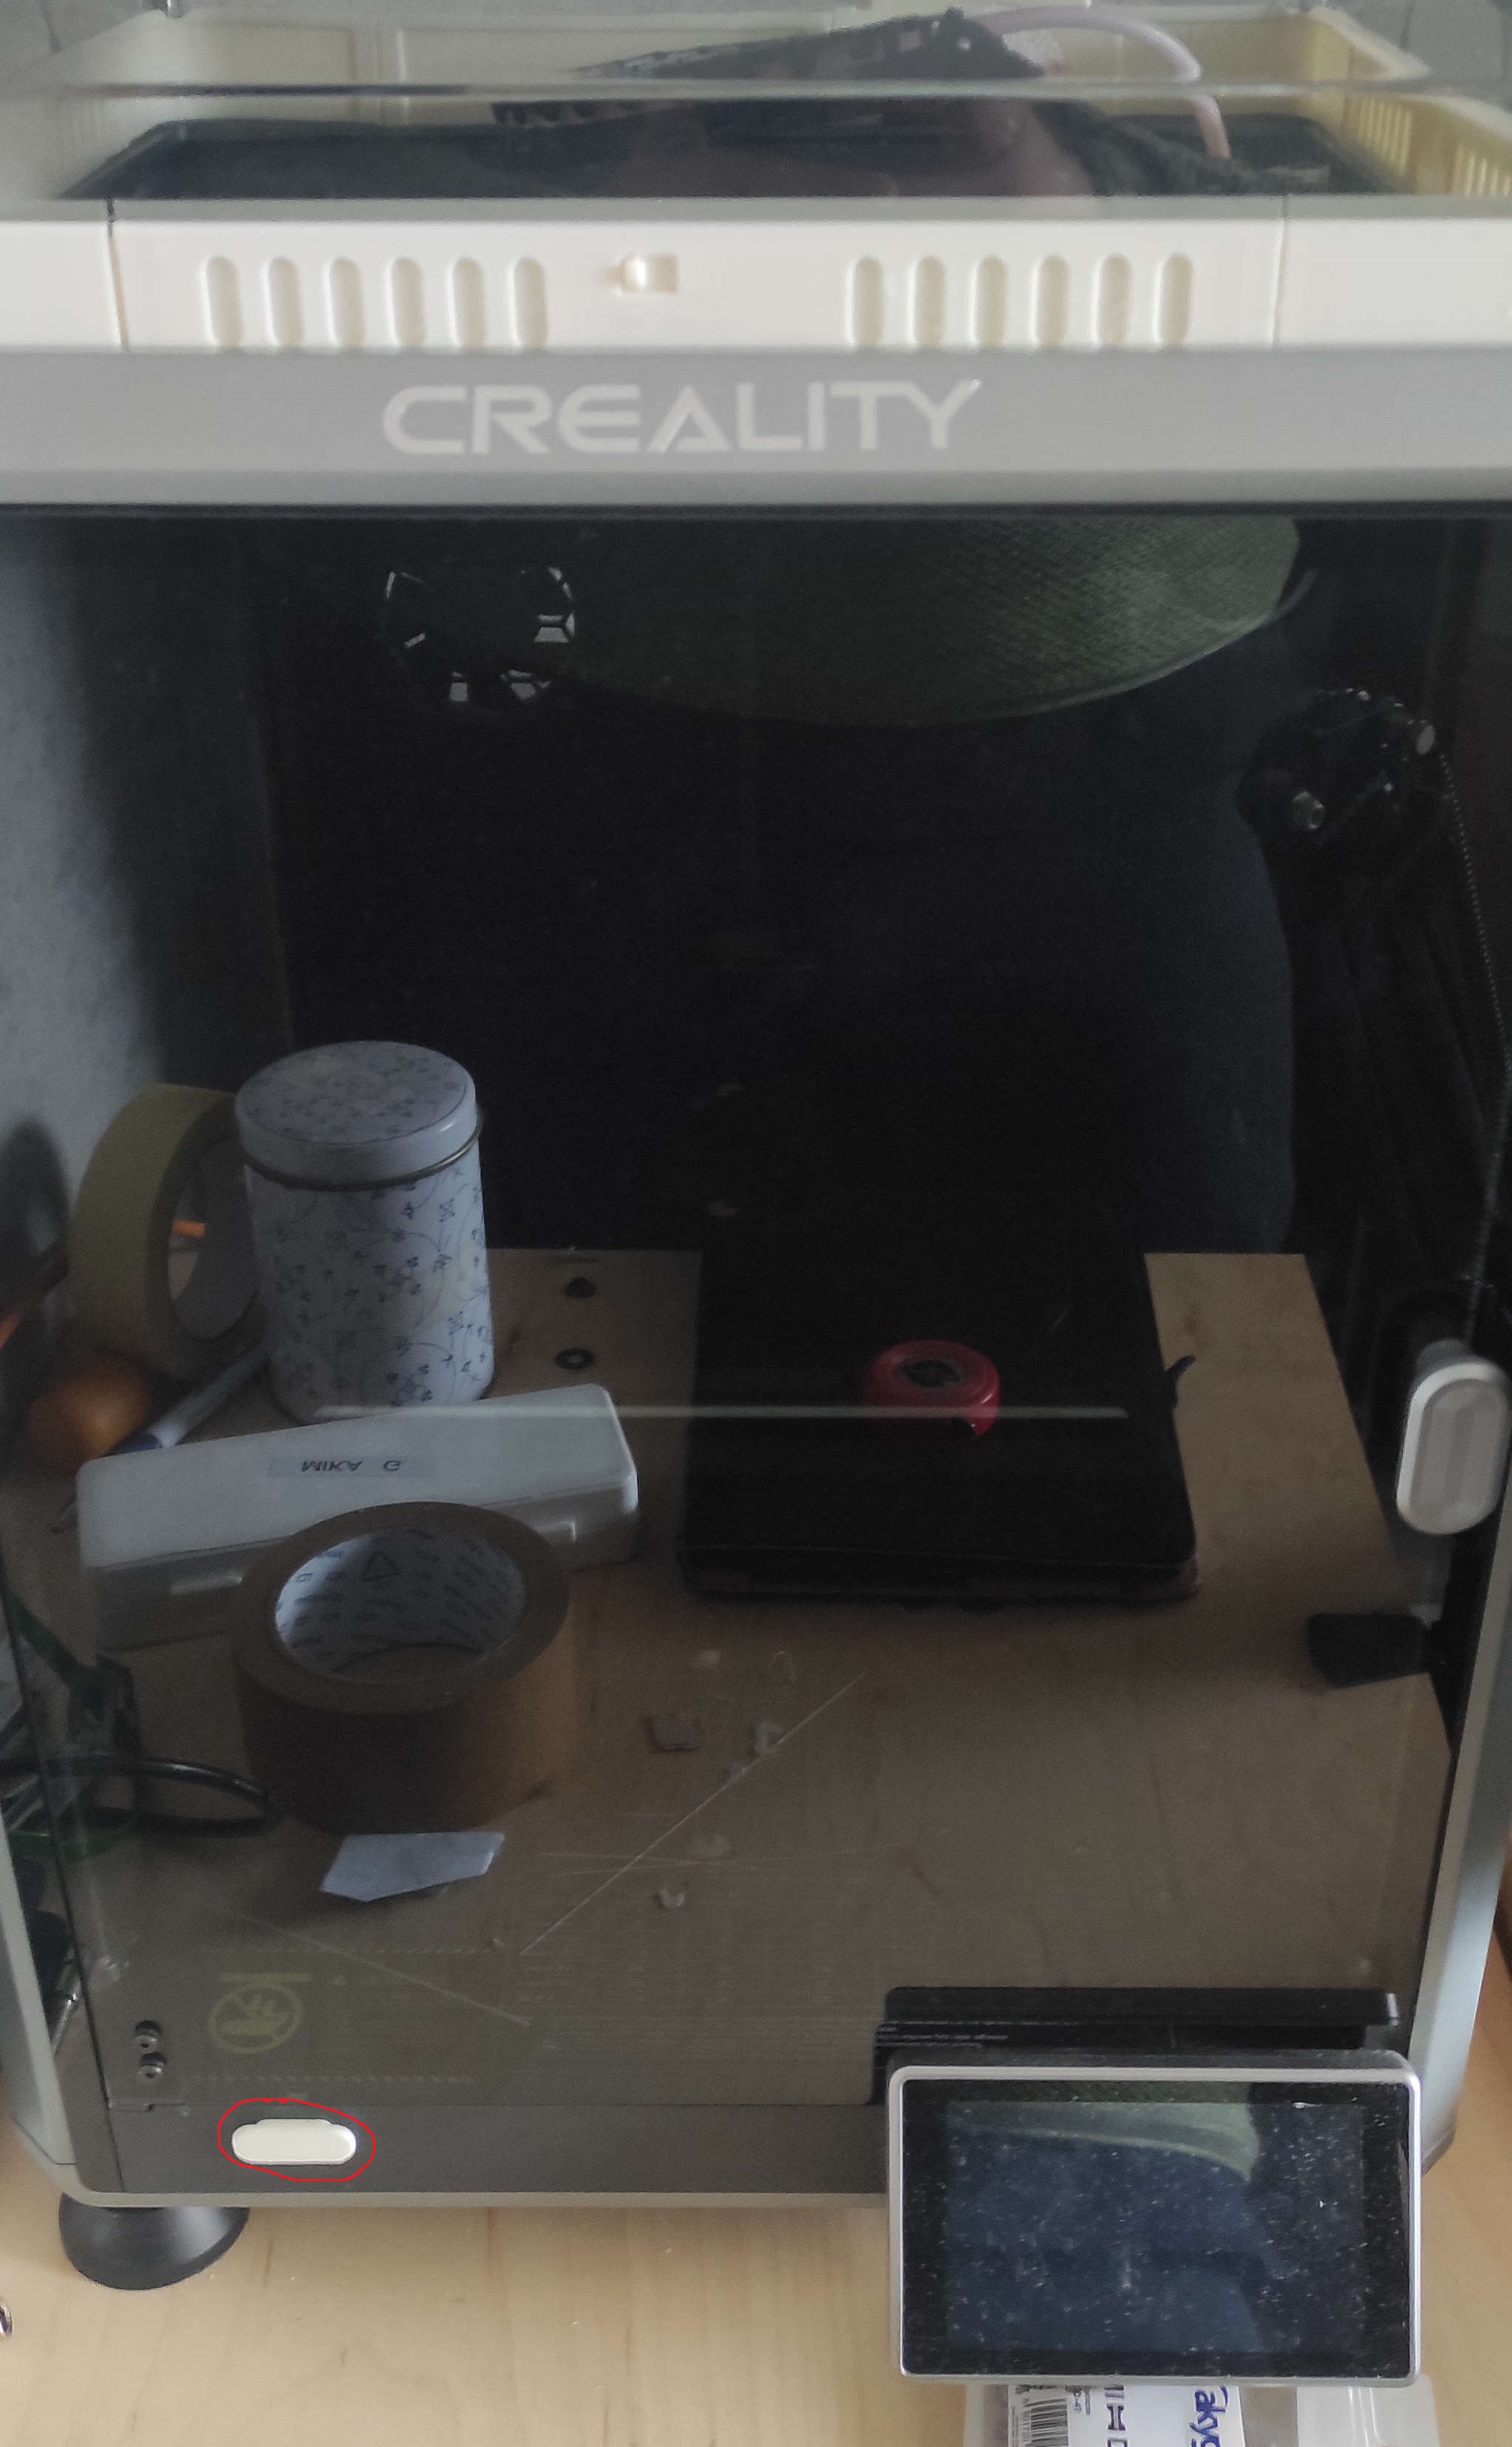
In my case i have a usb cover. I removed it and put the USBstick there
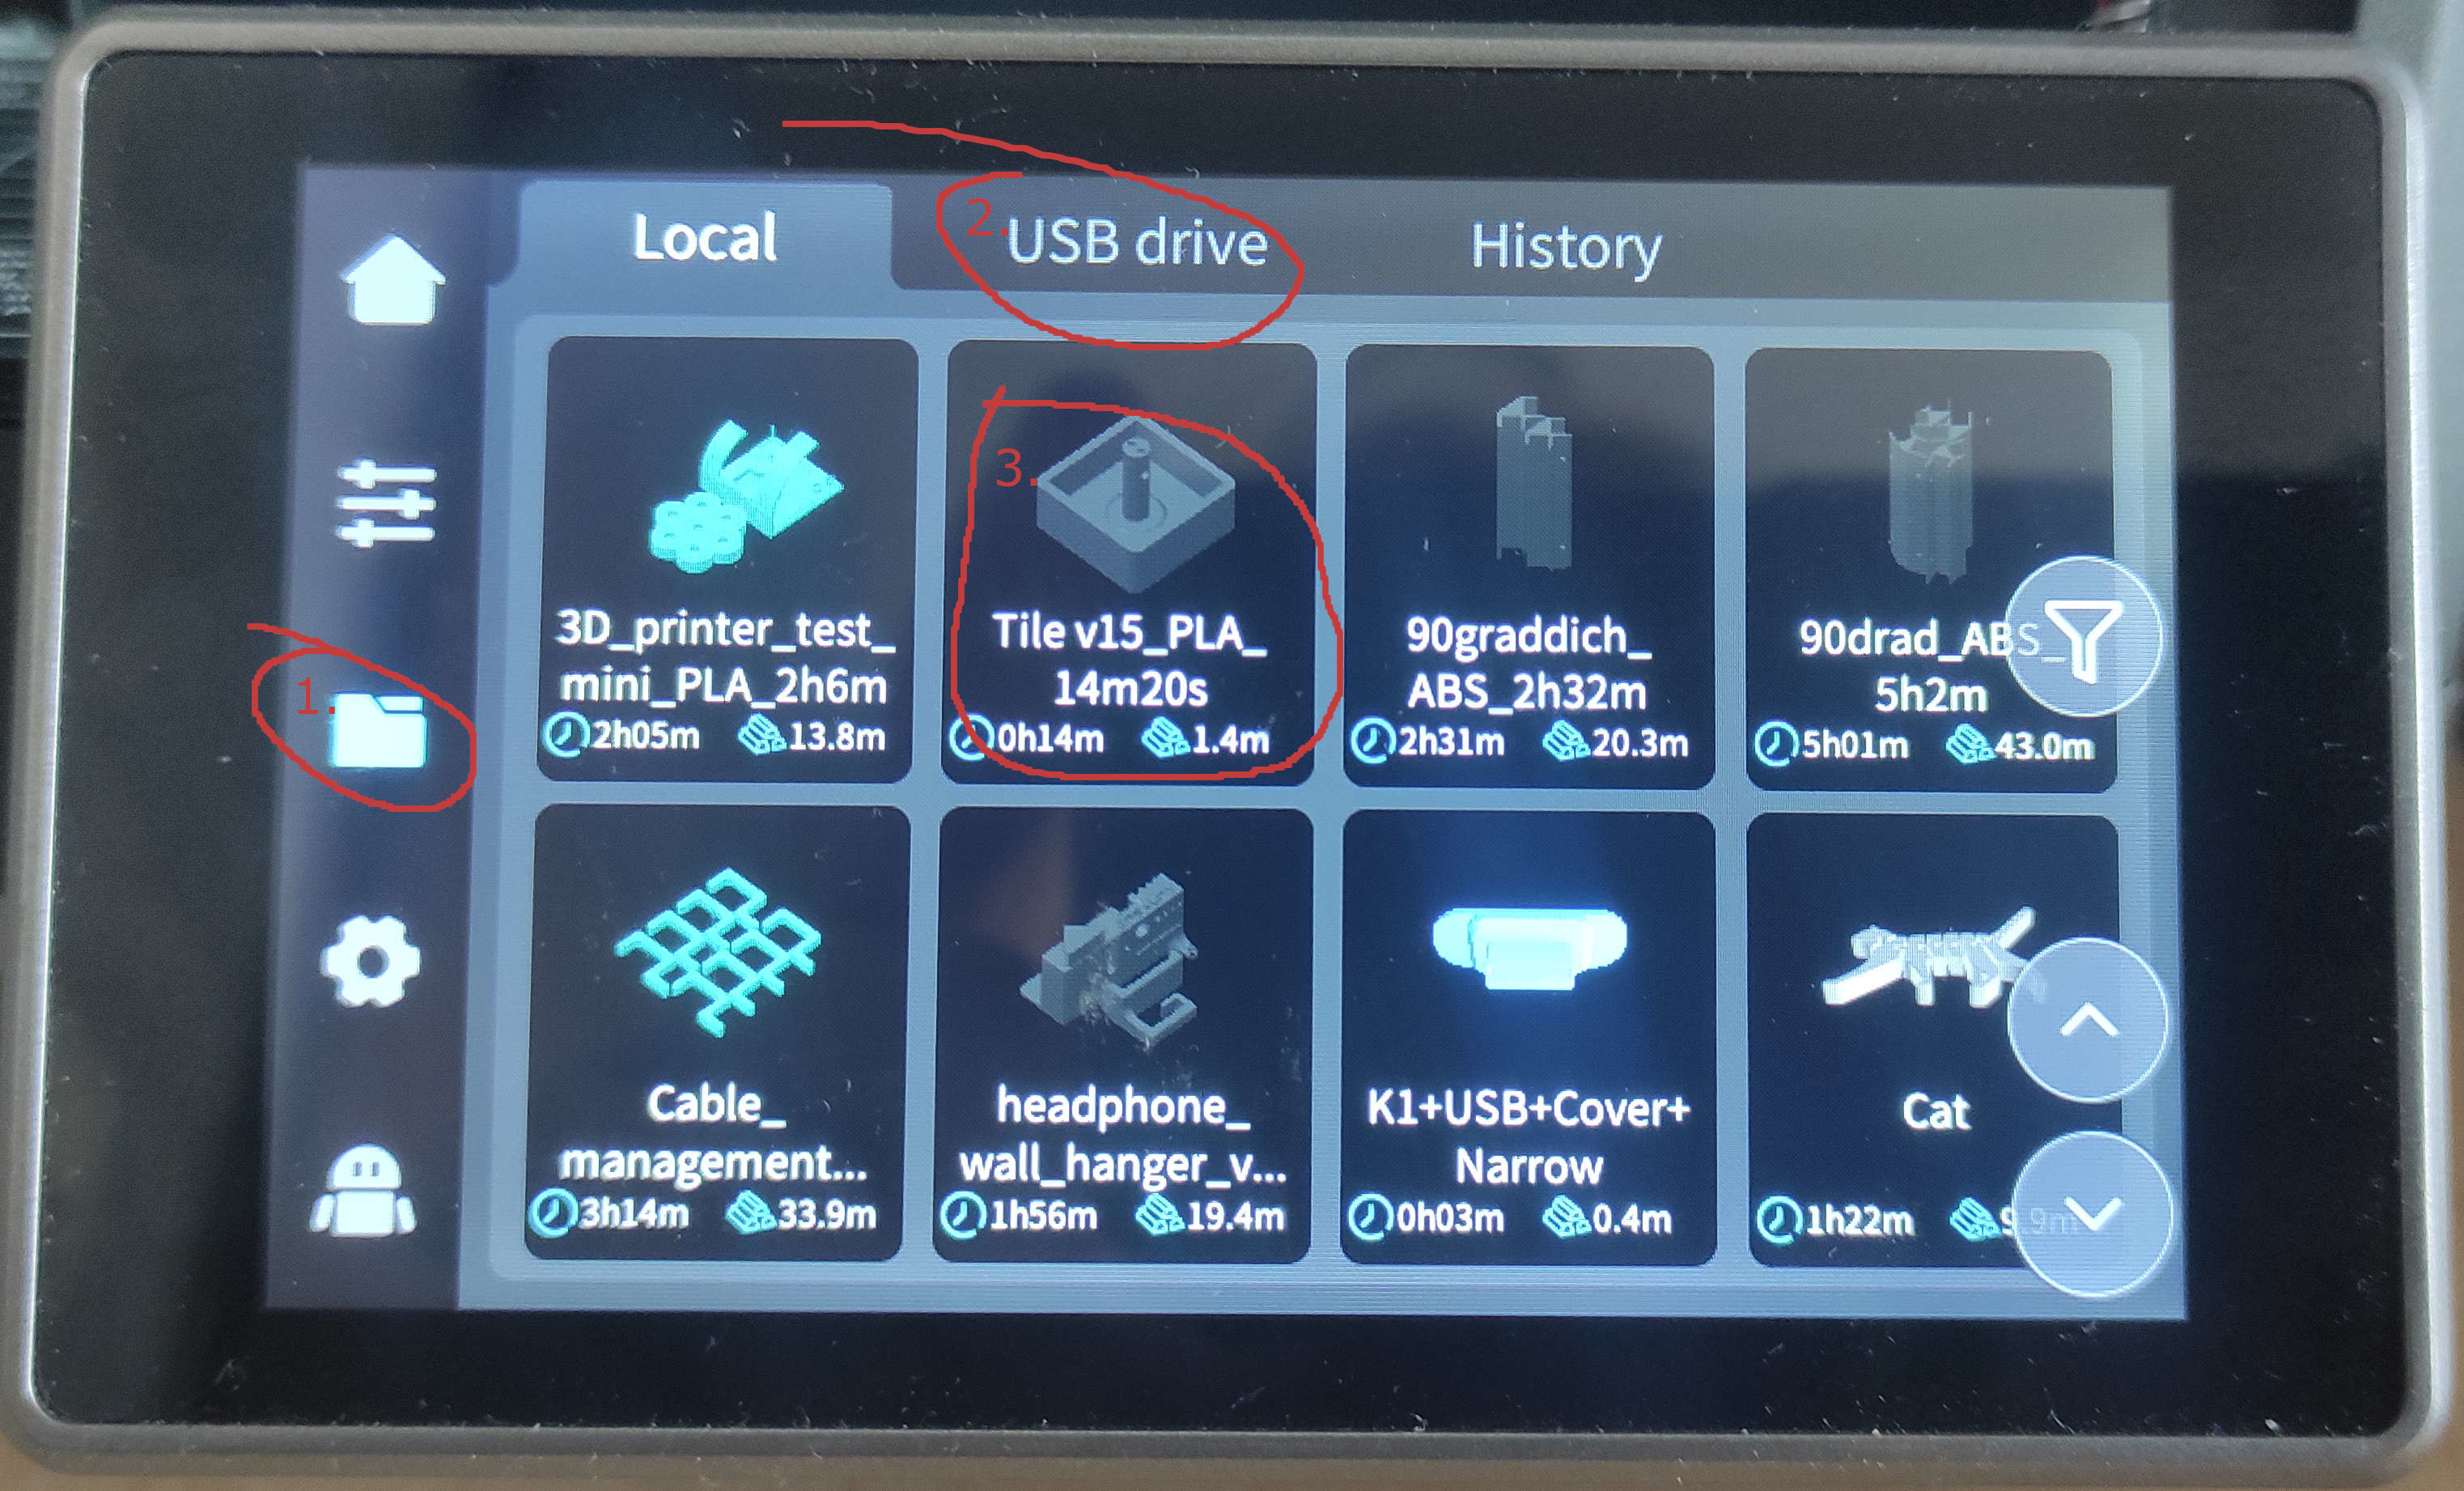
After inserting the Stick I changed to the File selction(1.), switched to the USBstick tab(2.) and selected my file(3.)
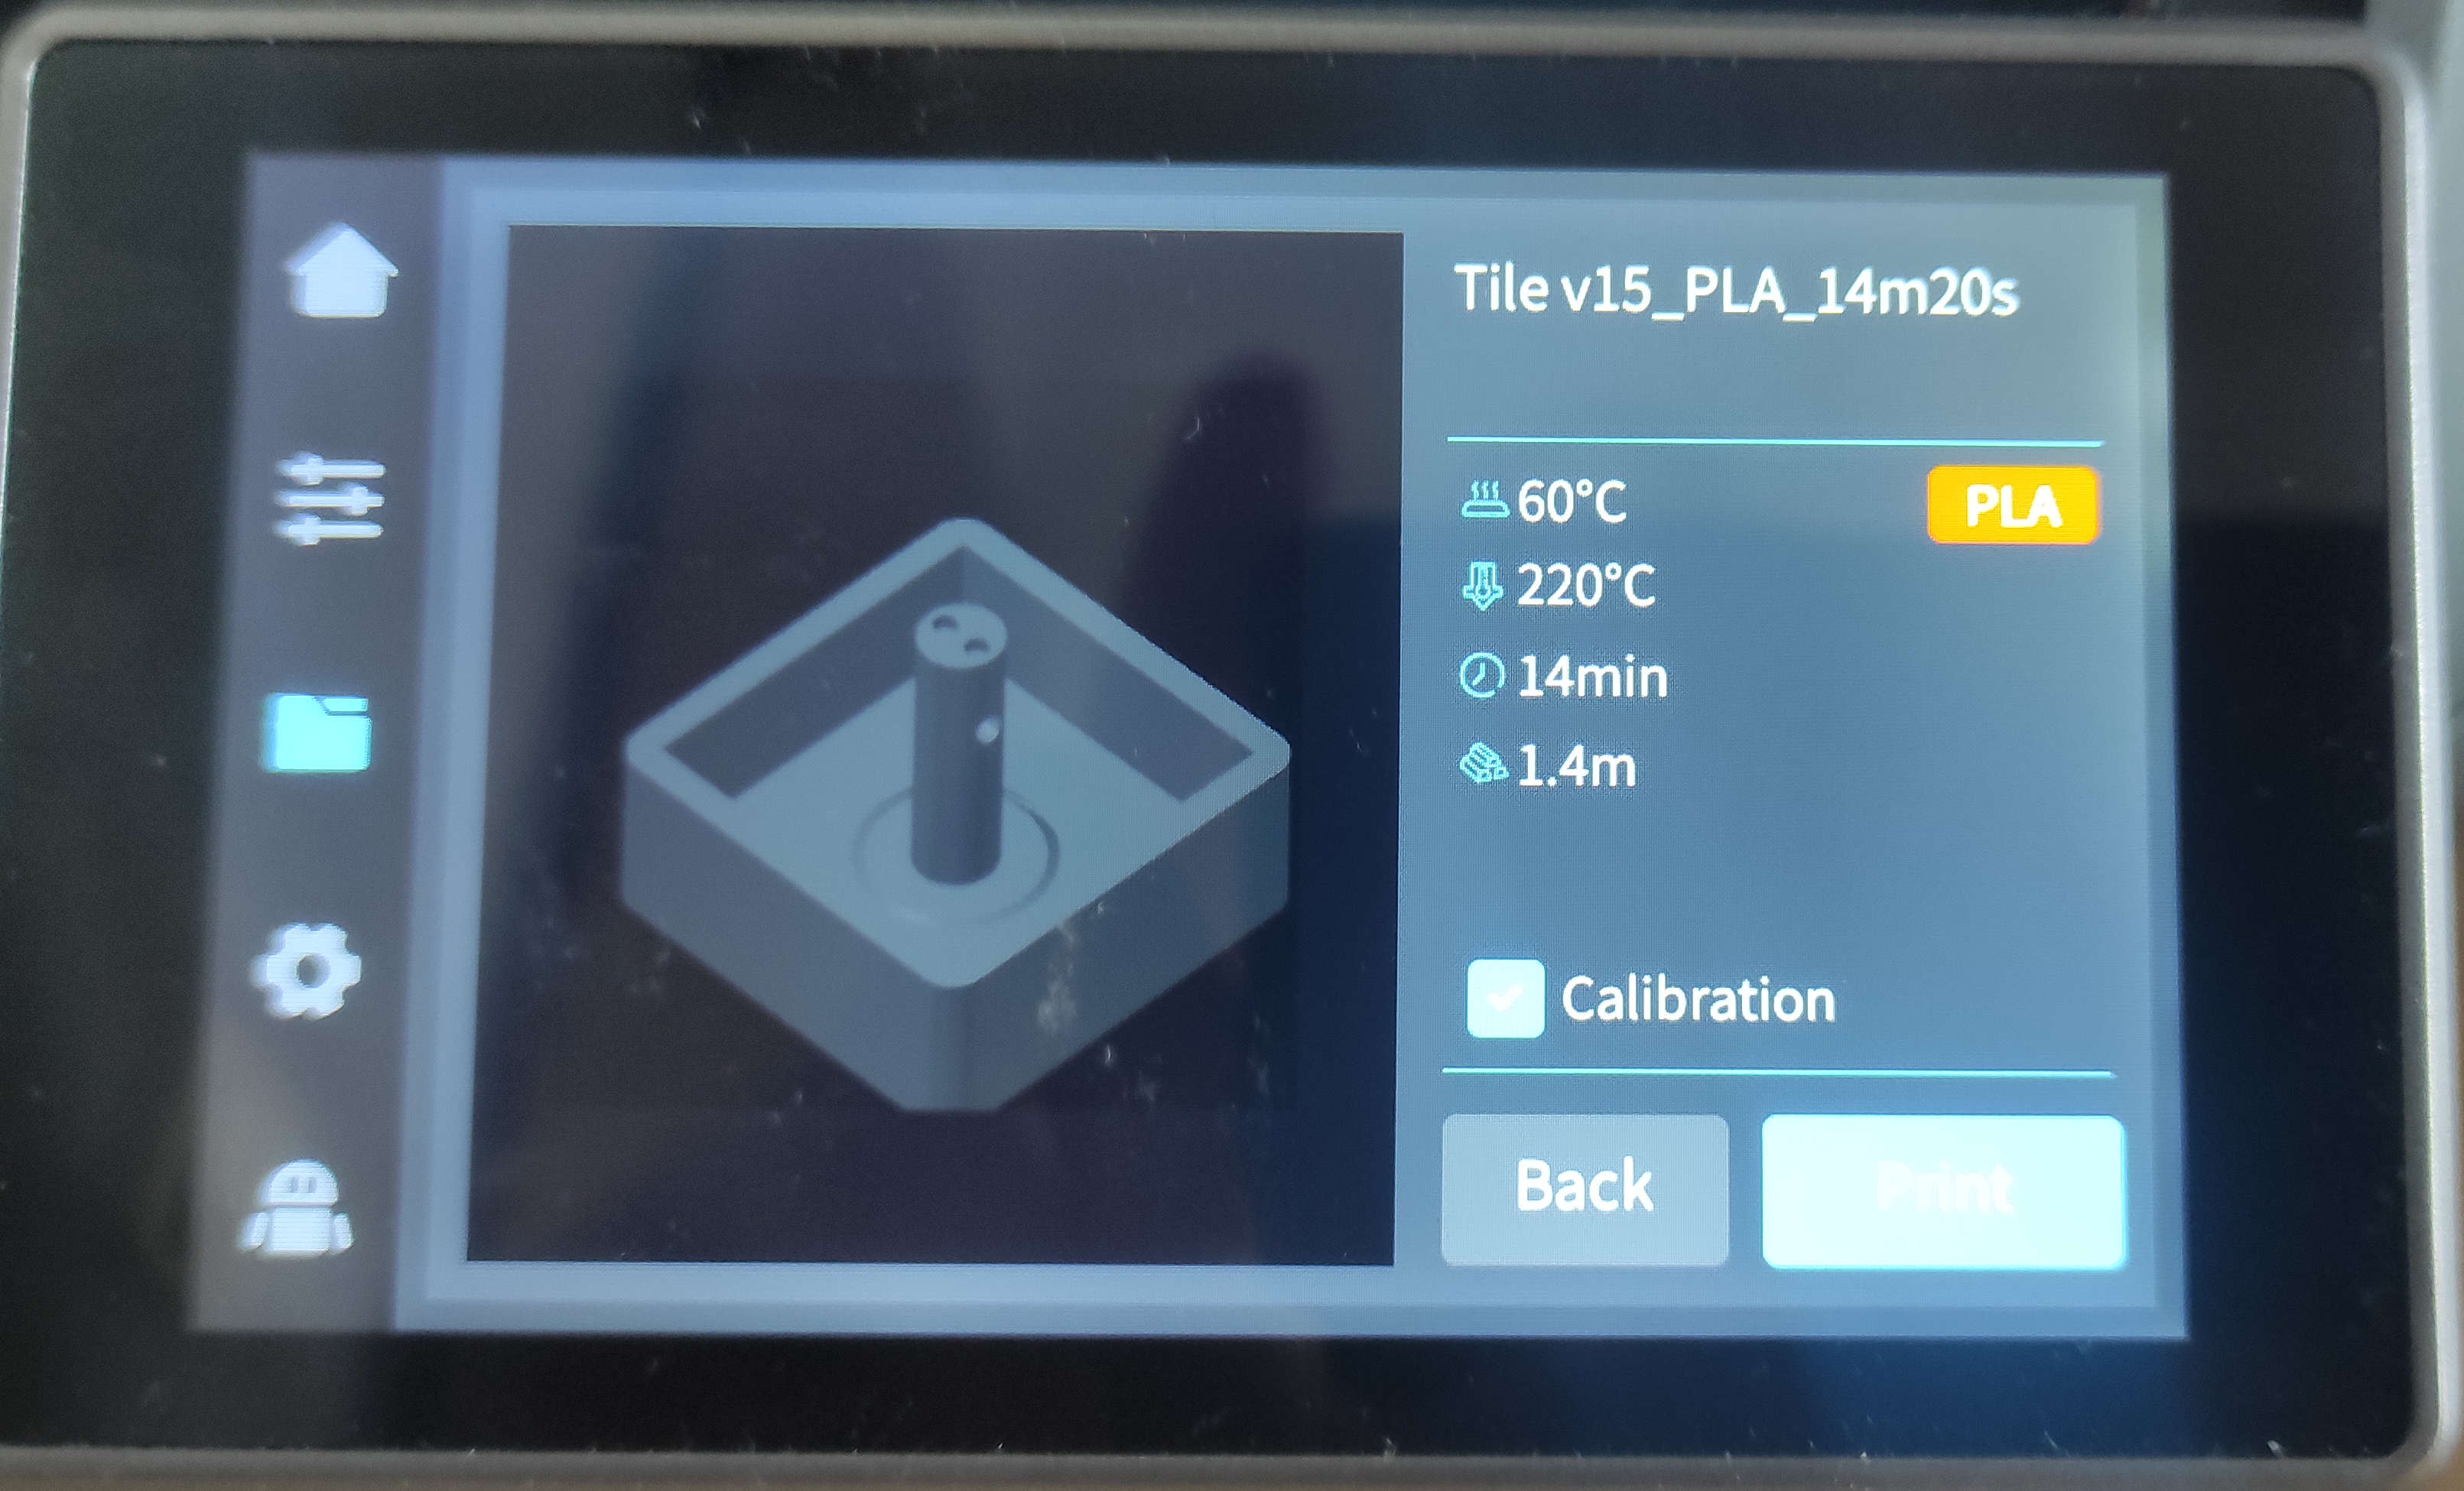
I always select the Calibration and printed the File by clicking print
Result
Tile+Holder(f3d)3D-Scanning
In this part of the assignment I scanned Leen Skaf with the Shining3D EinScan H2 in Ifrared mode with TextureScan
First thing was to start the Sofware "EXScan H"
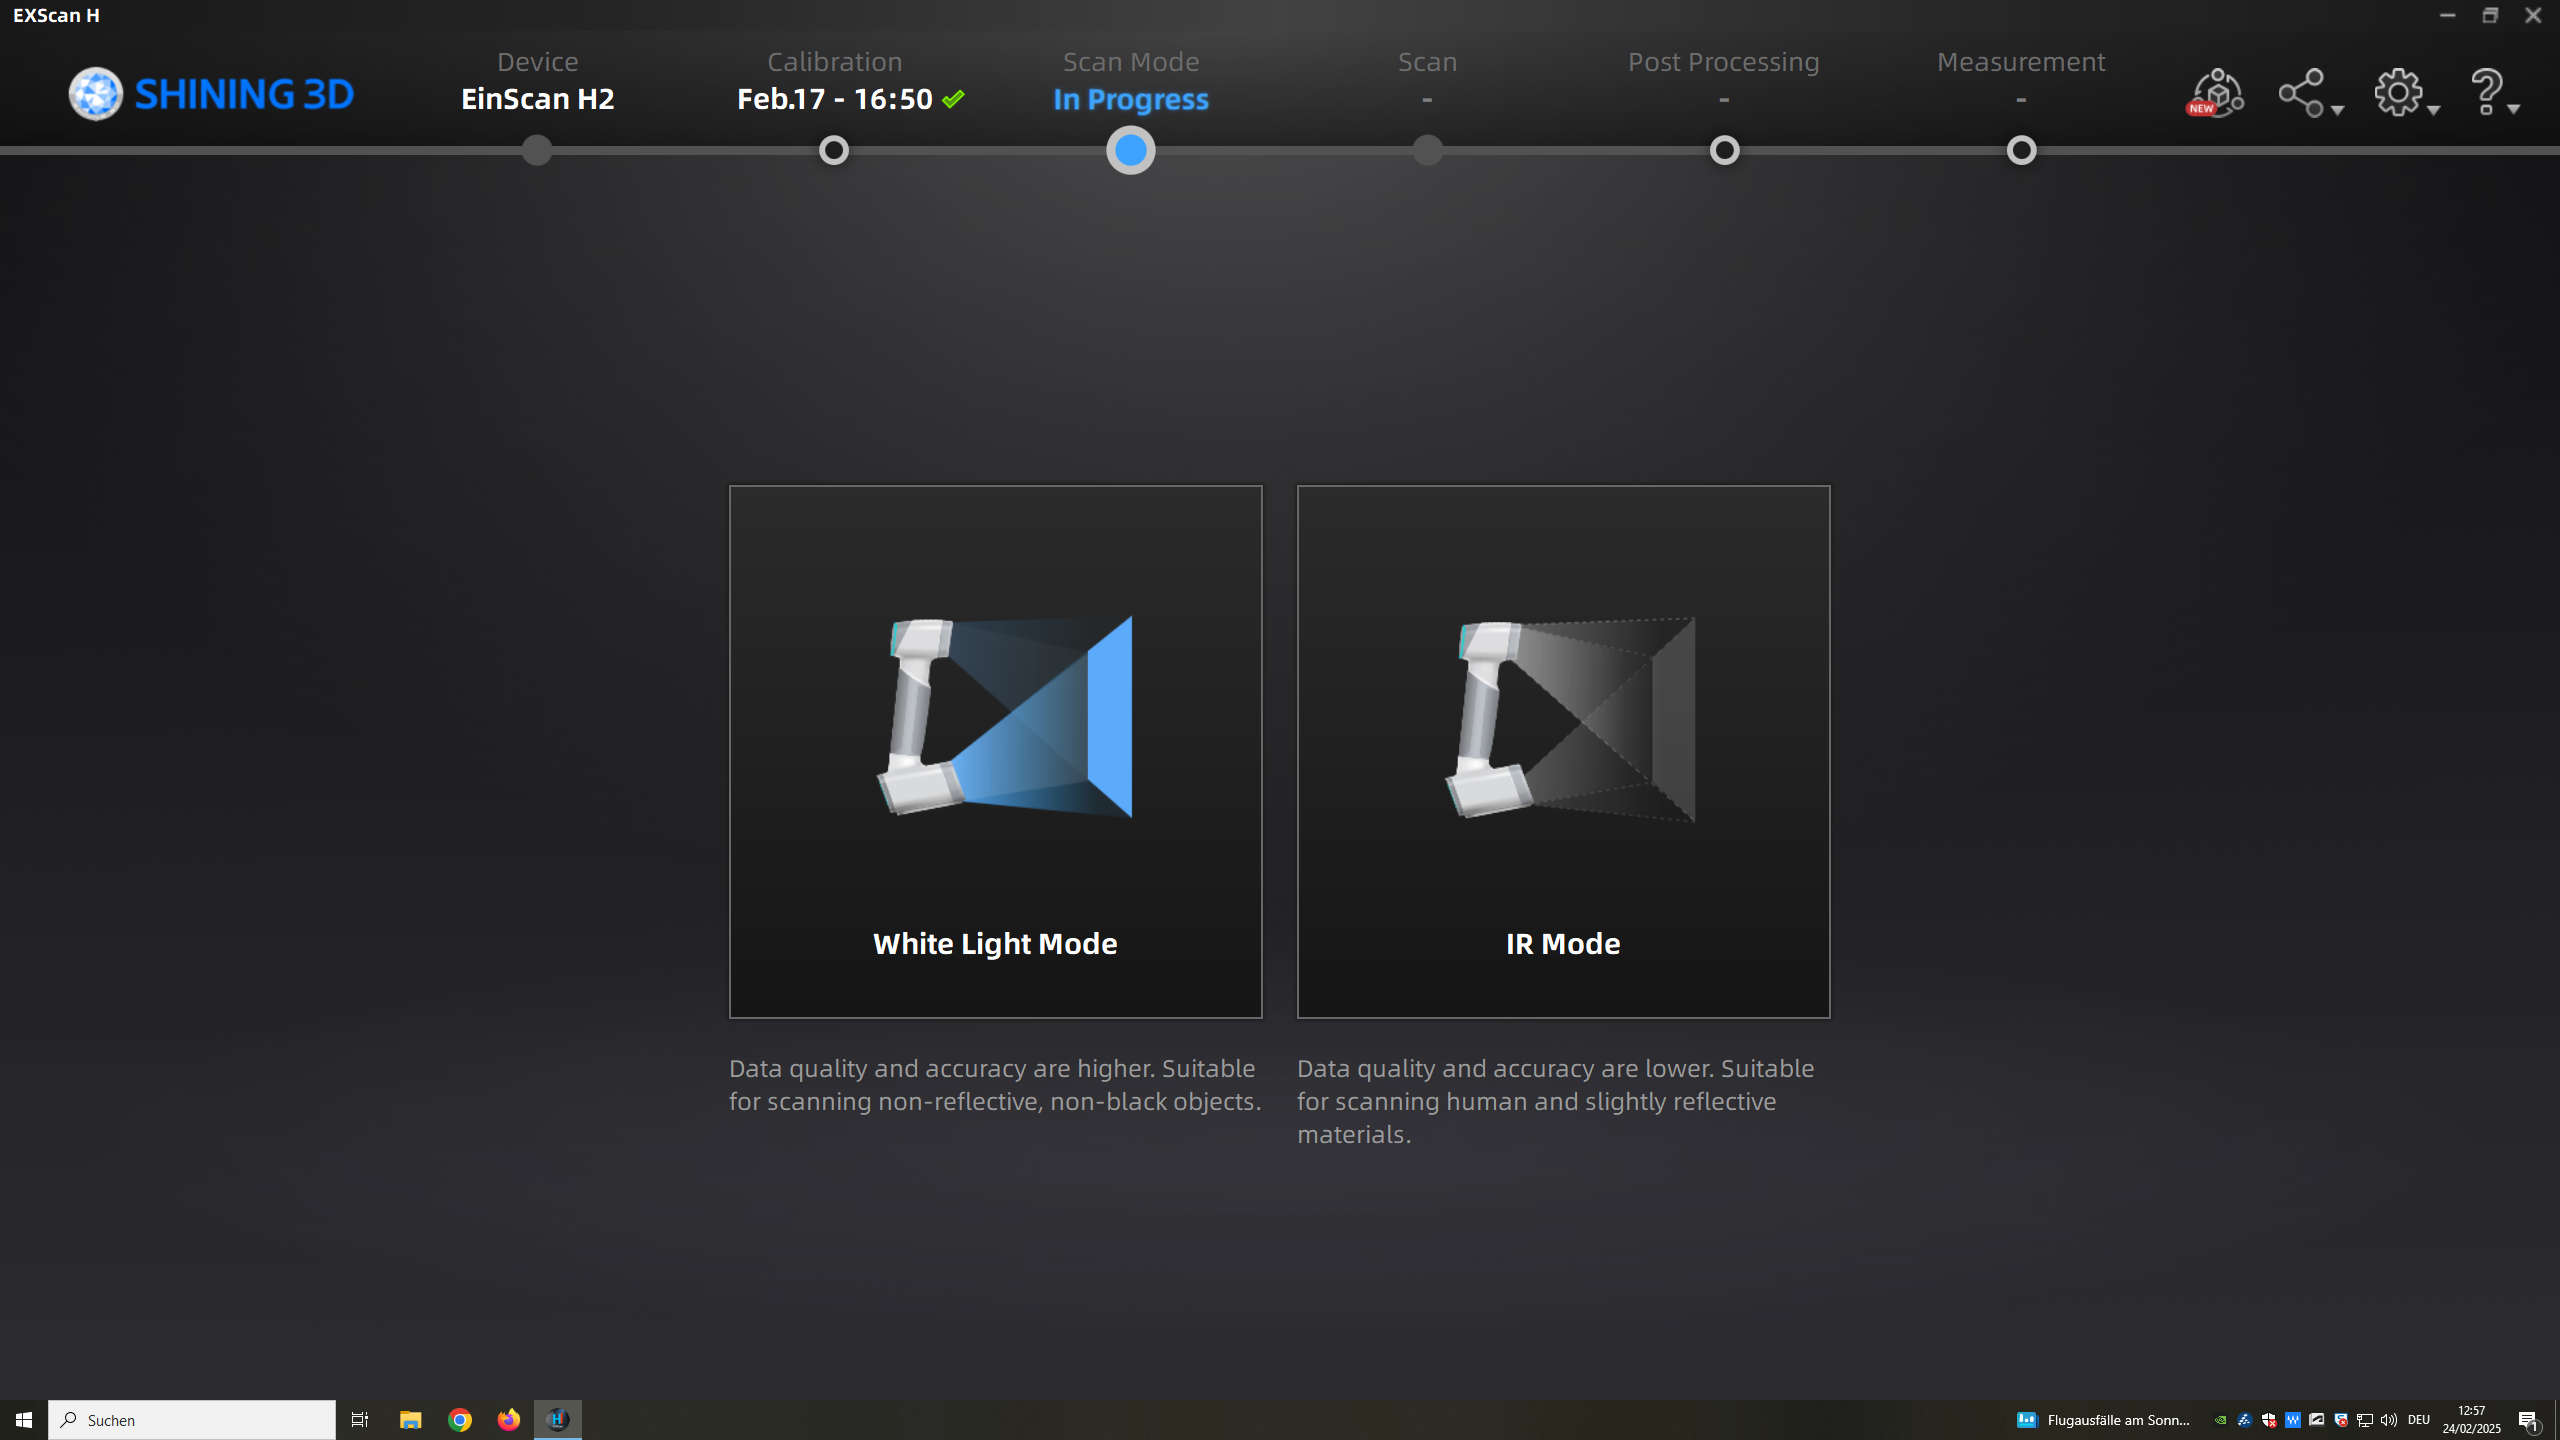
Then i needed to select IR mode. This is great for scanning people. Also they dont get blinded that much
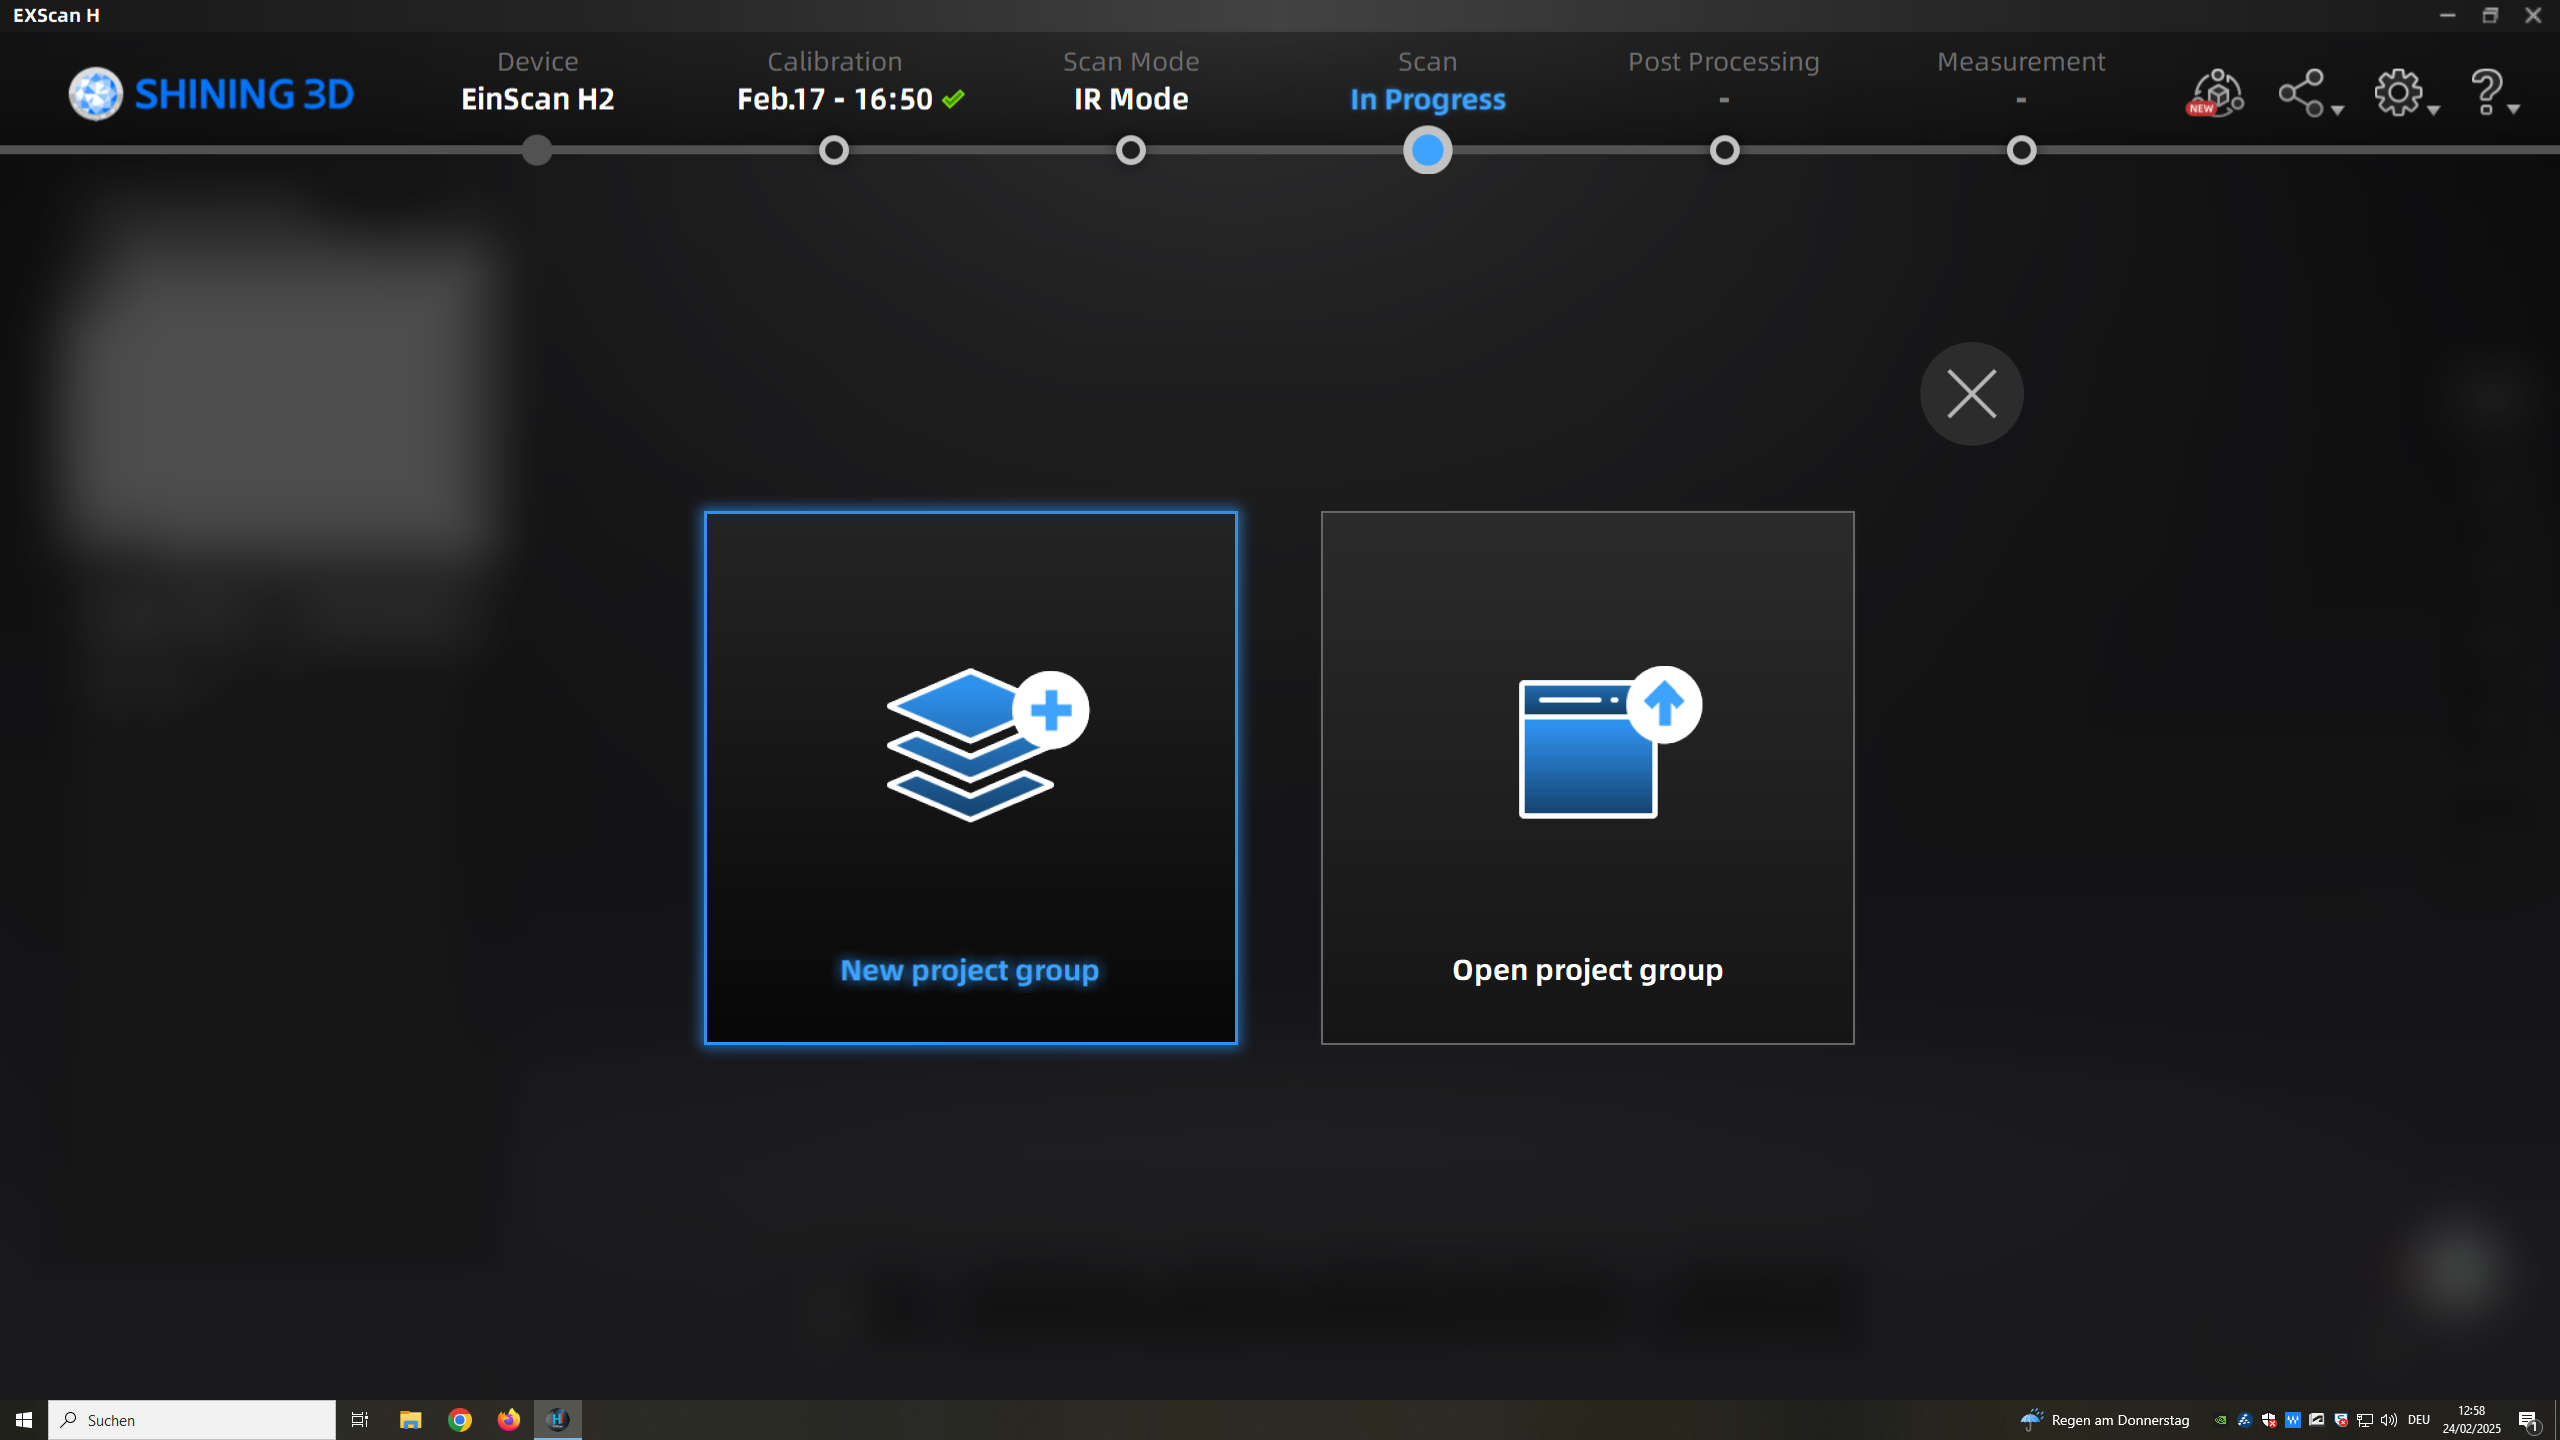
I created a new preoject

and started to scan with full brigthness. The Scanning Process can be seen in the next Video.
After Scanning there is a bit of touchup necessery. I showed you this at a spot in the leg
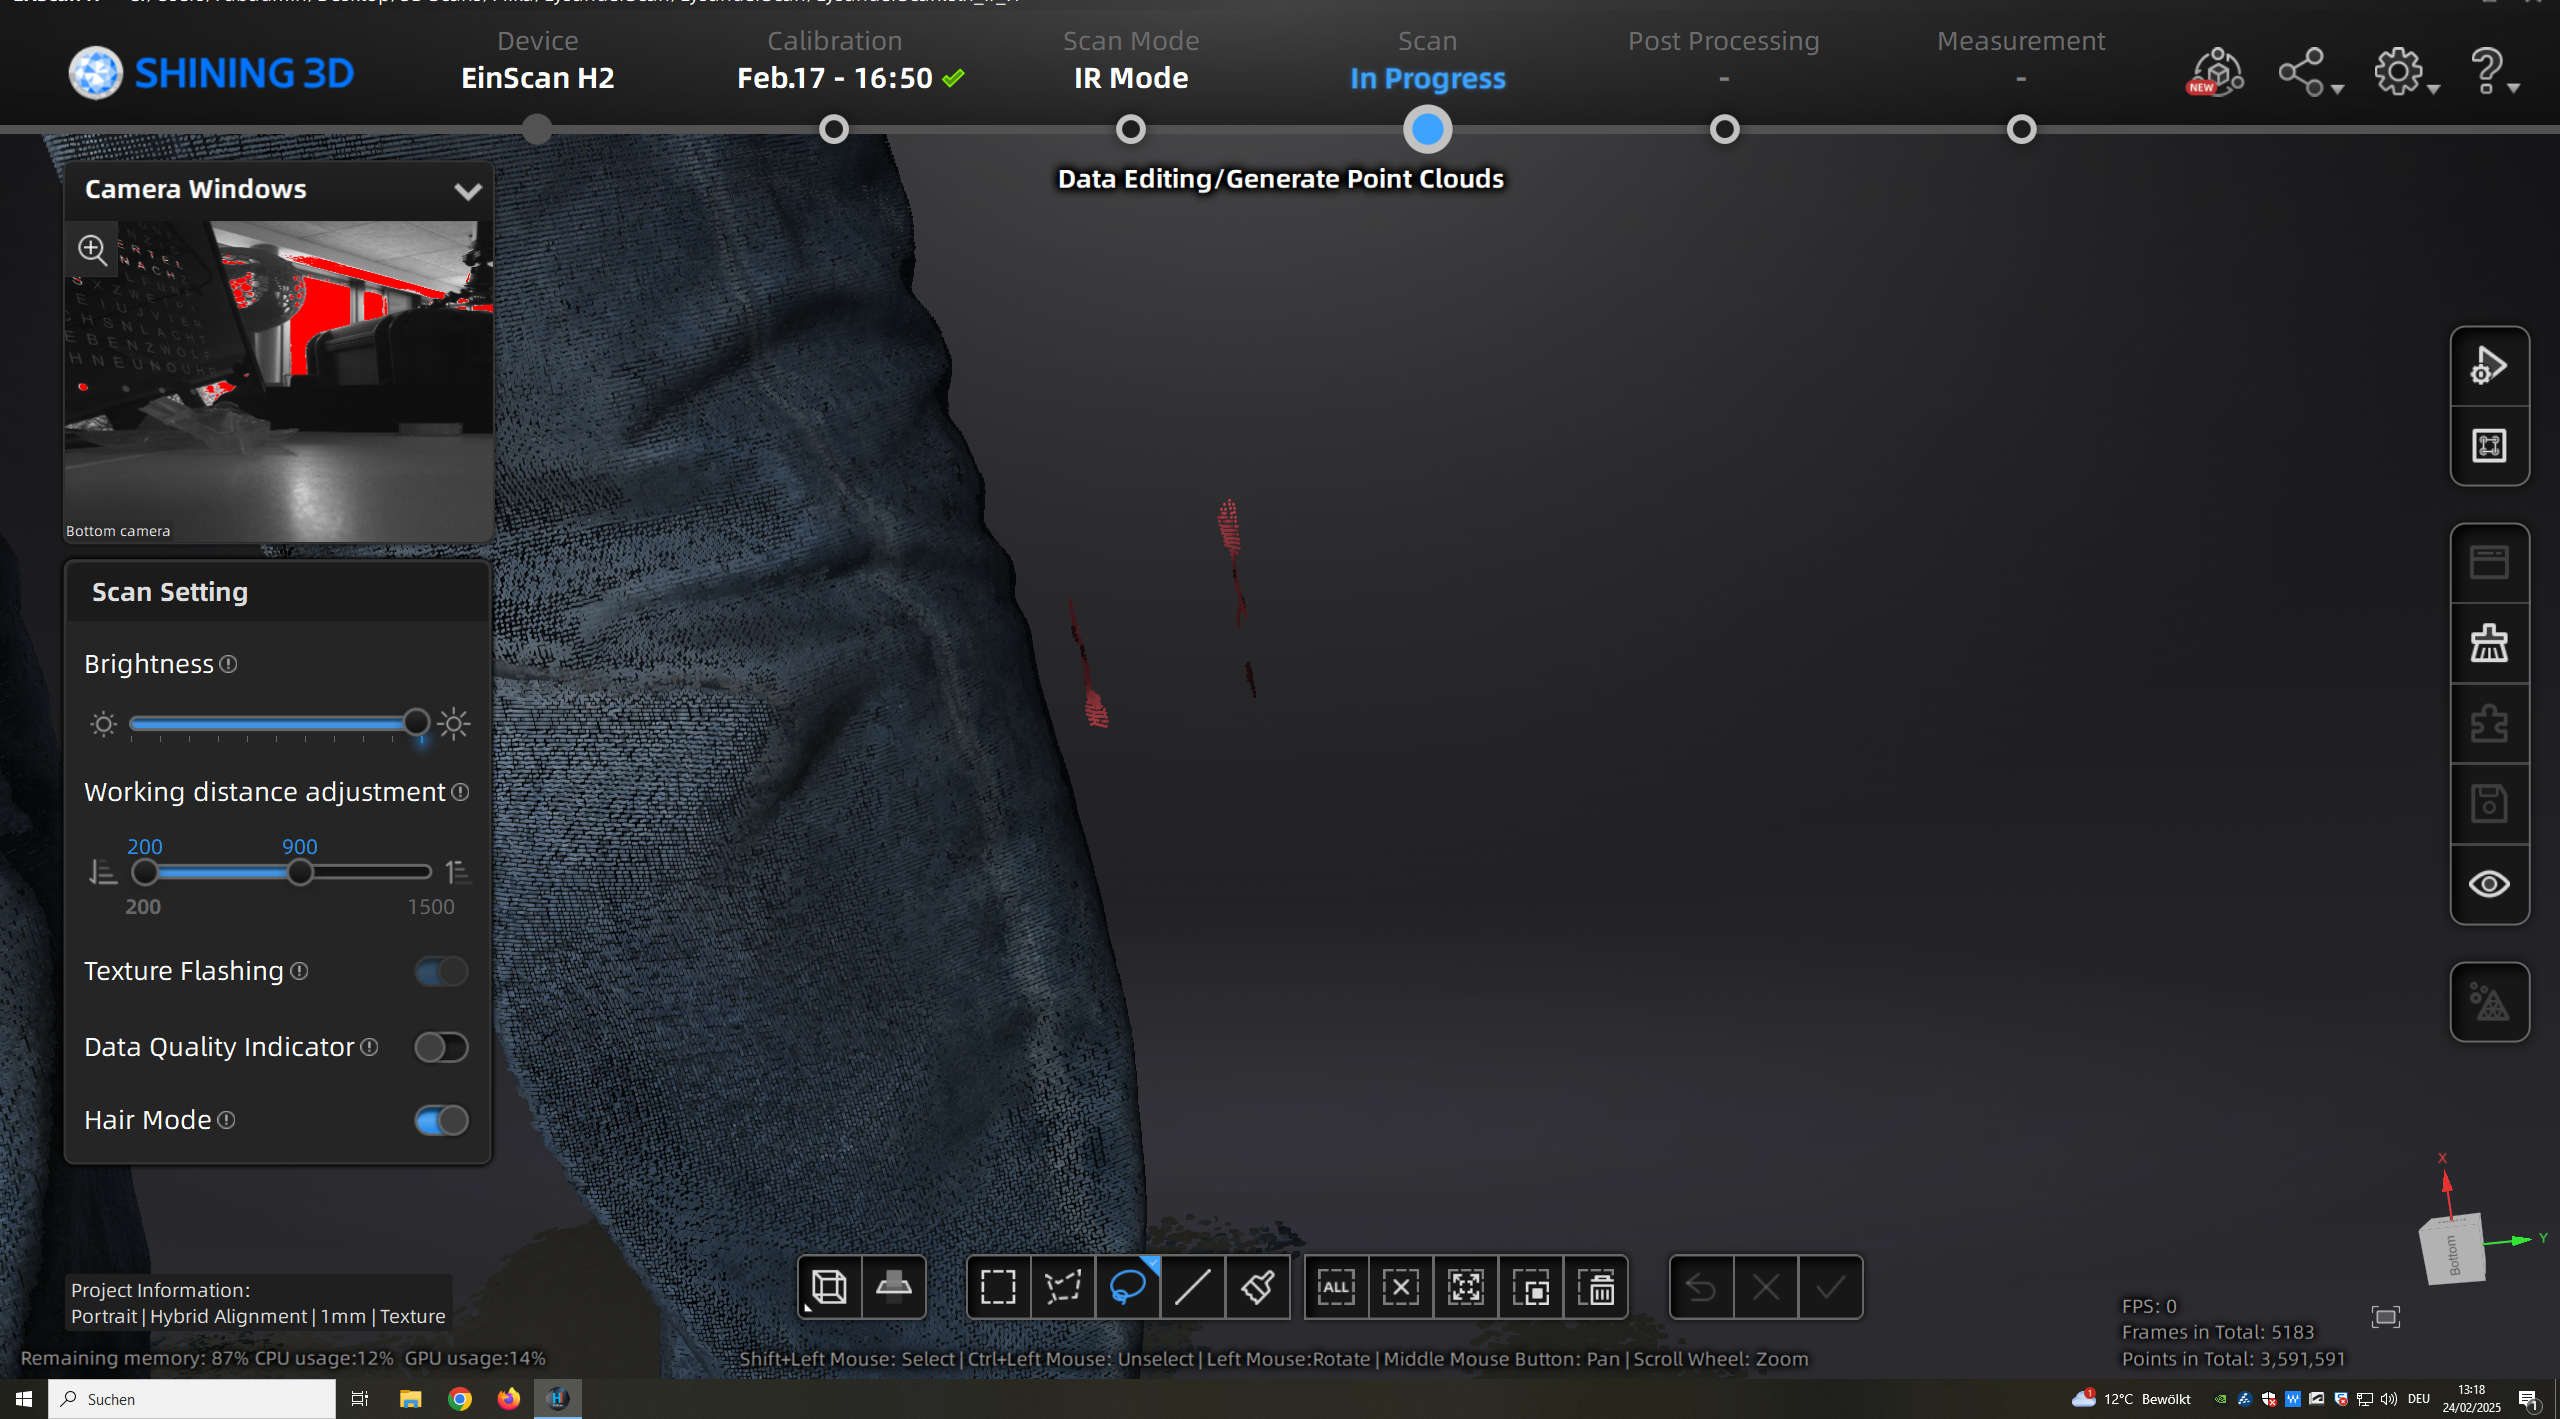
By holding shift and dragging the mouse around the artifacts with the lasso tool i select everything in the area inside the lasso. Pressing delete after this, gets rid of the Artifacts in the point cloud.
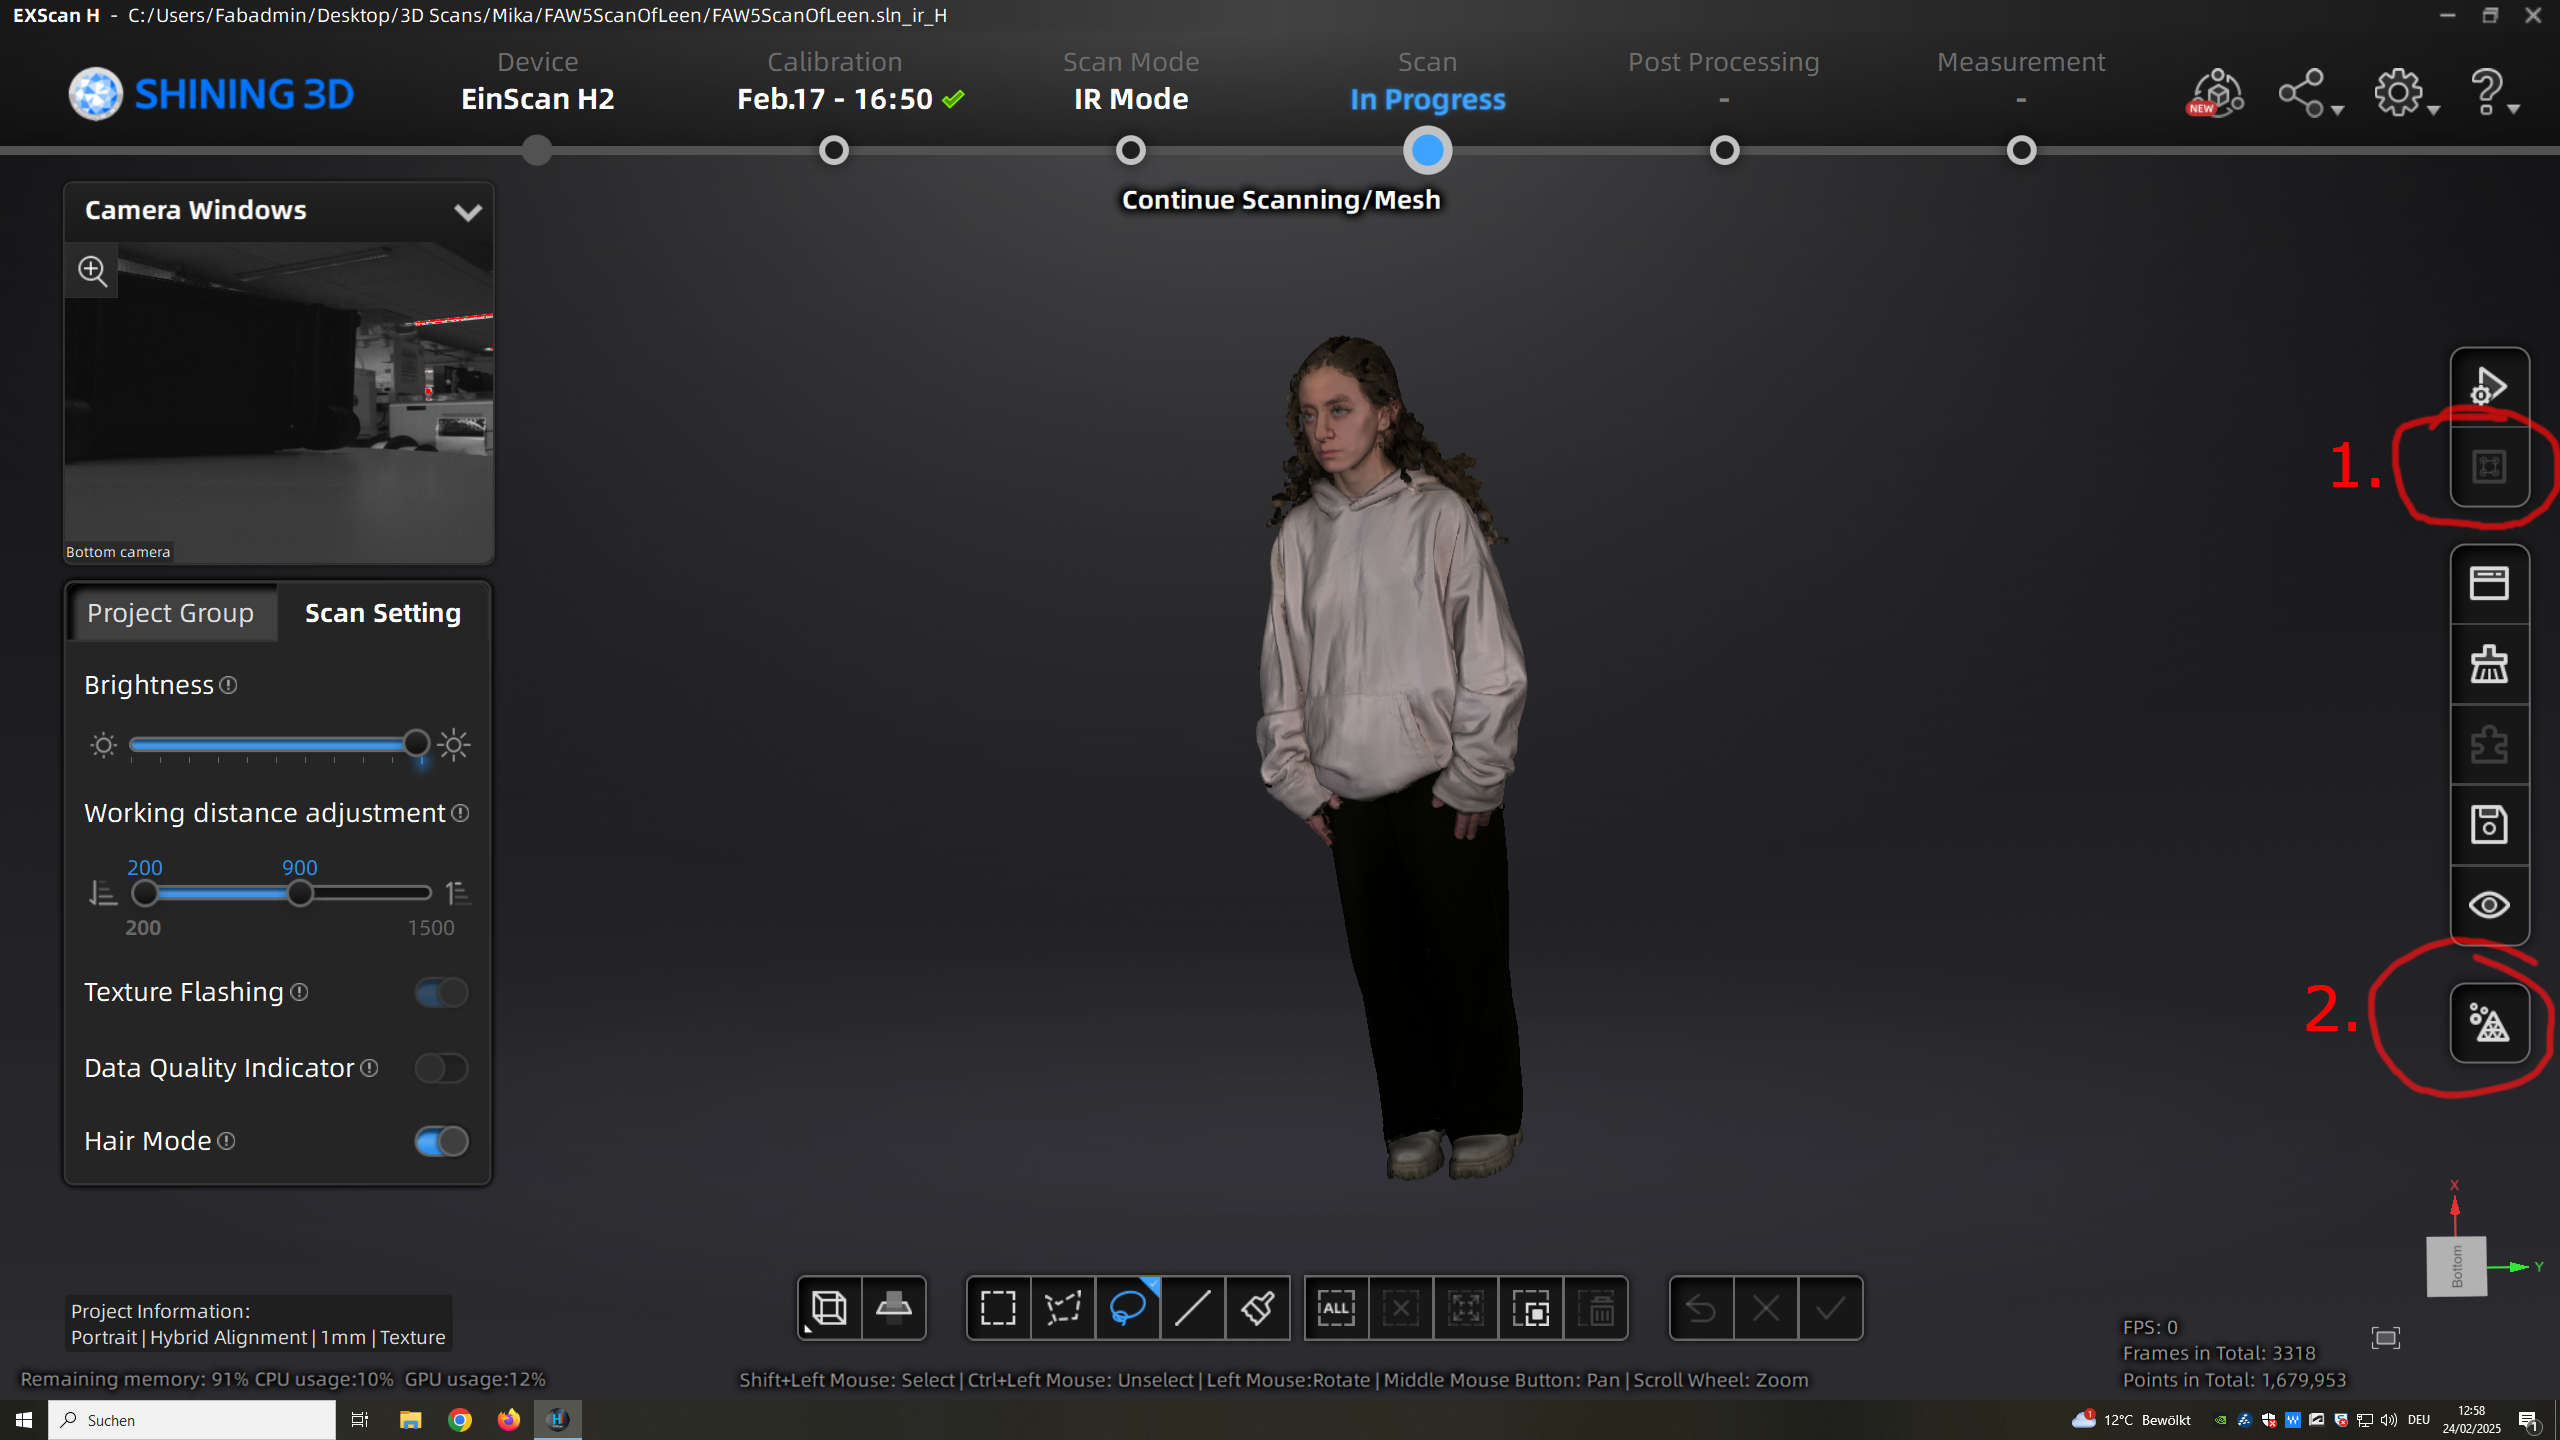
I did this with all artifacts around Leen and let the software optimiz the pointcloud(1.) and then continue to the meshing (2.)
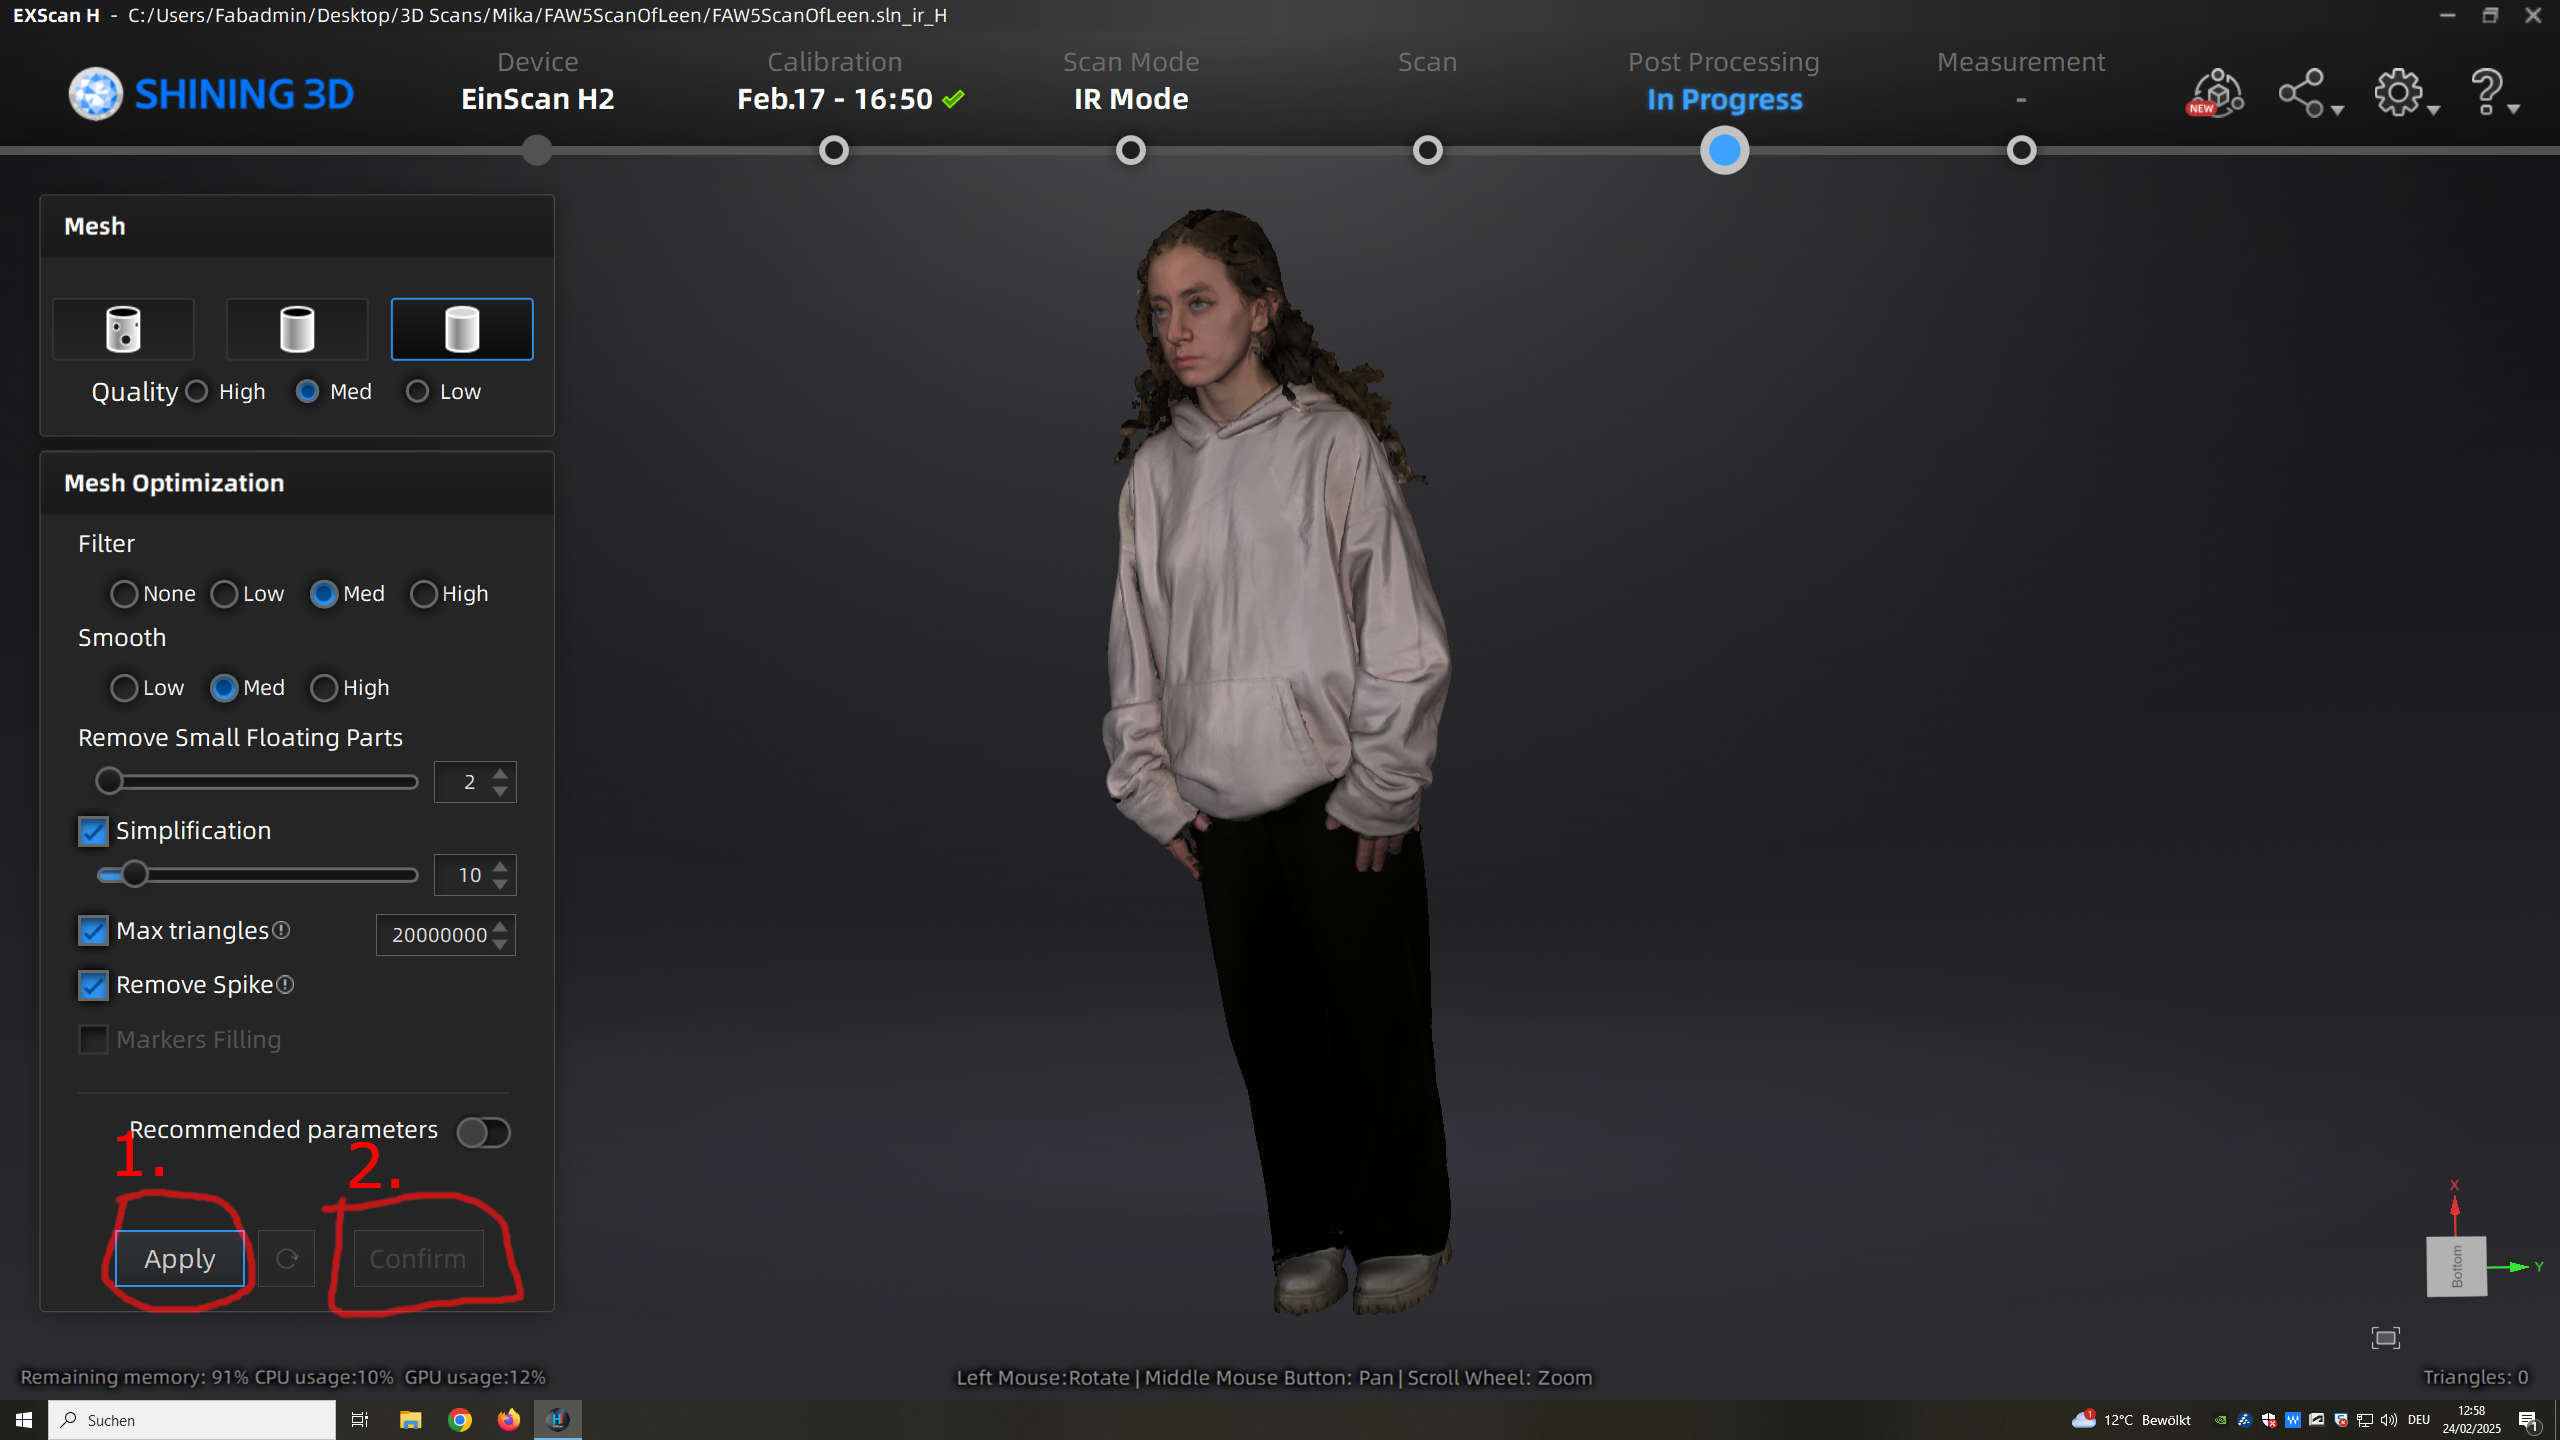
I set Mesh to watertigth then quality, filter and smooth to med and rest on standard settings. After apply(1.) the mesh was genertated and i was happy and confirmed(2.)
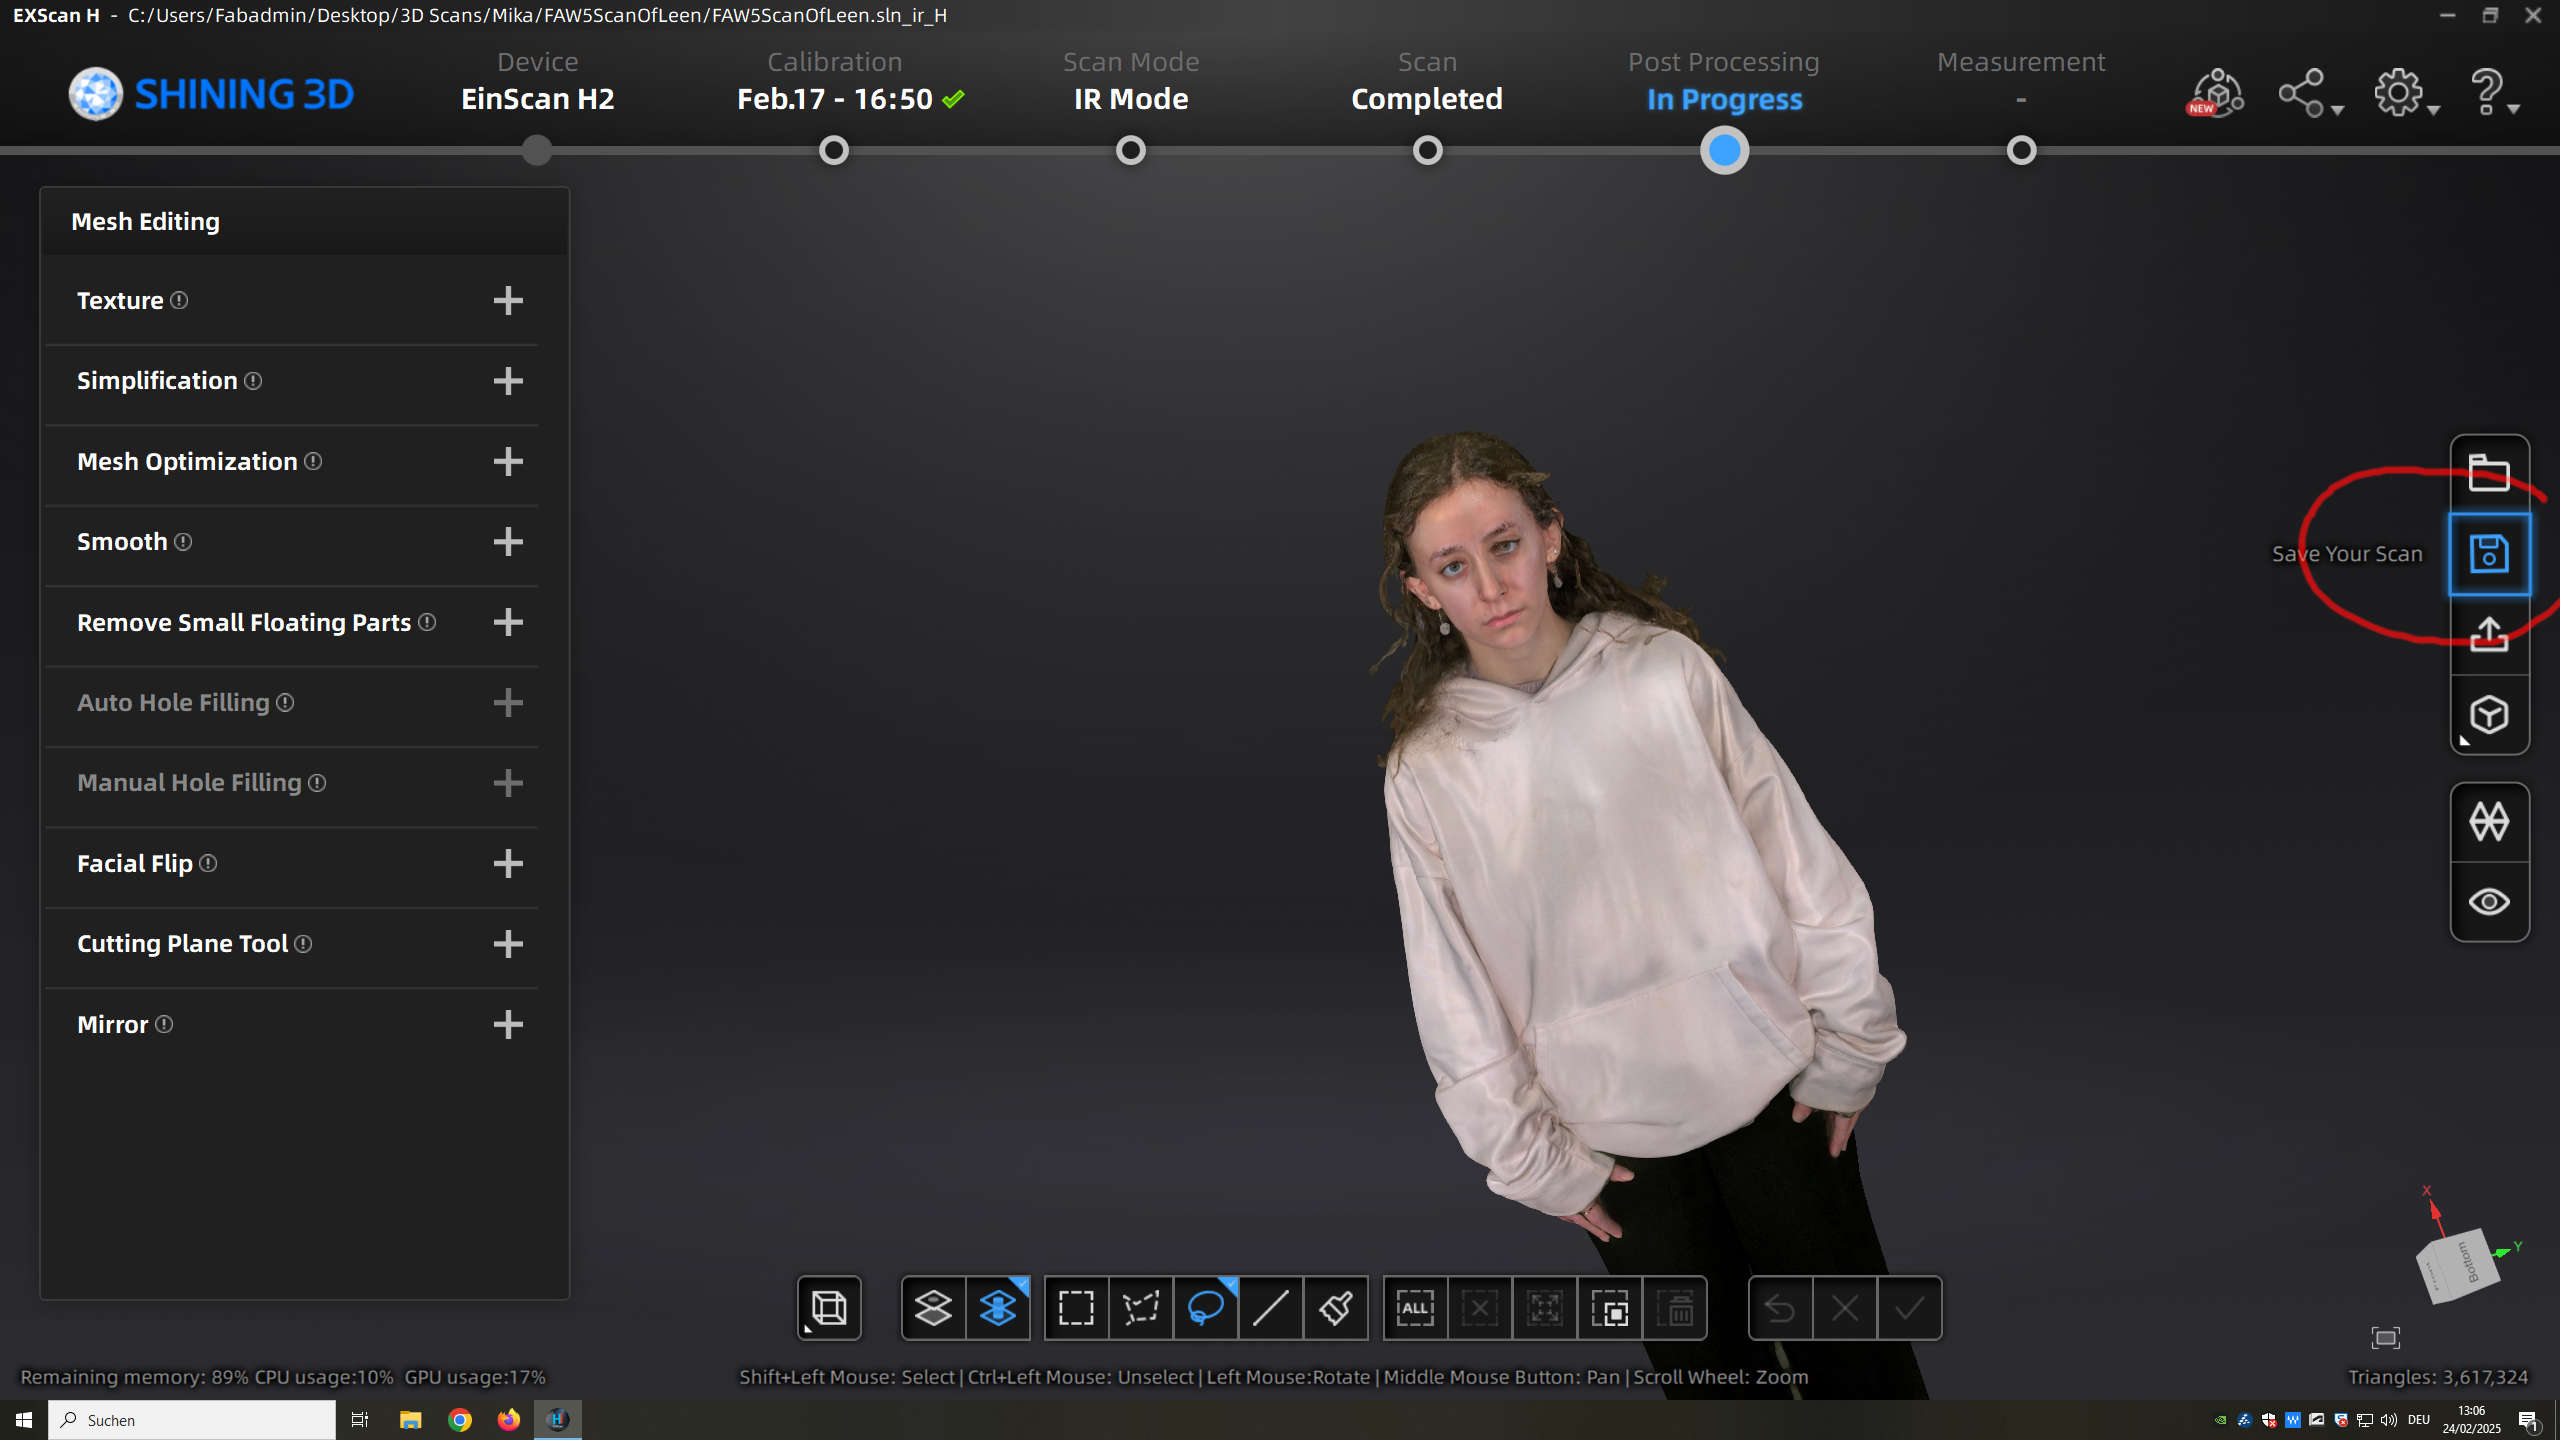
As you see the texture mapping is a bit off but we print this in one color and this is no problem for us.
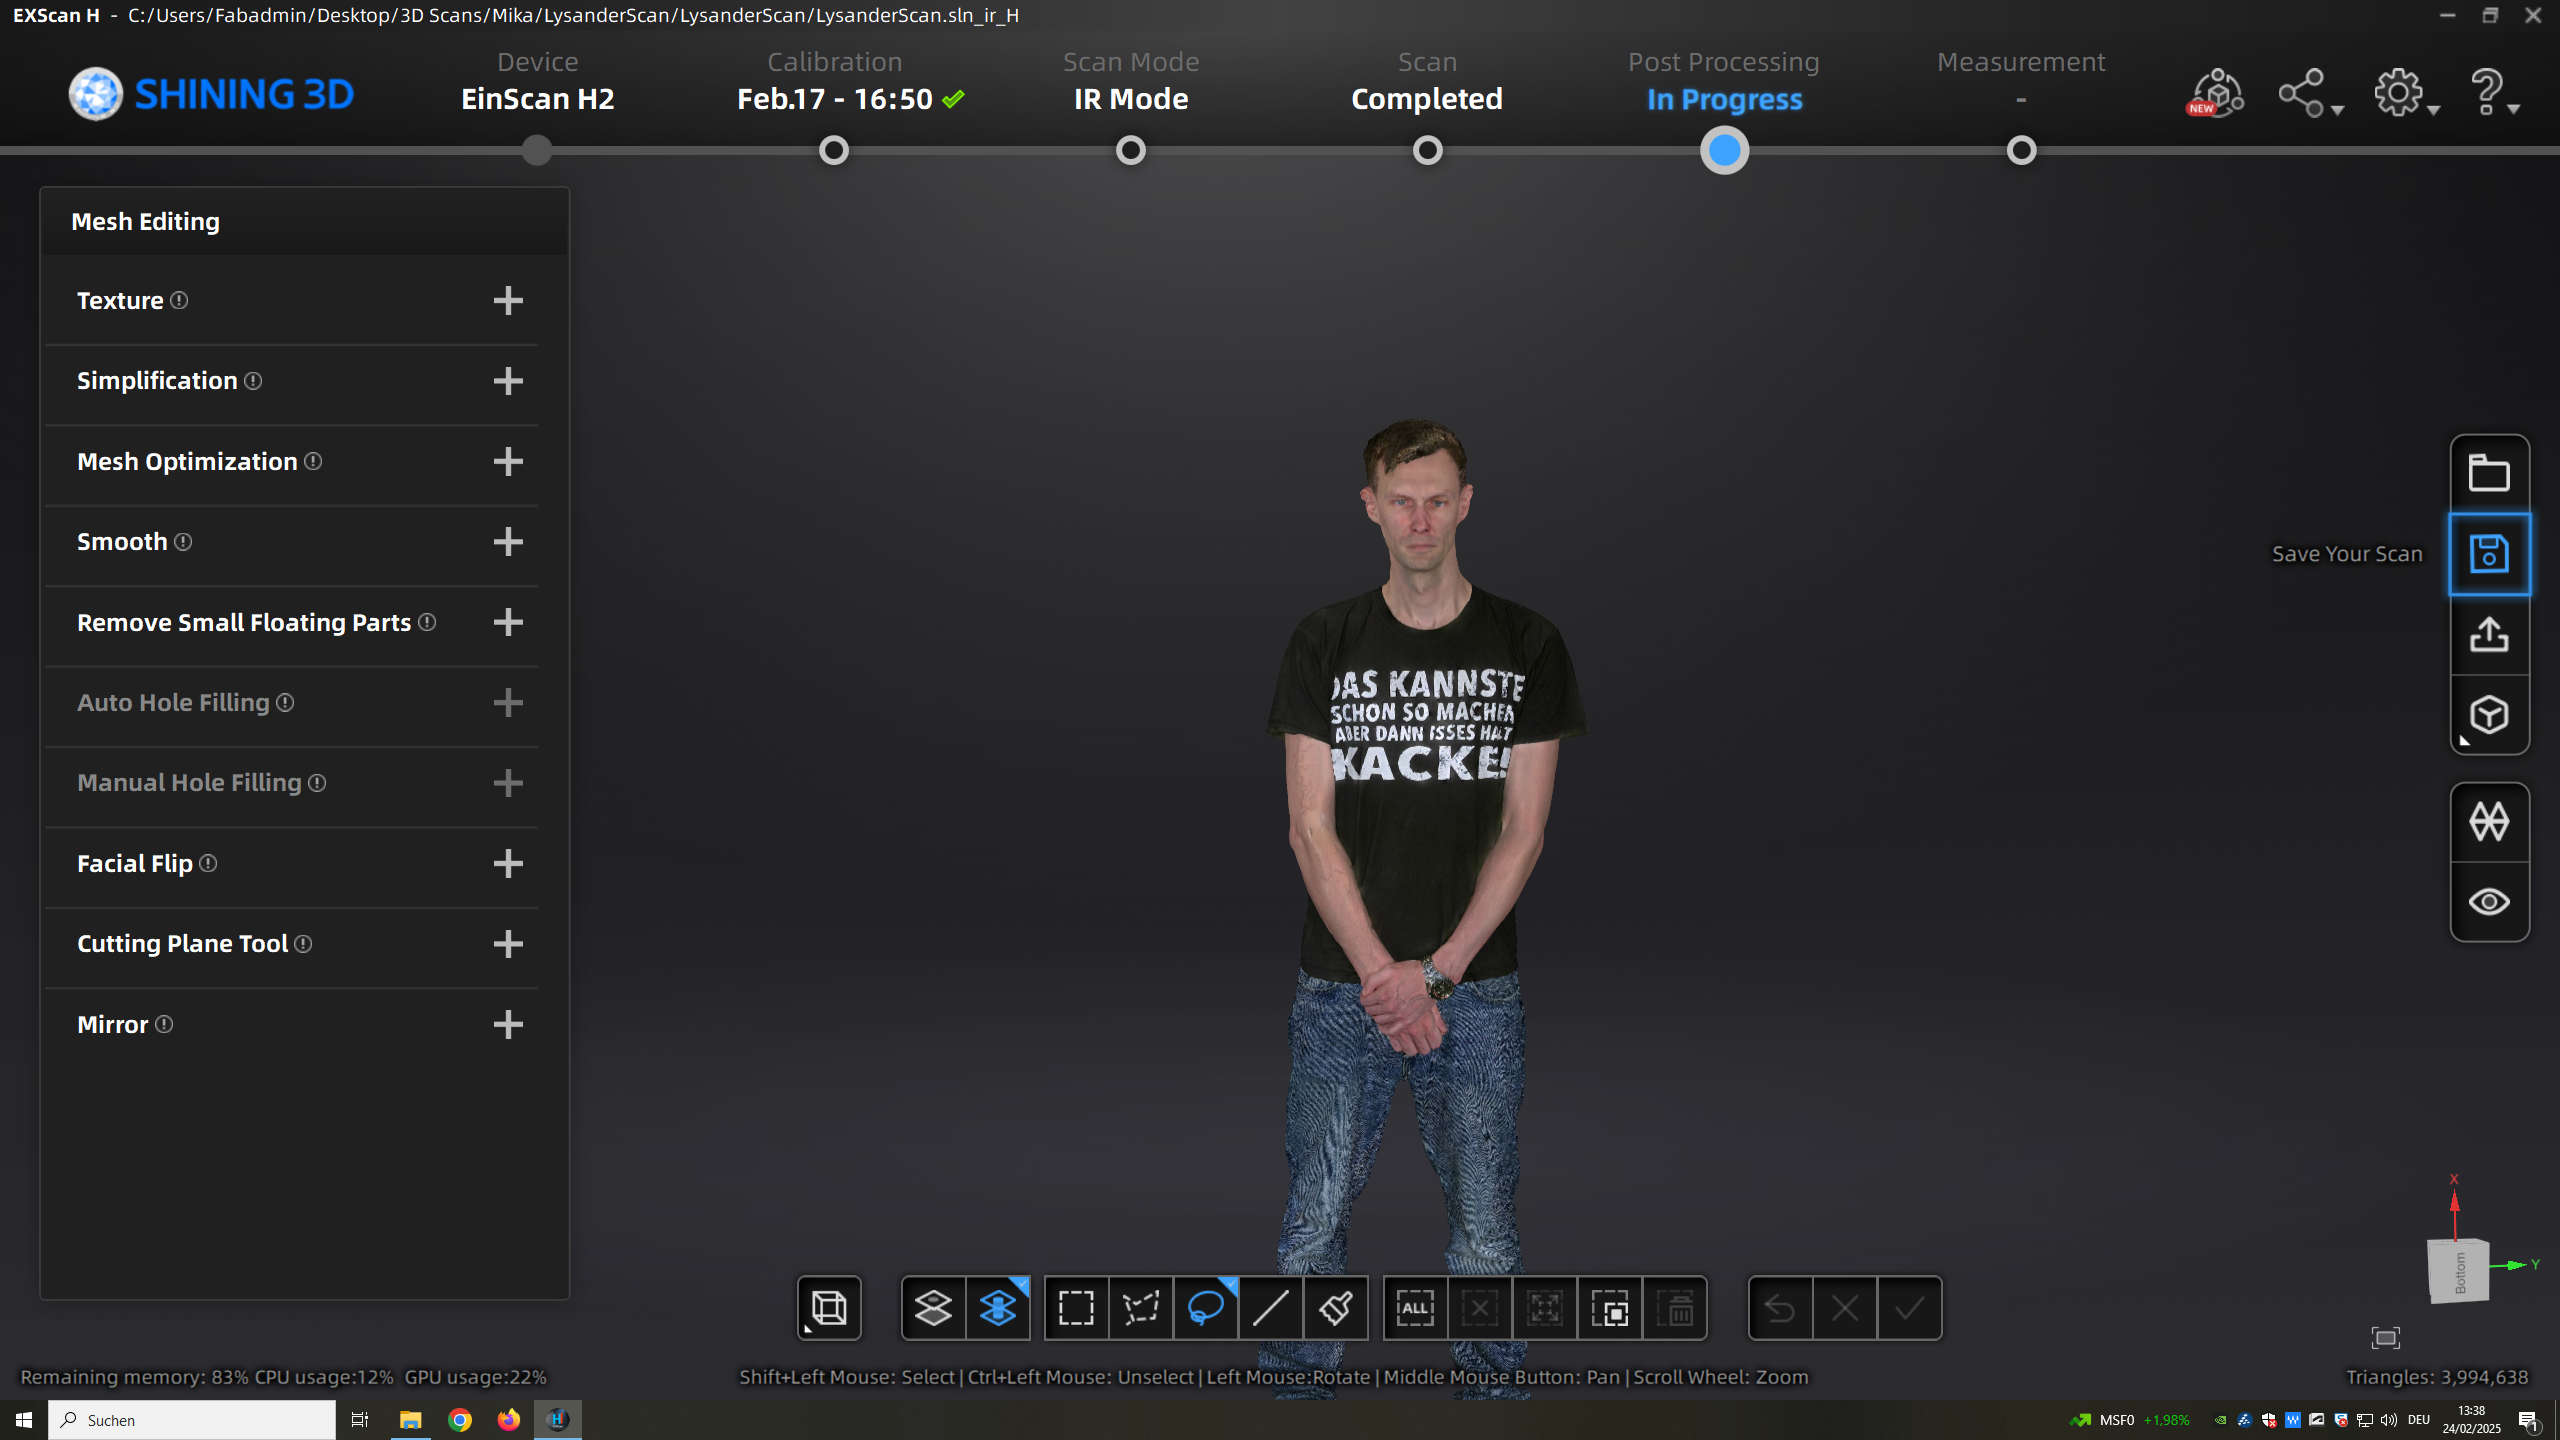
I also Scanned Lysander that way