1. Project management
This is the First week and in this week everything is about Projectmanagement
Git
First thing to get into Git, is to install it. I use it now on Linux(Manjaro) and on Windows for a long time and have a good amount of experience with it. But now i needed on a Ubuntu Machine. I setted it up through Bash
apt-get install git -y
Before you start to wonder why i used -y. if you would remove this, there would be a promt, where you type in y or n. This ist just a question of: would you realy like to install git?
The next step is to set up git. I started with my username and email. This is done in ubuntu in bash(or the terminal you use)
        git config --global user.name "Mika Günther"
        git config --global user.email mika-nils.guenther@hsrw.org
After setting up git. I need to get a SSH-Key. this is again done in bash.
ssh-keygen -t ed25519 -C "Spielwiese"
"-t" says what type of key you want to generate. I went with the standard one. -C is where you put a comment. I put Spielwiese, because this is the name of my Ubuntu VM, which will be relavant later.

As you can see, after executing the command, you are prompted to enter a name for the key. This key is saved in the specified directory, but two files are also created in your current Bash location. I named mine FabKey. After that, you need to enter a passphrase and confirm it. You'll also notice a file named FabKey.pub, which contains your public key. This is important to me because the fingerprint I obtained in the terminal did not have the correct header. To resolve this, I opened FabKey.pub in a text editor and copied the key from there.
To get the key into our git, i opened gitlab.fabcloud.org and went into my Profile preferences in the top left corner. to do this click on your profile picture an then on prefferences

After that, go to SSH Keys and on "add Key" and you see the following:
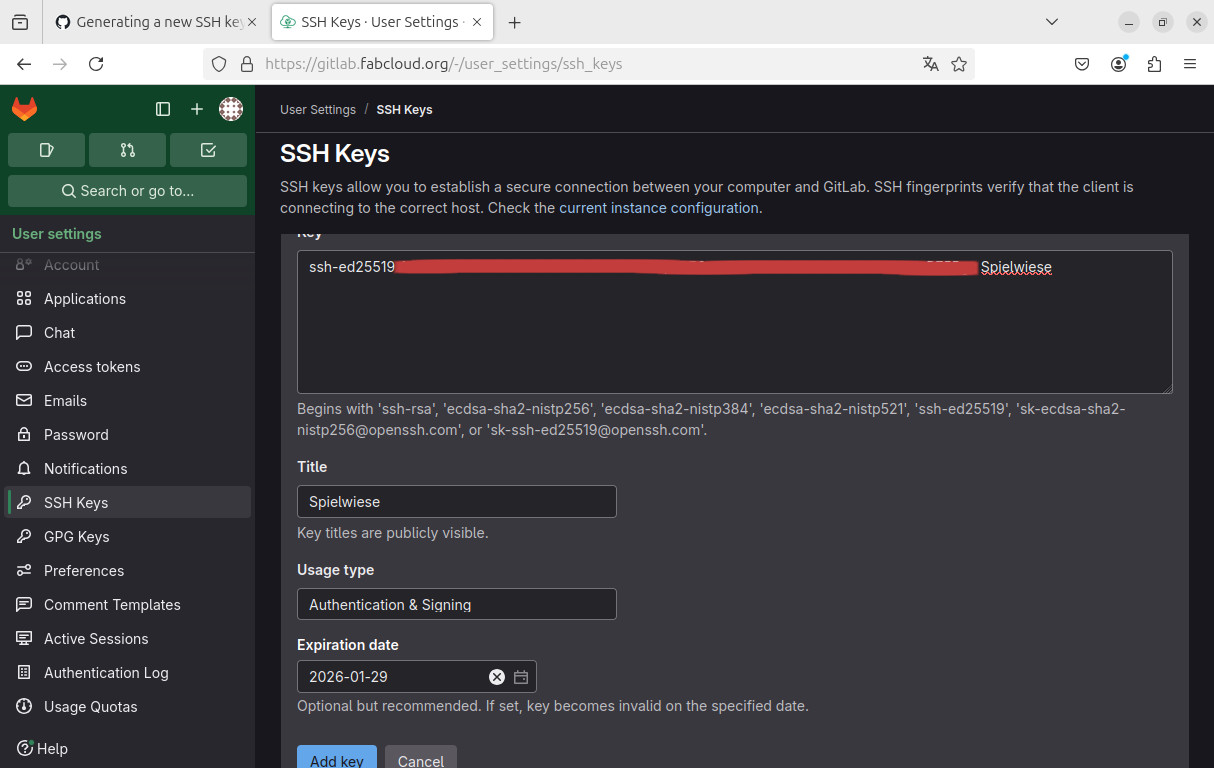
As you can tell i already put in my Fingerprint which contains the Comment, which is then used as the Title. Now you need to hit add Key and you are good to go.
VSCode
For my daily work i'm using VSCode. This Tool is the most familiar for me I used webocton Scriptly,a for that time quite nice and free Alternative to dreamweaver, in my beginnings of html and css progress, which is now way out of date,cause its latest update is from 2010. As long as you setted up git, you can use the build-in Source Control in VSCode, which is also not available with webocton Scriptly. In my VM i used the "App-store" provided by ubuntu. Just Search "Code" and install it.

After installation of VSCode, you need to set up your Repo. I started with switching to the Source Control Tab in VSC. Then clicked on Clone Repo and entered the URL of the Repo.
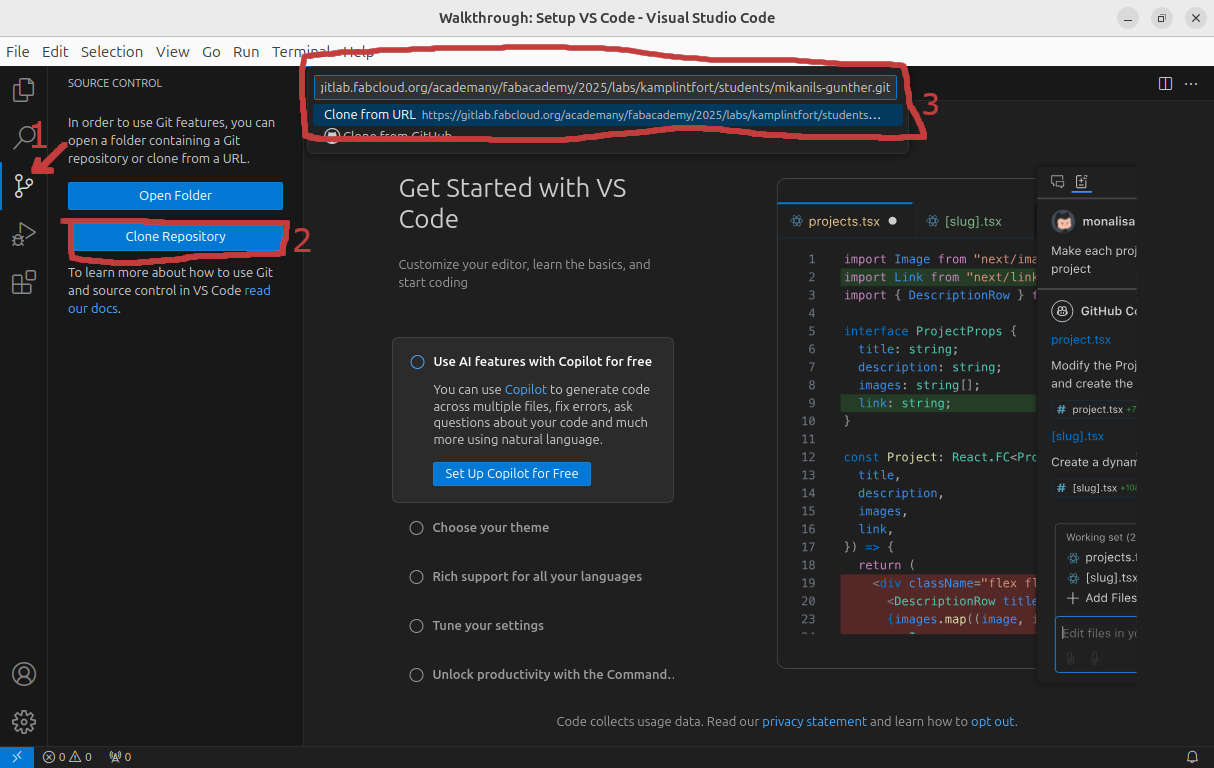
After that you are asked to select a location, where your workcopy will be saved and then asked to enter your username and passord of Gitlab
To make a commit after changes, you go to the source control tab and enter a message. Importen is, that VSCode doesnt let you commit without a message. After entering the message hit commit
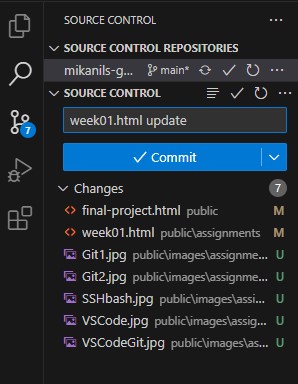
You are Asked, if you wannt to Stage alle Changes. I allways click on yes.
The last step is to push your commit. This is done by clicking on SYNC CHANGES.
The Plan
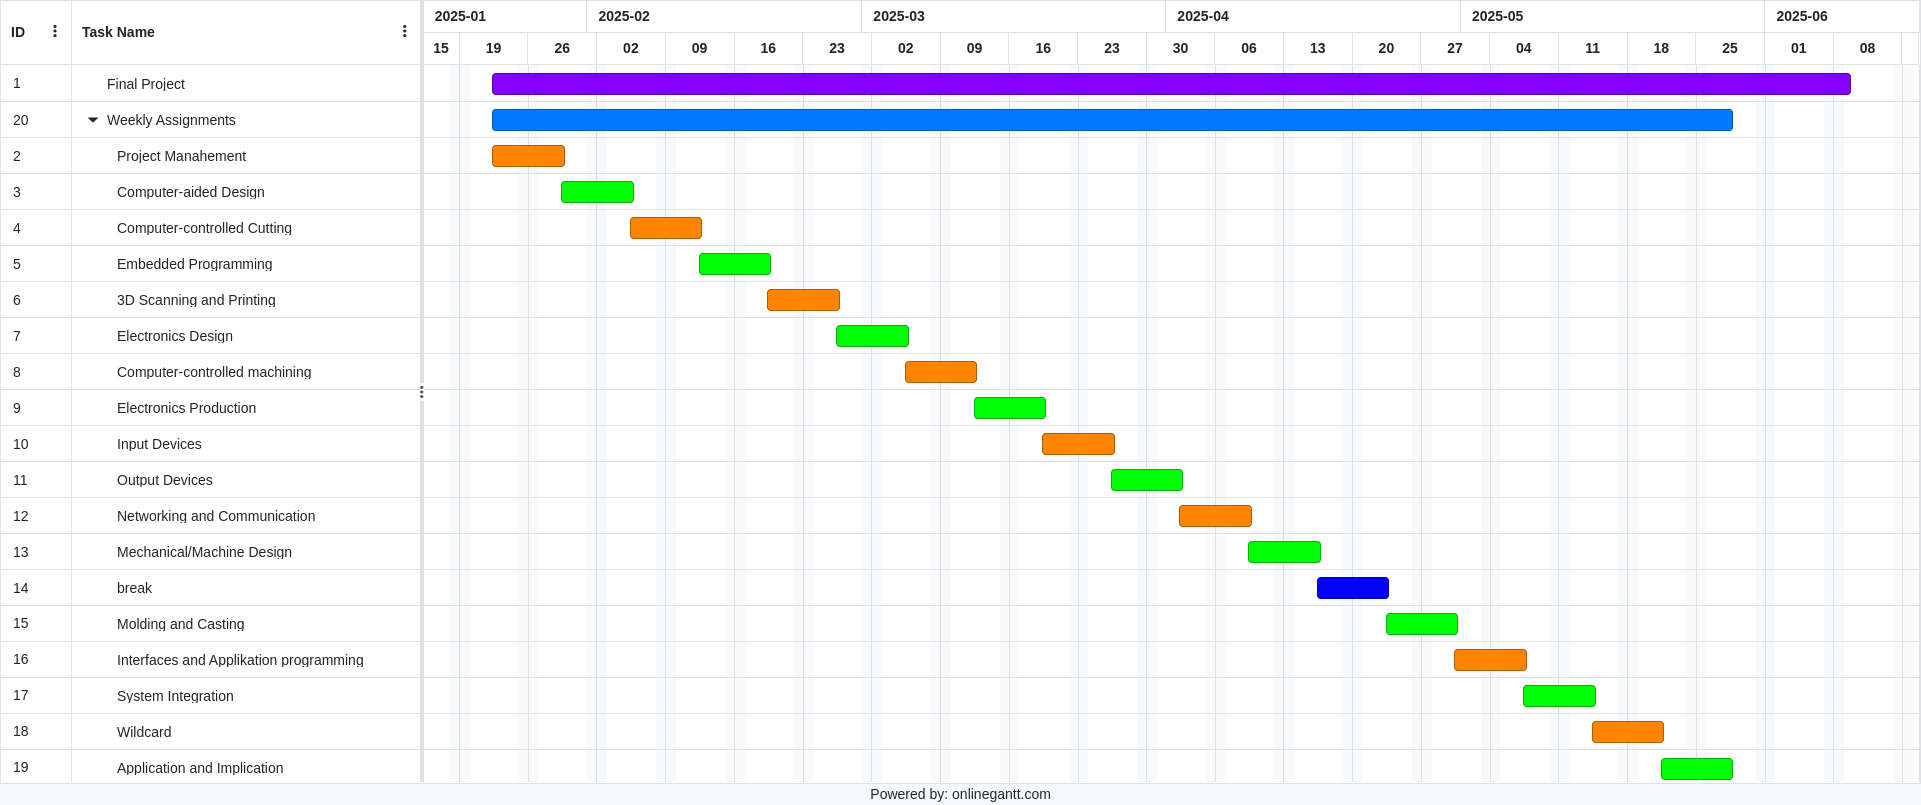
To get a brief overview of the time I will need in the future, I created a Gantt chart. This represents how I want things to go. However, based on past experience, I know that it will likely not go exactly as planned.
The Website
As you can tell, it has a really old-school look. And to be honest, I absolutely love its aesthetics. Another reason I don’t use any "fancy" stuff like Bootstrap—an easy-to-learn frontend toolkit—is the size of the repository. Adding more advanced features and additional frontend-related files would increase the repo size, which I want to avoid.