week 4. Embedded programming
This Week i worked on making the Menu for my Final Project
In our group assignment, we learned alot about C/C++ and Micropython. I was responsible for getting the MicroPython code to work and to find out, how to install MP on the MCU and how to upload the Programm to it
IDE and Simulation
For coding i used cpp for Arduino to programm an Arduino Nano over the ArduinoIDE. I testet and simulated my code with TinkerCad and an original Arduino Nano
The Programm
The Head
The head or header is the part of the Programm where you declare the used librarys, create global variables or create objects like the LCD which contains information which then where Handled by the library for example. In my Case the LiquidCrystal I2C libray by Frank de Brabander is used.
      /*
      This is a Menutest for my Mecha Dungeon
      Mika Günther Fabacademy 2025
      */
      #include
      LiquidCrystal_I2C lcd(0x27, 16, 2); //0x27 is the standard I2C Adress for the PCF8574-Based LCD

      const int buttonNext = 5;     // button for next entry
      const int buttonPrev = 6;   // button for previous entry
      const int buttonSelect = 7; // button for selection

      //const mean that the array for example is not changeable while running
      const char *menuItems[] = {"Dungeon Select", "Create Dungeon"}; //what to display on the LCD
      const int menuLength = 2;
      int menuIndex = 0;
      boolean inMenu = false;

      // Dynamic dungeons array
      String* dungeons = nullptr;  // Pointer for dynamically allocated array. First array will be initialized later
      int dungeonCount = 0;        // Number of dungeons
      int currentDungeon = 0;
      boolean inDungeons = false;

      #define STRING_LENGTH 25  // Define the required string length (for the test i'm using a 5x5 grid -> 25bits)
      char receivedString[STRING_LENGTH + 1];  // Array to store input (+1 for null termination)
The Setup
The Setup is a Function, which is called or executed at the startup. Here you initializing steps like define which pin is an Input or Output or start a serial connection.
      void setup() {
        Serial.begin(115200); //allow a serial connection with a baudrate of 115200 to comunicate with for example the computer
        // set the Buttons as Input
        pinMode(buttonNext, INPUT);
        pinMode(buttonPrev, INPUT);
        pinMode(buttonSelect, INPUT);

        // Initialize the LCD and activate the Backlight
        lcd.init();
        lcd.backlight();

        //Print welcomescreen
        lcd.clear() //wipes the screen
        lcd.setCursor(3, 0); //sets the cursor to a specific row in a specific column
        lcd.print("Welcome to");//prints a string started from the location of the cursor.
        lcd.setCursor(2, 1);
        lcd.print("MechaDungeon");
        delay(5000);

        // Initialize with predefined dungeons(call the function)
        initializeDungeons();

        //call the function to initialize the Menu
        showMenu();
      }
The Loop
The Loop is a function, which is repeated indefinetly or until you restart or shutdown the Microcontroller. This is the Main code area
      void loop() {

        //check in which Menu we are
        if (inMenu) {
          //check if and wich button is pressed
          if (digitalRead(buttonPrev)) {
            menuIndex--;   //changes the current position in the menu to previous Entry
            if (menuIndex < 0) menuIndex = menuLength - 1; // if "before" the begin of the list go to last entry
            showMenu(); //refresh screen
            delay(300);  // Debounce  the Button to prevent multiple inputs
          }else if (digitalRead(buttonNext)) {
            menuIndex++; // current position to next entry
            if (menuIndex >= menuLength) menuIndex = 0; // if at the end of the list start from the beginnig of the list
            showMenu();
            delay(300);  // Debounce
          }else if (digitalRead(buttonSelect)) {
            //if button is pressed, call function acording to current index
            switch (menuIndex) {
              case 0:
                showDungeons();
                break;
              case 1:
                getDungeon();
                break;
            }
            delay(300);  // Debounce
          }
        }else if (inDungeons) {
          if (digitalRead(buttonPrev)) {
            currentDungeon--;
            if (currentDungeon < 0) currentDungeon = dungeonCount - 1;
            showDungeons();
            delay(300);  // Debounce
          }

          if (digitalRead(buttonNext)) {
            currentDungeon++;
            if (currentDungeon >= dungeonCount) currentDungeon = 0;
            showDungeons();
            delay(300);  // Debounce
          }

          if (digitalRead(buttonSelect)) {
            //if pressed, "build" or show content of the selected Dungeon
            buildDungeon();
            delay(300);  // Debounce
          }
        }
      }
initializeDungeons()
This function creates the first set of Example Dungeons to scroll through
      void initializeDungeons() {
        dungeonCount = 2;     //set initial dungeoncount
        dungeons = new String[dungeonCount]; //let the pointer point to a new String Array with size of the initial dungeoncount
        //Save first two example Dungeons
        dungeons[0] = "1111110001101011000111111";
        dungeons[1] = "1011110100101011000111111";
      }
showMenu()
This function starts or refreshes The Mainmenu
      void showMenu() {
        lcd.clear();
        lcd.setCursor(0, 0);
        lcd.print("Menu:");
        lcd.setCursor(0, 1);
        lcd.print("> " + String(menuItems[menuIndex]));
        //says that we are now in the mainmenu and that the mainmenu loop starts; resets the dungeonmenu params
        inMenu = true;
        inDungeons = false;
        currentDungeon = 0;
      }
showDungeons()
This function starts or refreshes the Dungeonmenu
      void showDungeons() {
        lcd.clear();
        lcd.setCursor(0, 0);
        lcd.print("Dungeons:");
        lcd.setCursor(0, 1);
        lcd.print("> " + String(currentDungeon + 1) + ". Dungeon");
        //says that we are now in the dungeonmenu and that the dungeonmenu loop starts; resets the mainnmenu params
        inDungeons = true;
        inMenu = false;
        menuIndex = 0;
      }
getDungeon()
This function creates a new dungeon entry acording to a serial input
      void getDungeon() {
        String receivedString = "";//creates empty String to store new Dungeon

        //Reads string from serial
        while (receivedString.length() < STRING_LENGTH - 1) {
          if (Serial.available()) { // checks if a there is still a bit to read
            char receivedChar = Serial.read();  //reads one char of the serial input
            receivedString += receivedChar; // appends last read char on string
          }
        }

        // Create a new dynamic array with one extra slot
        String* dungeonsNew = new String[dungeonCount + 1];

        // Copy old dungeons into new array
        for (int i = 0; i < dungeonCount; i++) {
          dungeonsNew[i] = dungeons[i];
        }

        // Add the new dungeon
        dungeonsNew[dungeonCount] = receivedString;

        // Free old memory
        delete[] dungeons; // deletes the old Array, onwhich the pointer points

        // Update pointers and count
        dungeons = dungeonsNew;
        dungeonCount++;
      }
buildDungeon()
This function is currently a Placeholder, which dislplays the dungeonstring. In the future will this be the function which coordinates the motors and solonoid.
      void buildDungeon() {
        lcd.clear();
        lcd.setCursor(0, 0);
        lcd.print("Selected Dungeon:");
        lcd.setCursor(0, 1);
        lcd.print(dungeons[currentDungeon]);
        delay(3000);
        inMenu = true;
        inDungeons = false;
        showMenu();
      }
Donwload
Menutest.inoChatGPt|Arduino Maestro
I had some Problems finding a soulution, to read serial input and to save the input into the Array, so i Asked Arduino Maestro. This is a GPT by Branko Doljac, u can use if you have a ChatGPT Subscription. So the part of the getDungeon() and initializeDungeons() are from Maestro aswell as the pointerpart in the header.
Conversation with the MaestroSimulating and Testing
Bevor we start we need to know how to connect the Arduino with the components.
The Components
- 1x Arduino Nano
- 1x PCF8574-Based LCD with I2C module
- 3x Buttons
- 3x 10k Resistors
- 1x Breadboard
- Breadboard wire
What to connect
- LCD SDA -> Arduino A4
- LCD SCL -> Arduino A5
- LCD VCC -> Arduino 5V
- LCD GND -> Arduino GND
- Button 1A -> Arduino D5 <- Resistor 1 -> Arduino GND
- Button 1B -> Arduino 5V
- Button 2A -> Arduino D6 <- Resistor 2 -> Arduino GND
- Button 2B -> Arduino 5V
- Button 3A -> Arduino D7 <- Resistor 3 -> Arduino GND
- Button 3B -> Arduino 5V
Tinkercad
To use TinkerCad u need a Autodesk Account, which is free.
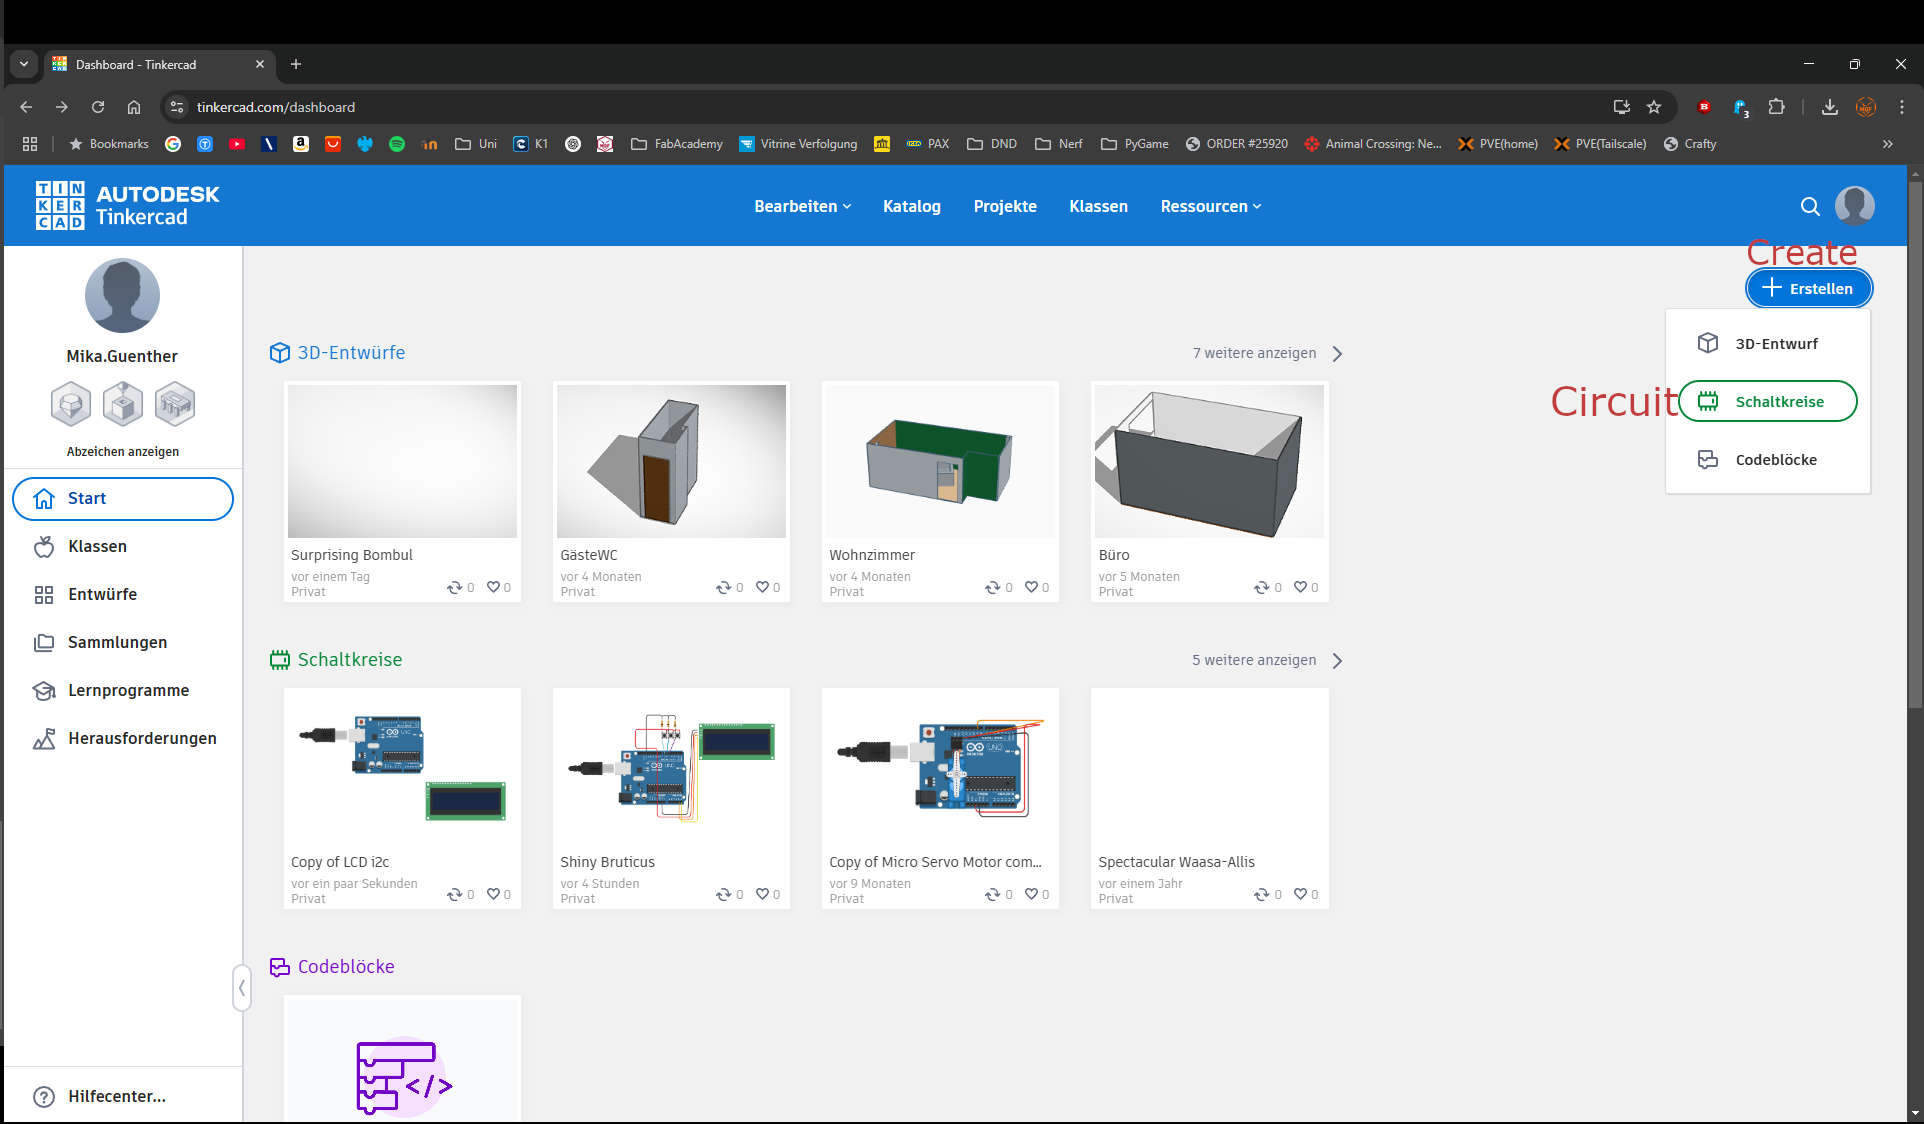
I started by creating a new Circuit | Create -> Circuit
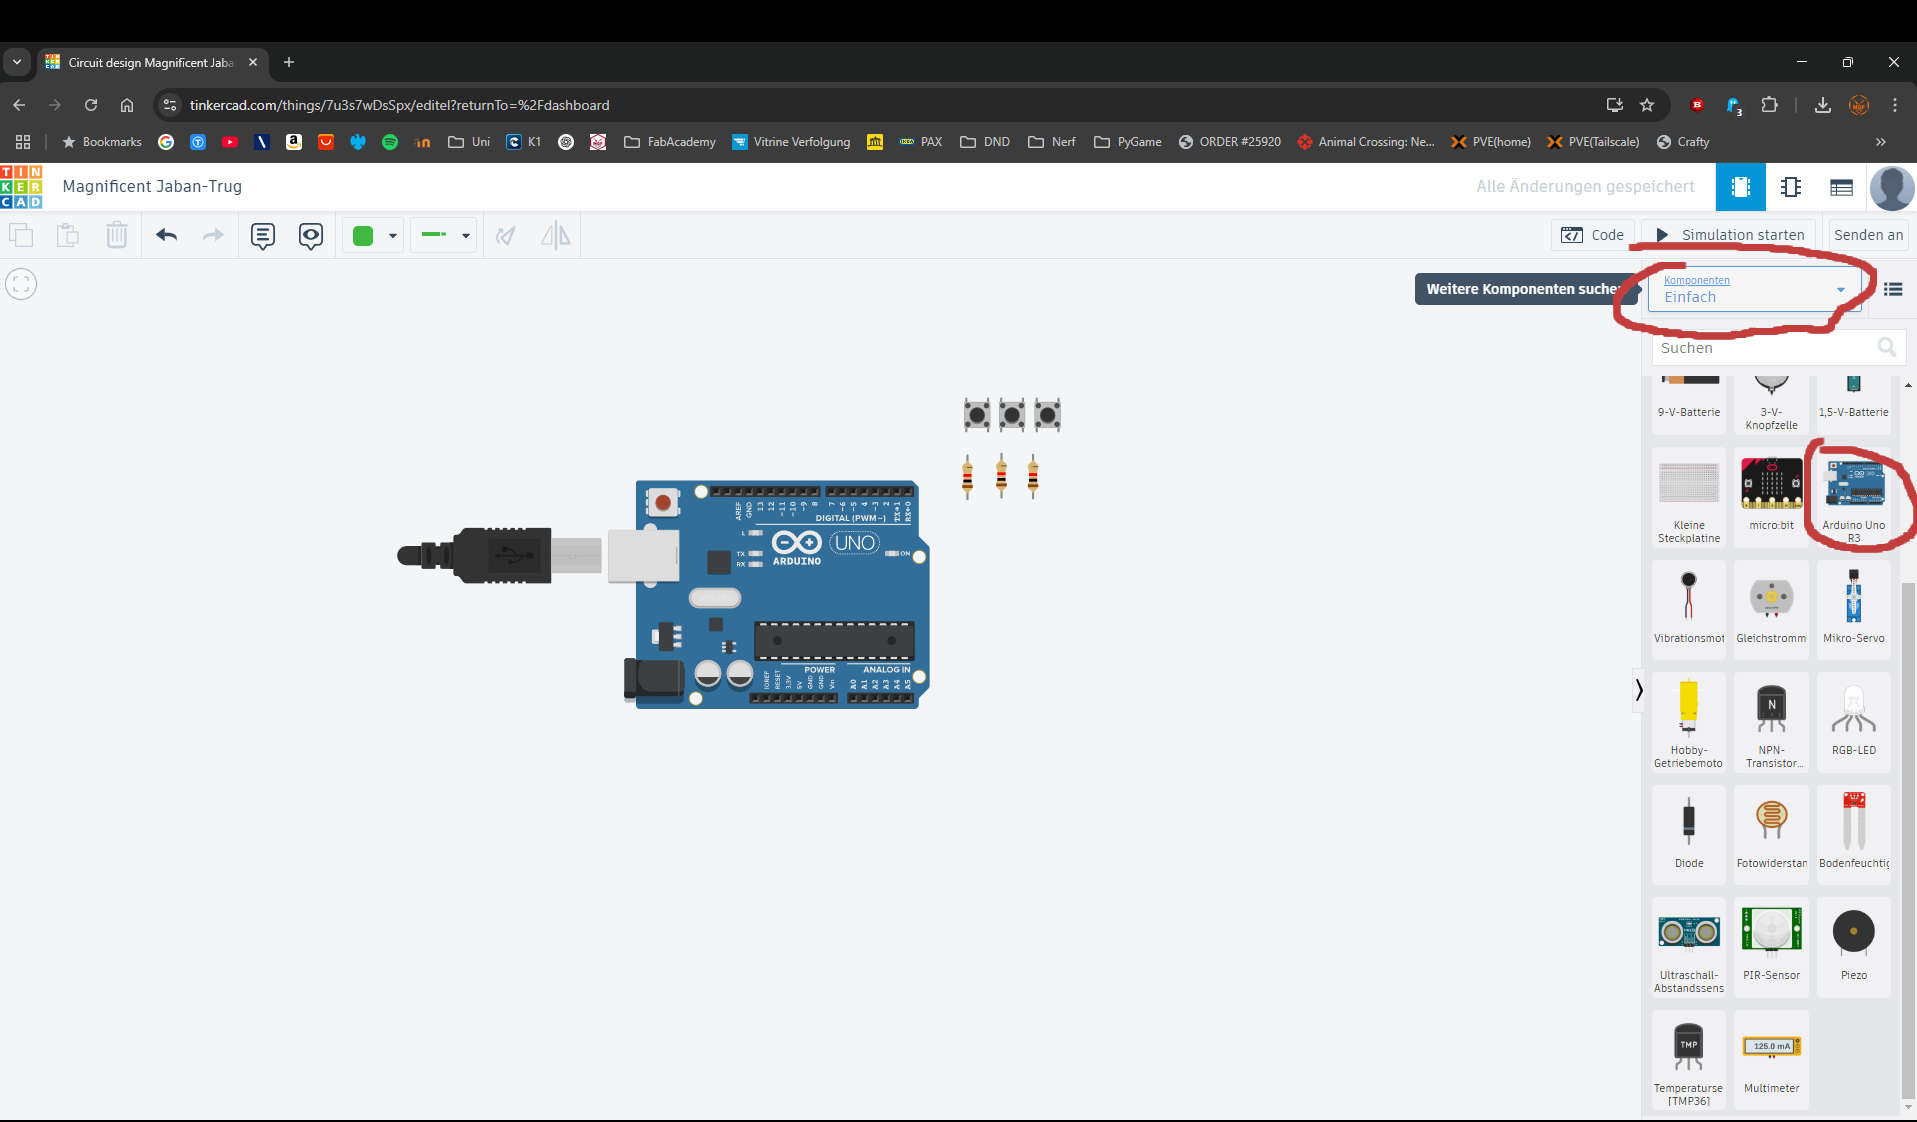
Now i needed Parts. Under the category "basics" i got the Arduino Uno, the 3 Resistors and the 3 Buttons. I just draged them into the middle
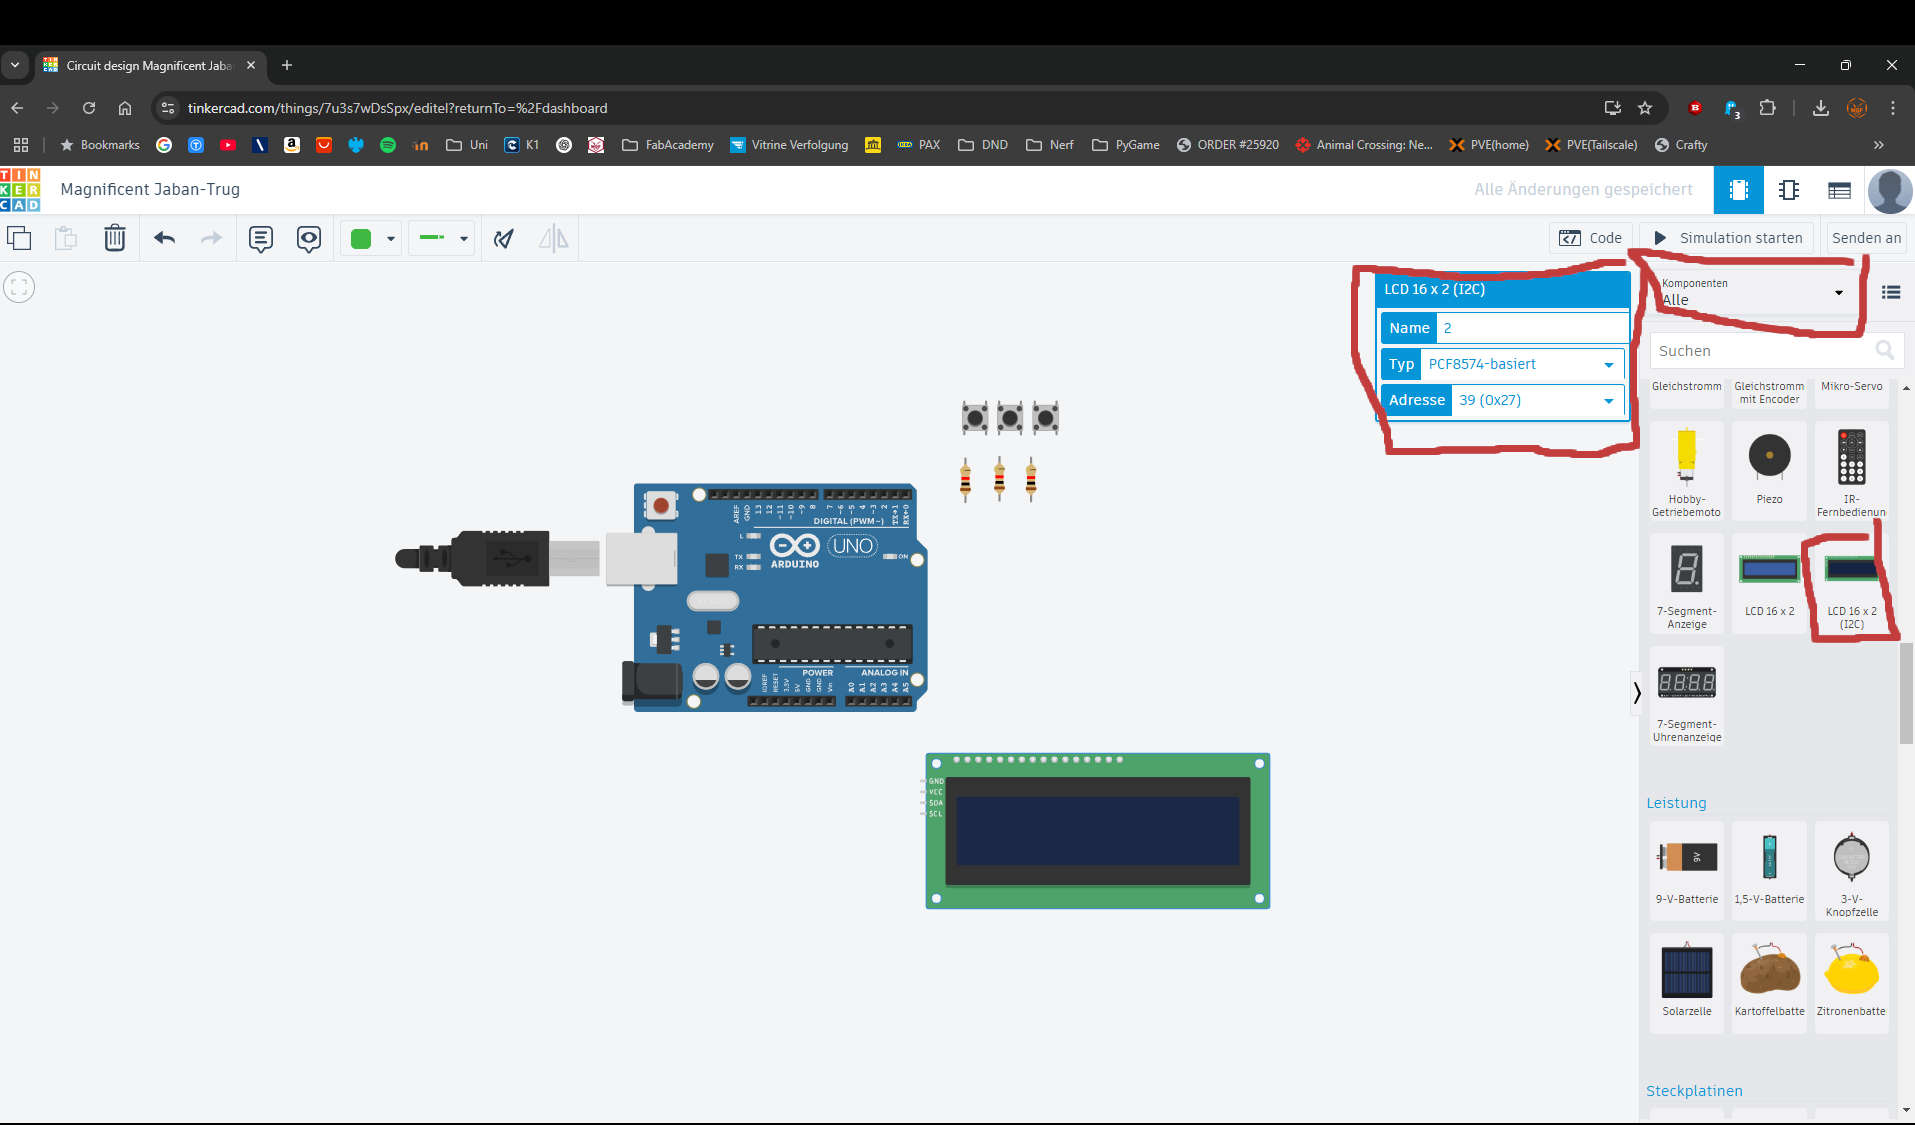
Under the category "all" you find the LCD. I used the I2C version, because its simpler to connect and less to initialize in the header of the code. In my case i use a PCF8574-Based LCD and used the Adress: 0x27 because this is the Adress, the real LCD i have is using
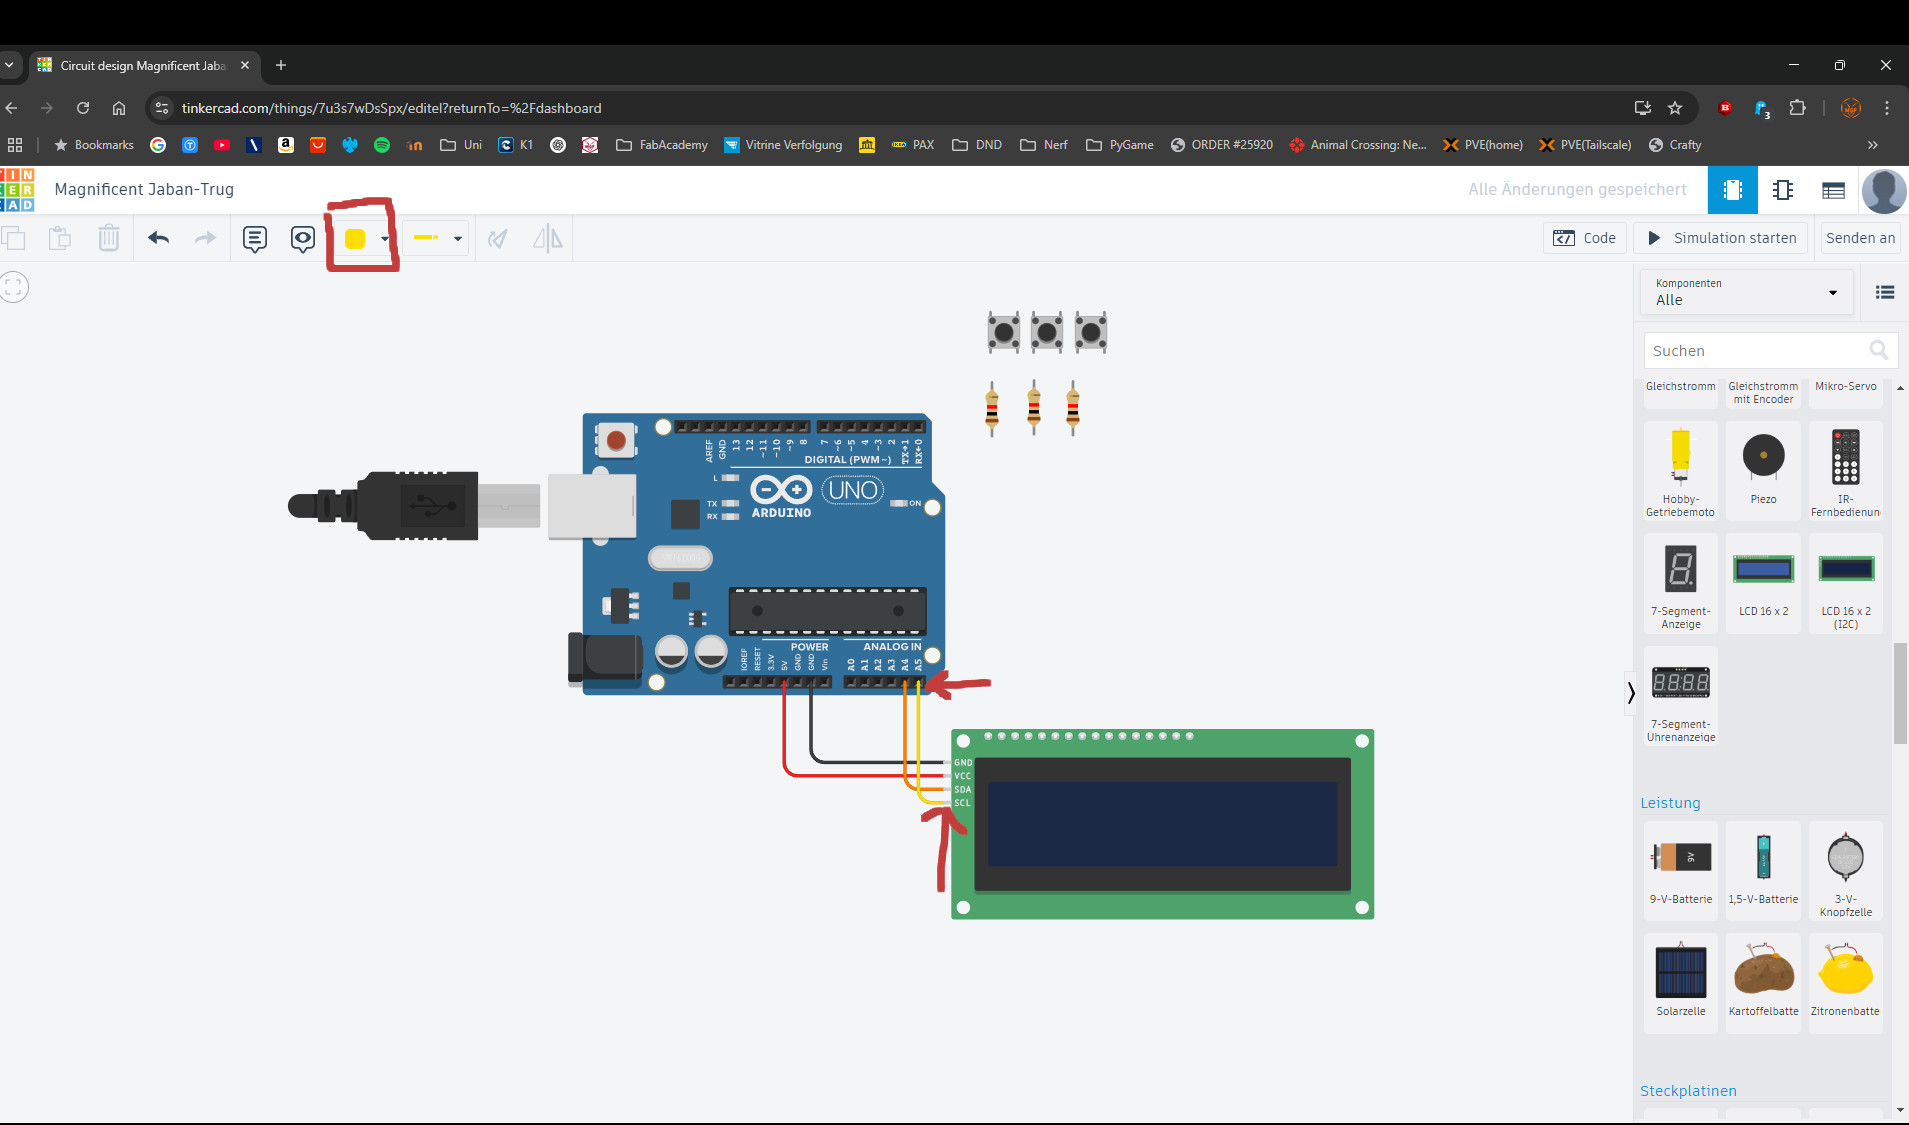
The next step was to connect the LCD according to what i wrote to what to connect. in the red square you see, where you can change the color of the connection. I prefer to colorcode. VCC/+ = red, GND/- = black and data lines ,I colorcode in what color is available and not used
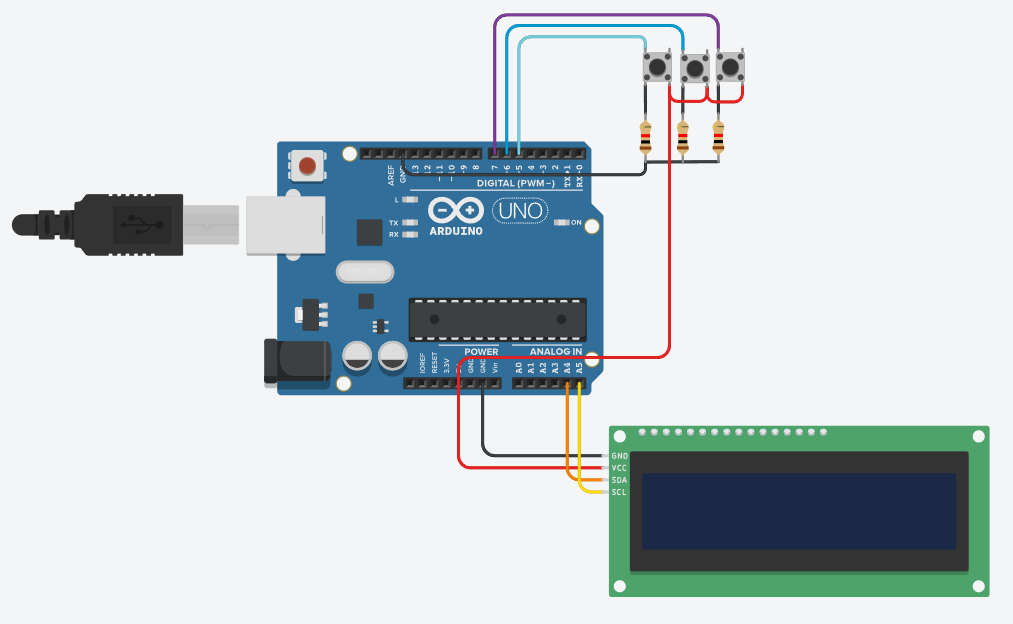
Followed by the Buttons
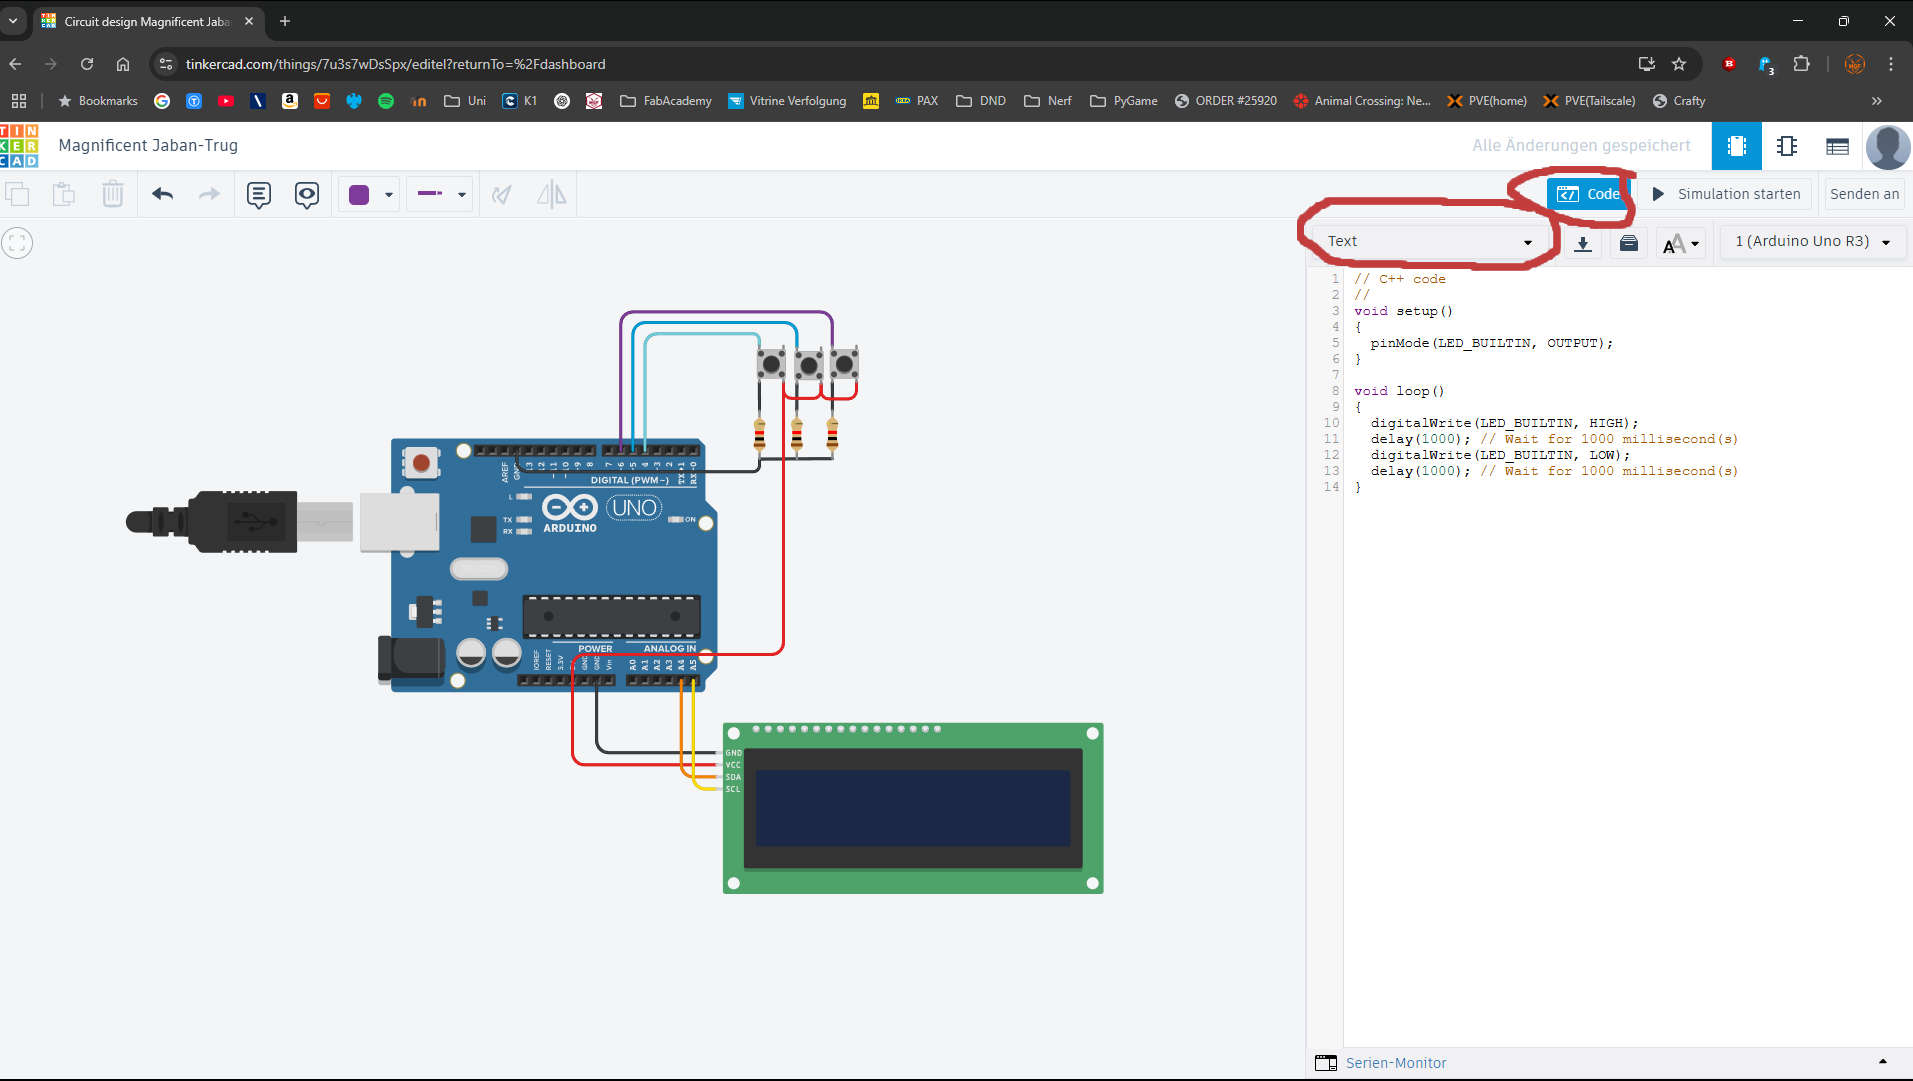
Now the code. I changed to the code tab and changed the editor style to Text.
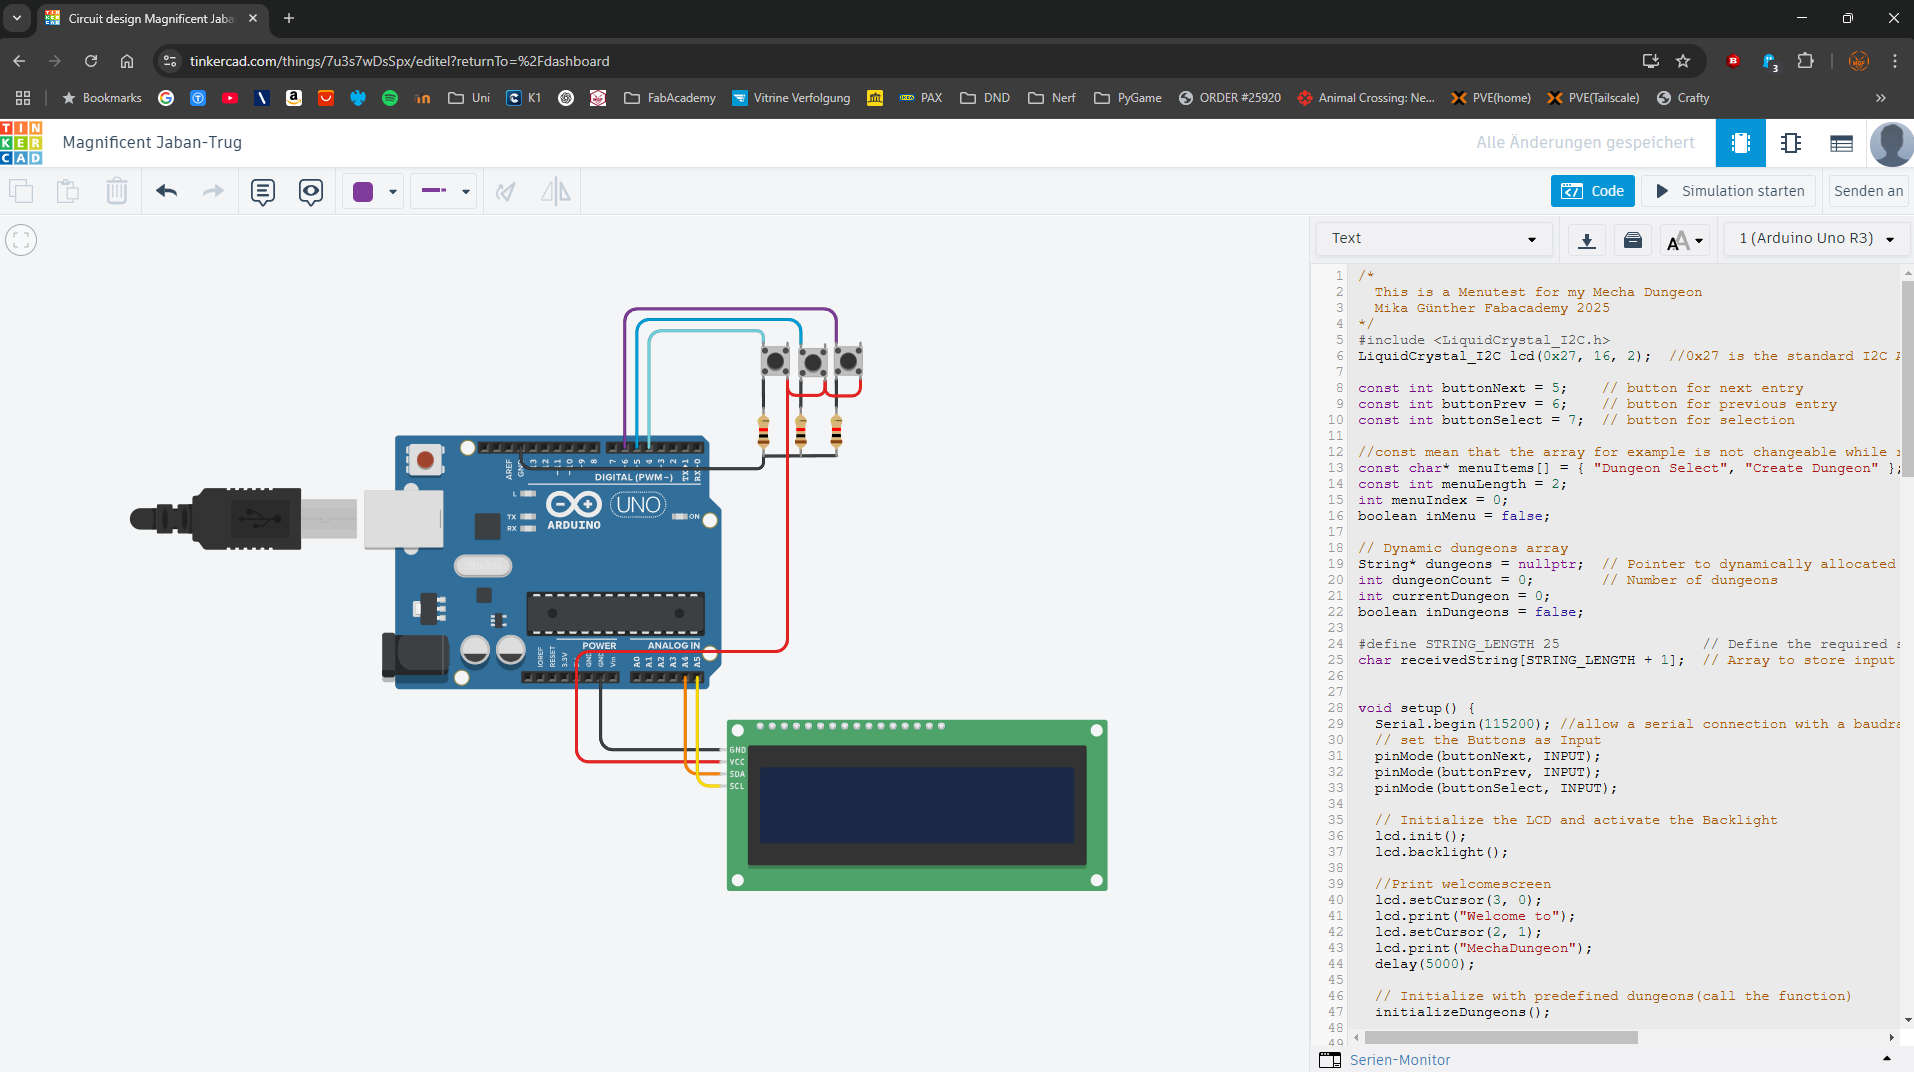
Paste the code and click on start simulation
Simulation:
As small information: the left button is next entry, the middle button is previous entry and the rigth one is select. Thats the reason, why dungeon 3 comes after dungeon 1.
The real thing
To get to the real thing now, I build the circuit with the above listet Components
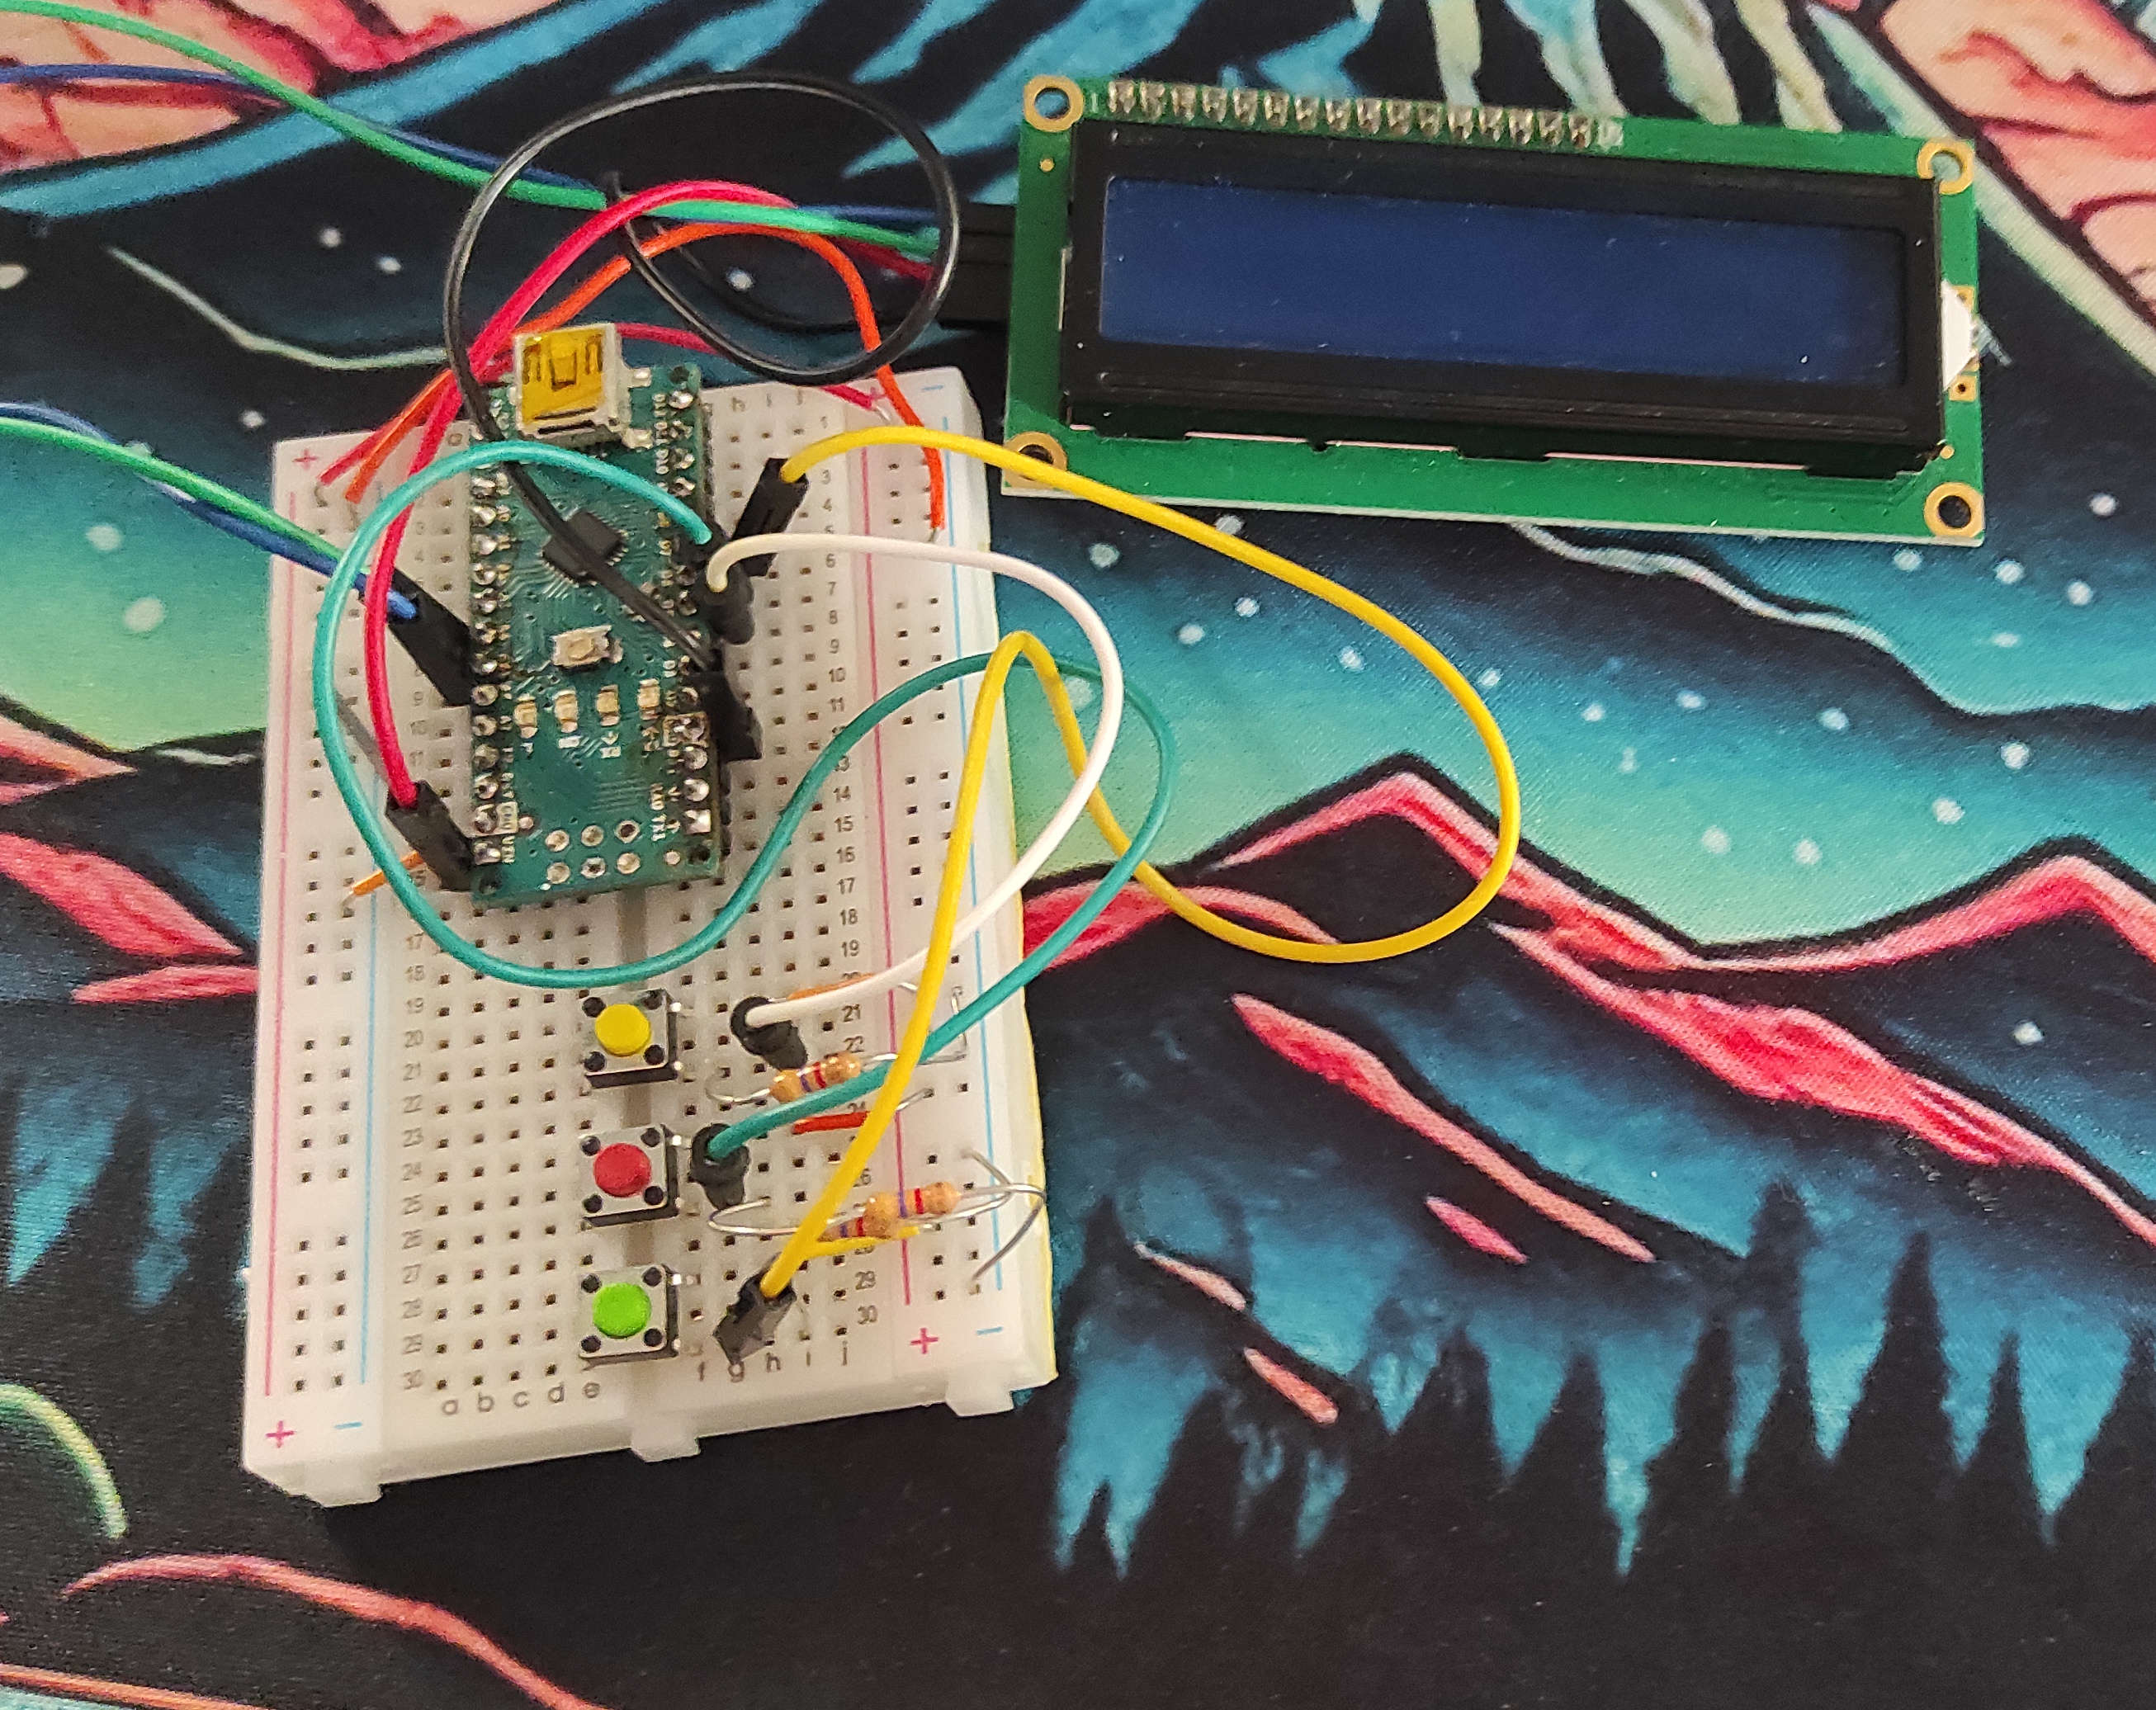
Here is the Circuit in its full glory
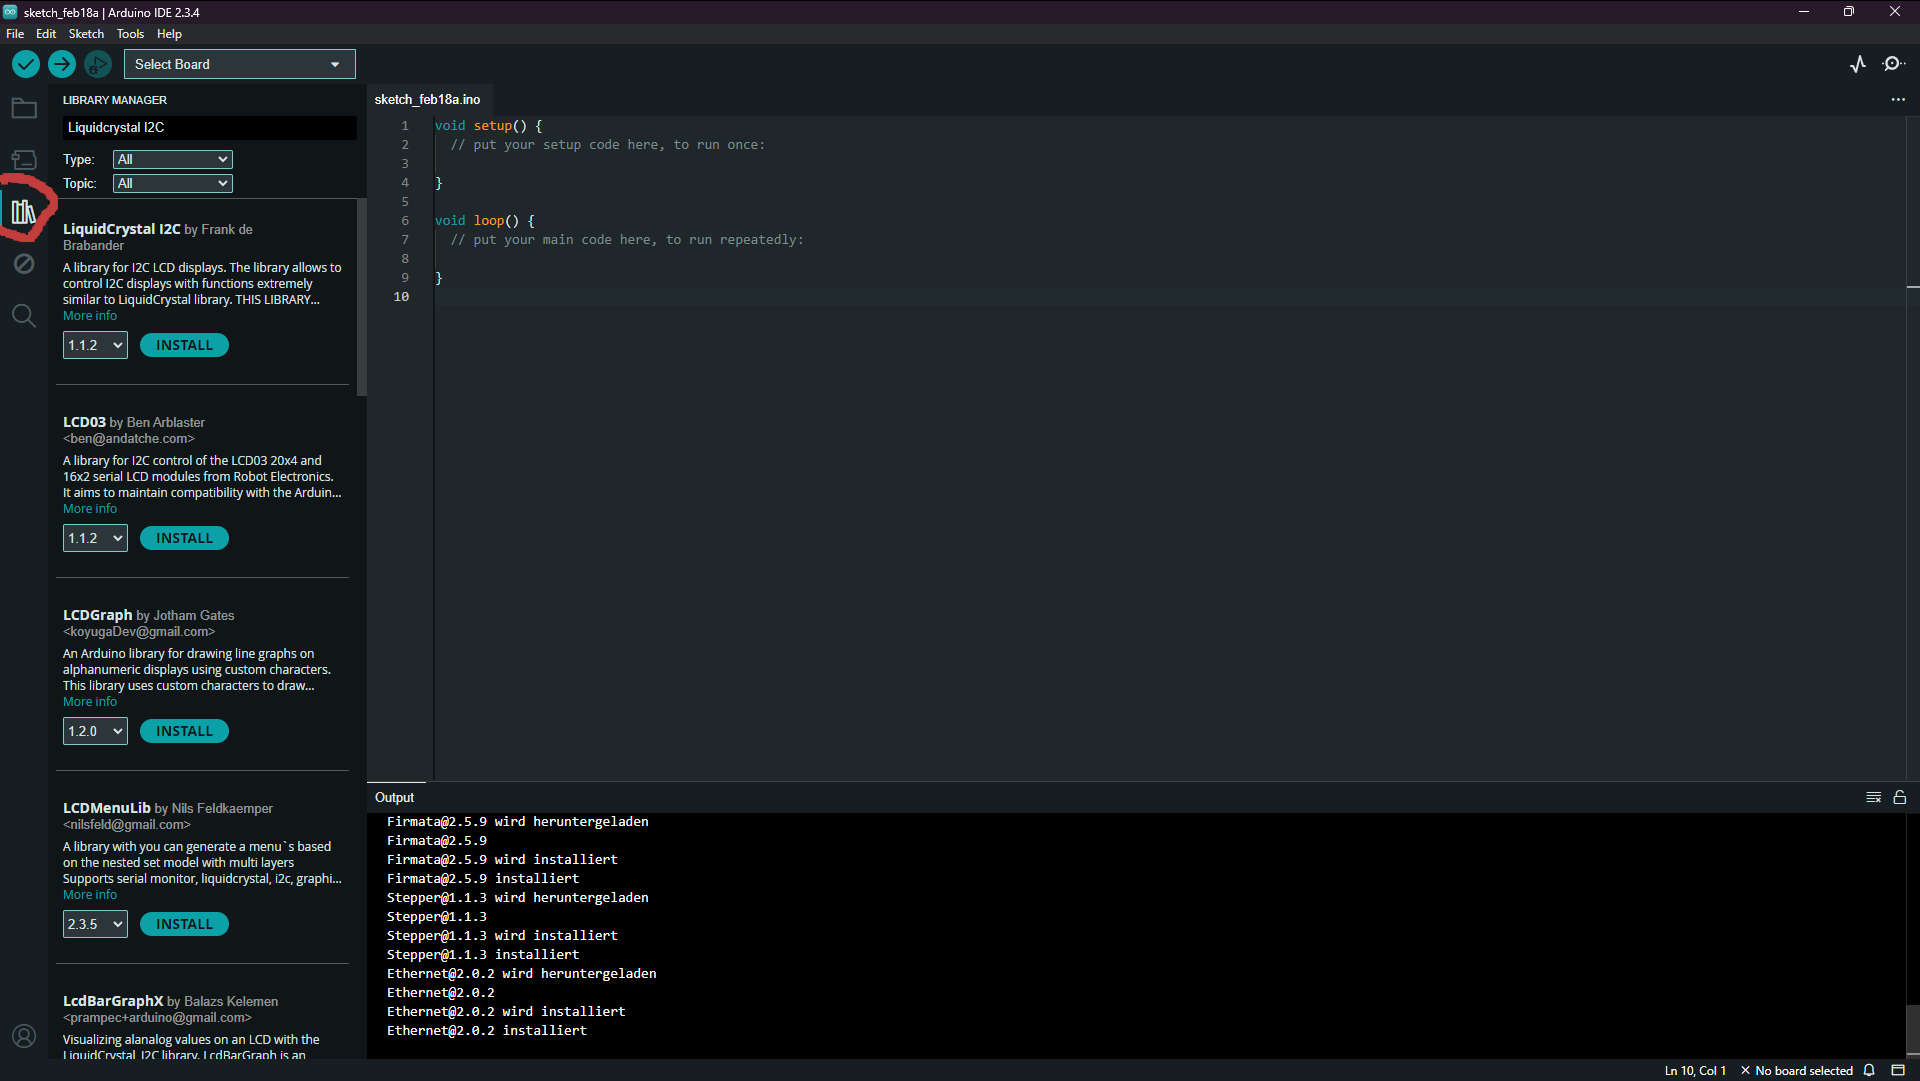
After starting the Arduino IDE, i needed The Library for the LCD. I went to the librarys tab, searched for LiquidCrystal I2C and Donwload the library from Frank de Brabander
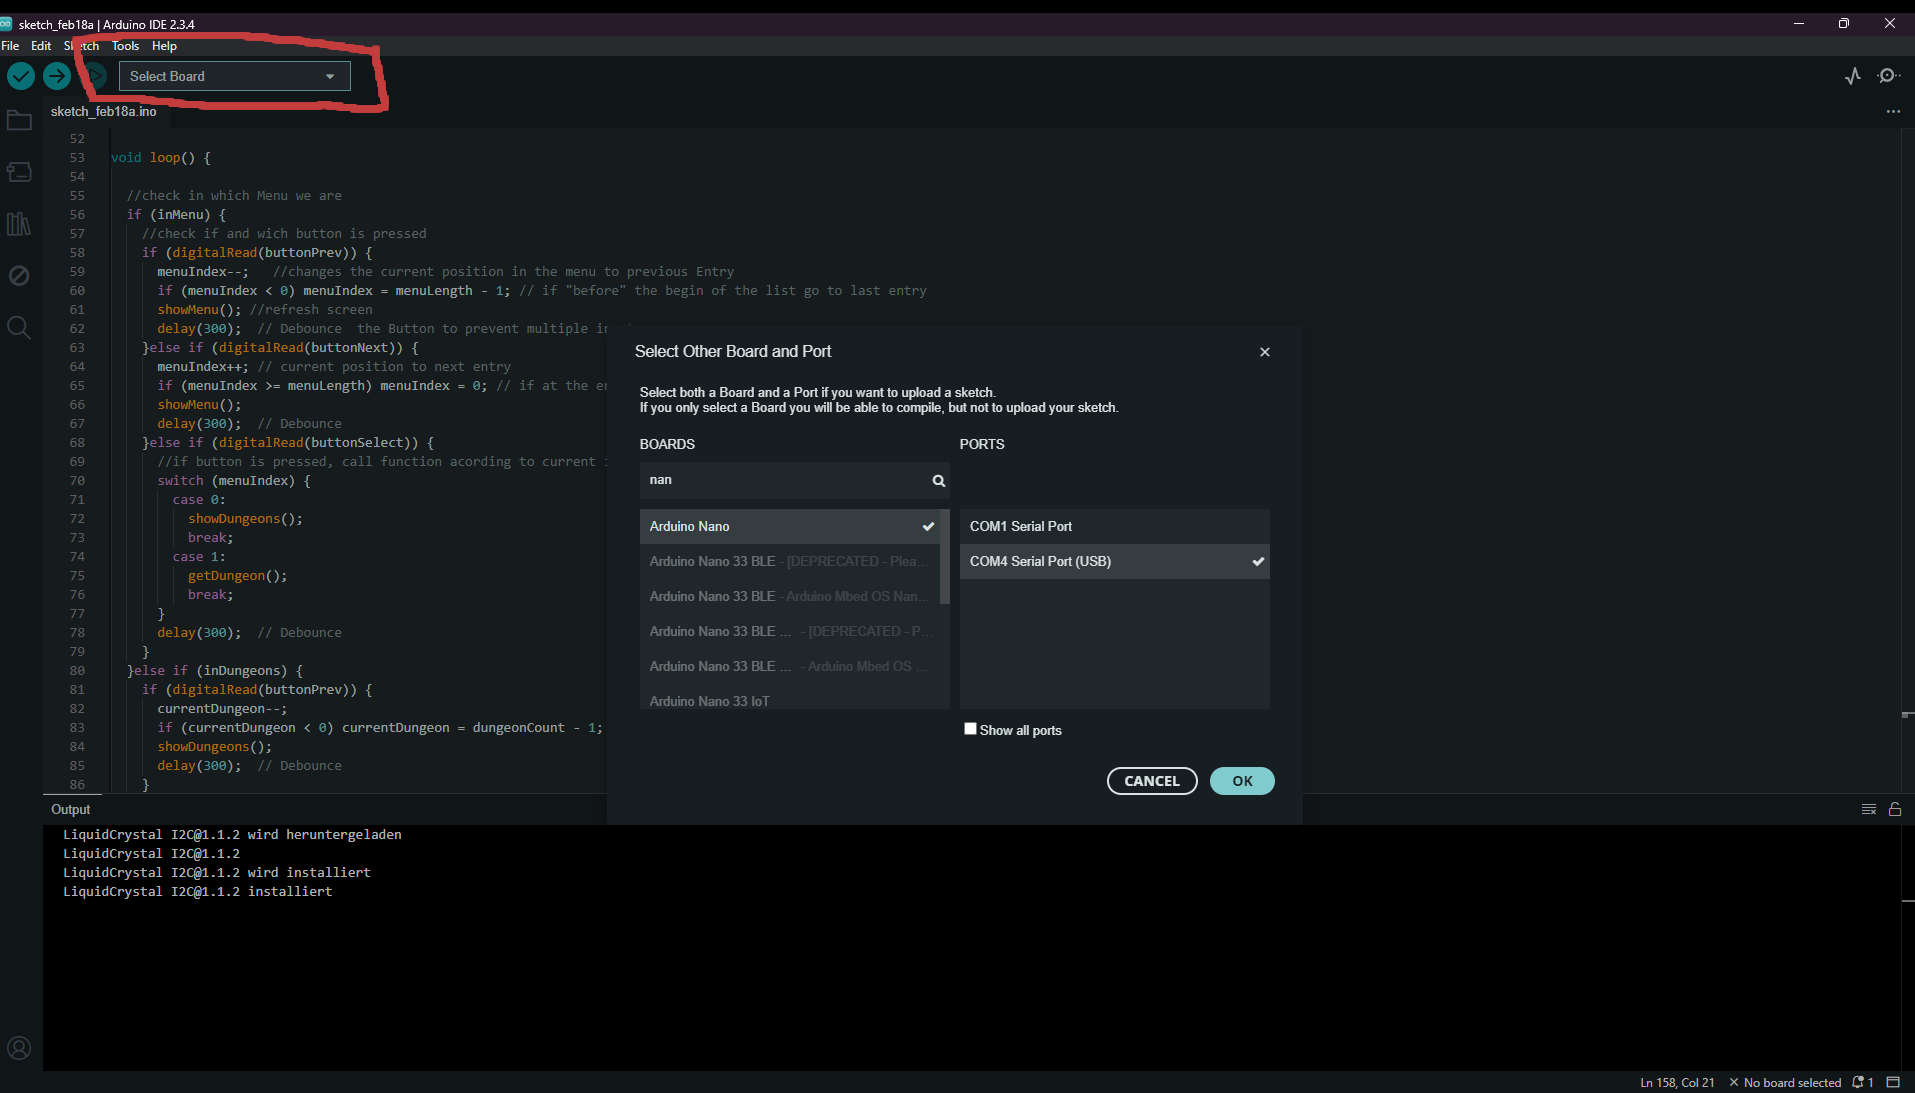
then selected the Port "Com4" because this is the USB port of the Arduino and selected the Arduino Nano as my board.
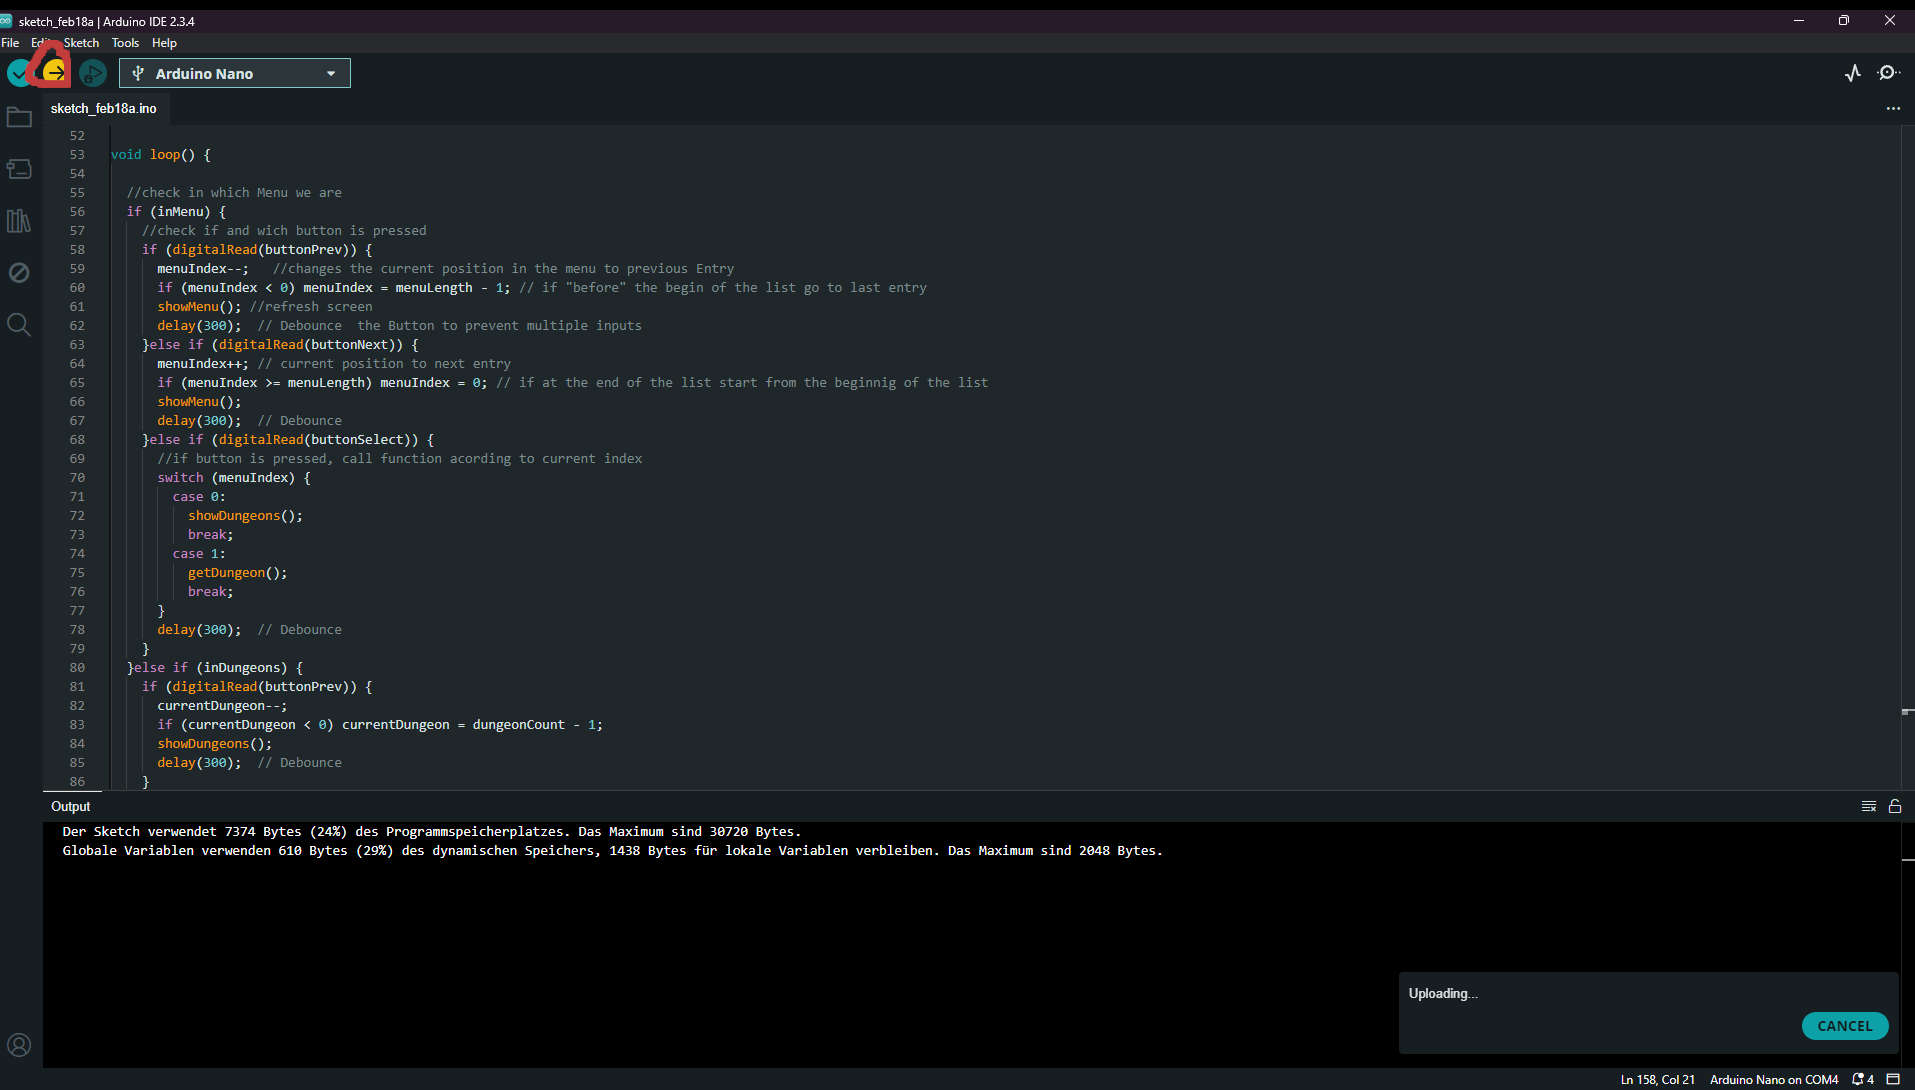
last step was to paste my code and upload the Sketch. Now the Arduino restarts and the programm is loade and i could test it
The Result:
The Arduino Nano
Now that i showed you how i used the Arduino nano in my application, i'll give you some information
The Nano is based on the ATMega328P as well as the big sibling the Arduino Uno and has the following specs:
- 32kb flashmemory
- 1kb EEPROM
- 2kb sram
- up to 16mhz speed(at 4.5v to 5.5v)
- 23 usable I/O lines