Comparing the ESP32 and the RP2024
In oder to compare the two microcontrollers We went back to look over the data sheets. After looking over the sheets We found that there are some small differences in the Performance.
ESP32-S3
- CPU-Dual Xtensa LX7
- clock speed-240MHz
- Flash Memory-16MB external
- RAM-512KB internal + externalPSRAM support
RP2040
- CPU-Dual-core ARM Cortex-M0+
- clock speed-Up to 133 MHz
- Flach Memory-2 MB (external)
- RAM-264 KB internal
The ESP32 is the more powerful microcontroller of the two, as it has a higher clock speed. The second biggest difference is that the ESP32-S3 comes with Wi-Fi and Bluetooth, allowing it to gather information from a local computer or even communicate with other microcontrollers that have built-in Wi-Fi or Bluetooth (so-called IoT applications). Both of these microcontrollers can understand multiple programming languages, from C++ to MicroPython and JavaScript. Looking over the datasheet, the ESP32 has higher power usage compared to the RP2040. There are many different variables to consider. Depending on the project, the main application must be taken into consideration.
The comparison of the two languages will happen on the ESP32-S3
C/C++ vs Python
C/C++
- fast execution as it compiles to machine code
- Real-time signal processing
- precise timing
- effective use of memory
MicroPython
- code needs to be interpeted (slowing it down)
- use more RAM
- real time processing is slower, not ideal for PWM speeds
- Easier to use with built-in libraries
- Supports interactive development with REPL
CircuitPython and MicroPython
MicroPython
- More efficient, uses less RAM
- Faster execution compared to CircuitPython
- Supports more microcontrollers
- Can run on boards with limited storage
- Lacks built-in USB support for drag-and-drop code execution
CircuitPython
- Easier for beginners with built-in USB drag-and-drop support
- More user-friendly with Adafruit’s libraries
- Simplified file system management
- Uses more RAM and storage
- Slower execution due to additional overhead
- Fewer supported microcontrollers compared to MicroPython
C/C++
For our comparison we are using a Script, which Leen Skaf provided. Its written in C/C++ and she translatet it in Micropython. Its a Script for reading sensor data from a DHT22 humidity and temperature Sensor.
                        #include

                        // Pin definition for Arduino Uno (using digital pin 2 for DHT22 sensor)
                        const int dhtPin = 2;  // Pin 2 is used for the DHT22 sensor

                        // Define the DHT sensor type (DHT22 in this case)
                         #define DHTTYPE DHT22

                        // Create an instance of the DHT sensor
                        DHT dht(dhtPin, DHTTYPE);

                        void setup() {
                            // Initialize serial communication at 9600 baud
                            Serial.begin(9600);

                            // Start the DHT22 sensor
                            dht.begin();
                        }

                        void loop() {
                            // Read temperature in Celsius from the DHT22 sensor
                            float temperatureC = dht.readTemperature();
                            // Read relative humidity percentage from the DHT22 sensor
                            float humidity = dht.readHumidity();

                            // Check if any reads failed and exit early (to try again)
                            if (isnan(temperatureC) || isnan(humidity)) {
                                Serial.println("Failed to read from DHT sensor!");
                            } else {
                                // Print the temperature and humidity values to the Serial Monitor
                                Serial.print("Temperature: ");
                                Serial.print(temperatureC);
                                Serial.println(" °C");

                                Serial.print("Humidity: ");
                                Serial.print(humidity);
                                Serial.println(" %");
                            }

                            // Wait 1 second before taking a new reading
                            delay(1000);
                        }
This simple code, reads temperature and humidity of the environment and displays the code
Output of the Arduino IDE Sketch uses 298996 bytes (8%) of program storage space. Maximum is 3342336 bytes.
Micropython
Leen was so kind and also provided the Script in Micropython
import machine
import time
import dht

# Initialize DHT22 sensor on GPIO3 (D3 on some ESP32-C3 boards)
dht_pin = machine.Pin(3)
sensor = dht.DHT22(dht_pin)

while True:
    try:
        # Read sensor data
        sensor.measure()
        temperature = sensor.temperature()  # Celsius
        humidity = sensor.humidity()        # Percentage

        # Print results
        print("Temperature: {:.1f}°C".format(temperature))
        print("Humidity: {:.1f}%".format(humidity))

    except OSError as e:
        print("DHT sensor reading failed:", e)

    time.sleep(2)  # Wait 2 seconds before next reading
Comparison of C/C++ and Micropyton
Performance
| Programming Language | Memory Uptake | Memory Maximum | Percentage |
|---|---|---|---|
| Arduino | 298996 B | 3342336 B | 6 % |
| Micropython | 4248 B | 3342336 B | 0,12 % |
As you can see the memory usage is completly different between MP and C/C++. The MP Code is 98,58 % smaller or is 1,42% of the size of the C/C++ Code
Workflow
ArduinoIDE
The Workflow for the ArduinoIDE with C/C++ is shown here
Micropython
This part was executed on Manjaro, which is a Arch-Linux Distro
prepwork
First we need to Install some tools on Manjaro through the Terminal. We need "Screen" to connect to the microcontroller via serial. Pipx is a variant of the python installer PIP. In the case of the used machine we weren't able to install via regular pip. esptools is used to flash the micropython firmware to our MCU. the last was adafruit-ampy, a tool used to manage files on the Microcontroller.
pacman -S screen
pacman -S python-pipx
pipx install esptool
pipx install adafruit-ampy
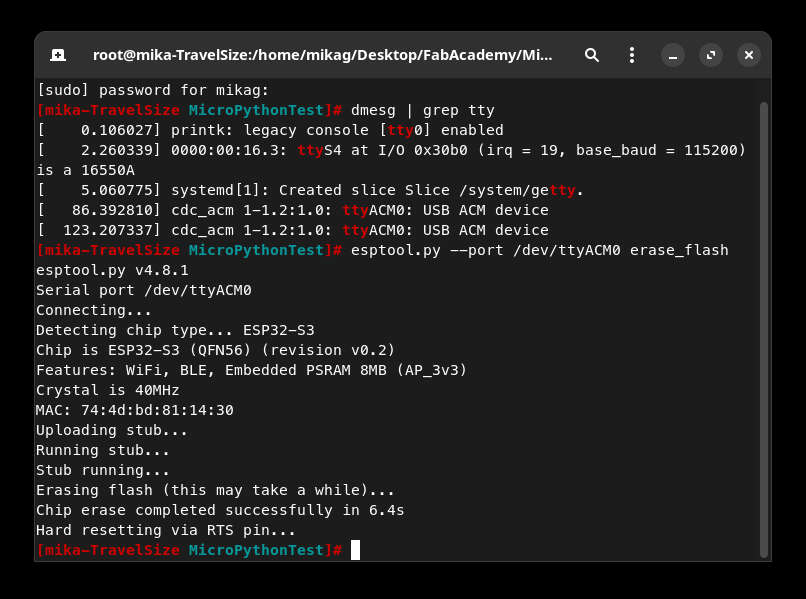
dmesg | grep tty
"dmesg | grep tty" gives us information of usb Serial Connections. Normaly u see only Microcontroller. In our case it was /dev/ttyACM0 but in some cases the number in ACMx can vary.
flashing micropython
First thing was to erase the flash to prevent to brick the MCU. Followed by flashing the firmware
esptool.py --port /dev/ttyACM0 erase_flash

esptool.py --port /dev/ttyACM0 --baud 460800 write_flash 0 ESP32_GENERIC_S3-20241129-v1.24.1.bin

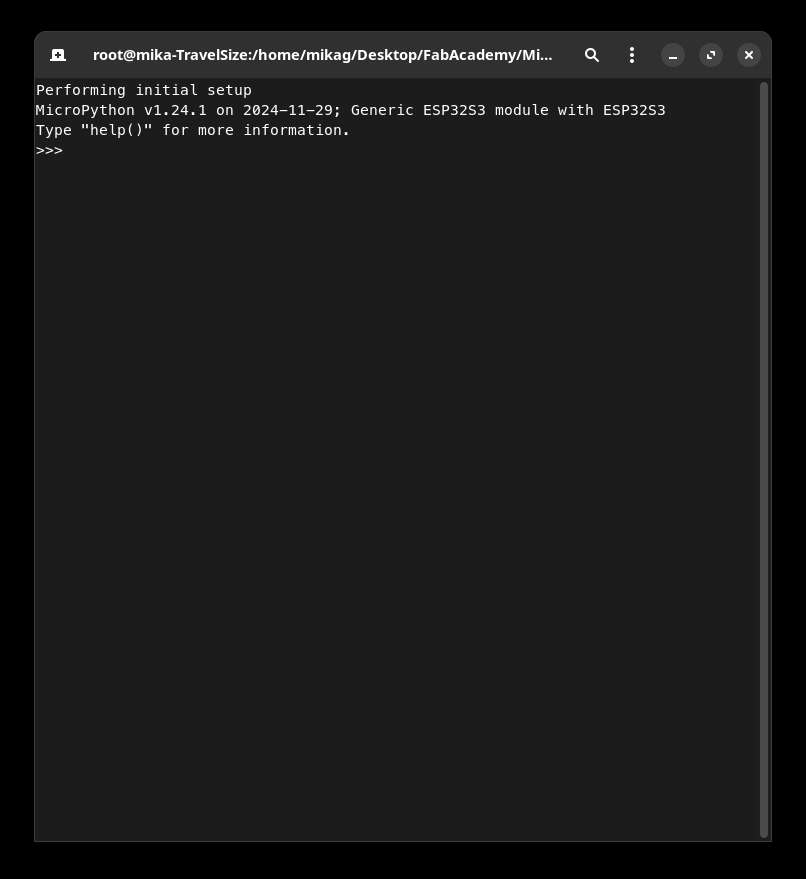
Now connecting to the MCU using Screen u should see that the firmware was flashed correctly
screen /dev/ttyACM0 115200

upload Script
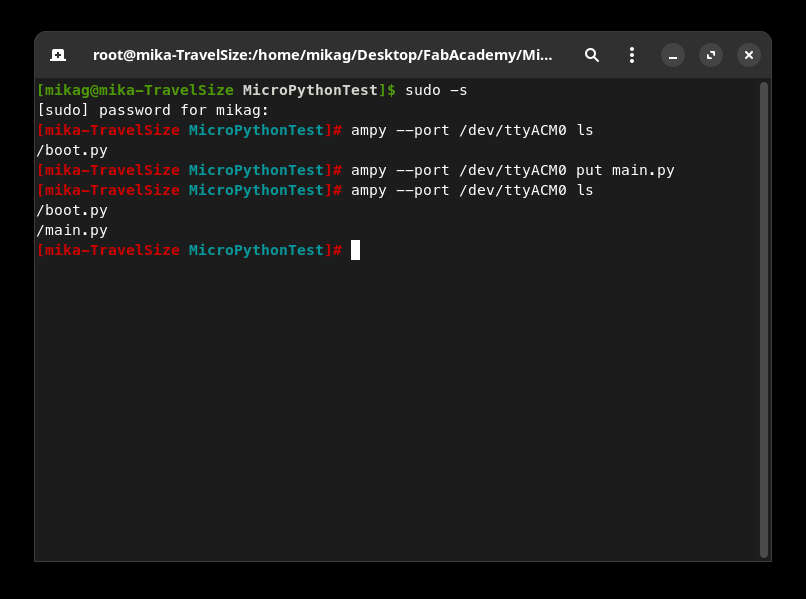
With ampy not connected through screen, we could upload the file and also list the file to check, if everything worked as intenden
ampy --port /dev/ttyACM0 put main.py
ampy --port /dev/ttyACM0 ls

Execute the script
last step was to start the program. for that connect again trough screen and "import" the program. Another option is to just restart the Microcontroller, what we did
import main.py

- download the firmware ofMicropython for ESP32-S3
Conclusion
As you can see the Workflow with the Arduino IDE is much simpler. In the case of an ESP you just need to add the ESP32 Boards in the Boardmanager, install you librarys, paste the code, select the correct board and port and just upload. While working with Micropython you need to first flash a complete new firmware onto the board and upload the code via a terminal, which is not beginner friendly. But at the end, you can squeeze more code onto your board.