16 - Wild Card Week
For this weeks assignment I had planed to make a skate board, but do to time needed to finish with the final project which I am
happy to report is almost completed. I decided to try Embroidery. As this is WILD CARD WEEK we have to decide what
what needs to do be documented. Since we all have now had a lot of practice since Fab-Academy this should be fairly fun. This process was not
covered in any of the assignments that we had up to now. Textiles are interesting as they are flexible. You can create just as many different shapes and forms with them
as you can imagine. Even embroidering a PCB on cloth is do able process that could prove important to monitoring heath in patients in future health care. Fact is that
we use more textiles than any other product.
I do want an to mention that Leen Skaf also decided to do Embroidery but on a different machine. I was hoping to also
give this one a go, but as luck would have it, the trains were not going and there was no other connection I could take to get to
the fab-lab in Kamp-Lintfort. This left me with the lab in Kleve where we also have a Embroidery machine.
Thanks to a fast introduction form Frauke Waßmuth on how to operate the Embroidery machine this was a fun task.
Getting started you want to download inkstitch. This is a add one feature for inkscape, allowing you to convert you image to a stitching format that the
sowing machine can use. The sowing machine for the Embroidery is a Wertarbeit W6 N 5000 with secondary attachment that let the
normal sowing machine convert itself into a stitching machine.
Getting started
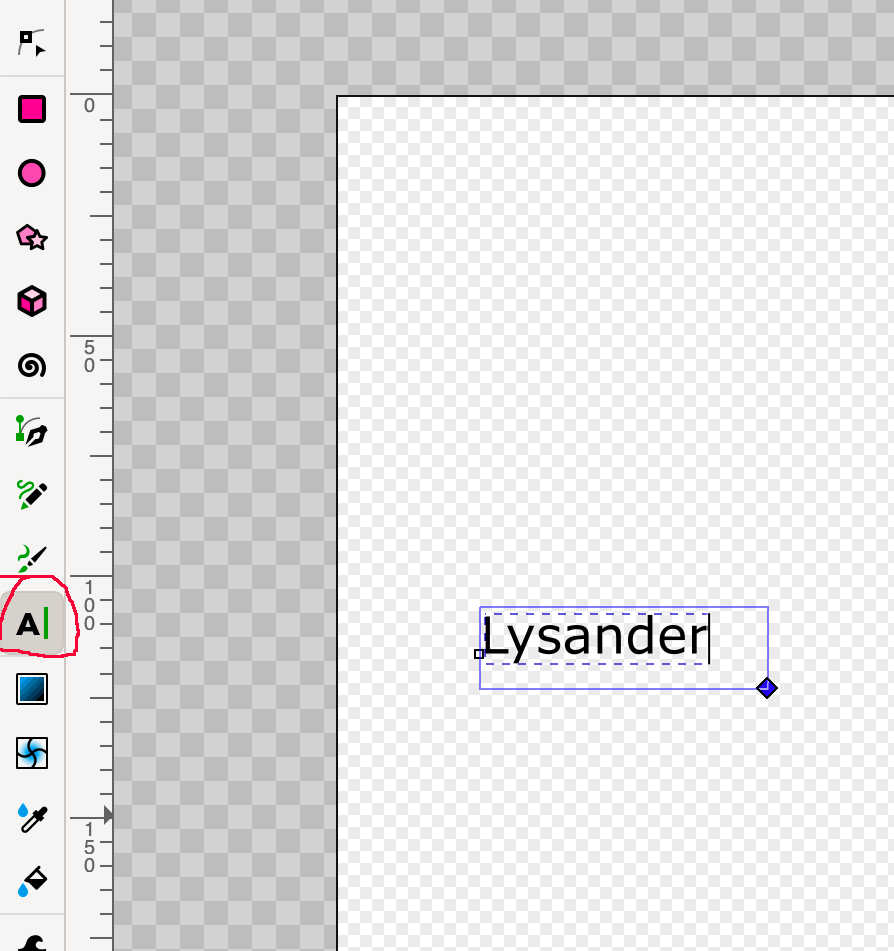
In one of the assignments I used inkscape where we all learned about computer controlled cutting. So to get started you will have have to have installed both, inkscape and inkstitch. those are installed you can either spend some time designing your own image or even download images that you would like to place on a short or pillow for example. Just to test how all of this works and not wanting to spend time make an image for learning how get stared I just created a text: Lysander. This would be more than enough to test different speeds and sting tension. Once you have your text or test image we can convert the image to Stroke to path. To do this go to top menu bar, select > Path > Stroke to Path.
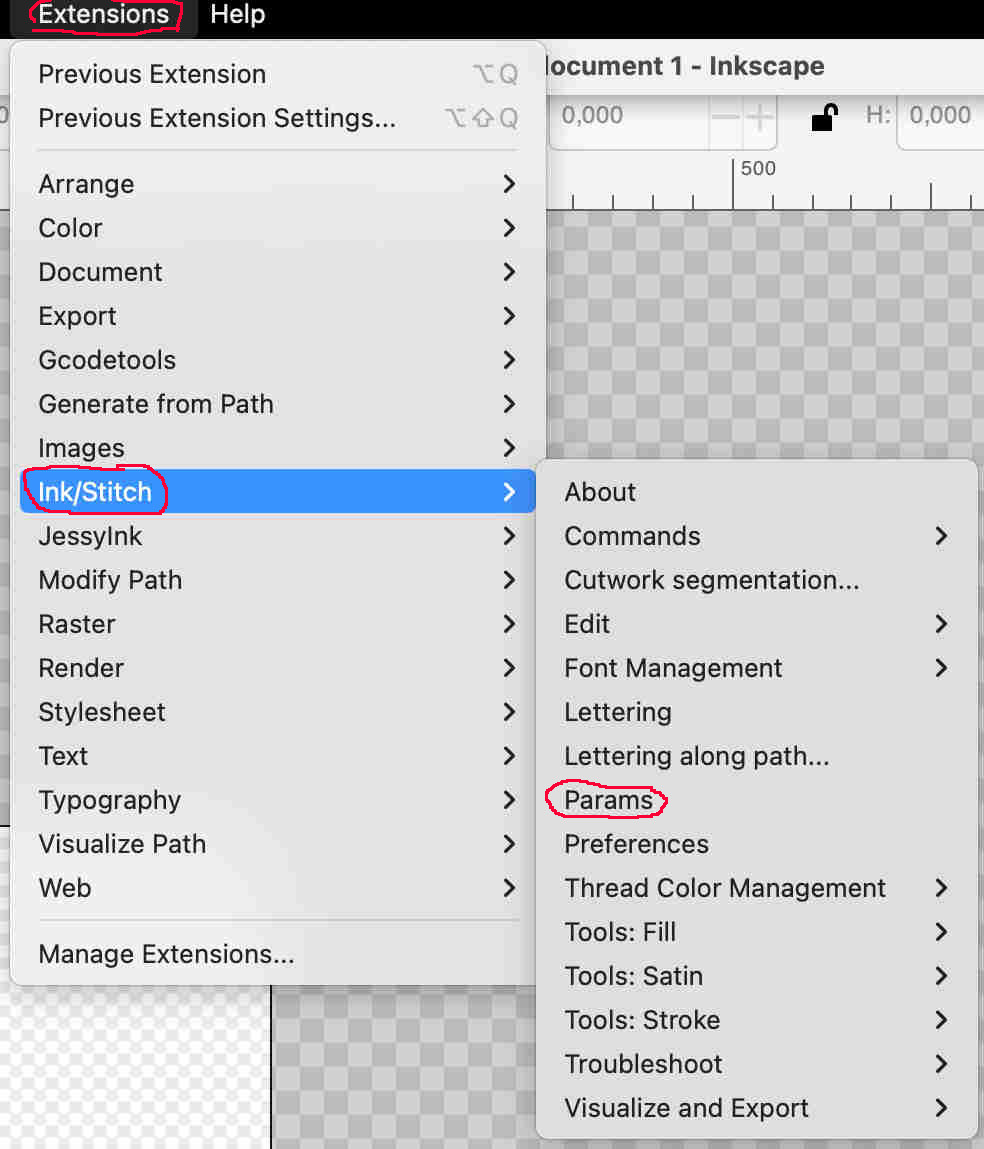
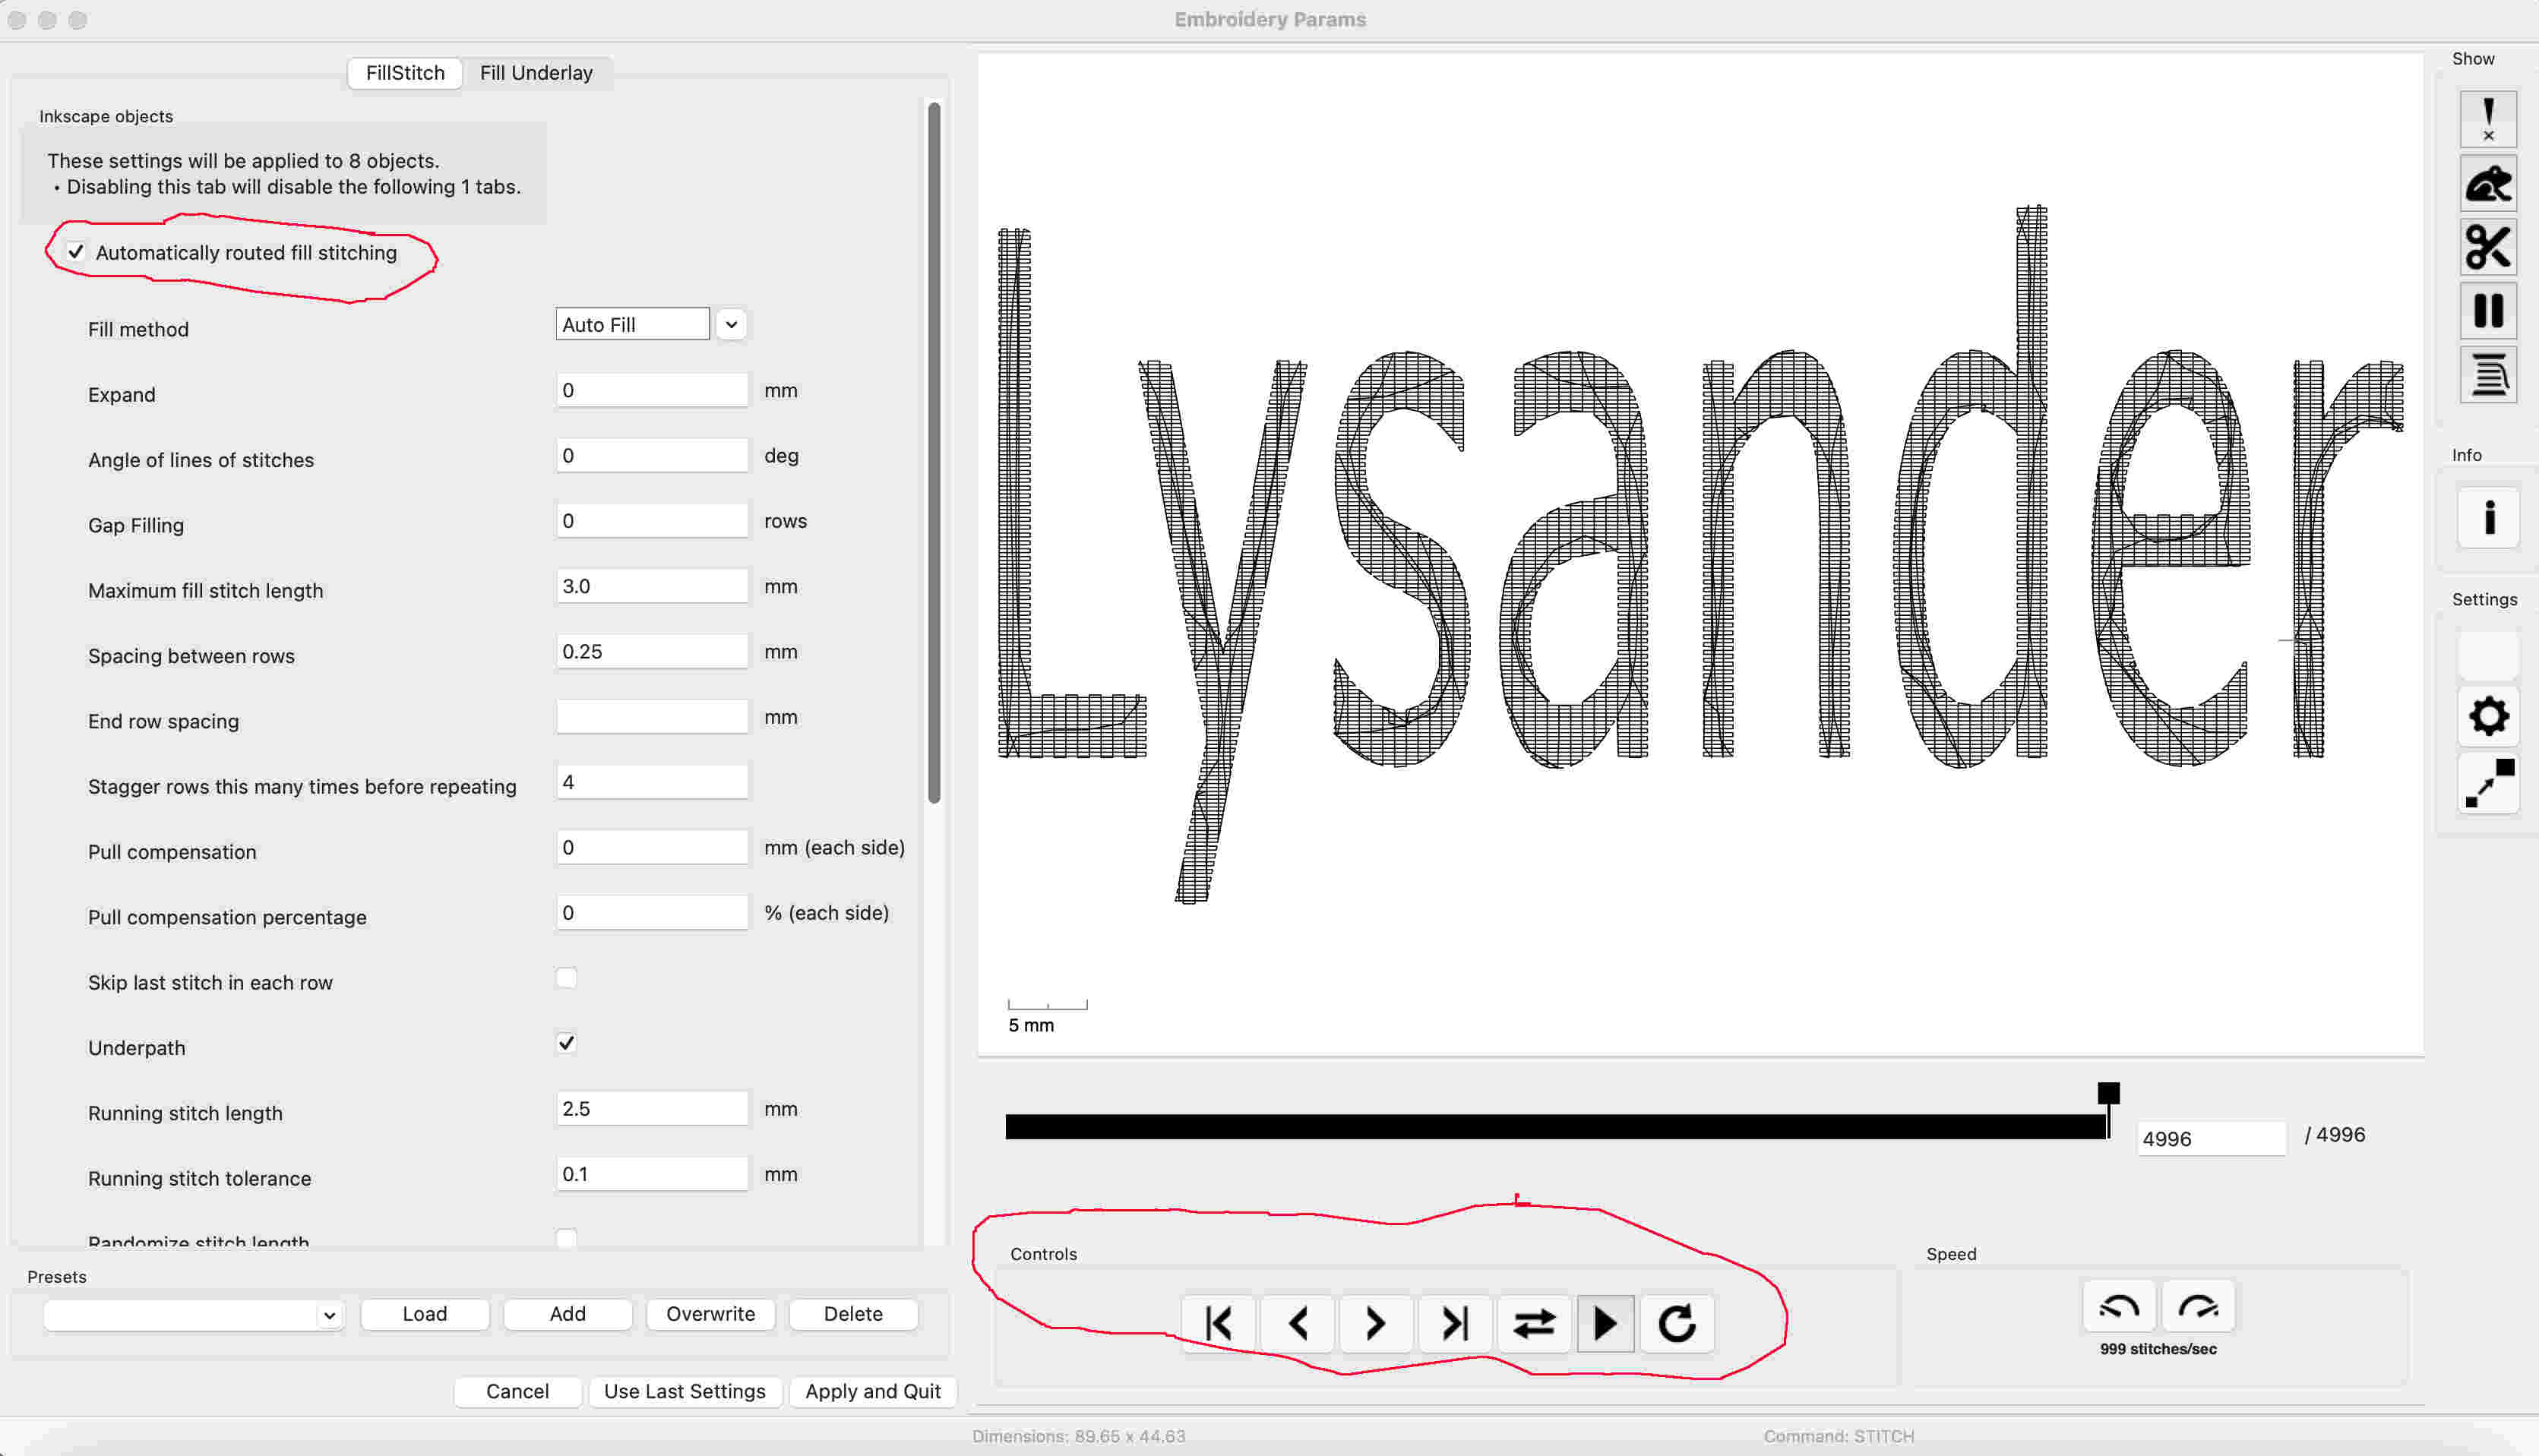
Next we want to check if we are happy with the setting. For this we need to have installed Inkstitch which allows for the conversion of the path to be converted to G-code for the sowing machine. To check if everything is correct go to > Extension > Inkstitch > params. This will helps you check for stitching mistakes or even chaining the stick path as well as the stick types. As I did not see a good reason to mess with the setting I left left them alone as automatically routed fill stich.
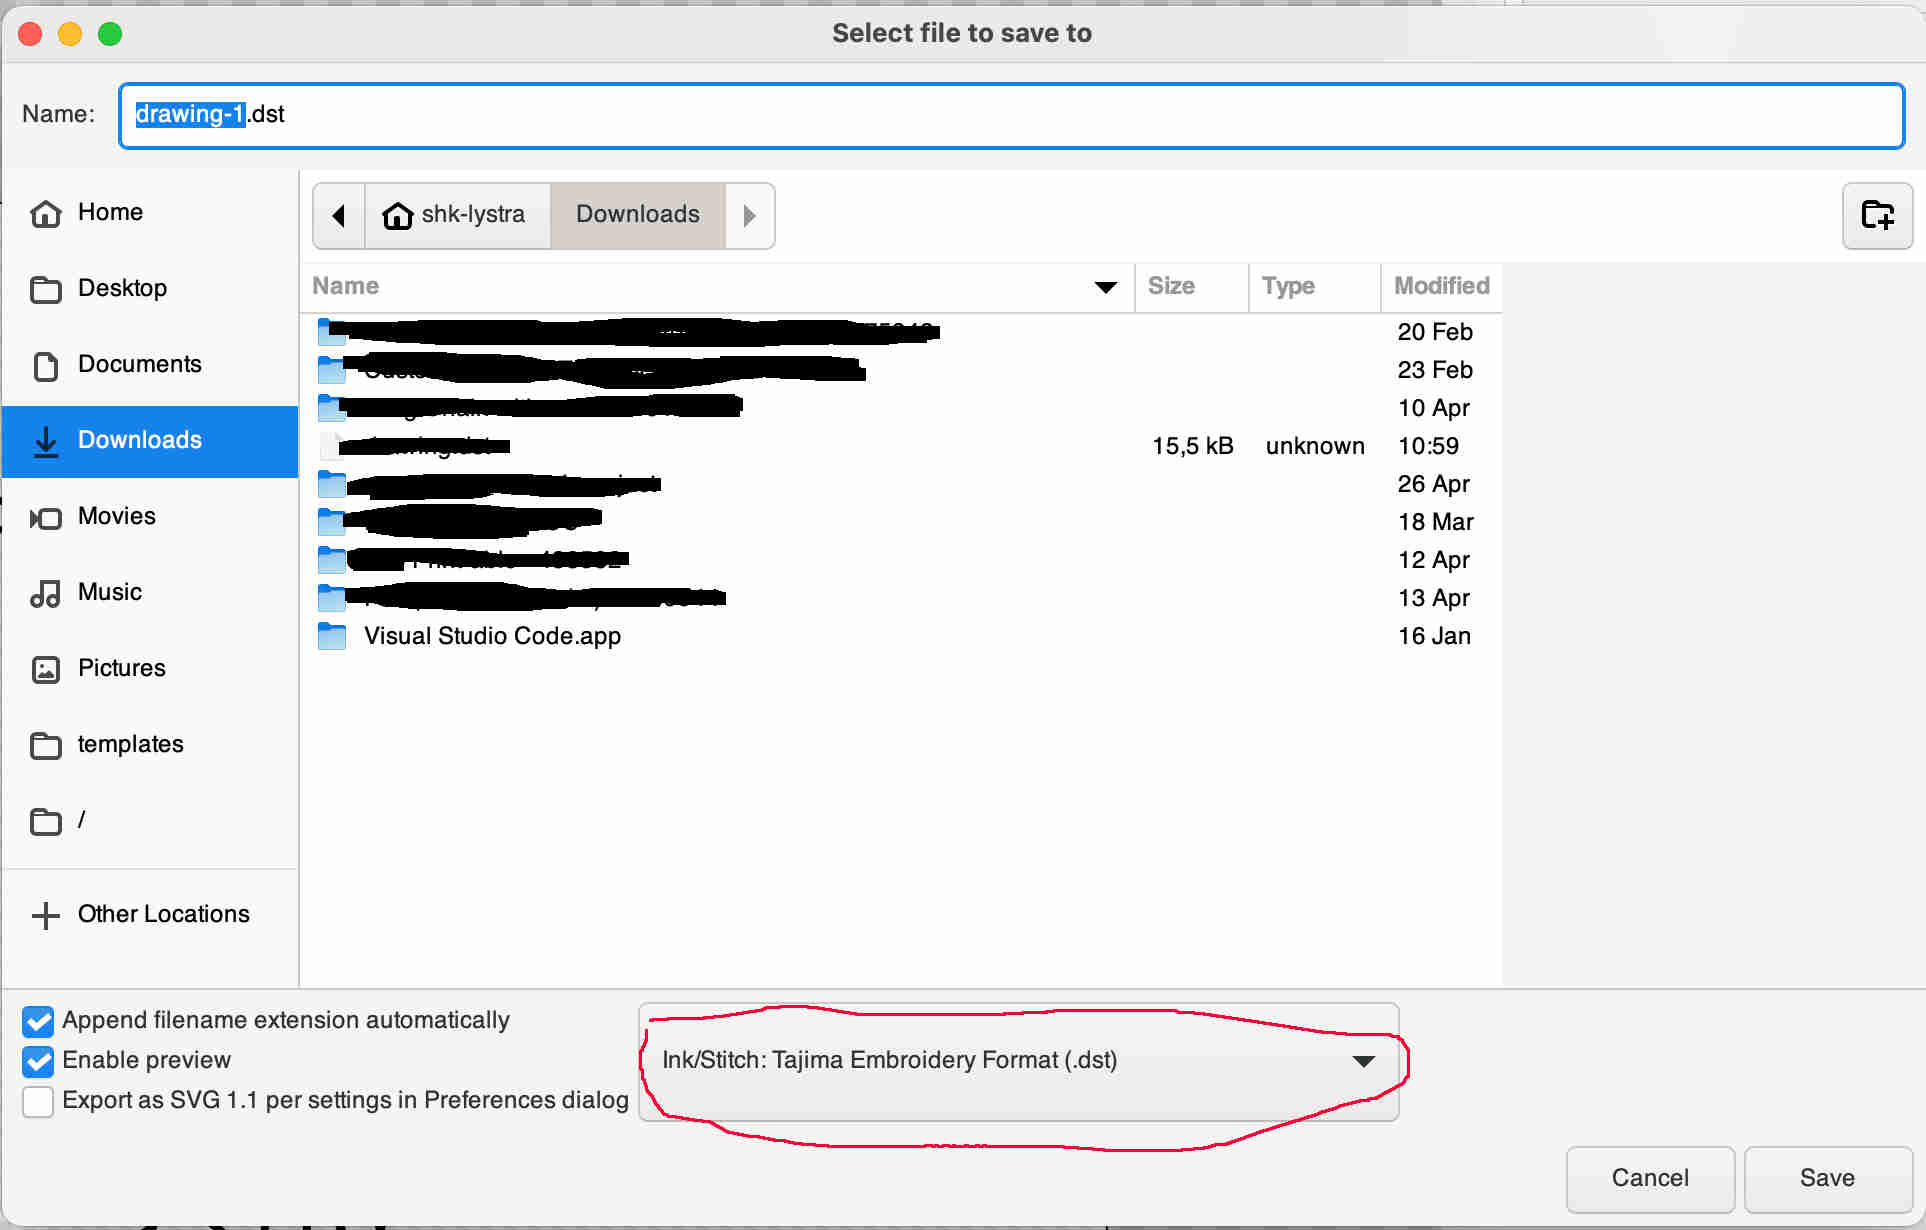
Now that everything was set up and no mistakes could detected, we can save the file. Here we need to File > Save as . In the save as window we want to select
Ink/Stitch: Tajima Embroidery Format (.dst). This allows the sowing machine to read our file. Save this file to a USB so that we can plug it into the usb on the
sowing machine.
Setting up the Wertarbeit W6 N 5000
Once you have decided on what color the thread should be. We need to spool that thread on to a bobbin that will be the thread that will get pulled from underneath the cloth
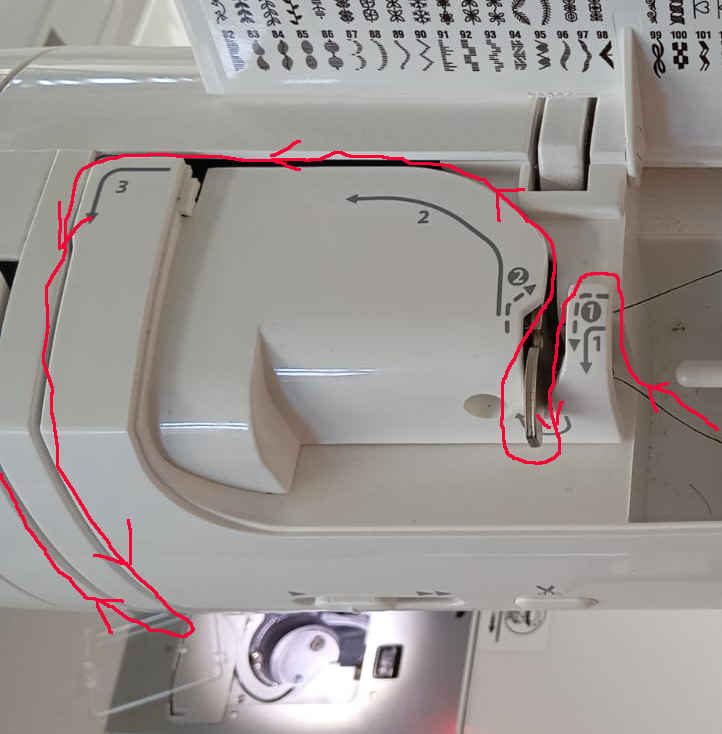
we are going to be stitching on. To spool up the bobbin we need to set up the sowing machine first to do this this. Open the top cover. It should look something like this when
opened.

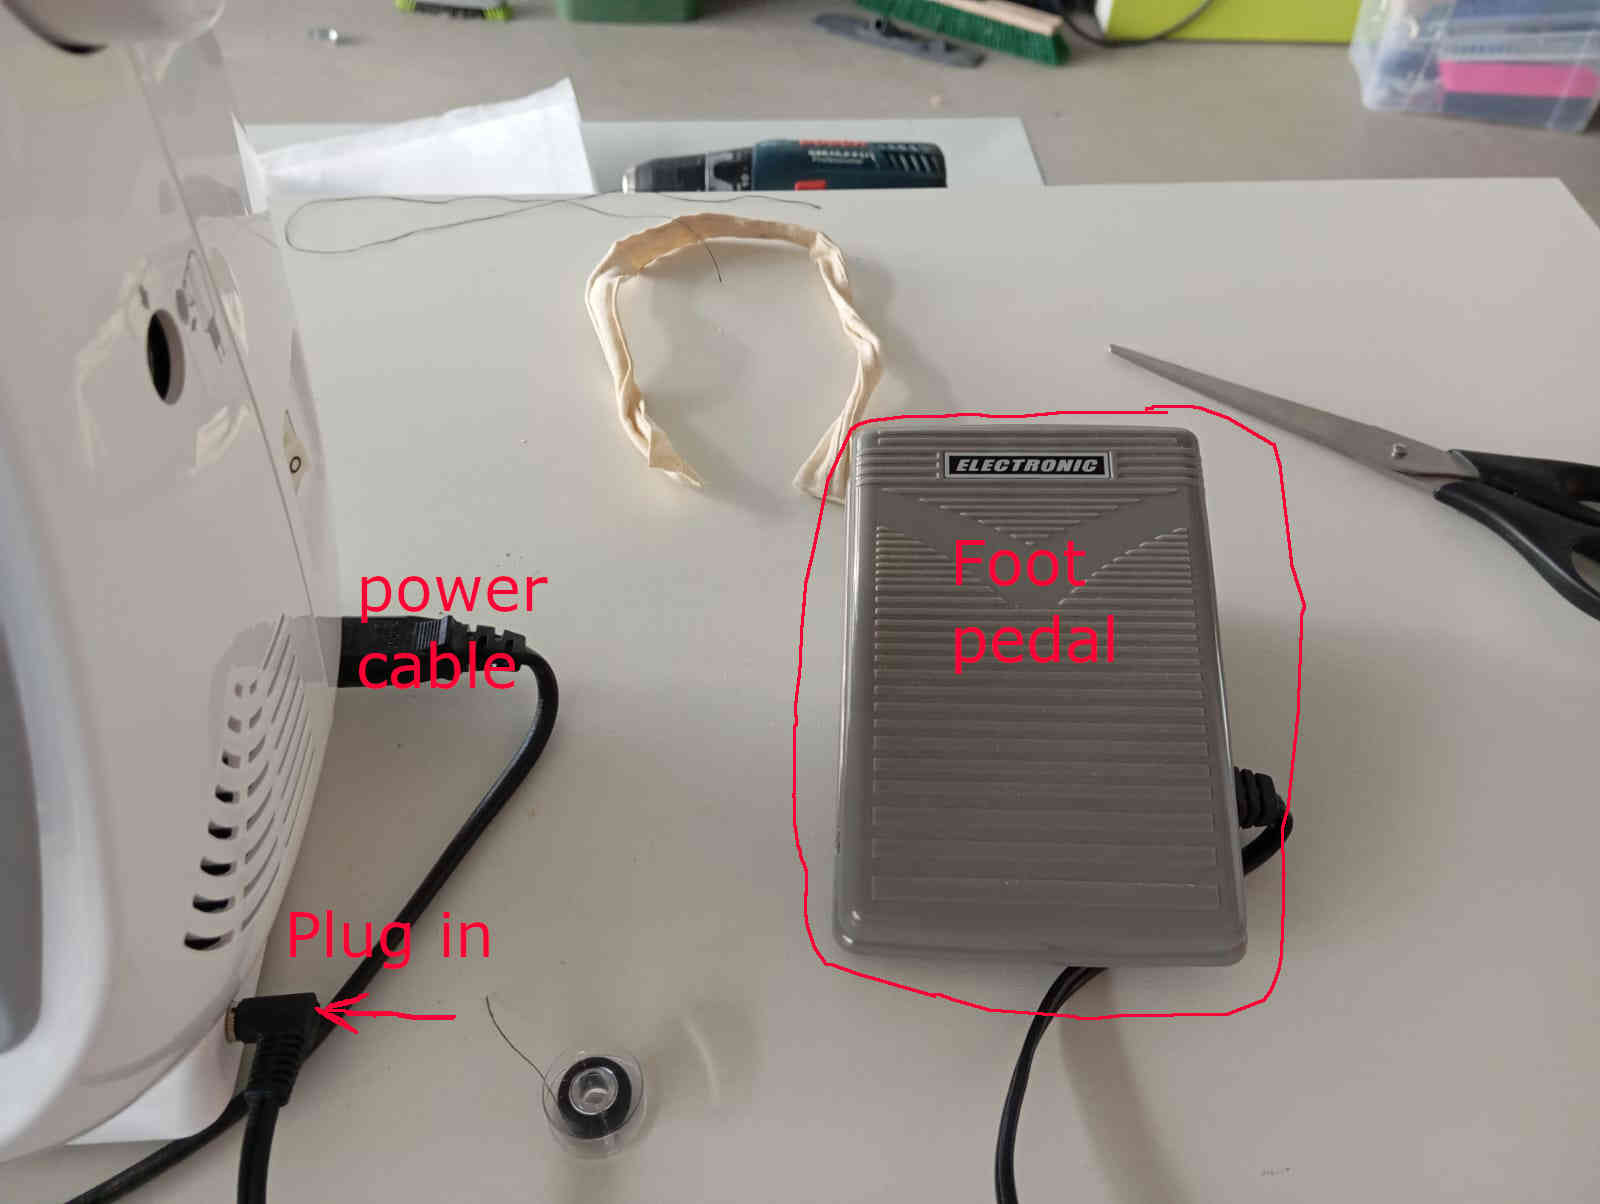
Once the thread has been threaded along the path for filling up the spoil, the small bobbin can be pushed to the right, where it will lock into the winder mode. Plug in the foot pedal if you have not
done so already and turn on the sowing machine.
plugs
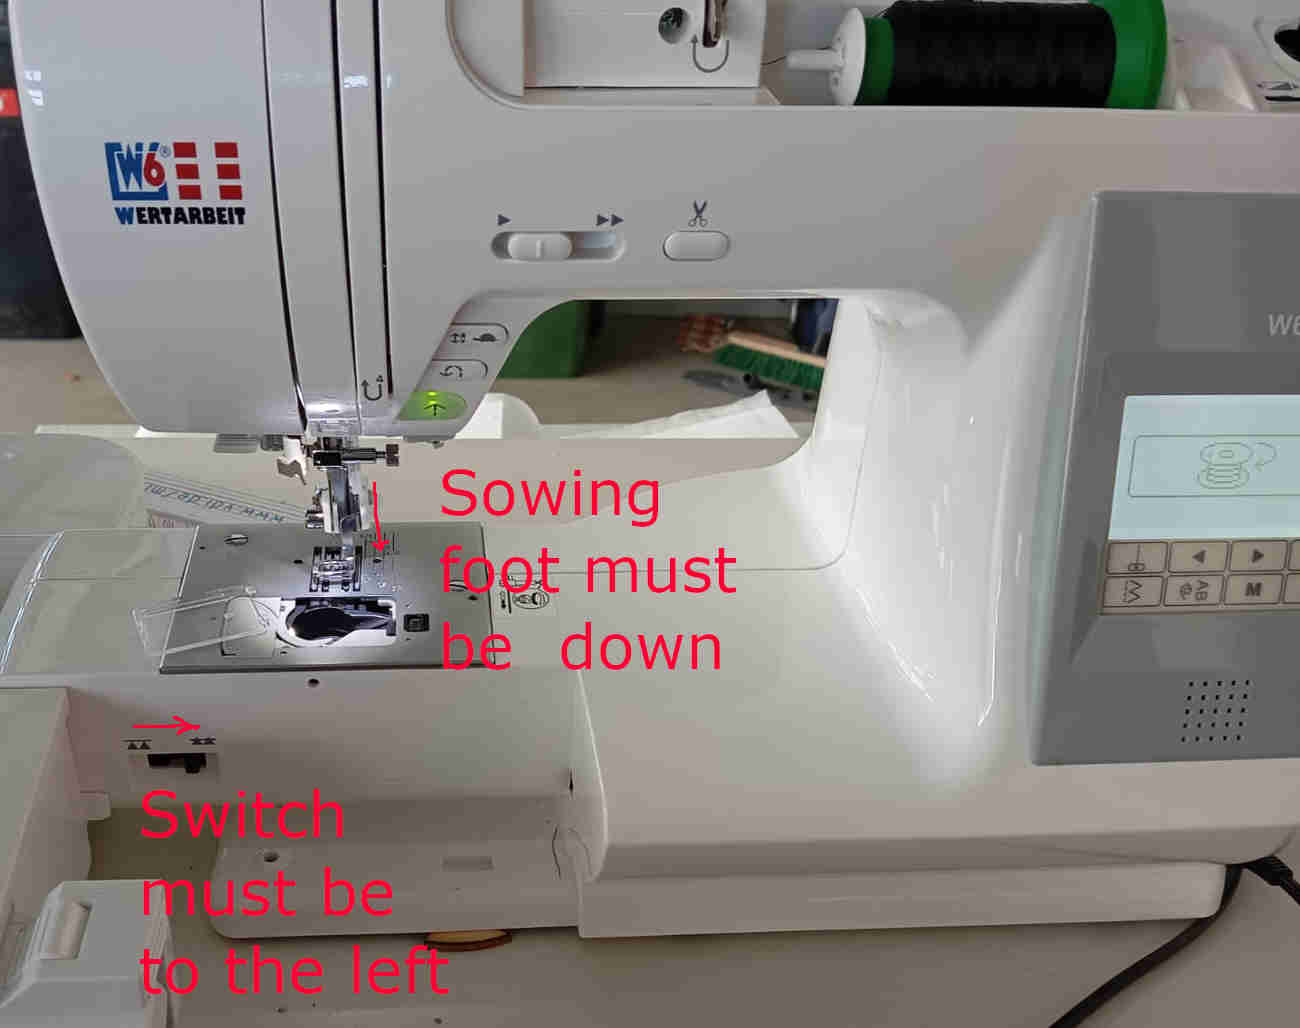
Sowing foot & switch
Ready to spool!
Threading the Needle
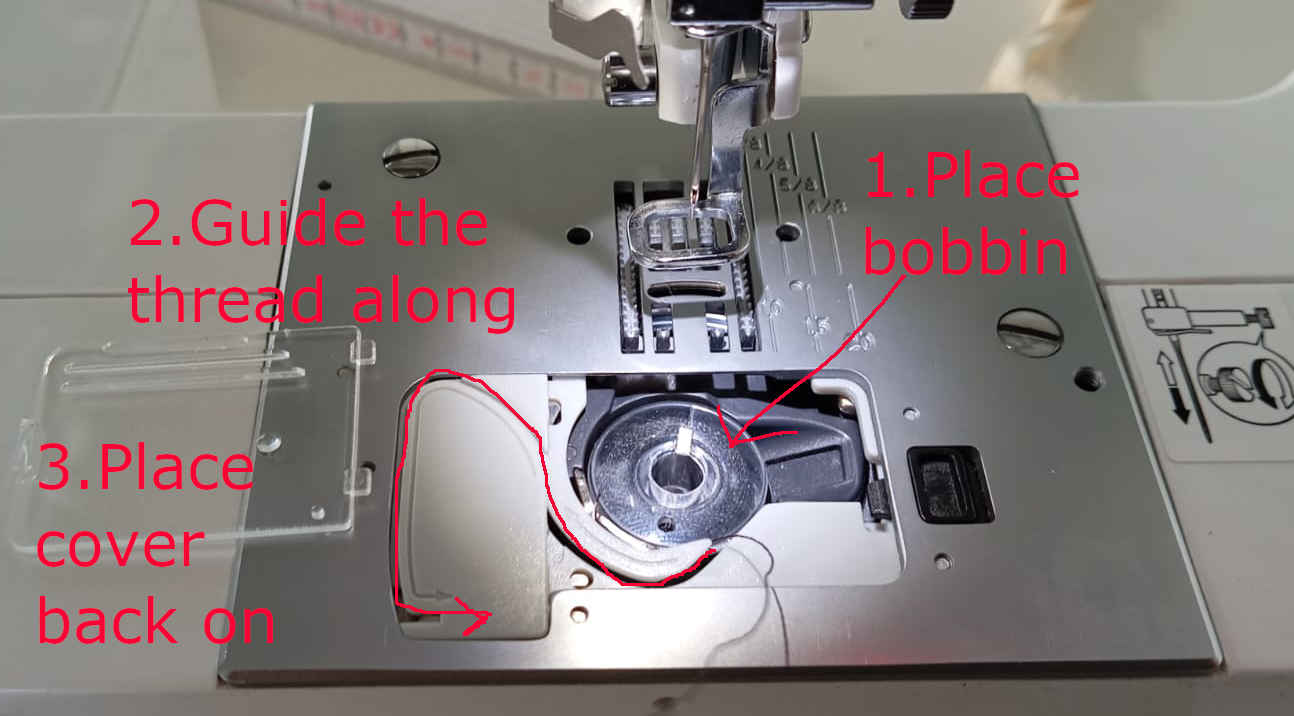
To now get ready to sow or stitch we need to place the small bobbin in the bottom of the sowing machine. As well as thread the needle. To do this simply follow the instructions
to guid the thread to its starting position.
Bobbin setup
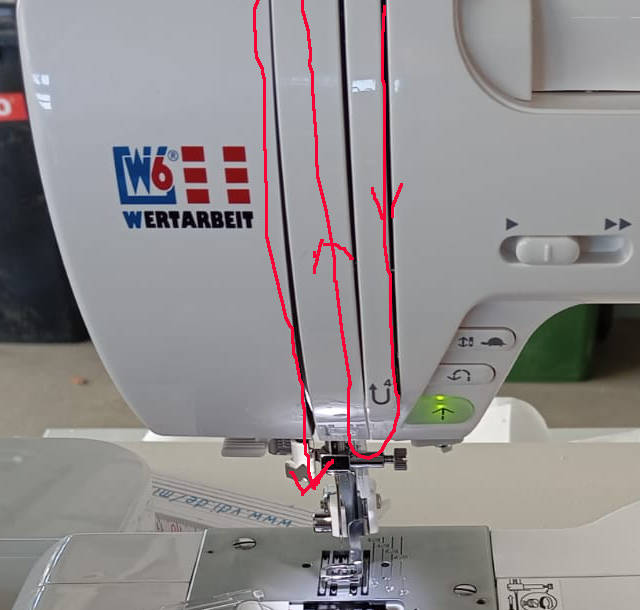
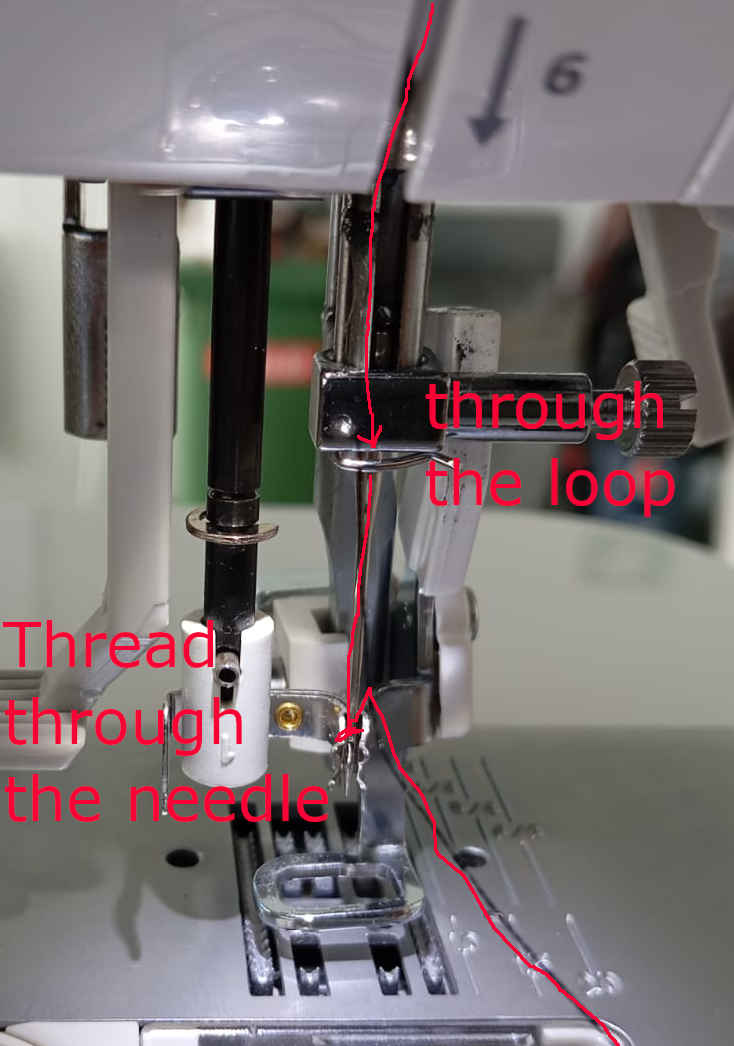
Thread & needle
The cloth
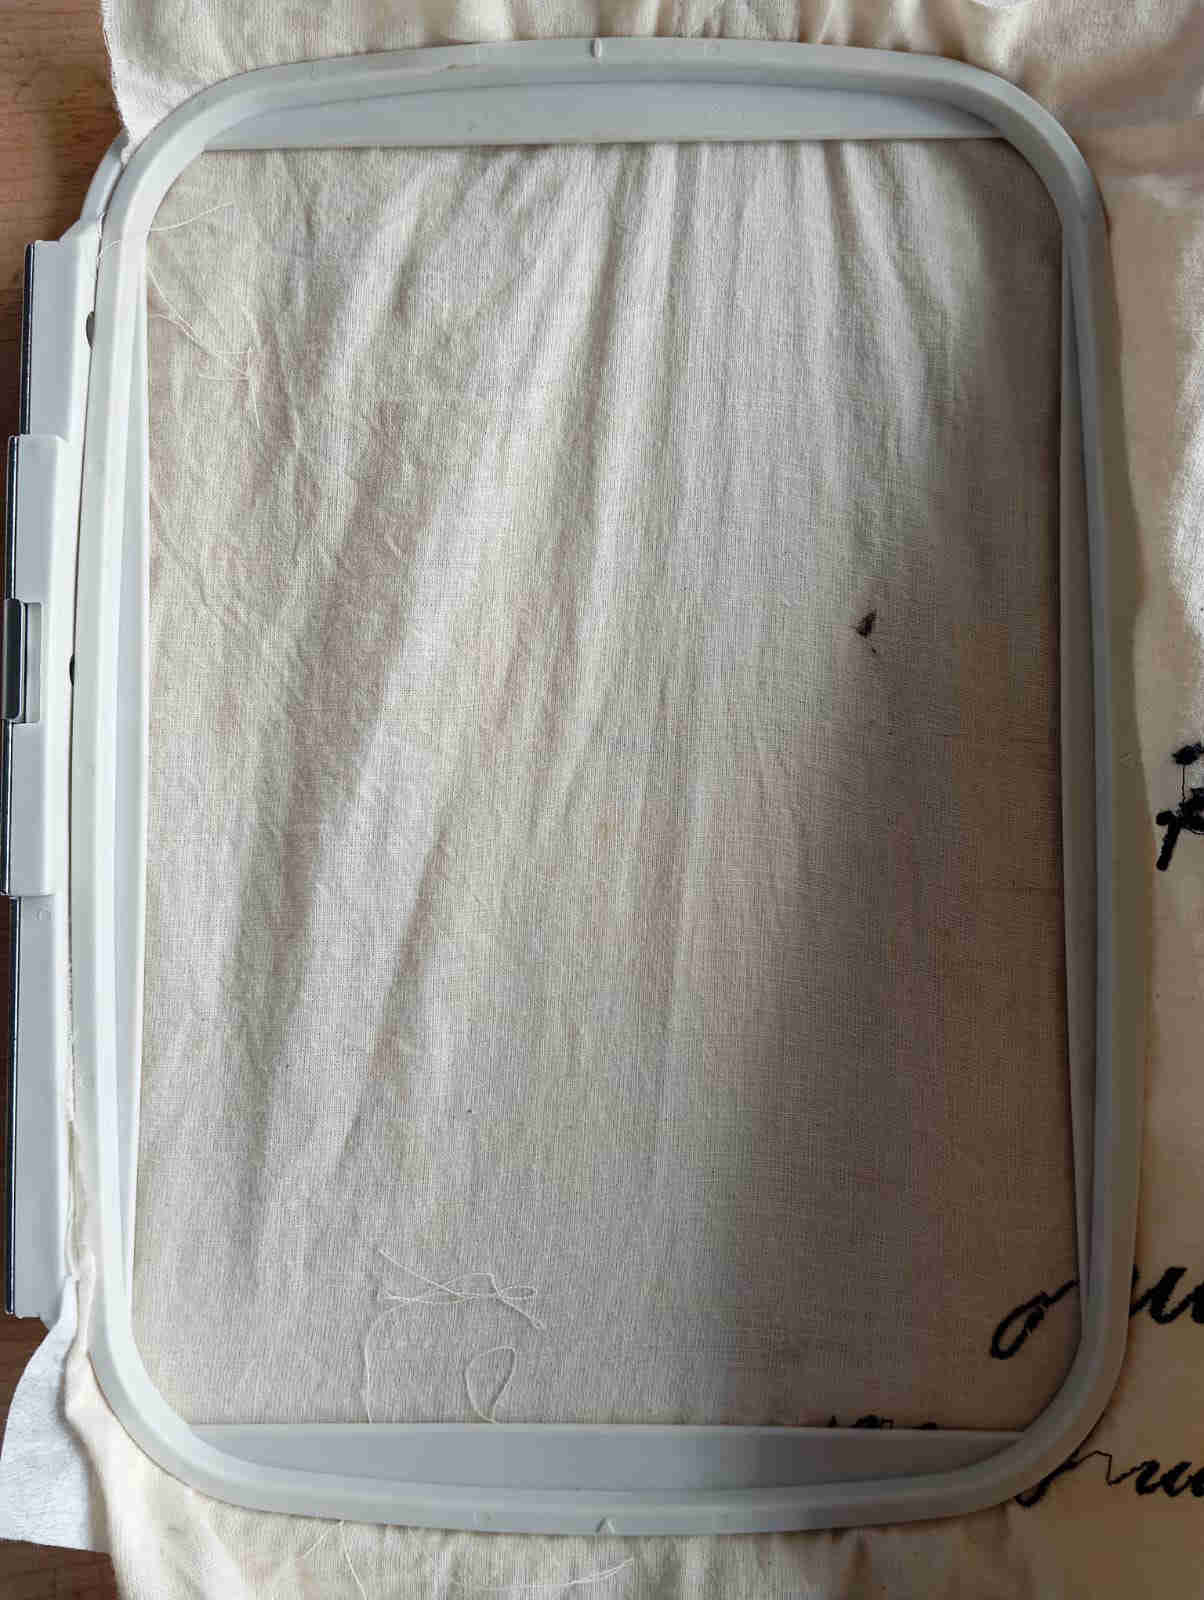
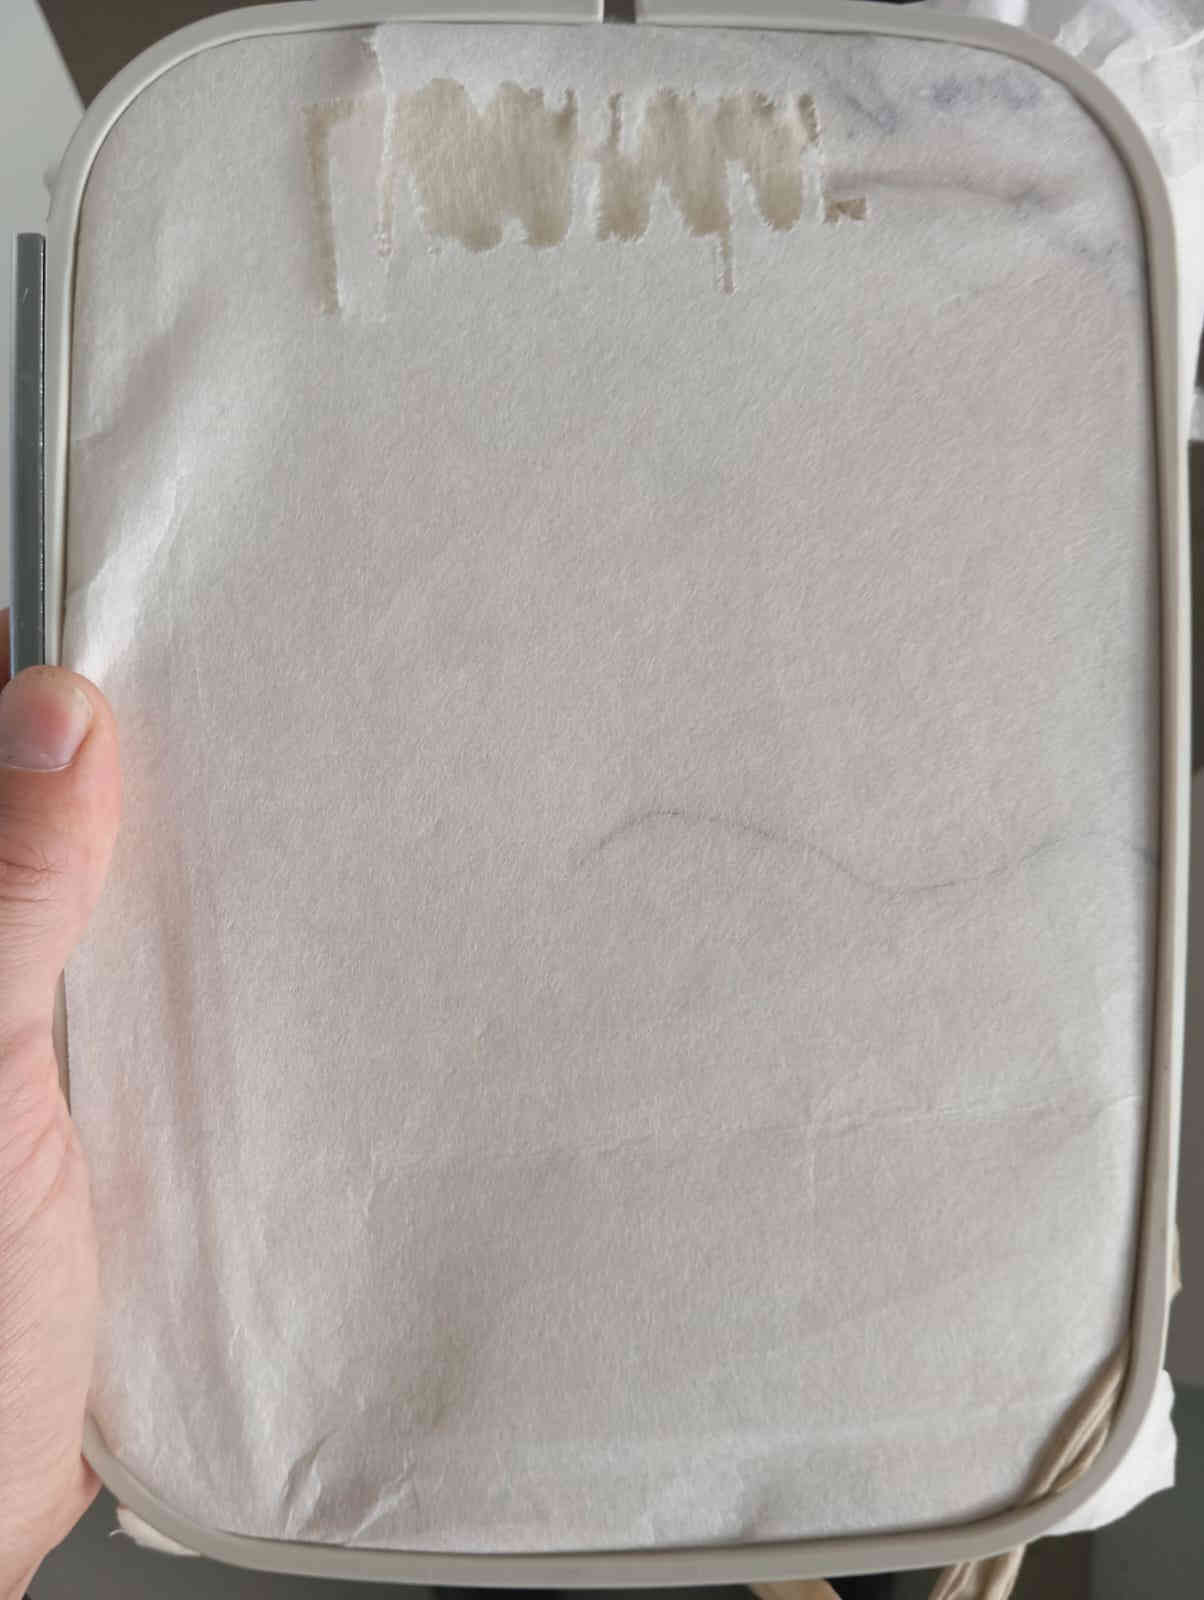
Here we have to use two part hoop to span the cloth. The cloth needs a under laying stabilizer cloth. This is a stiff cloth that helps prevent the stitches from ripping through and can be removed later once the Embroidery is completed. Once the cloth has been placed and the hoop has been fastened, to insure that the cloth does not move. The adapter for Embroidery can be placed back. make sure that you push the one switch back from when the bobbin was wound.
Cloth and Hoop plus Backing
Embroidery setup
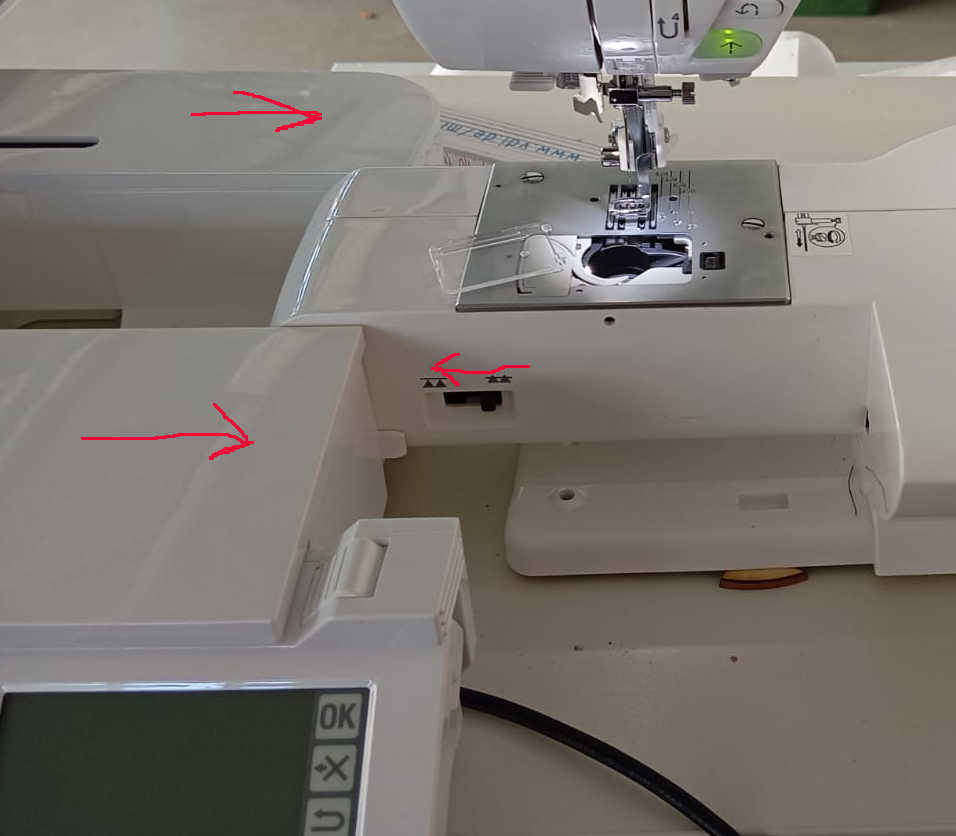
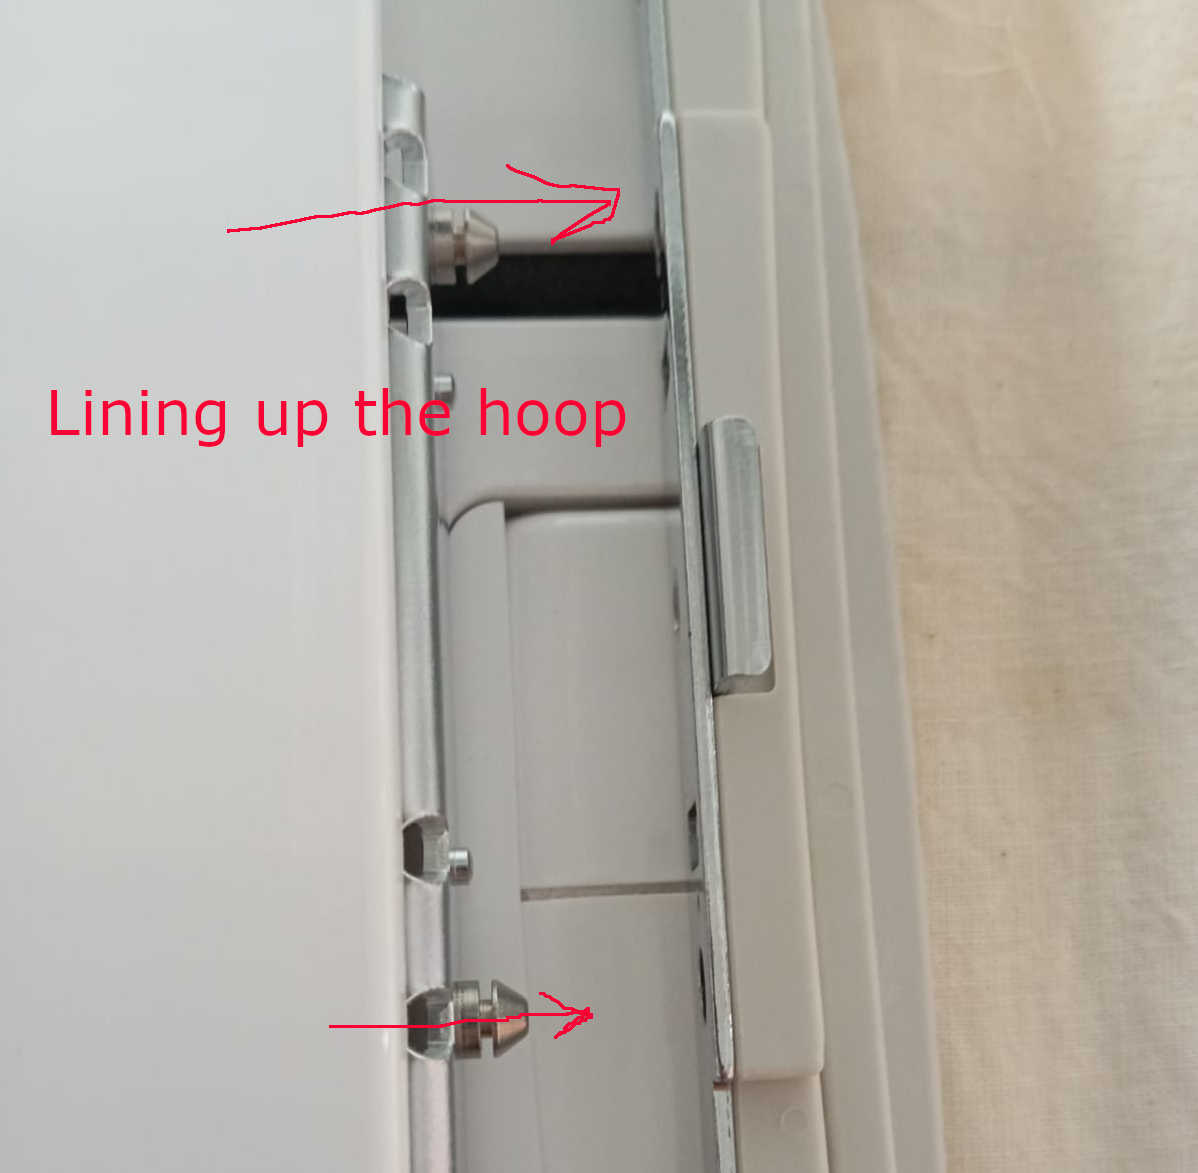
Image Upload
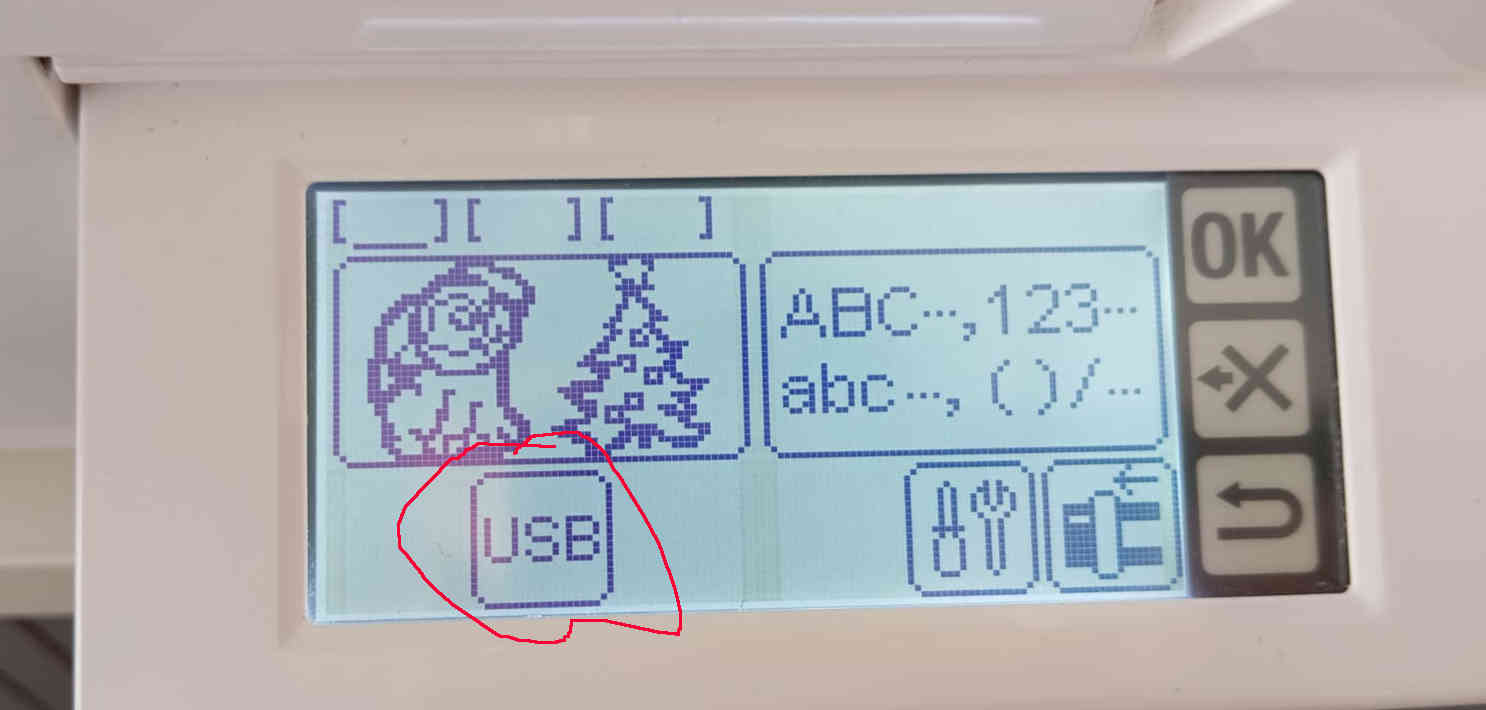
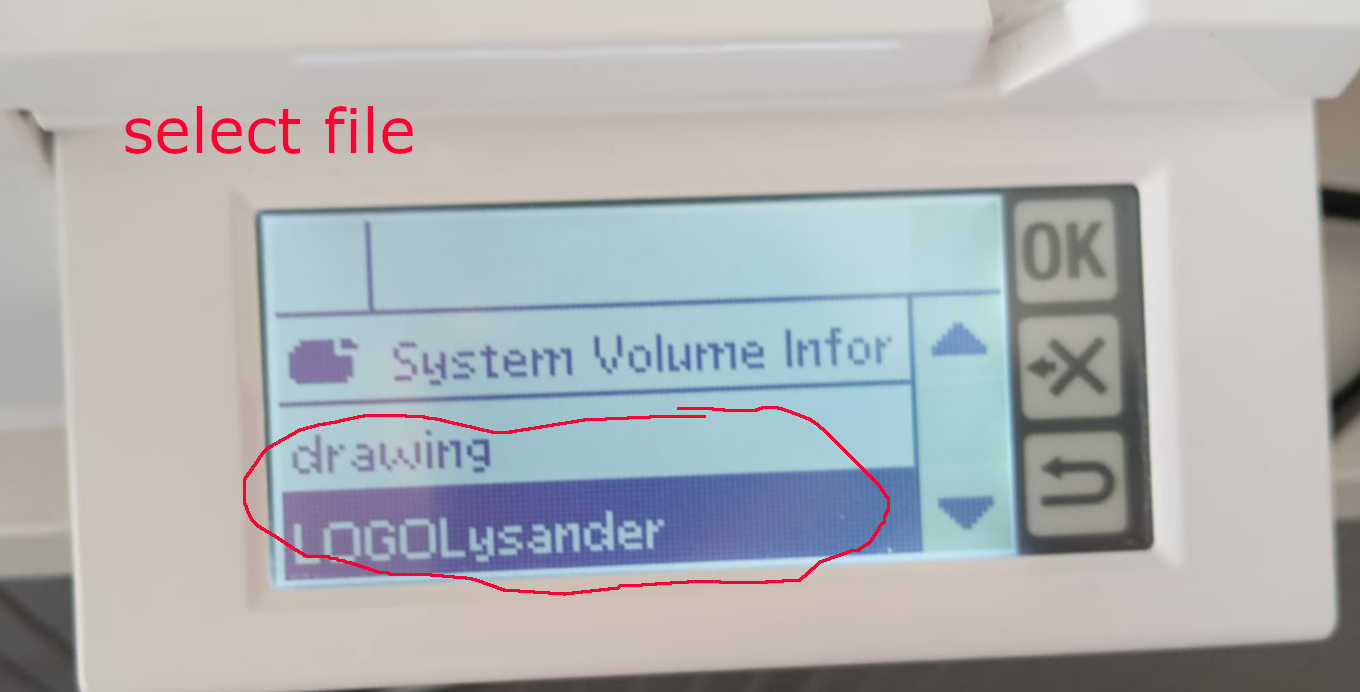
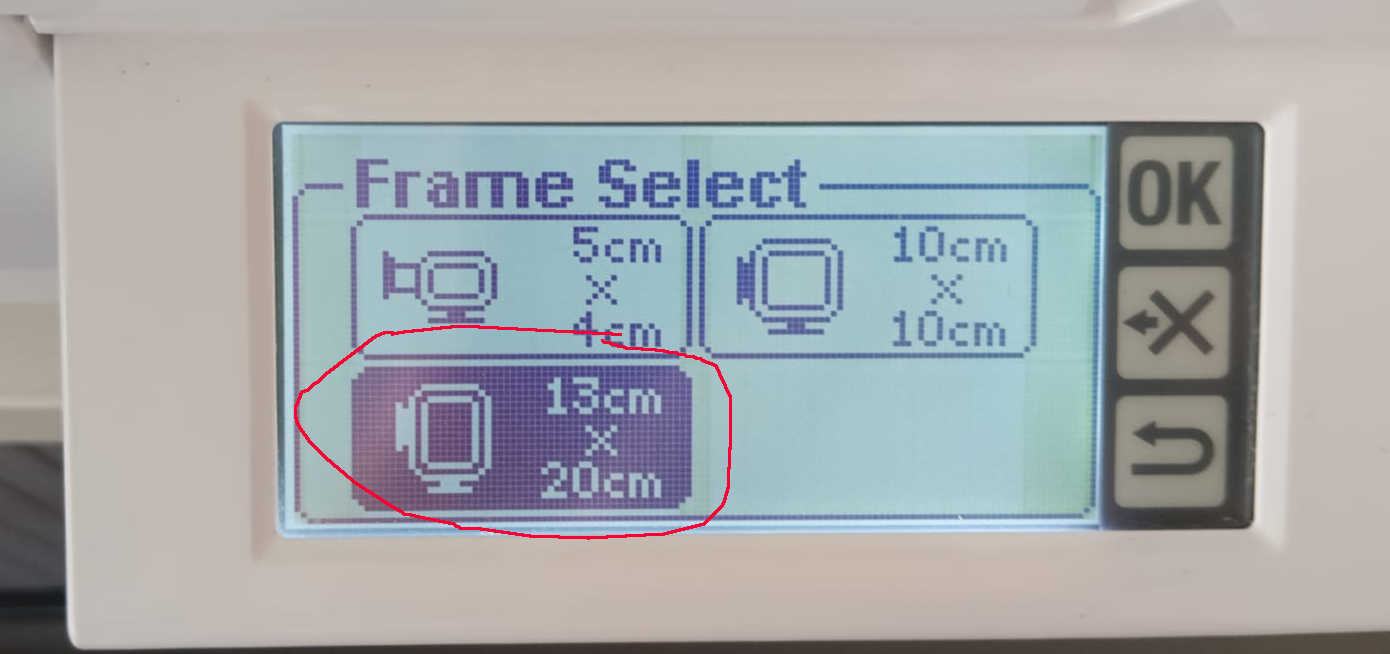
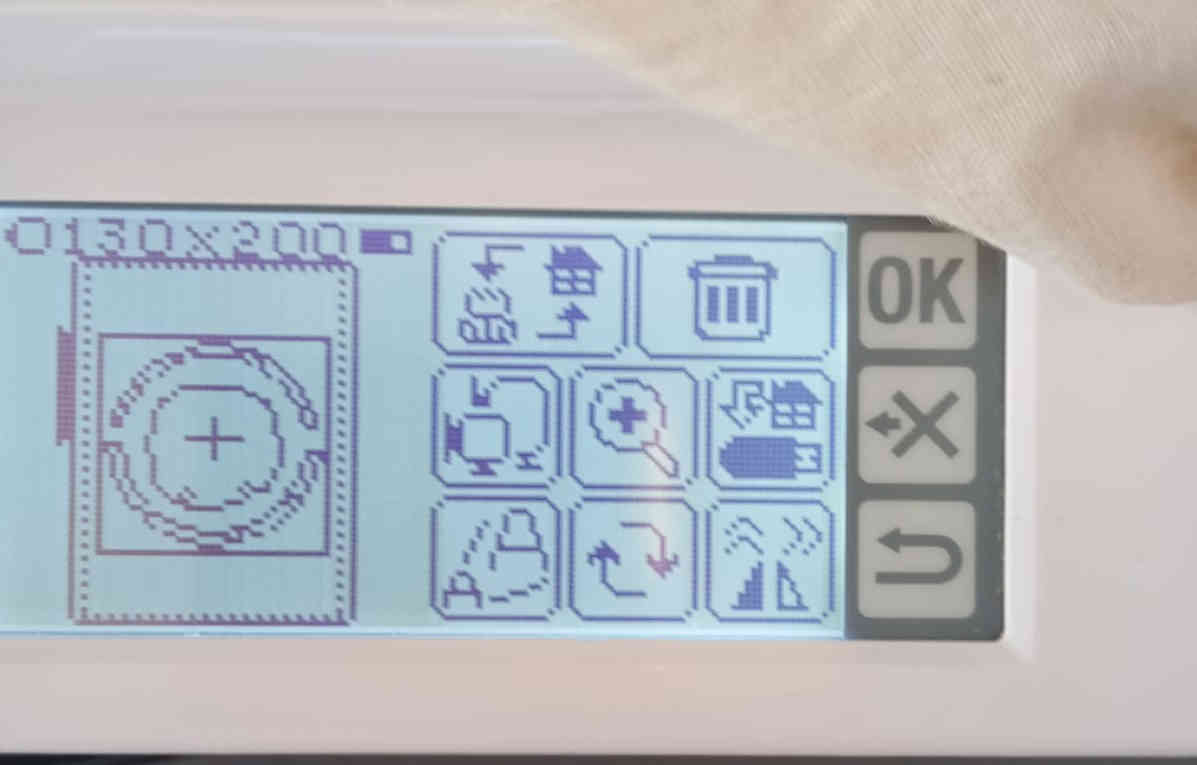
To upload the image to the Wertarbeit Embroidery machine follow the next steps on the screen. The UBS port is located in the Embroidery adaptor. once the USB is plugged in use the touch screen to find your file. Than select the the size of the hoop and the location you would like to embroider. The on screen slectional step is easy to follow.
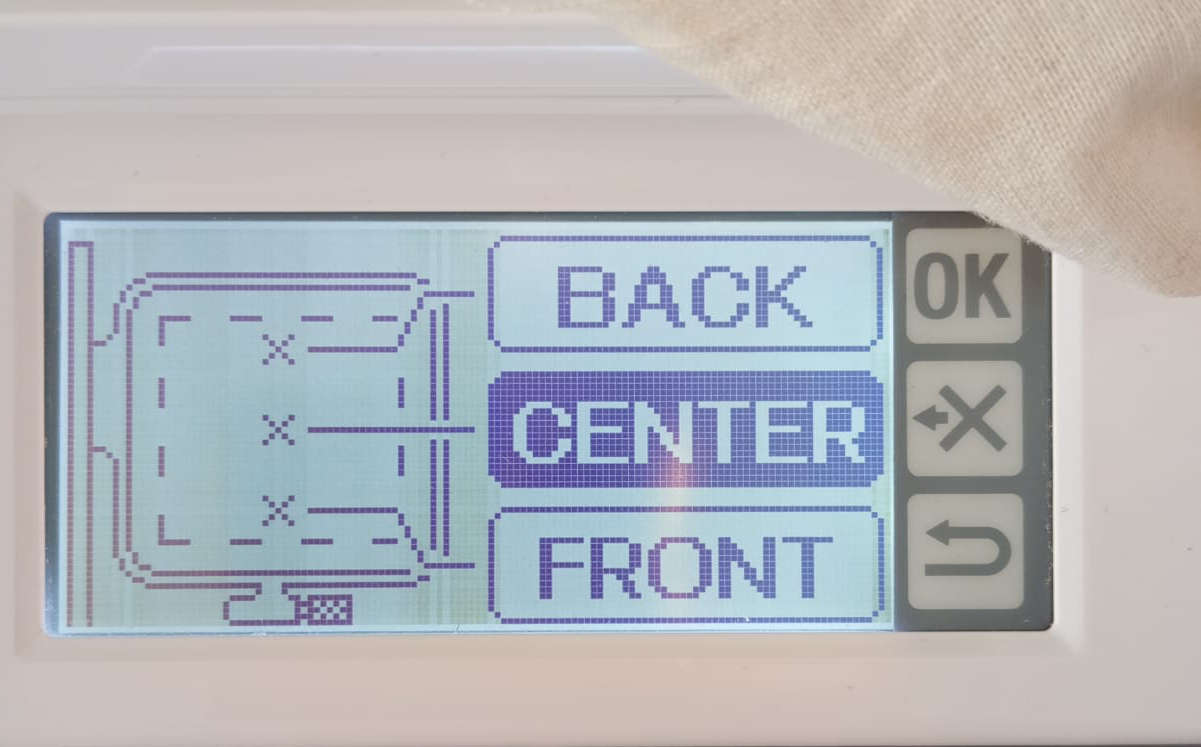
Once all settings have been selected you have setup everything to your liking. You can press OK. The graphic won't really show up with this display screen. As you can see below. Once you have pressed OK the sowing machine will start up.
Testing
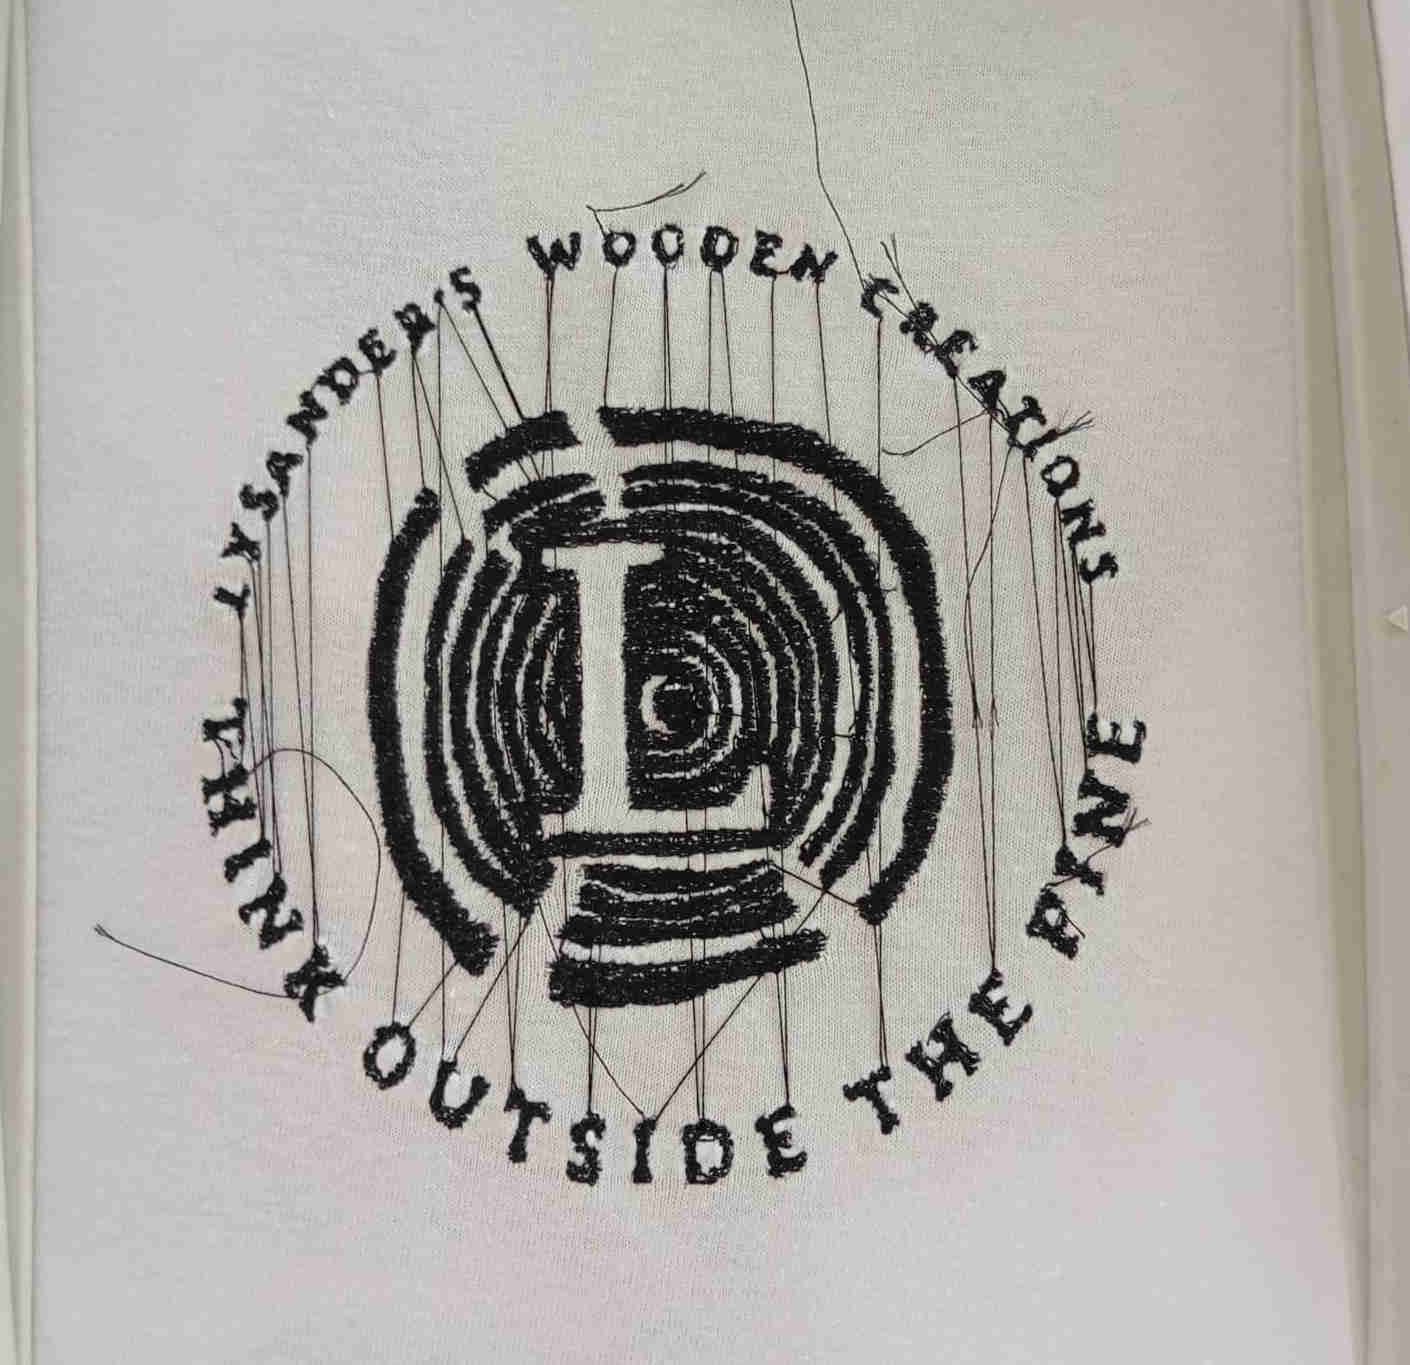
I left most the setting as they were on the Automatic settings, this yielded really good results. You have the option to speed up the process, but this resulted in the stitching not looking as nice in some areas. I made two different test runs. One with just my name, to play around with the manual settings such as Thread tension and Speed setting. Once I found the speed that I was happy with I went ahead and got the logo from the assignment Computer controlled cutting Ran the same test again. Here are the results of those tests.
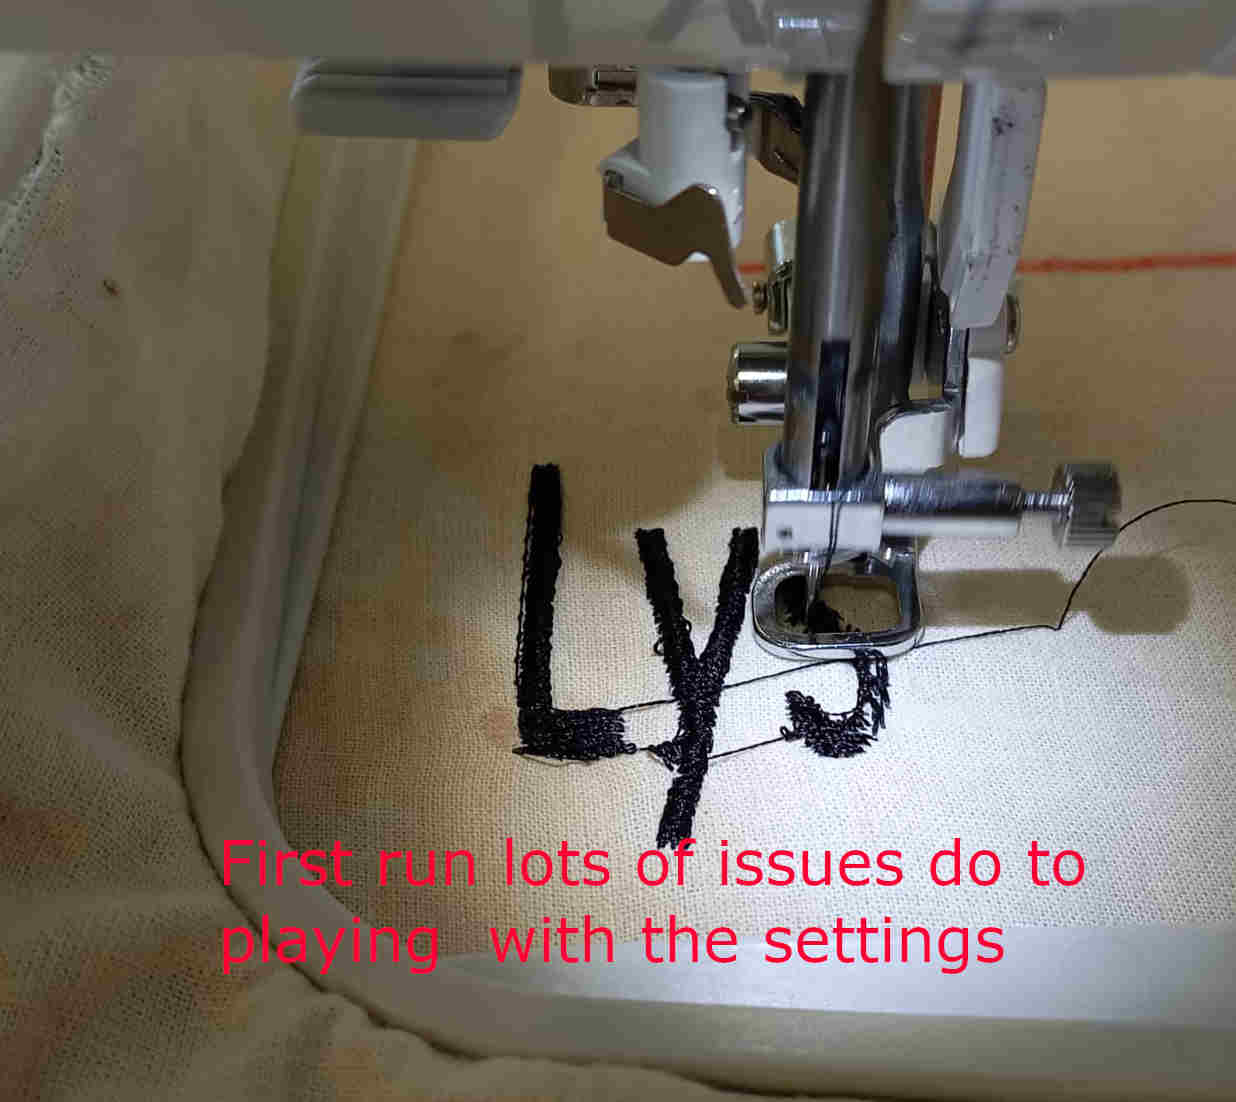
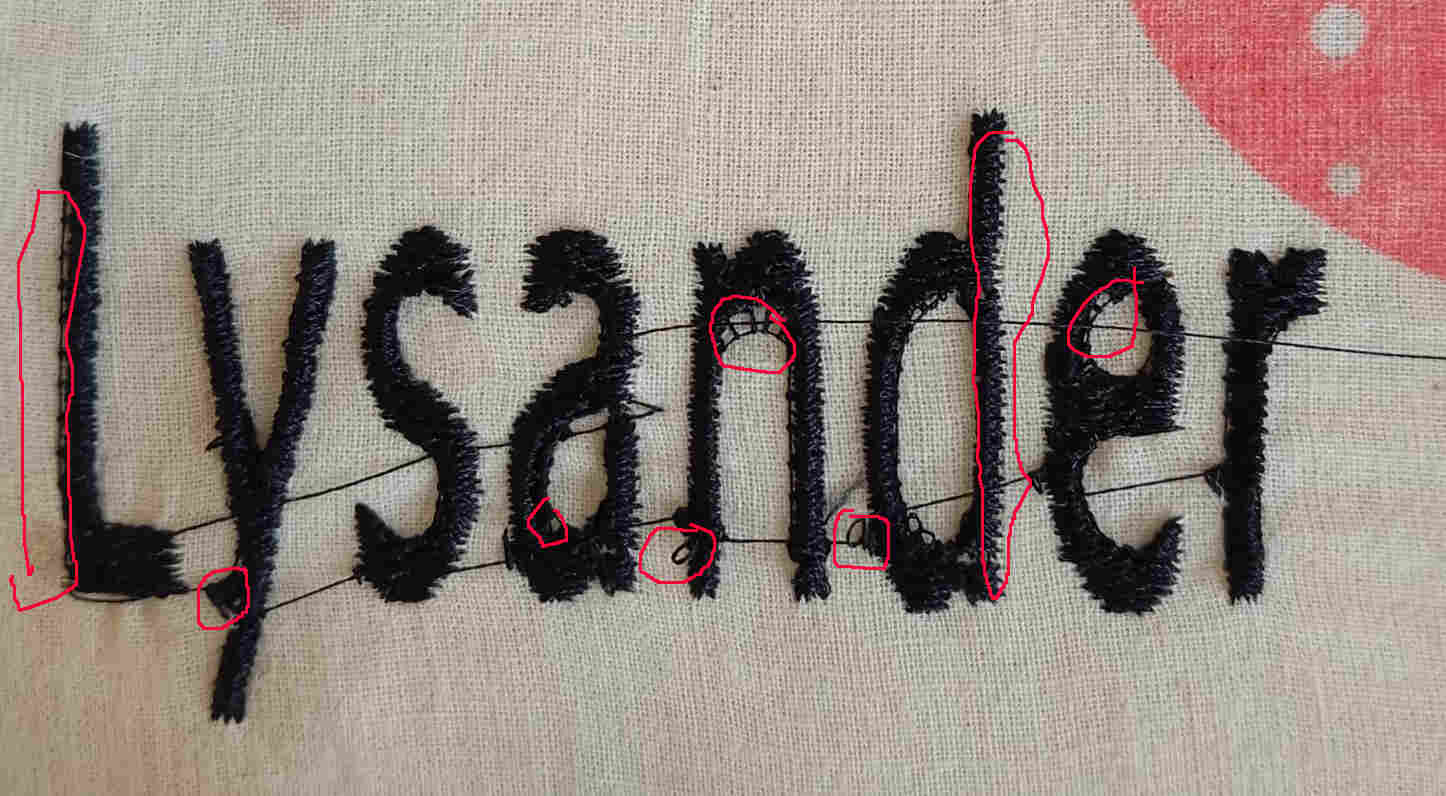
The result was less then perfect, this may also be the result cause the cloth was not pulled tight enough or the result of the bottom bobbin not having been spooled with the proper tension. As you can see there are mistakes in every letter. Running the second test I left everything on the Automatic settings as well as spooling of the bobbin. That resulted in much better quality of the stitches.
Second Test
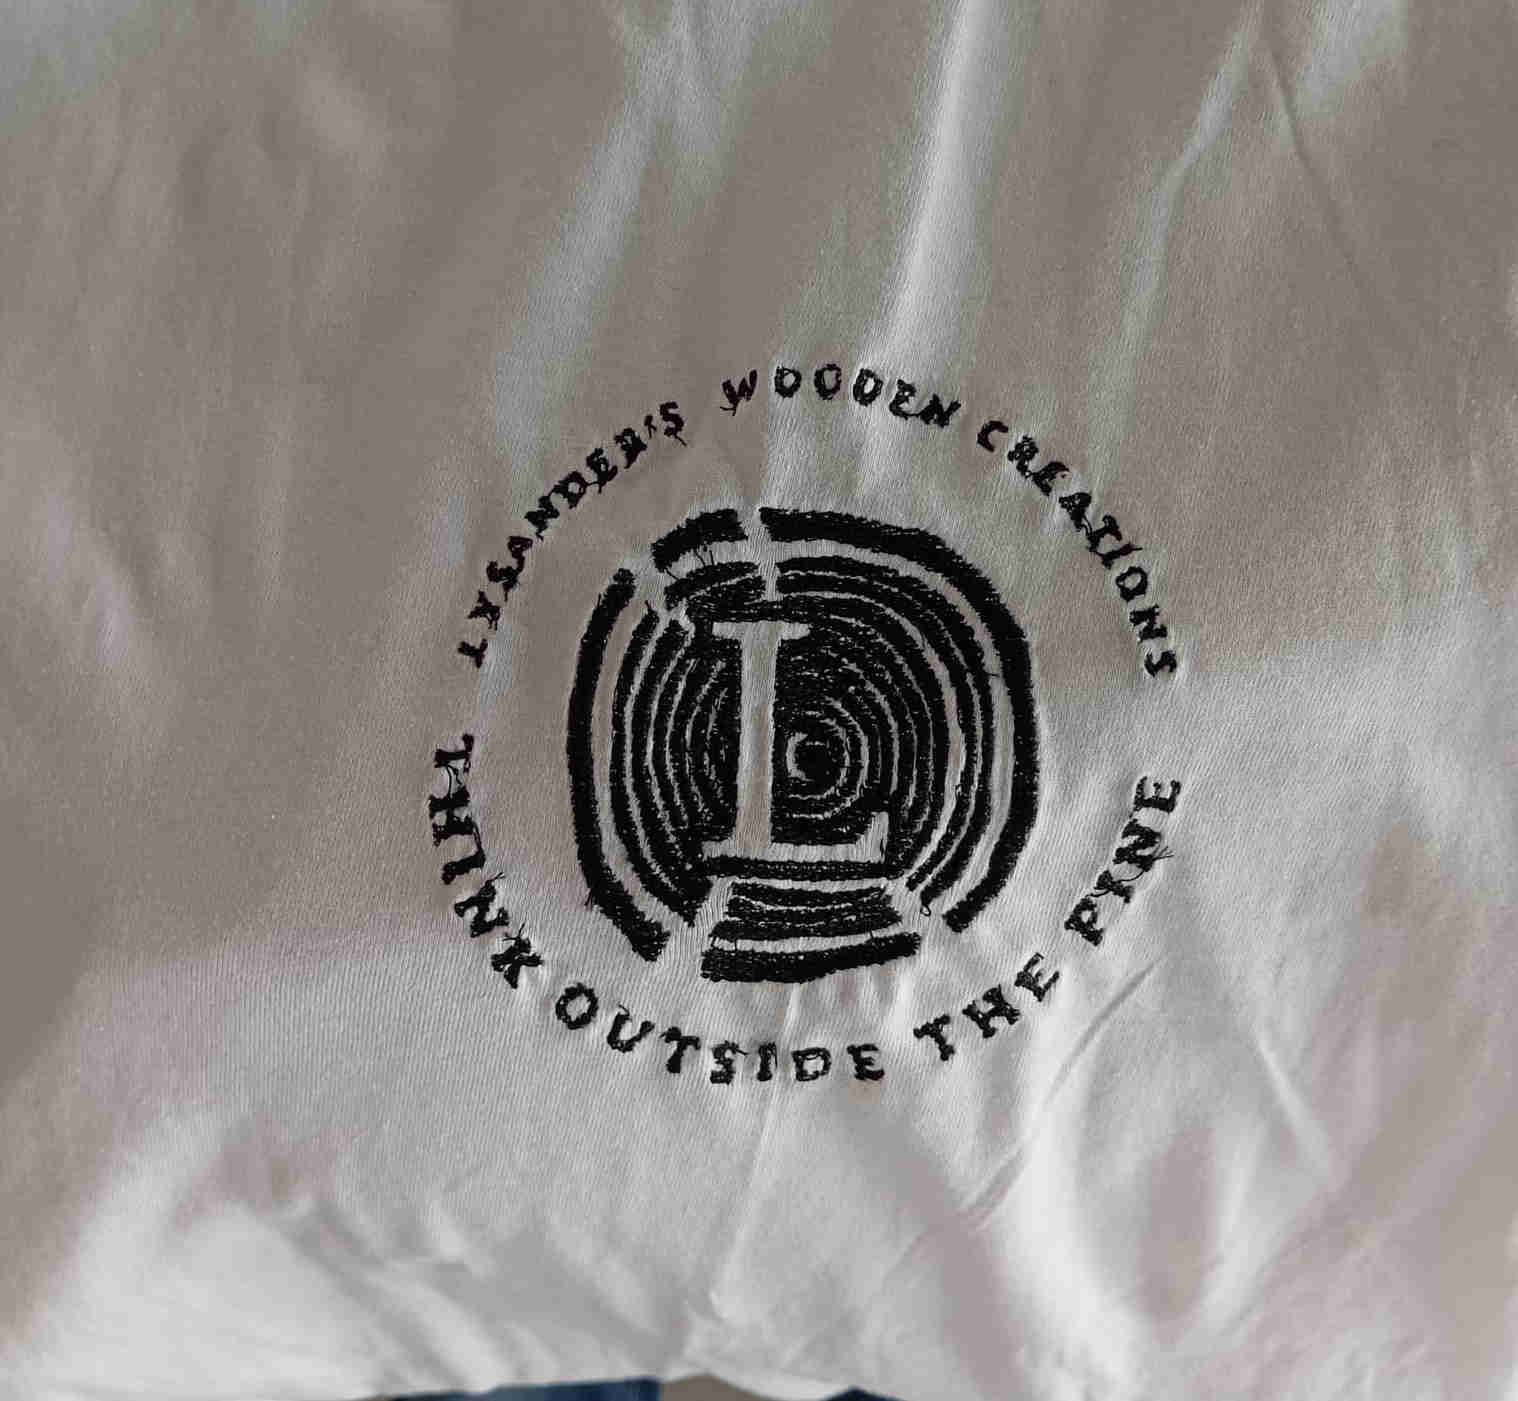
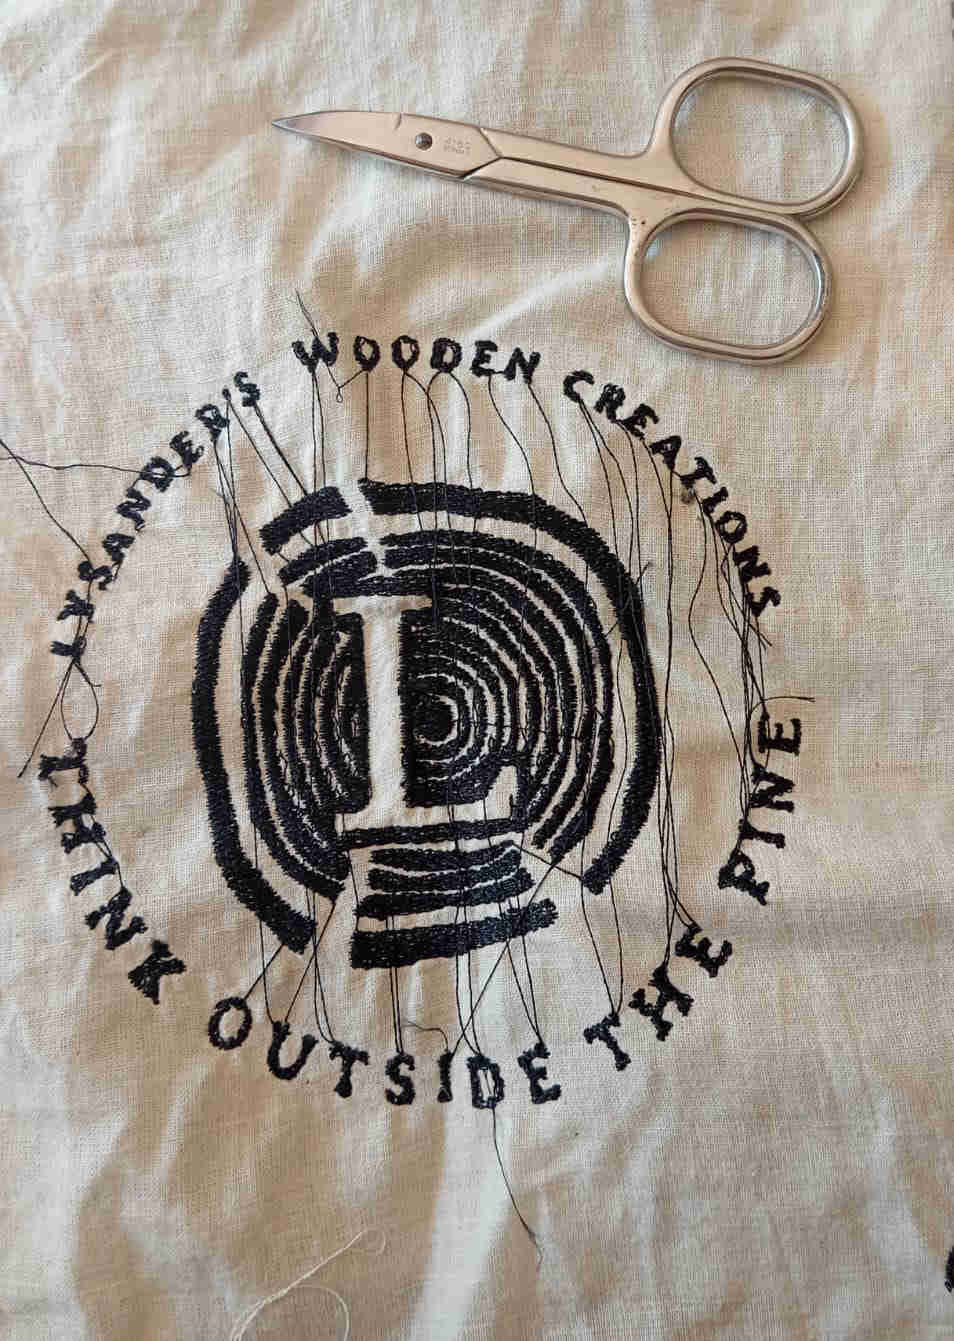
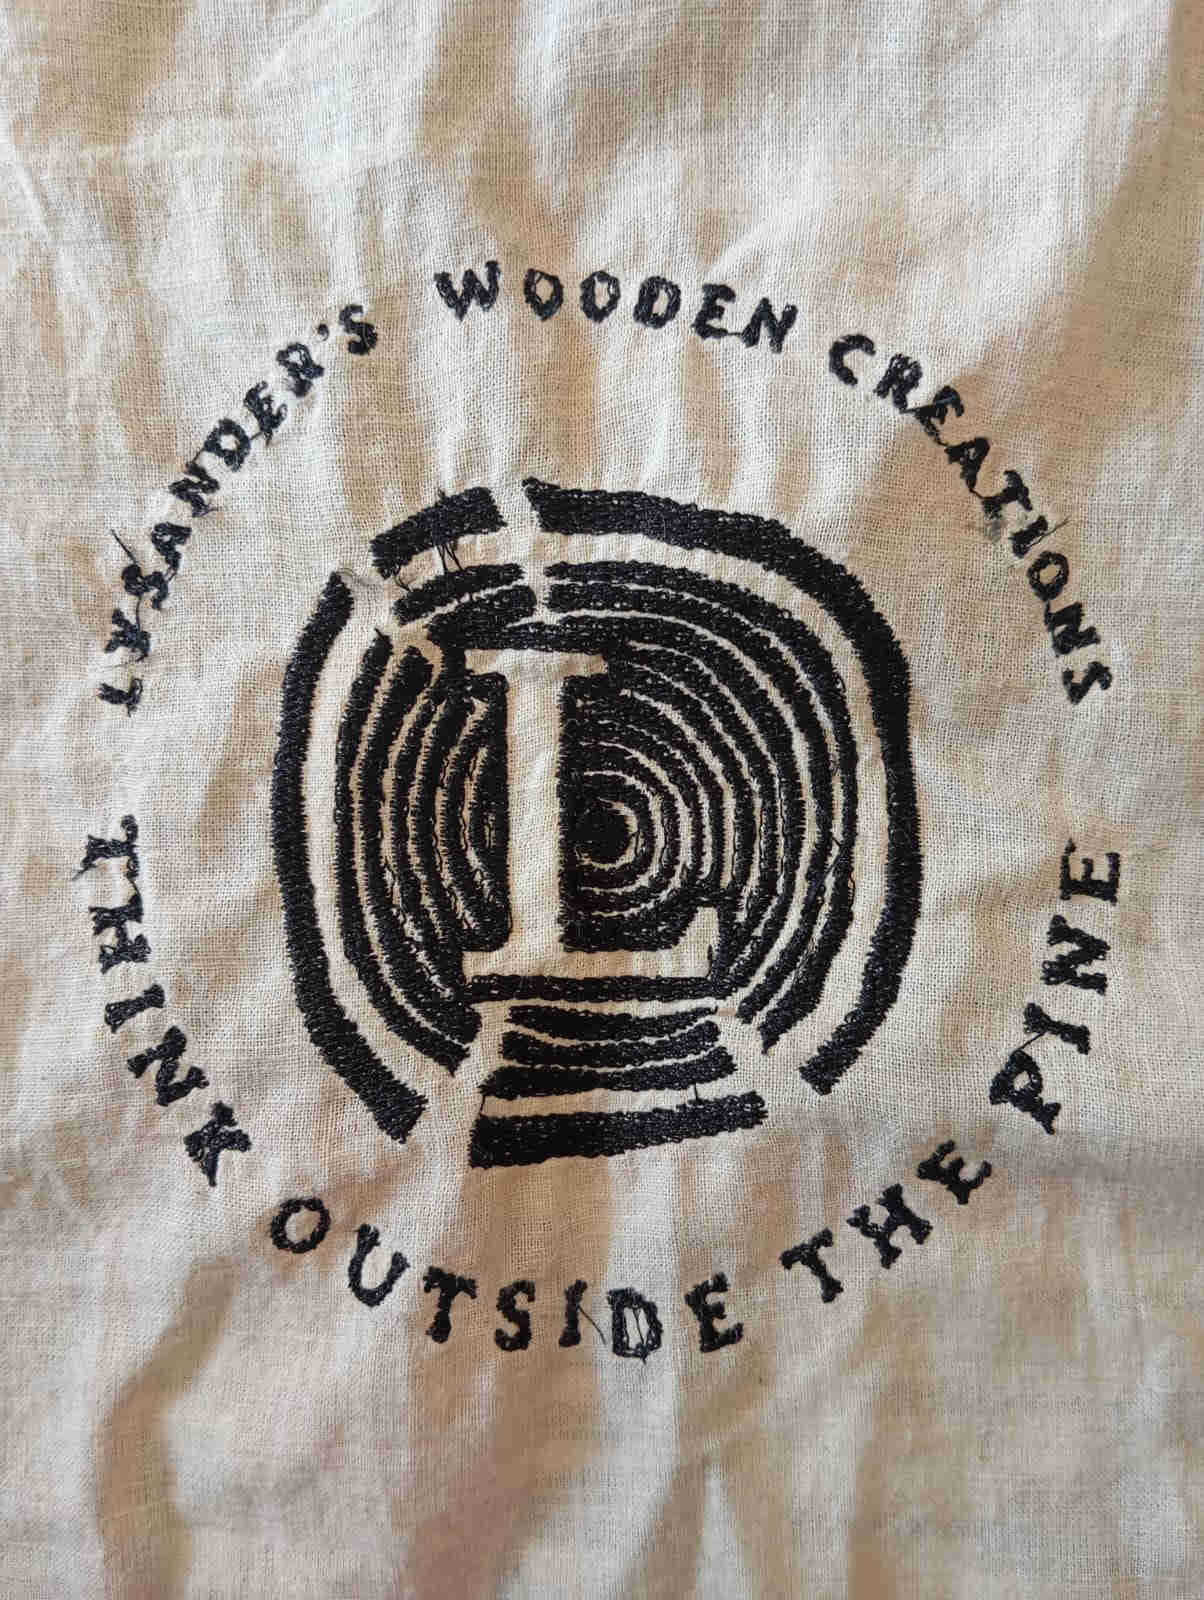
Here I went ahead and ran a full bottom bobbin to check if I would have to spool up a second bobbin as the logo is 50mm by 50mm and has a lot of detailed curves. The result was much better. This was do to the several different factors. One I felt every setting on auto mode, secondly I pulled the coth as tight as I could. The result was near perfect and one that I could live with on a T-Shirt. As for the lettering I will let the Embroidery sowing machine run a little slower so that the finer detailed result will look better.
Resulting test
Running the test
Post Processing
As with all forms of manufacturing, wether 3D Prints, building furniture, making parts on a mill or lathe, there is always some cleaning up process involved. In this case we need some small scissor to remove all the connecting threads. We will also see that this needs to be done on both sides of the embroidery. Here I also noticed that do to the lack of tension of the cloth the under lying cloth also was not properly tension. This lead to the letter being less than optimal, the thread will pull tight letting the cloth bunch up. To avoid this on a T-shirt make sure that both top and the under laying cloth is pulled tight. Leaving not room for the two cloths to slip or loosen during the process of embroidering the shirt.
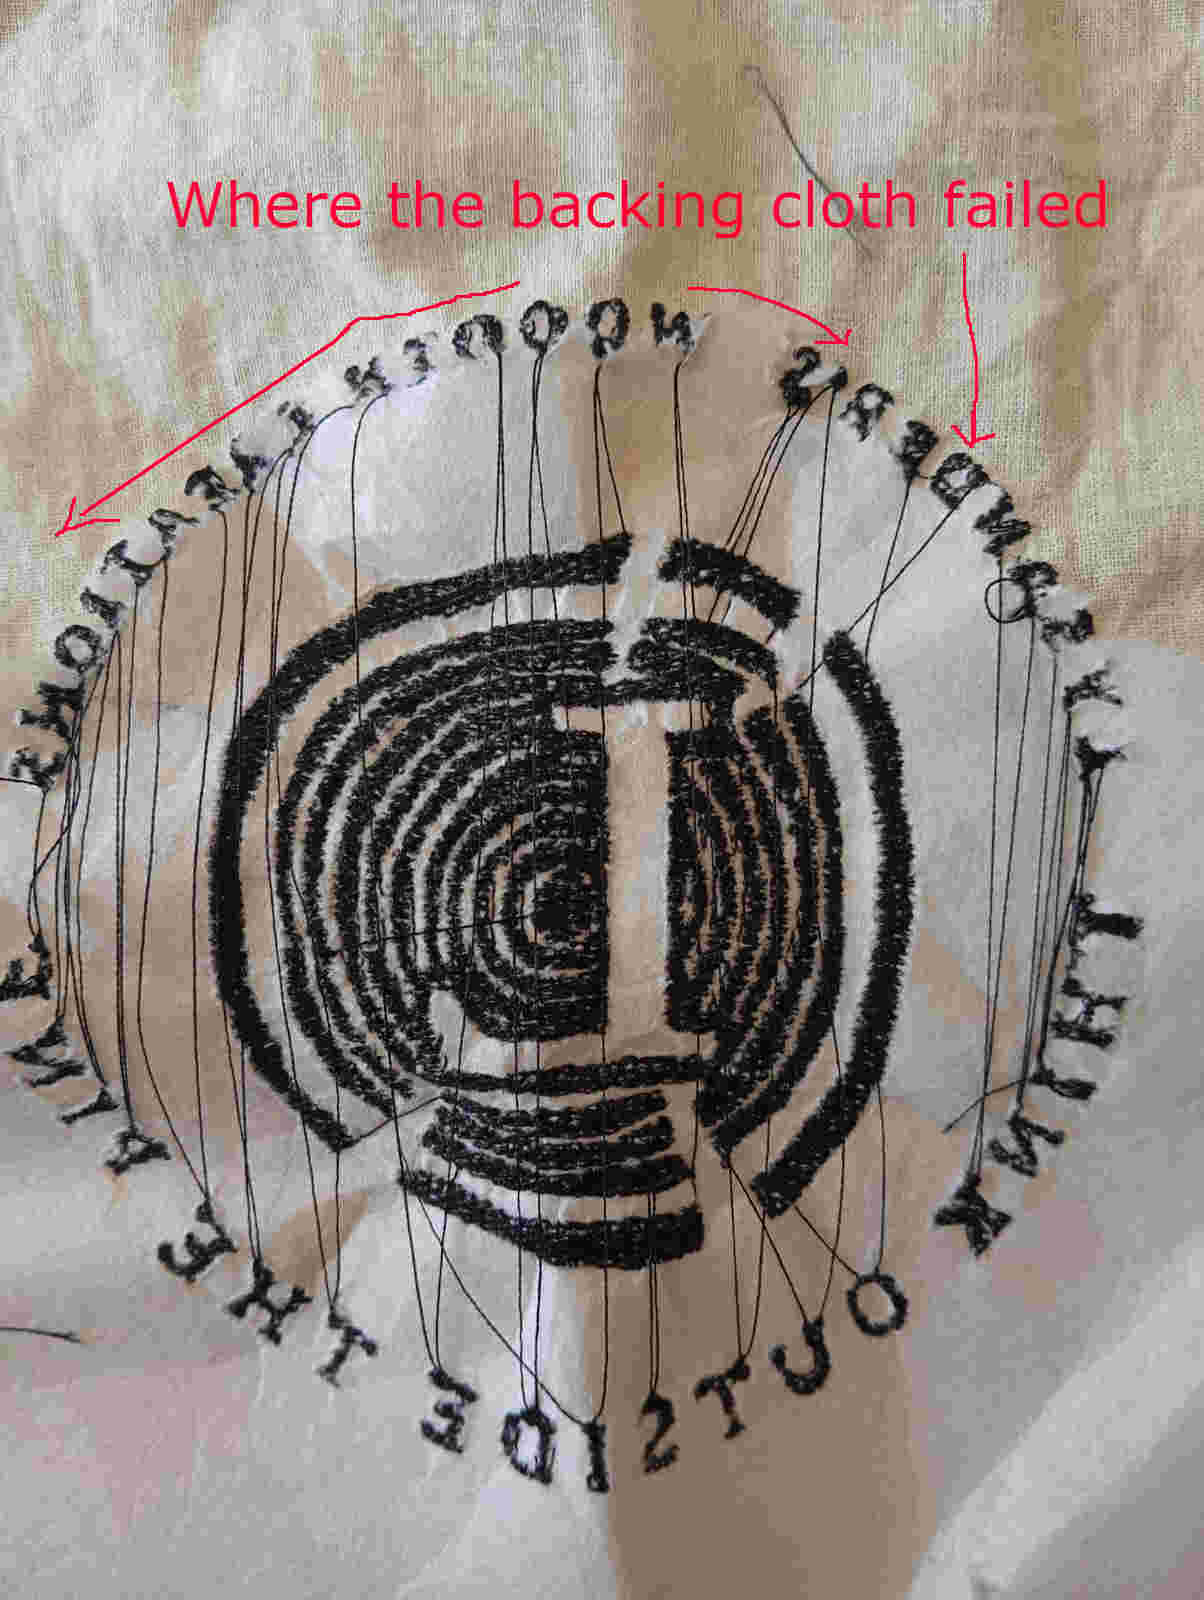
Result after Post Processing
Next lets run this on a T-shirt. I am curious how the result here will compare to new cloth where I made sure that everything is tensioned correctly and all the speeds the
thread tensions have been worked out what the resulting shirt will look like. After all the testing and playing with the setting I hope to have a clean embroidered shirt to
take home. All of the factors that needed to be taken in to consideration before starting up the embroidery process.
Having run the same process on the shirt yielded the same result. I would how ever next time recommend adding a stronger backing or even using some spray adhesive to help the backing cloth to stiffen up the cloth so that stitching process does not move the cloth as much when the needle goes up and done. On other things I would do is see what different setting in inkstitch could improve the quality of the embroidery. With the current result I am happy with, as a first time doing embroidery. This was a lot of fun and I would recommend doing this again. It is fairly easy and there is room for improvement, I am sure that I will revisit this process in the future and try different cloths and even a two color process, which I did not figure out how to do with the setting on the sowing machine.
Hero shots