principles and practices, project management
Topic(s) of this week
principles and practices, presentations, introductions (video), project management (video, review)
Assignments
Individual assignment
Principles and Practices (part 1 of 2)
- Plan and sketch a potential final project
Project Management (part 2 of 2)
- Work through a git tutorial.
- Build a personal website describing you and your final project. Refer to the lecture material for examples.
- Upload parts 1 and 2, to the class archive.
- Sign and upload Student Agreement
What I think I already know
- I’m quite proficient in HTML, CSS, JS and PHP. So building a website shouldn’t be that hard for me.
- I grew up using computers in MS-DOS. Before the windows era (old? No, just lucky to have a dad that was an early adopter). I used linux in the past as well. So I’m totally fine with command line.
- Managing projects is what I’ve done professionally. So I should be able to manage myself here as well.
What I want to learn
- Git. I only used it sparsely to pull projects from github.
- SSTM planning. Let’s see if this way of planning suits me.
SSTM planning
Tasks
Estimated time not yet filled because I already started setting up git, mkdocs and started to sketch and think of my final project before diving into my planning. Will do better next time....
| Task | Estimated Time | |
|---|---|---|
| Research time | Git | |
| MKdocs | ||
| final project | ||
| Planning time | ||
| Documentation time | make current documentation fit mkdocs | |
| configure obsidian + sync | ||
todo
- TODO Add programmers cases fusion files to repo
- TODO change order of menu items in mkdoc -> main menu + submenus (always lecture notes below weeklies)
- TODO add more screenshots re: git, mkdocs local server
- TODO describe obsidian self hosted live sync
- TODO create planning for final project
Supply
| Day | Supply | Tasks |
|---|---|---|
| Thursday | 08:00-09:30 (train) | |
| 10:00-18:00 | ||
| Friday | 9:00-13:00 (fablab) | - (other appointments) |
| 14:30-16:00 | Get static site generator done | |
| 20:00-23:00 | Try to combine Obsidian and mkdocs | |
| Saturday | 14:00-17:00 | Get documentation in markdown |
| Sunday | 19:00-22:00? | Make documentation work locally in mkdocs |
| Continue sketch final project | ||
| Monday | ||
| 13:00 - 15:00 (fablab) | Compress images and videos watch lecture Julian |
|
| 20:00 - ? | First push to gitlab |
|
| Tuesday | 9:00-12:00 (fablab) | customize mkdocs theme Document obsidian self hosted live sync |
| 19:00 - ? | make planning for final project. | |
| Wednesday | 9:00-12:00 (fablab) | - (other appointments) |
| document lessons learned of this week Final push to gitlab. |
||
| 12:00-13:00 | Local review | |
| 13:00-14:00 | Regional review | |
| 15:00-18:00 | Neil time |
Individual assignment Principles and Practices (part 1 of 2)
The idea of my final project is to create a digital musical instrument. It should at least output MIDI, but ideally have a build-in sound engine. This is why.
See final project documentation for the planning and my sketch.
Individual assignment Project Management (part 2 of 2)
Setting up fabcloud
Use powershell instead of command prompt as powershell has better history. And you can use linux commands.
Or beter: use windows terminal (microsoft docs) and set it as your default.
To get windows powershell as rightclick to open it immediately in the right folder, I used this howtogeek
Technology is never the answer #henkquote
SSH key
See gitlab manual
SSH is required for secure communications when using Internet.
Creating your own public and private key is required to do this.
Currently the preferred encryption is ED25519.
ssh-keygen -t ed25519 -C "gitlab: l.a.kuipers@saxion.nl"
Don’t use a passphrase....
The result are some files in the .ssh folder:
- id_ed25519.pub -> public key
- id_ed25519 -> private key
Now upload the public key in gitlab:
- gitlab profile -> preferences -> SSH keys
- Add new key
- copy public key (not the file, the file content) into the key field
- Give it a name to identify this key.
Next is to create a config file in the ssh directory so Windows can talk to gitlab.
to use this key to securely talk to gitlab, save these settings in the ~/.ssh/config file:
# Private GitLab instance
Host gitlab.fabcloud.org
PreferredAuthentications publickey
IdentityFile ~/.ssh/id_ed25519
User git
IdentitiesOnly yes

# if github is going to be used too:
# Host gitlab.com
# PreferredAuthentications publickey
# IdentityFile ~/.ssh/gitlab_com_rsa
Clone
Next create a directory and clone the fabcloud repository:
mkdir fabcloudRepo
cd fabcloudRepo
git clone git@gitlab.fabcloud.org:academany/fabacademy/2024/labs/waag/students/leo-kuipers.git
And identify yourself (to the local git repository):
git config --global user.email "l.a.kuipers@saxion.nl"
git config --global user.name "Leo"
Yeah, got my first git clone!
GIT
Git commands to use a lot:
git status
git add .
#or
git add <changed_filename>
git commit -m "Commit message"
git push
git log
Per git commit, the total file size may not exceed 10MB.
origin/master is the repository on gitlab.org.
After making sure my mkdocs page (see below) was set up properly, I wanted to push it to gitlab. I attended the Julians’ recitation on GIT and version control where he specifically talked about how to set things up for mkdocs. The mkdocs template can be found here: gitlab.fabcloud.org/academany/fabacademy/templates/student-template-mkdocs
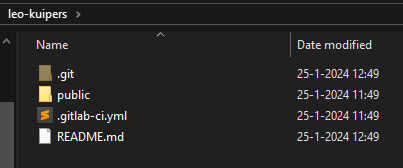
I’m going to clone my git page into a folder on my harddrive. Next I’ll add:
- .gitlab-ci.yml file from the template
- requirements.txt from the template
- mkdocs.yml
- my documentation (in the docs folder)
I also configured the .gitignore (read all about it) to ignore my .obsidian folder.
Next step is to make changes to the mkdocs.yml file so it fits my needs, after that check in localhost if it looks alright.
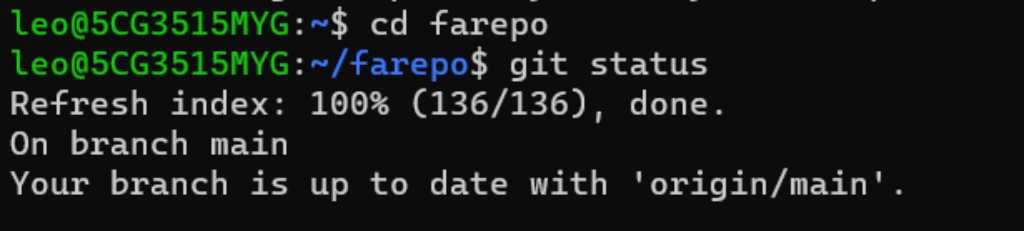
Now let’s commit & push after all that hard work we did! First checking git status:
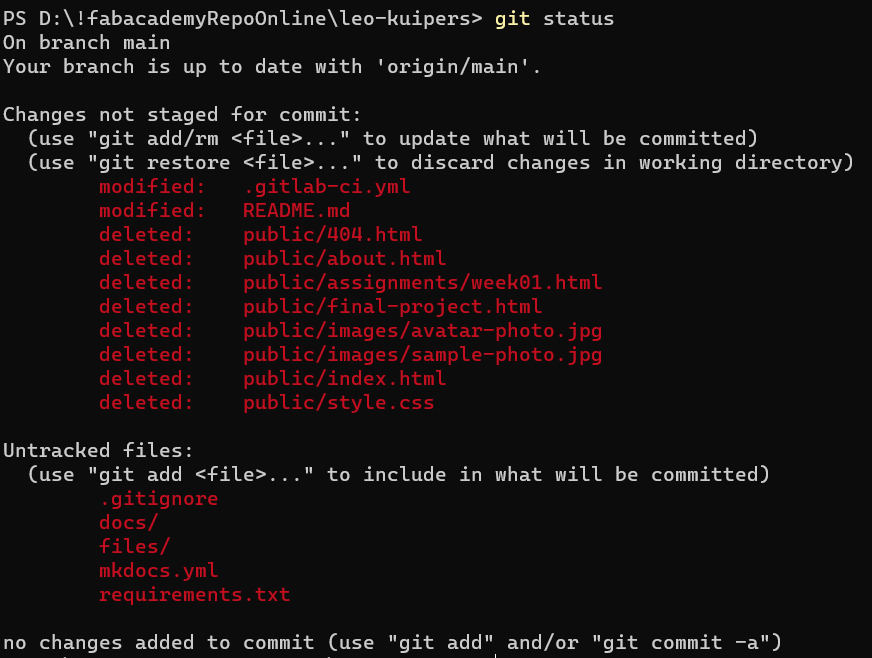
Next git git add . because this looks exactly what I want to happen.
Lots of warnings happen now:

I found this stackoverflow answer helpful in explaining what’s going on, so I can now safely ignore the warning:
The side-effect of this convenient conversion, and this is what the warning you’re seeing is about, is that if a text file you authored originally had LF endings instead of CRLF, it will be stored with LF as usual, but when checked out later it will have CRLF endings. For normal text files this is usually just fine. The warning is a “for your information” in this case, but in case git incorrectly assesses a binary file to be a text file, it is an important warning because git would then be corrupting your binary file.
So now let’s commit:

Lots of changed files, insertions and deletions. As expected for this first commit.
So here goes. The push. And it is done! My first fabacademy push!
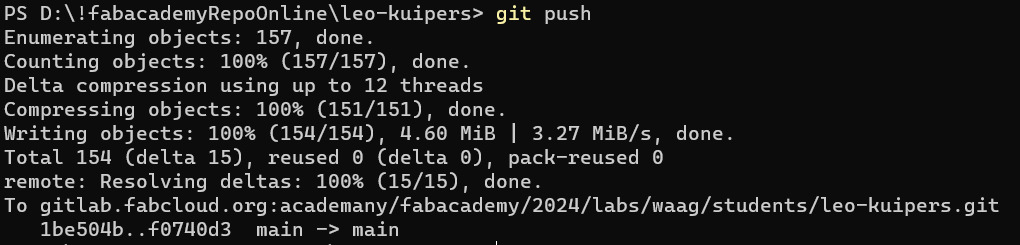
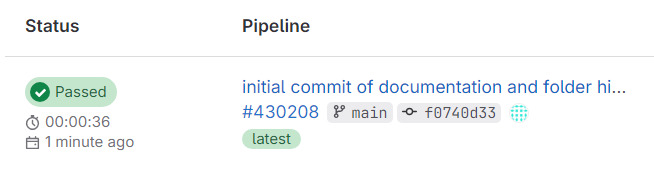
The site is looking good. Let’s check gitlab:
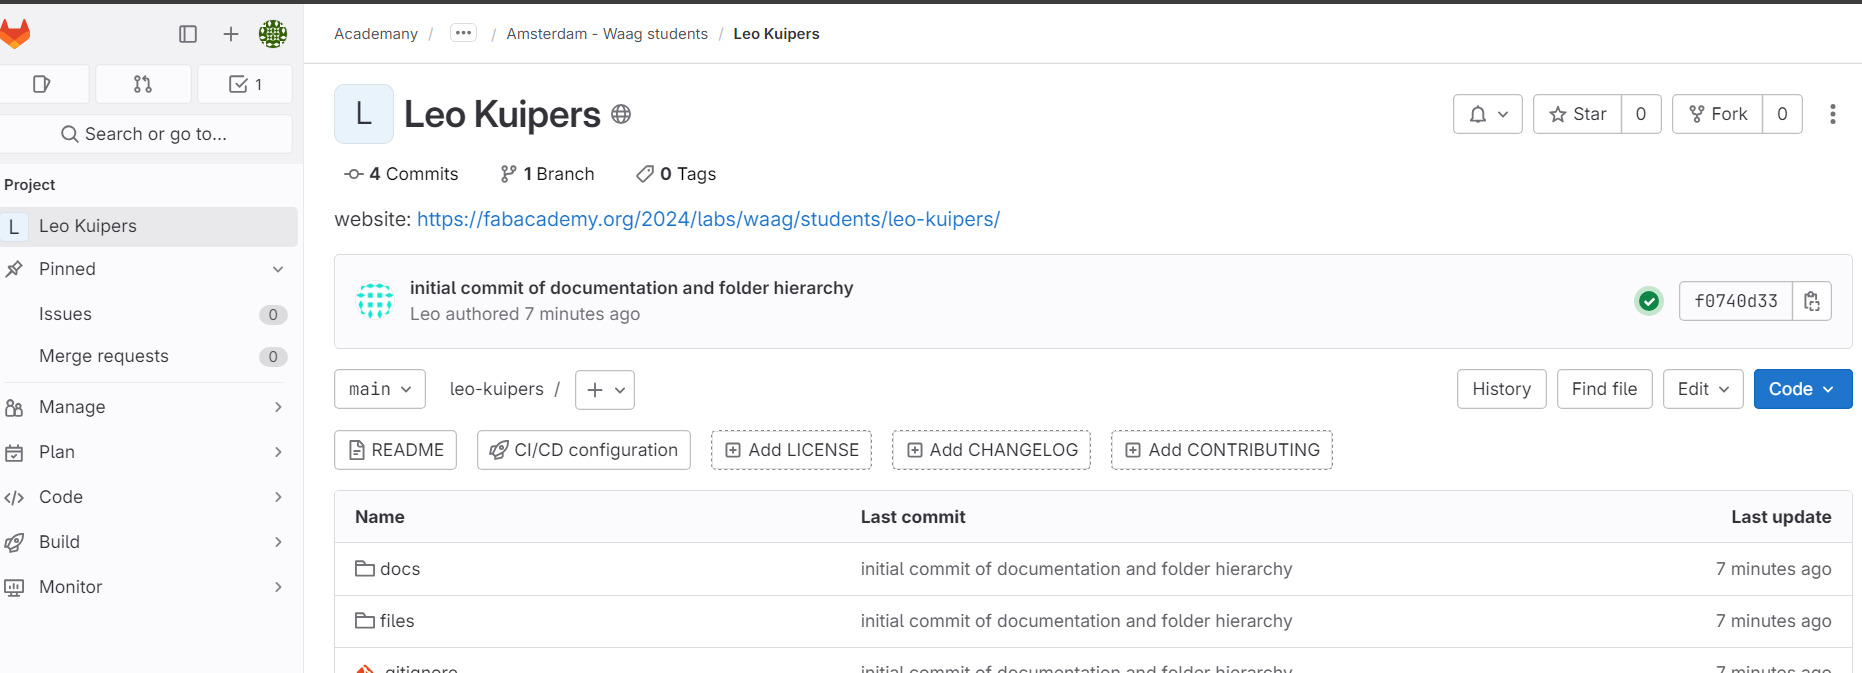
pipeline worked as expected as well with no errors or warnings in the pages job.
Job well done, now go to rest.
in linux
Install git: no need to do that :-) git comes pre-installed:

As I’m using linux in windows (WSL) and document in obsidian for windows, I created a symlink in my linux homedir so I can easily get to my documentation folder.
ln -s <real_folder> <symlink_folder>

ln -s /mnt/c/fabacademy/'!fabacademyRepoOnline'/'leo-kuipers' ~/farepo
This way I can just open terminal and cd farepo to get into my local Fabacademy repository.
mkdocs runs in python, which is pre-installed. Pip is not installed though, so sudo apt install python3-pip should be run in order to install any mkdocs theme like pip install mkdocs-material.
Yeah, mkdocs running in WSL linux works!

pipelines
the website can be automatically build. This is set up using
.gitlab-ci.yml
pages is a server program that can run scripts. Any script. Could build webpages, could build android apps, whatever.
After every commit, pages is automatically run.
- You can see what pages did by checking my gitlab website
- Go to build -> pipelines
- click the status button of the commit you just did (the button where it says “passed”
- you’ll see the jobs it did during this pipeline. Click the job of interest
- check the shell for errors and other messages.
Image compression
Imagemagick was already installed in week 0. Using it on windows, the command is:
magick convert [options ...] file [ [options ...] file ...] [options ...] file
General rule of thumb: image size should be below 100kB unless with a reason.
Around 900px width is quite acceptable.
Checking sizes of all files in a directory: On linux the command is called ncdu. But on windows I’ll have to find out.
I will try with resizeing to 1024px width maximum using 1024> and quality 70 and see how this will turn out to be. I will also have to convert everything to jpg (some screenshots are png). The basic command is
magick convert [original image] [converted image name]
So lets try to cripple my beautiful pictures. This is going to be tough for me as I spent the last 15 years in the audiovisual industry where it was all about higher quality, more pixels and less compression. Doing this the other way round feels highly unnatural to me.
So after testing, a width of 1024px seems acceptable to me. I’ll keep this as a standard. Now for compression:
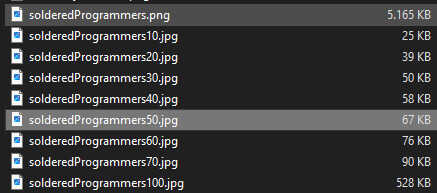 As you can see here, converting from png to jpg drastically decreases filesize. Not enough though. So compression is required. a 50% compression leads to 67kB. Sounds decent. How does it look? Well… Let’s not go there. Let’s just say this is acceptable.
So the command will be:
magick convert [original image] -resize '1024>' -quality 50 [converted image name]
I’m going to batch resize and try to get rid of those nasty PNGs in the first place, so I only use JPG as original. Just overwriting the original with the converted one will make me spend less time changing image links in my documentation. So that’s what I’ll do.
To do that I better use the magick mogrify command. From the docs:
convert converts an input file using one image format to an output file with the same or differing image format while applying an arbitrary number of image transformations.
mogrify transforms an image or a sequence of images. These transforms include image scaling, image rotation, color reduction, and others.
See imagemagick docs
I do have some PNG files still, so to batch convert them into JPG:
magick mogrify -format jpg *.png
So the final compress command will be:
magick mogrify -resize '1024>' -quality 50 *.jpg
A number followed with a > symbol mean “Shrink an image with dimension(s) larger than the corresponding width. If you want to do the same thing with height, the command would be x[number]>, so for example x1024>.
In linux
I installed imagemagick using sudo apt install imagemagick.

Usage:
convert [original image] -resize '1024>' -quality 50 [converted image name]
mogrify -resize '1024>' -quality 50 *.jpg
Video compression
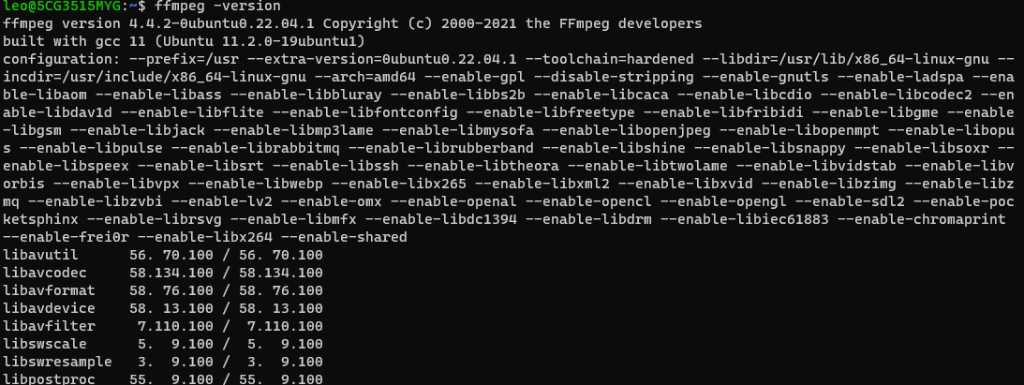
Next in line is video compression. Although this is not a topic of this week, I already made 2 videos in my final project folder which I’d like to upload to git. But they need compression as well. FFMpeg is made for this. I already installed FFMpeg in the bootcamp week, so now find out how it works.
To do that I looked at the documentation of Michelle Vossen.
Convert mov to mp4:
ffmpeg -i input.mov -q:v 0 output.mp4

Compress mp4 AND REMOVE AUDIO (because of the -an):
ffmpeg -i input.mp4 -vcodec libx264 -b:v 500k -vf scale=-2:500 -an output.mp4

The reduction after conversion to mp4:

The reduction after compression:

Let’s do this in one go:
ffmpeg -i input.mov -q:v 0 -vcodec libx264 -b:v 500k -vf scale=-2:500 -an output.mp4
in linux
install using sudo apt install ffmpeg
Usage:
ffmpeg -i input.mov -q:v 0 -vcodec libx264 -b:v 500k -vf scale=-2:500 -an output.mp4
Set up static site generator
Some generators:
Markdown Markserv Strapdown.js Pandoc Hugo Jekyll VuePress MkDocs
They can run locally so you can see how your site is going to look like without pushing to git.
mkDocs
MkDocs is the easiest one to set up. Great for documentation purposes.
From the manual:
pip install mkdocs
pip install mkdocs-material
Due to windows this doesn’t work. You have to use py -m <commandname>. #fail
This is the second time this happened to mee. See week 0… Argh…
See stackoverflow:
So:
py -m pip install mkdocs
py -m pip install mkdocs-material
next create a new mkDocs project and “serve” it
mkdocs new <projectdirectory>
mkdocs serve
Changes to the source will be detected automatically, the site will be rebuild and even the webbrowser will be automatically reloaded.
Directories in the root projectdirectory will become tabs in mkdir. Markdown files in these directories will become “menu-items” under this tab.
Config file of mkDocs is mkdocs.yml. E.g. adding theme, config menu items.
There are some themes. Find them cataloged here:
I’m going to try the Dracula theme, so I’m installing
py -m pip install mkdocs-dracula-theme
Next I tried material theme. Just because it looks clean.
py -m pip install mkdocs-material
The mkdocs.yml file is used to configure how mkdocs works. Things to add:
- theme
- todo checkbox plugin
like this:
site_name: My Docs
theme:
    name: material
markdown_extensions:
  - pymdownx.tasklist:
      custom_checkbox: true
And then a #fail: My ordered and unordered lists didn’t work properly at all. The answer was given 14 years ago in this stackexchange post: I need to add a blank line before the list. Why?
The answer is that this is how Markdown works.
I still think it’s a usability issue that affects everyone who only writes lists occasionally. If you are used to writing your lists without blank lines - for example if you use Microsoft Word or Outlook - then the solution is counter-intuitive and not documented in the Markdown reference.
Apparently “most users figure it out eventually” so it isn’t necessary to improve the documentation.
Well, the 2 whitespaces at the end of a line to make a page break are counter-intuitive as well. Got to live with it I guess…
mkDocs customization
So of course I want to customize mkDocs a little. There’s lots to tweak. See documentation here. So here’s what I did and where I got the info from:
- change site information, author, socials, etc. in mkDocs.yml, based on the fabacademy template.
- Font to Raleway, codefont to VT323 (in mkDocs.yml)
- Color palette to a custom css (see below)
- a logo and favicon: custom logo file as svg in docs/assets and point to it in mkDocs.yml
To use a custom color, as described here you should use a custom stylesheet. You can custom style anything of mkDocs in this custom stylesheet. To make this happen 2 things are required:
in mkdocs.yml
extra_css:
  - assets/extra.css
in docs/assets/extra.css
:root { /* custom primary and accent colors & gradient */
  --md-primary-fg-color: #3B5BA5;
  --md-accent-fg-color: #F3B941;
  .md-header {
      background: linear-gradient(135deg, #3B5BA5 55%, #E87A5D 75%);
  }
  .md-header .md-ellipsis { /* custom title color and font */
      color: #F3B941;
      font-family: var(--md-code-font-family);
      font-size: 2.0em;
      font-weight: normal;
  }
  nav.md-tabs { /* more gradients */
      background: linear-gradient(135deg, #3B5BA5 50%, #F3B941 70%);
  }
  nav.md-tabs .md-tabs__link { /* custom nav link color & font */
      color: #F3B941;
      font-family: var(--md-code-font-family);
      font-size: 2.0em;
      font-weight: normal;
  }
  .md-nav--primary .md-nav__title[for=__drawer] { /* custom color for mobile menu */
      background-color: #3B5BA5;
      color: #F3B941;
  }
  .md-header__button.md-logo img, .md-header__button.md-logo svg { /* larger logo */
      height: 2.2rem;
  }
  .md-typeset code { /* larger code font */
      font-size: 1.05em;
  }
}
Regarding the nice gradients I found here how to do it.
Then there are some plugins that make mkDocs life a bit better:
- awesome pages: a way to define the navigation items yourself in
mkdocs.yml; - git revision date localized: enables displaying the date of the last git modification of a page.
- glightbox: click an image to make it larger.
The awesome pages plugin requires a .pages file which defines how the nav looks like.
nav:
    - home: index.md
    - weeklies: weekly-assignments
    - final project: final-project
    - other: other
    - ...
These plugins are all installed using their respective pip install command and then enabled by putting them into mkdocs.yml under the plugins keyword.
These plugins will need to be defined in requirements.txt as well so the git pipeline knows that these need to be installed too.
hugo
get it from Hugo website You can install using Winget, Microsoft’s official free and open-source package manager for Windows.
winget install Hugo.Hugo.Extended
hugo new site quickstart
cd quickstart
git init
git submodule add https://github.com/theNewDynamic/gohugo-theme-ananke.git themes/ananke
echo "theme = 'ananke'" >> hugo.toml
hugo server
Config file of Hugo is hugo.toml located in the root folder.
Conclusion
So all these SSGs (static site generators) basically all do the same. One works on Python, or on Ruby, the other in Go, others vanilla JS, etc. And they all have different themes. So decision should be based on if you prefer a certain framework/programming language. But for documenting Fabacademy this will not matter at all. The other deciding factor would be if you can find a theme that fits. I looked at different demo sites for mkdocs, hugo and jekyll. I like the clean mkdocs. I have material theme running now. Probably going to customize it a bit, but for now, I choose you mkDocs! And I have serious issues typing in Jekyll, so I’ll probably never going to go for that....
Editors
Visual studio code
some plugins in VSCode allows for showing source control information:
- Git extension pack
- Git graph
- Git Vusualizer other interesting plugins, e.g. to work in other languages:
- Hugo plugin
- Yekyll plugin
- etc.
Repo organisation
So now let’s try if I can get my own documentation, that I’ve already written in markdown, into mkdocs.
For safety purposes, I first make a copy of my documentation into my testRepo and use the copy to set up mkdocs. If that works, I’ll find a way to do it with my actual documentation.
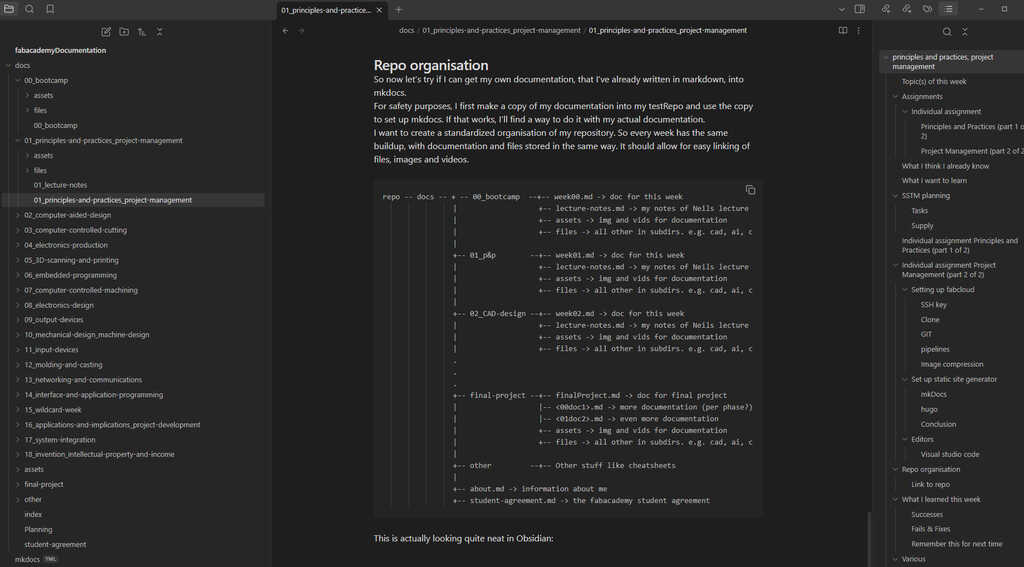
I want to create a standardized organisation of my repository. So every week has the same buildup, with documentation and files stored in the same way. It should allow for easy linking of files, images and videos.
repo -- docs -- + -- 00_bootcamp  --+-- week00.md -> doc for this week
      |          |                   +-- lecture-notes.md -> my notes of Neils lecture
      |          |                   +-- assets -> img and vids for documentation
      |          |
      |          +-- 01_p&p        --+-- week01.md -> doc for this week
      |          |                   +-- lecture-notes.md -> my notes of Neils lecture
      |          |                   +-- assets -> img and vids for documentation
      |          |
      |          +-- 02_CAD-design --+-- week02.md -> doc for this week
      |          |                   +-- lecture-notes.md -> my notes of Neils lecture
      |          |                   +-- assets -> img and vids for documentation
      |          .
      |          .
      |          .
      |          +-- final-project --+-- finalProject.md -> doc for final project
      |          |                   |-- <00doc1>.md -> more documentation (per phase?)
      |          |                   |-- <01doc2>.md -> even more documentation
      |          |                   +-- assets -> img and vids for documentation
      |          |
      |          +-- other         --+-- Other stuff like cheatsheets
      |          |
      |          +-- about.md -> information about me
      |          +-- student-agreement.md -> the fabacademy student agreement
      |
      +-- files -- all non-documentation files, e.g. cad, ai, c. Ordered in subfolders
This is actually looking quite neat in Obsidian:
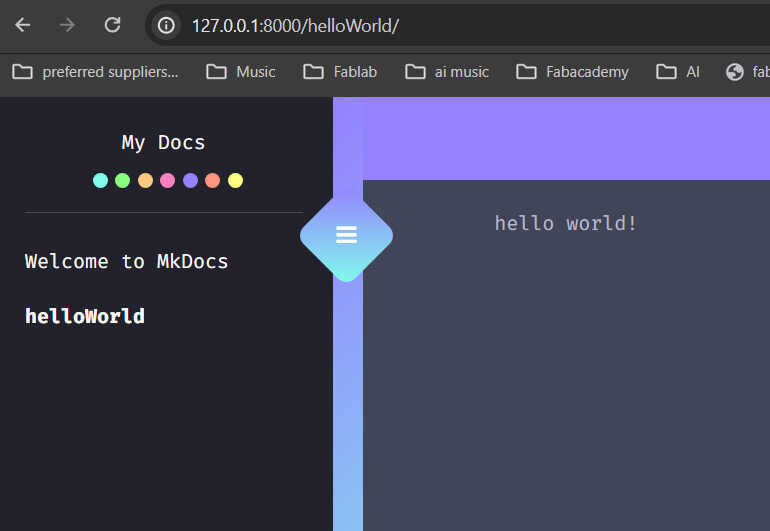
And looking good in mkdocs as well:

What I learned this week
Successes
- mkDocs runs pretty nice locally.
- Obsidian, when configured correctly, does a good job producing mkdocs-readable markdown files.
Fails & Fixes
- Windows. Or hardware. OR both… Over the weekend I got blue screens. On monday I went to IT. Couldn’t solve it, so got a new laptop. And on tuesday I had to spent all day installing that new laptop and getting it up&running. Although this is also a good thing: I don’t have any weird & old pieces of software anymore and I can start using WSL (Windows subsystem for linux)!! So all magic is going to happen in the terminal :-)
Remember this for next time
I don’t like windows
I don’t like windows
I don’t like windows
I don’t like windows
And mkDocs is easy and fast.
Various
learn from other peoples repo
look other people up at fabacademy.org -> For example Erwin Kooi
He uses 1 MD file for each week with a standardized template of what he learned, what he already knew, etc. It is really advisable to do it this way.
Projectmanagement
check this support document
Nueval handbook of last year can be looked in.
Check here for “Have you answered these questions?”
Copy this in the Assignments section of every week -> use checkboxes and check them :-)