3-D. Printer: Testers
I started with printing out a couple of testers that I found on the site to figure out the limit of the printer. Explanations are below each of the testers.
Angla
Bridging
Overhang
Overhang_2
Thickness
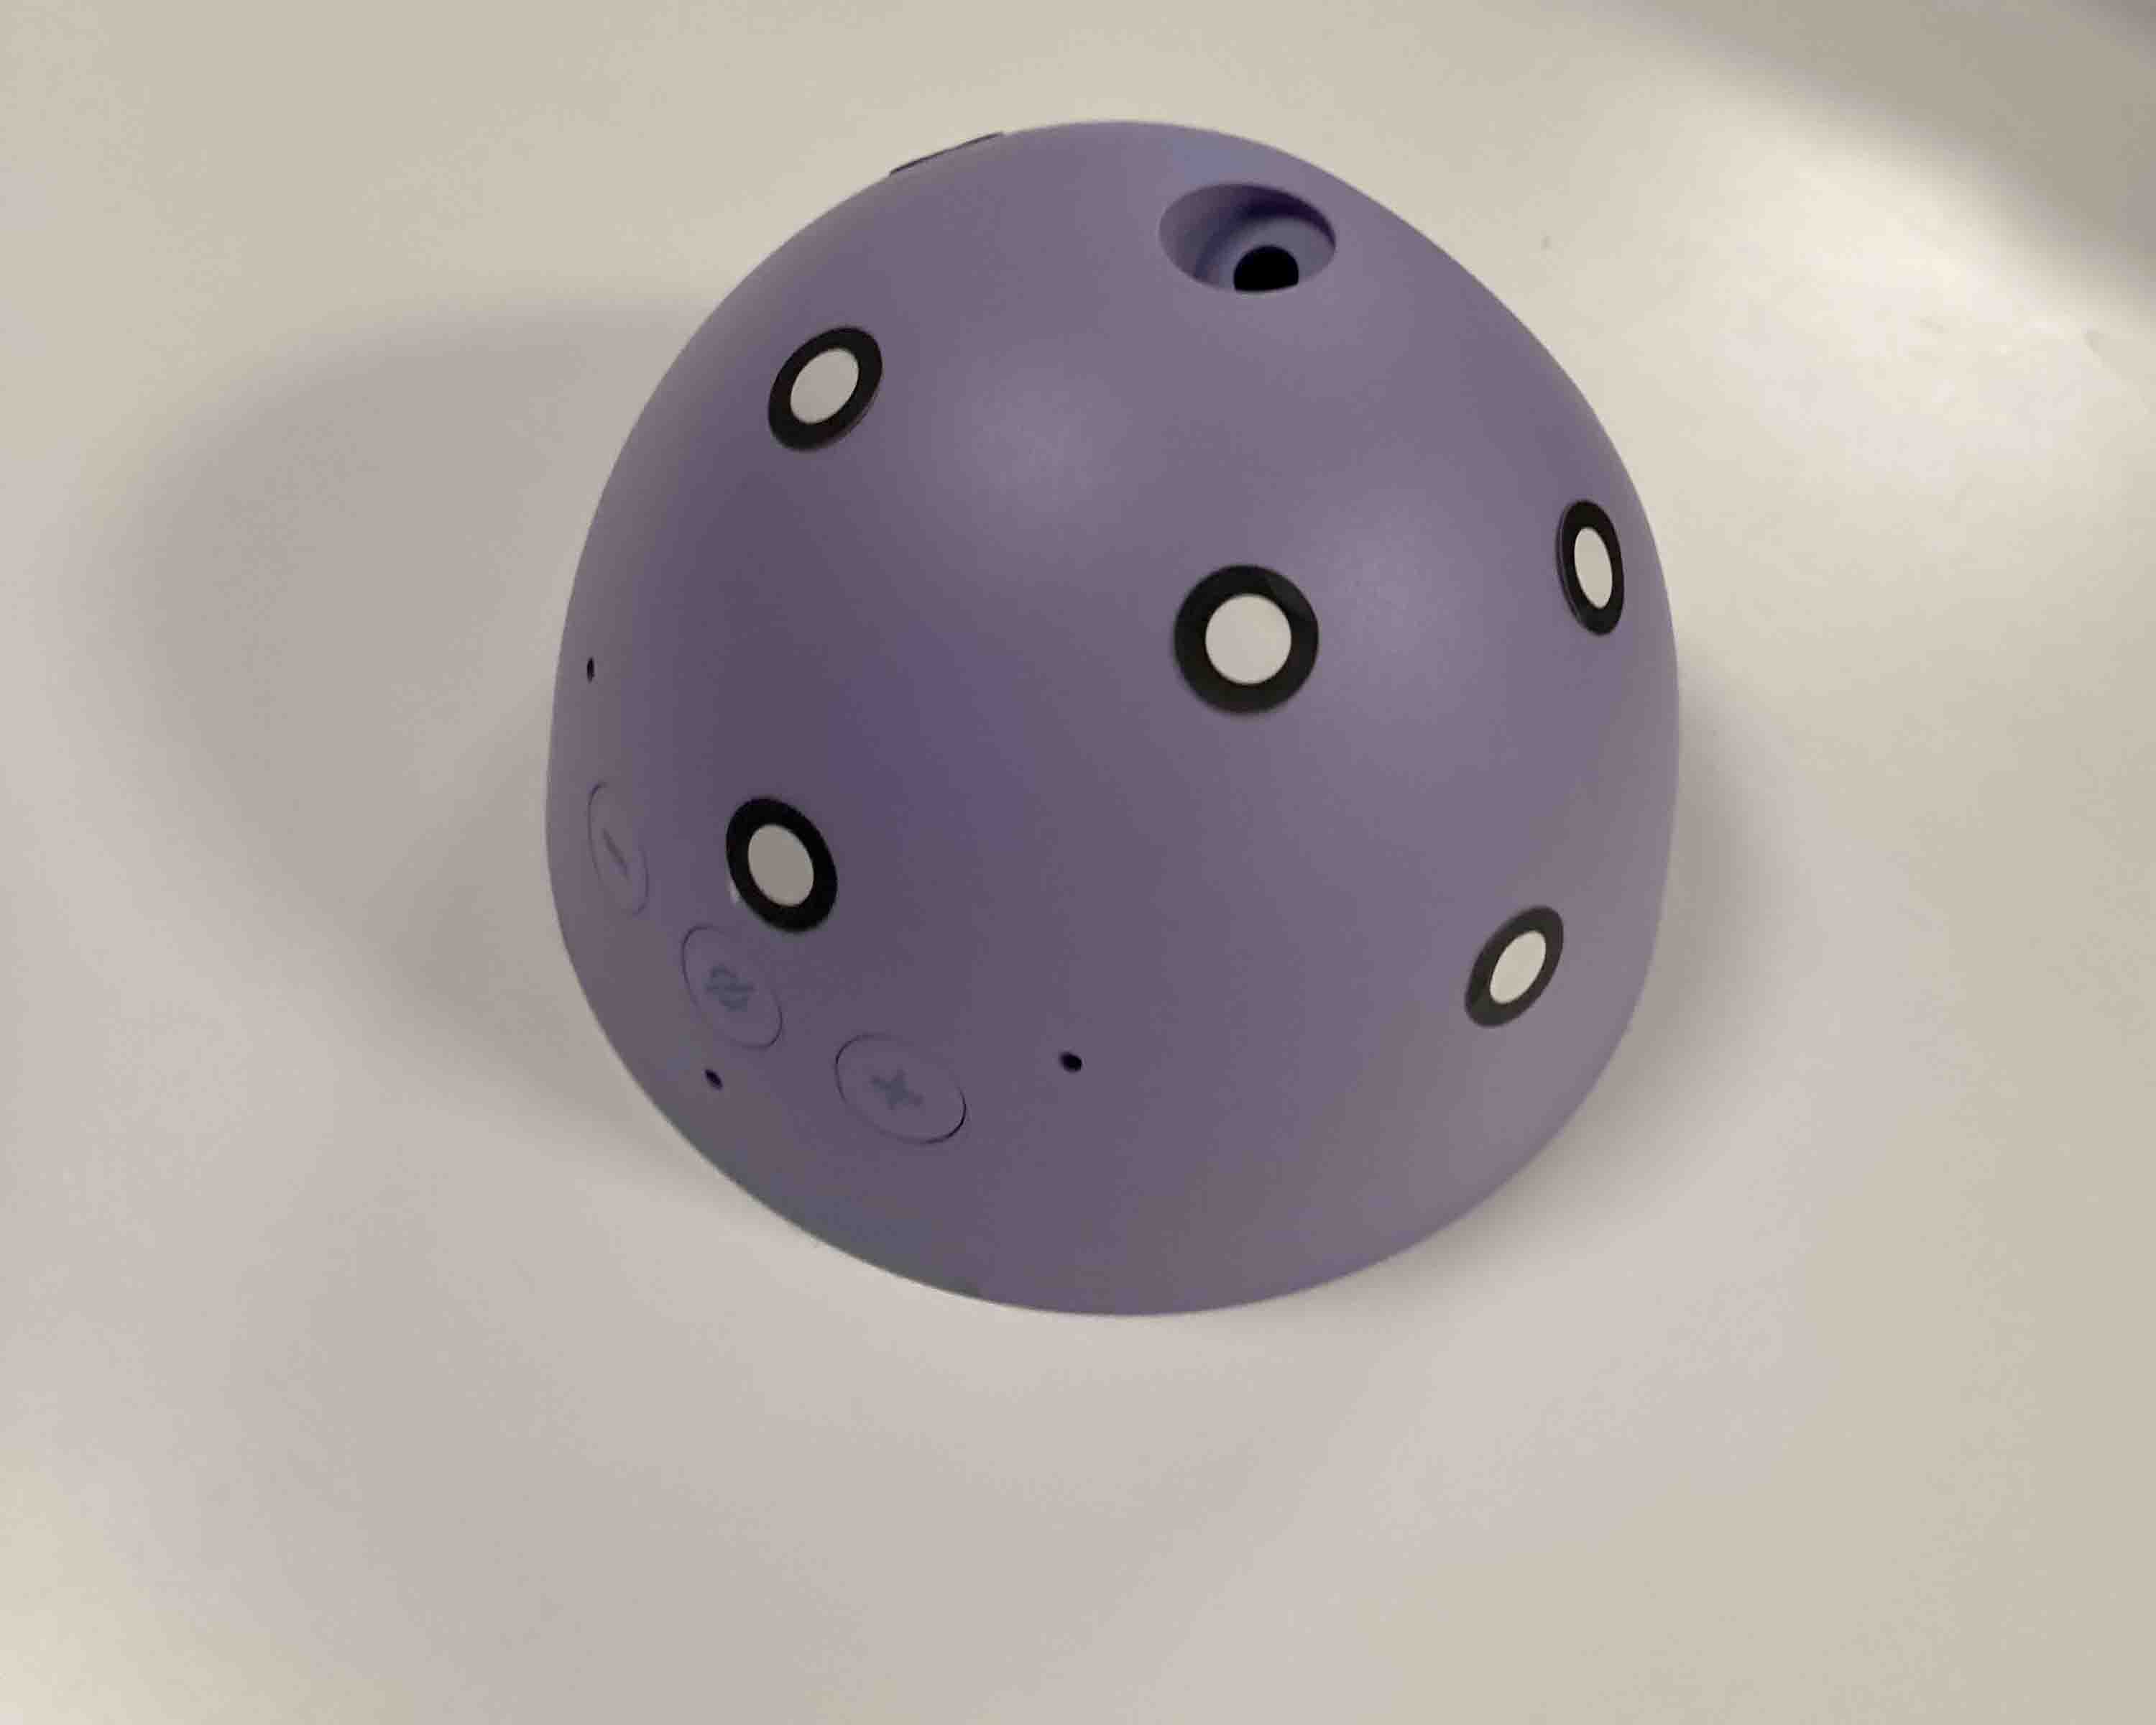
Scanner: Alexa Pop
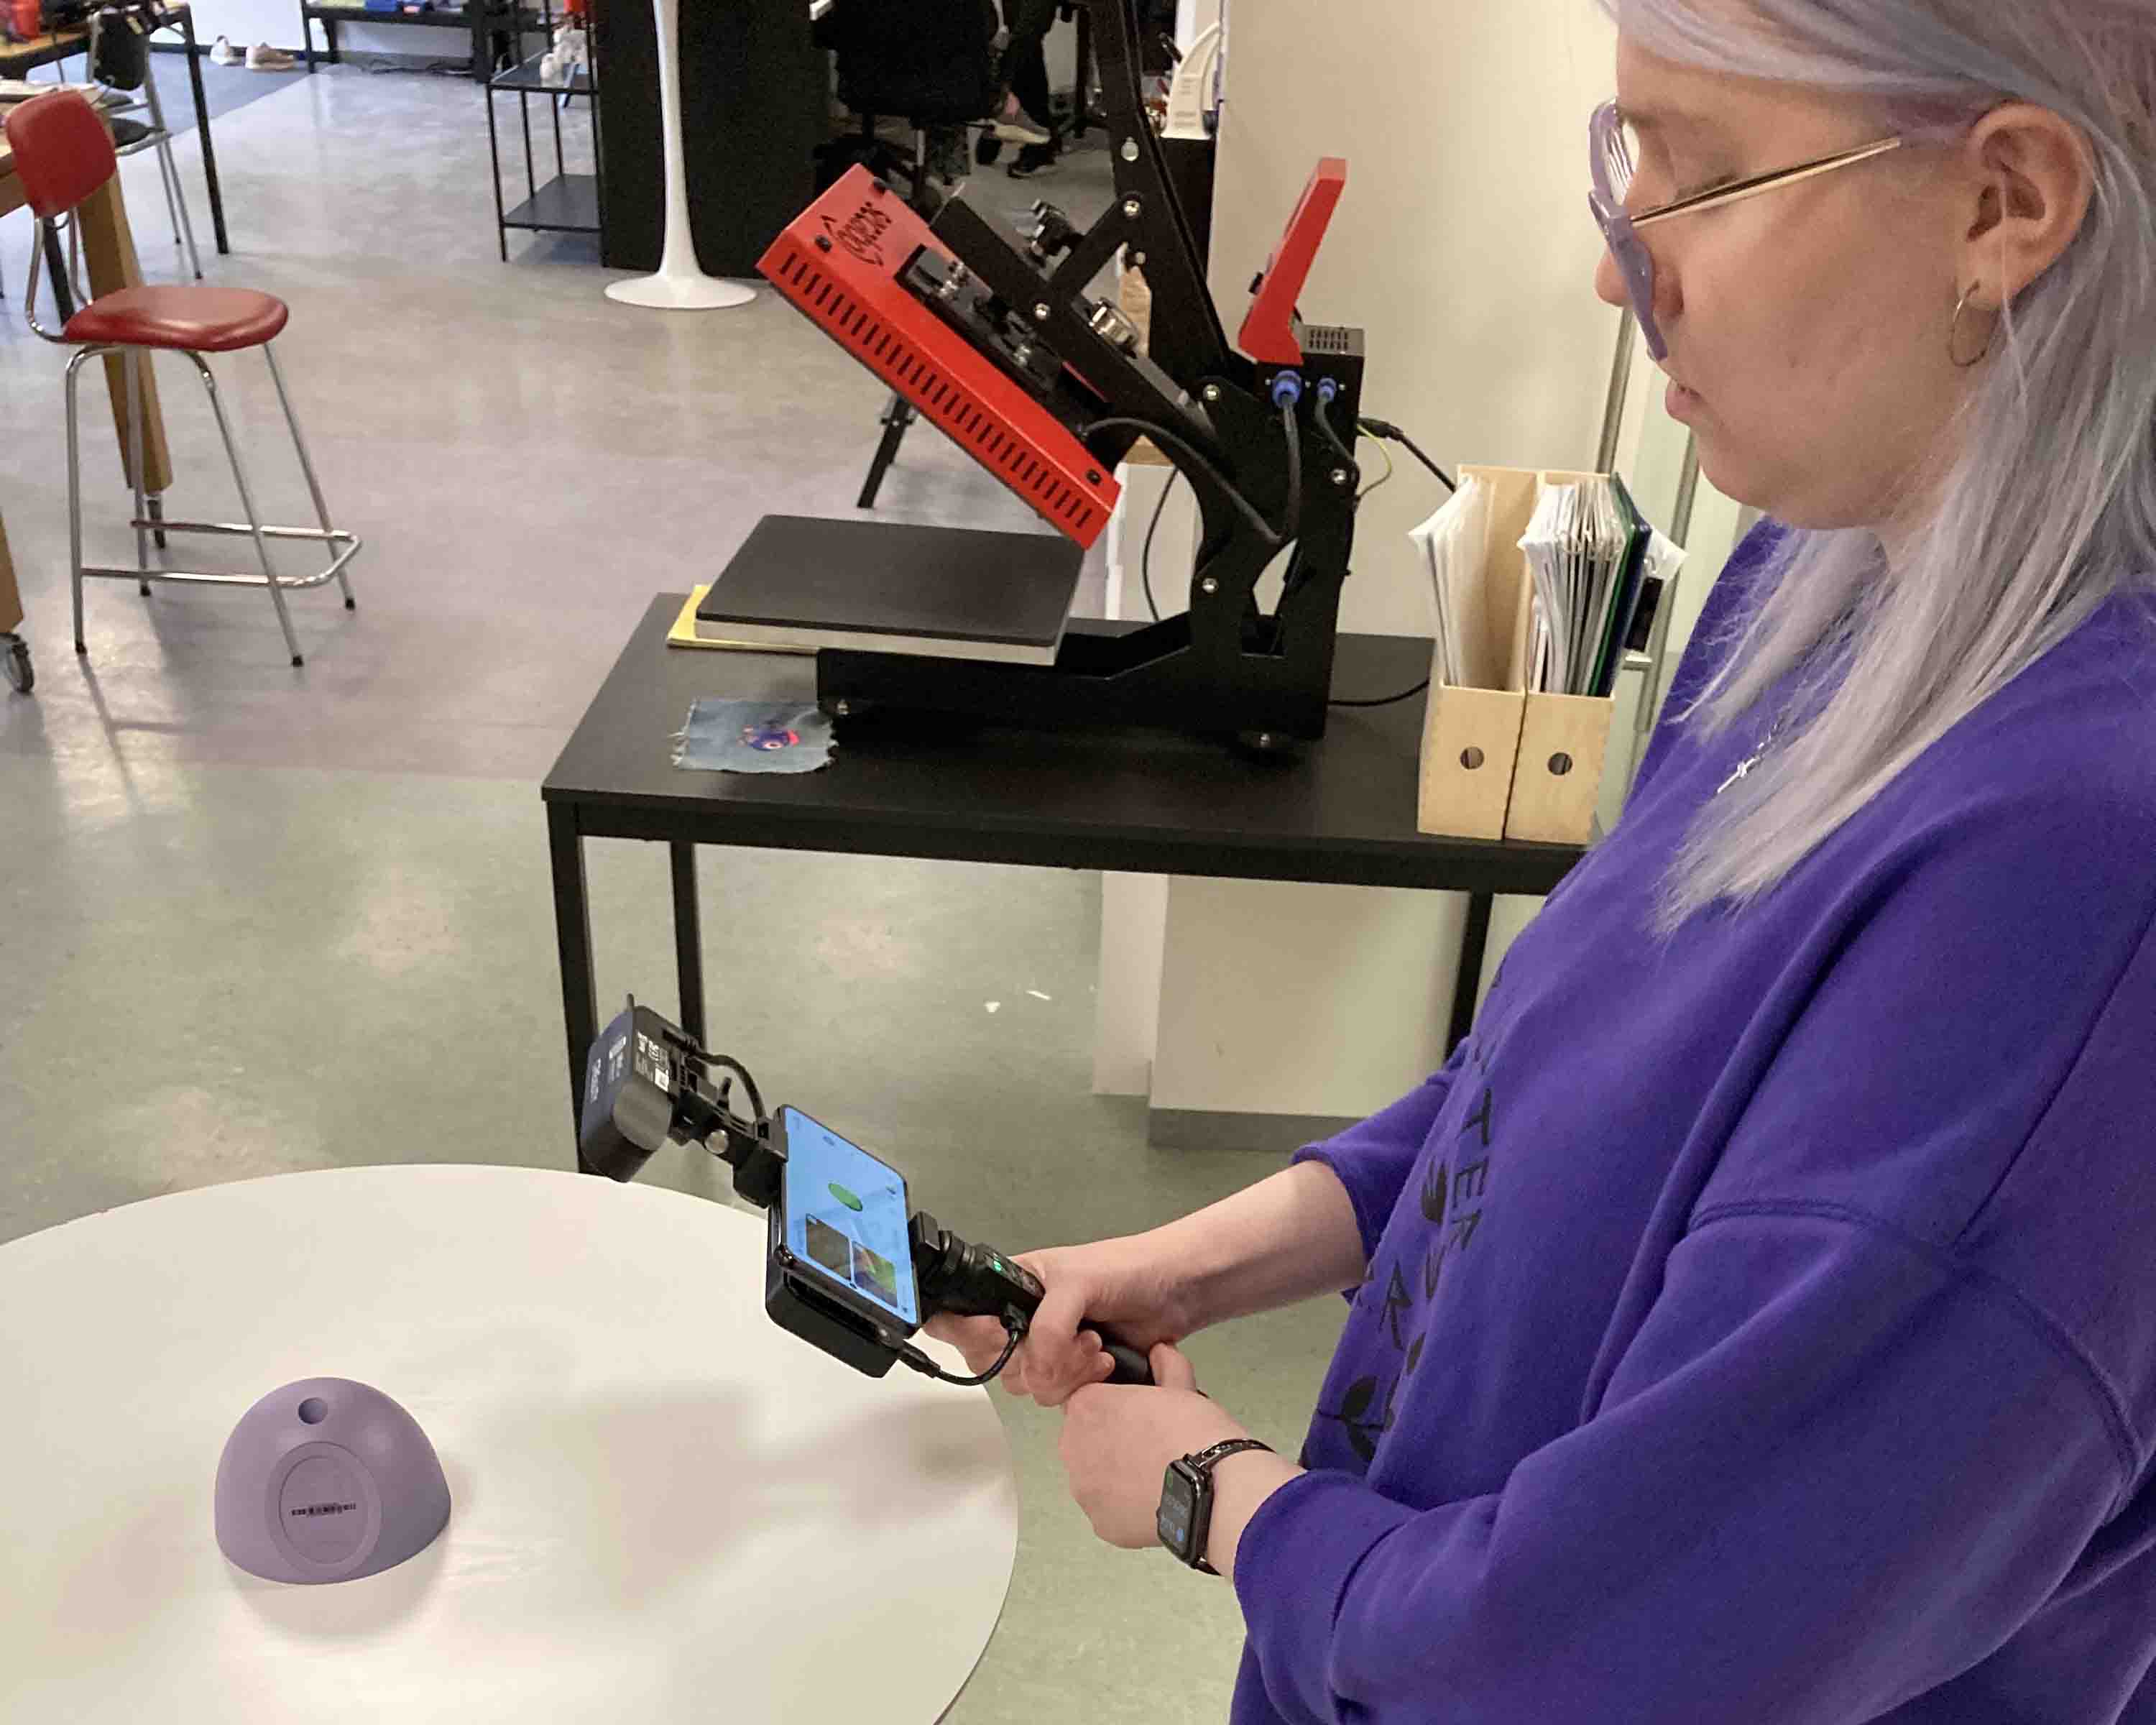
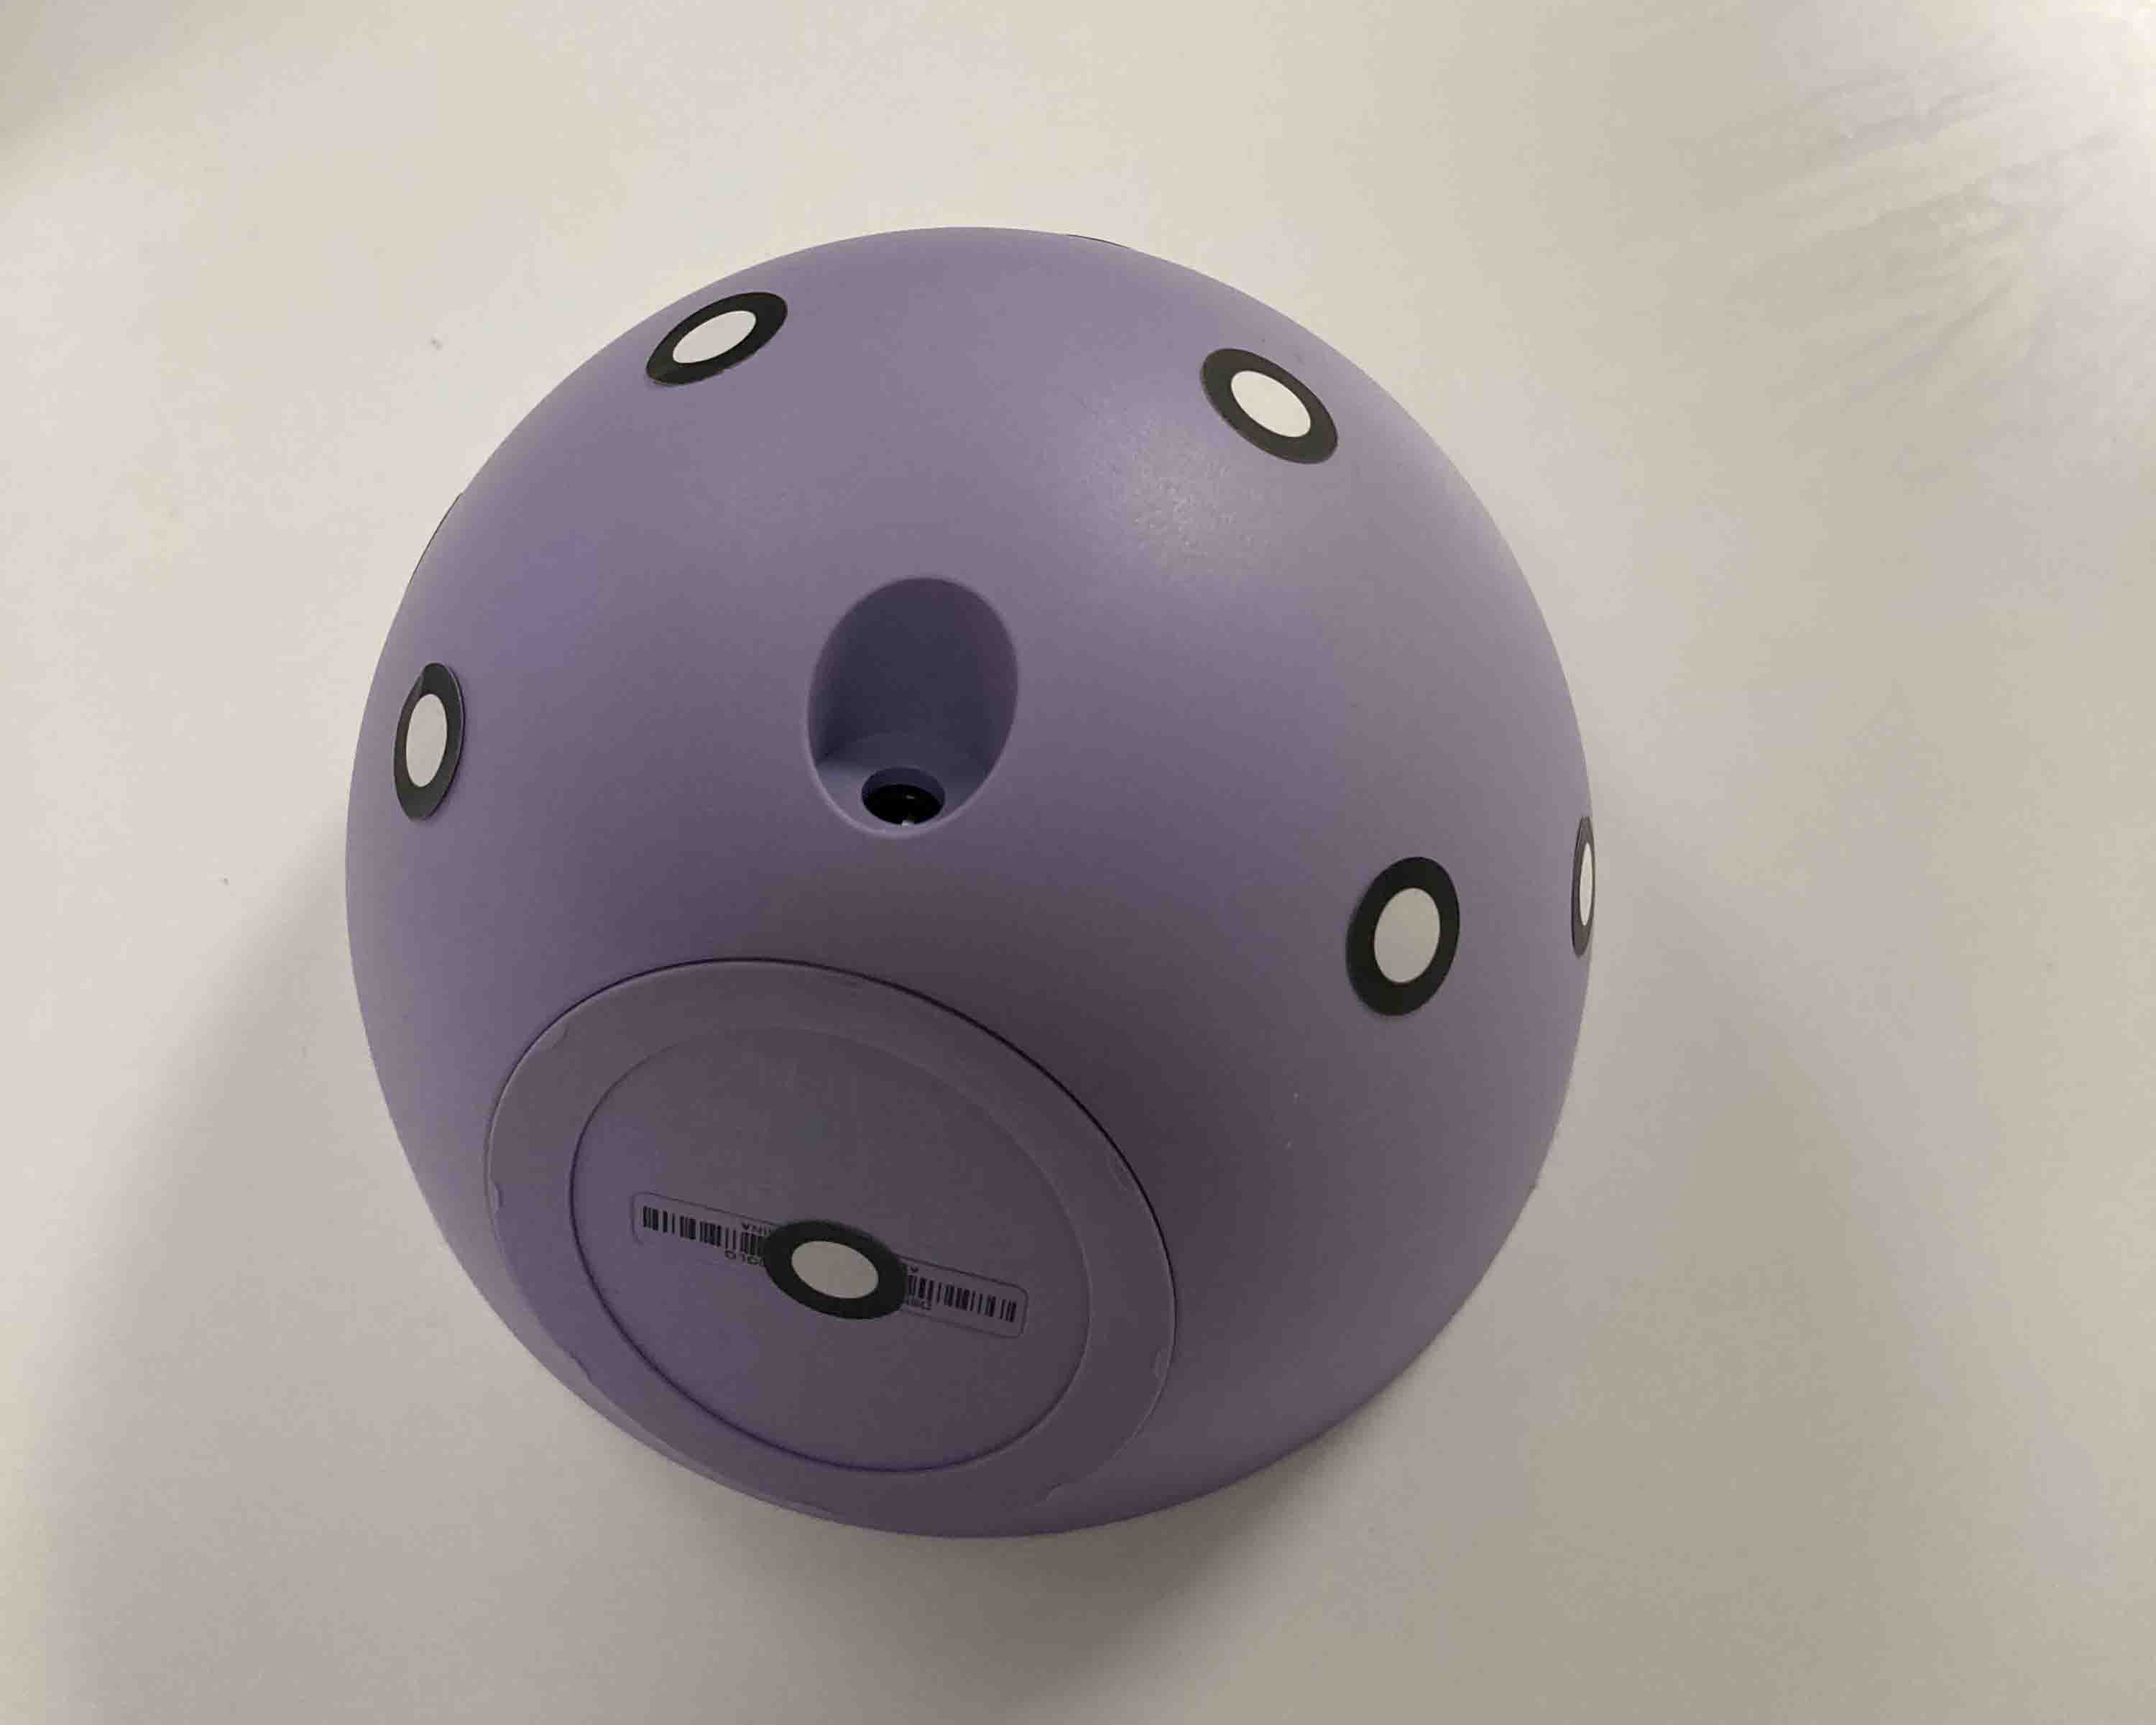
I tried to scan my Alexa it took me a couple of tries to scanner because I needed to be very slow in my movements and follow the directions that the scanner gives you to make a something for her to stand on in my studio, it would be/will be shelf that attached attaches to us SKÅDIS bored from IKEA.
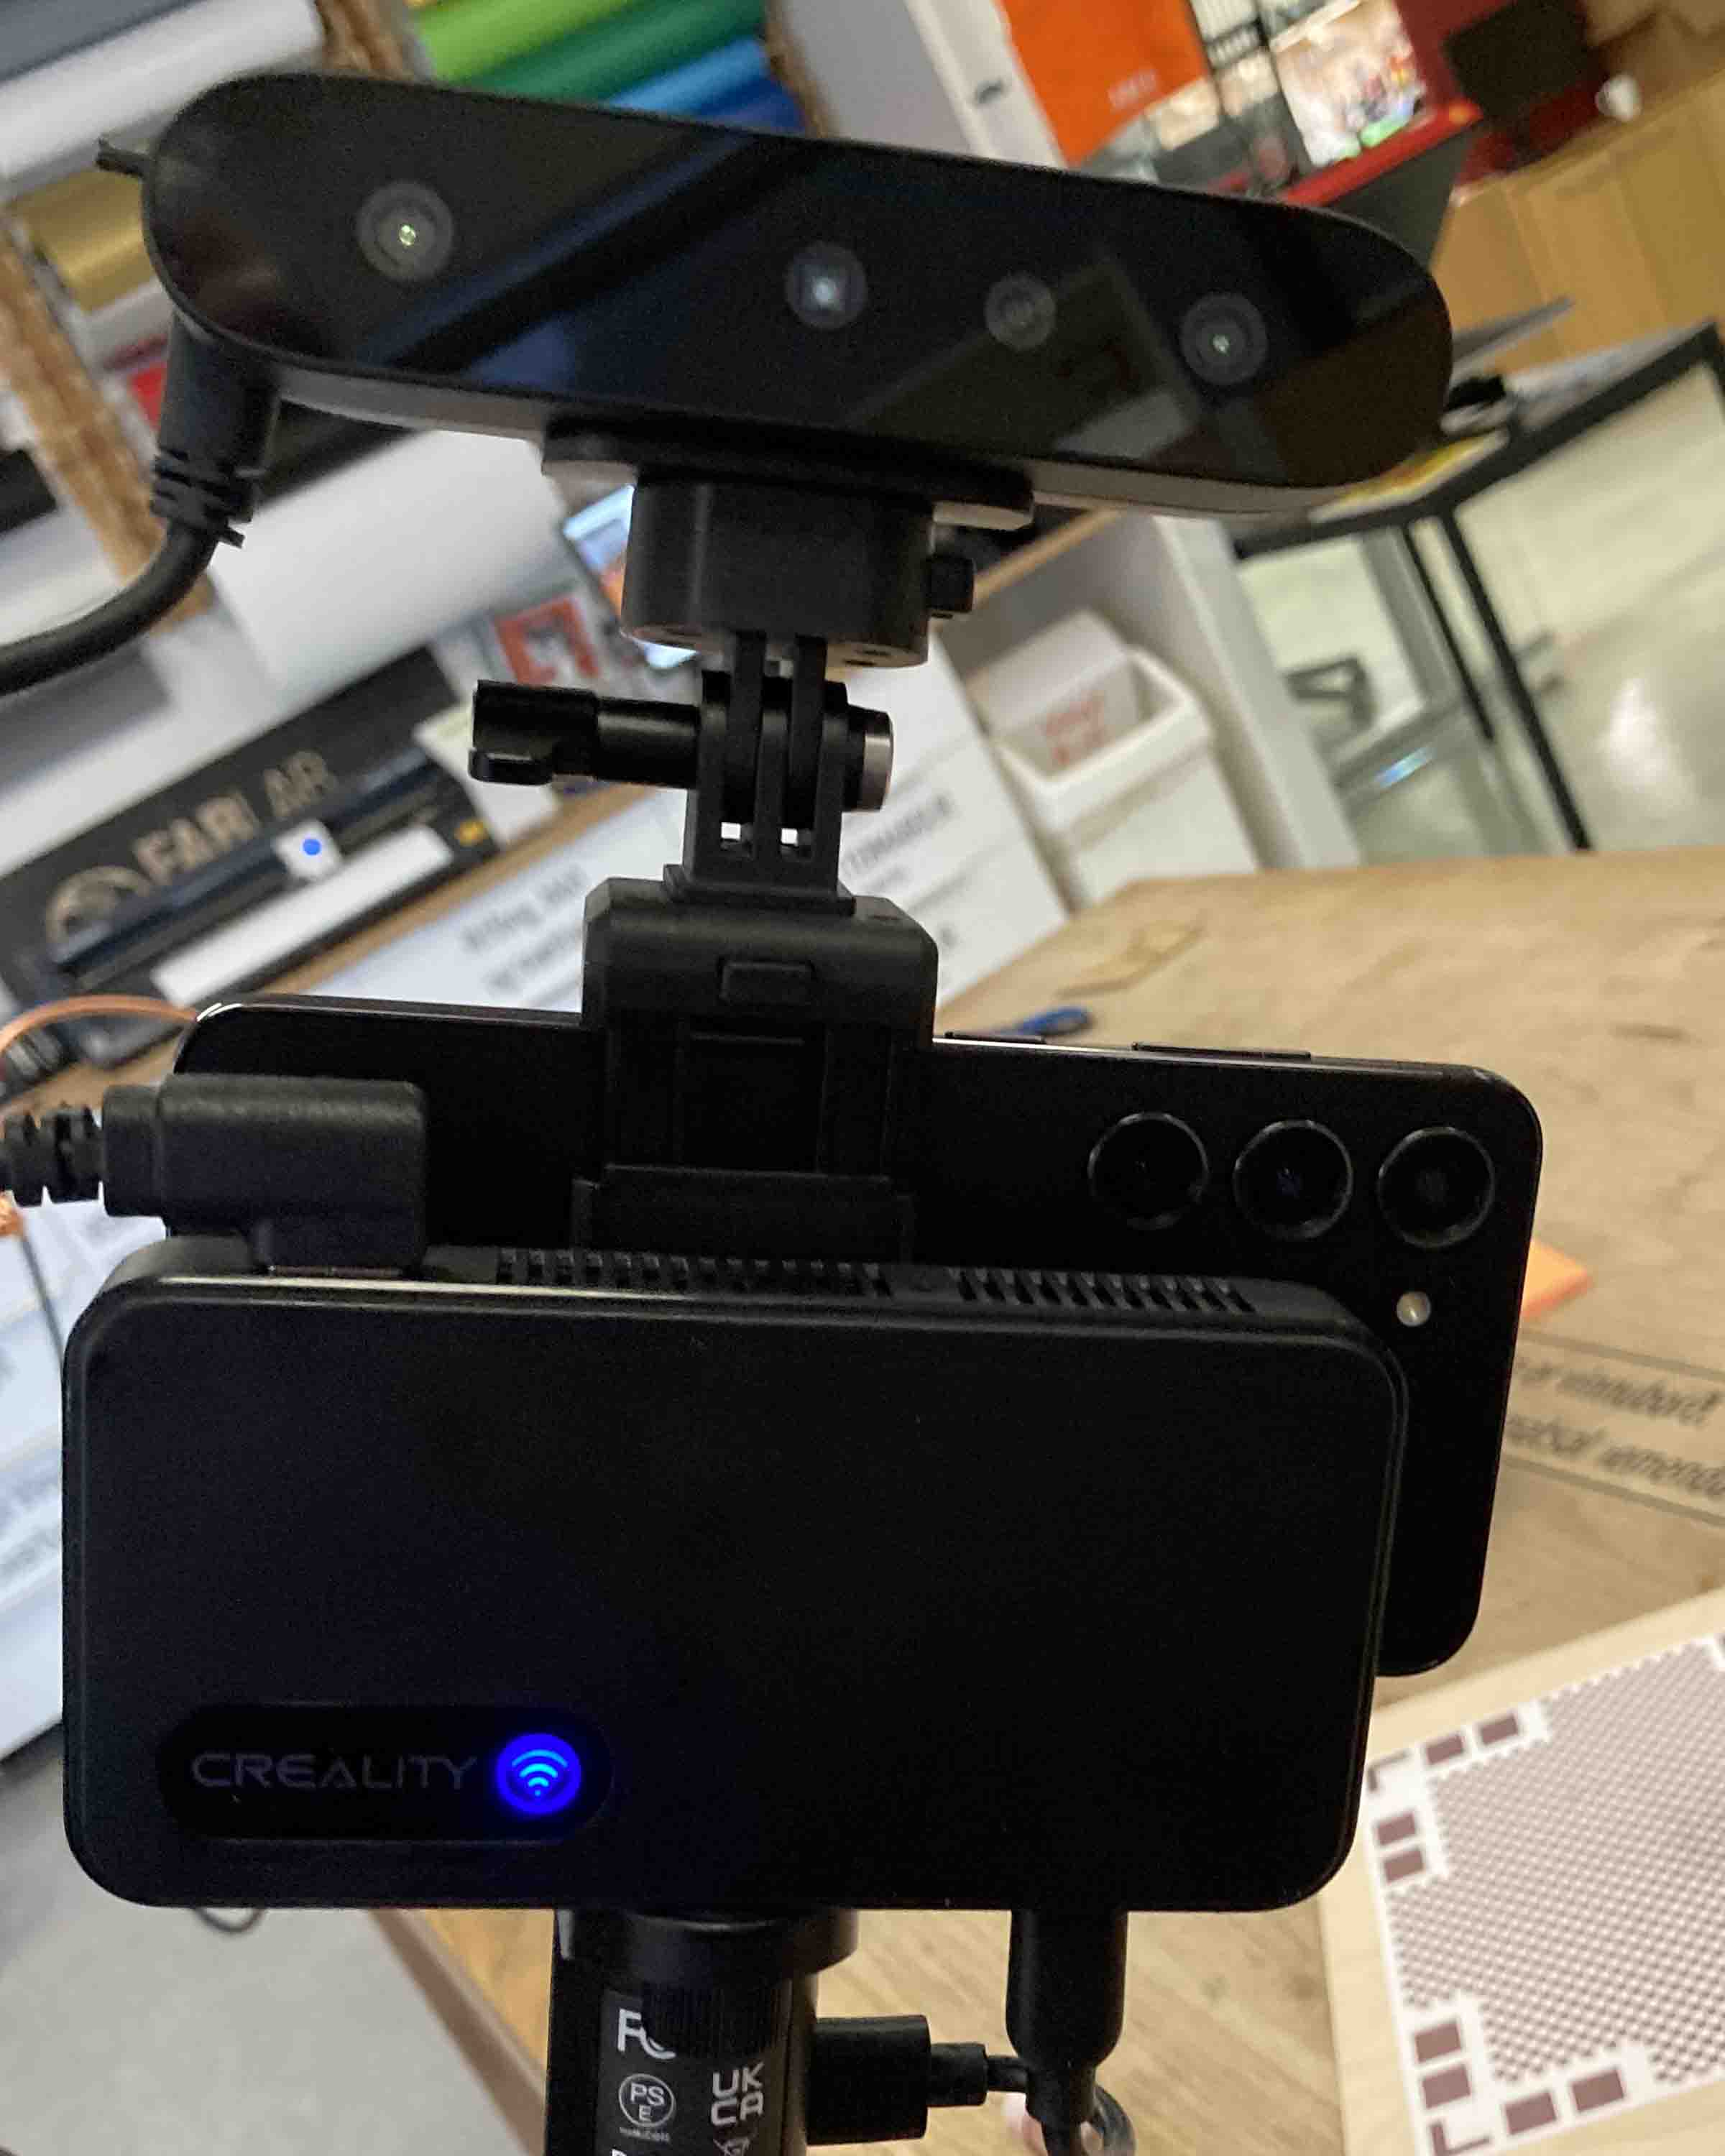
I used Creality CR-Scan Ferret to scan my Alexa. I scanned it by goingin circles around it making sure to keep the correct distance from the object. The first scan didnt come out quite the way I liked it so I put the dot stickers on it to help the program sort the information then it came out the way I wanted.
Creality
Alexa_Pop_Scan
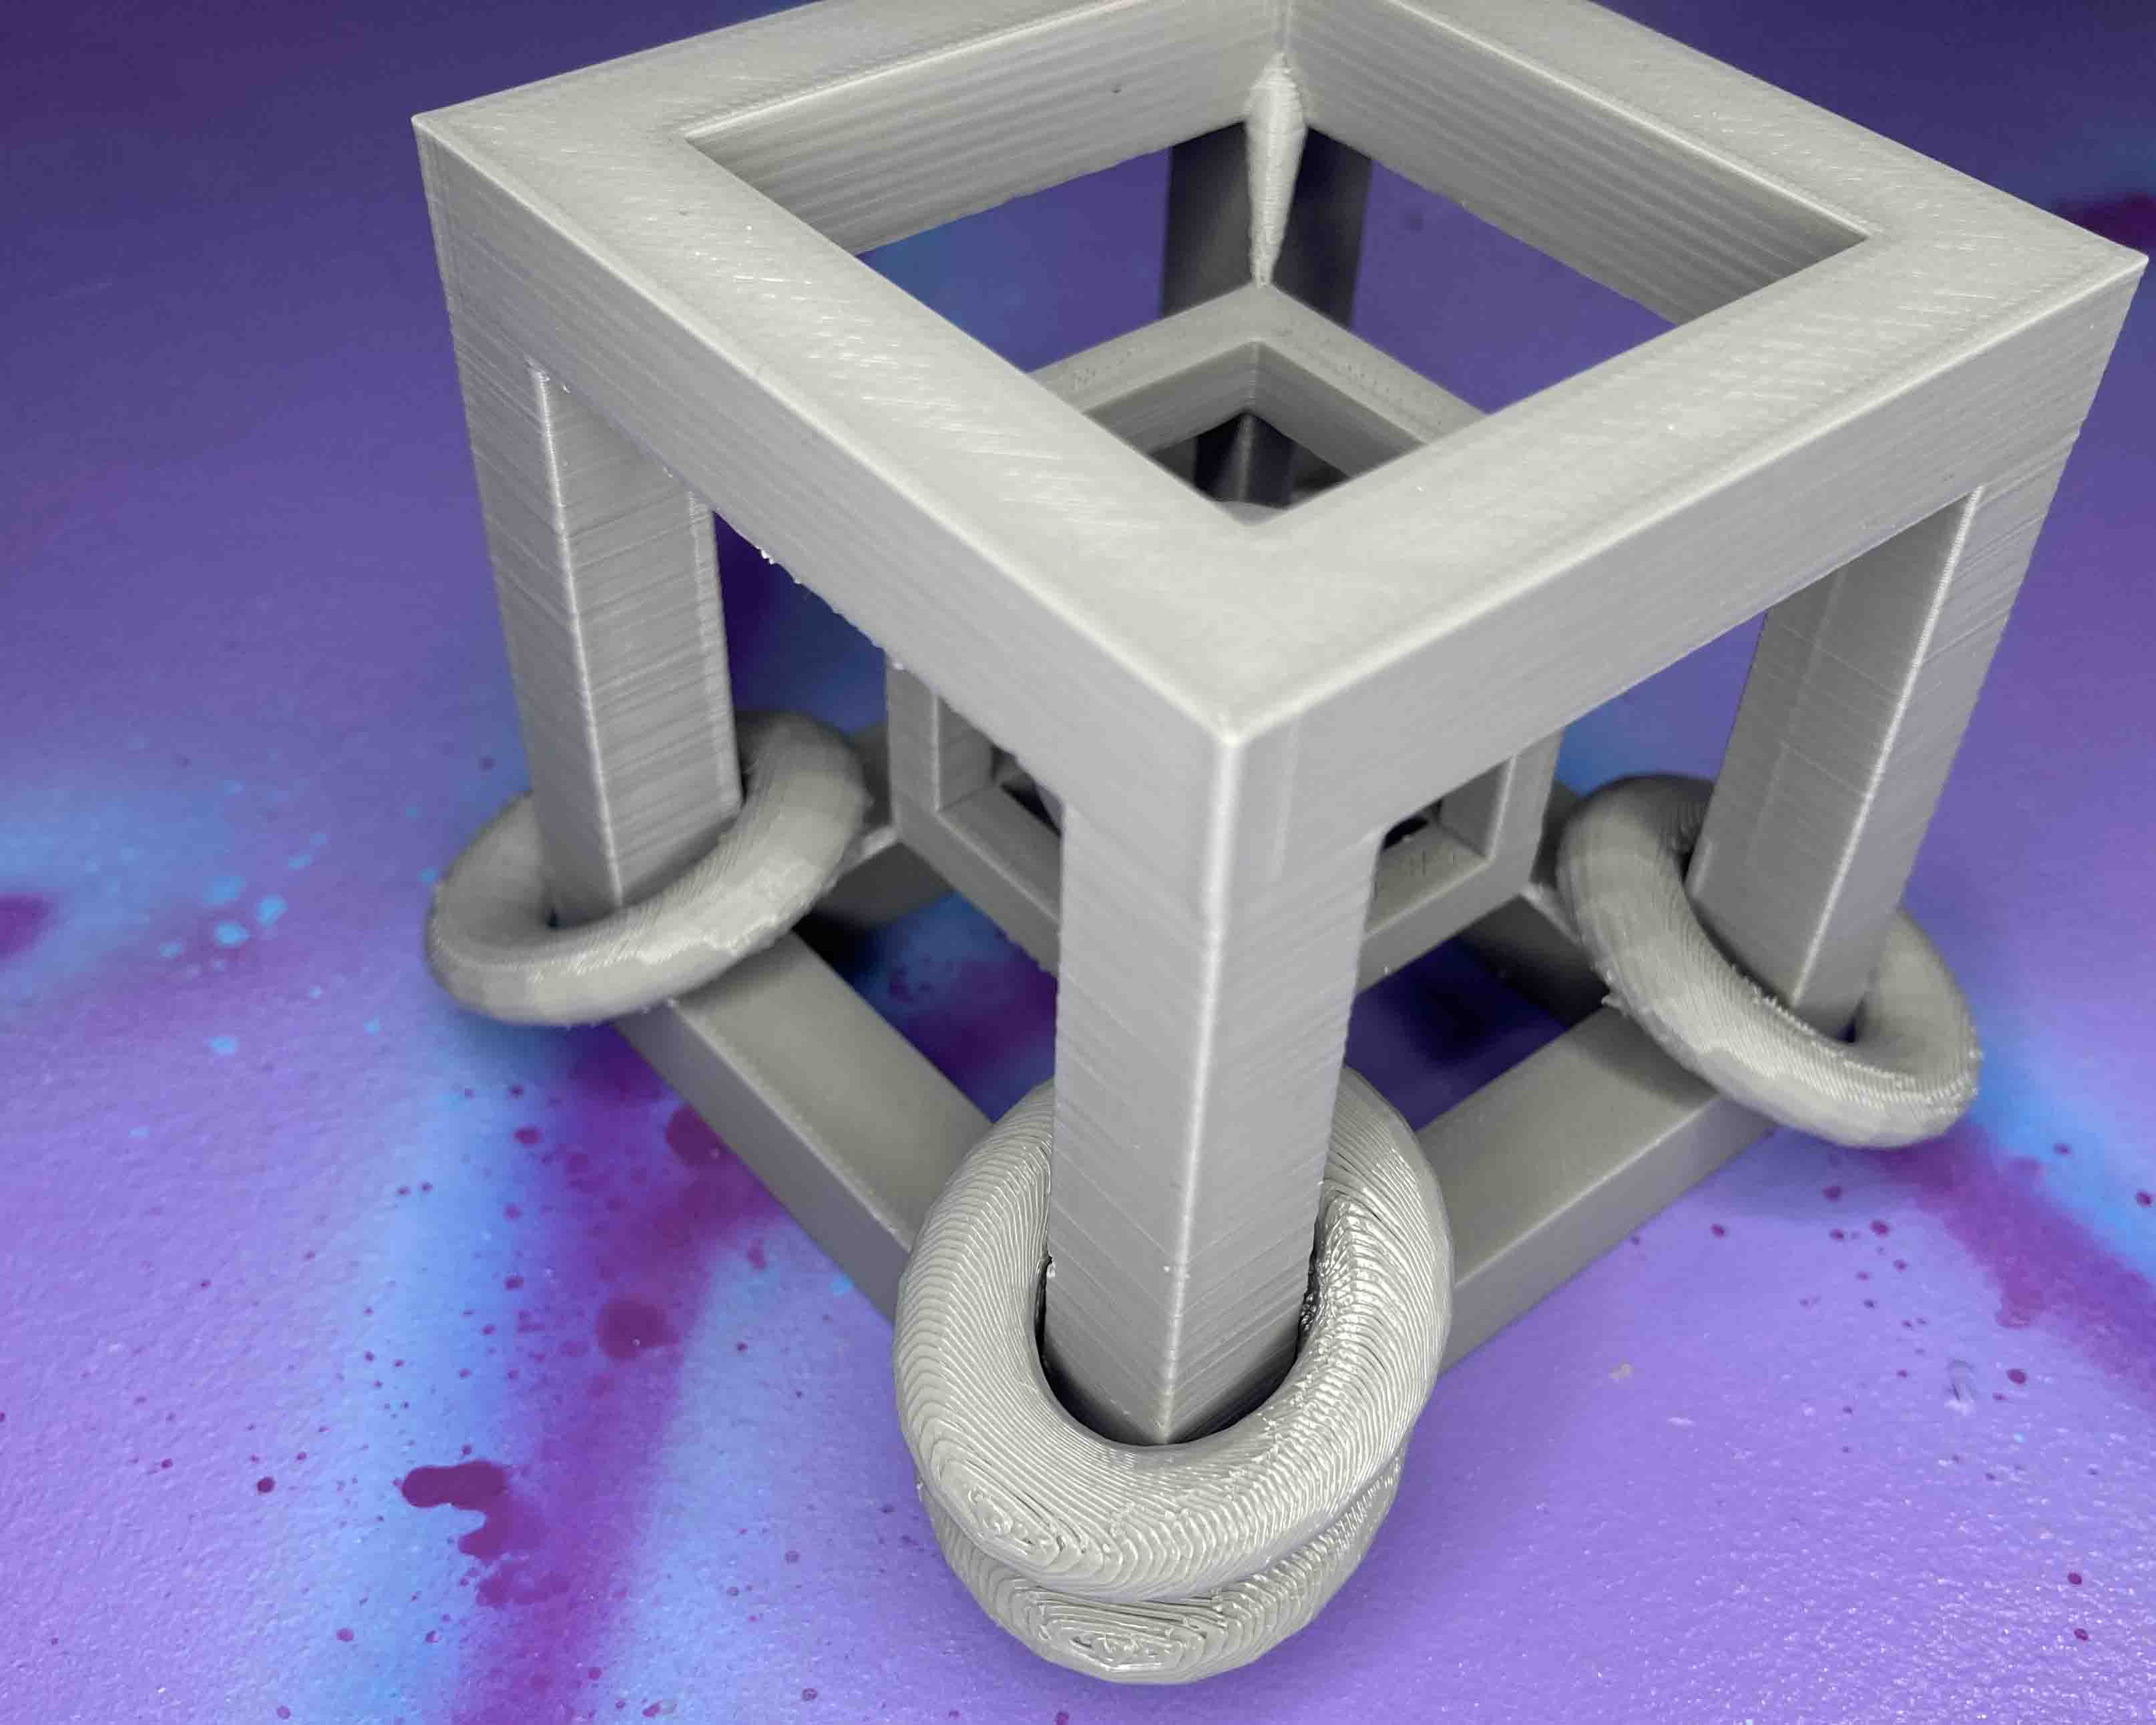
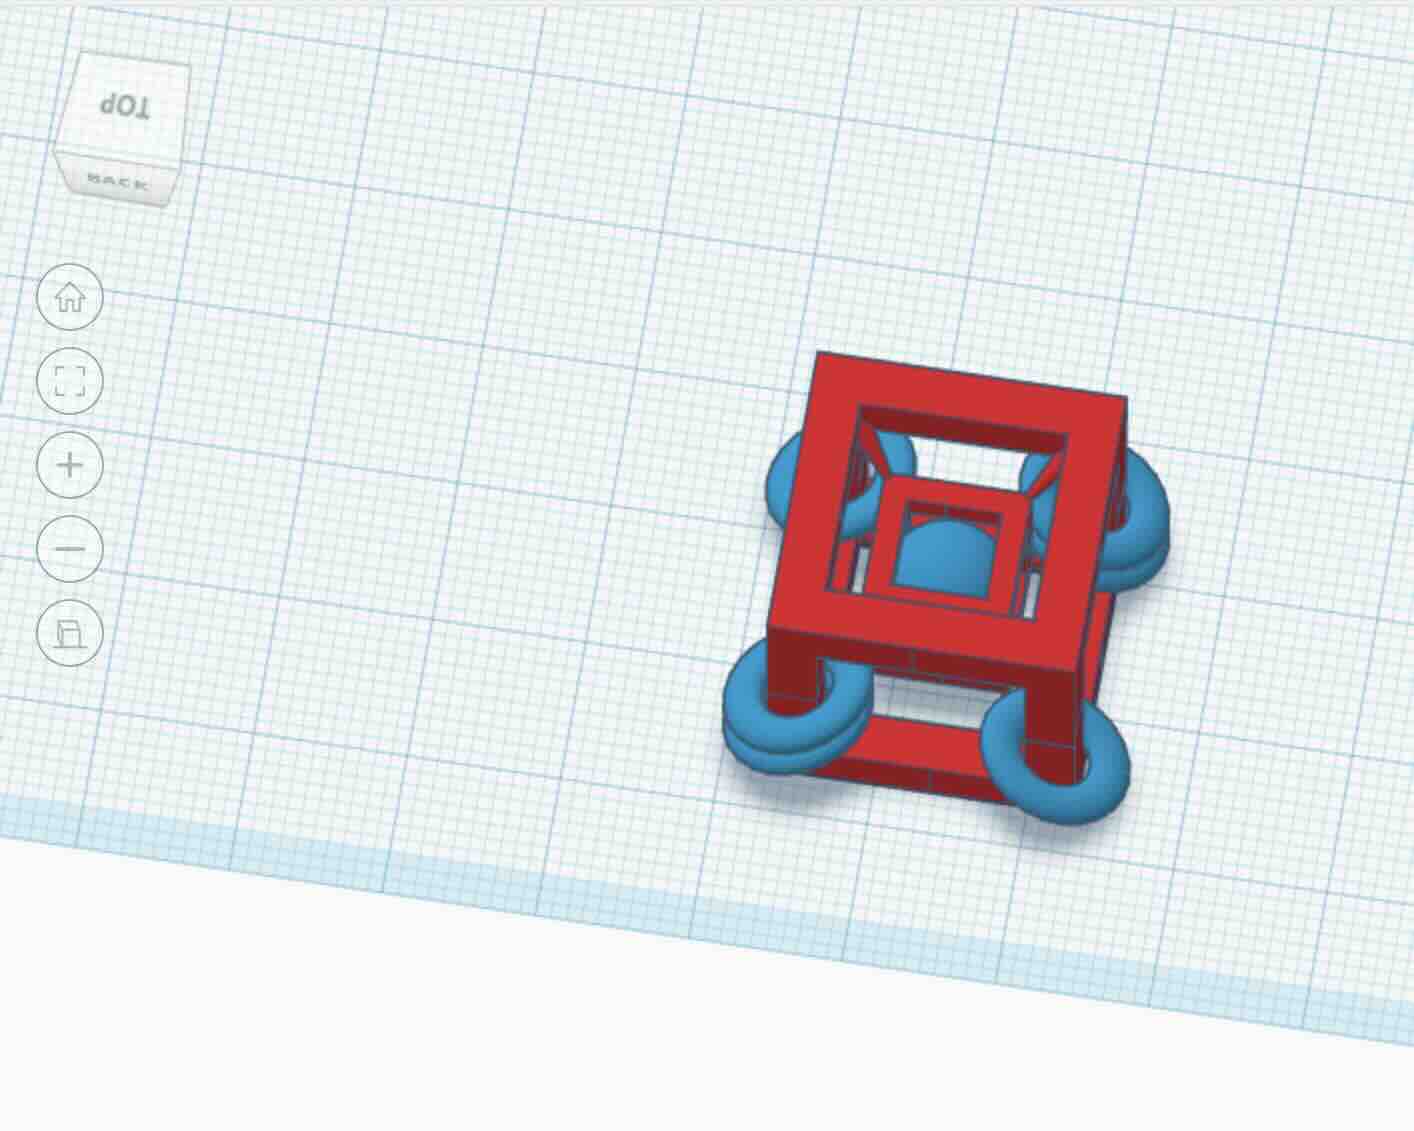
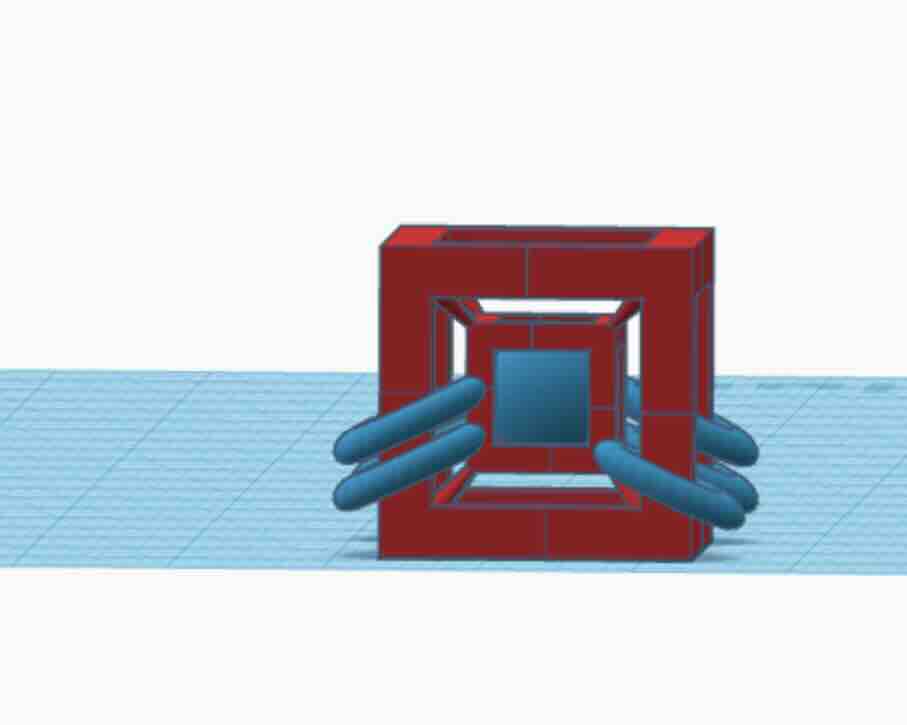
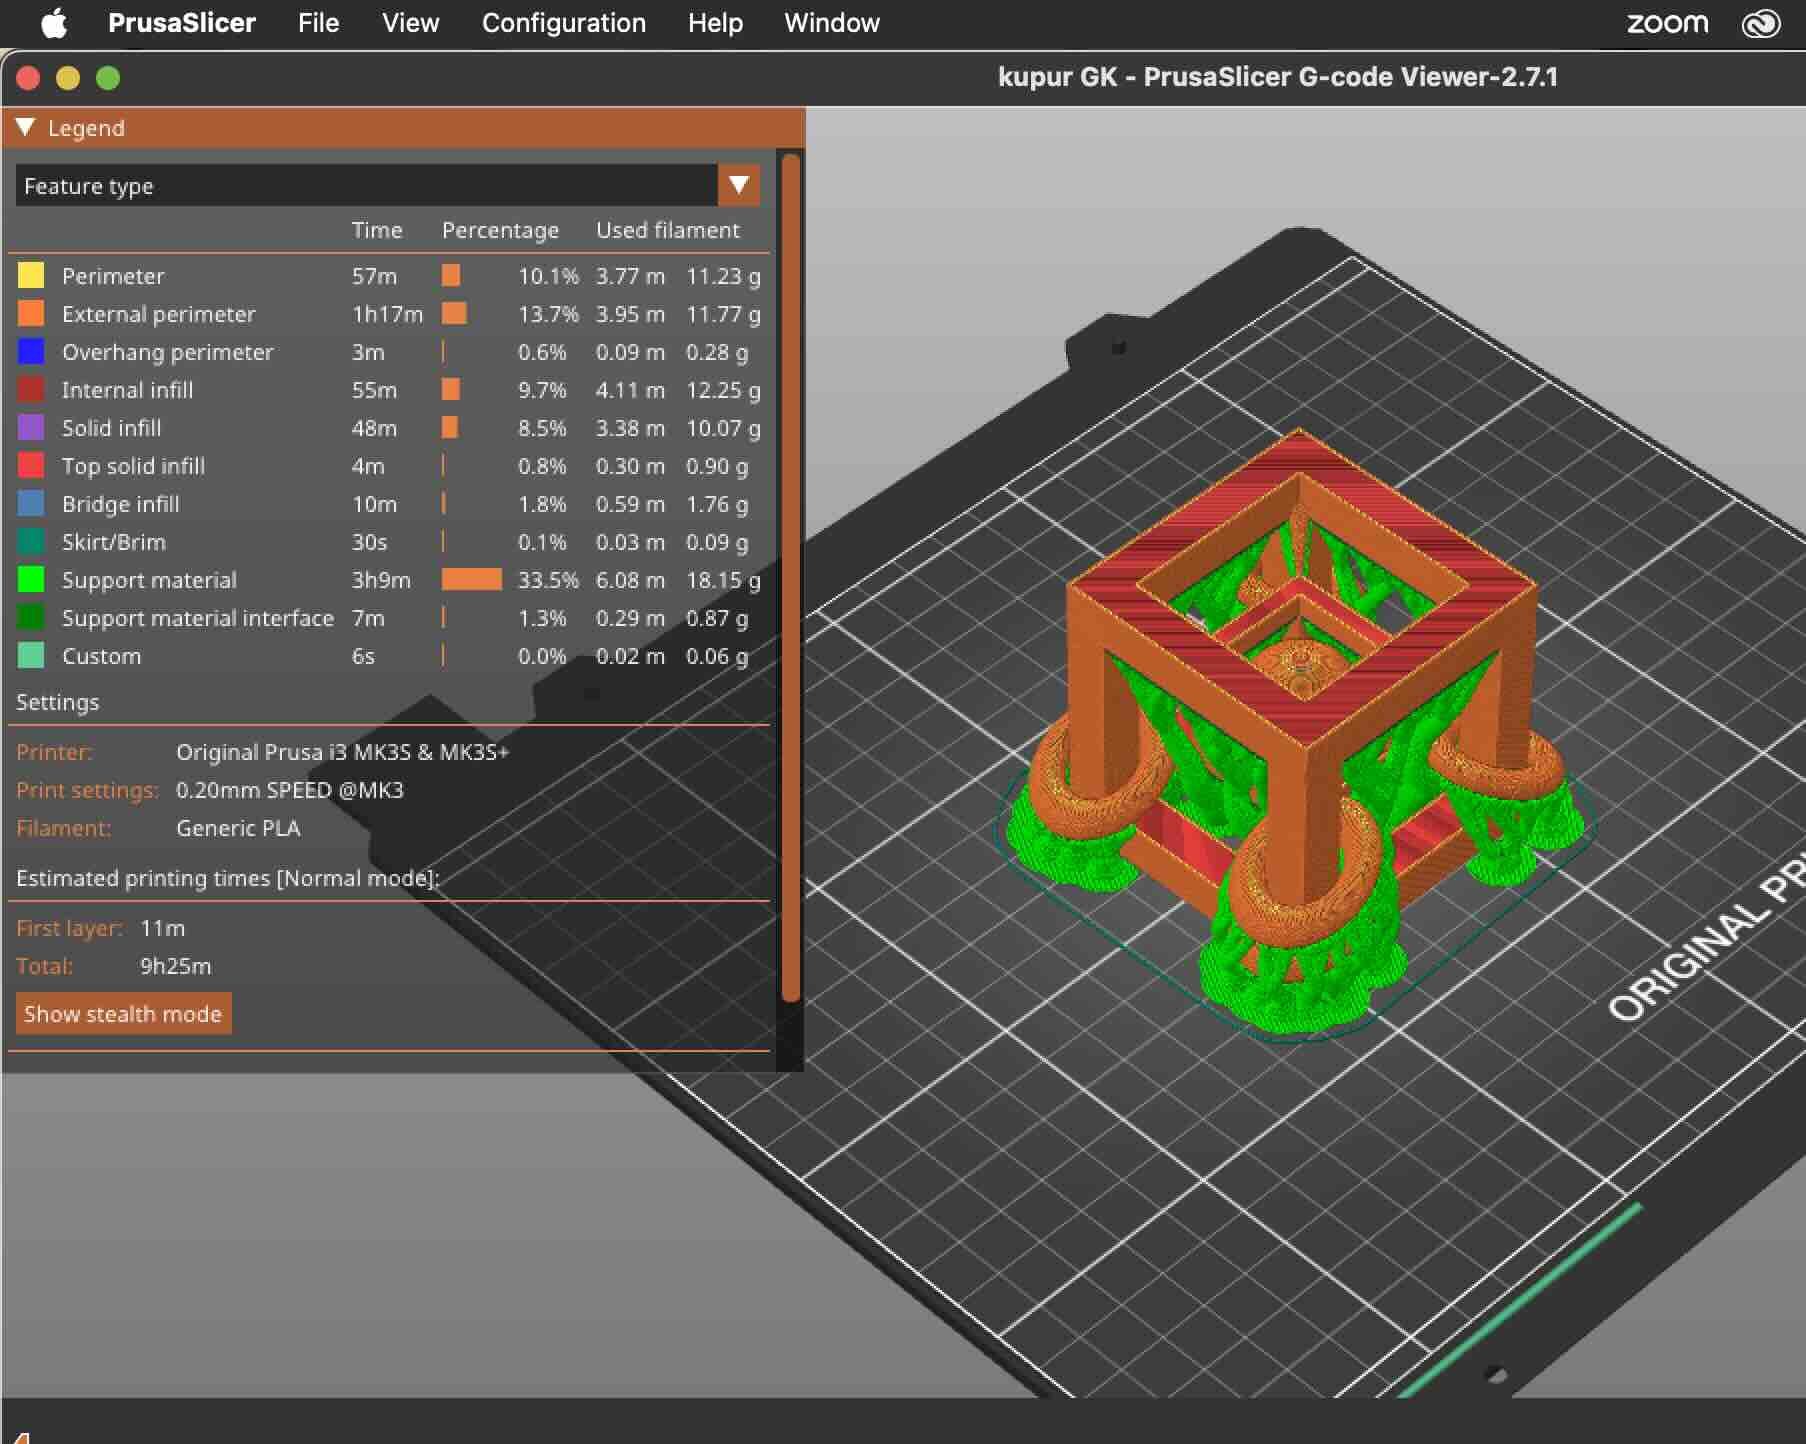
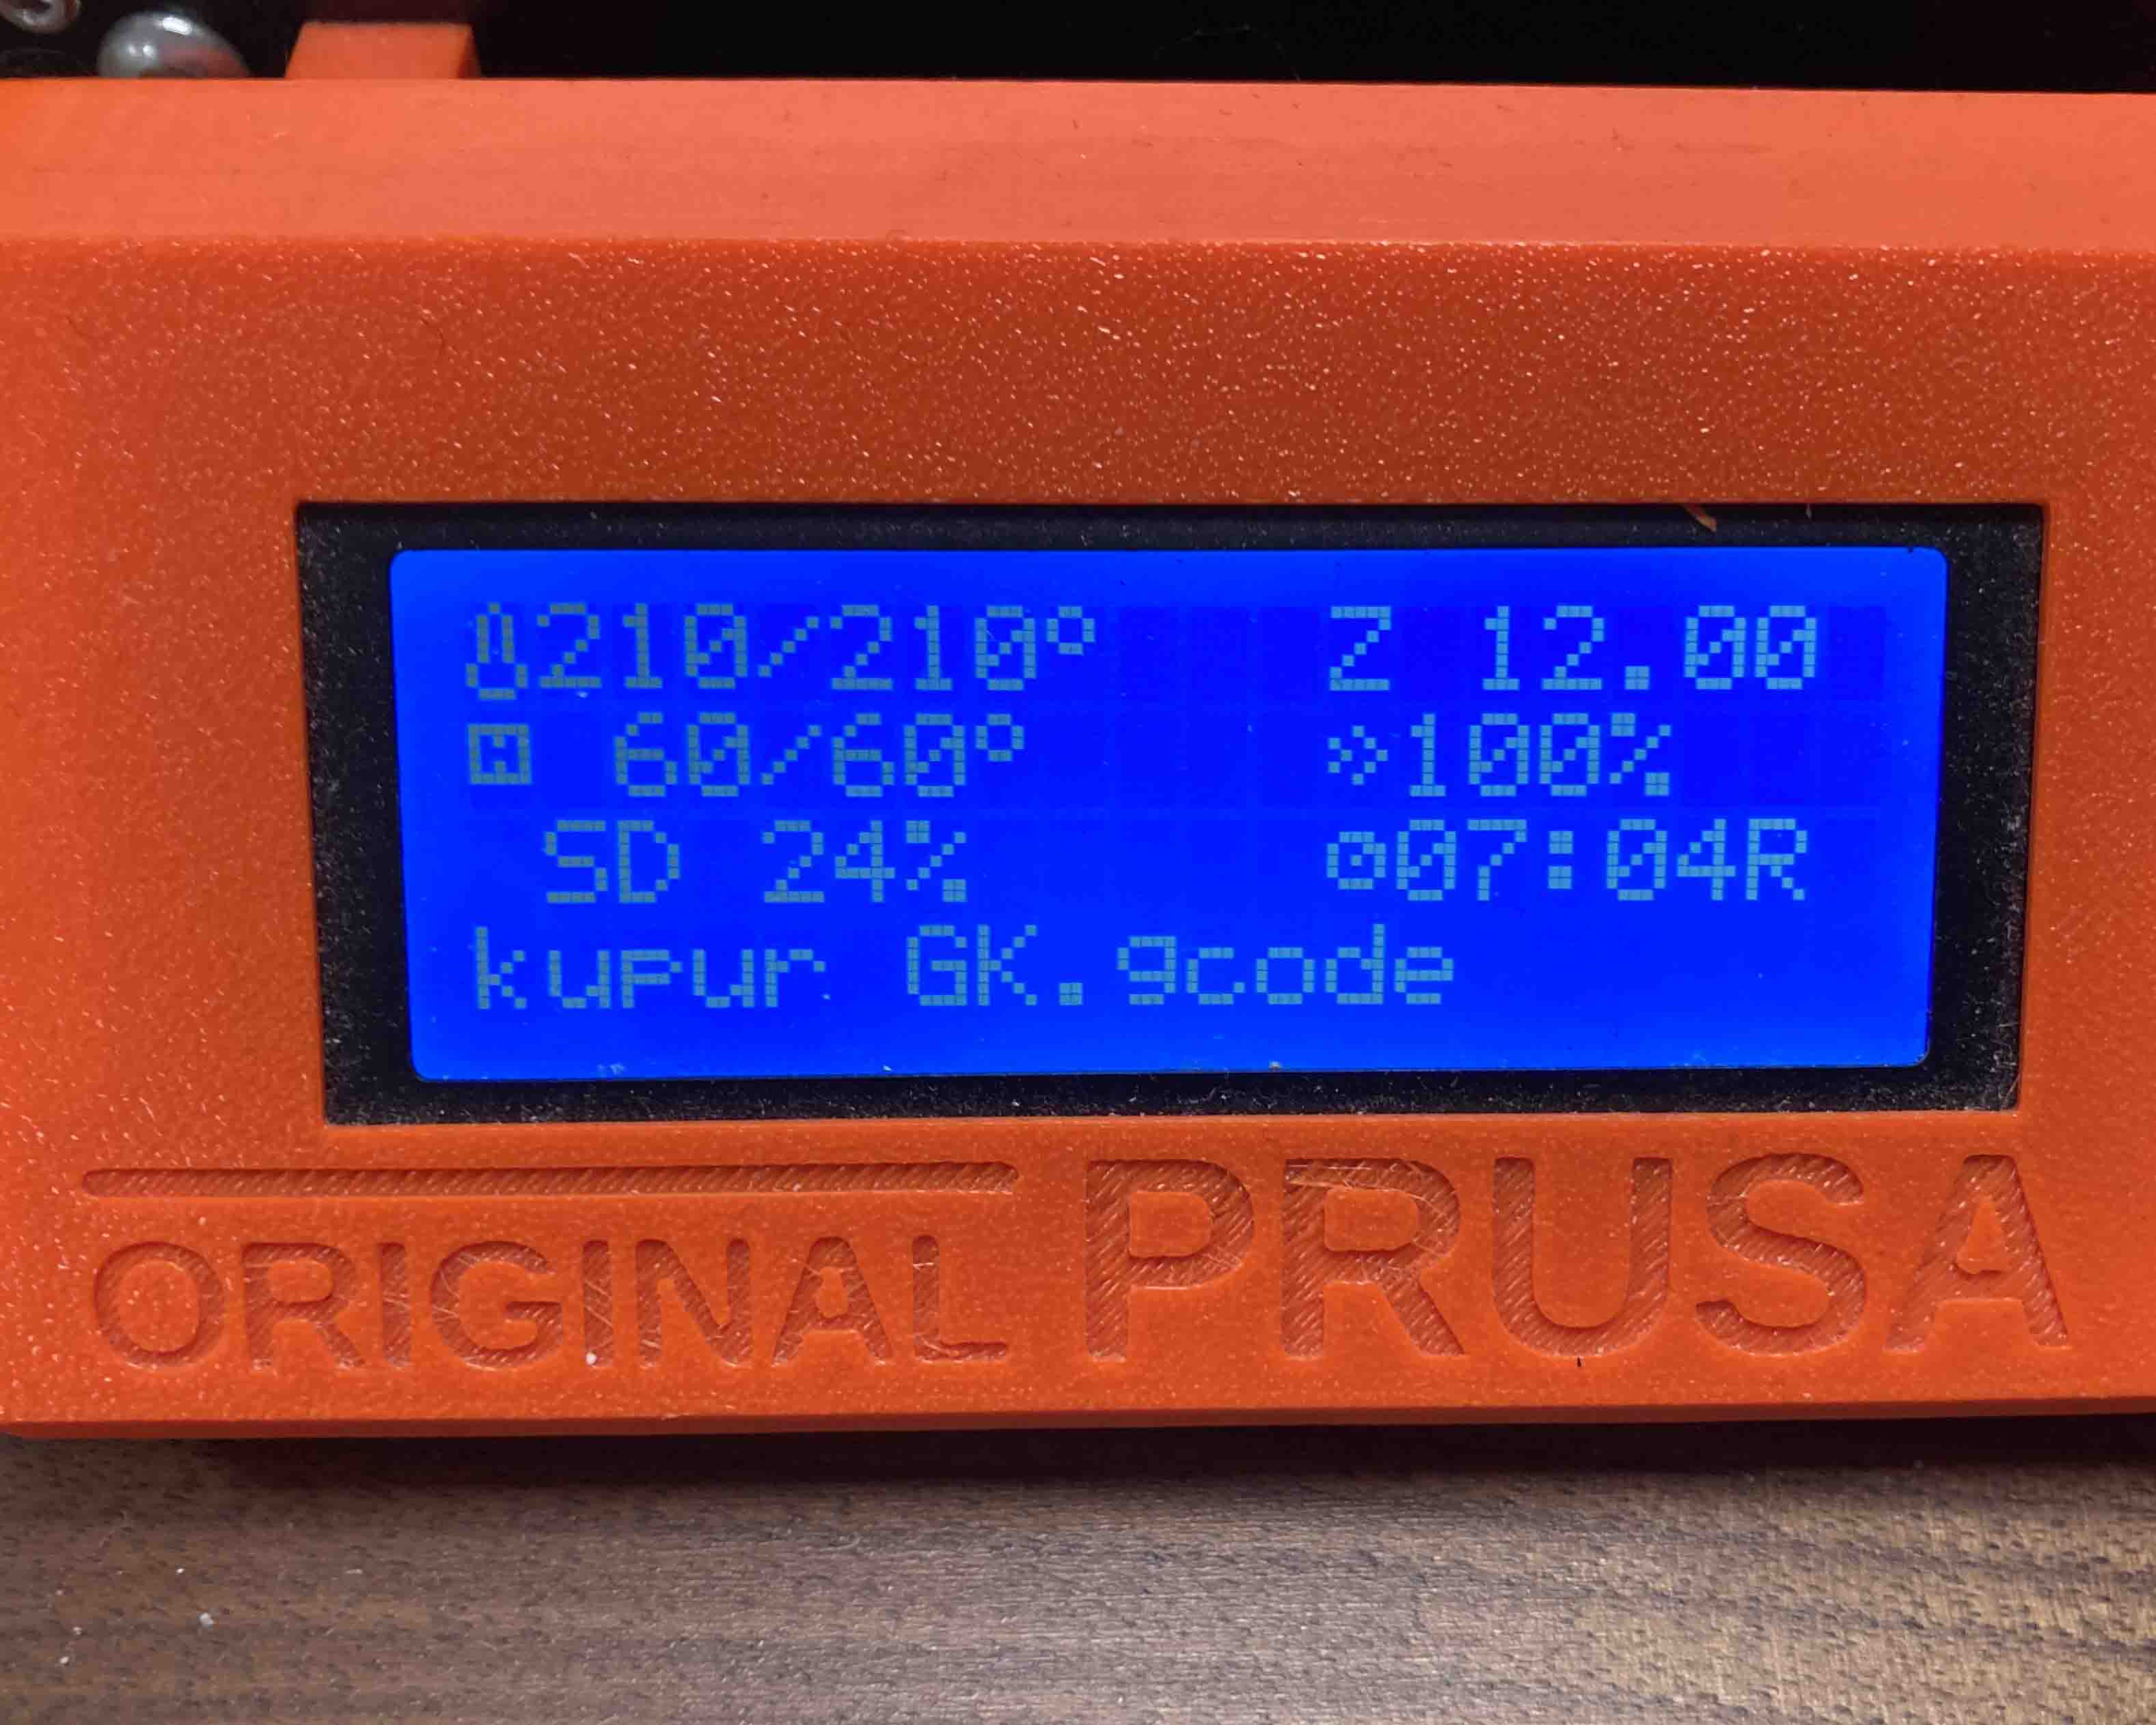
3-D Model: Fidget box
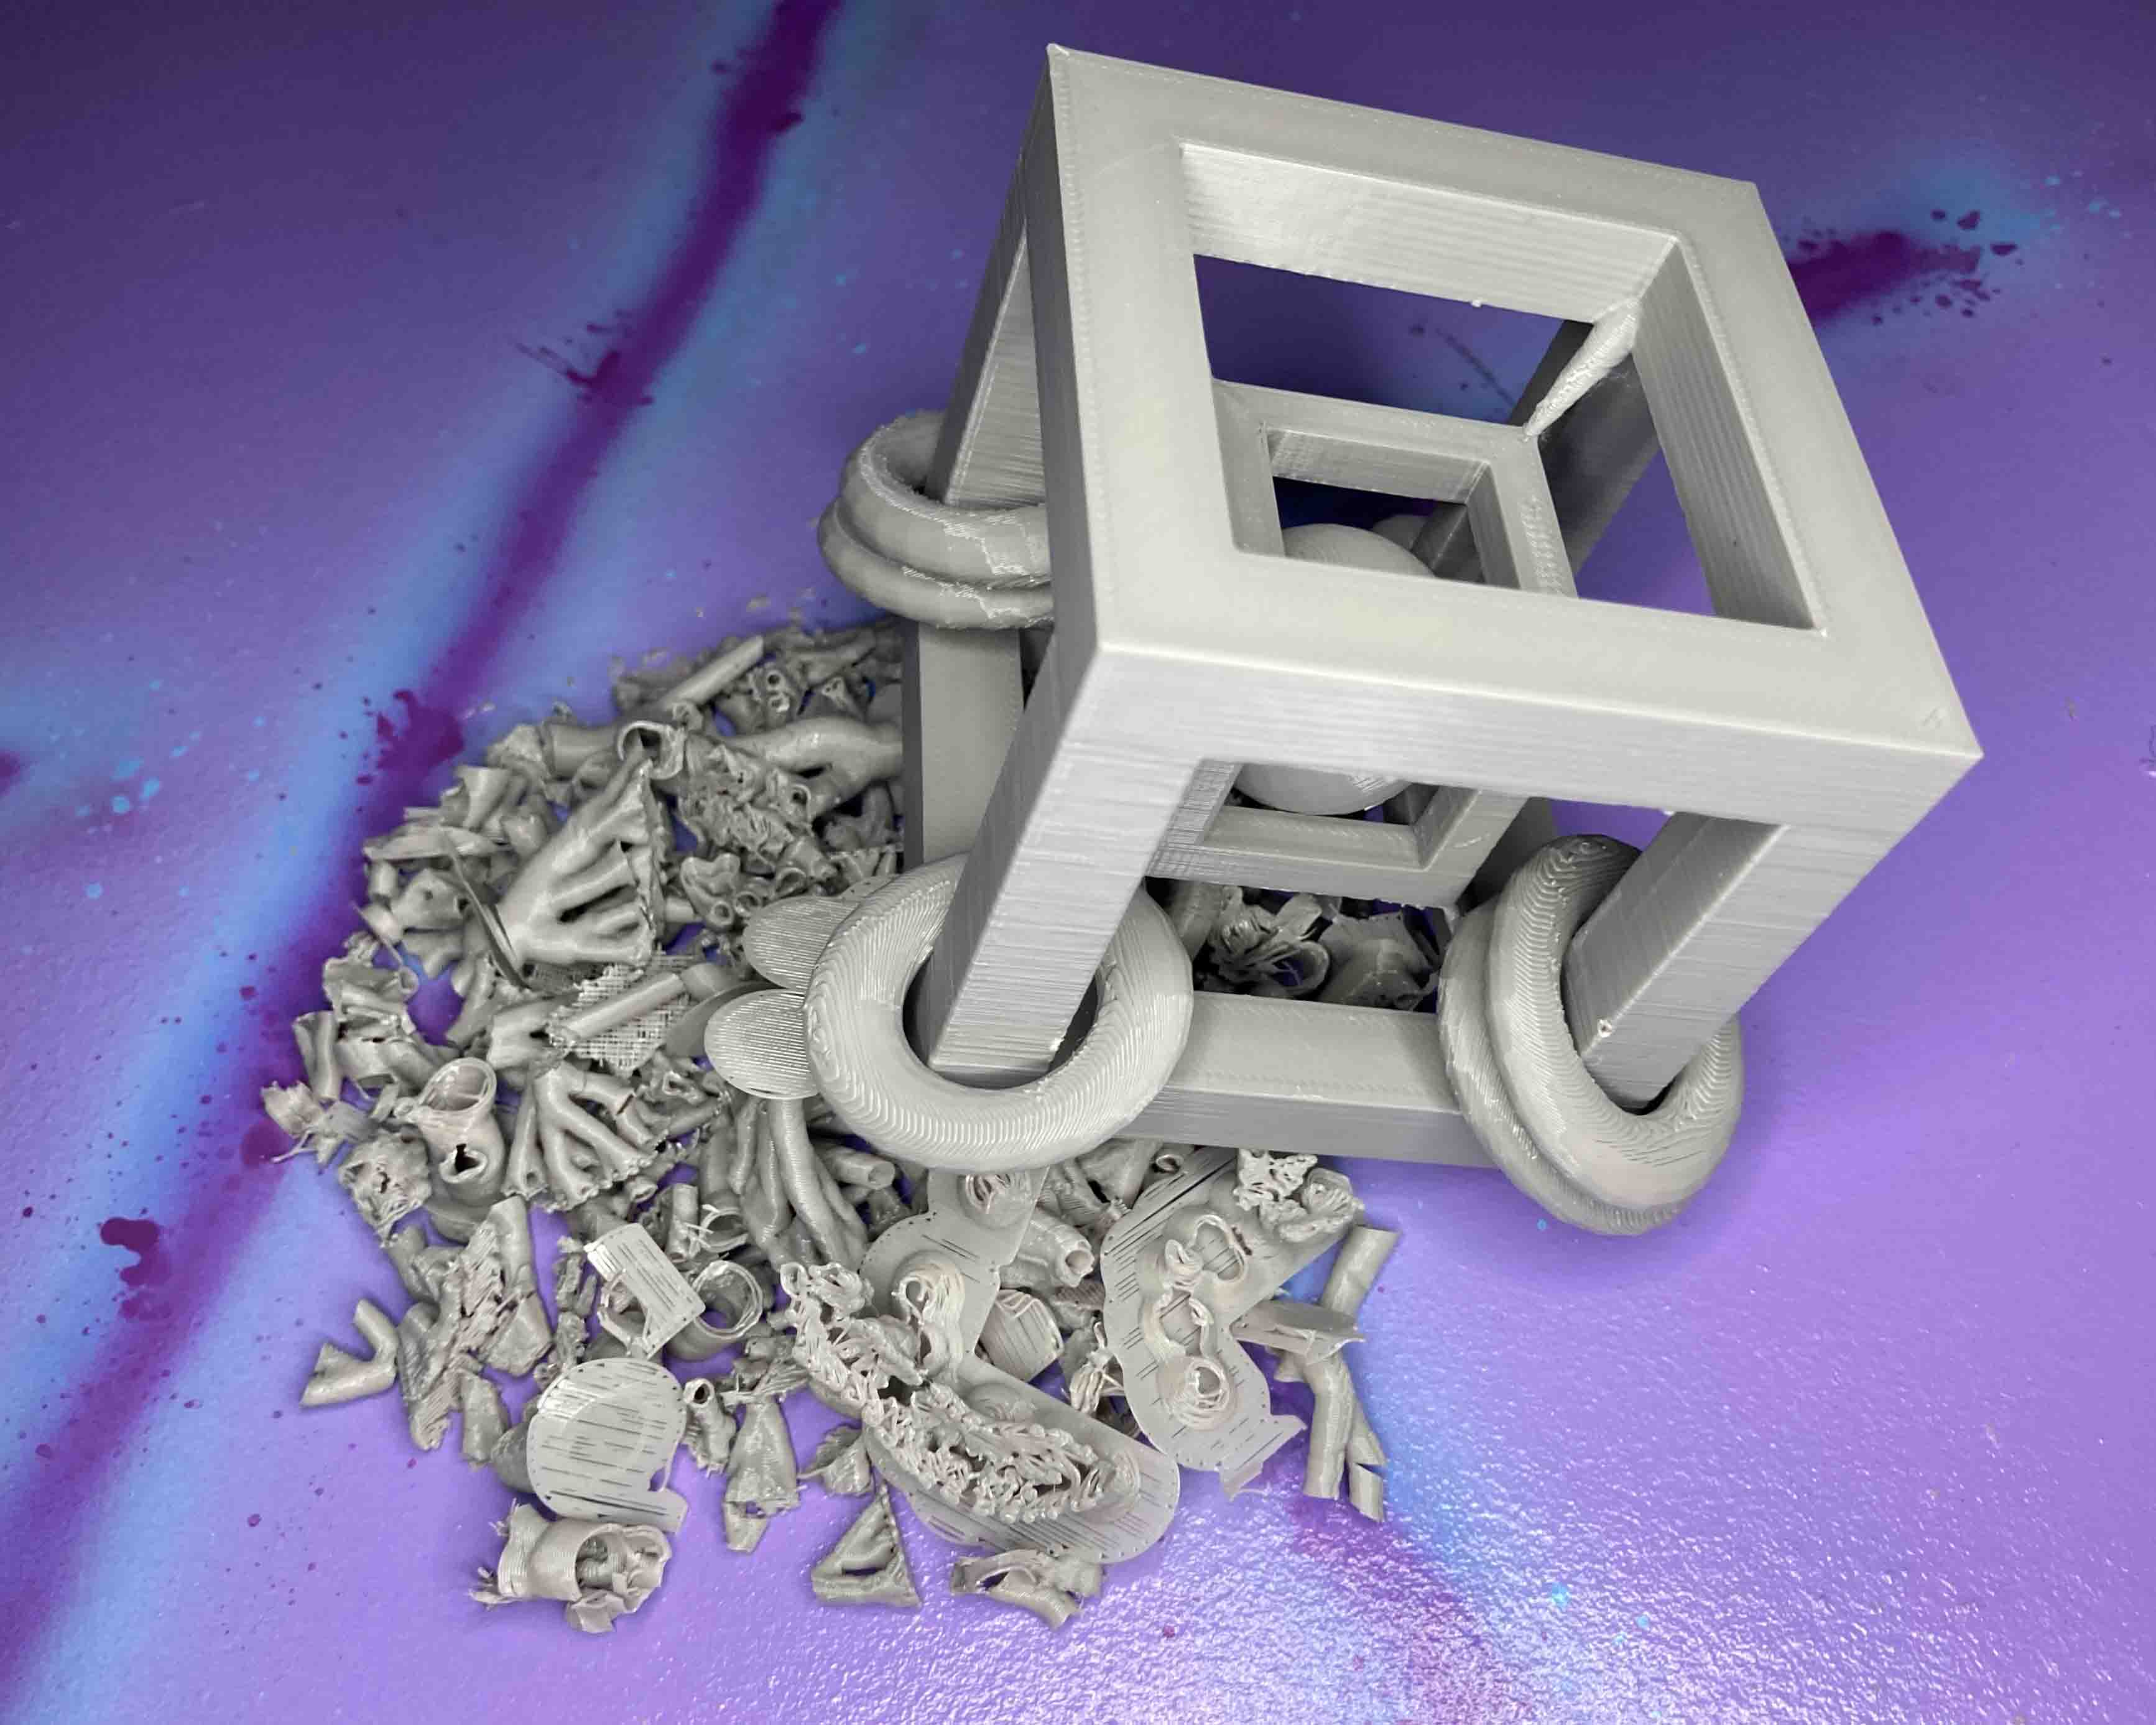
I was gonna make a 12 sided dies with an eight sided dice within that would rattle, but I couldn't figure out how I would print it out, so that project got scrapped for another project. I figured out in the end that I could not print the inside dice without supports so it would never work. I ended up making a fidget box thing that had out all inside a box with rings that would you could mess with. The box wasnt easy to print because it was a large box with rings on the ends. Inside it was a smaller box with a ball inside of it. With all these moveble pieces it could not be easily make subtractively. Lots of supports were needed to make to form work and keep all the things movable.
Fidget_Box
3-D Printer: Fidget box
3D printed with organic support.
3-D Pre Printed: Testers
3D printed without support.
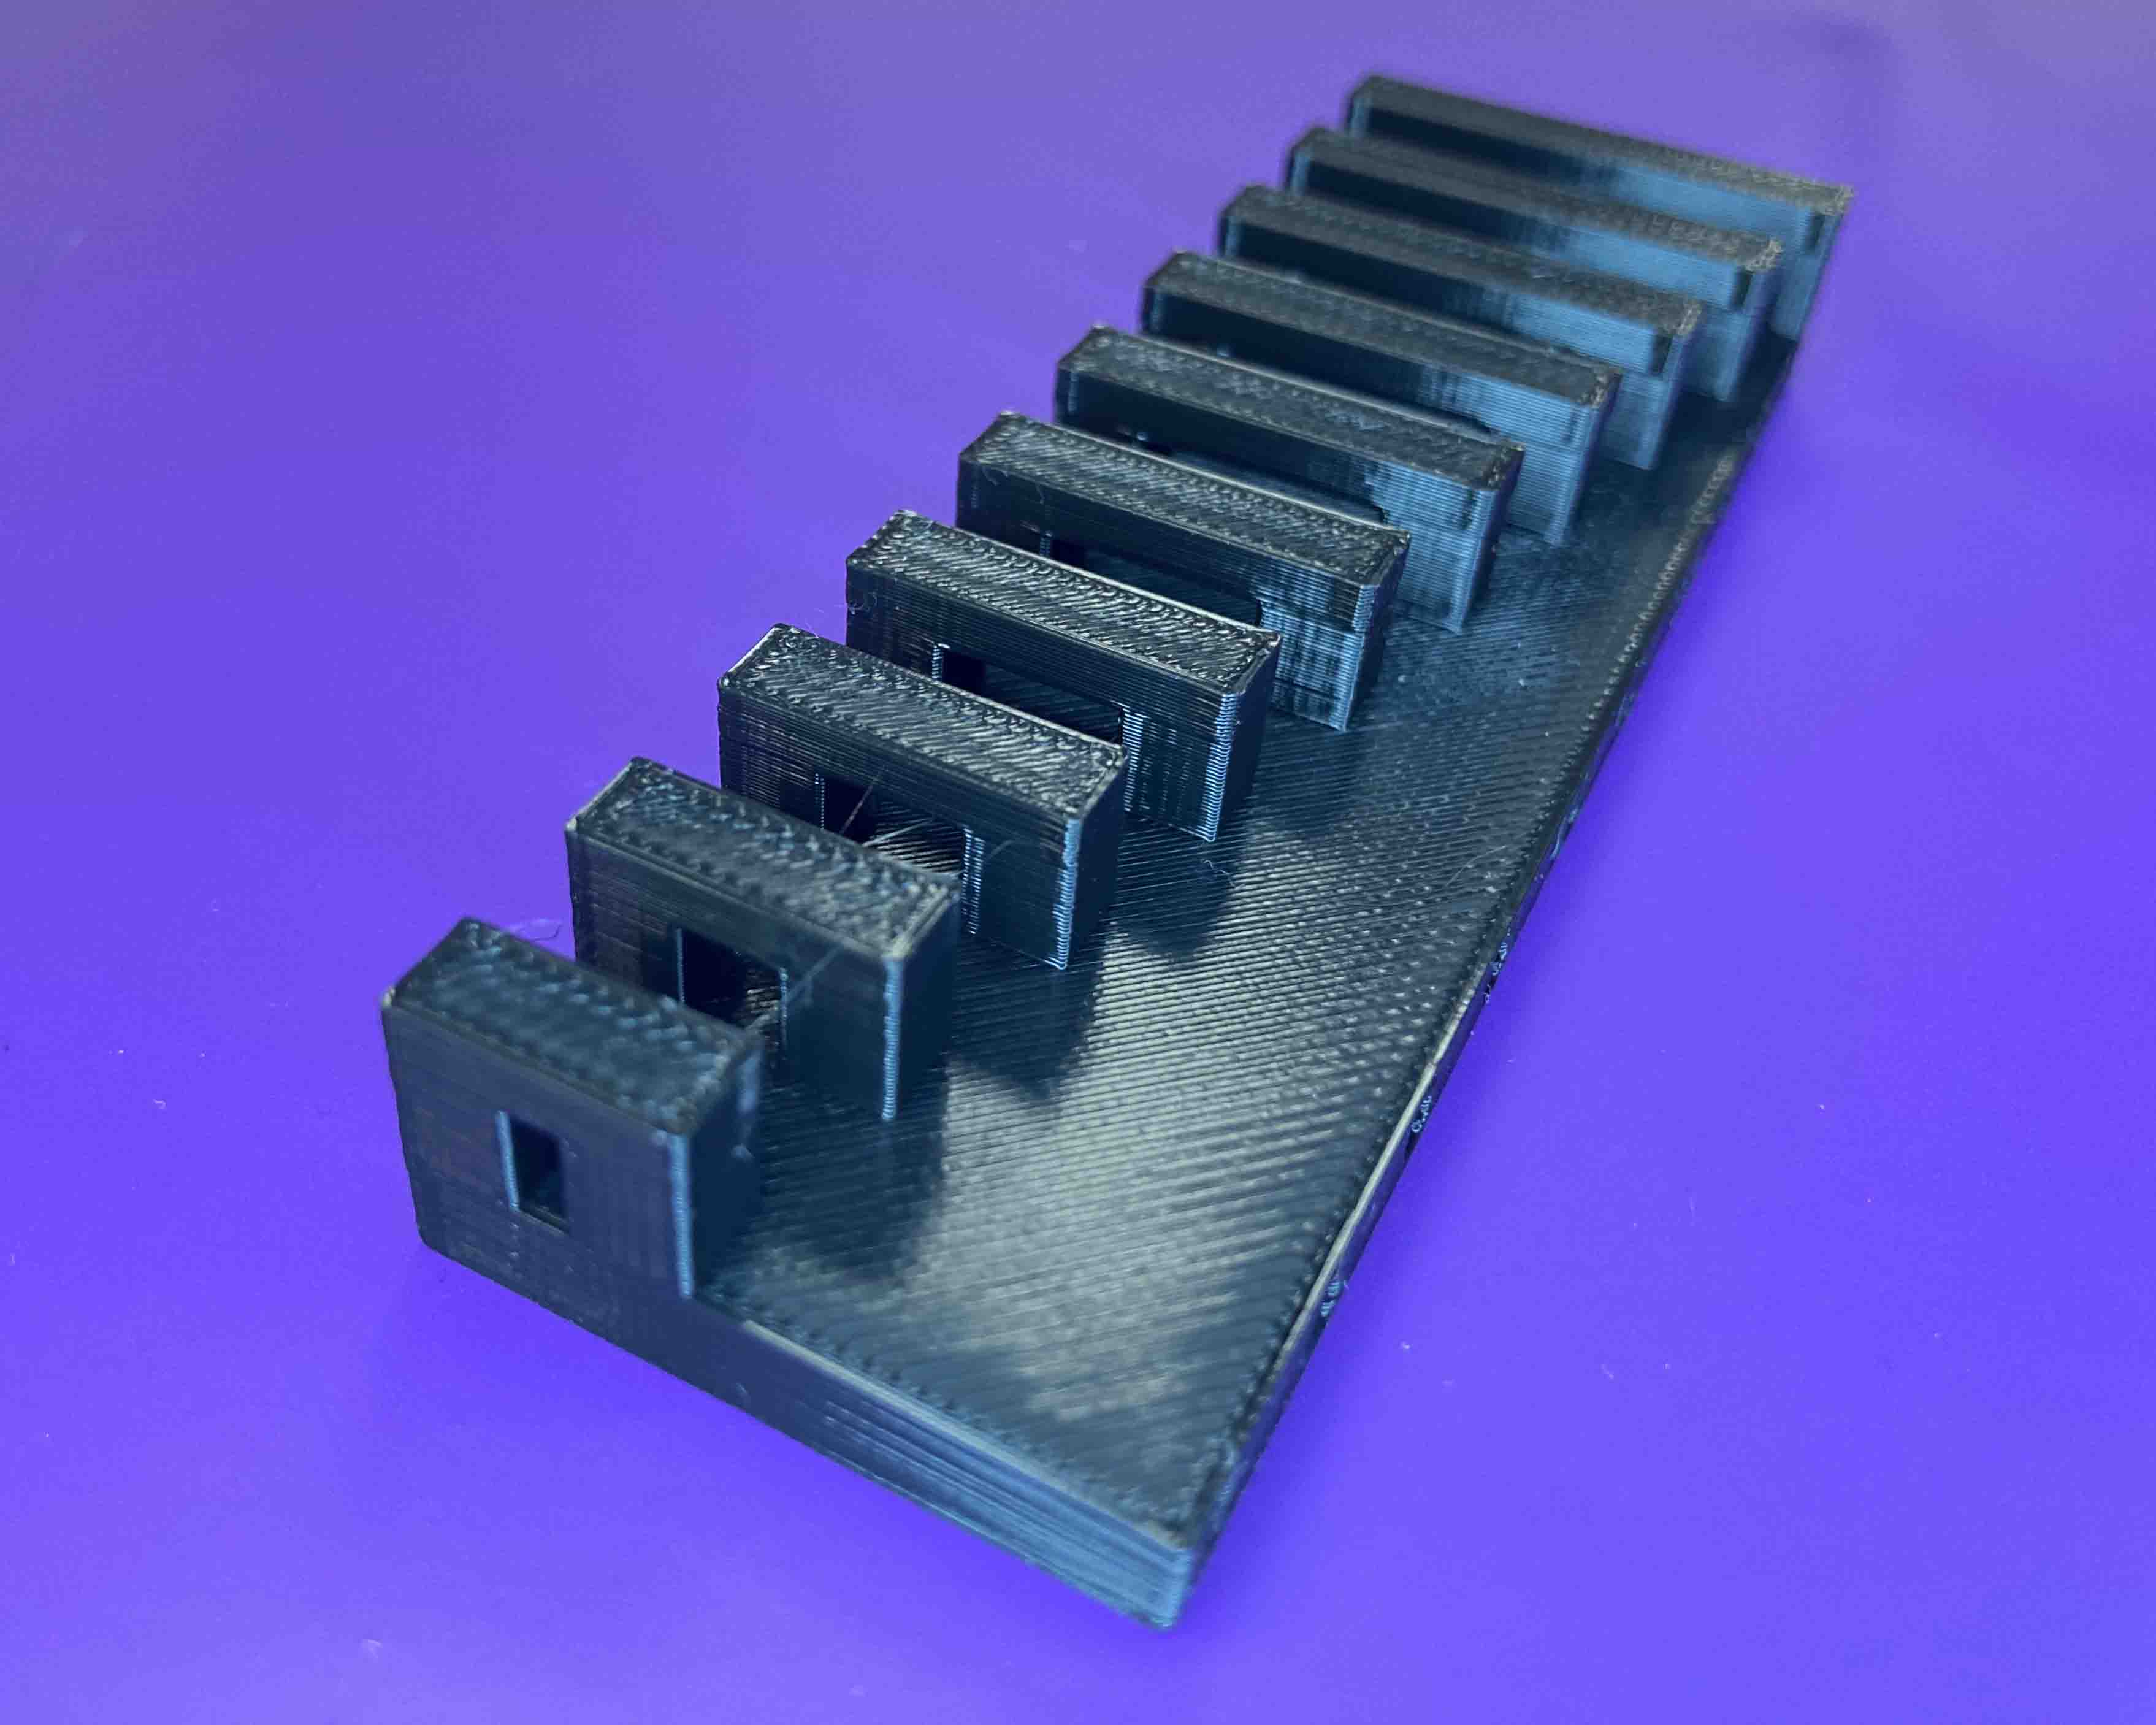
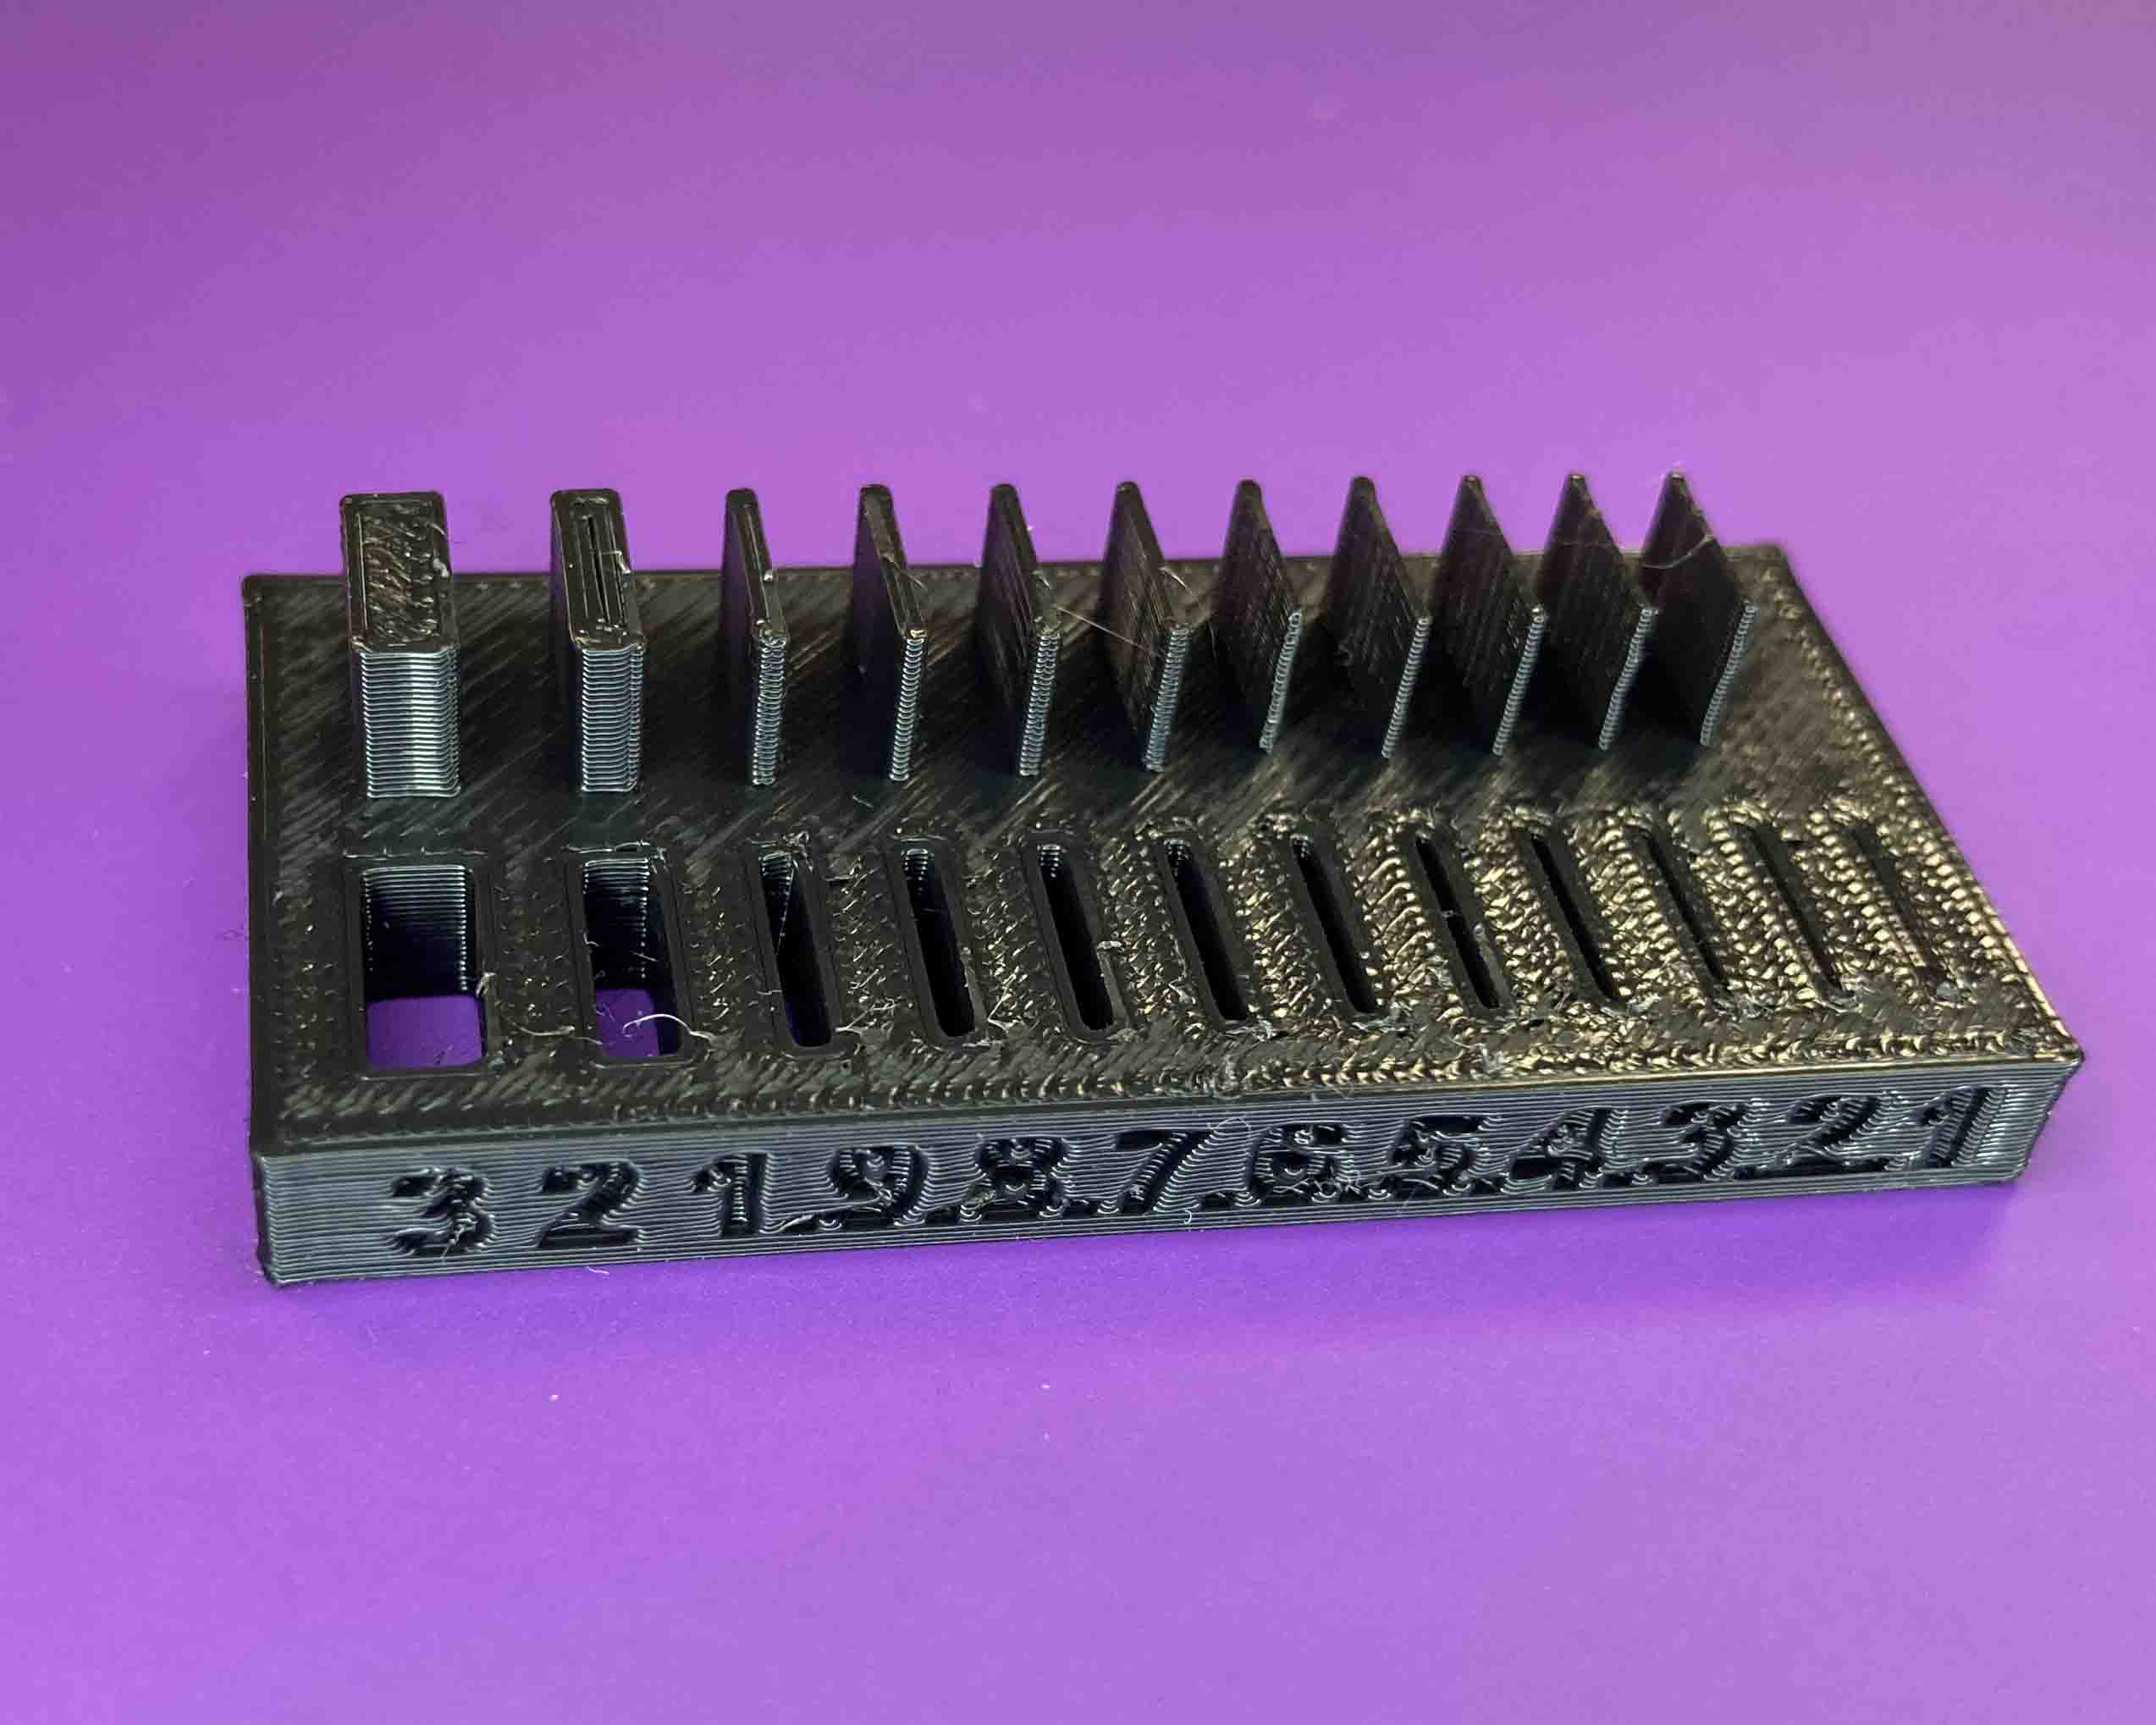
Angle test
This 3D print serves as a crucial experiment to determine the safe printing angles for maintaining quality in 3D printed objects. It features nine pillars, each printed at increasing angles from 0 degrees to 90 degrees. Observations indicate that print quality remains acceptable up to a 50-degree angle. Beyond this threshold, the quality noticeably diminishes, highlighting the critical impact of print angle on the outcome's fidelity. This experiment underscores the importance of angle consideration in 3D printing processes to ensure optimal results.
Overhang test
This overhang test comprises two distinct files designed to illustrate the critical role of supports in 3D printing, especially when dealing with overhangs at challenging angles. The first file features a singular overhang extending 15mm at a 90-degree angle, demonstrating that without adequate supports, the print quality is significantly compromised, rendering the outcome unacceptable. The second file methodically explores overhangs through ten pillars, each with a 90-degree overhang that increases incrementally from 1mm to 10mm in length. Observations reveal a discernible decline in print quality beginning at just 2mm, underscoring the necessity of supports or design adjustments to mitigate extreme overhangs. Together, these tests highlight the imperative of incorporating supports or avoiding 90-degree overhangs in model designs to ensure the integrity and quality of 3D printed objects.
Bridging
This bridging test is meticulously designed to evaluate the performance of 3D printing across varying lengths of unsupported spans, featuring a series of ten bridges. The initial bridge spans a modest 2mm, with each subsequent bridge extending an additional 2mm in length, culminating in a 20mm bridge. The results of this test are remarkably positive, indicating that up to a certain point, 3D printing can effectively manage bridging without direct support. All bridges, from the shortest to those approaching the 20mm mark, display acceptable quality, demonstrating the capability of 3D printing technology to create stable, unsupported structures. However, the longest bridge, at 20mm, exhibits slight sagging, a minor deviation from the otherwise consistent quality observed in shorter spans. This subtle sagging at the extreme end of the test spectrum highlights the physical limitations of material cooling and gravity's effect on 3D printed structures, underscoring the importance of considering bridge length in design and the potential need for supports or adjustments for longer spans.
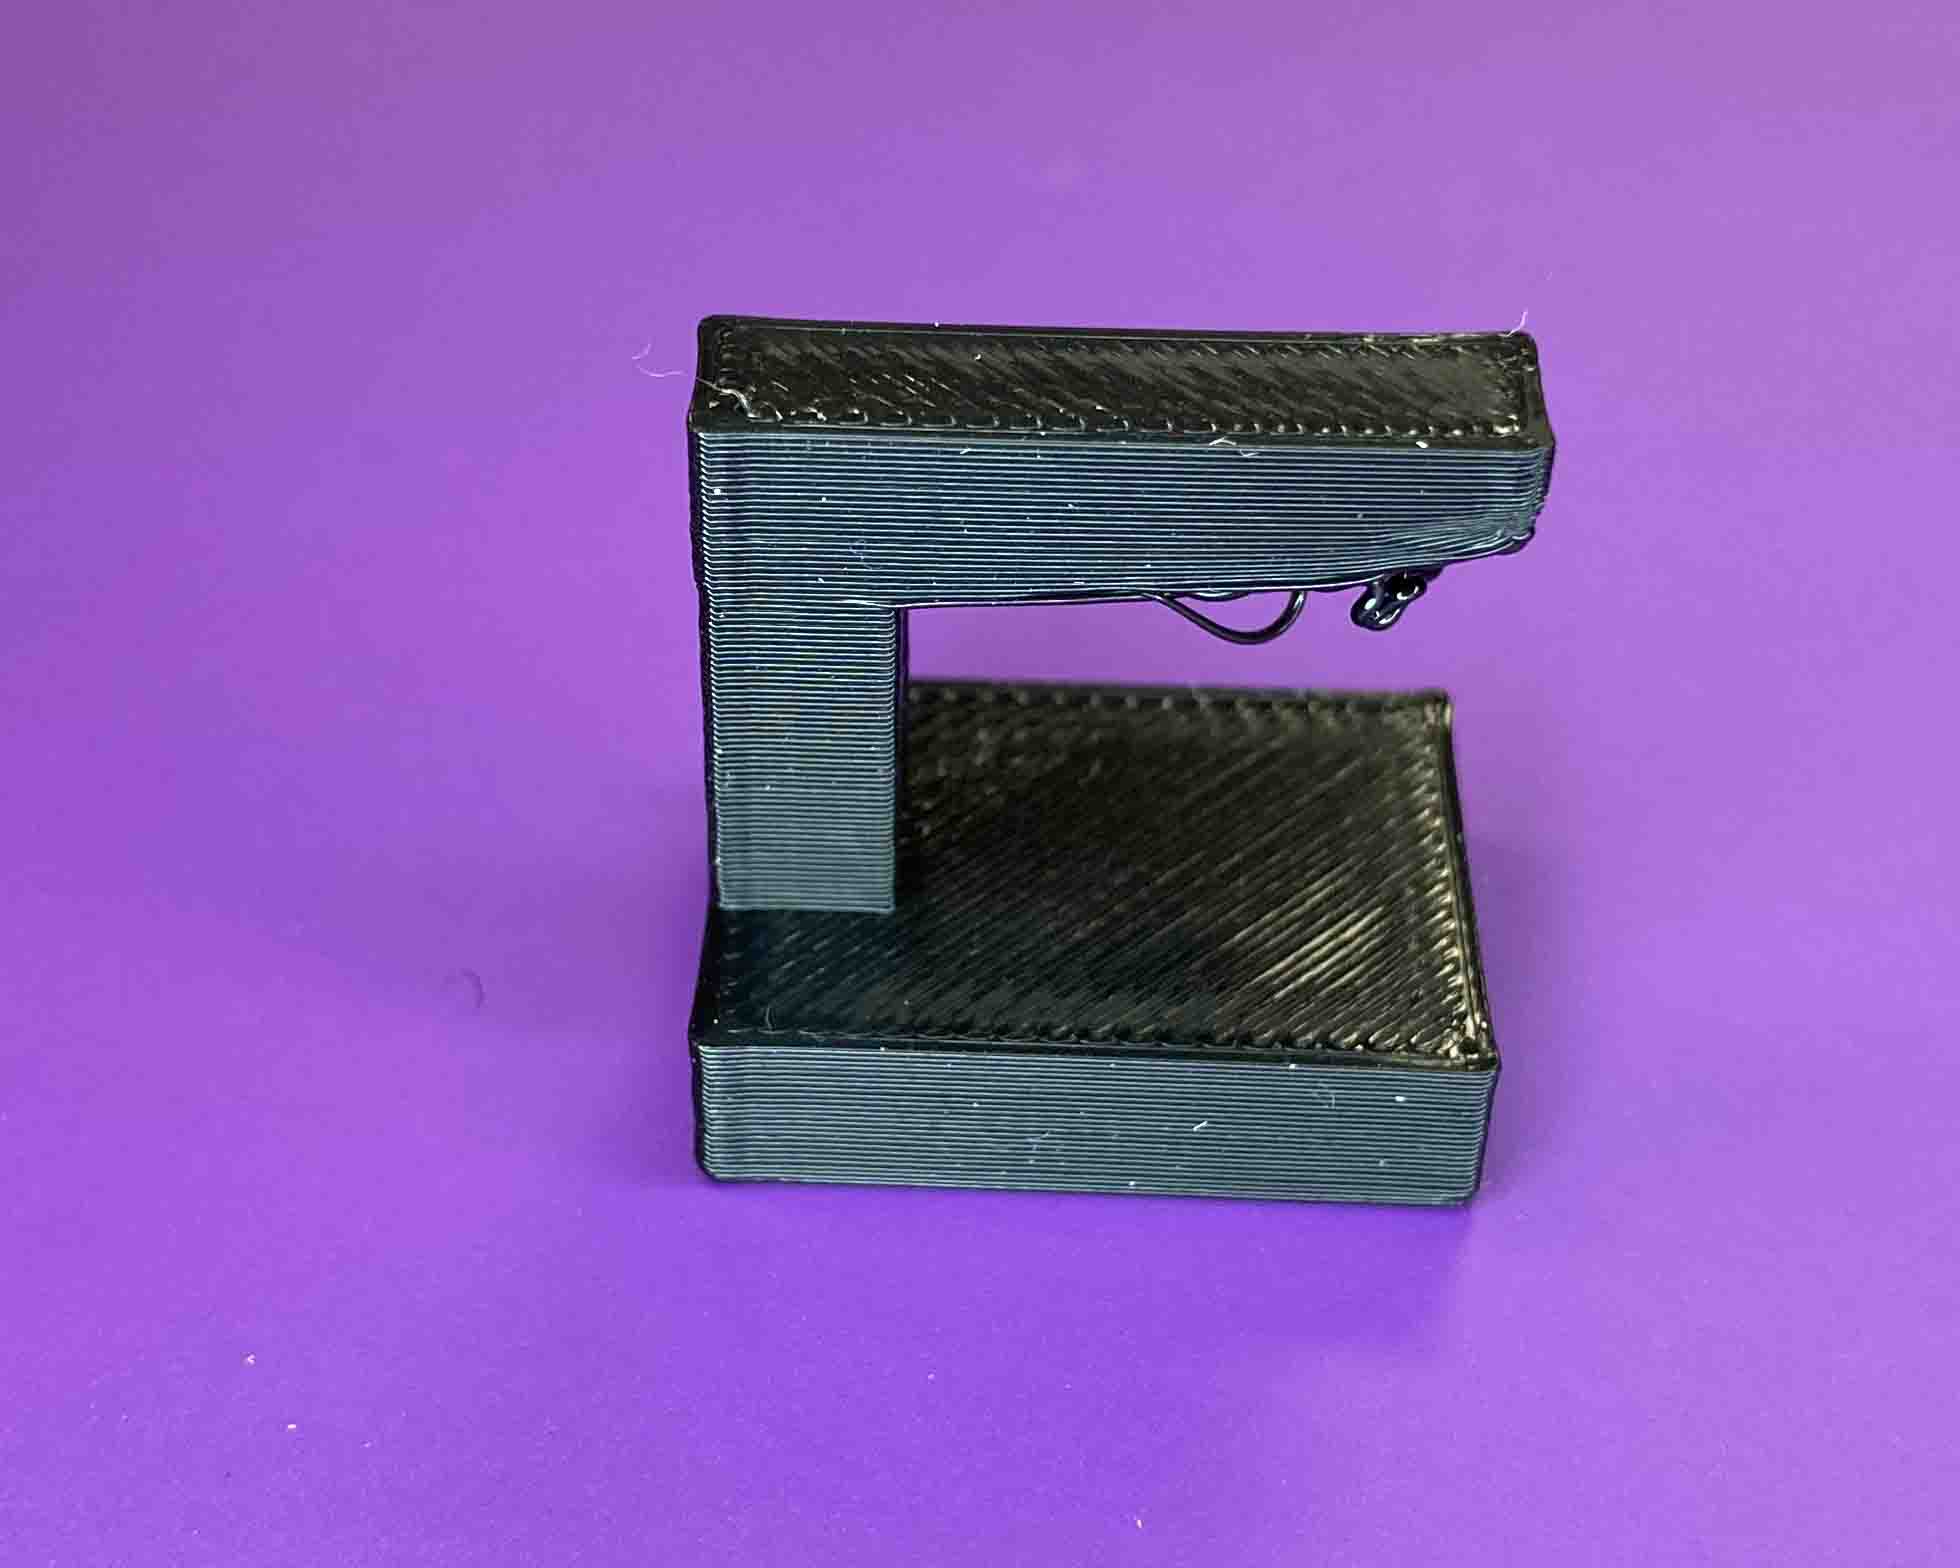
Wall thickness
The wall thickness and gap tests are essential evaluations to determine the precision capabilities of 3D printing technology, particularly in achieving fine details and maintaining structural integrity at minimal dimensions. These tests explore a range of gaps and wall thicknesses, starting from a mere 0.1mm and incrementally increasing up to 1mm, with additional tests for 2mm and 3mm gaps. The findings from the gap test reveal that gaps beginning at 0.2mm are deemed acceptable, with the 0.1mm gap being distinguishable yet falling short of acceptable quality, indicating the printer's limitations in resolving extremely narrow spaces.
On the counterpart, the wall thickness test uncovers a similar boundary of the printer's capabilities. All tested wall thicknesses, mirroring the gap sizes from 0.2mm onwards, are successfully printed and meet acceptable standards, showcasing the printer's adeptness at creating slender yet stable structures. However, the printer did not attempt to print the 0.1 mm wall since the slicer software deemed it too fine to print. This outcome highlights a critical threshold in the printer's precision, underscoring the challenge of producing ultra-thin walls and the necessity of adjusting design parameters to align with the printer's capabilities. Together, these tests offer valuable insights into optimizing designs for 3D printing by acknowledging the practical limits of gap resolution and wall thickness that can be reliably achieved.
3-D Pre Printed: Fidget box
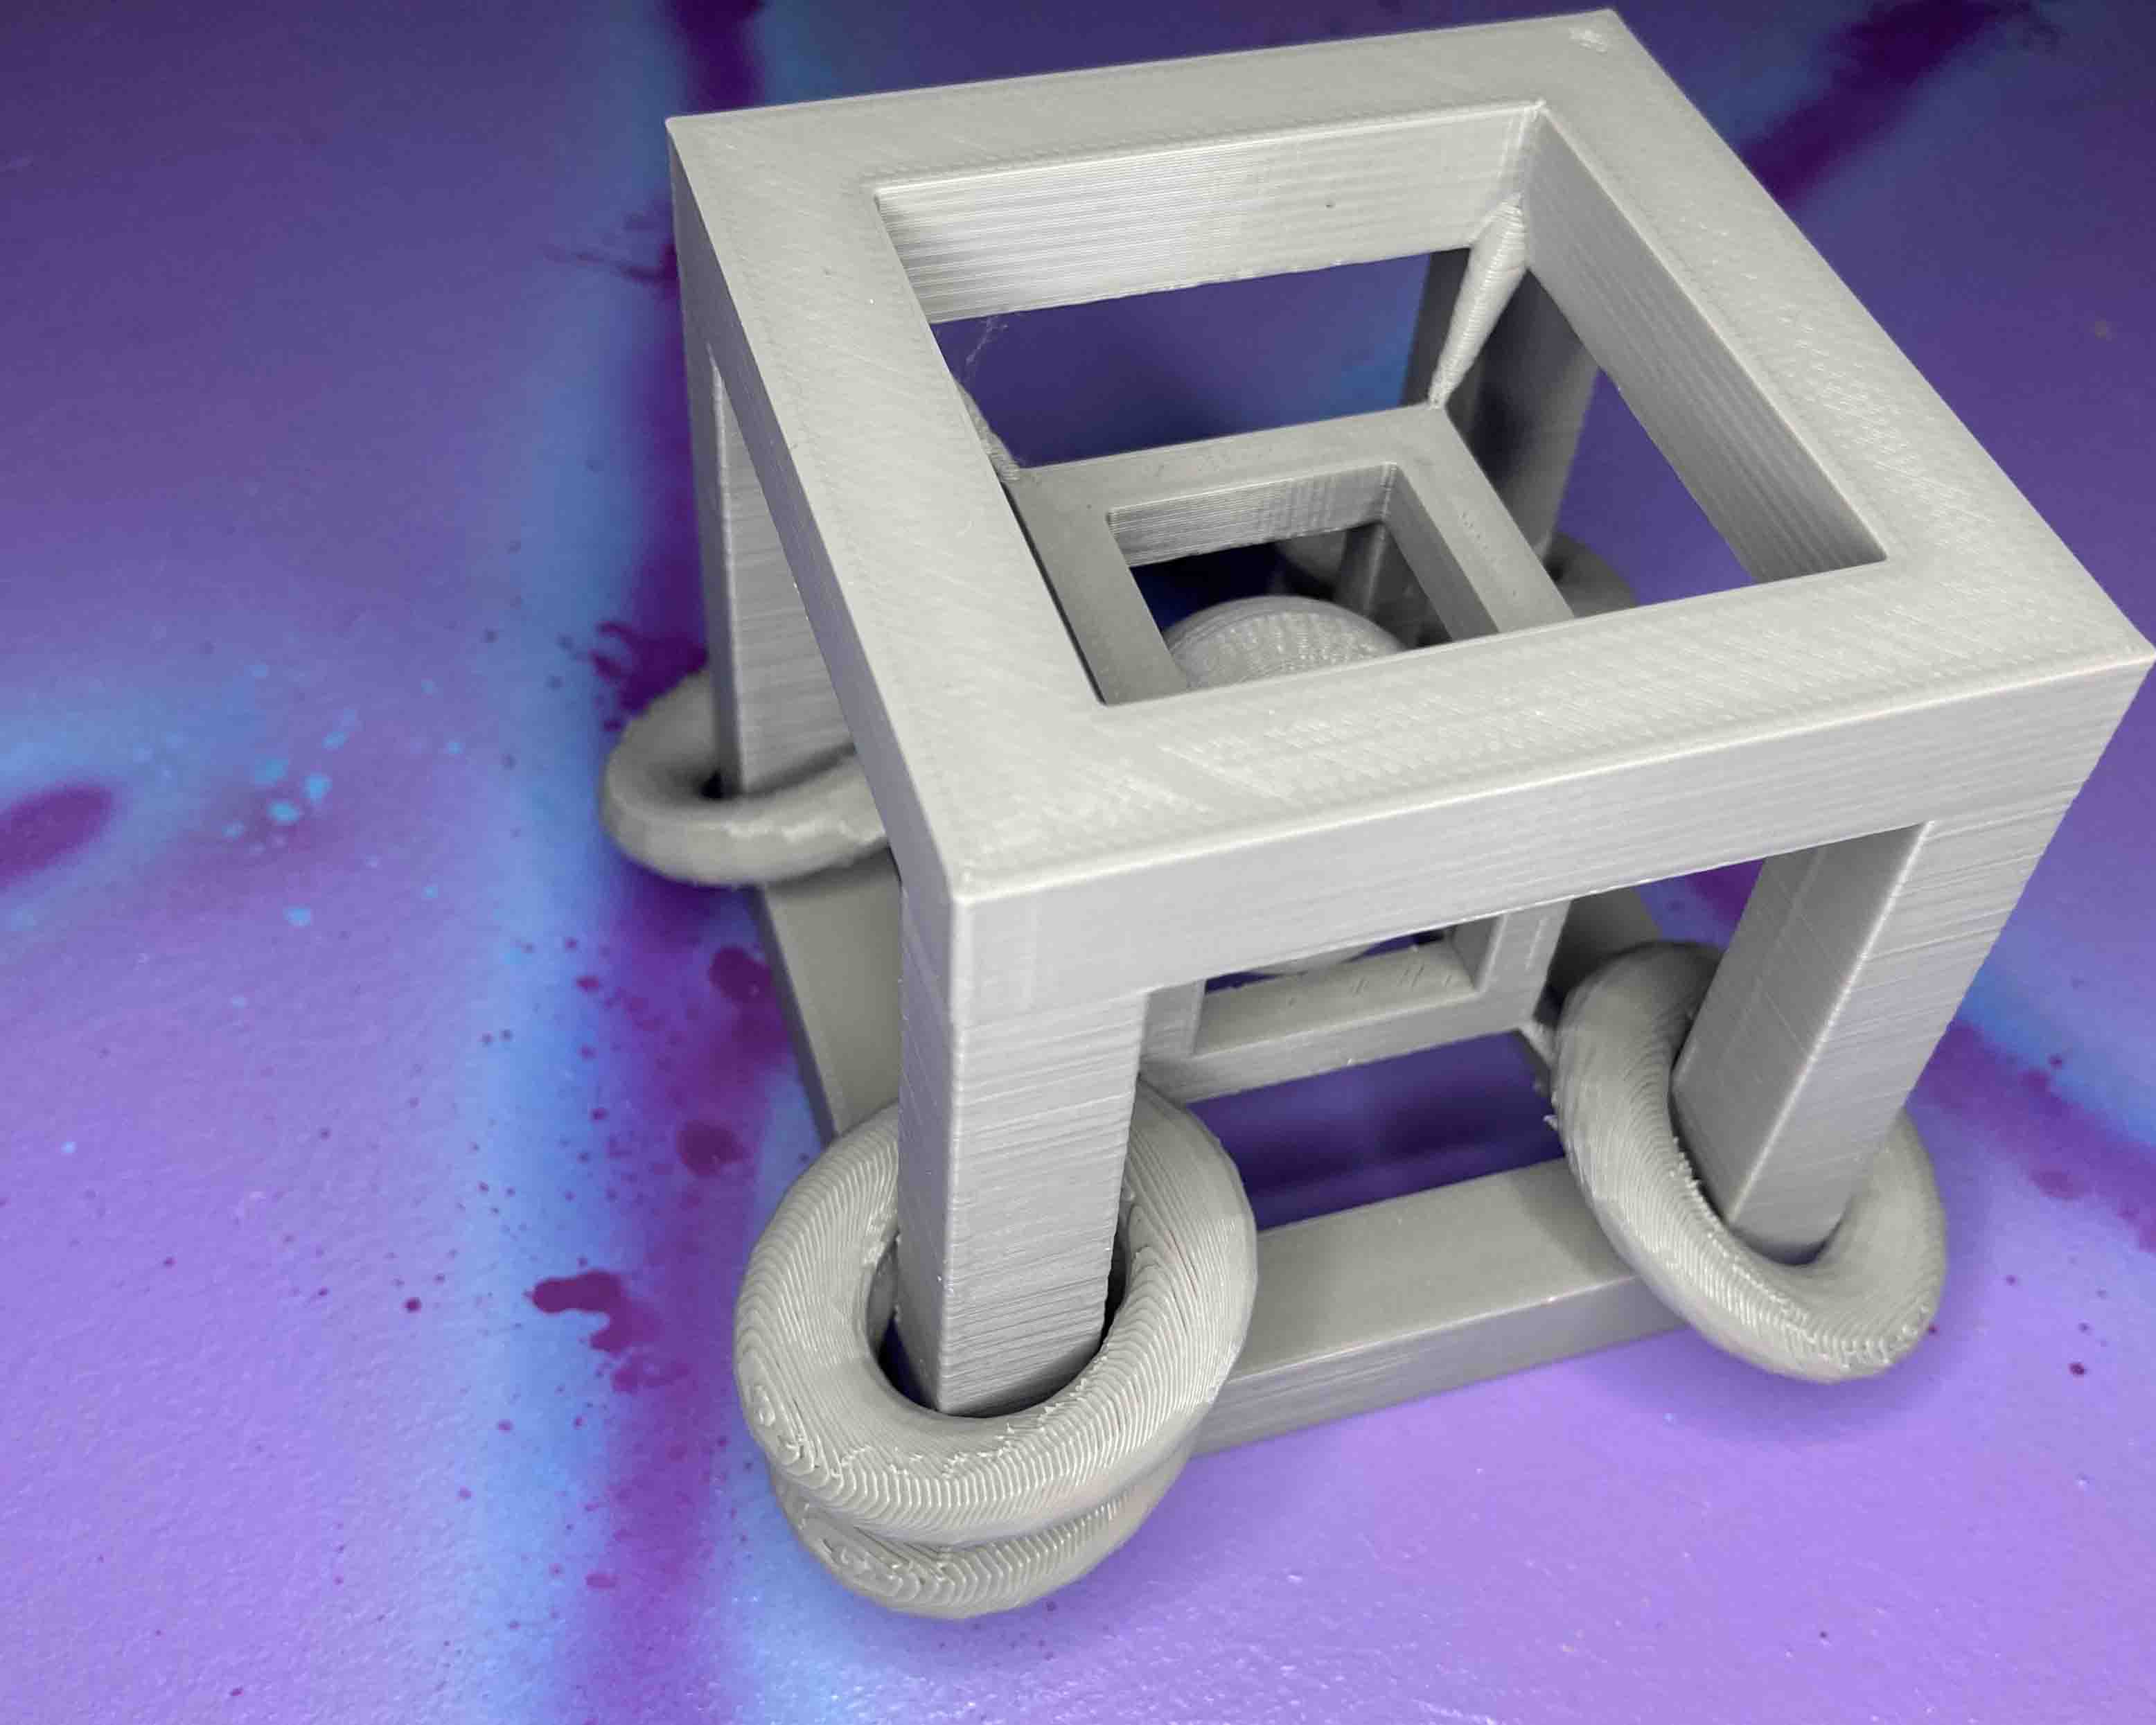
Organic supports removed.
I give it 10/10. Its really functional as a fidget box.
I started by making testers for the 3D printer. That was so I could figure out the limits of the printer. Those were helpful to figure out what to fix on designs.
I scanned the Alexa Pop but it didnt go as well I hoped. The shine of the material in the Alexa kept messing up the scan. I ended up putting stickers on the Alexa to help the scanner. Then it went well. I then designed a wall unit for the Alexa. I have 3D printed it and changed it so it can be used on walls and on my pin board from IKEA.
I made a really cool Fidget box that would rattle but figuring out the supports and how to take them out became a huge project. So I ended up printing and do a simple box with several moving parts. That box had 8 pieces that were interlocked. Getting the supports out of that one was hard.