5. 3D Scanning and Printing
This week we learned about 3D scanning and printing technologies.
I've already done some 3D printing and have a 3D printer (Prusa Mini+) at home, but 3D scanning was new to me.
3D printing is very exciting technology as it allows us to create objects additively (by adding material layer by layer) instead of subtractively (by taking away pieces of a material to make a final form).
There are multiple forms of 3D printing, the most common in consumer applications being SLA (stereolithography) and FDM (fused deposition modeling).
SLA uses a liquid that hardens into resin when exposed to UV light. It generally uses a high resolution screen to flash layers of the printing object and solidify it layer by layer.
It can also use lasers which rapidly scan a layer and solidify the resin this way.
FDM printing uses a spooled plastic material and runs it through a heated extruder, then deposits the molten material onto a build plate layer by layer to make an object.
Once a 3D model is created, it has to be processed by a software known as a slicer in order for the printer to understand what it must do.
The slicer software (such as Prusa Slicer, Cura Slicer, Octoprint, etc.) divides the model into layers and generates a .gcode file, which gives directions to the printer about how to print.
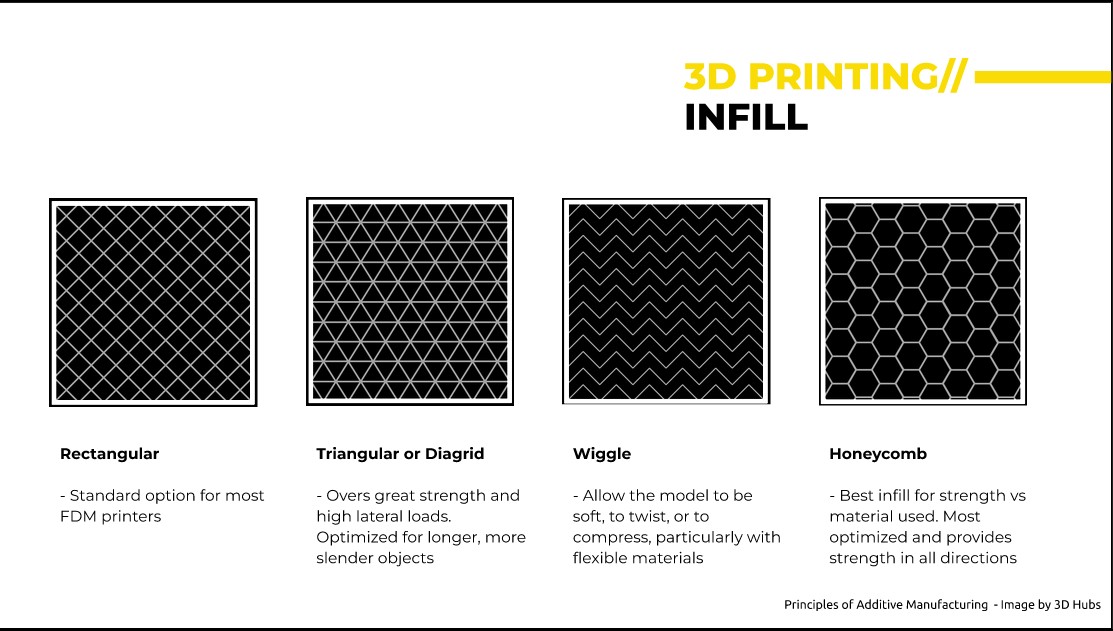
Since it is generally ineficient and a waste of material to print a fully solid object, you can choose an infill option, letting you pick an infill percentage as well as an infill pattern, each of which have their strengths and weaknesses.
Group Project
You can find the group project information here!
3D Printing
The ball and socket joint STL file is here.
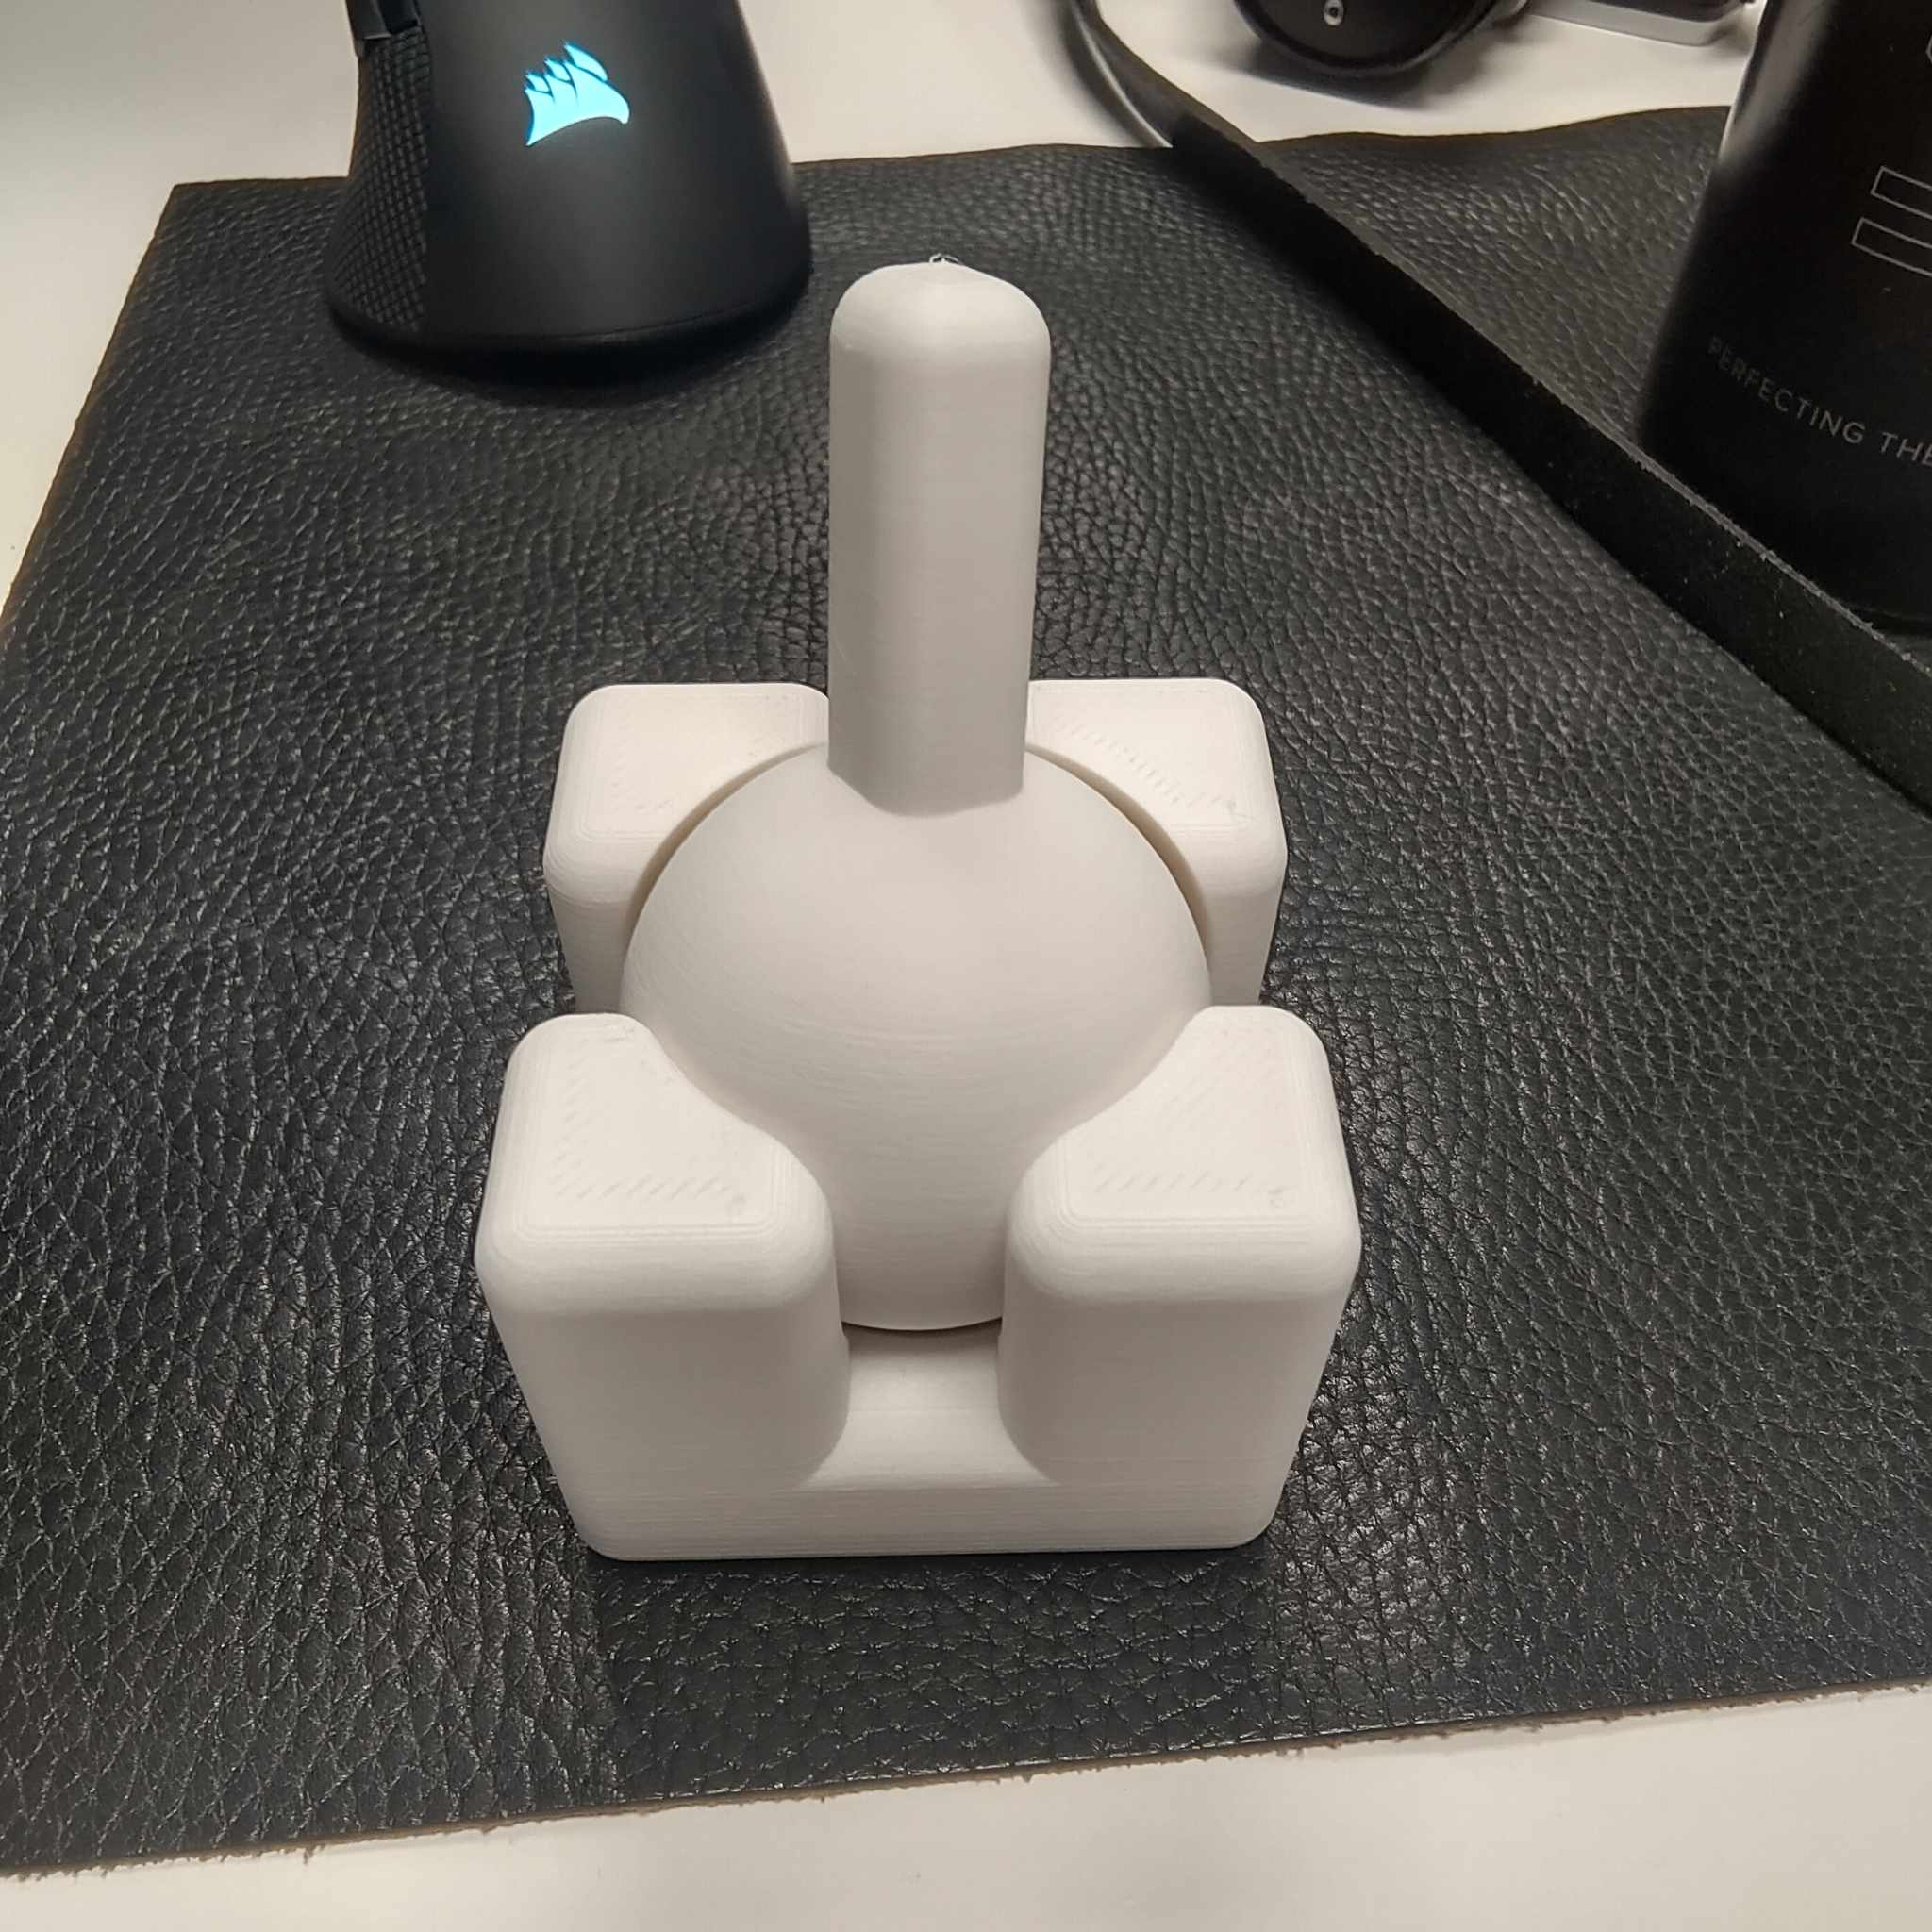
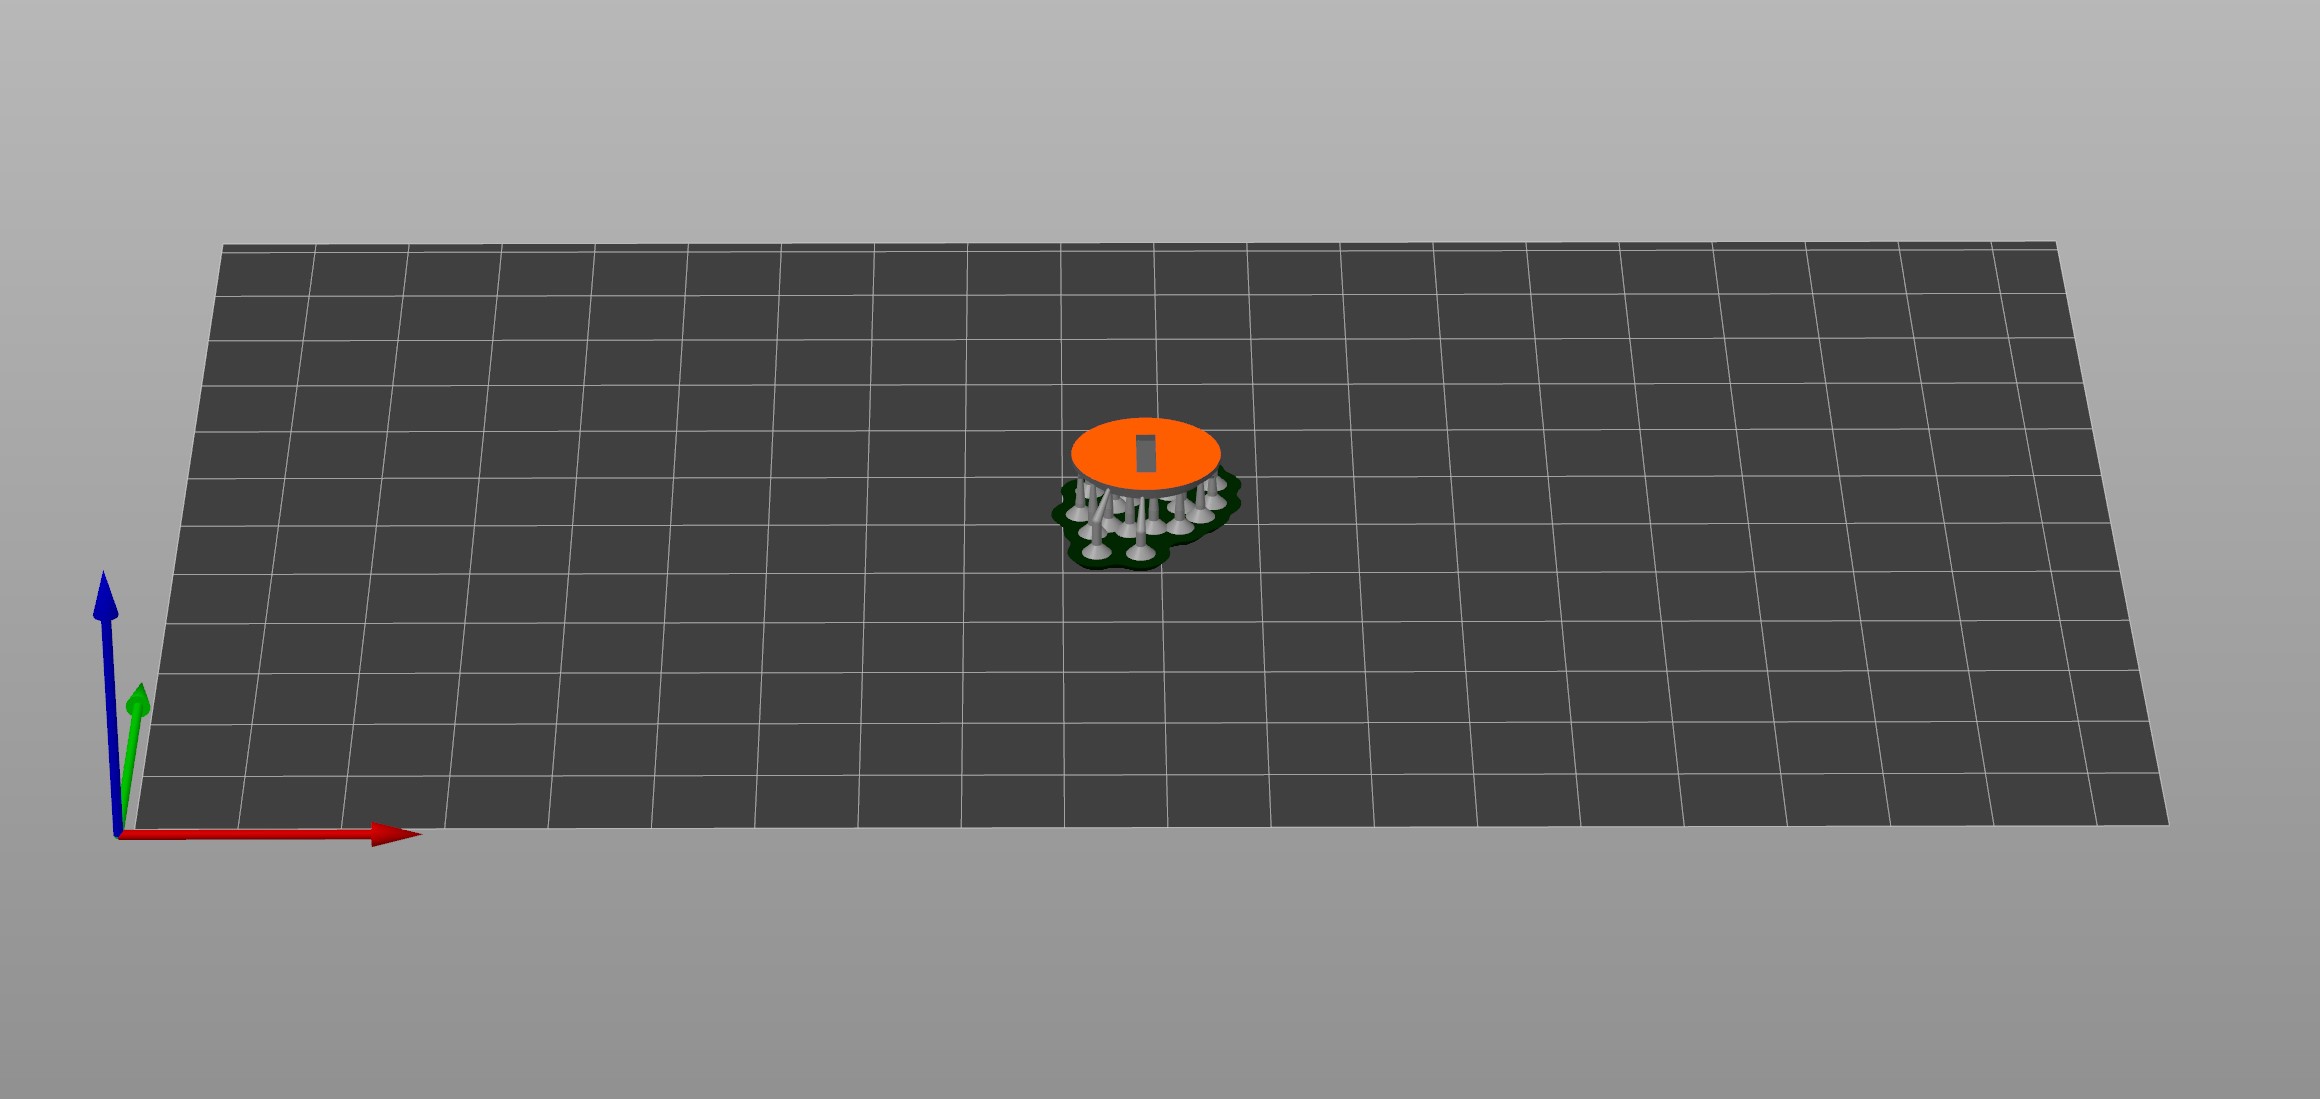
I designed a simple Ball and Socket joint in Rhino 3D, that I wanted to be able to print-in-place. Printing in place is the reason that it could not have been made subtractively.
I first made the basic design, using a cube as the base and a sphere with a rectangle attached.
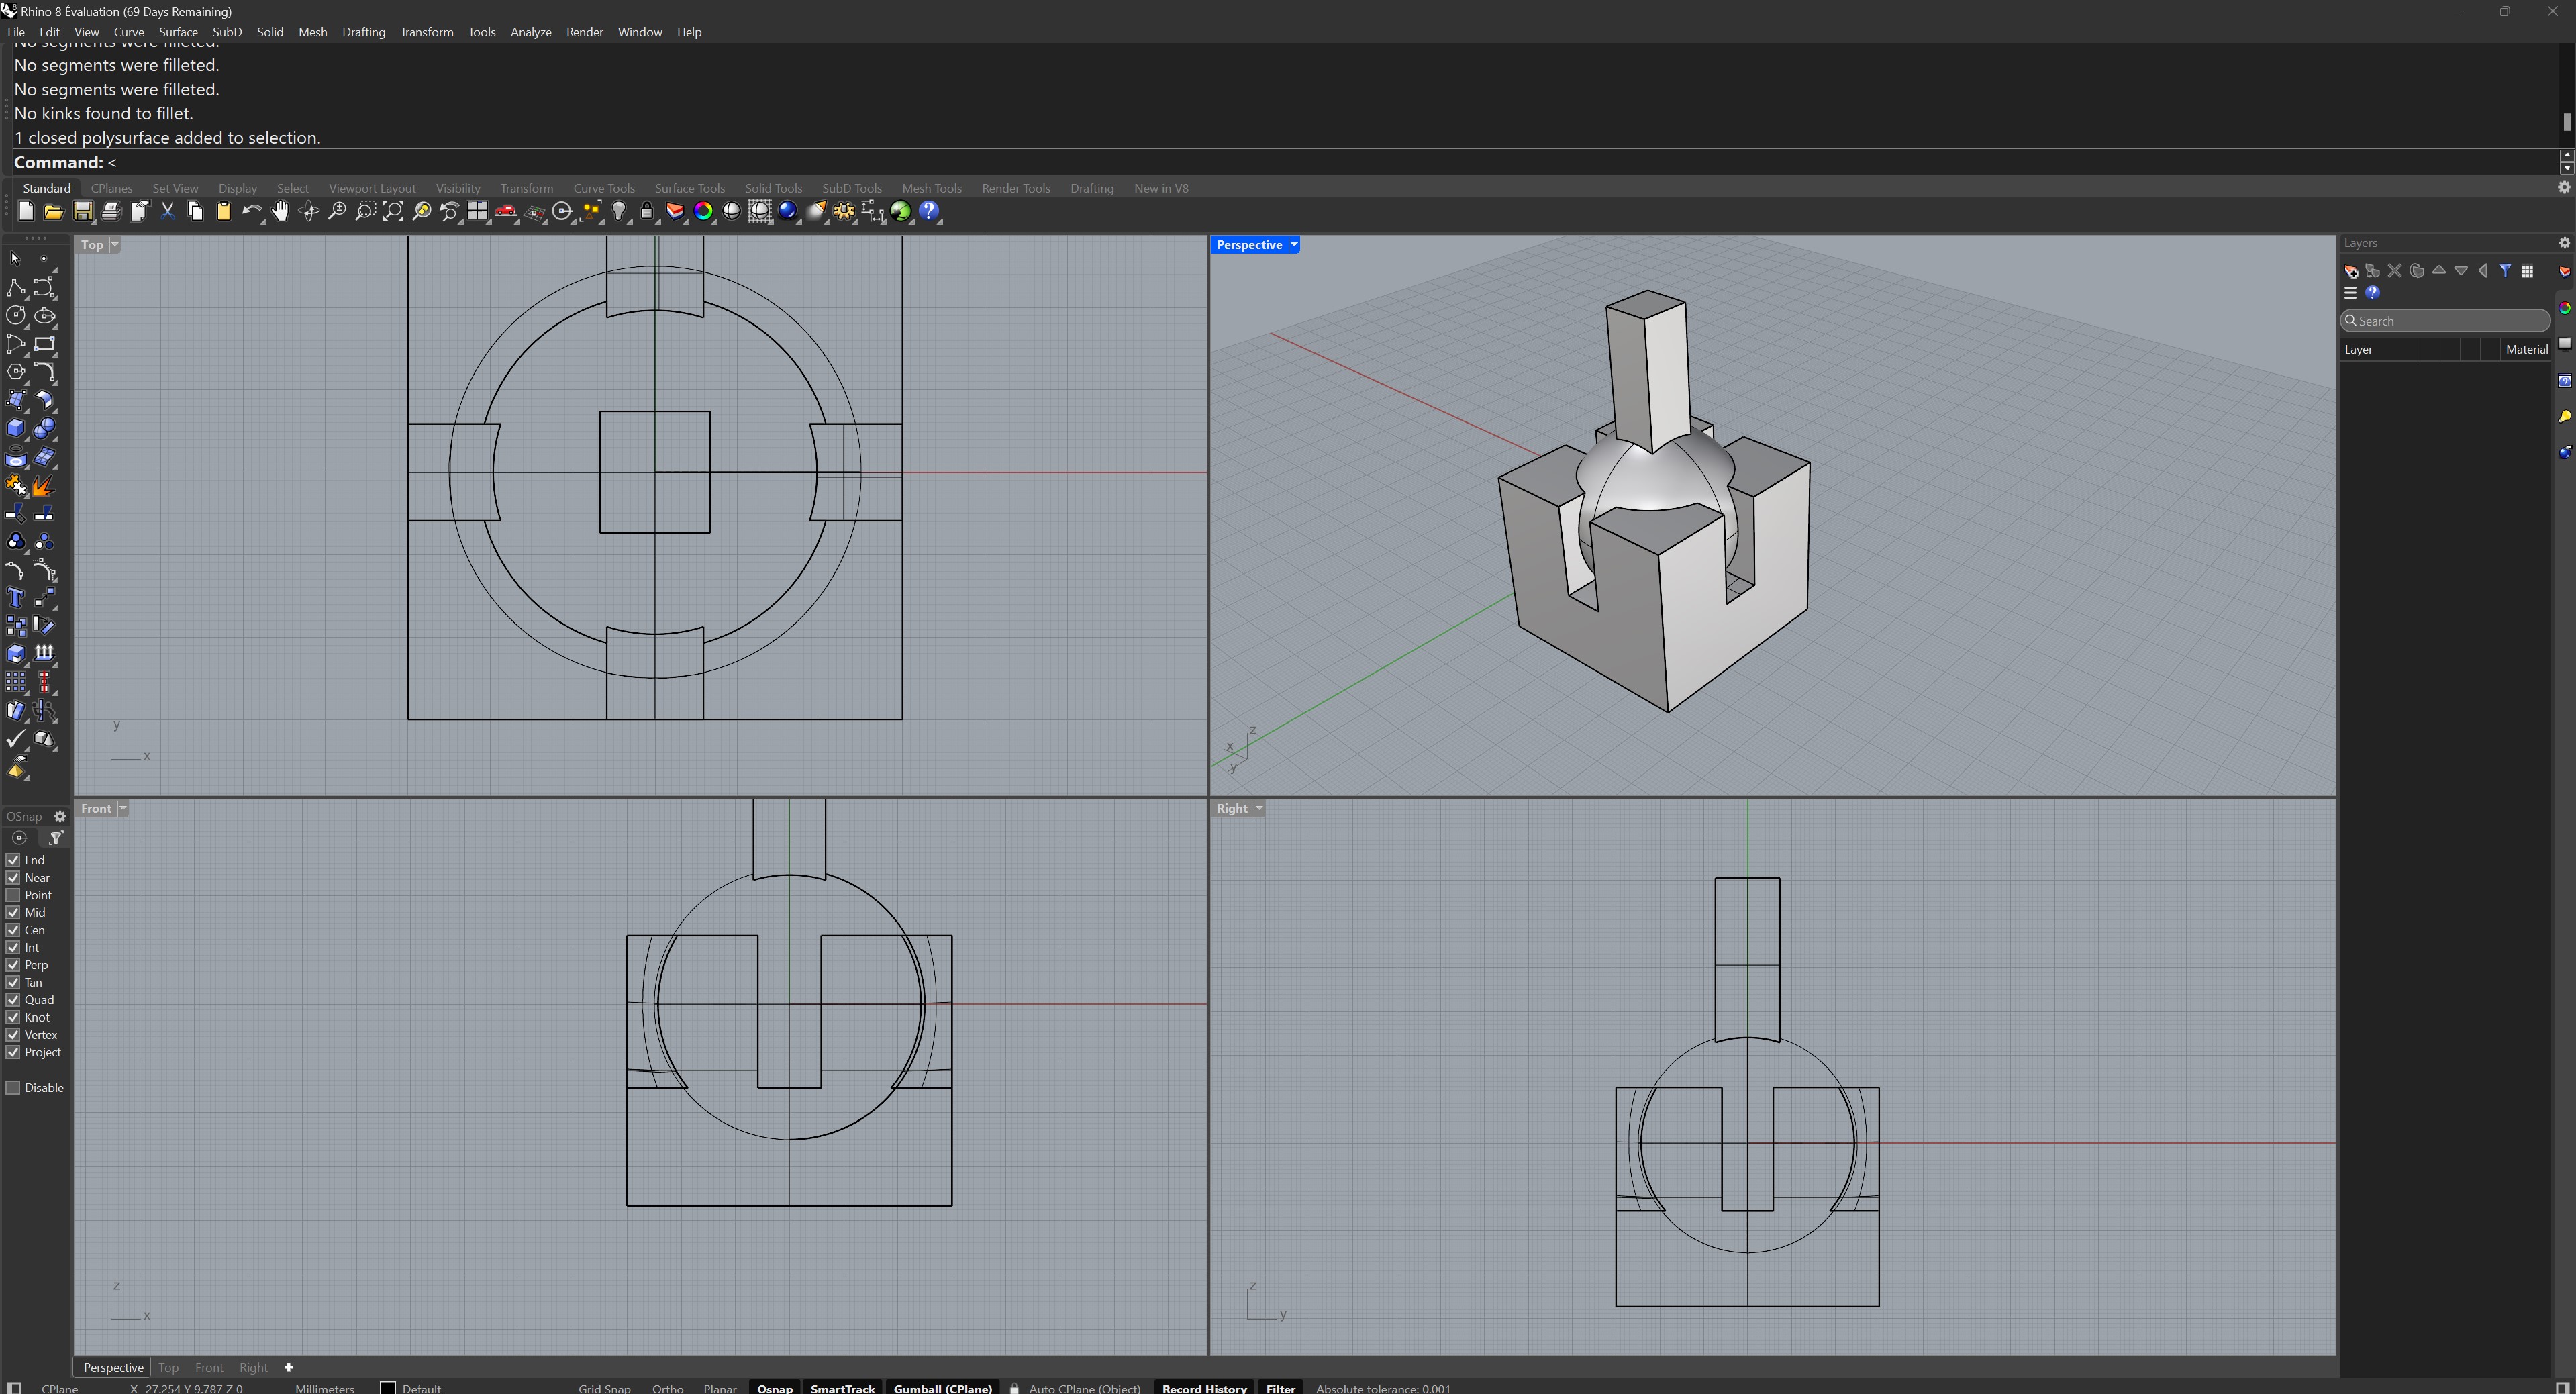 I then refined the design a bit by filleting the edges and adding a small gap in between the ball and the socket.
 The key was to leave a small gap in between the ball and the socket, and then have Prusa Slicer add just a few support layers that I would then be able to break off.
 For settings, I set a 25% fill on the printer, and made sure to select a 0.6mm nozzle as that is what we have installed on our Prusa.
When finished, I pressed the Slice Now button to generate the G-code file and exported it in order to print on the Prusa MK2.
For the material choice, I used the basic PLA setting.
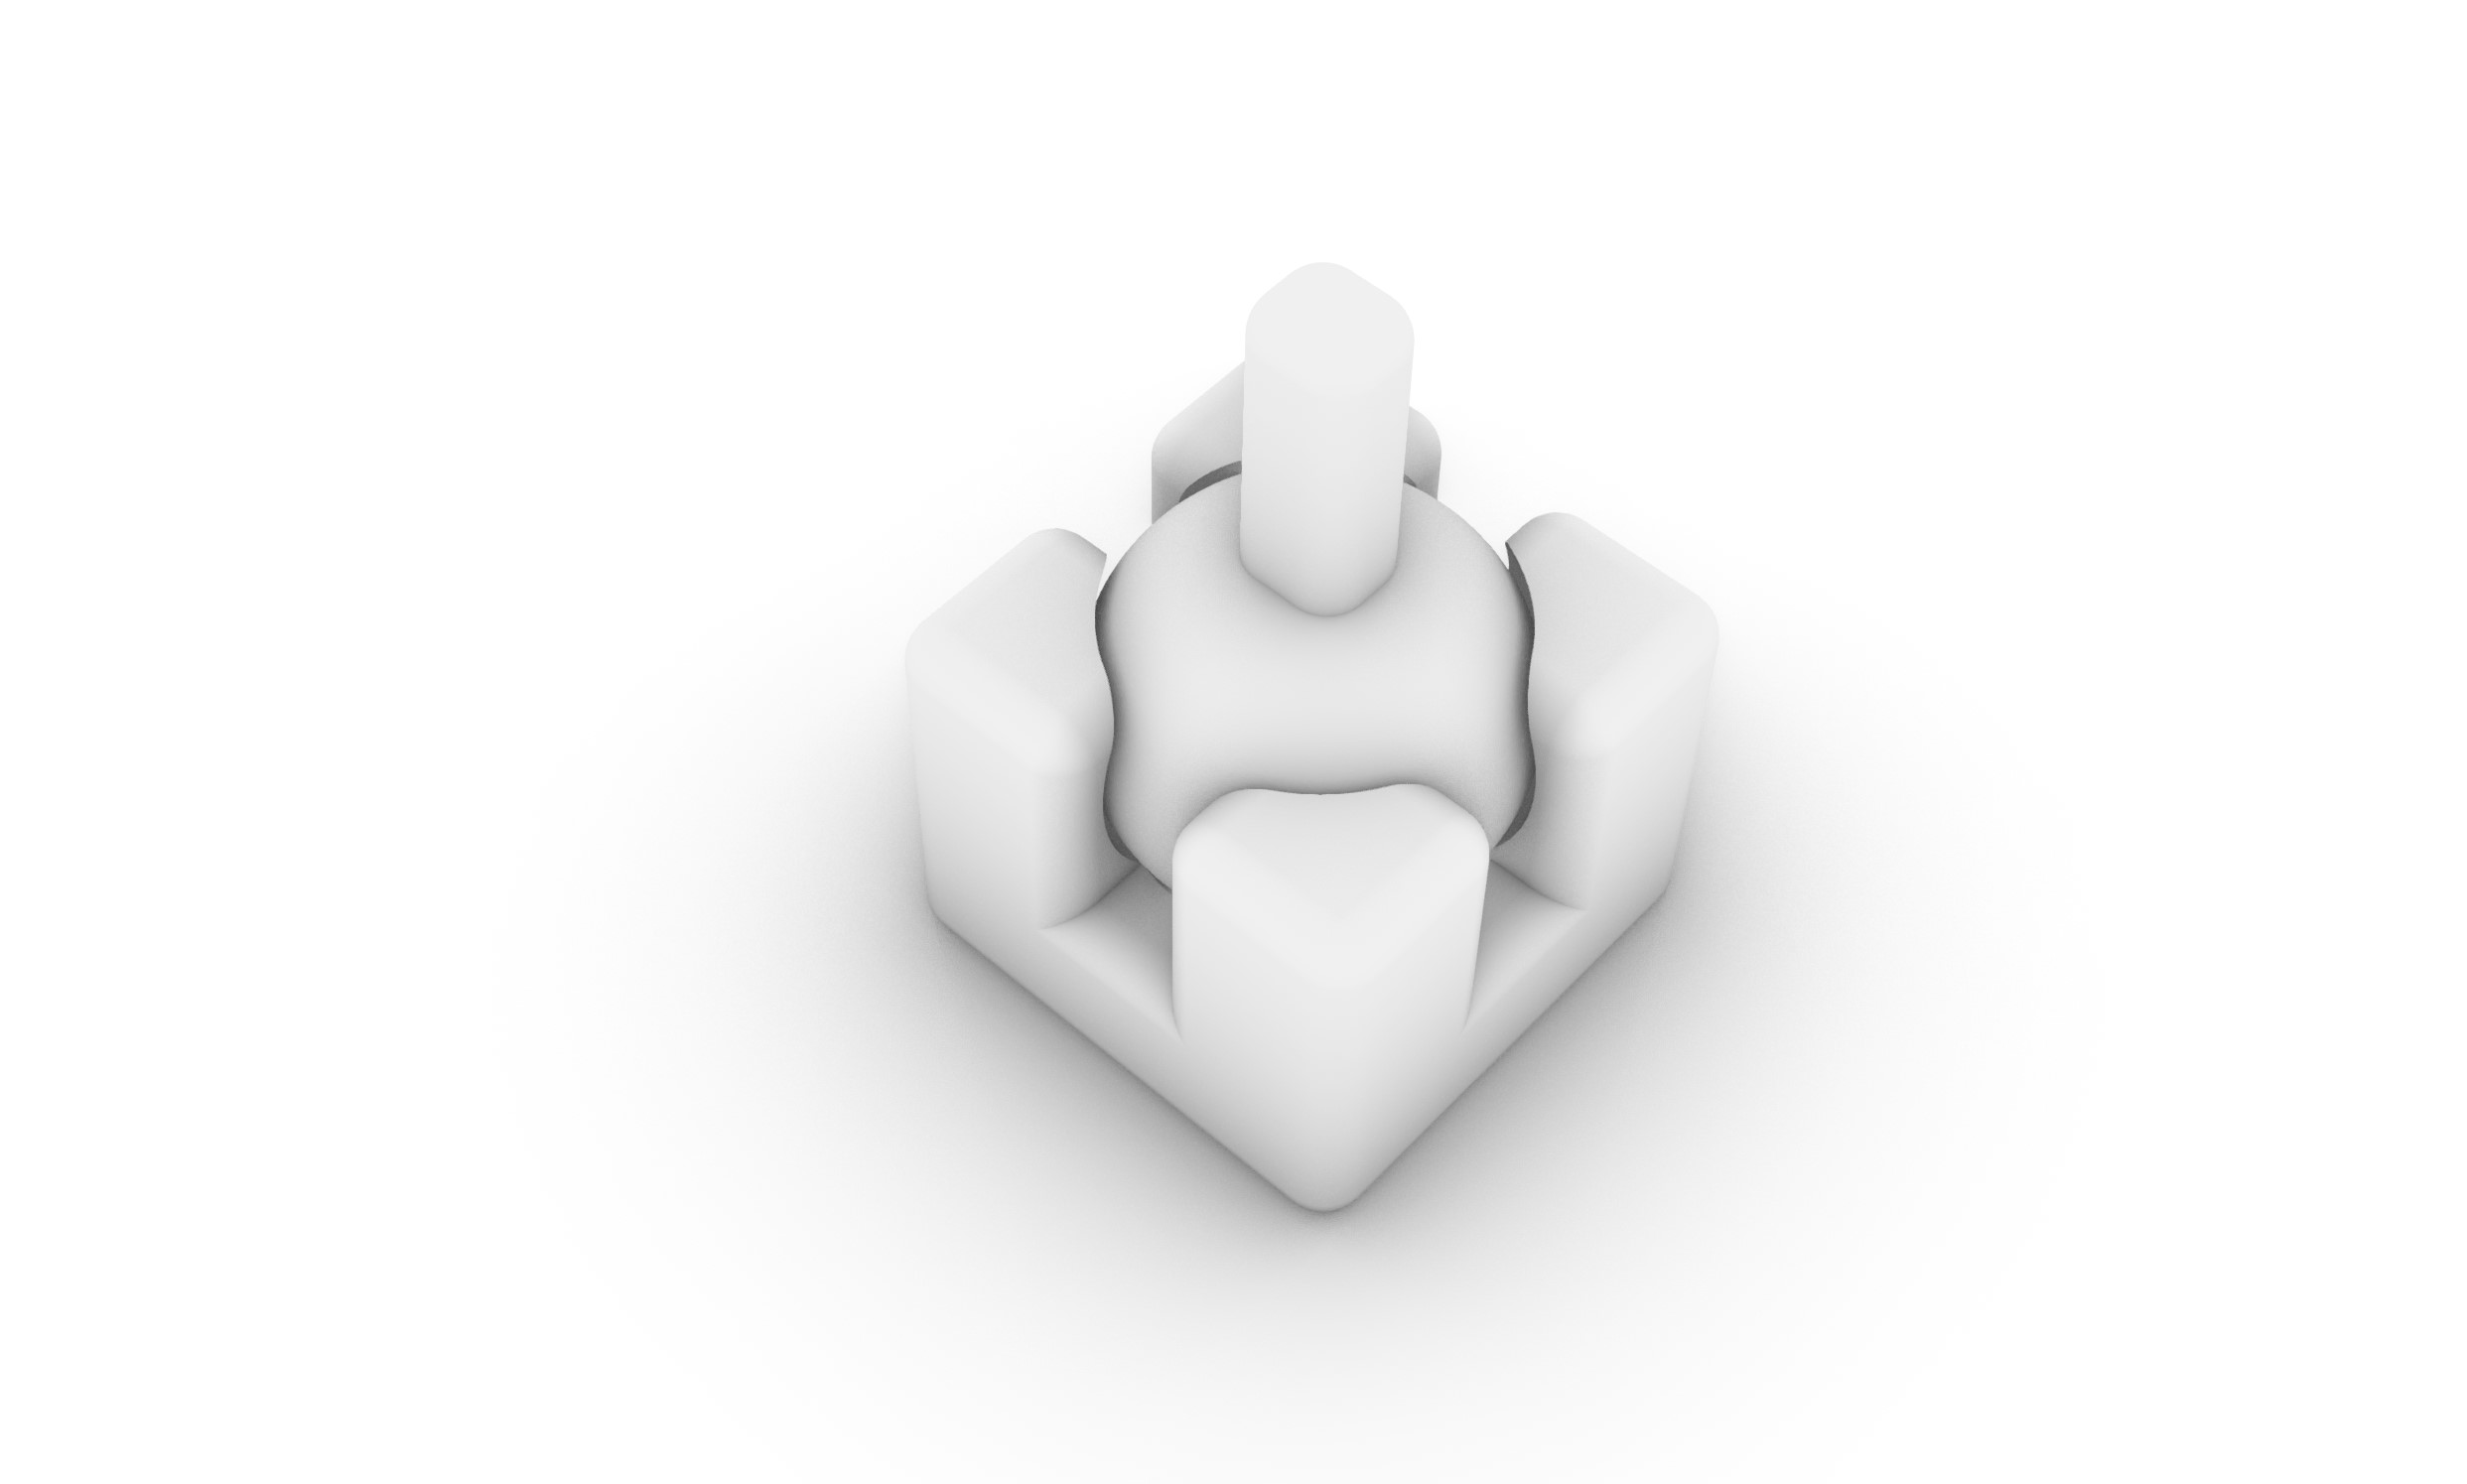
Once printed on the Prusa MK2, it came out perfectly and works well!
For settings, I set a 25% fill on the printer, and made sure to select a 0.6mm nozzle as that is what we have installed on our Prusa.
When finished, I pressed the Slice Now button to generate the G-code file and exported it in order to print on the Prusa MK2.
For the material choice, I used the basic PLA setting.
Once printed on the Prusa MK2, it came out perfectly and works well!
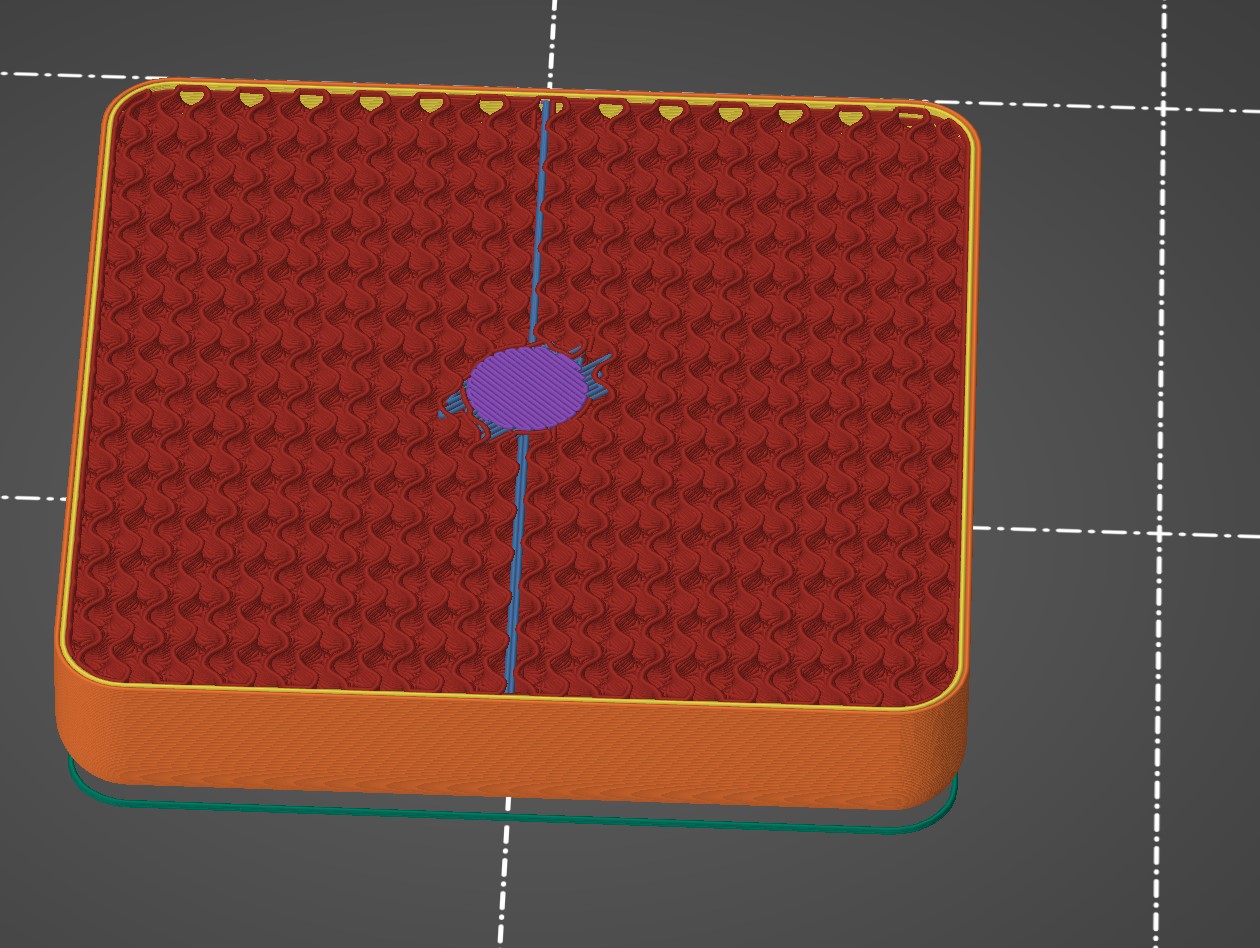
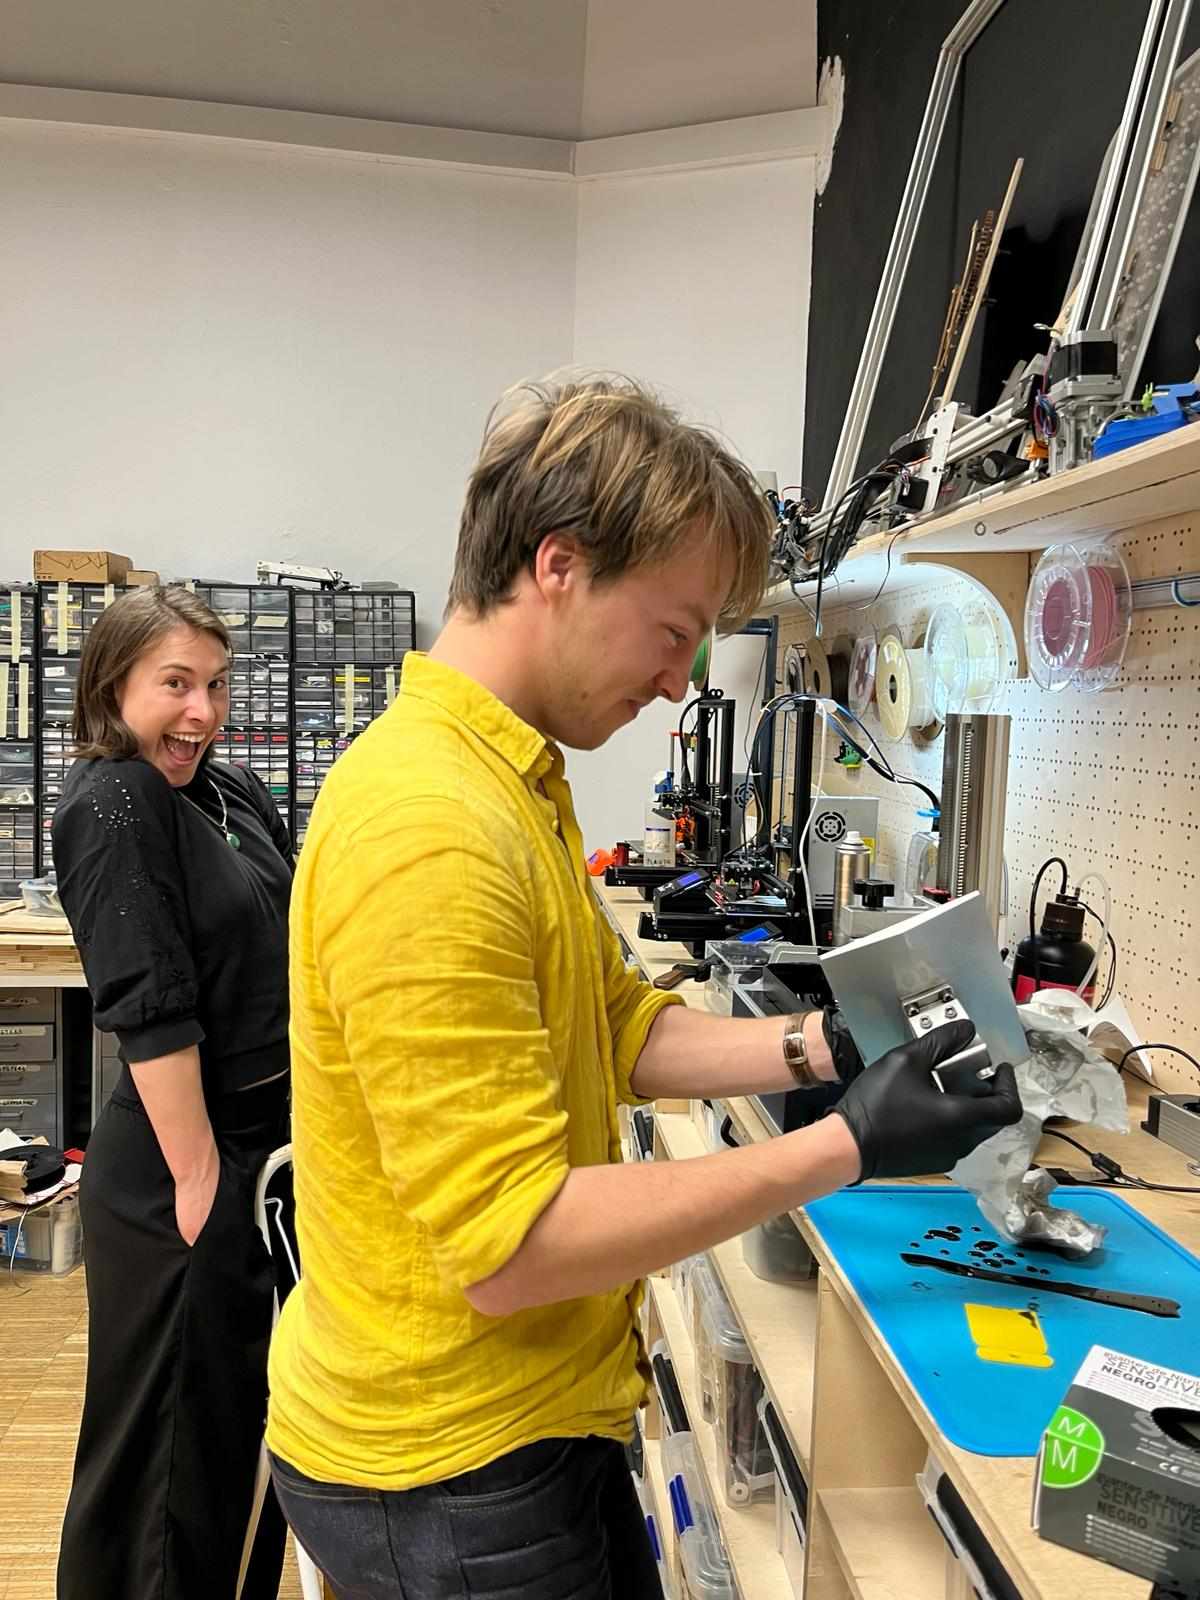
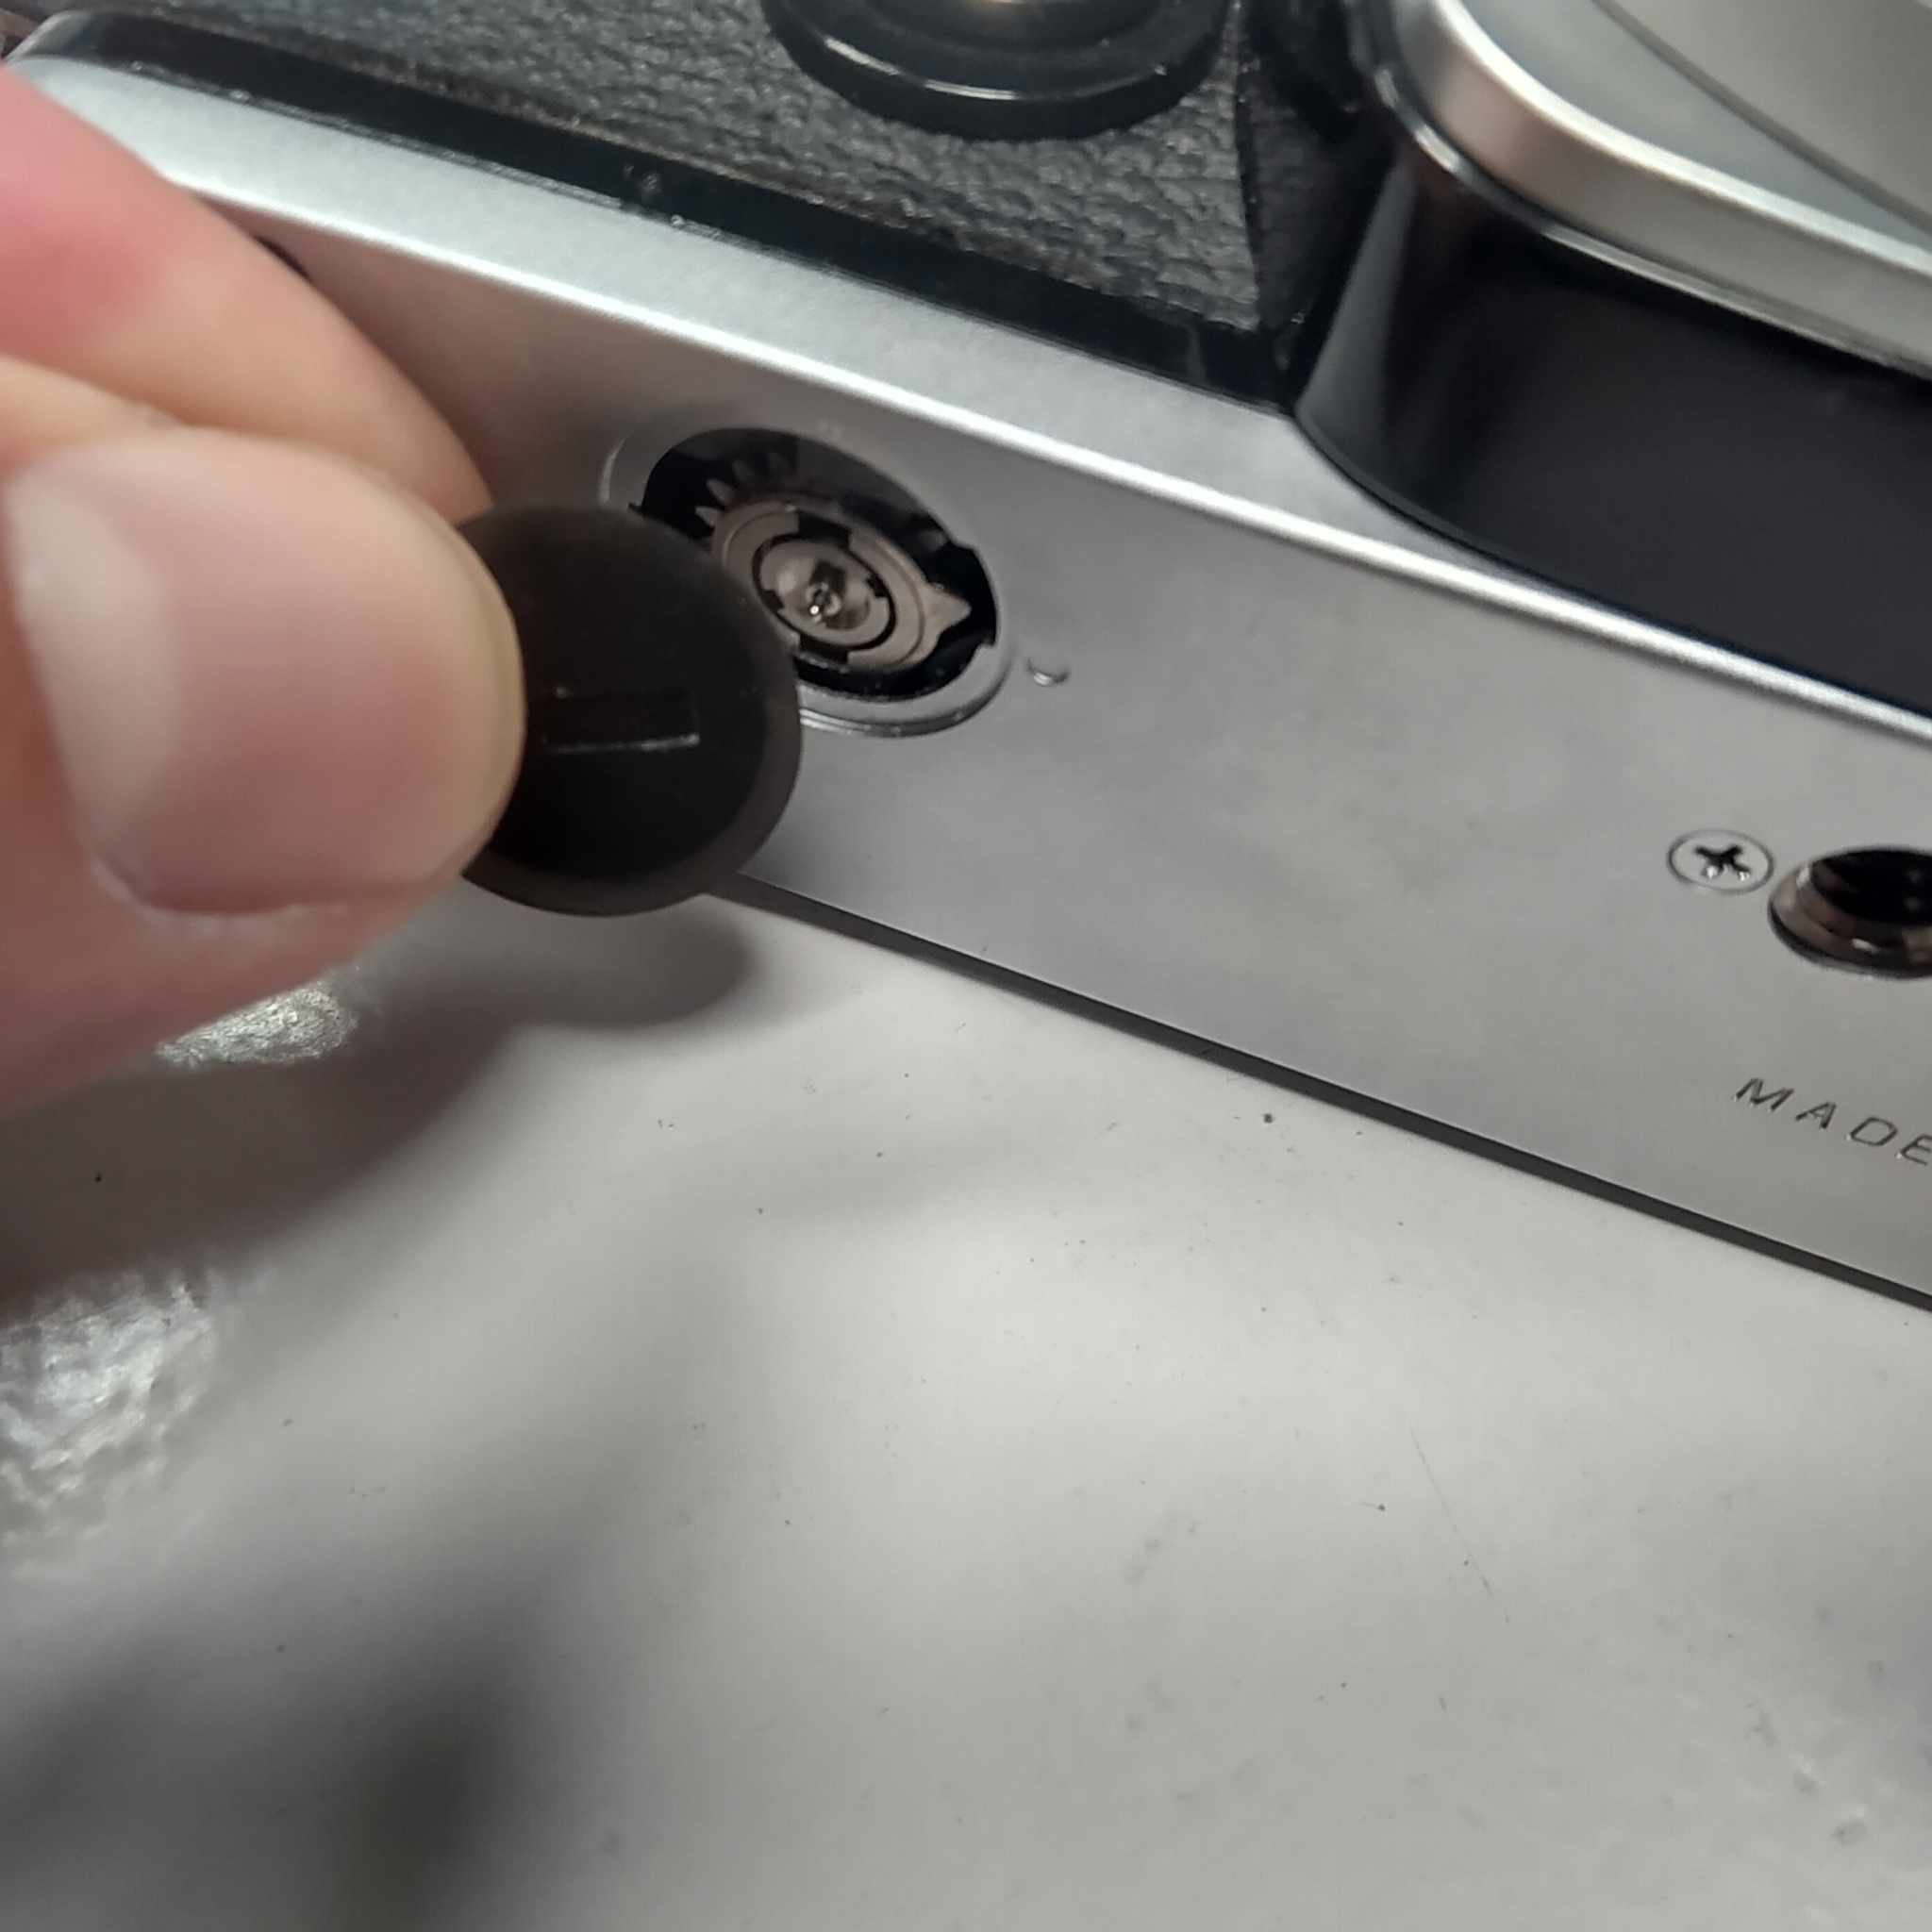
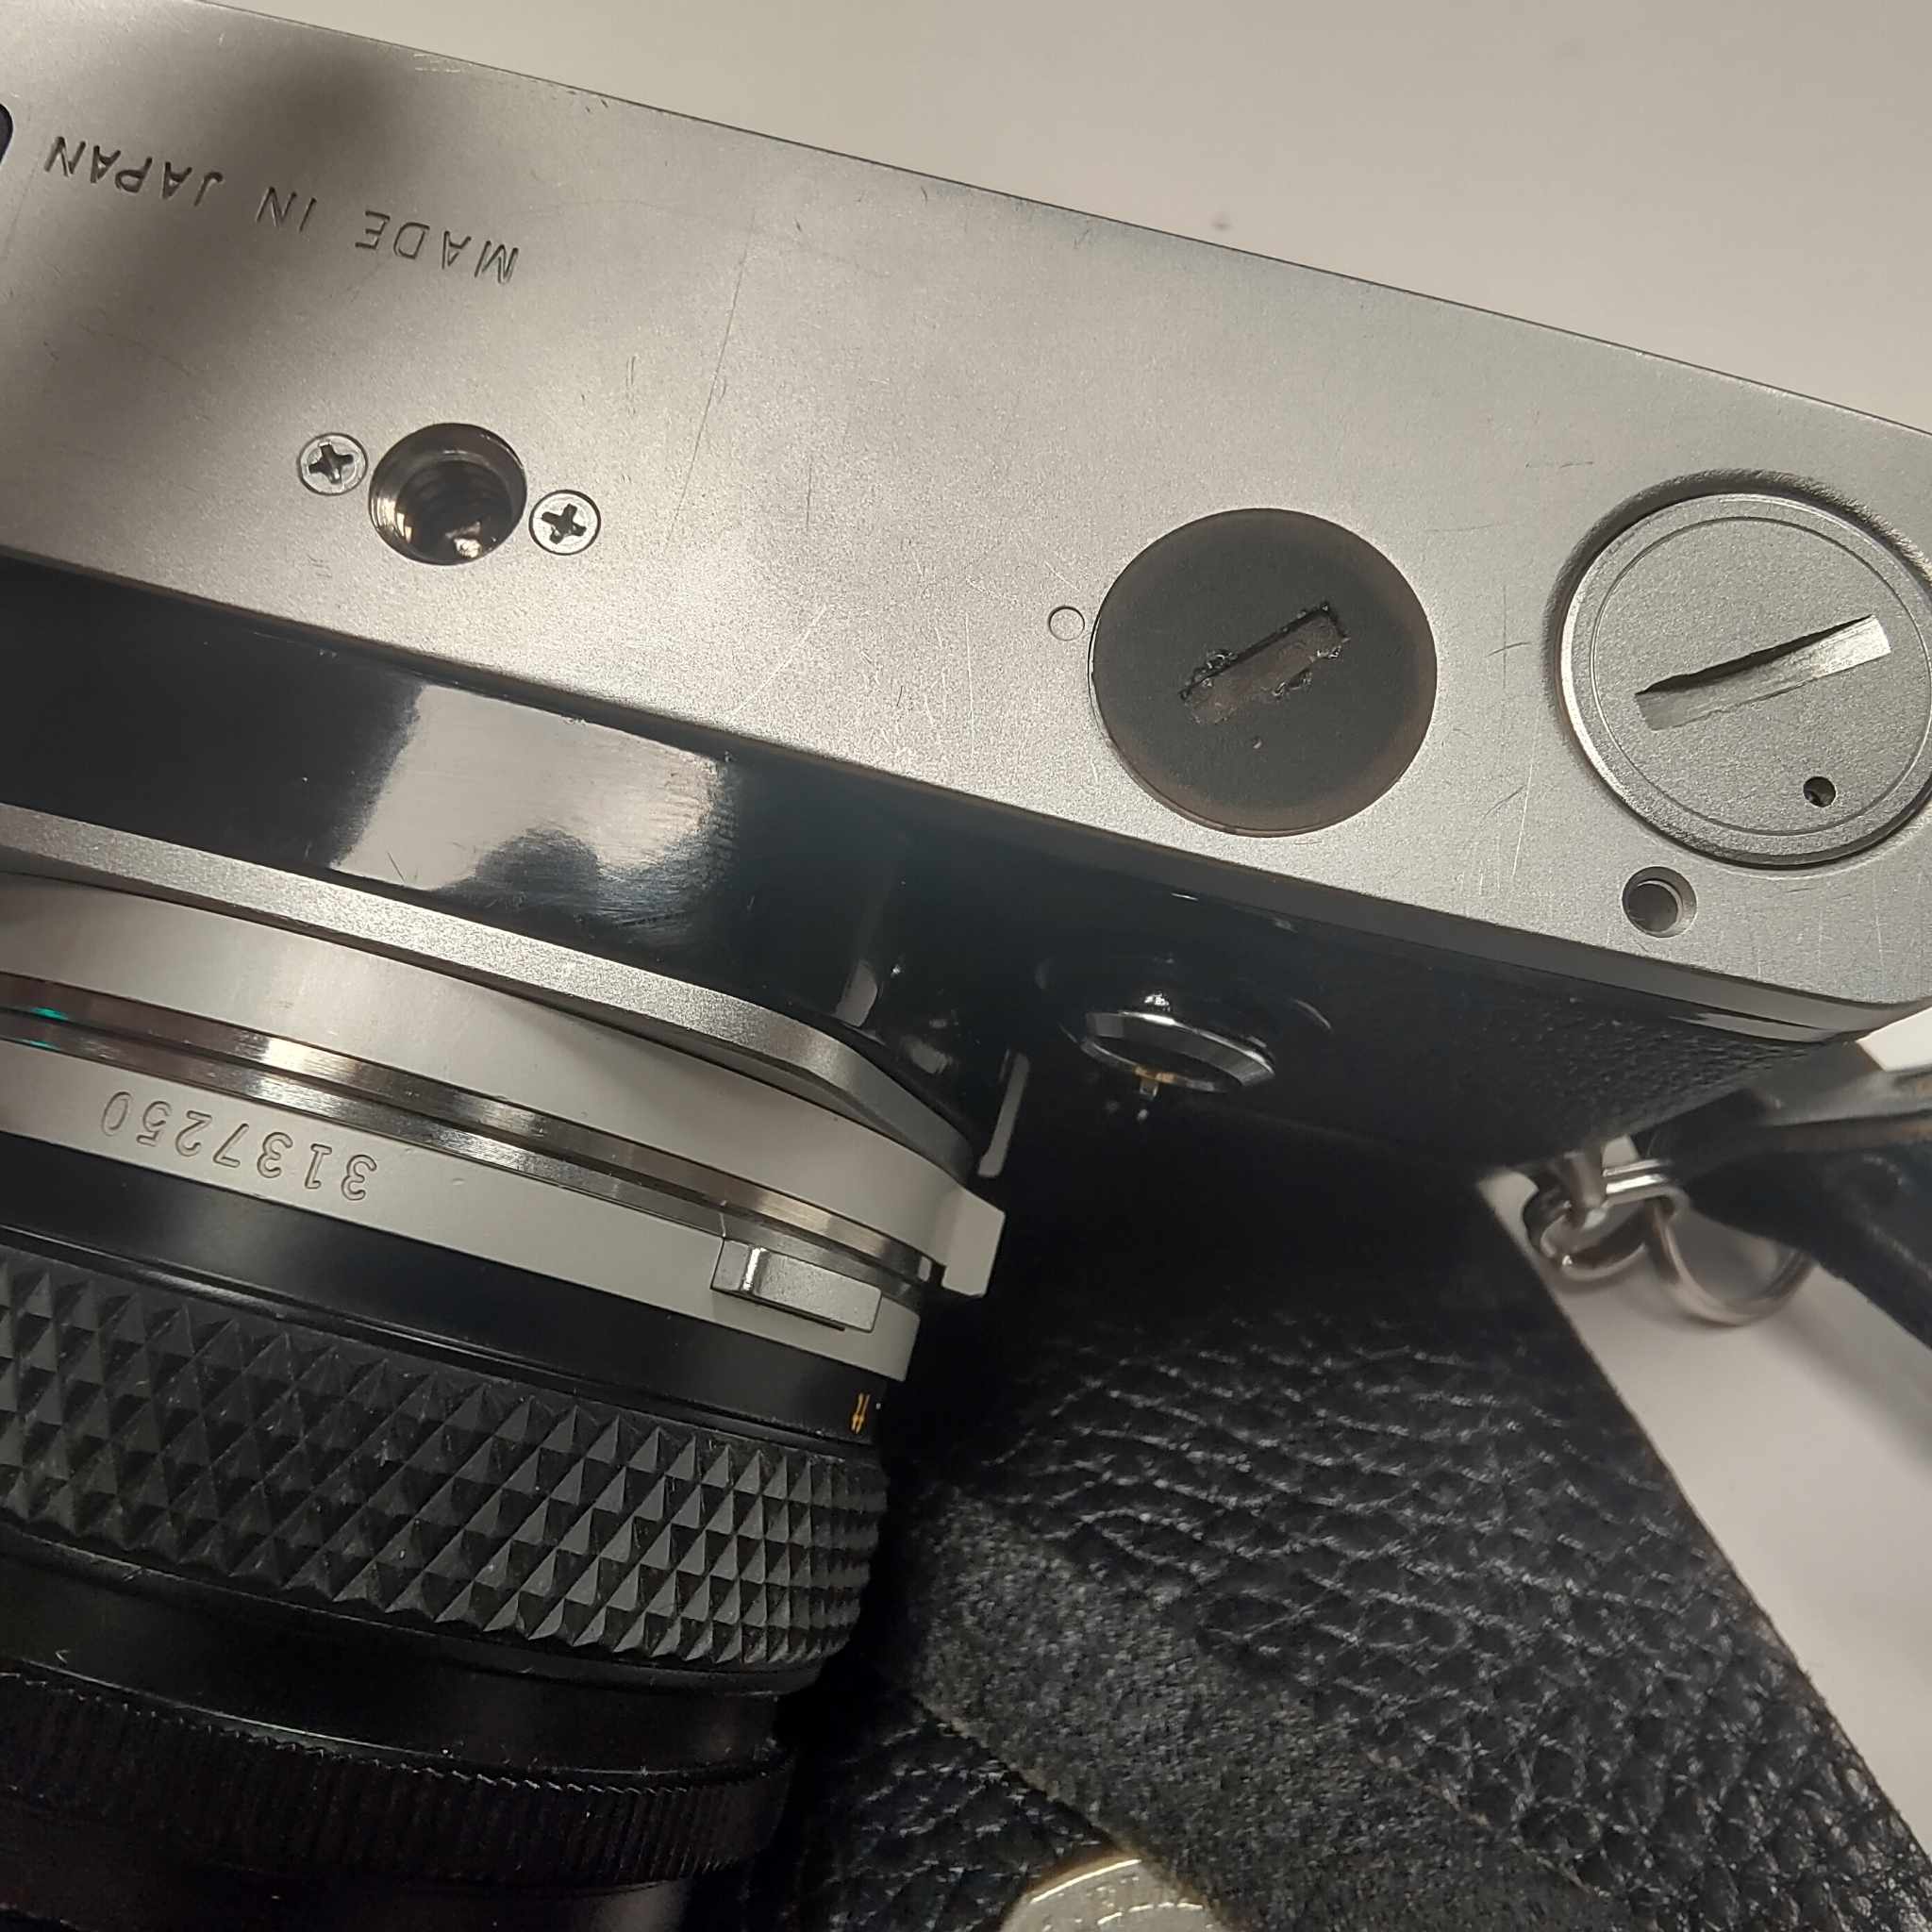
 I then wanted to also use the Anycubic SLA printer in order to print a missing cover for my Olympus OM1 camera.
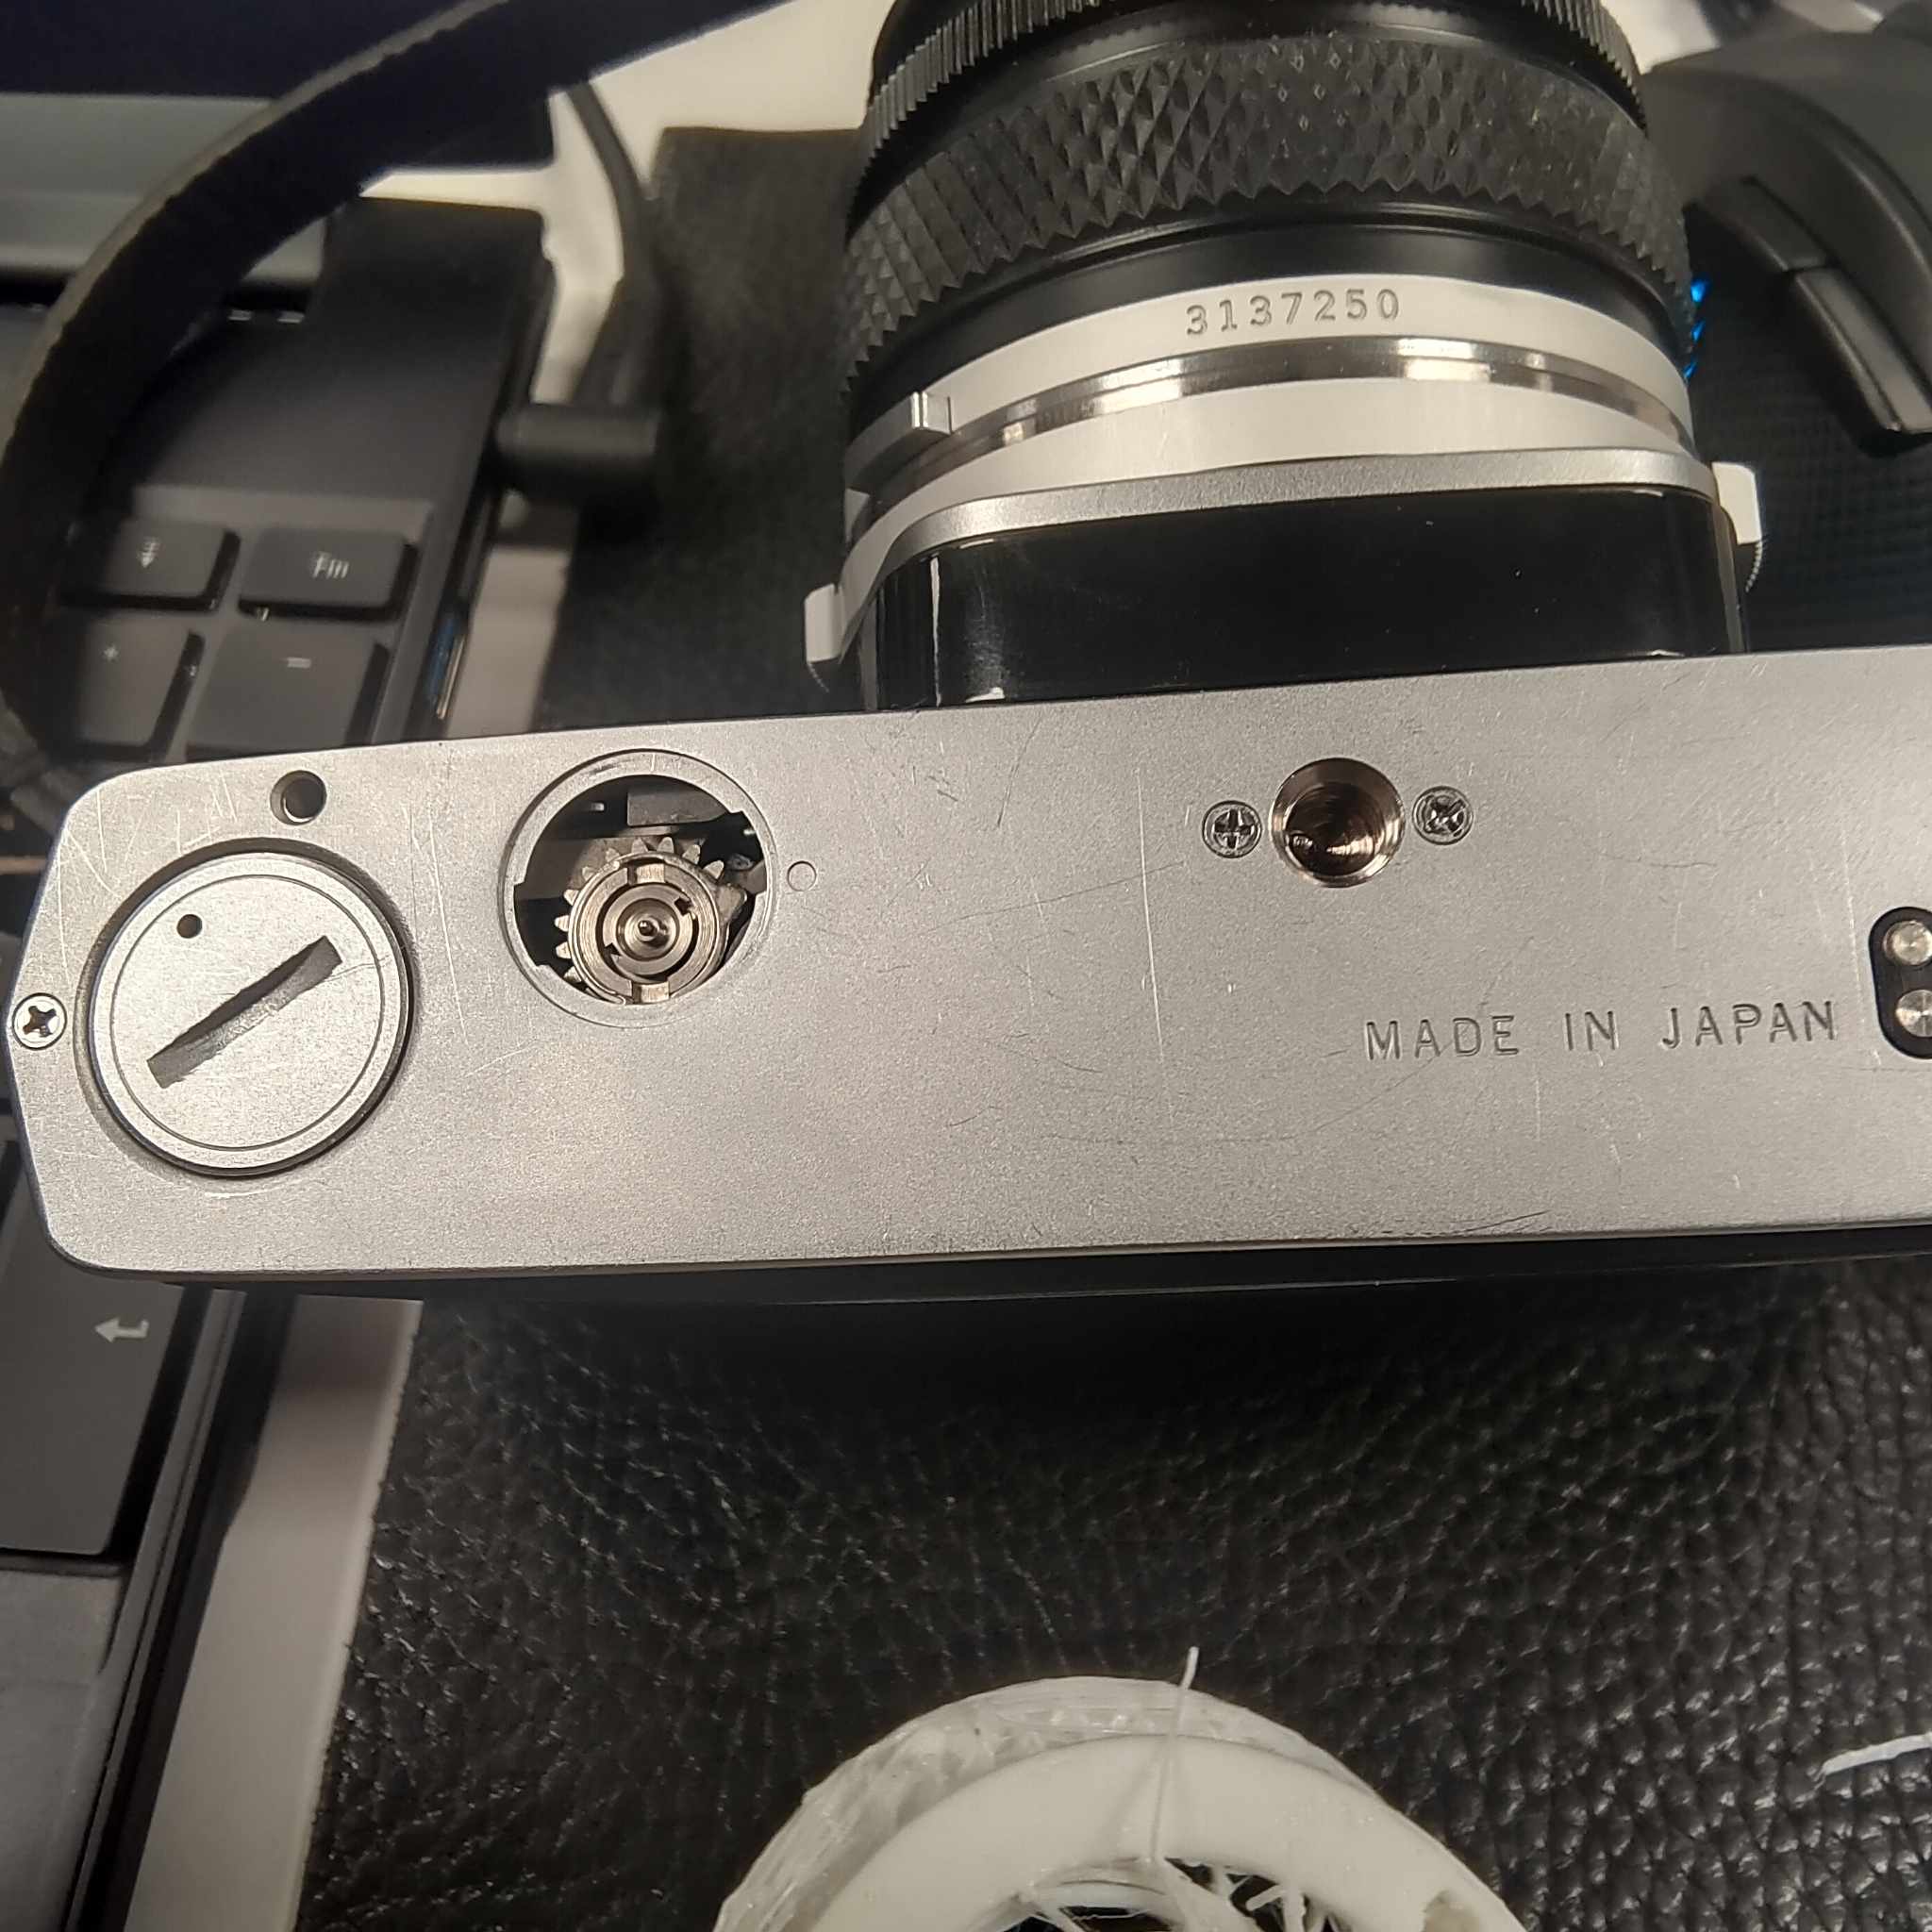
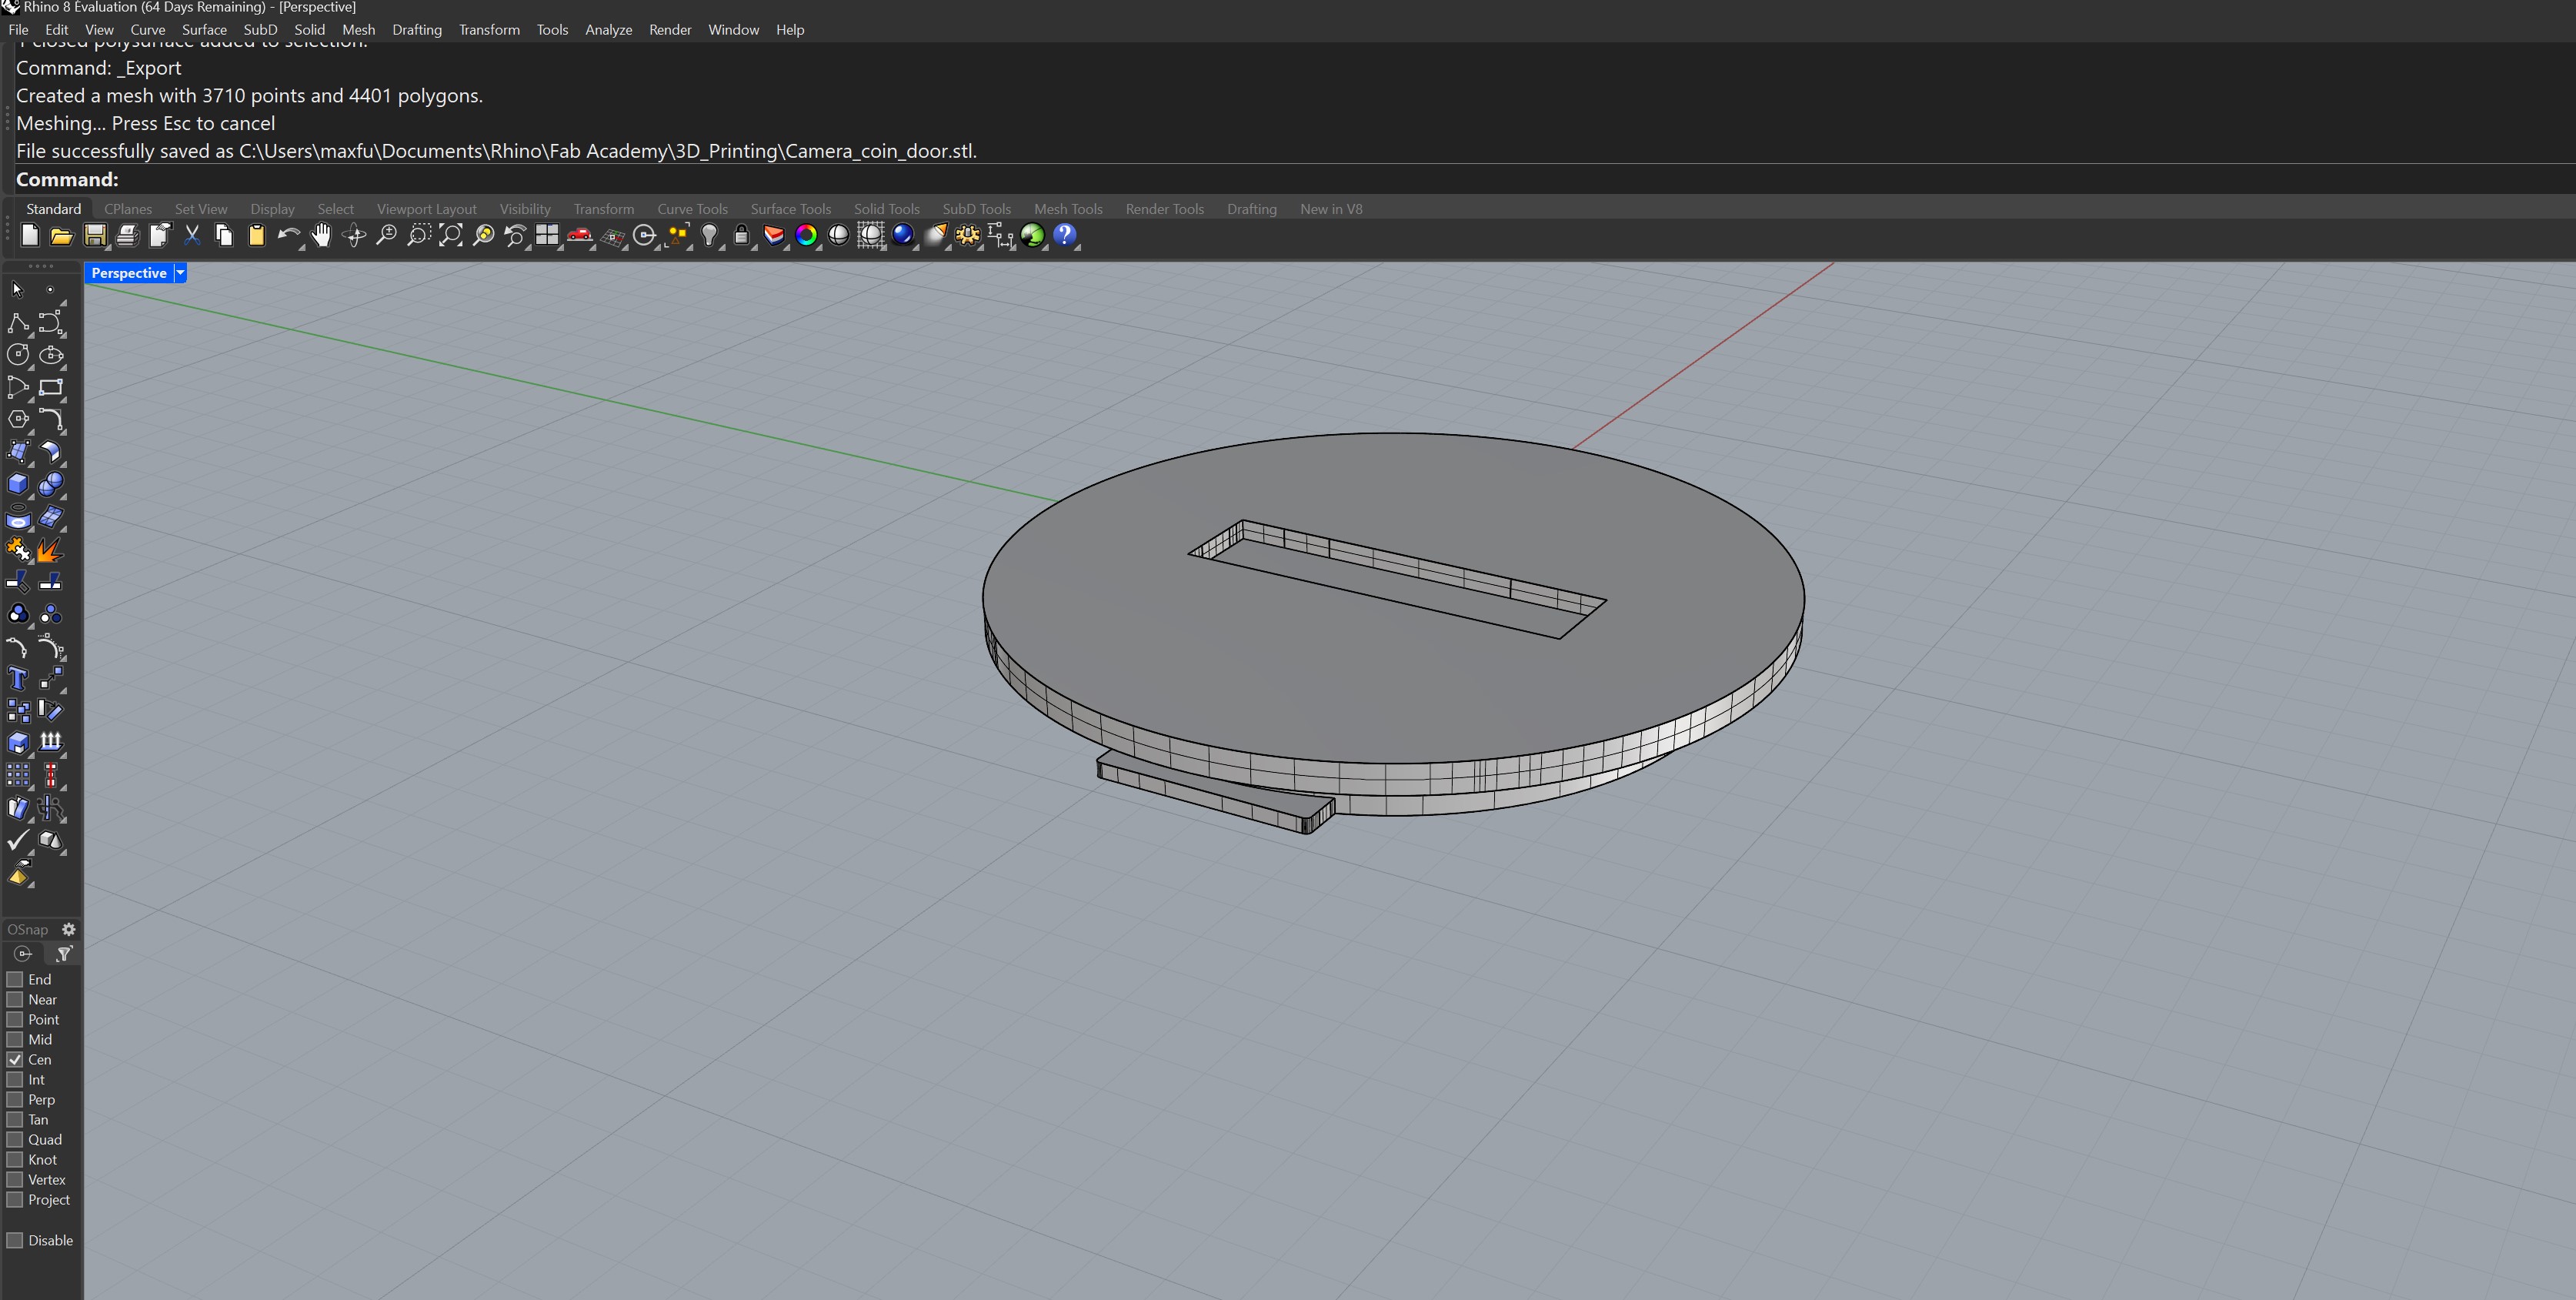 The precision needed for this print was too small for the FDM printers.
I added supports in PrusaSlicer in order to print my object.
The precision needed for this print was too small for the FDM printers.
I added supports in PrusaSlicer in order to print my object.
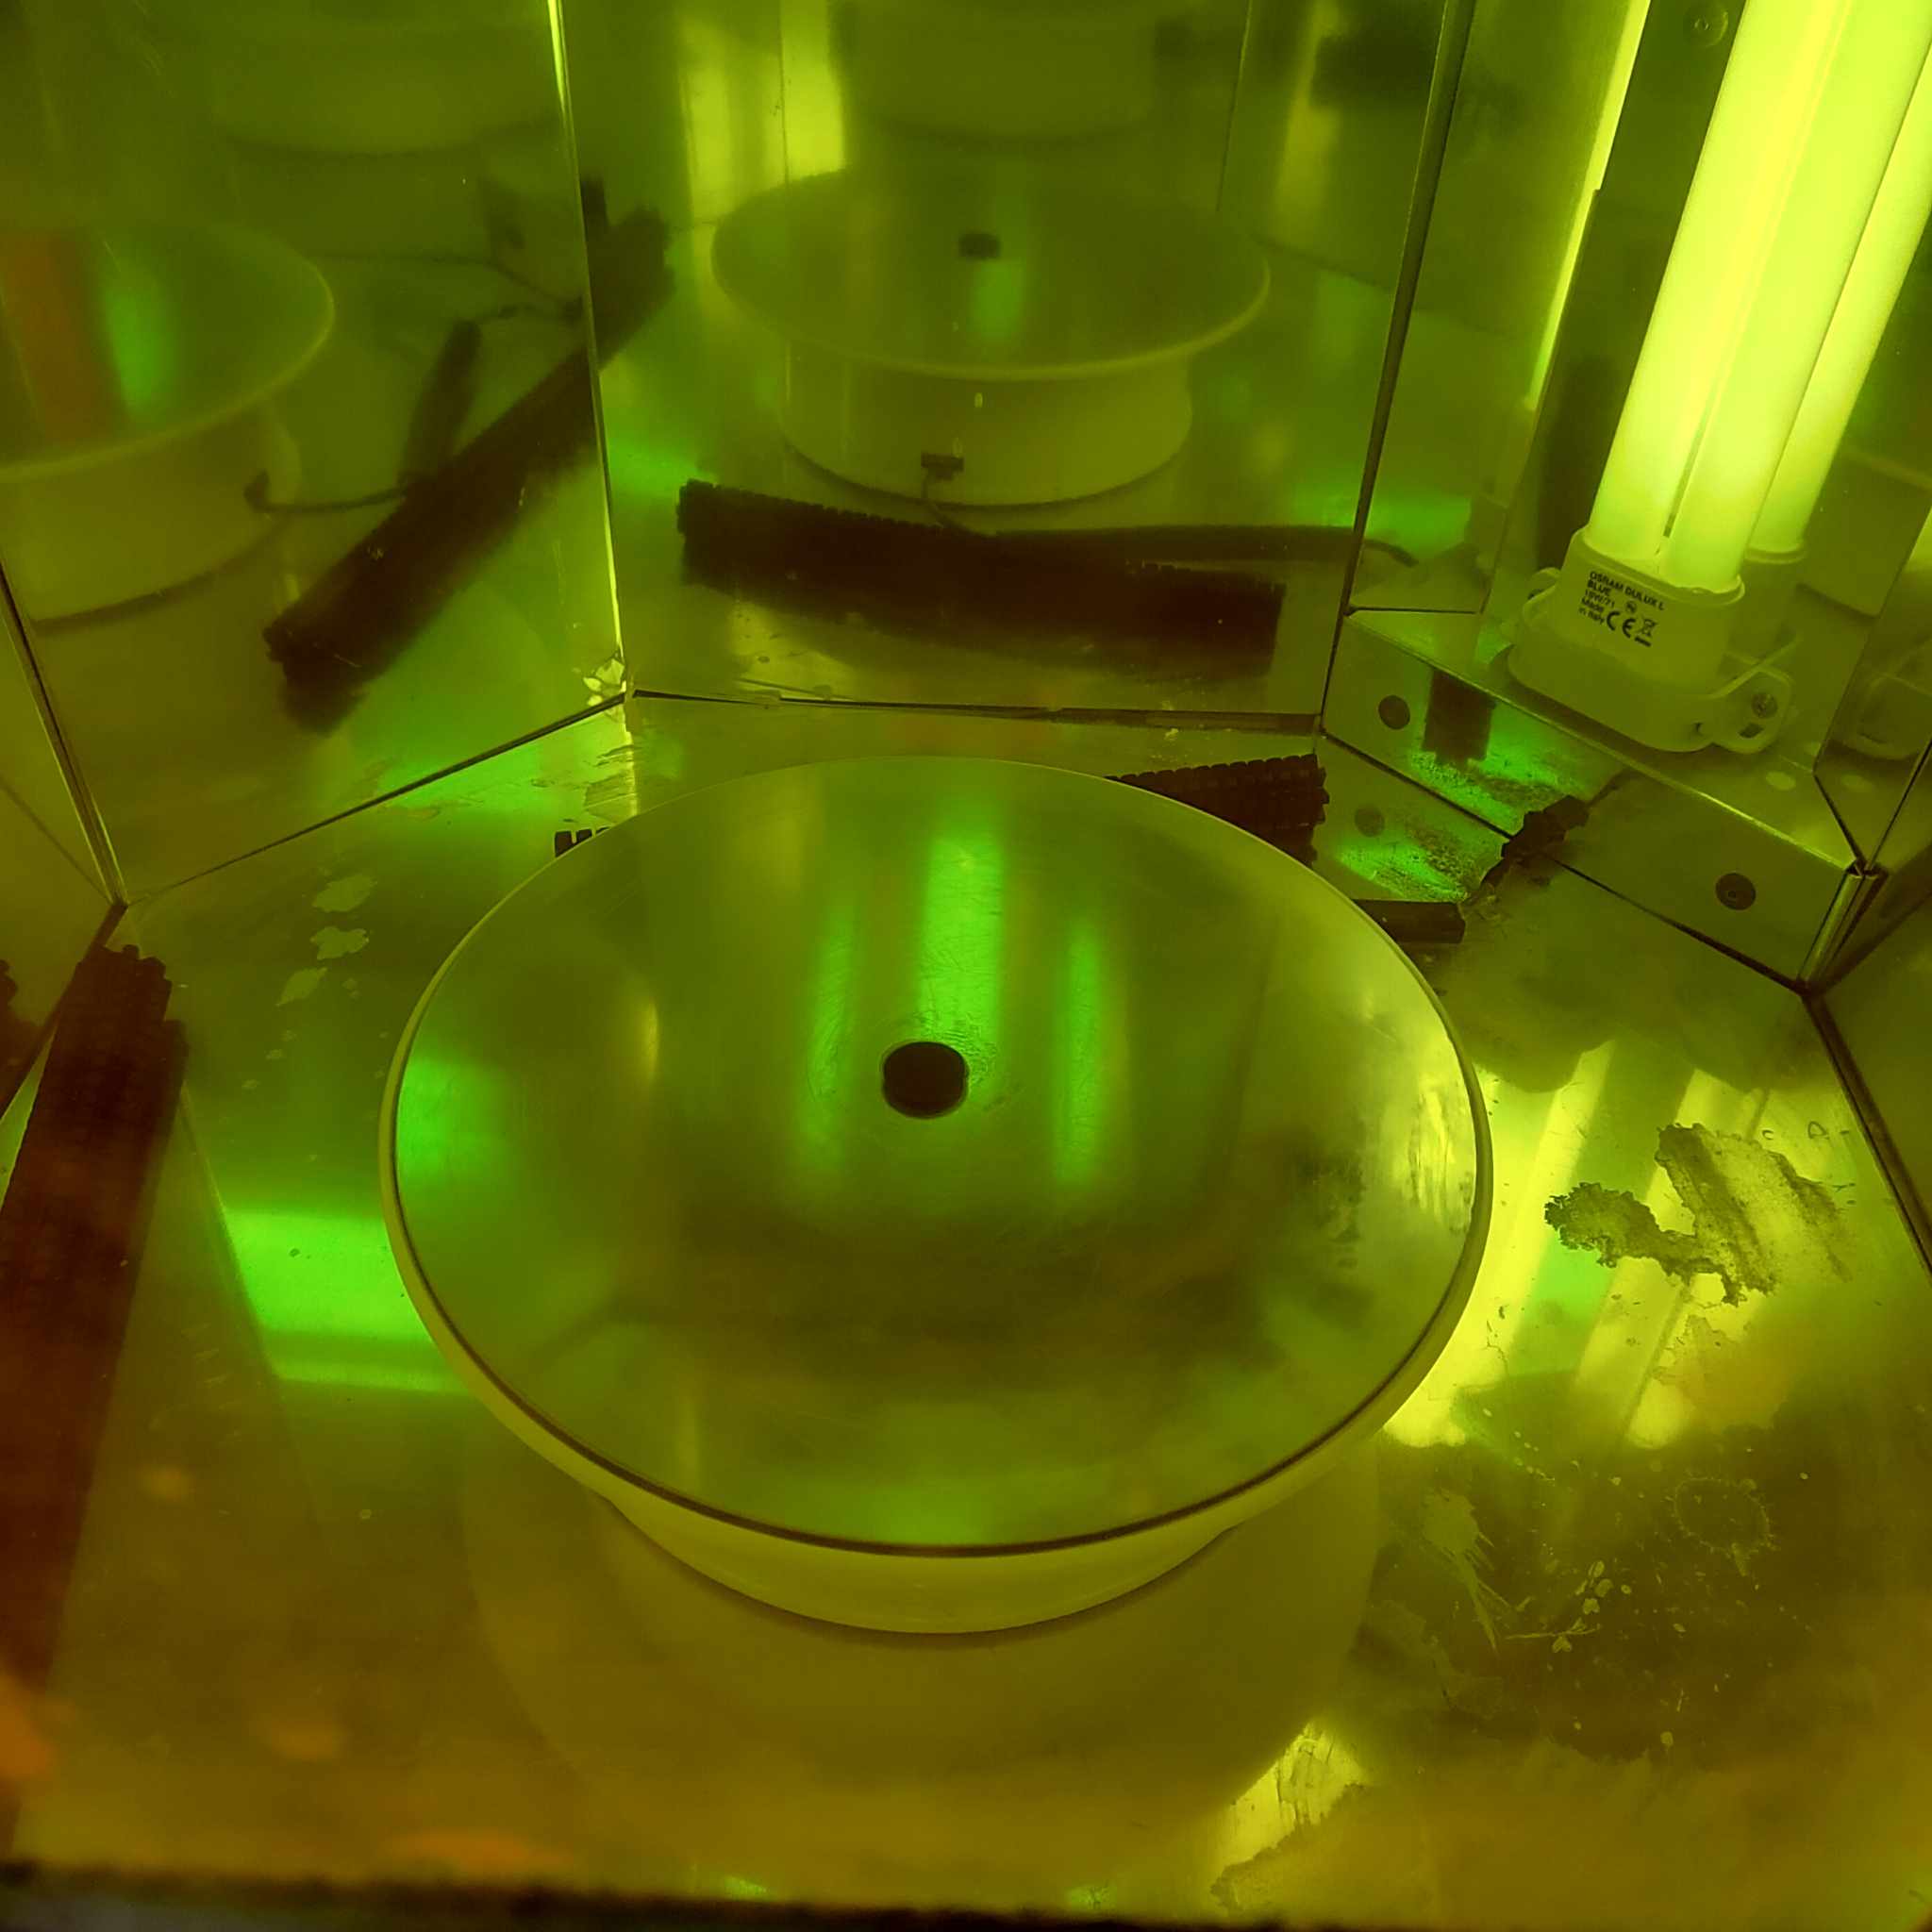
 Once the print was succesful, I removed my object and started the curing process.
 The print did not end up functioning because of a little mechanical piece in the camera that was pushing back.
 I slightly changed my model thanks to Grasshopper parametric modeling, and printed again.
The 2nd version worked well!
I slightly changed my model thanks to Grasshopper parametric modeling, and printed again.
The 2nd version worked well!
3D Scanning
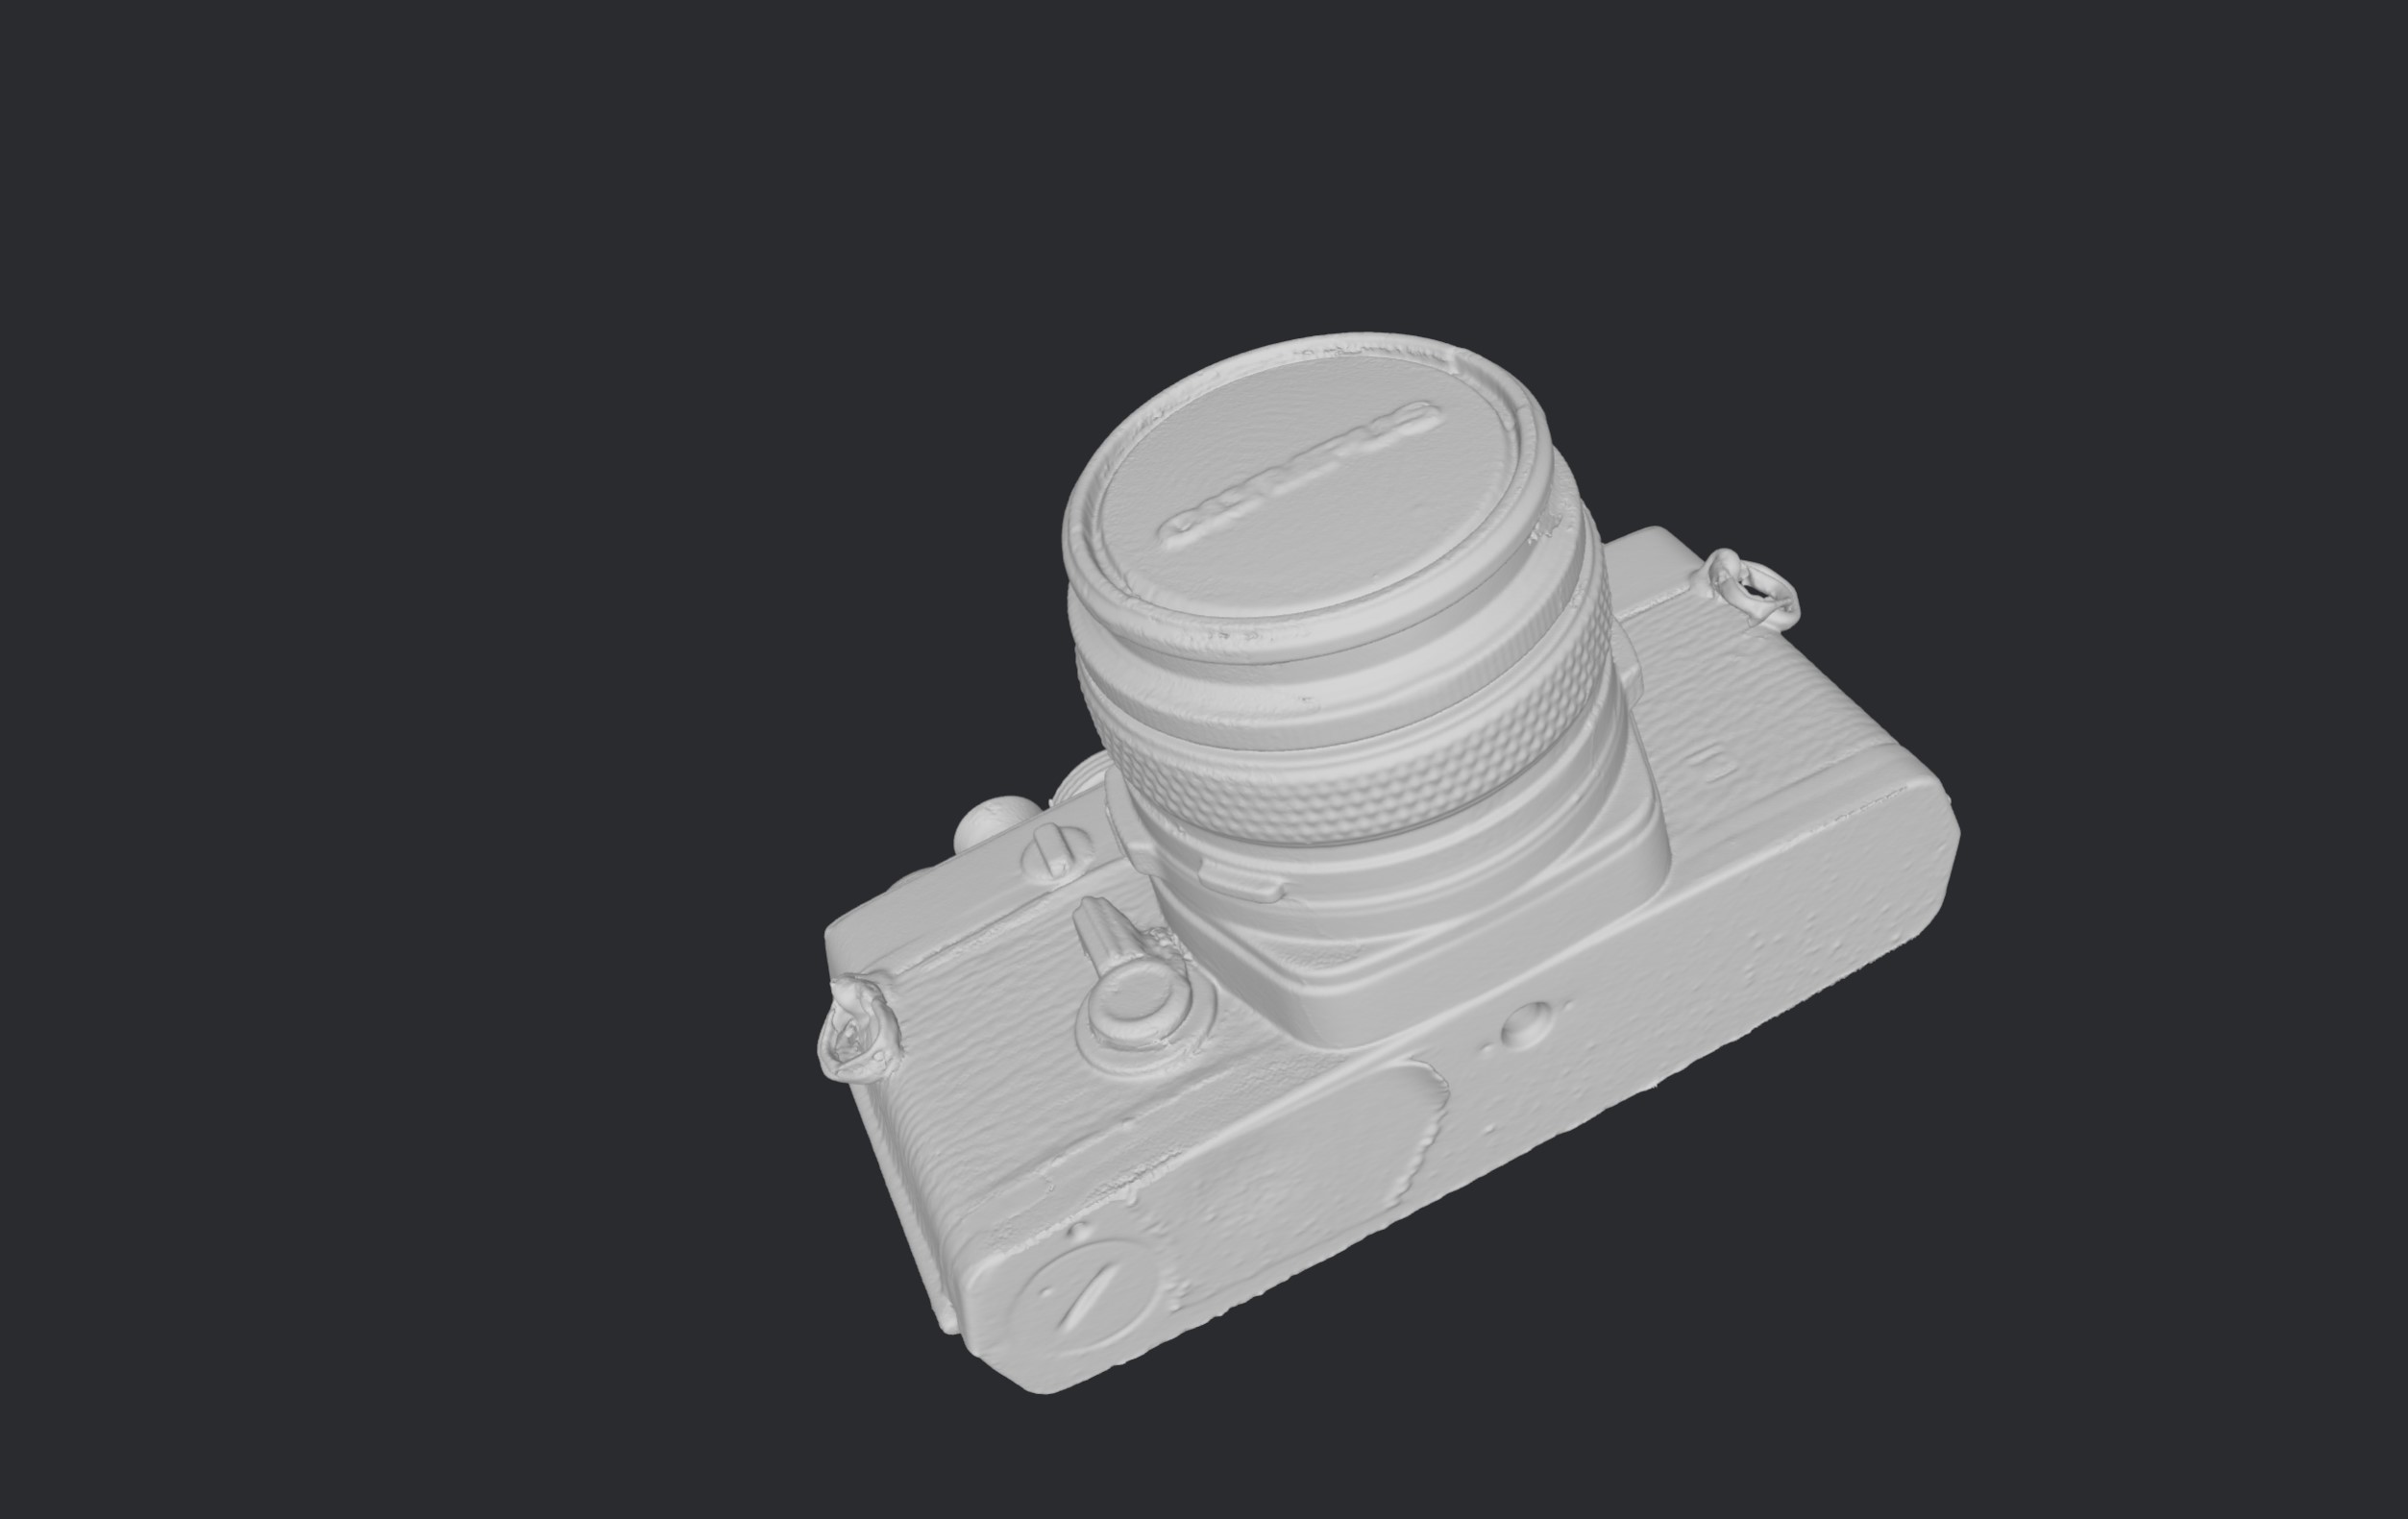
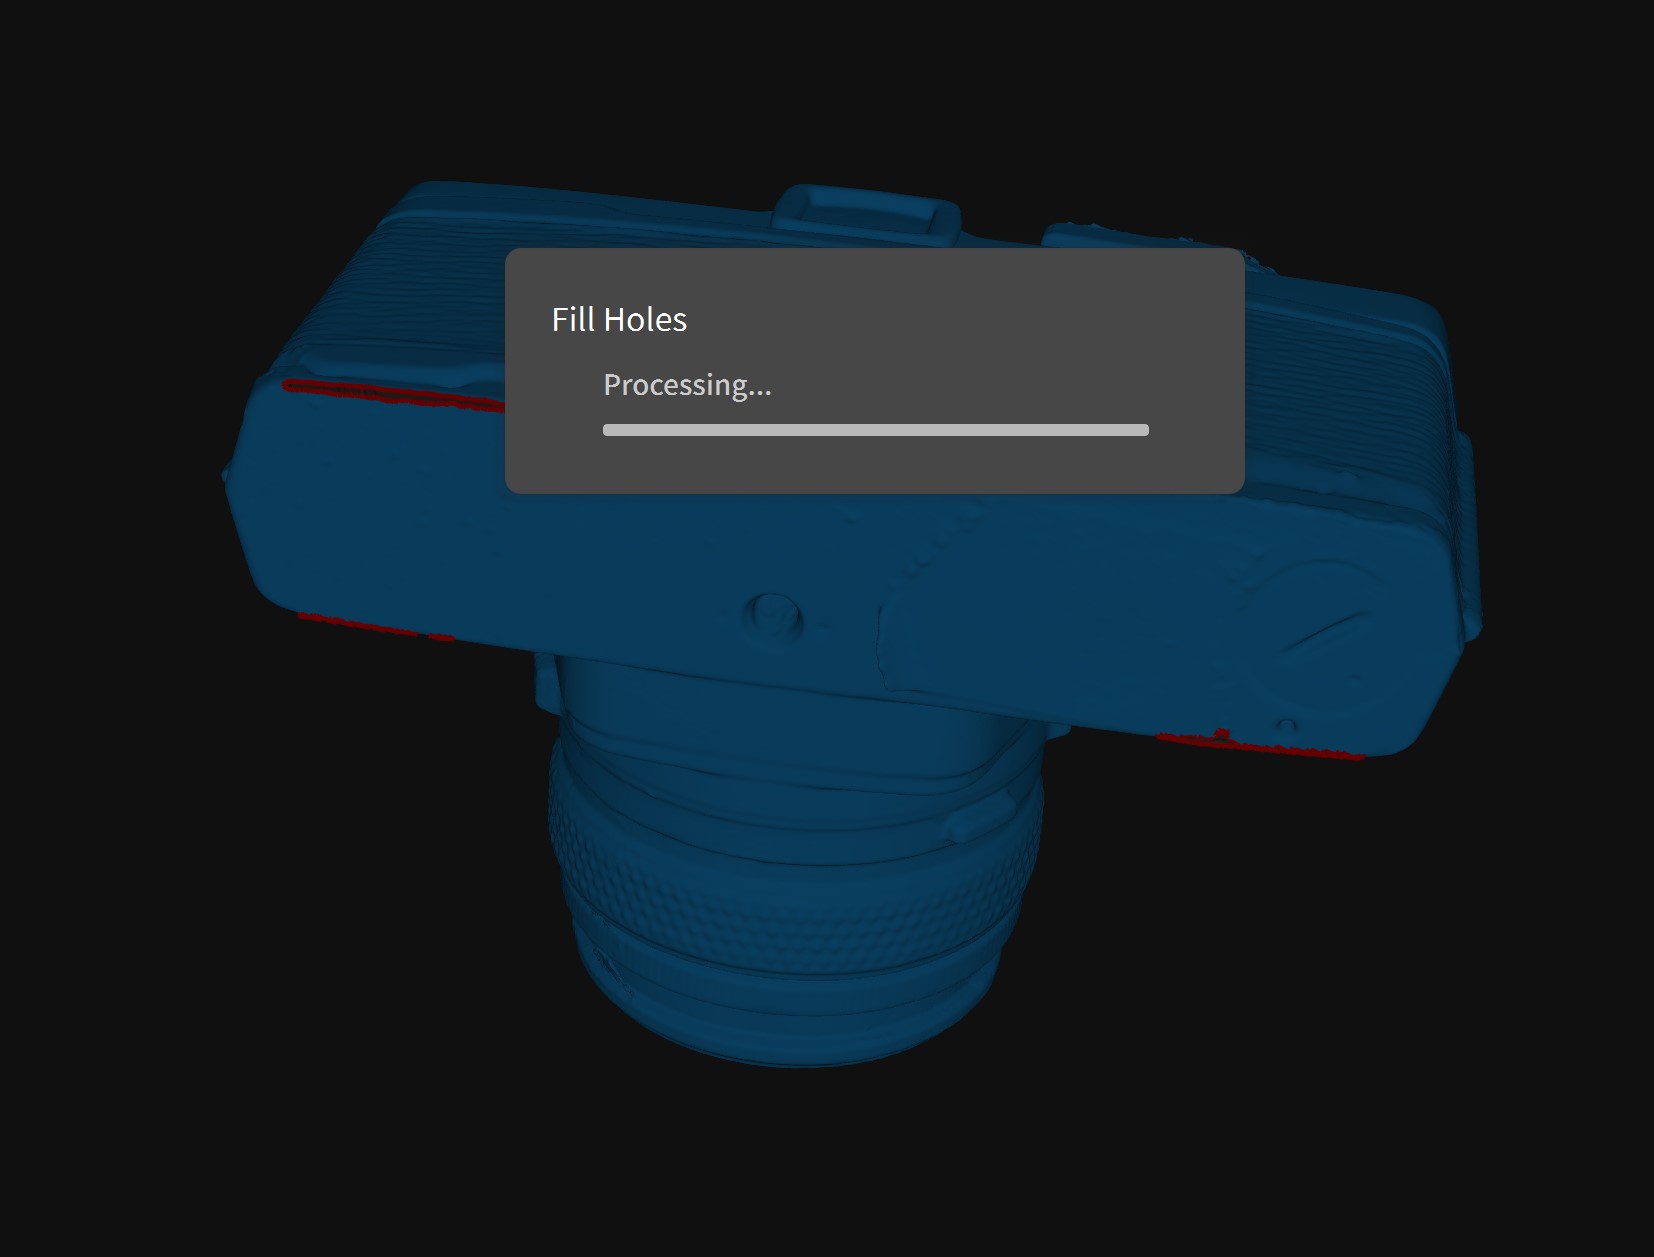
For 3D scanning, I decided to scan my camera using the Revopoint Range 2 3D Scanner. The STL file is here.
This was a challenging scan, as the camera has some matte black surfaces combined with some shiny reflective metal.
I decided to use the Aesub Blue scanning spray, which sublimates after four hours and is meant for these types of sensitive surfaces.
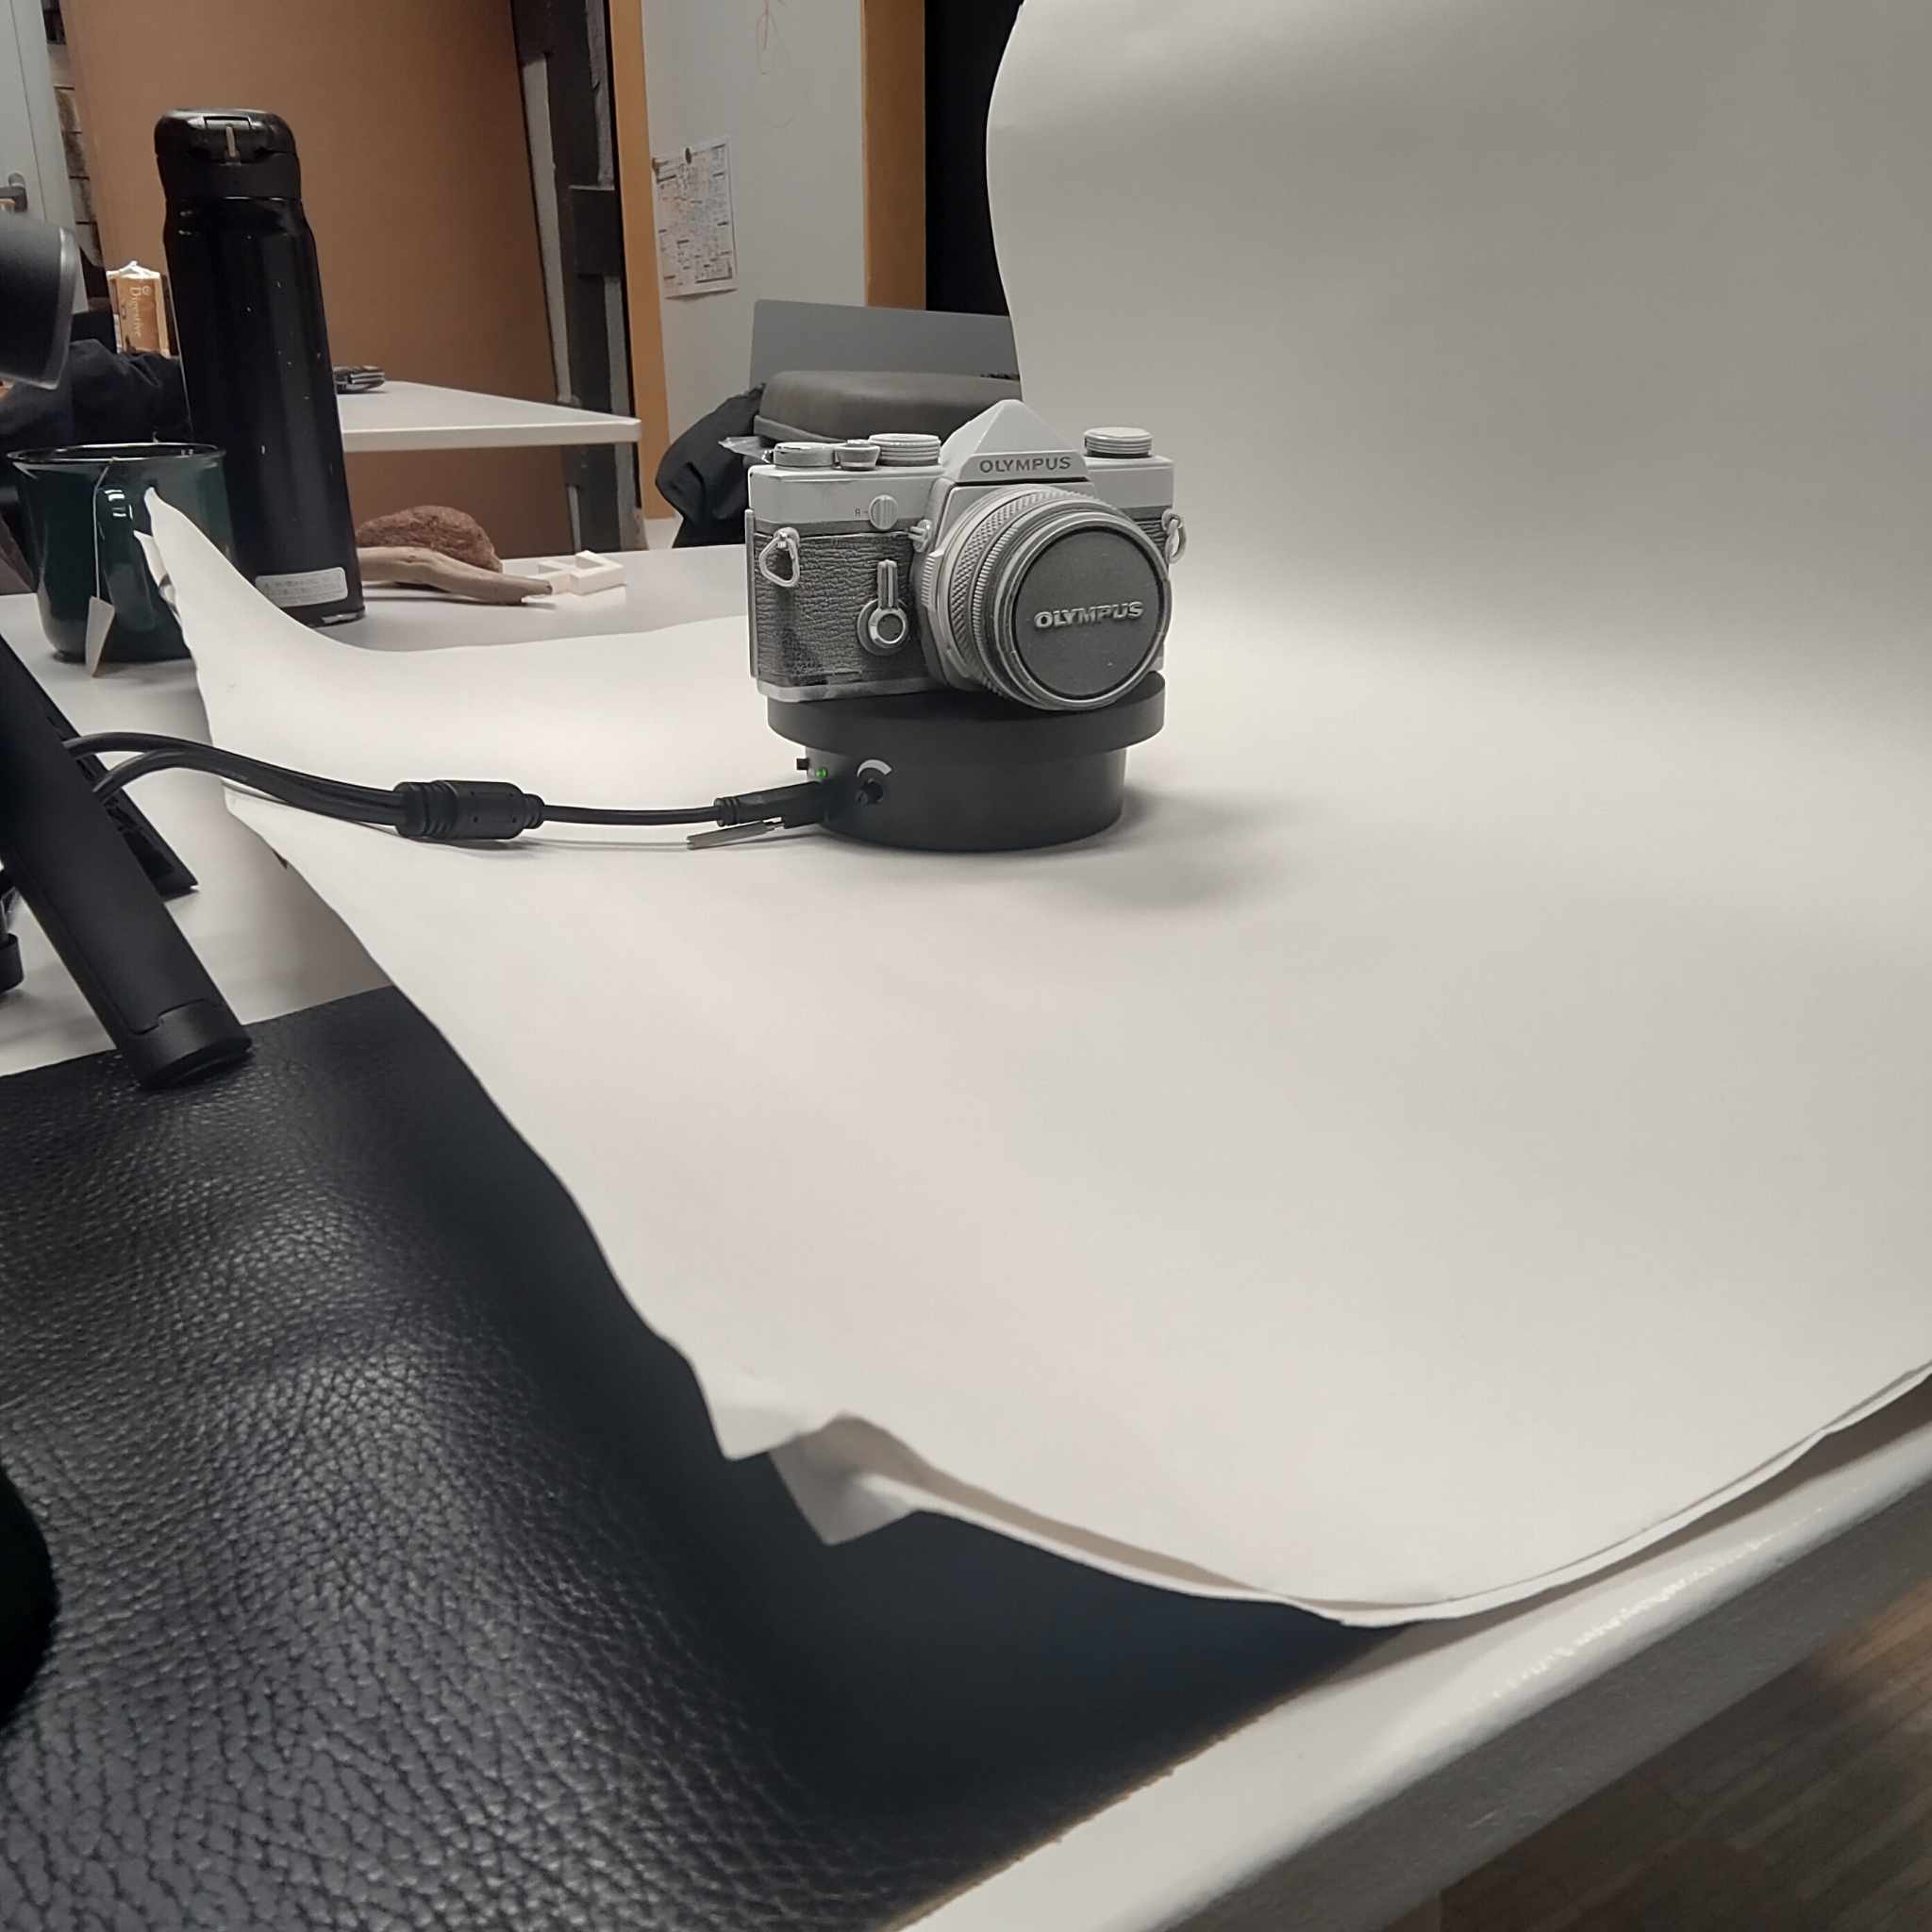
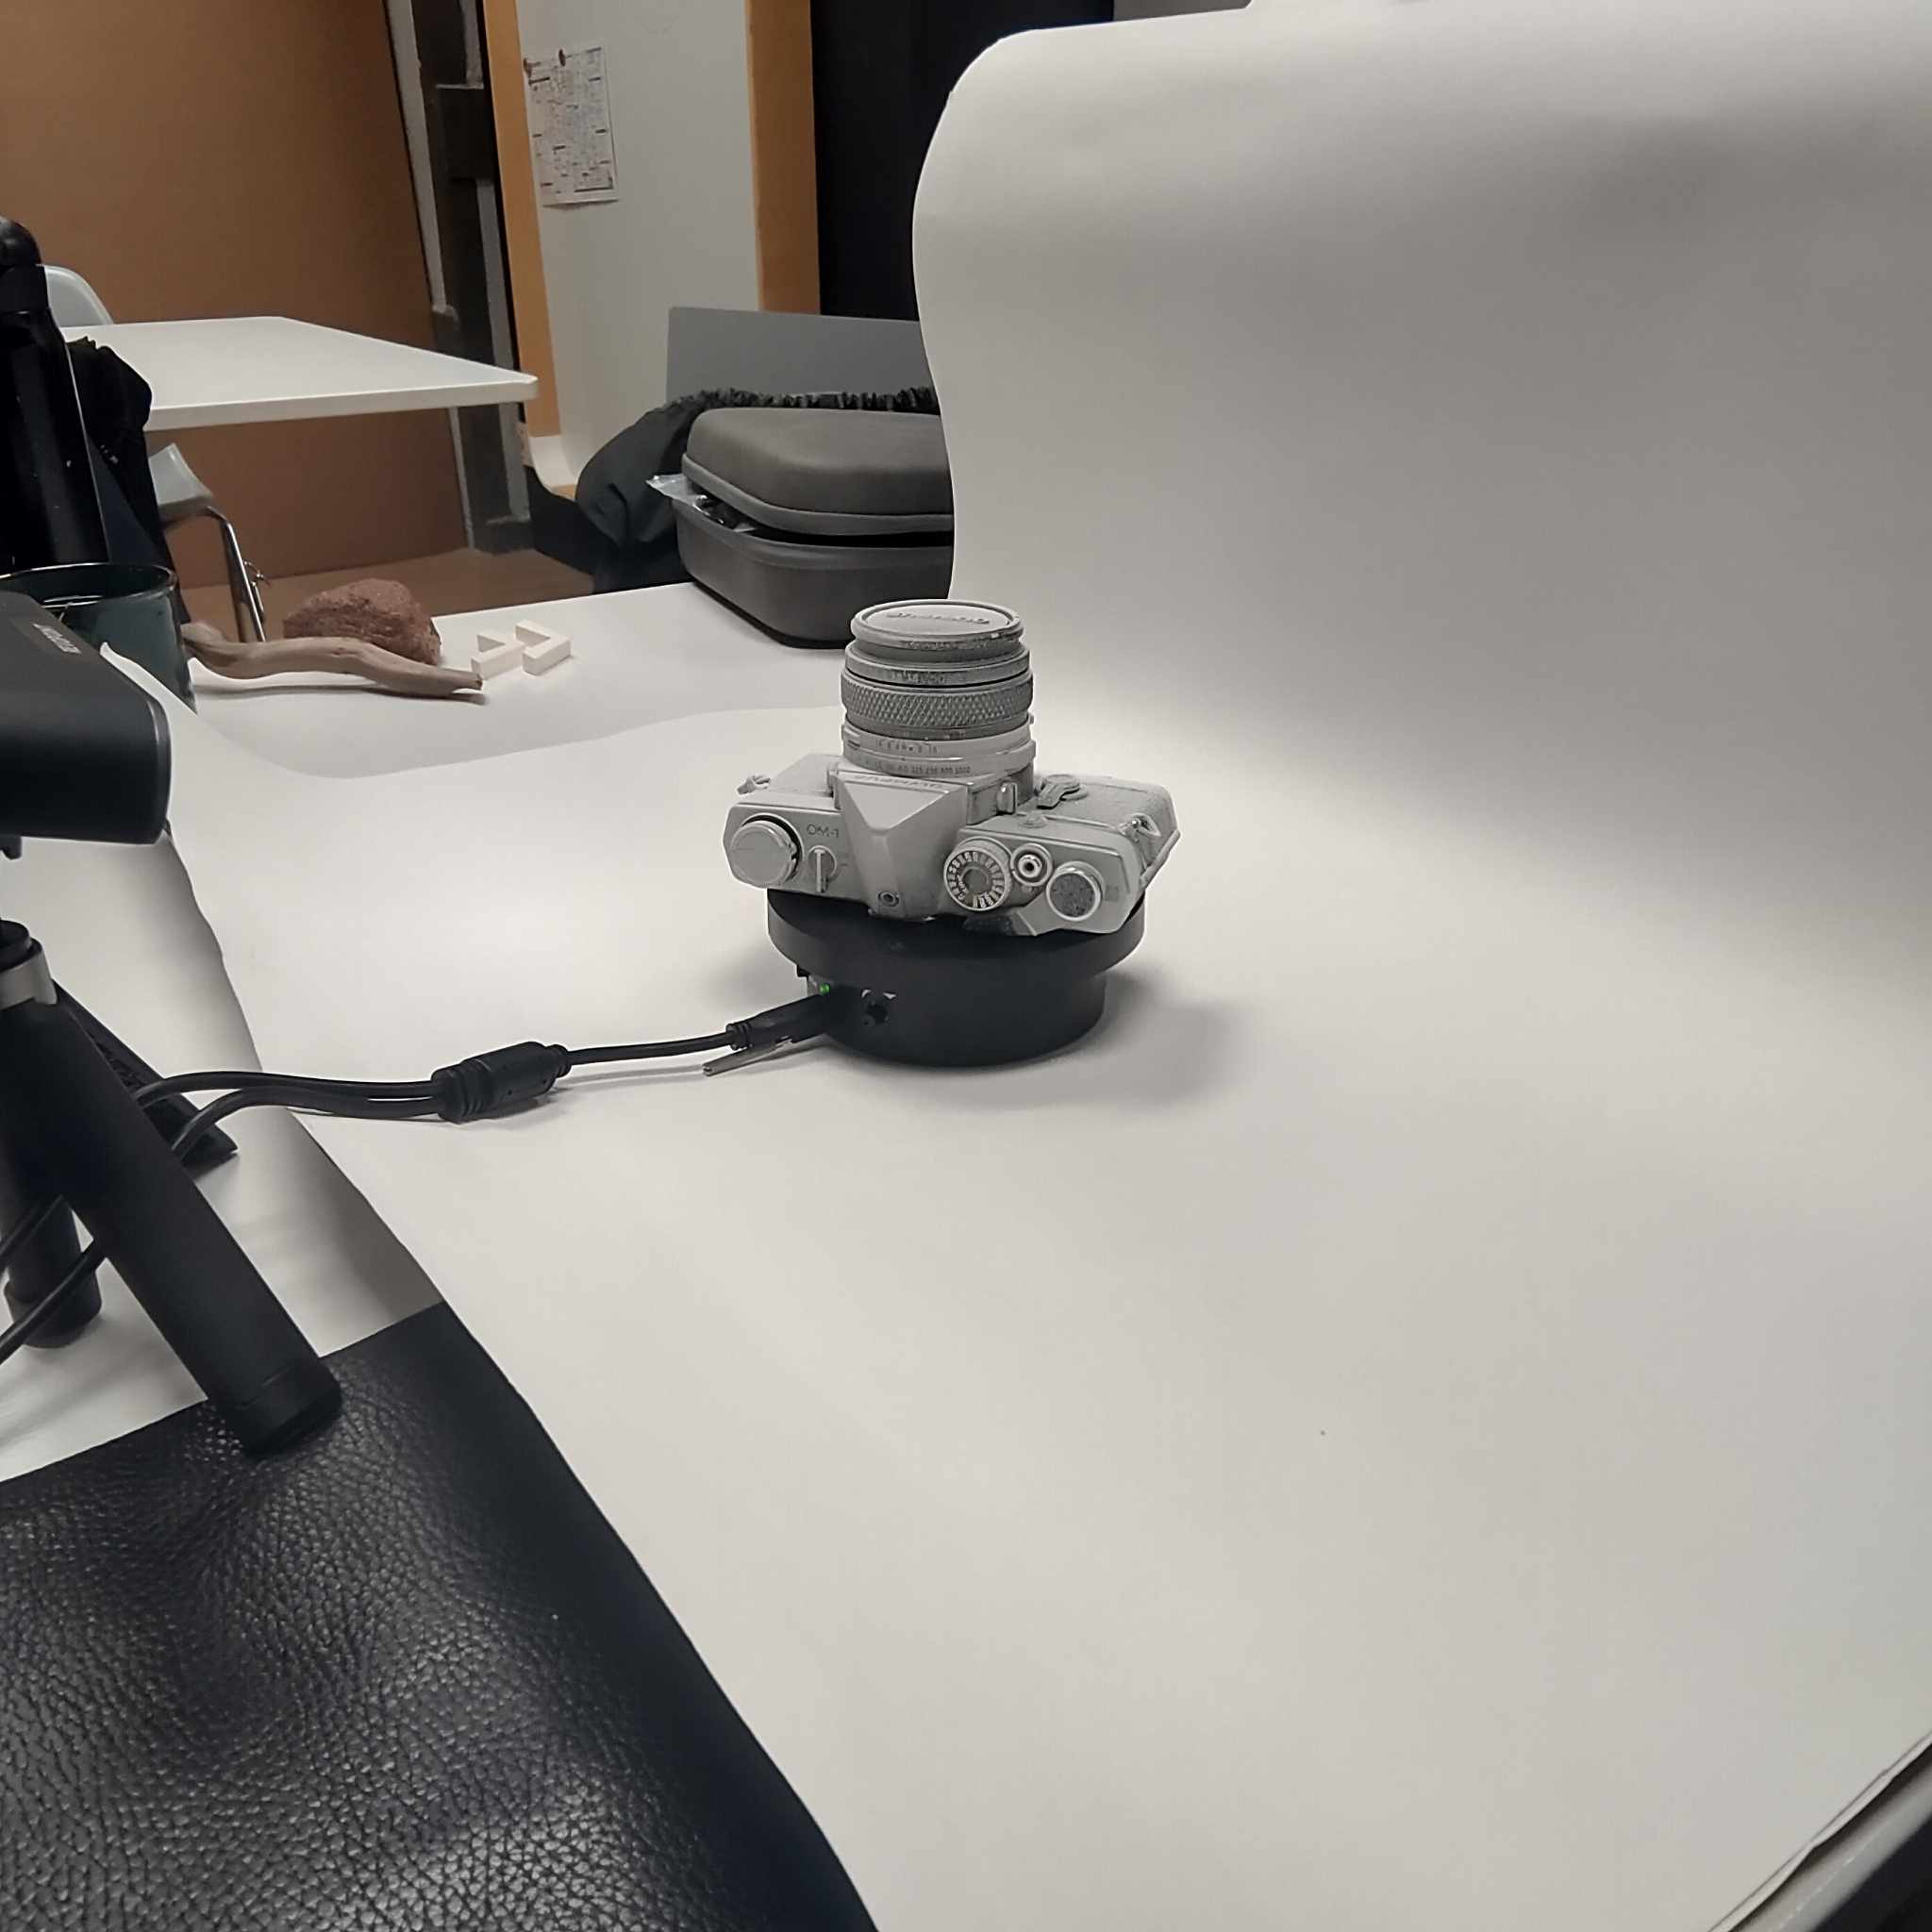 Since the camera has to rest on a surface, I needed to turn it around after scanning one side.
In this way, I got two scans of the camera and merged them together within the Revo Scan software.
This led to this scan which looked very nice, with some problems at the bottom of the scan.
Since the camera has to rest on a surface, I needed to turn it around after scanning one side.
In this way, I got two scans of the camera and merged them together within the Revo Scan software.
This led to this scan which looked very nice, with some problems at the bottom of the scan.
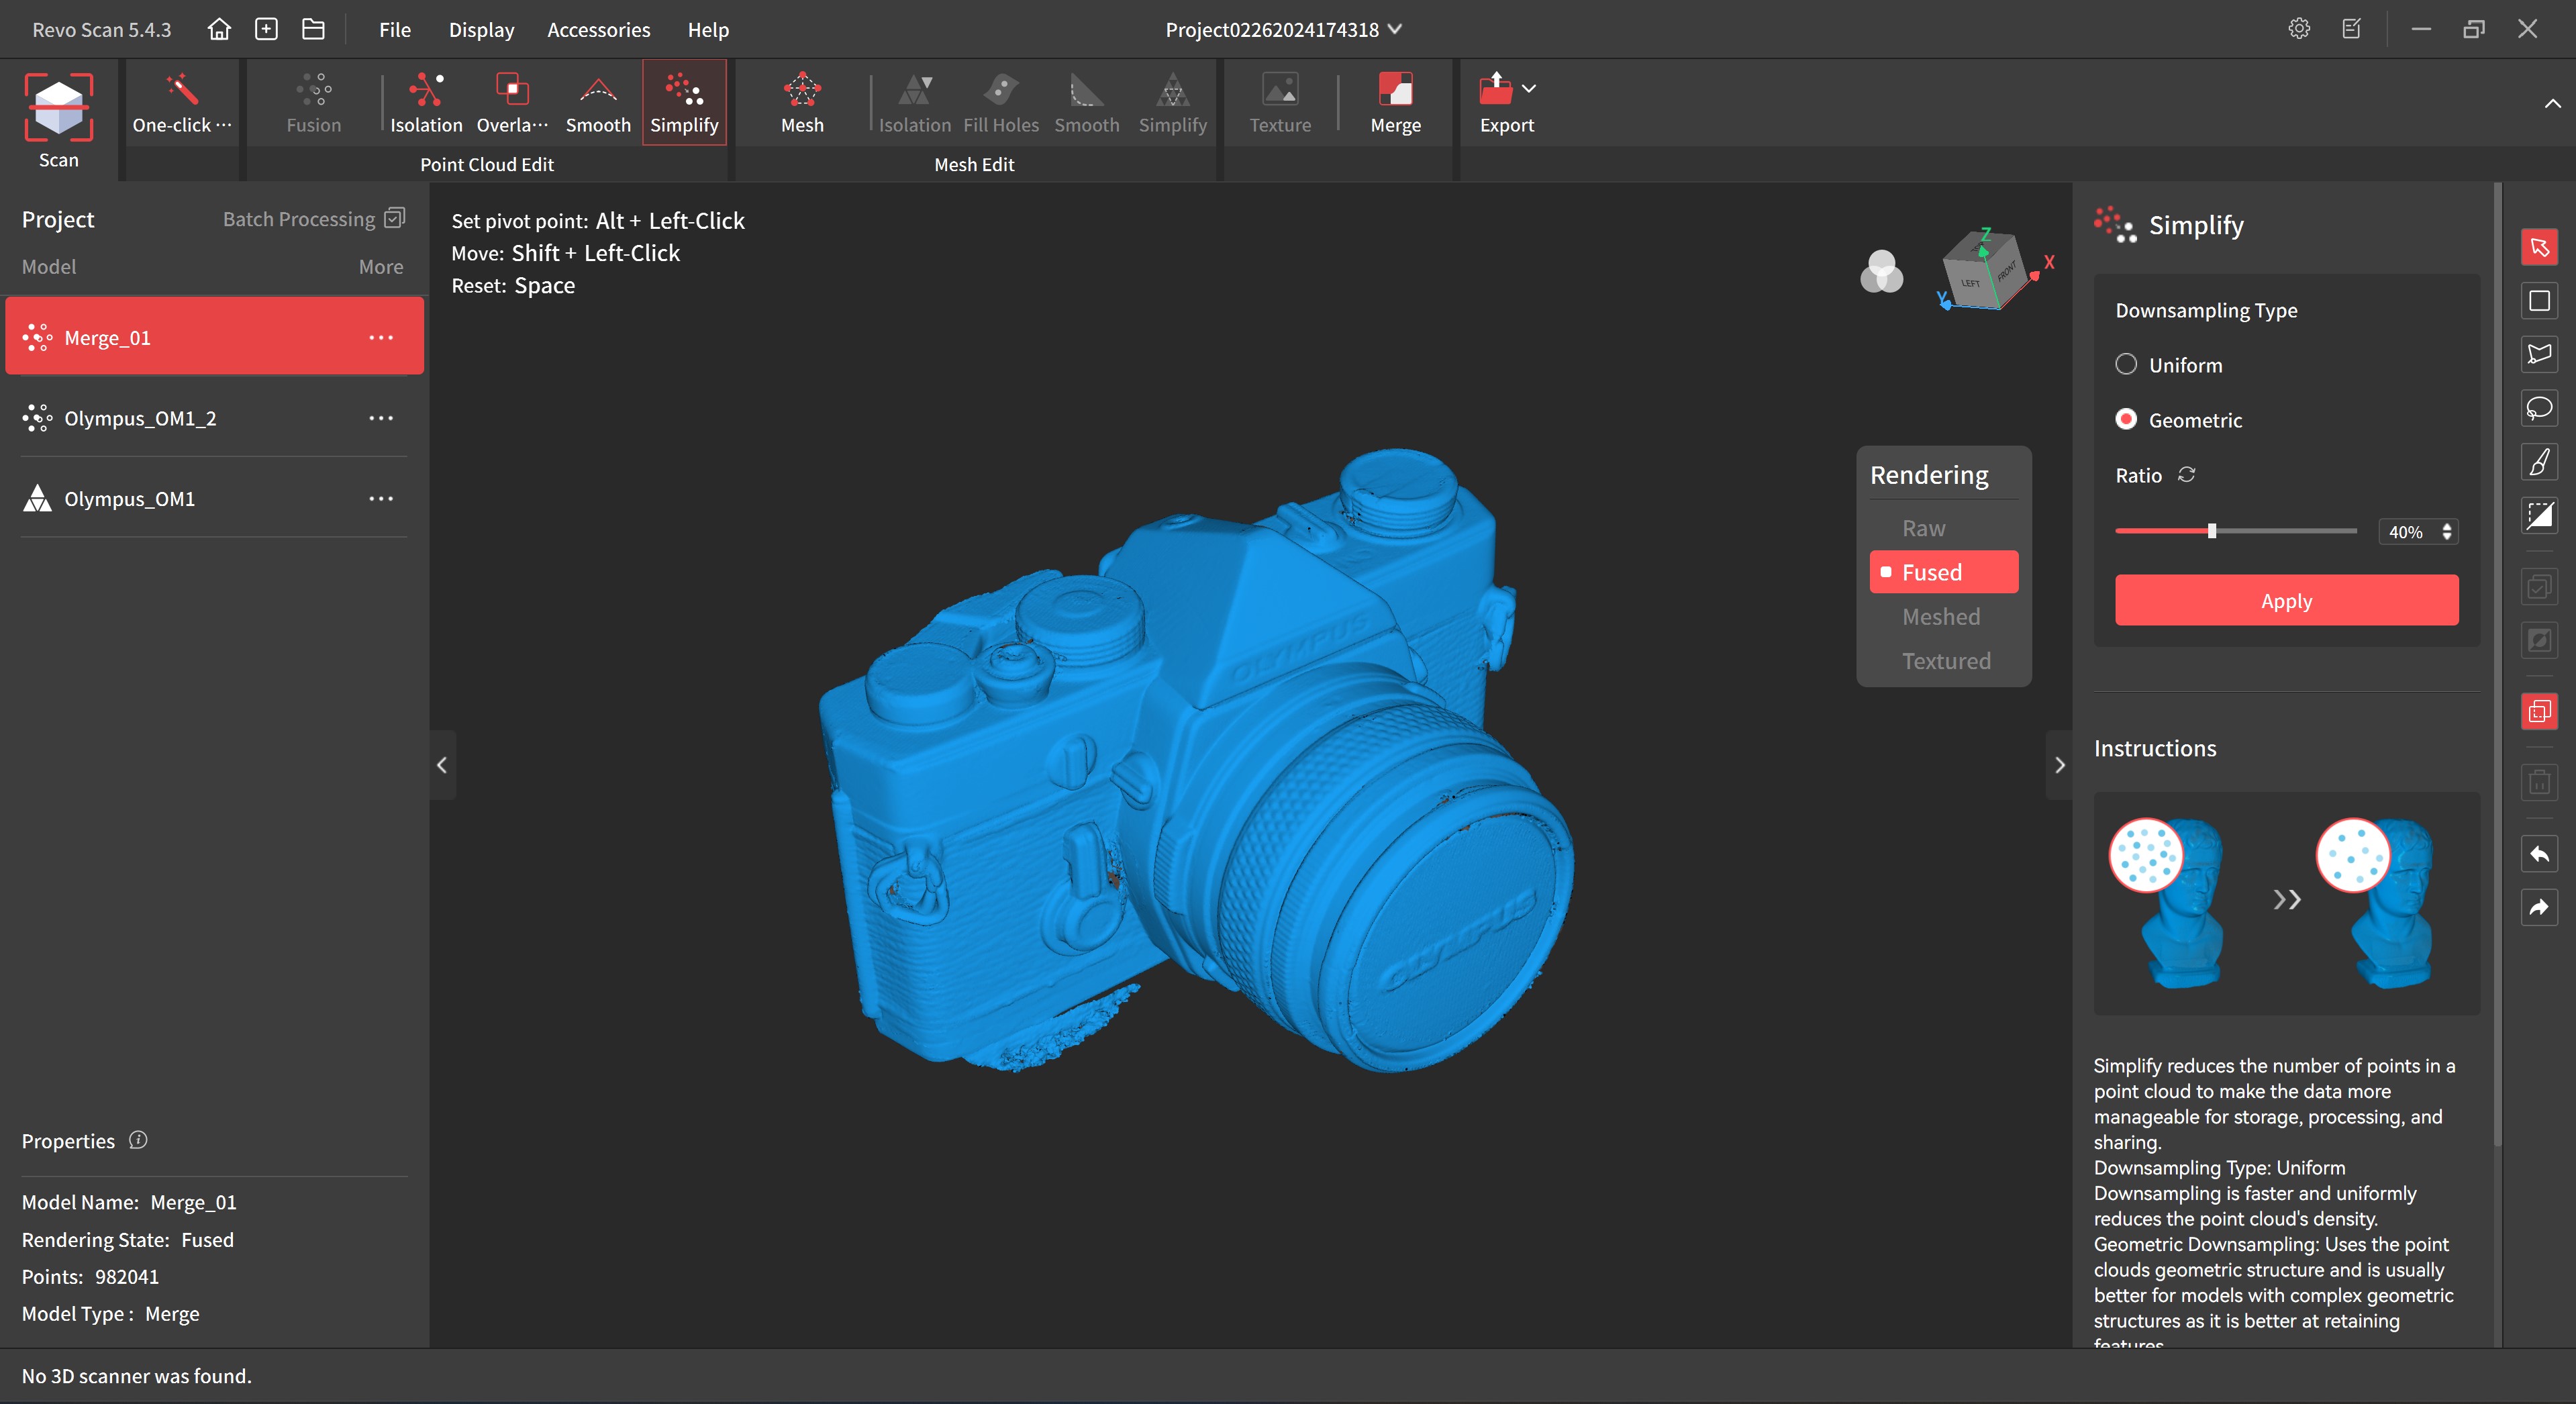 Following that, I exported the file to Blender in order to cut away the remaining issues.
 I then sent it back into Revo Scan 5 in order to automatically fill in the holes.
 The finalised scan looks like this: