13. Input Devices
Week 13 · 2023.04.12-2023.04.19
This week I worked on understanding how some input devices (sensors) work.
Research
I thought it would be a good idea to sense in my final project, if people is close to the machine while its running, or if the gripper actually has a piece to work upon or not. If it doesn’t really have an element grabbed there would be no need to start the machine in first place.
Therefore I wondered if a PIR sensor for detecting movement would be a good idea, or if an IR sensor being interrumped by an element would be better, but we (my tutor and I) thought it was worth giving a try with an ultrasonic sensor that would actually sense the piece in the right distance, without movement interferance (as would happen with the PIR) or with a two element sensor with an IR.
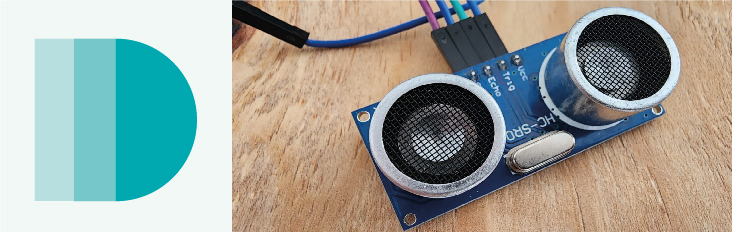
Ultrasonic sensor
In this case we’ll be using the HCSR04 ultrasonic sensor with the XIAO ESP32C3, a combination that as far as I know hasn’t beeing used before in fabacademy.
The wiring should follow this image:
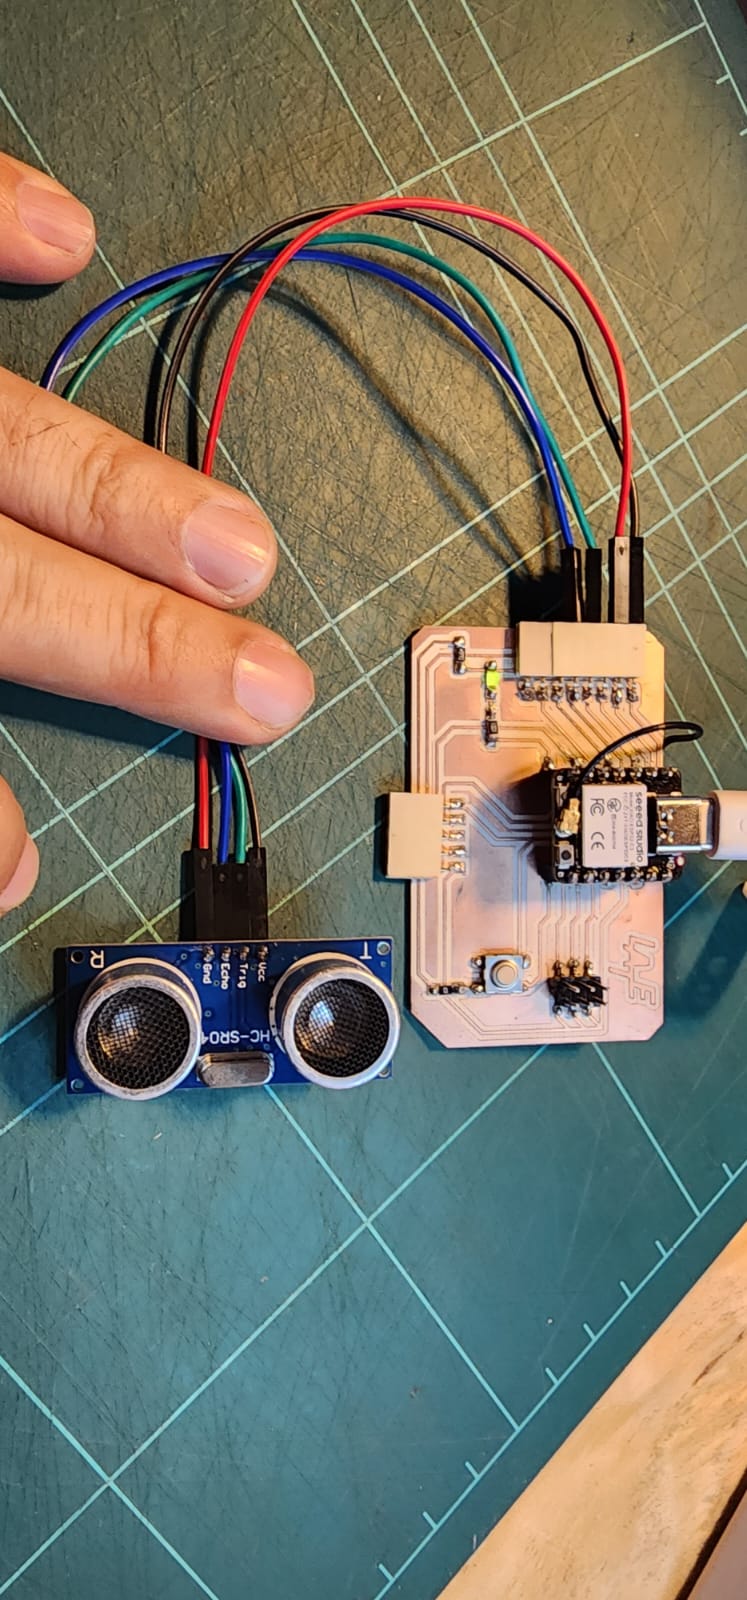
- Black goes from 5V in Xiao to VCC in Ultrasonic sensor.
- Red goes from Ground in Xiao to GND in Ultrasonic sensor.
- Green goes from D0 in Xiao to Trigger in Ultrasonic sensor.
- Blue goes from D1 in Xiao to Echo in Ultrasonic sensor.
Code Example
Based in this code by Dejan, I made some adjustments and it ran smoothly.
// By Dejan
// Adjustments by Ronan Bolaños
// defines pins numbers
const int trigPin = D0;
const int echoPin = D1;
// defines variables
long duration;
int distance;
void setup() {
  pinMode(trigPin, OUTPUT); // Sets the trigPin as an Output
  pinMode(echoPin, INPUT); // Sets the echoPin as an Input
  Serial.begin(9600); // Starts the serial communication
}
void loop() {
  // Clears the trigPin
  digitalWrite(trigPin, LOW);
  delayMicroseconds(2);
  // Sets the trigPin on HIGH state for 10 micro seconds
  digitalWrite(trigPin, HIGH);
  delayMicroseconds(10);
  digitalWrite(trigPin, LOW);
  // Reads the echoPin, returns the sound wave travel time in microseconds
  duration = pulseIn(echoPin, HIGH);
  // Calculating the distance
  distance = duration * 0.034 / 2;
  // Prints the distance on the Serial Monitor
  Serial.print("Distance: ");
  Serial.print(distance);
  Serial.println("cm");
  delay(1000);
}
Video
The following video shows how it works with different distances:
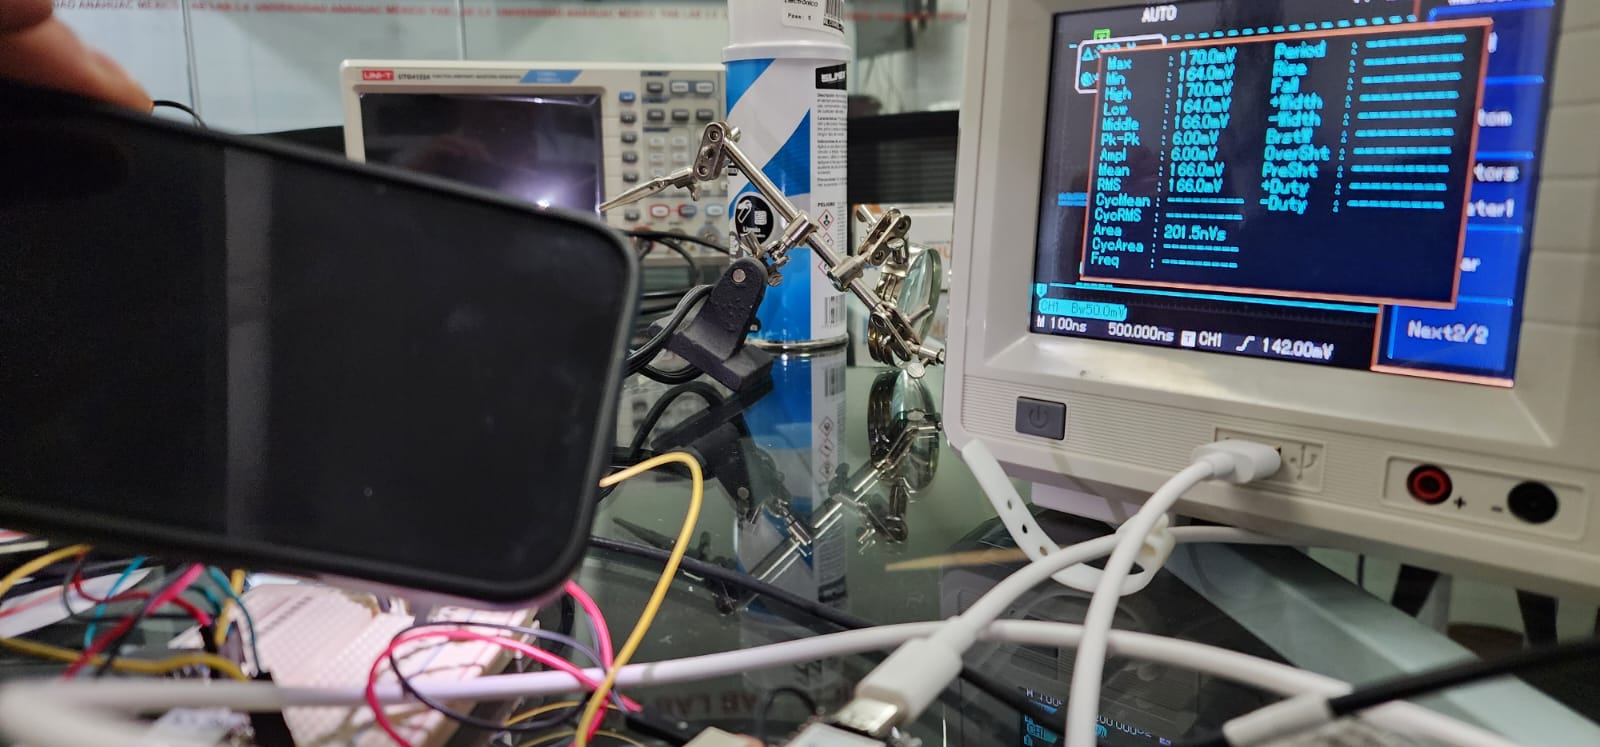
Group assignment
- Probe an input device(s)’s analog and digital signals
- Document your work on the group work page and reflect on your individual page what you learned
Analog input device
I tested a photoresistor in order to observe the minimum value and maximum value within the lighting conditions of the working space and then we added a source of light in order to test how the limit would be pushed over.
I used the following code for observing the measurements:
/*
  Analog Input

  Demonstrates analog input by reading an analog sensor on analog pin 0 and
  turning on and off a light emitting diode(LED) connected to digital pin 13.
  The amount of time the LED will be on and off depends on the value obtained
  by analogRead().

  The circuit:
  - potentiometer
    center pin of the potentiometer to the analog input 0
    one side pin (either one) to ground
    the other side pin to +5V
  - LED
    anode (long leg) attached to digital output 13 through 220 ohm resistor
    cathode (short leg) attached to ground

  - Note: because most Arduinos have a built-in LED attached to pin 13 on the
    board, the LED is optional.

  created by David Cuartielles
  modified 30 Aug 2011
  By Tom Igoe

  This example code is in the public domain.

  https://www.arduino.cc/en/Tutorial/BuiltInExamples/AnalogInput
*/

int sensorPin = A3;   // select the input pin for the potentiometer
int ledPin = D6;      // select the pin for the LED
int sensorValue = 0;  // variable to store the value coming from the sensor

void setup() {
  // declare the ledPin as an OUTPUT:
  pinMode(ledPin, OUTPUT);
}

void loop() {
  // read the value from the sensor:
  sensorValue = analogRead(sensorPin);
  // turn the ledPin on
  digitalWrite(ledPin, HIGH);
  // stop the program for <sensorValue> milliseconds:
  delay(sensorValue);
  // turn the ledPin off:
  digitalWrite(ledPin, LOW);
  // stop the program for for <sensorValue> milliseconds:
  delay(sensorValue);
}
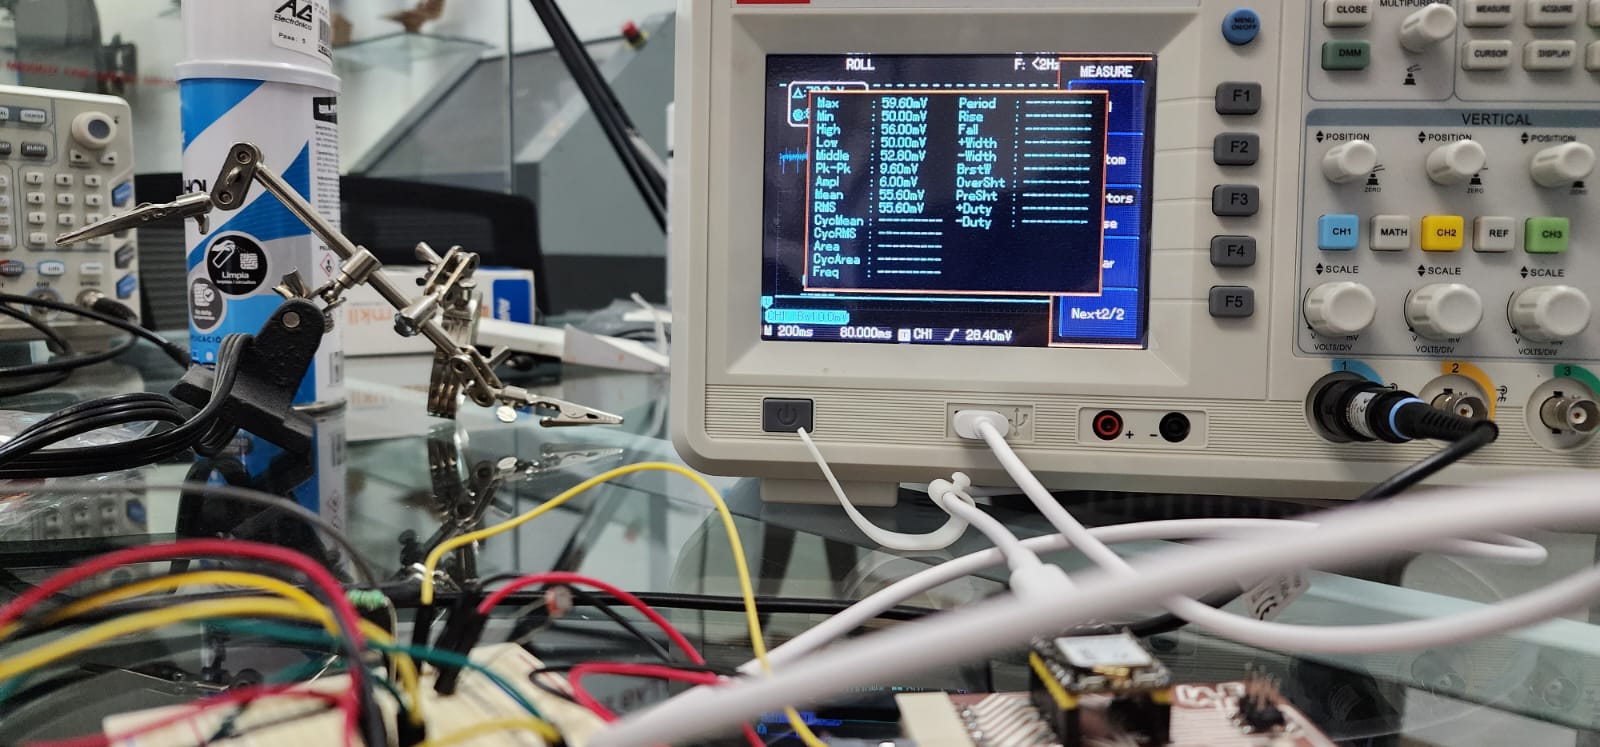
The light of the LED blinks faster whenever has less light
Ambient light mesured between 50 and 59.6 mV
While adding an external source of light the measurements scaled in between 164 and 170 mV