1. Principles and practices

Week 01 · 2023.01.25-2023.02.01
‘Starting Fabacademy’
This week I mainly worked on learning and managing how to put up a site with git, and on the other hand I worked on developing the basic documentation for what I expect it will be my final project
Checklist for the tasks assigned:
- [x] Sketched your final project idea(s)
- [x] Described briefly what it will do and who will use it
- [x] Made a website and described how you did it
- [x] Created a section about yourself on that website
- [x] Added a page with a sketch and description of your final project idea(s)
- [x] Documented steps for setting up your Git repository and adding files to it
- [x] Pushed to your class GitLab repository
- [x] Signed and uploaded Student Agreement
‘The Git way’
In order to follow ‘the git way’ I have gone through the next steps derived from this fabacademy tutorial:
From Windows:
-
Installed GitBash for windows (in specific Git-2.39.1-64-bit)
-
Already in Gitbash y set my username (in my case my name)
$ git config –-global user.name “YOUR_USERNAME”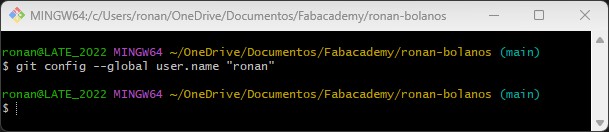
Tip · in GitBash if you don’t receive anything back it’s usually working (as far as my experience can tell)
-
I configured my email address for uploading
$ git config -–global user.email “xxxxx@unam.mx”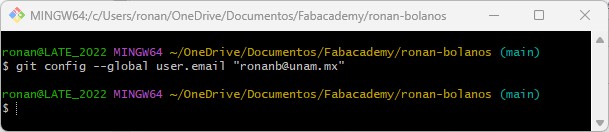
Tip · I used the same email I have registered in fabacademy so I could keep things simple
-
I checked if I had an SSH KEY already (If I had I was not aware of it)
$ cat ~/.ssh/id_rsa.pub -
Then I generated the KEY:
$ ssh-keygen -t rsa -C "xxxxx@unam.mx" -
And then typed the following for showing the KEY:
$ cat ~/.ssh/id_rsa.pub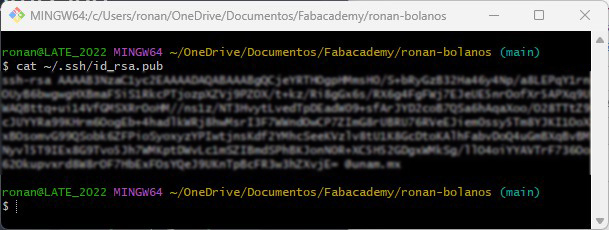
-
Copied the KEY:
Tip differing from tutorial - I right-clicked on GitBASH terminal to copy the KEY · It also works for pasting · If needed you can use arrow keys on keyboard to move right or left on text written down on the GitBash (Don’t use the mouse or for moving or ctrl+c or ctrl+v por copying and pasting in the terminal, it won’t work well)
-
I finally added the copied key to GIT on the web version as shown in this video
Git local repository
-
I navigated within Windows file explorer to my Documents and there decided to create the local repository (I like my desktop clean, so I had to differ from the tutorial which recomended such location)
-
Then to clone the directory I typed in GitBash:
$ git clone git@git.fabacademy.org:fabacademy2017/yourlabname/yourstudentnumber.git
Upload local Repository online
-
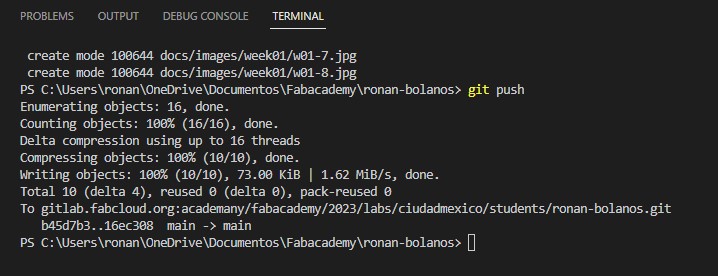
Keeping in mind that is important to keep low the size of the repository online, it is a good idea to upload only the files that git will be really showing. In order to upload file per file type:
git add index.htmlto upload al the repository (at least all that has changed) y typed:
git add . -
Next, the update has to be named to understand what the update is about then it should be typed:
git commit -m "About WIP" -
The third step to make the update work in git needs typing:
git push -
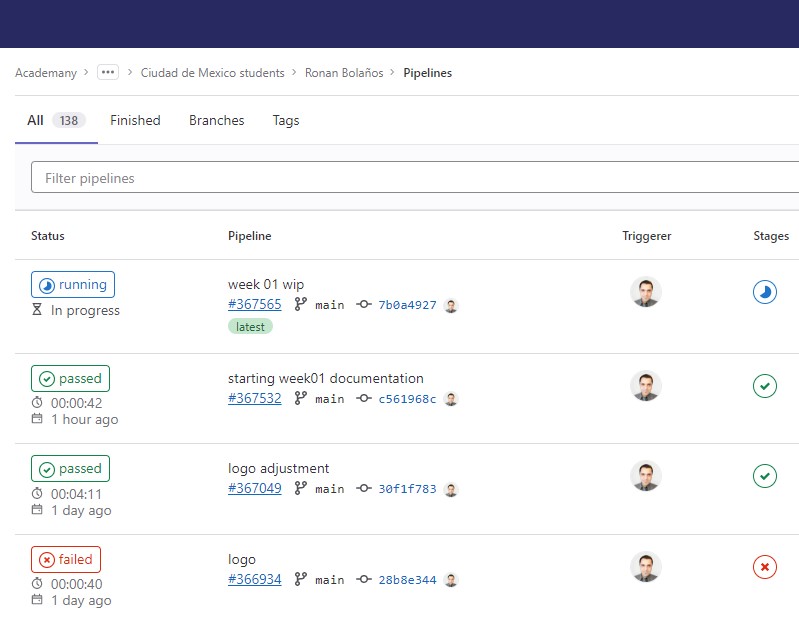
After Gitlab receives the push the pipe will run for a while and even after the process is finished it will still take about another minute for the changes to really show.
In the gitlab uploaded space, there is a menu on the left that says CI/CD
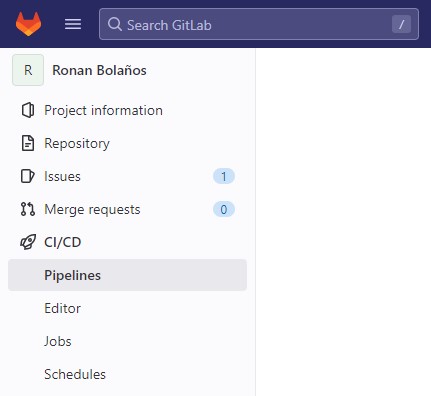
there you can see in realtime the pipeline processing
Tip if by any chance you need to start all over again from a certain point the repository because maybe because the pipeline got stucked and you don’t care about what is uploaded commited or not afther that point, It is possible to follow the steps at How do I use ‘git reset –hard HEAD’ to revert to a previous commit? Mainly you have to type (read precautions first)
$ git reset --hard <some commit code>
Integrating MkDocs
I used this tutorial for this steps, afterwards I followed the steps that lead towards the student template from a different tutorial, which might (not sure, since I did both) not require the following three steps
-
First check versions of Python and Pip
$ python --version
$ pip --version -
With Python and Pip installed, use the following command to install MkDocs
(If you don’t have pip, you need to install it, and if you have it probably you will need to updated it)
pip install mkdocs -
Confirm successfull installation of MkDocs by using the command below
mkdocs --version
Install Mkdocs for the student template
The Student template using Mkdocs-materials is on Gitlab Mkdocs-material-template
In order to incorporate Mkdocs student template I found this tutorial and followed the steps:
-
First, to recall if Python is installed, in the CMD command line terminal in Windows I typed:
python3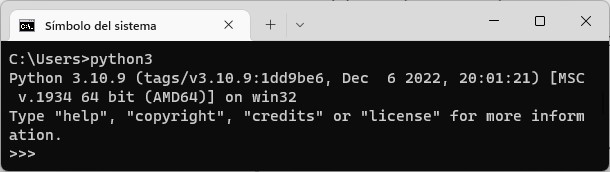
-
In Gitbash created the virtual environment (as told in the tutorial) by typing:
$ cd "<your local repository>"
# cd ~/Documentos/Fabacademy/ronan-bolanos
$ py -m venv env1
$ source env1/Scripts/activate(may use Bin folder instead)(env1)Tip · In order to easily arrive to the local repository address, you can navigate to that folder in the windows file explorer, then with right click (and probably then under more options if running on Windows 11 as I) you’ll find ‘Git Bash here’ so it opens GitBash from this location
-
In Gitbash in a different location (folder) from the repository (such as /student-Mkdocs-template) run the following:
$ git clone git@gitlab.fabcloud.org:fibasile/fabacademy-student-template.git -
Copy the necessary files in windows file explorer to the repository folder from the student-Mkdocs-template (I left the rest out in a different folder) · you only need these files in the repository so far:

-
Check python and pip versions on virtual environment
$ python -V
Python 3.9.1
(env1)$ pip -V
pip 22.3.1 from C:\Users\ronan\.local\lib\python3.9\site-packages\pip (python 3.9)
(env1) -
Install Mkdocs and related libraries from repository location:
$ pip install -r requirements.txtYou can check installed library packages by:
$ pip list -
Update .gitignore file >Before you git add . or git commit to your local repository, add “env1” (python virtual environment directory specified above) to .gitignore file. Nevertheless bunch of python execution libraries will be uploaded to local/remote repository.
in .gitignore add env1
.env
_site
.DS_Storeenv1 -
On gitbash type (It seems to turn off environment)
$ source env1/Scripts/activate -
Then launch test server locally typing:
$ mkdocs serveThen check your work in progress in http://localhost:8000/ or http://127.0.0.1:8000
To exit the local server use ctrl+c = ^c
Other details
I followed some steps on how to change the font, the favicon and the logo in mkdocs. Following the remarks from the material theme guide
Following some recomendations on different ways of working I opted for using Visual Studio Code or VSC Currently on Gitlab you can clone the repository through SSH and then select a folder for the repository.

Also installed the Markdown Preview Enhanced plugin to see within the VSC a preview of the page being edited.
The terminal at the VSC has shown useful in sustitution for the Gitbash by the way.
I developed graphical icons that reinterpret the initials of every accreditation, and made them into menu items for directing promptly from the welcome page. I made every icon with a main color as predominant, I though it would be a good idea to do all and try to balance the perception of the whole, that is way I uploaded them since week 1.
On the technical side I made extra.css with some styling for adding another font (Electrolize) for the headers 1 and 2, and allow the table not to have blank spaces and borders, mainly.