4. Computer controlled cutting
Week 04 · 2023.02.08-2023.02.15
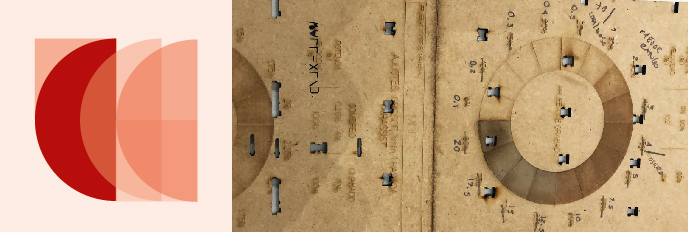
This week we received the assignment for a vinyl cutting, a laptop sticker was one of the options, so I took it!. We also worked around getting more acquainted into laser cutting, in a group assignment with some individual participations.
- [x] Linked to the group assignment page · Fablab Ciudad de México Page
- [x] Explained how you parametrically designed your files
- [x] Documented how you made your press-fit kit
- [x] Documented how you made your vinyl cutting
- [x] Included your original design files
- [x] Included your hero shots
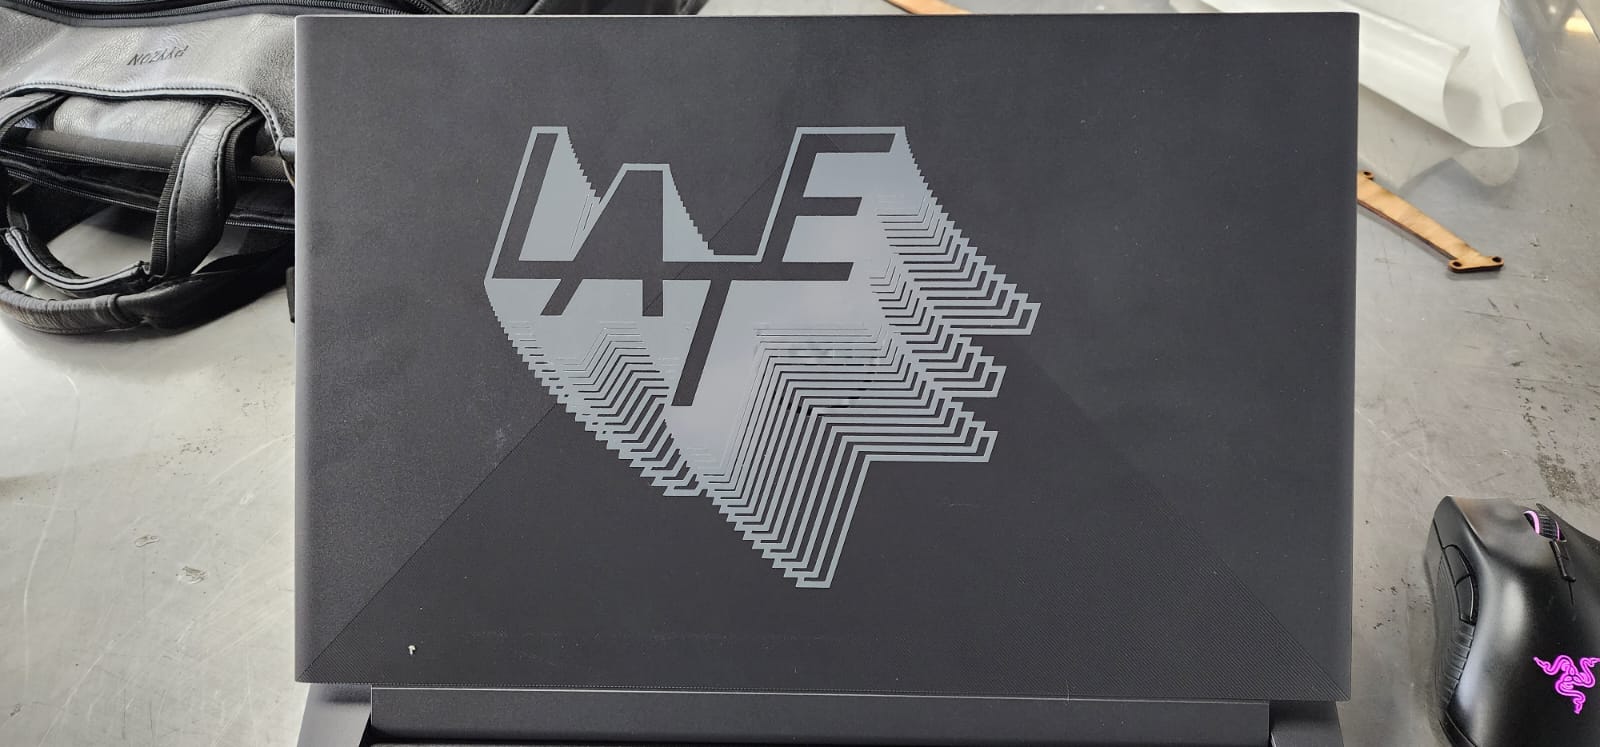
Vinyl cutting Laptop Sticker session
Tweeking the design of the logo, adjusted the size, the number of ‘shadows’ and the thicknes of the line. I used a GCC PUMA III Vinyl cutter.
Preparing the file, I processed the file in inkscape to try different configurations, in eps, svg and dxf (which resulted the best option for cutting) the line thickness were converted to shapes that would cut as outlines.
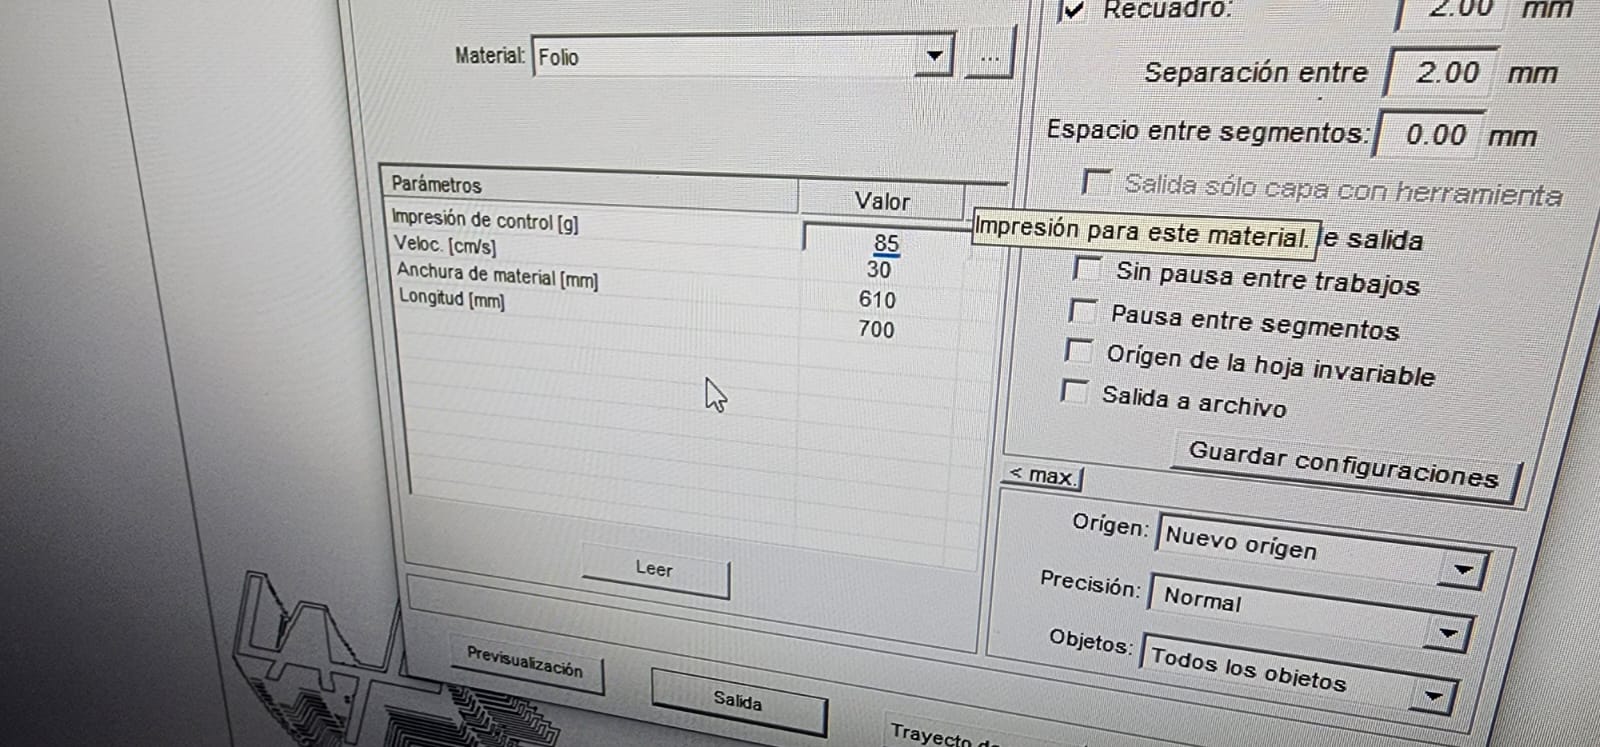
Loading the information for sending into the vinyl cutter.
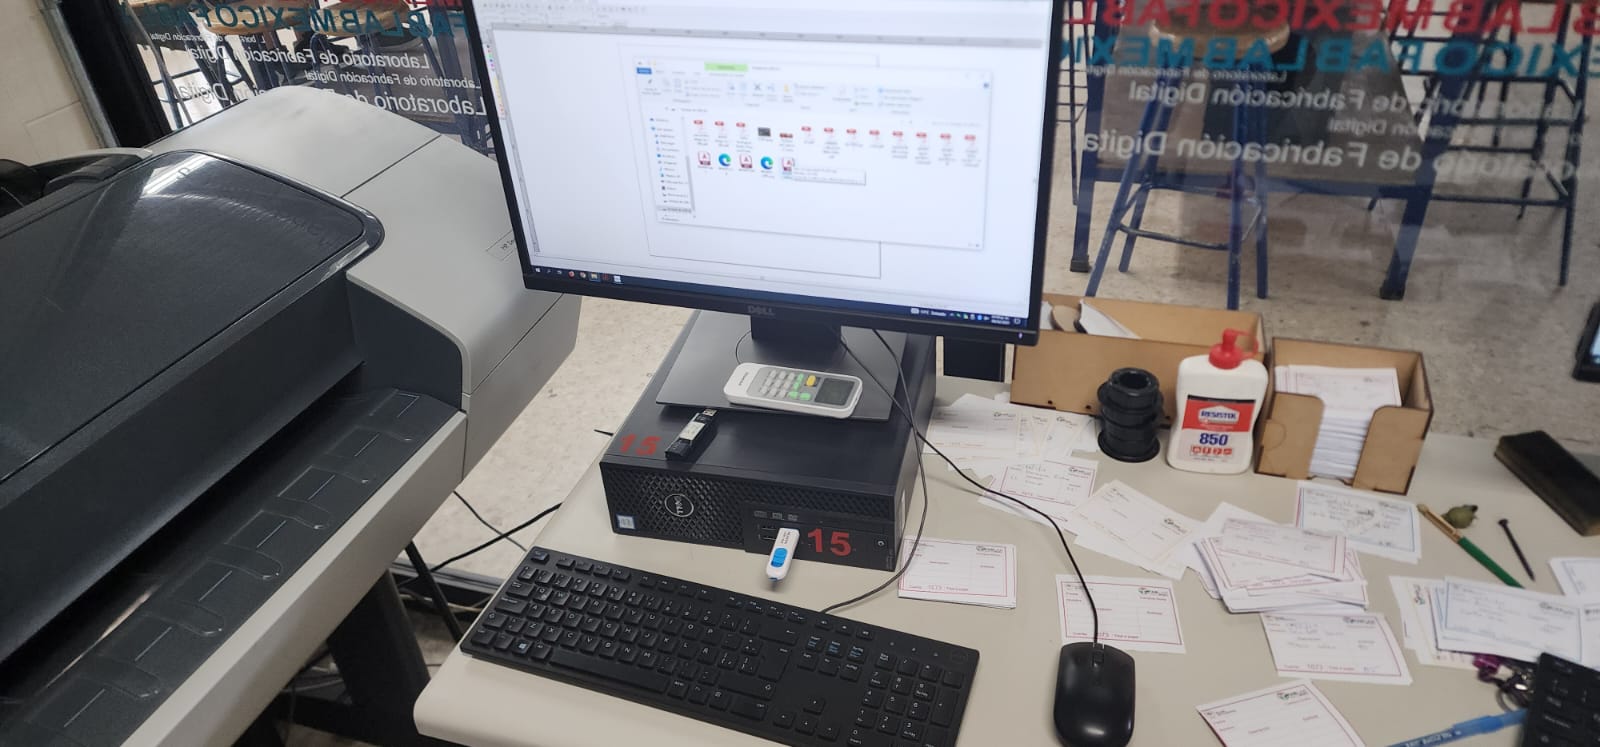
Preparing the cutter and the vinyl, loading files into cutter software and setting necessary adjustments.
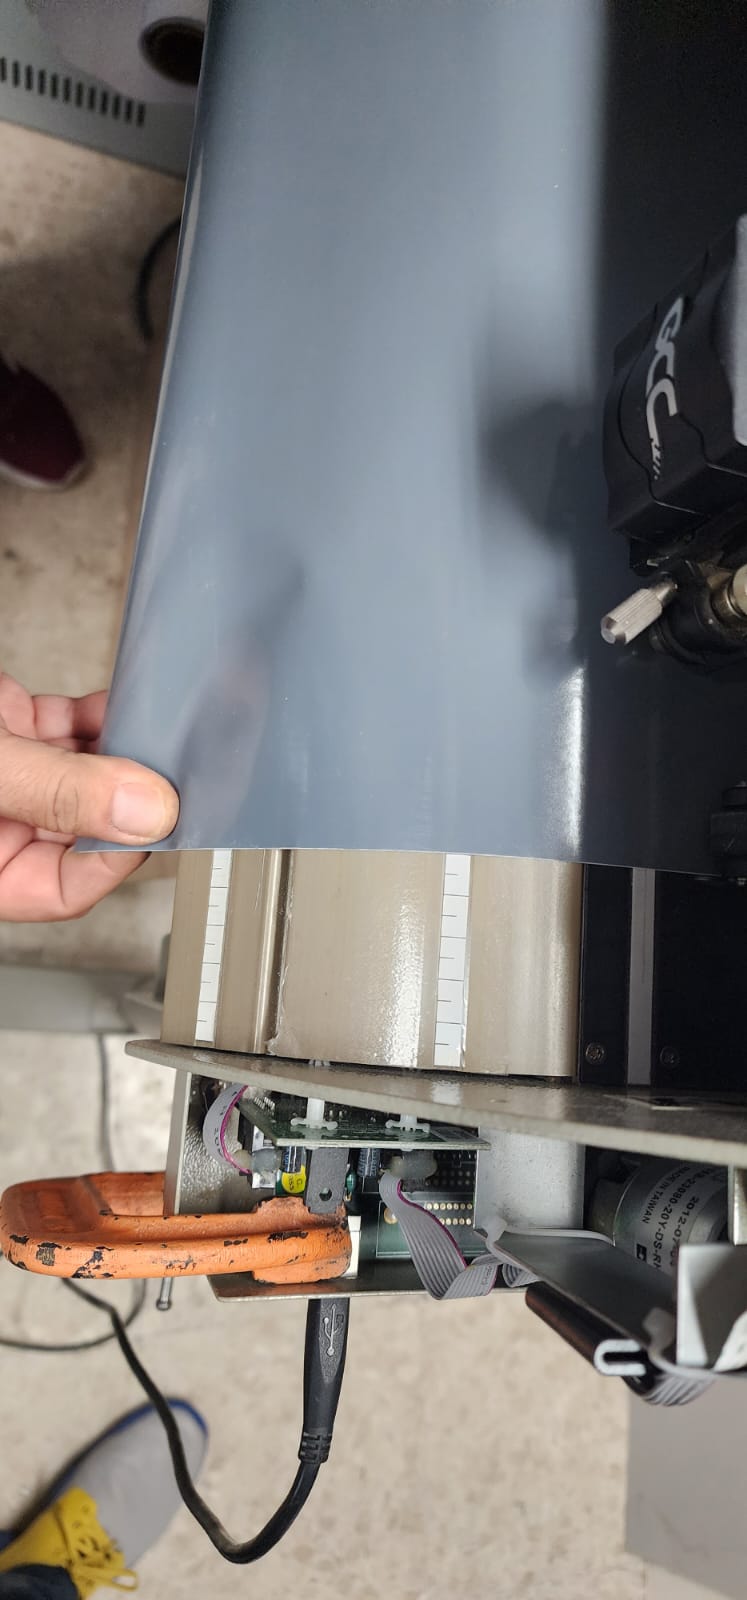
Loading vinyl in cutter, aligned to marks
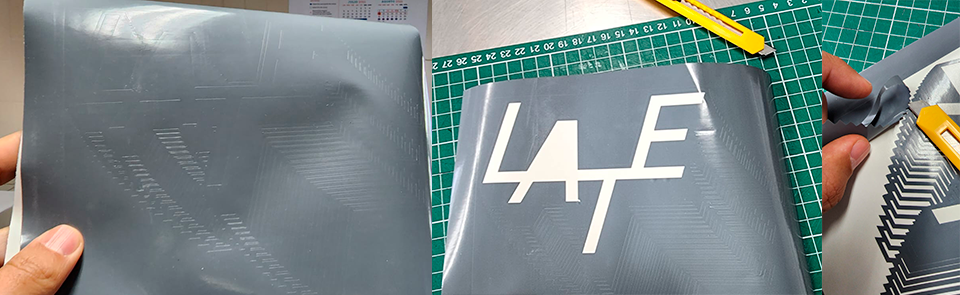
Vinyl cutting
Finished, time to weed
Transfering to final surface
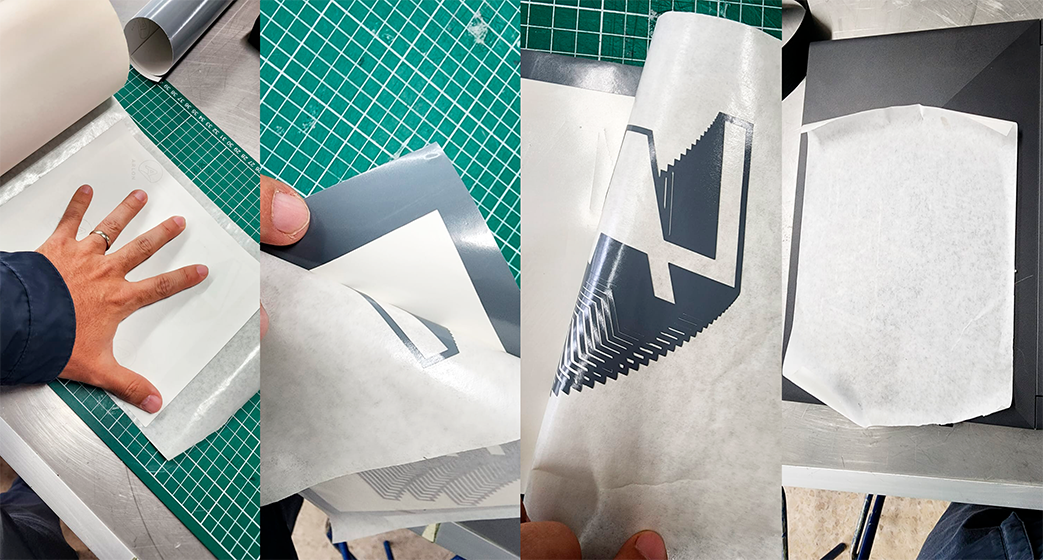
Final product
Laser Cutting
We determined the specific characteristics for cutting and engraving for different equipments · Fablab Ciudad de México Page
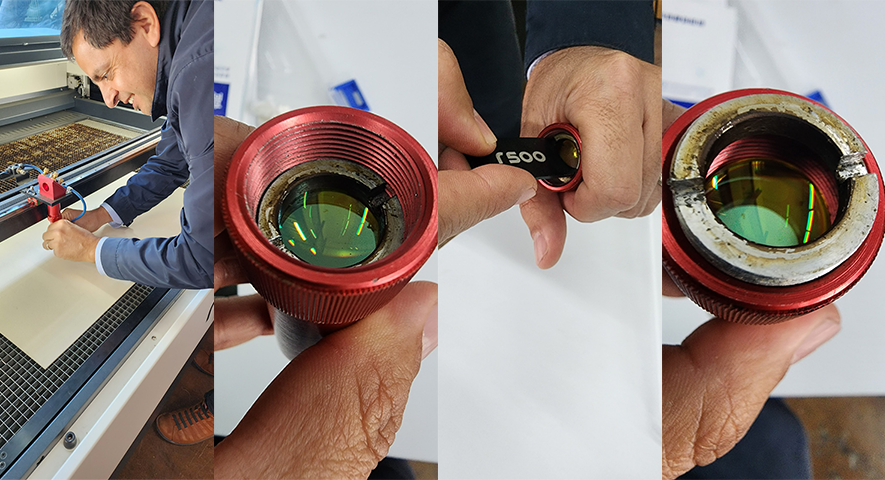
In order to use the laser cutter it is recomended to mantain the lense clean, it should be cleaned often, on a regular use basis, daily.
- First, unscrew the tip of the tube that has the air connection
- Unscrew the upper screw of the red tube to liberate the straight section
-
Unscrew the inner screw with the proper tool
-
Take out the lense
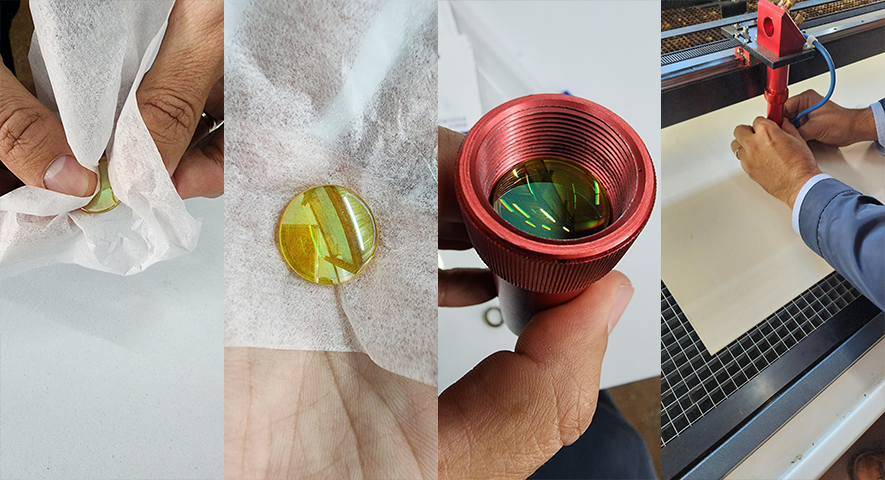
- Clean by rubbing with the special paper provided
-
Reattach, the convex side should point upwards when reattached
-
Take measurements for every material used, cardboard, ‘batería’ cardboard and acrylic in this case
-
Adjust the height of every different material you use, the red laser (pointing laser) should be set to the central 0 in the cartabon square
-
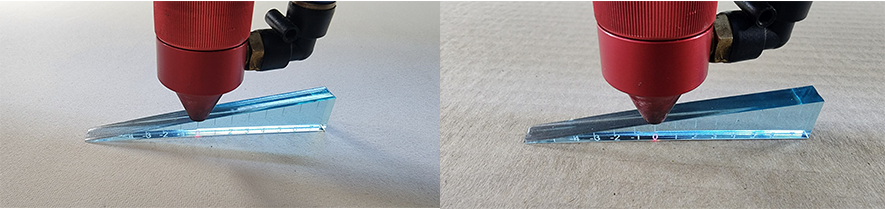
With a calibrating template figure out which are the proper settings for different materials
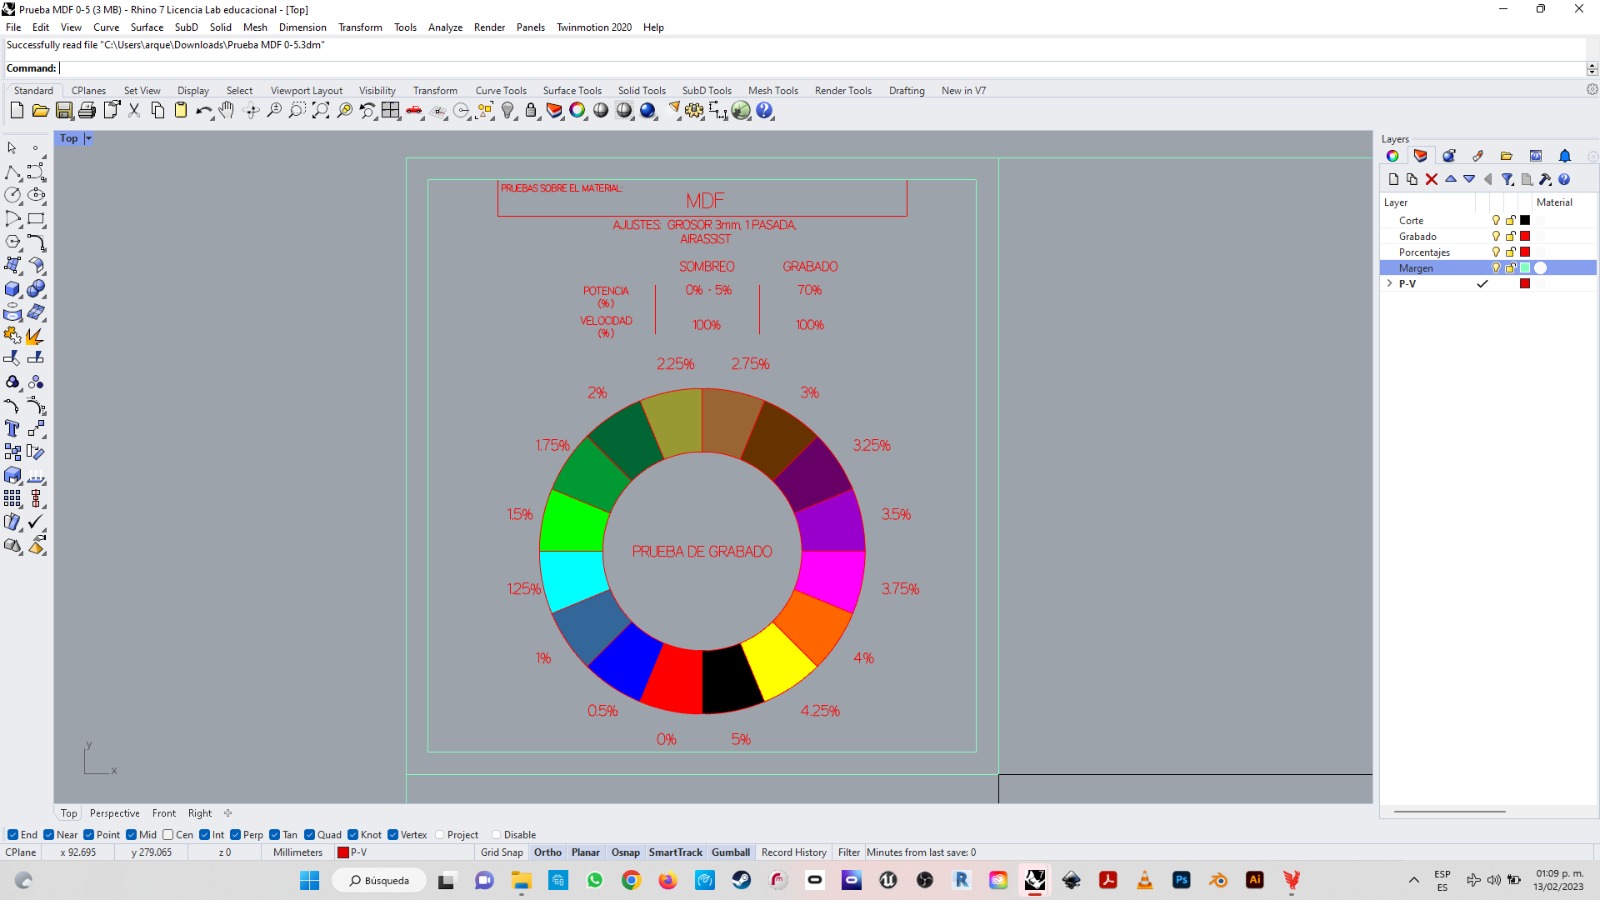

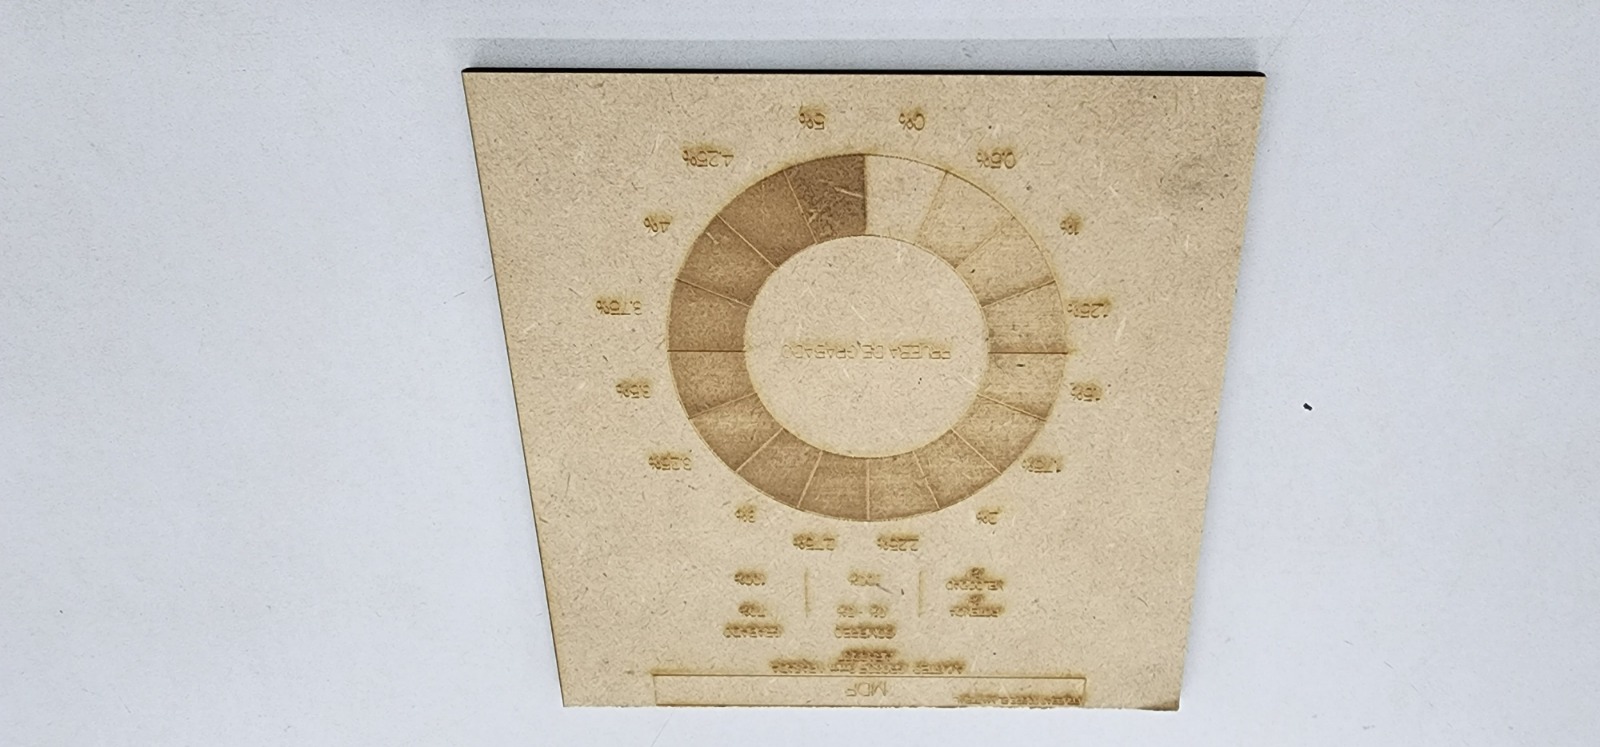
-
With a calibrating template figure out which are the proper settings for different materials
Press Fit Laser-cut design
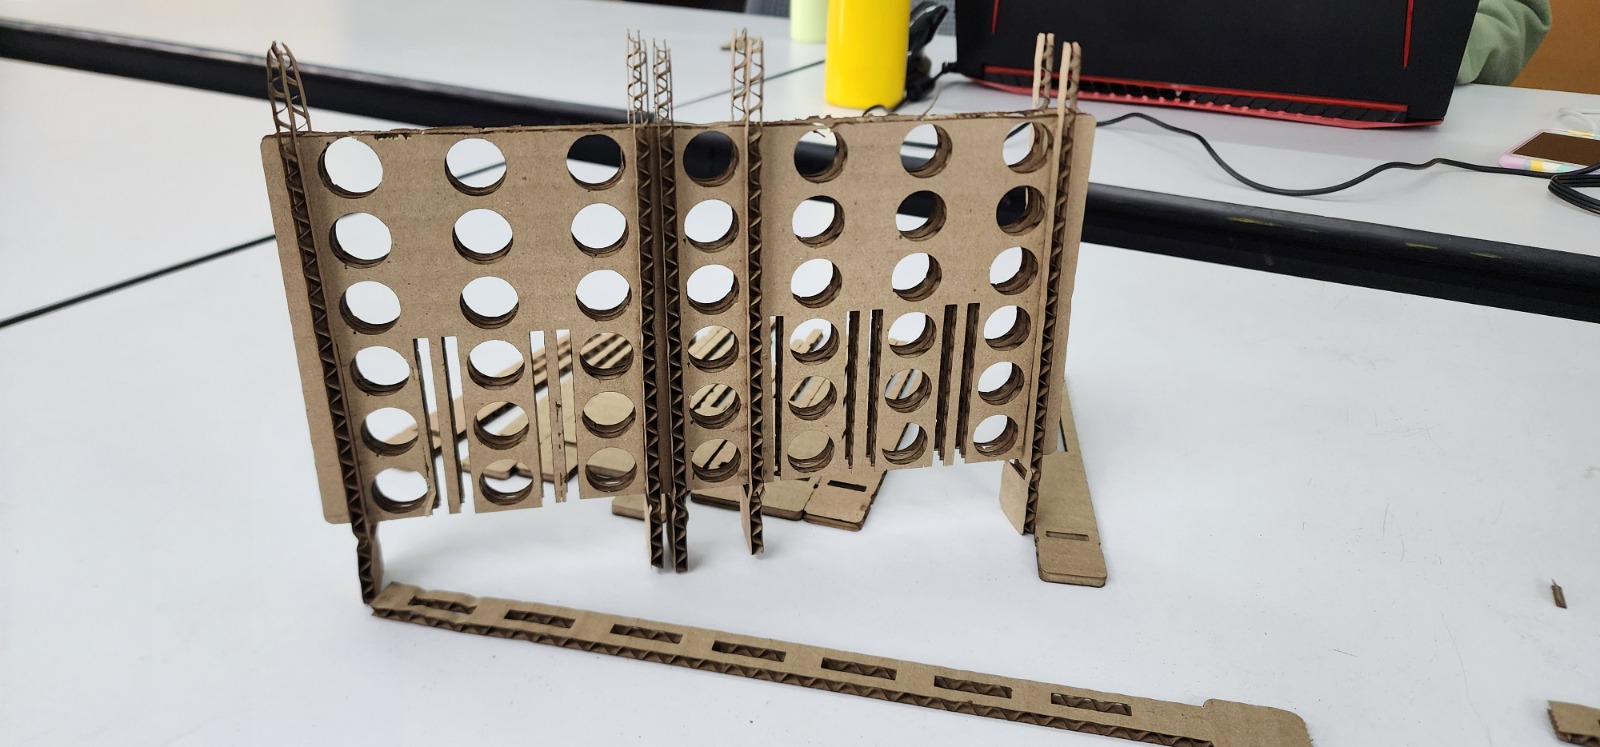
I prepared a press fit kit as a version of the Connect 4 game that interlocks in different planes and expands in an extended board that allows to turn a portion of the inline tokens in an angle. The paramters considered include:
- Material thickness
- Number of cells in x axis and y axis
- Size of cells
- Tolerance for token sliping
- Oversizing for trap door pusher and reduction for horizontal section
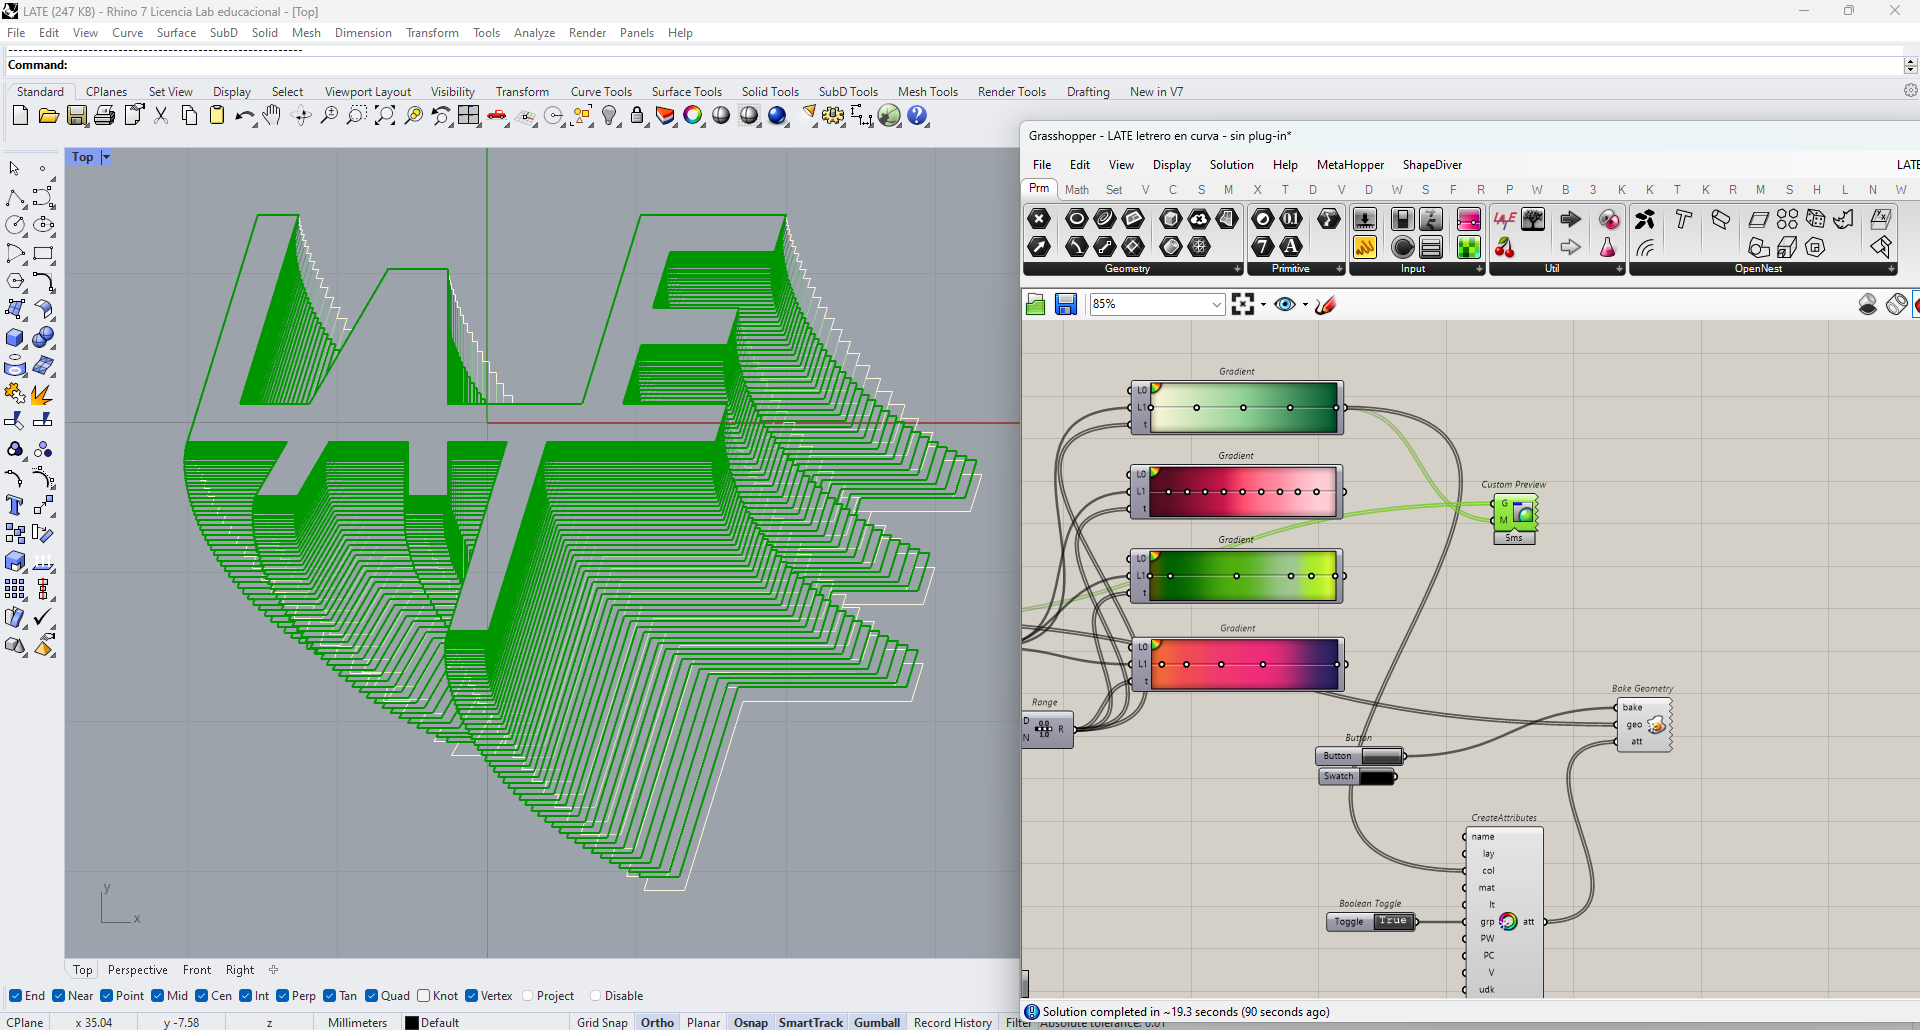
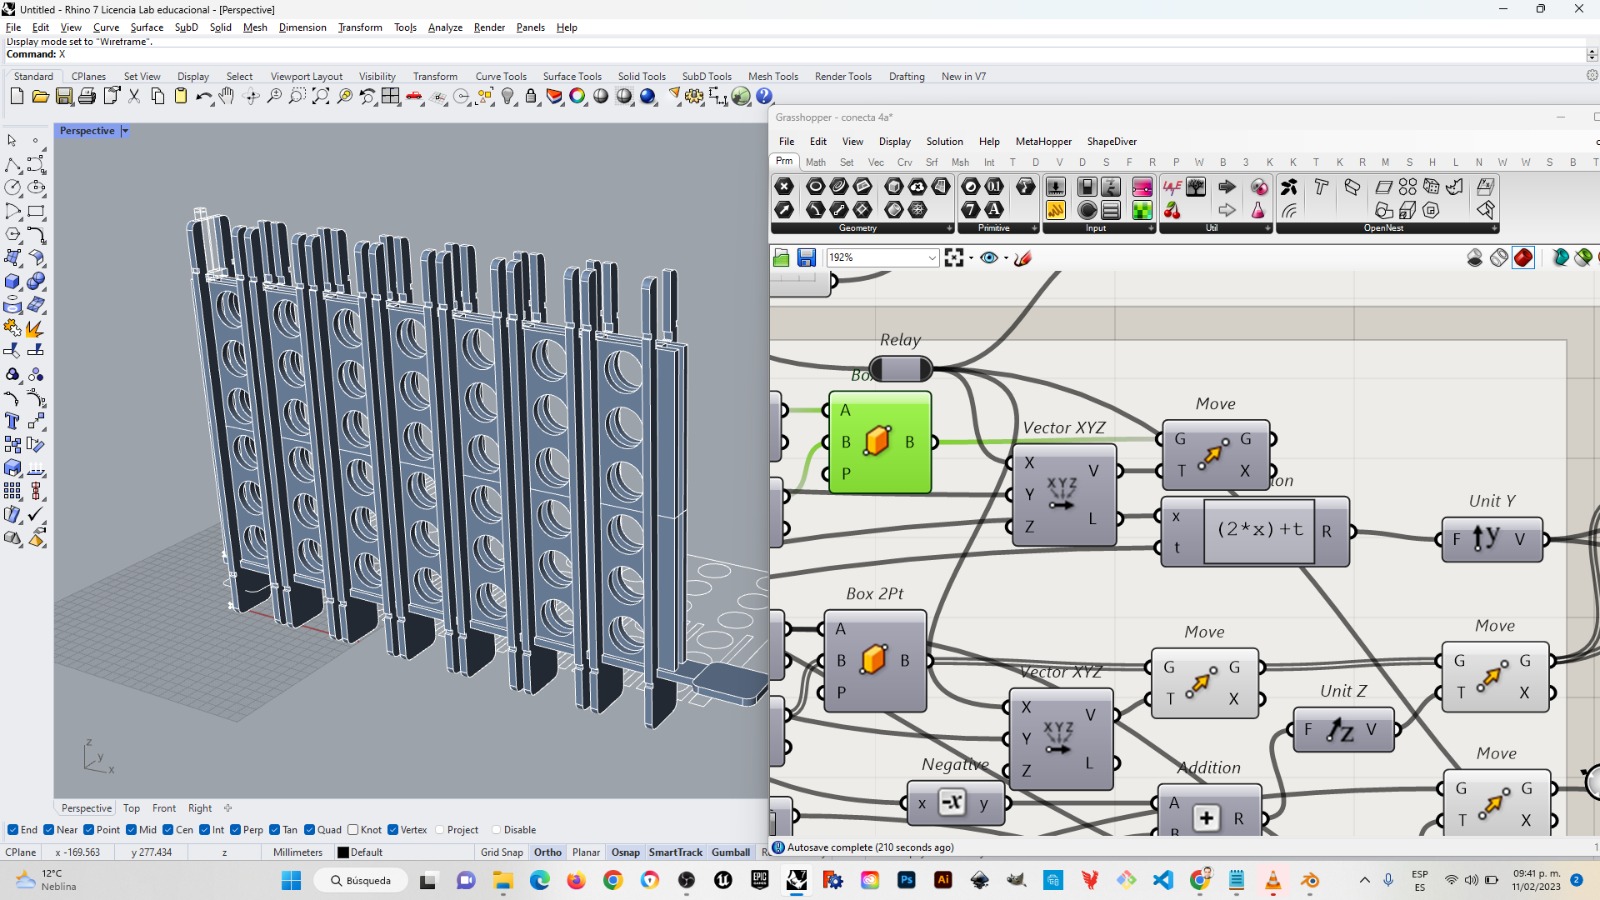
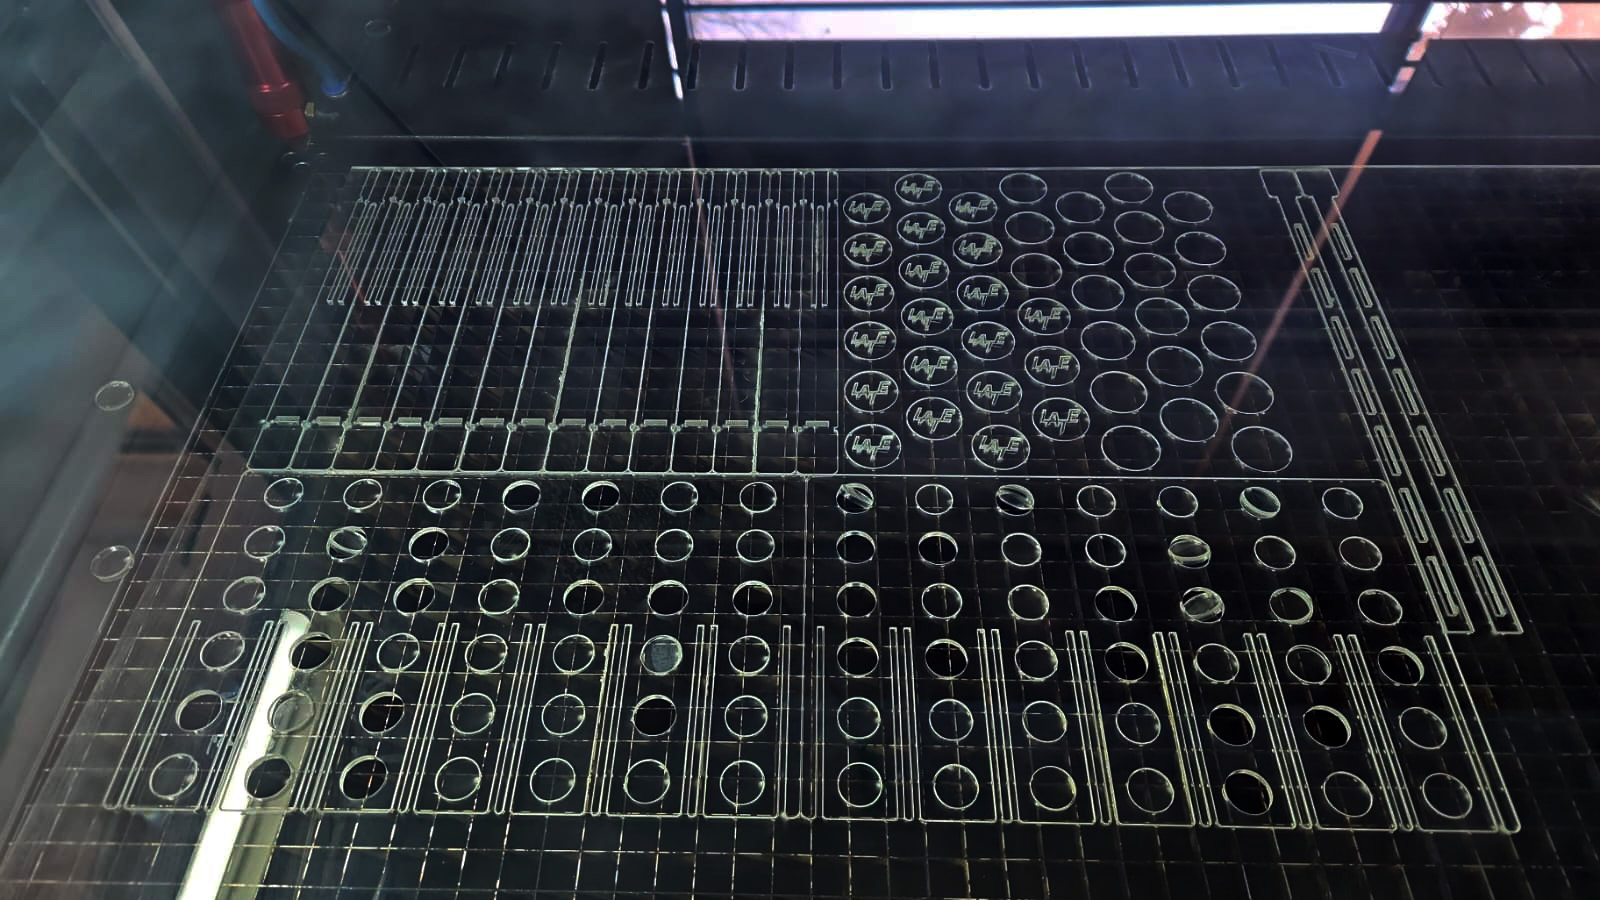
I developed the geometry in grasshopper taking in account these variables, building first a main box that oriented the general geometry, for the ribs, trap doors, and circular punched planes. Tokens had to be as tall as cells and slender than the width of cells, and bigger than the punched holes in the lateral planes. The layout for laser cutting is automatized according to a scheme that allowed to save space with ribs, tokens and trap doors on the upper row, and the circular punched planes on the lower row. I took special care for avoiding duplicate geometries to be cutted.
Note: Still to improve: The extreme bars of the circular punched planes need to be wider therefore stronger receiving the trapdoor end movement; the trap door punched holes in the ribs need more height; It is desirable to incorporate a wider support in the short section.
-
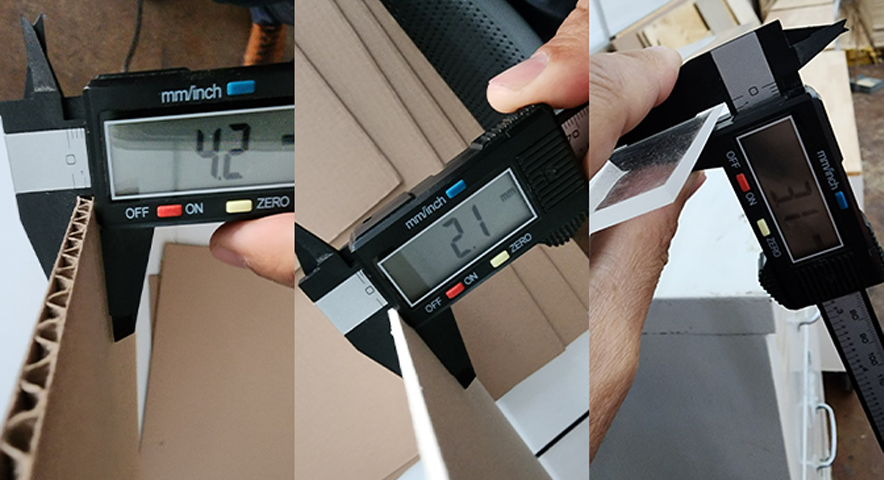
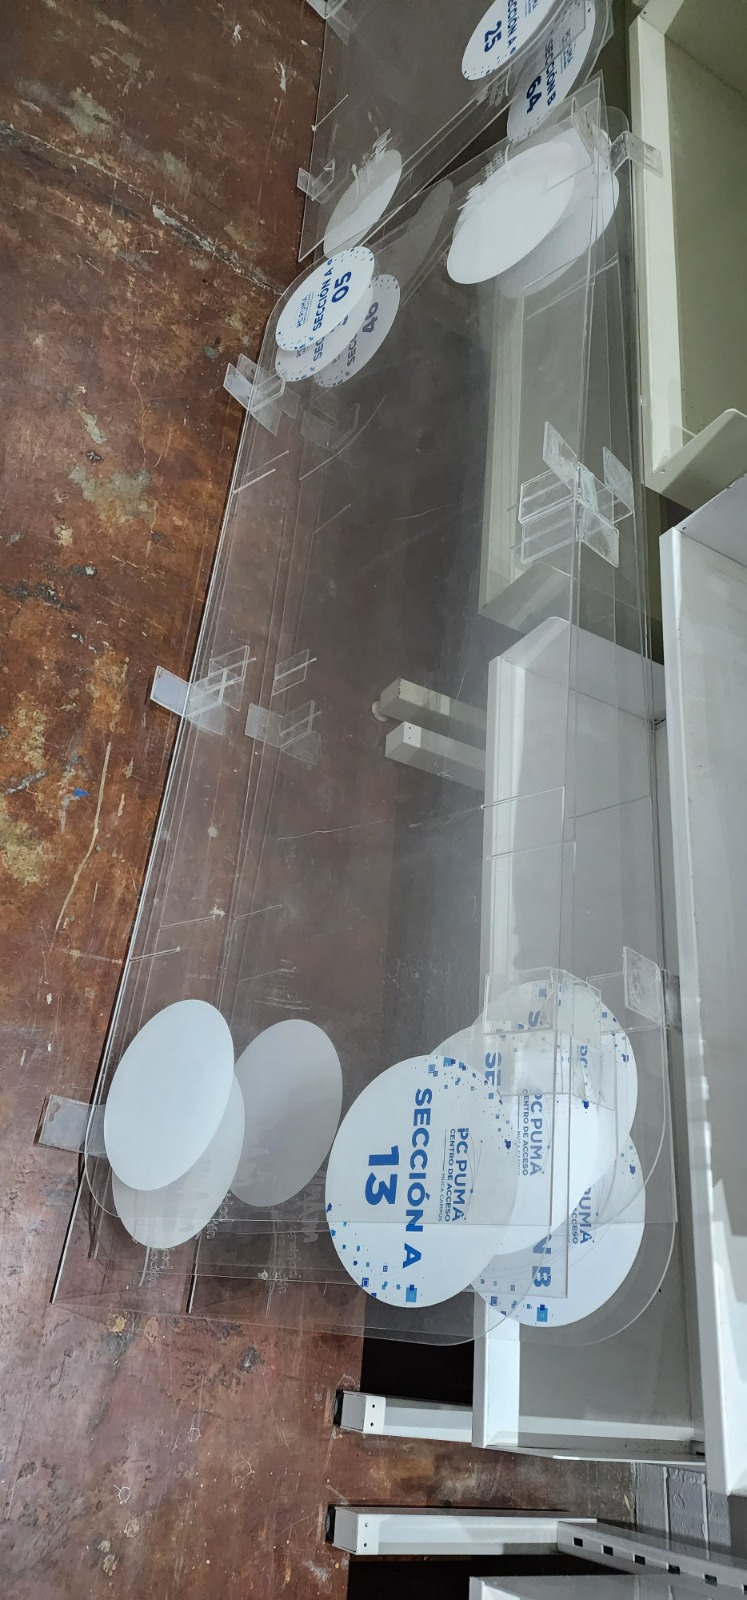
In order to understand the best option for press fitting into every material I prepared some combs
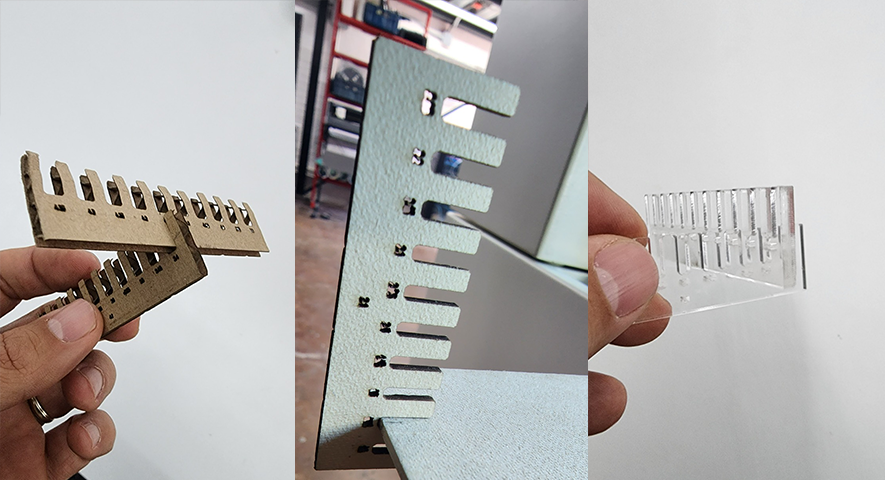
- For the 4.2mm Cardboard the best measurment was ~3.4mm
- For the 2.1mm ‘Batería’ Cardboard the best measurement was ~1.85mm
- For the 3.1mm Acrilyc the best measurment was ~2.35mm
-
Meanwhile I developed the design for as few different pieces as possible
-
I integrated the system as a modular setting that can shift from the regular x7-y6 to different number of modules, althought to interconect modules in angle, they need to have the same height.
-
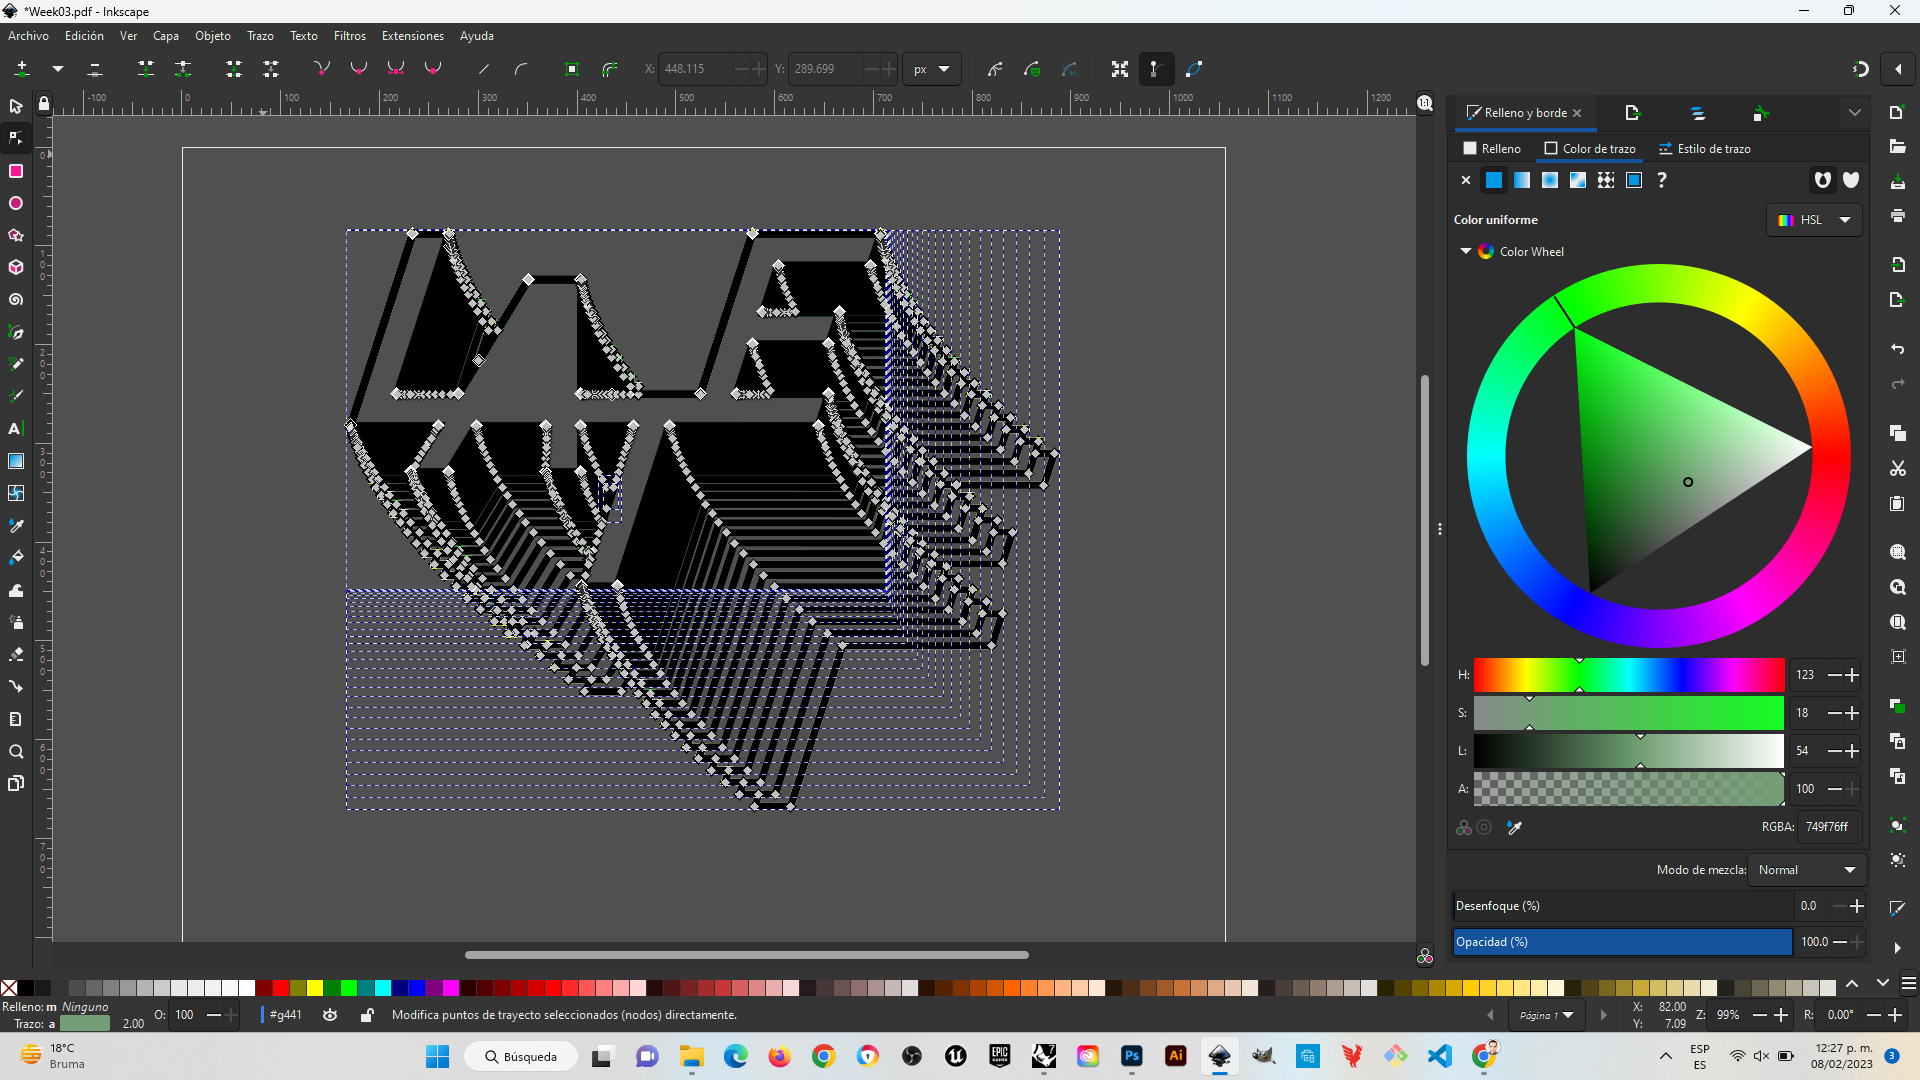
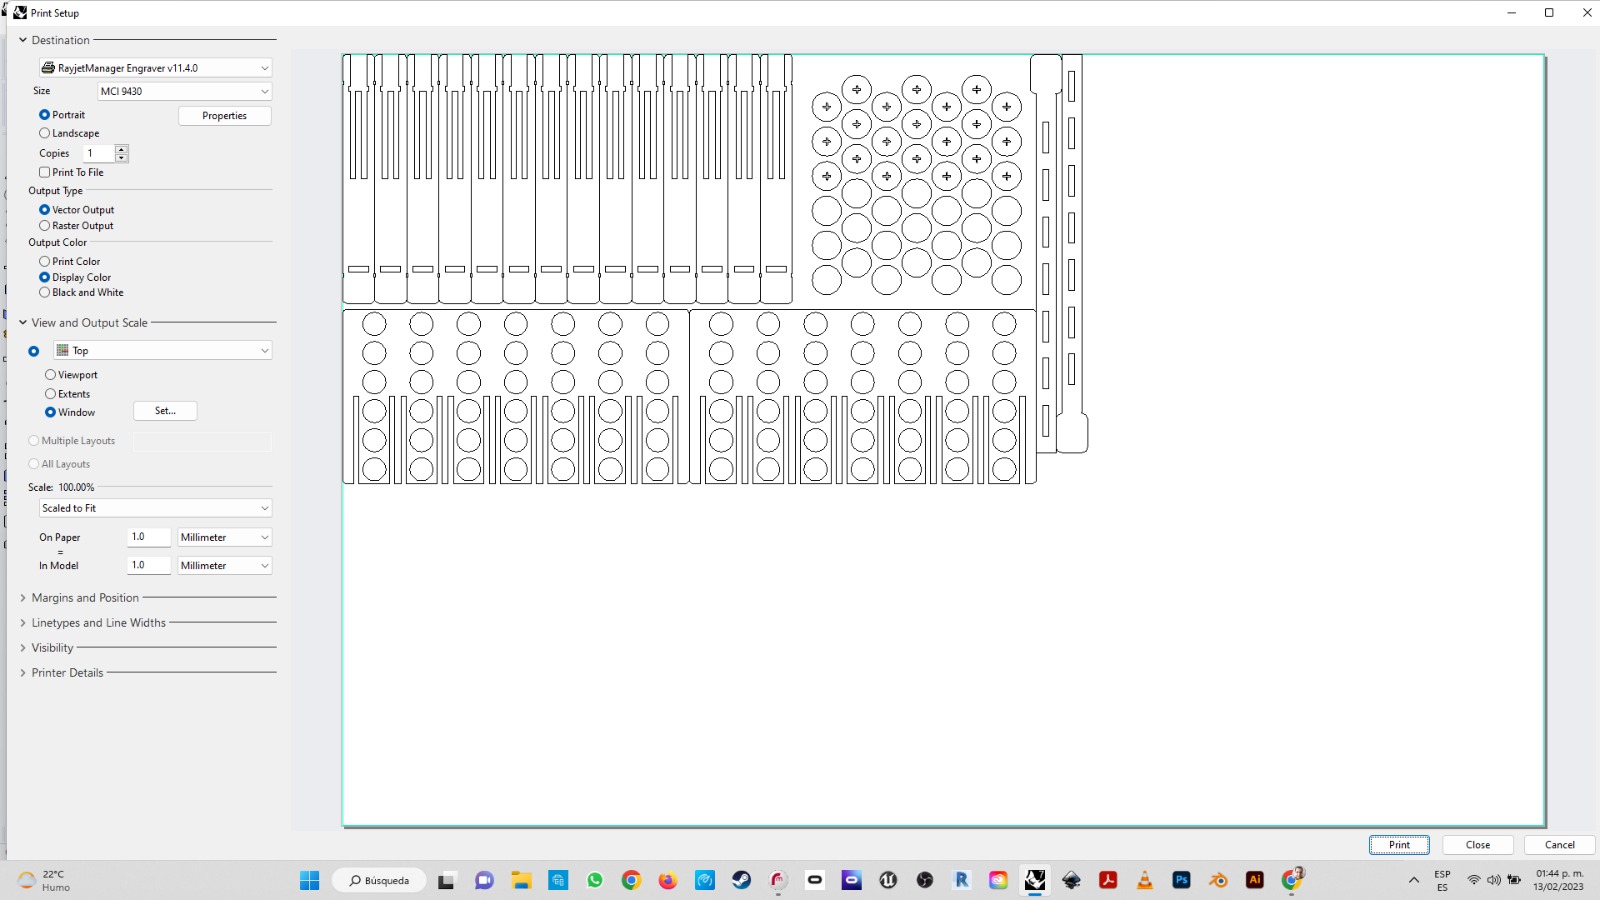
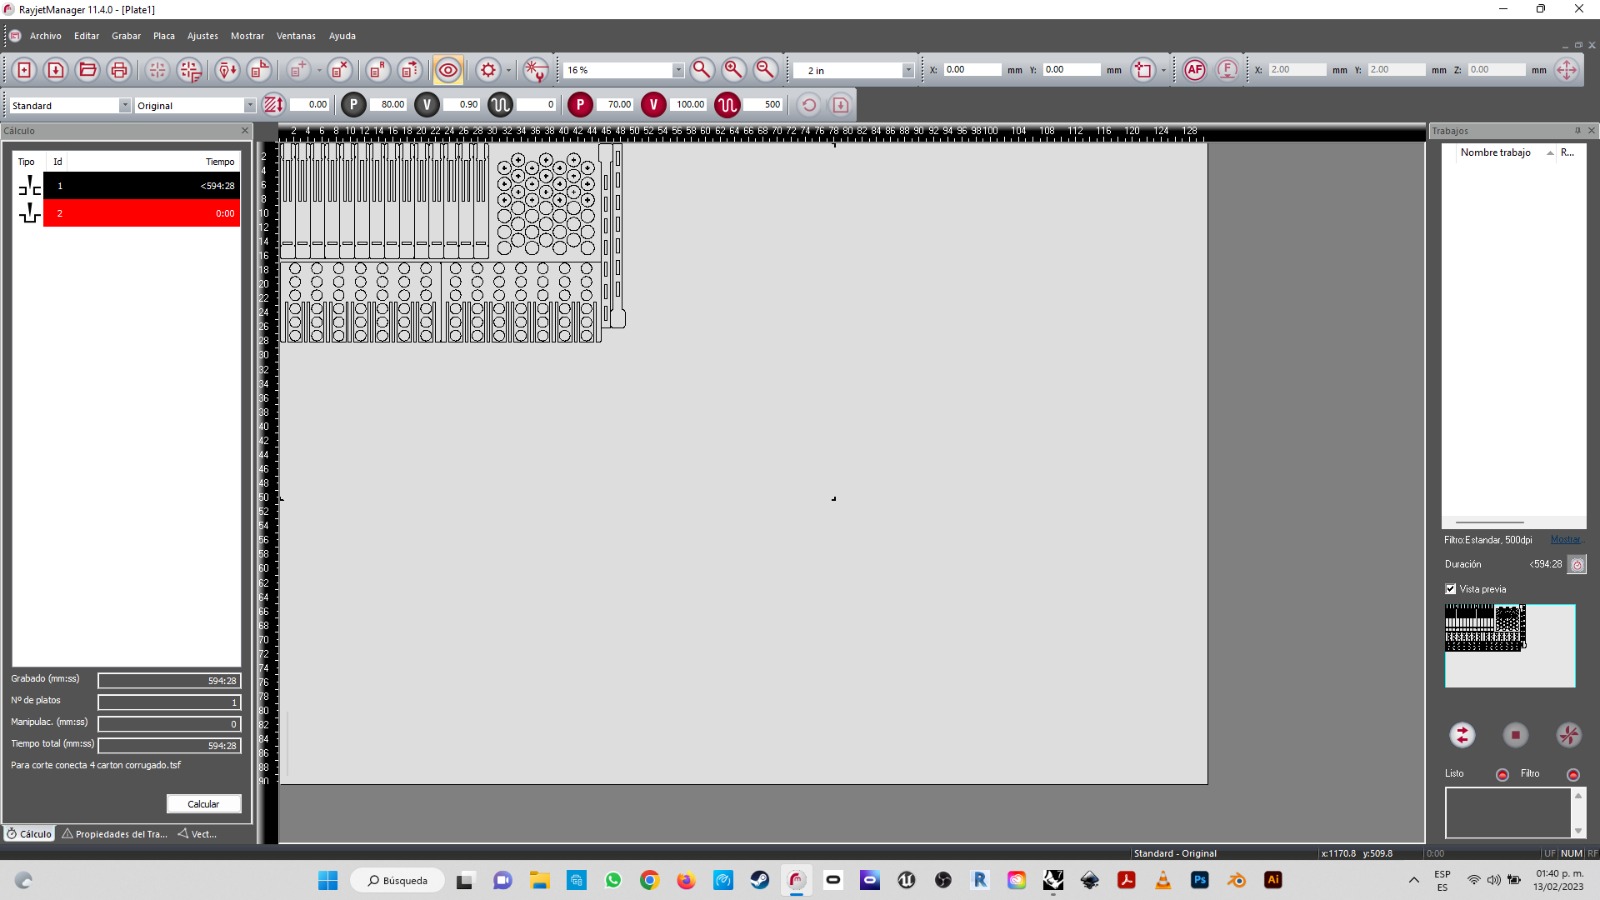
I managed to plot the cutting layout automatically from the model with quite some good nesting properties.
-
Layout settings from Rhino
-
Layout settings in Rayjet postprocessor
-
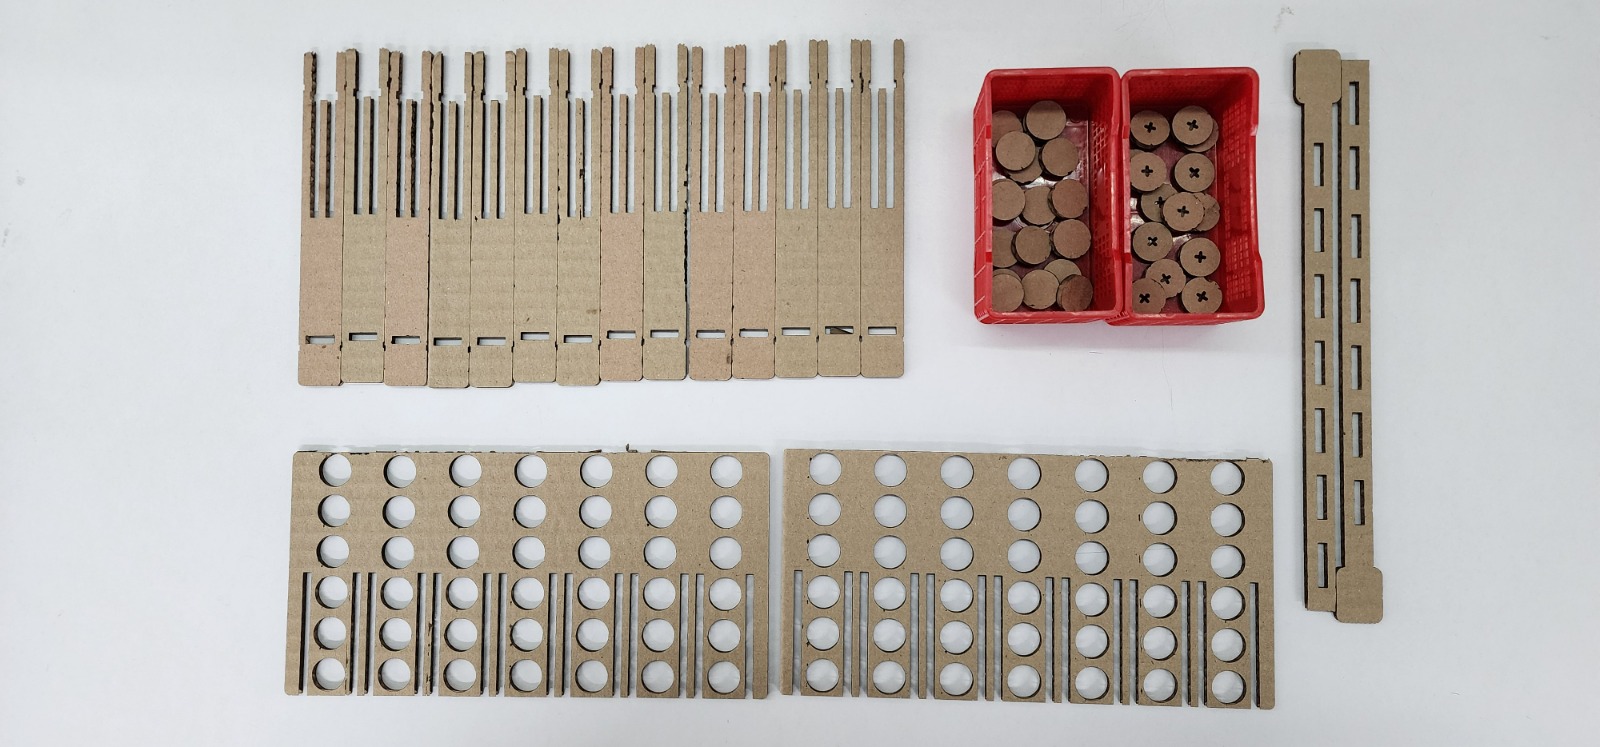
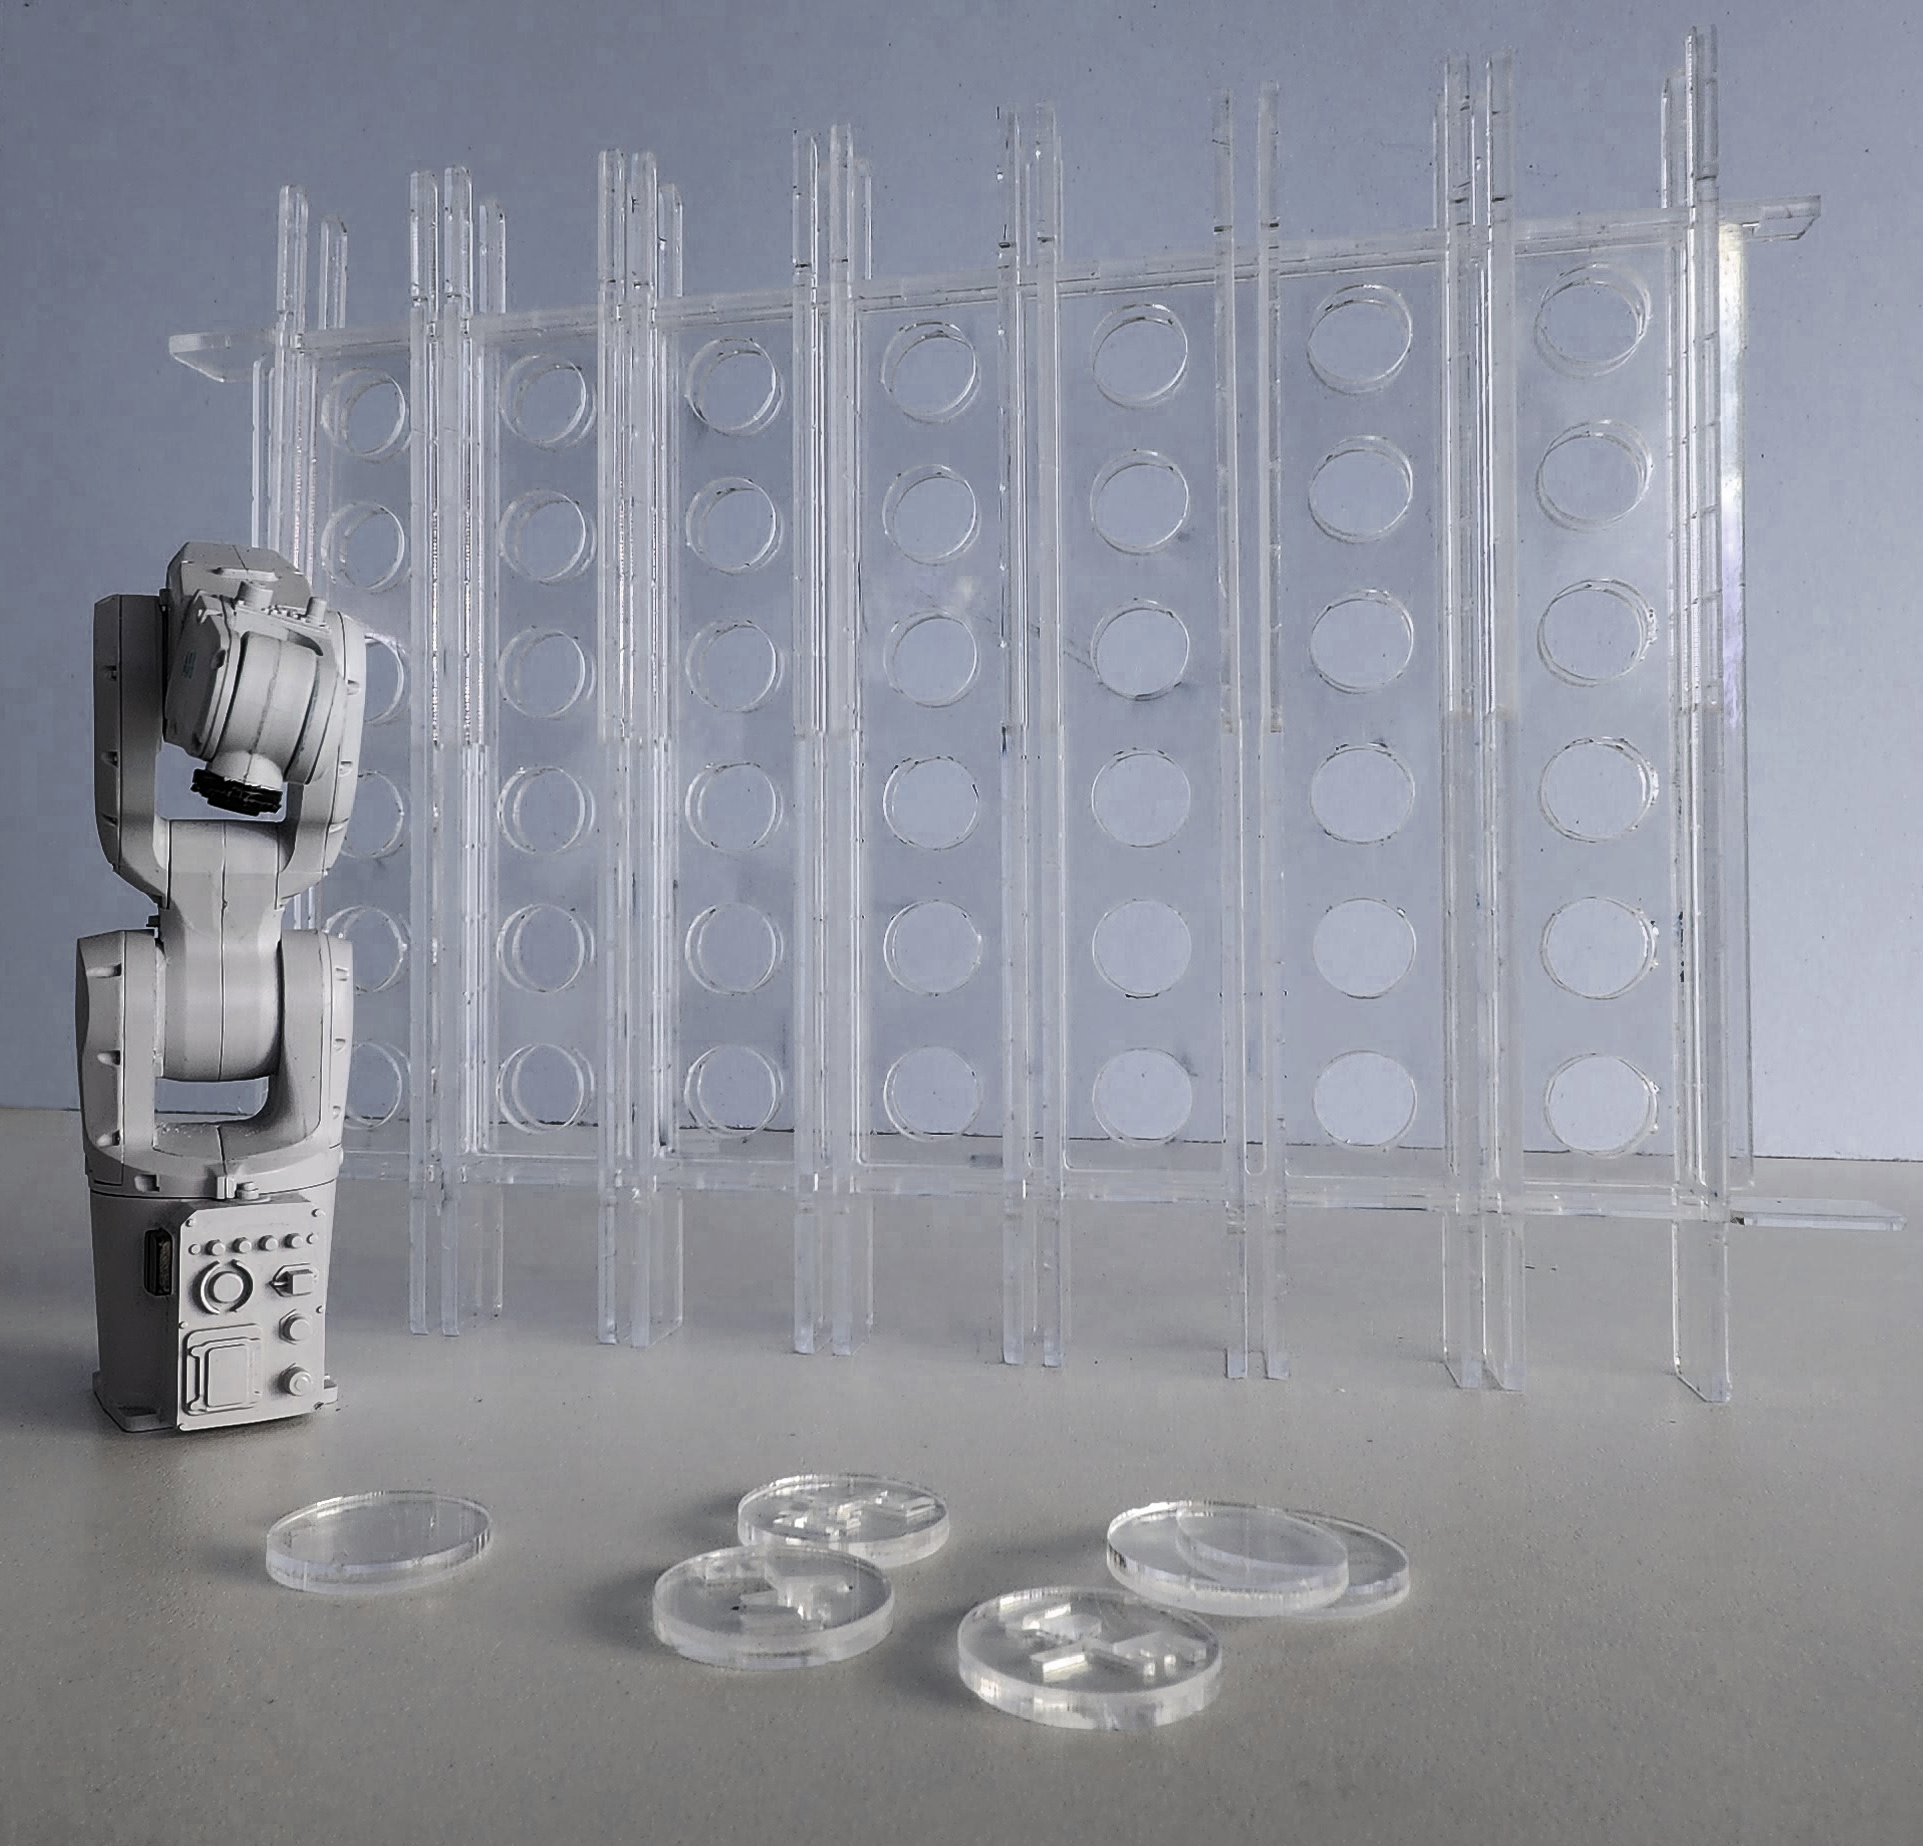
Pieces finally cut
-
Assembly, due to the material it came out too weak
-
Next attempt will be with these second hand acrilycs, for a stiffer structure
-
After a couple of attempts the final version came along
-
Finally we were able to play a game
-
Other features · Modular capacities for board extension
-
Other features · Fast unloading and easy storage for tokens
-
Working files:
RB Parametric Combs for press fit
RB Parametric Modular Game four in a rowI would like to thank the support of Nicole Manzano and Lorna de Dios