13. Networking and communications
This week, I was tasked was to connect two nodes to a network. As well as send a message between two projects as a group, seen on my group site
Wireless Connection
Research and Setup
I checked out this website that Dylan Ferro found the explained how to wirelessly connect a Raspberry Pi Pico W to the internet.
Raspberry Pi Pico W #1
In the main code, there is a library that is used to automatically enter the SSID and password to the network being used. I needed to create this library with the information required to do this. I first started by copying this code from the website into the Thonny:
ssid = 'SSID'
password = 'PASSWORD'
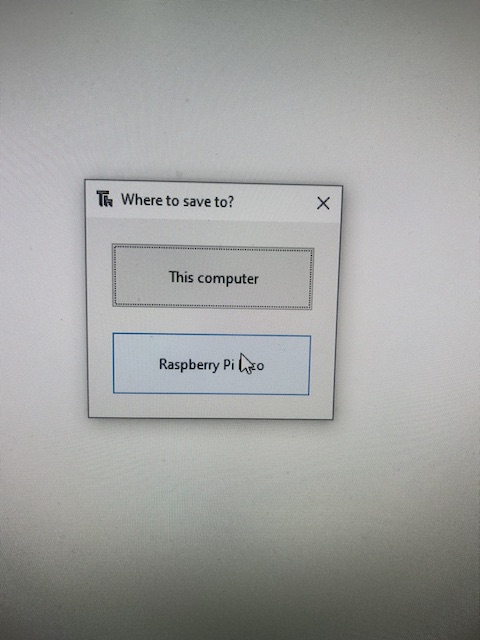
From there, I changed the SSID and password to fit that of my cellphone’s hotspot. After that, I connected my Raspberry Pi Pico W into my computer and updated micropython. After that, I when to file and selected the “Save As” option and named the Library Secret.py and saved it. From there, I created the web server by saving this code as Server.py :

# Webserver to send RGB data
# Tony Goodhew 5 July 2022
import network
import socket
import time
from machine import Pin, ADC
from secret import ssid,password
import random
wlan = network.WLAN(network.STA_IF)
wlan.active(True)
wlan.connect(ssid, password)

# Wait for connect or fail
max_wait = 10
while max_wait > 0:
    if wlan.status() < 0 or wlan.status() >= 3:
        break
    max_wait -= 1
    print('waiting for connection...')
    time.sleep(1)

# Handle connection error
if wlan.status() != 3:
    raise RuntimeError('network connection failed')
else:
    print('connected')
    status = wlan.ifconfig()
    print( 'ip = ' + status[0] )

# Open socket
addr = socket.getaddrinfo('0.0.0.0', 80)[0][-1]

s = socket.socket()
s.bind(addr)
s.listen(1)

print('listening on', addr)

# Listen for connections
while True:
    try:
        cl, addr = s.accept()
        print('client connected from', addr)
        request = cl.recv(1024)
        print(request)
        # Do not unpack request
        # We reply to any request the same way
        # Generate 3 values to send back
        r = random.randint(0,255)
        g = random.randint(0,255)
        b = random.randint(0,255)
        # Join to make a simple string with commas as separators
        rgb = str(r) + "," + str(g) + ","+str(b)

        response = rgb # This is what we send in reply

        cl.send(response)
        print("Sent:" + rgb)
        cl.close()

    except OSError as e:
        cl.close()
        print('connection closed')
this code connects the pico to wifi and tells it to send RGB values to the second Pico W. Once the code was saved, I ran the code. And The computer displayed the ip address along with the following:

This told me that the first pico was connected and ready for me to connect the second pico.
## Raspberry Pi Pico W #2
For the second Pico W, I needed to create a library that had the ip that was given by the first pico. To do that, I used the same steps for creating the secret.py library, however, I used this code:
ai = socket.getaddrinfo("192.168.1.27", 80) # Address of Web Server
but I replaced the ip address with the one I got from the first Pico W. I then saved that to the Pico W with the name of client.py. From there I ran this code:
# Program to read RGB values from a local Pico Web Server
# Tony Goodhew 5th July 2022
# Connect to network
import network
import time
from secret import ssid, password
import socket

wlan = network.WLAN(network.STA_IF)
wlan.active(True)
wlan.connect(ssid, password)
while not wlan.isconnected() and wlan.status() >= 0:
    print("Waiting to connect:")
    time.sleep(1)

# Should be connected and have an IP address
wlan.status() # 3 == success
wlan.ifconfig()
print(wlan.ifconfig())

while True:
    ai = socket.getaddrinfo("192.168.0.15", 80) # Address of Web Server
    addr = ai[0][-1]

    # Create a socket and make a HTTP request
    s = socket.socket() # Open socket
    s.connect(addr)
    s.send(b"GET Data") # Send request
    ss=str(s.recv(512)) # Store reply
    # Print what we received
    print(ss)
    # Split into RGB components
    l = len(ss)
    ss = ss[2:l-1]     # Strip to essentials
    p = ss.find(",")   # Find first comma
    r = int(ss[0:p])   # Extract RED value
    ss = ss[p+1:]      # Remove red part
    p = ss.find(",")   # Find comma separator
    g = int(ss[0:p])   # Extract GREEN value
    b = int(ss[p+1:])  # Extract BLUE value
    print(r,g,b)       # Print RGB values
    print()
    # Set RGB LED here
    s.close()          # Close socket
    time.sleep(0.2)    # wait
which started started the code. The first Pico W sent the RGB values to the second Pico W, which displayed them in the shell.
Adding Neopixels
I wanted to take this one step further by getting the second Pico W both read the values it was receiving but also change the color of a neopixel to match. For this I looked at this website that explained how to get a Pico W to read RBG values to a neopixel. I then modified the following code to include the necessary components:
# Program to read RGB values from a local Pico Web Server
# Tony Goodhew 5th July 2022
# Connect to network
import network
import time
from secret import ssid, password
import socket
import machine, neopixel
np = neopixel.NeoPixel(machine.Pin(4), 8)
wlan = network.WLAN(network.STA_IF)
wlan.active(True)
wlan.connect(ssid, password)
while not wlan.isconnected() and wlan.status() >= 0:
    print("Waiting to connect:")
    time.sleep(1)

# Should be connected and have an IP address
wlan.status() # 3 == success
wlan.ifconfig()
print(wlan.ifconfig())

while True:
    ai = socket.getaddrinfo("172.20.10.3", 80) # Address of Web Server
    addr = ai[0][-1]

    # Create a socket and make a HTTP request
    s = socket.socket() # Open socket
    s.connect(addr)
    s.send(b"GET Data") # Send request
    ss=str(s.recv(512)) # Store reply
    # Print what we received
    print(ss)
    # Split into RGB components
    l = len(ss)
    ss = ss[2:l-1]     # Strip to essentials
    p = ss.find(",")   # Find first comma
    r = int(ss[0:p])   # Extract RED value
    ss = ss[p+1:]      # Remove red part
    p = ss.find(",")   # Find comma separator
    g = int(ss[0:p])   # Extract GREEN value
    b = int(ss[p+1:])  # Extract BLUE value
    print(r,g,b)       # Print RGB values
    print()
    np.write()
    np[0] = (r, g, b)
    np[1] = (r, g, b)
    np[2] = (r, g, b)
    np[3] = (r, g, b)
    np[4] = (r, g, b)
    np[5] = (r, g, b)
    s.close()          # Close socket
    time.sleep(0.2)    # wait
this light an LED and had it change colors with the RGB values from the first Pico.
Wried Connection
Research and Setup
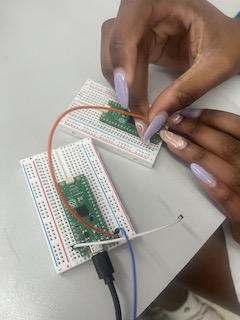
I also needed to complete a wired connection between two nodes. I watched this video to understand how to connect picos together. I again chose two Pico Ws and I connected the Tx and Rx pins on one pico to the opposite Rx and Tx pins on the other pico as well as connecting them both to the same ground. This would allow one pico to transmit messages to the other pico as well as receive messages being transmitted.
Sending a Message
The first library I needed to create was the easy_comms.py library with this code:
#Easy comms is a simple class that allows you to send and receive messages over a serial port.

from machine import UART, Pin
from time import time_ns

class Easy_comms:

    uart_id = 0
    baud_rate = 9600
    timeout = 1000 # milliseconds

    def __init__(self, uart_id:int, baud_rate:int=None):
        self.uart_id = uart_id
        if baud_rate: self.baud_rate = baud_rate

        # set the baud rate
        self.uart = UART(self.uart_id,self.baud_rate)

        # Initialise the UART serial port
        self.uart.init()

    def send(self, message:str):
        print(f'sending message: {message}')
        message = message + '\n'
        self.uart.write(bytes(message,'utf-8'))

    def start(self):
        message = "ahoy\n"
        print(message)
        self.send(message)

    def read(self)->str:
        start_time = time_ns()
        current_time = start_time
        new_line = False
        message = ""
        while (not new_line) or (current_time <= (start_time + self.timeout)):
            if (self.uart.any() > 0):
                message = message + self.uart.read().decode('utf-8')
                if '\n' in message:
                    new_line = True
                    message = message.strip('\n')
                    # print(f'received message: {message}')
                    return message
        else:
            return None
I did this the same way I made the previous libraries and saved it onto both picos. I then ran this code on Pico #1:
# Pico_comms_a
# Sends commands and listens to responses from pico_comms_b

from easy_comms import Easy_comms
from time import sleep

com1 = Easy_comms(uart_id=0, baud_rate=9600)
com1.start()

while True:
    message = ""
    message = com1.read()

    if message is not None:
        print(f"message received: {message.strip('\n')}")
    sleep(1)
this sent the message ahoy to the second pico. I then uploaded this code to Pico #2:
# Pico_comms_b
# Sends commands and listens to responses from pico_comms_a

from easy_comms import Easy_comms
from time import sleep

com1 = Easy_comms(uart_id=0, baud_rate=9600)
com1.start()

count = 0
while True:
    # send a message
    com1.send(f'hello, {count}')

    #check for messages
    message = com1.read()

    if message is not None:
        print(f"message received: {message.strip('\n')}")
    sleep(1)
    count +=1
This returned the message and started a hello +1 count. that showed on both Picos.
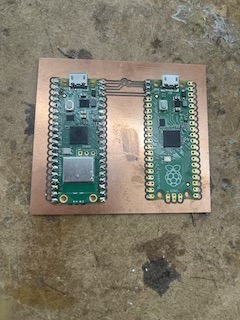
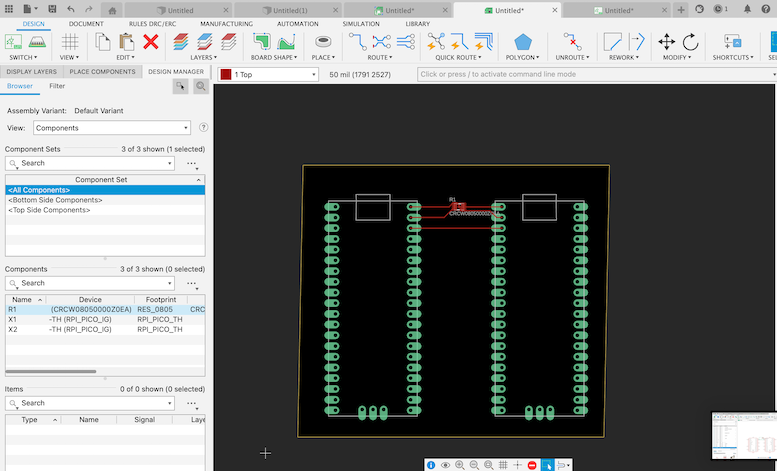
Creating a PCB for a wired connection
I created a PCB board that would allow for a wired connection between a Pico W and a regular Pico in Eagle CAD. here is the final.

 \
\