1. Principles and practices
This week I worked on defining my final project idea and started to getting used to the documentation process.
Creation of my Site
Getting Started:
The first thing I did while creating my site was looking at the sites of past Fab Academy graduates to take inspiration. Sites like Teddy Warner’s helped me with formatting, aesthetic ideas, and to instruct me on how to began. I also looked at a Git tutorial explaining what Git is and how to use it, along with a slide show that was presented to me before Fab Academy began.
Creation of My SSH Key:
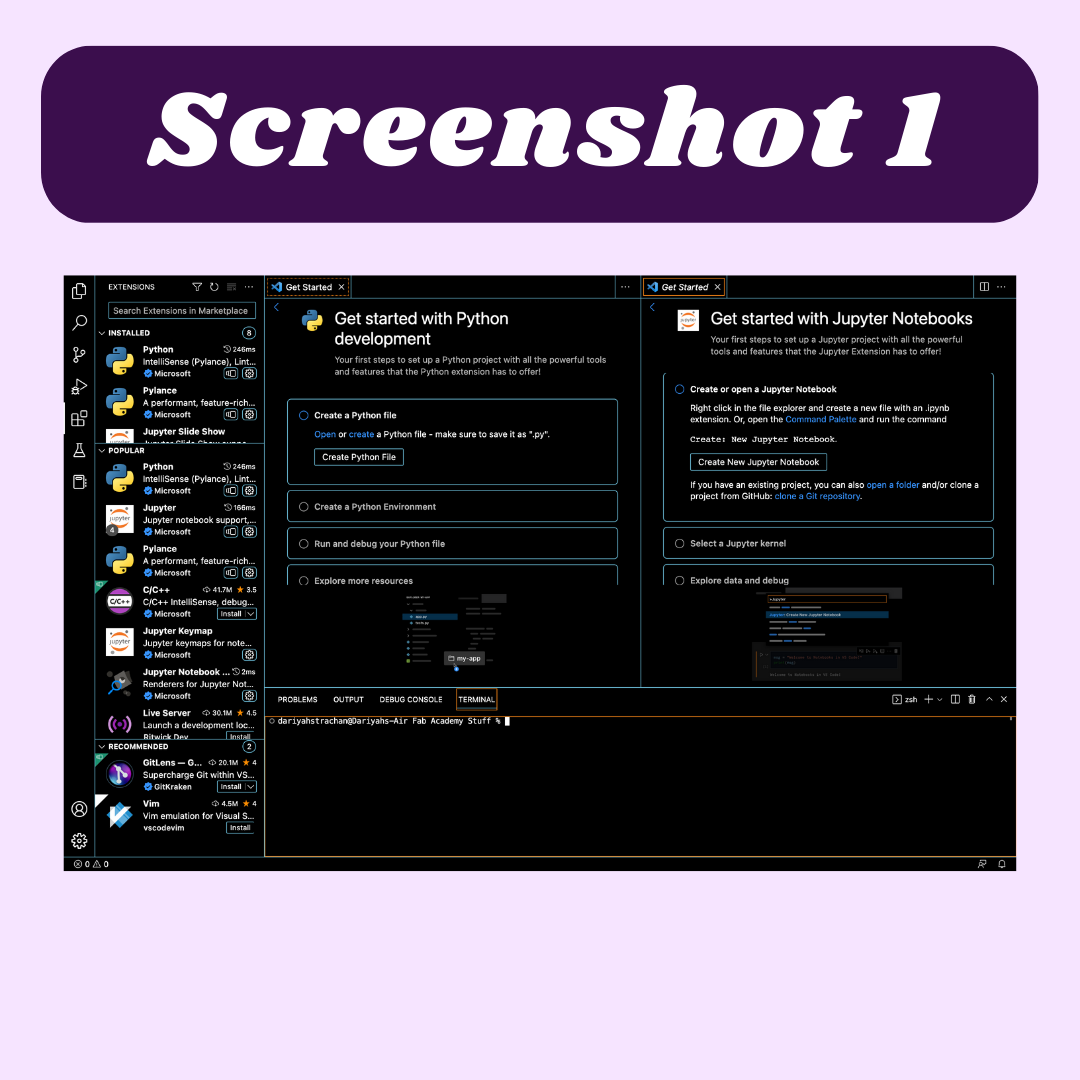
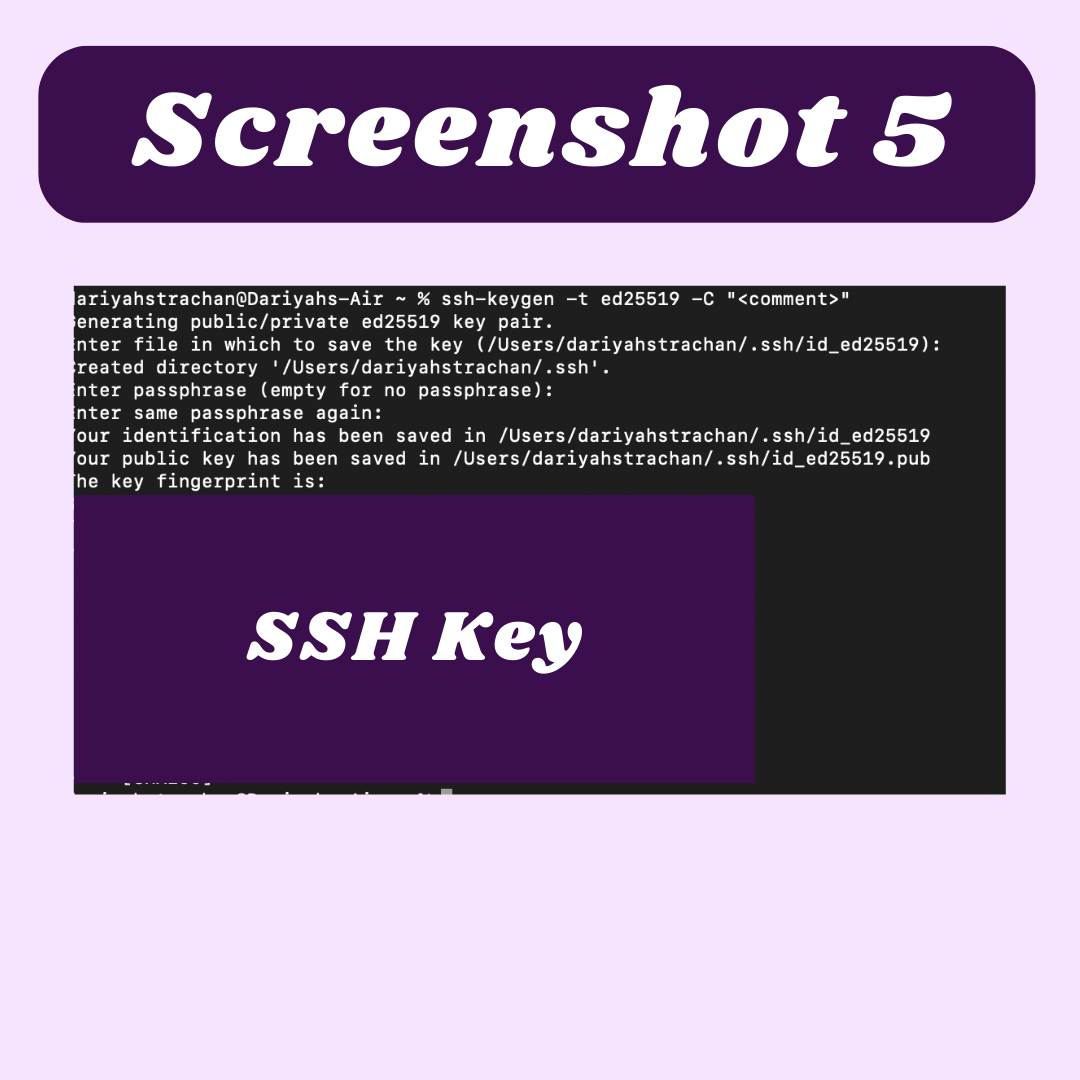
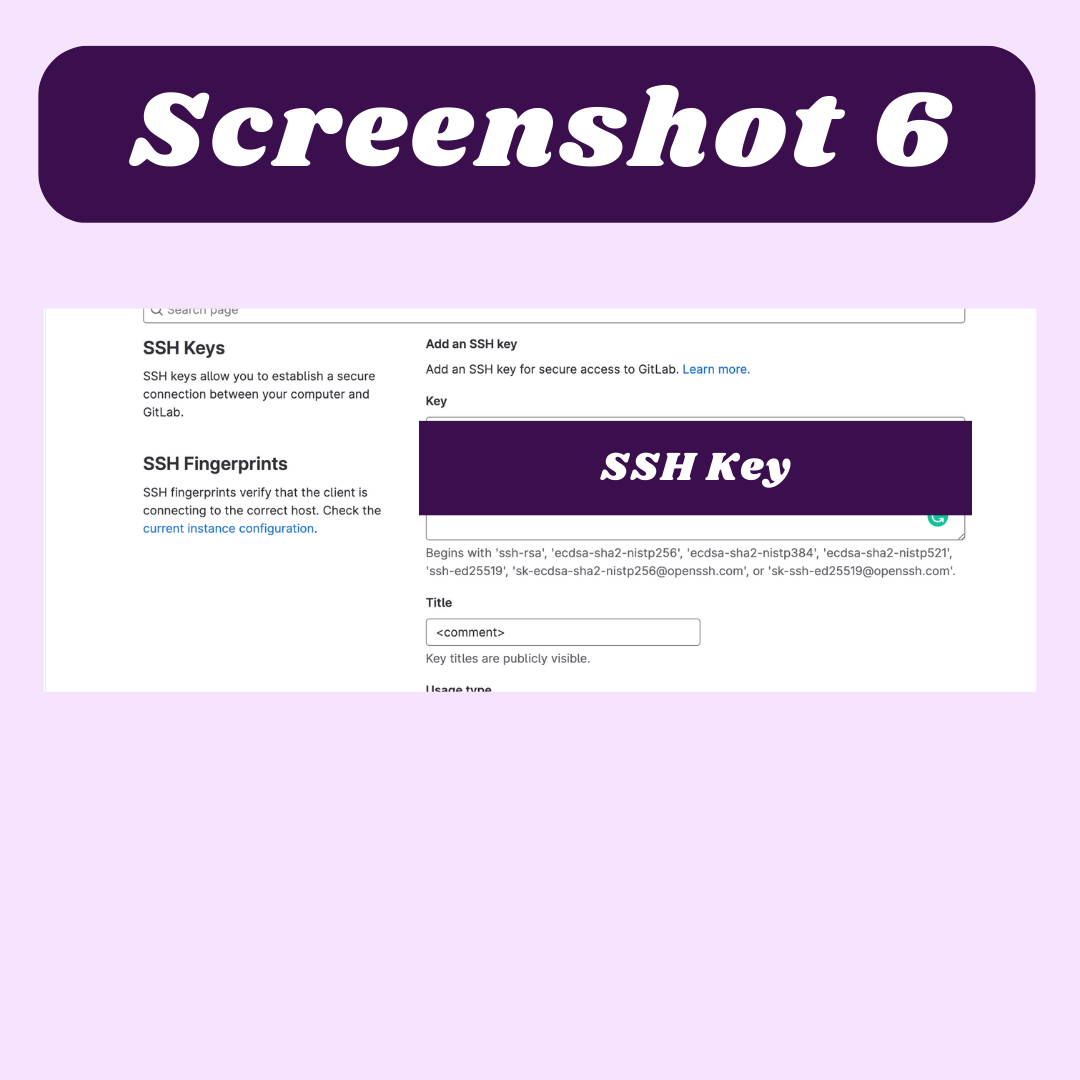
The first step in creating my site was generating an SSH Key. To do this, I first needed to download Python, and Visual Studio Code. Using Mrs. Morrow’s and Teddy’s documentation, I began the process of getting an ssh key. After I installed Visual Studio Code I installed python (screenshot 1). The first problem I ran into was that python was not recognizing the $ python get-pip.py command (screenshot 2). I have currently started to investigate this problem by googling the meaning of a syntax error. The Python SyntaxError occurs when the interpreter encounters invalid syntax in the code. I asked Mr. Adam Durett what I was doing wrong because I spent hours trying to troubleshoot. He told me that the subdivision of python that I was using was incorrect. I was using IDLE when I needed to use the terminal instead. Once this issue was resolved I realized that pip was in fact installed. I then typed the command “pip3 install MKDocs” and the files began downloading (screenshot 3). I now began to create an ssh key. In the beginning, I struggled to create the SSH key, but I eventually figured it out. In the terminal, I copied and pasted ssh-keygen -t ed25519 -c “<comment>” and when I pushed enter it generated my key (screen shot 5). The first problem I ran into was when I was looking for the file that python that said my key was stored. I later found out that I simply can not see the file python was referring to. So instead I typed cd ~/. ssh and after that, I typed cat id_ed25519.pub and that produced the SSH key that was then copied and pasted into GitLab (screenshot 6).

Cloning My Repository:
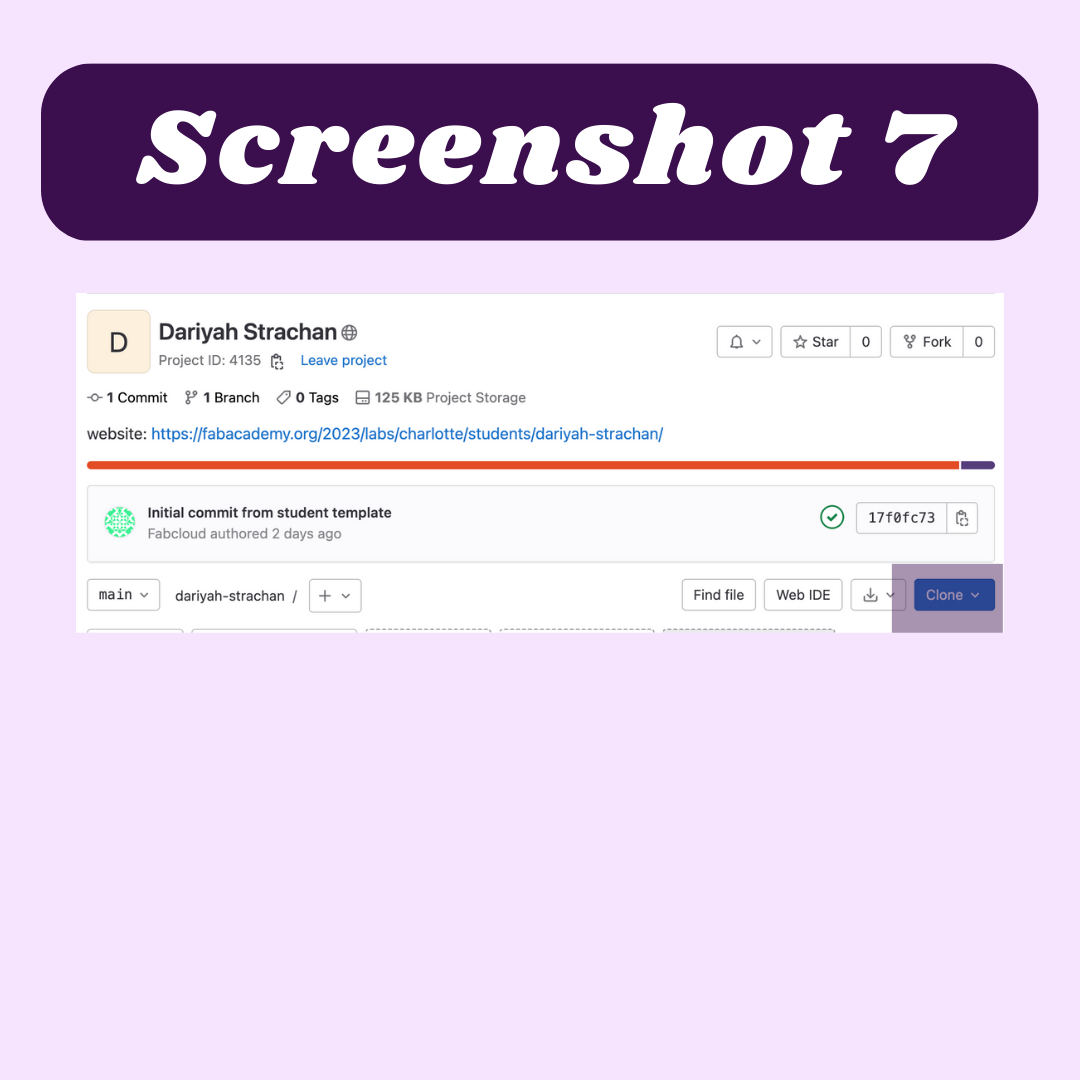
To begin cloning my repo I used Mrs. Morrow’s documentation to take my first steps. The first thing I noticed she did was open Visual Studio Code, so I Installed the application on my computer and followed the rest of the instructions she provided. Because the following instructions on Mrs. Morrow’s website are not very clear I ended up seeking help from other people in my class. Ginny Foster began by telling me a few of the things I would need to install on my computer and on Visual Studio Code (,Pip3, GitBash, Homebrew, MKDocs, and Python). Although I already had a few of these things installed, I wanted to double-check to ensure I had the correct versions. After first installing Python through Visual Studio Code, I then installed Homebrew using the following command. /bin/bash -c "$(curl -fsSL https://raw.githubusercontent.com/Homebrew/install/HEAD/install.sh)" (screenshot 4). I then used pip3 install mkdocs-material to install mkdocs and it’s contents. I went to my GitLab projects tab and selected the “clone” button. I copied the link I got to and pasted it into visual studio code (screenshot 7).
Importing the Template:
I was originally very confused with the few instructions I was originally presented with, so I asked David Tian, a fellow Fab Academy paticipant, for help. He ended up leading me completely astray with about 4,300+ unnessesary files and folders(screenshot 8). After realizing my mistakes that were made I completely restarted making my repo. I found the template file that was posted on google slides and downloaded the folders and a zip file. I then unzipped the file and dragged and dropped it into visual studio code. This copied the template from the files on my computer to Visual Studio Code, that way I could edit the information already on the template to personalize my site.
Commit/Push:
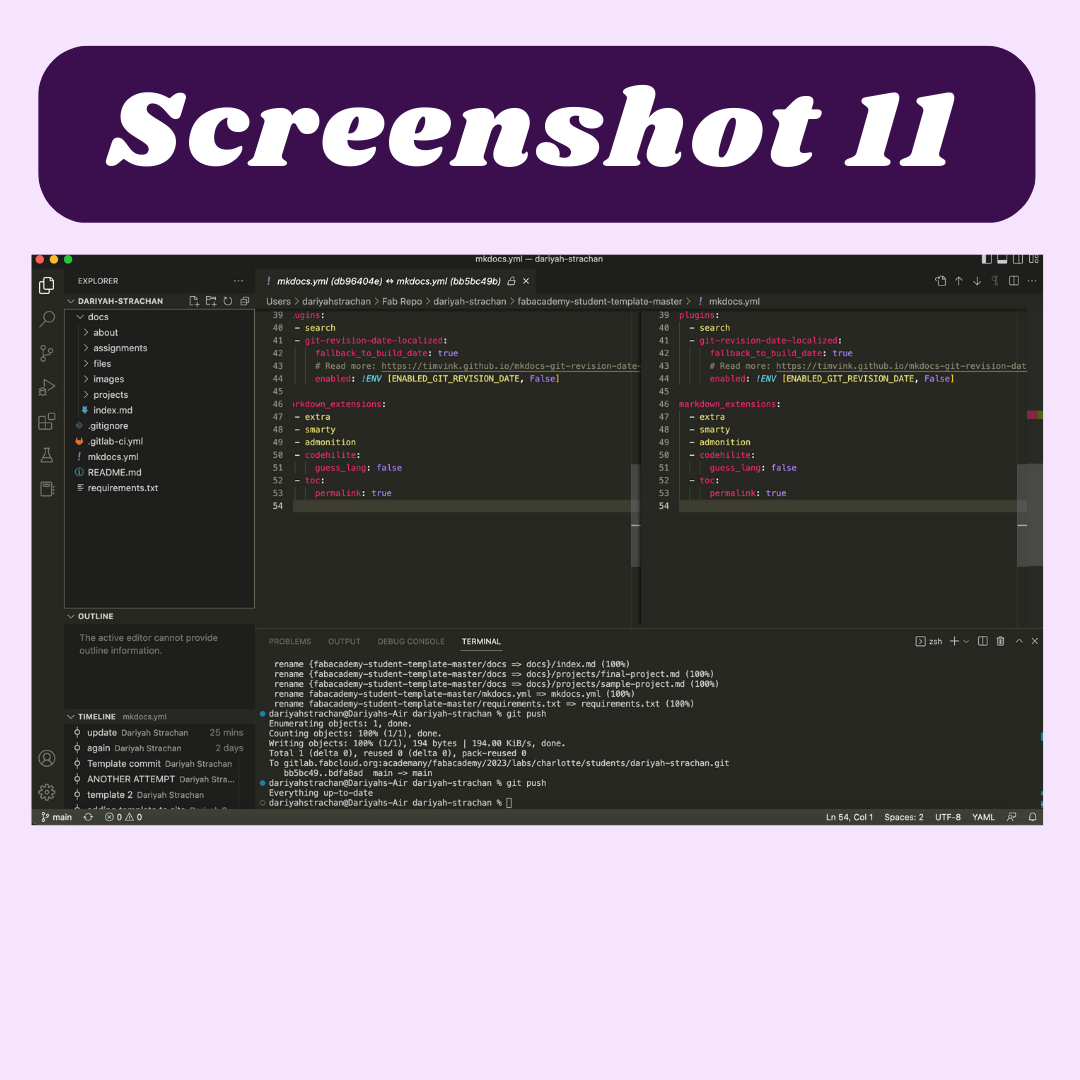
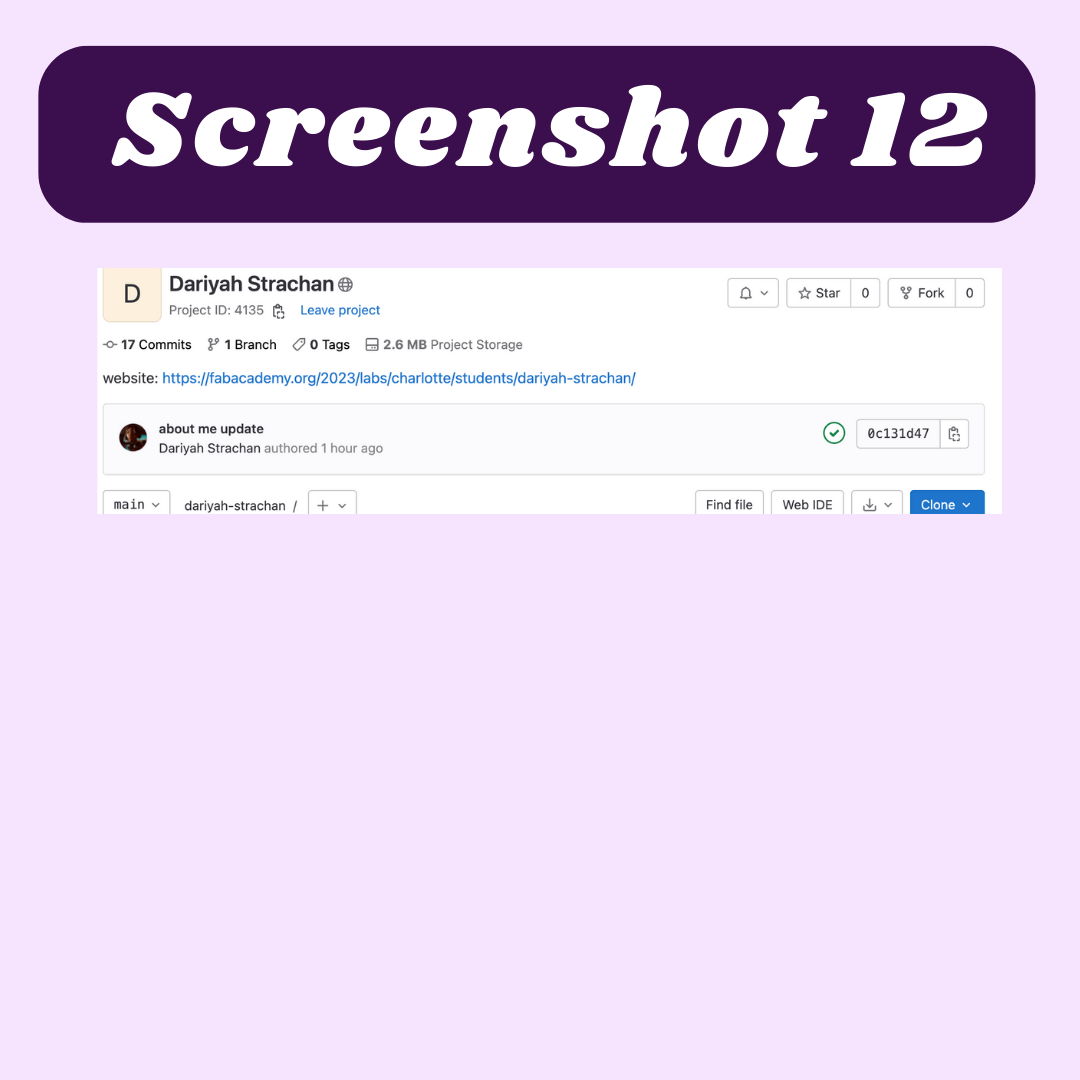
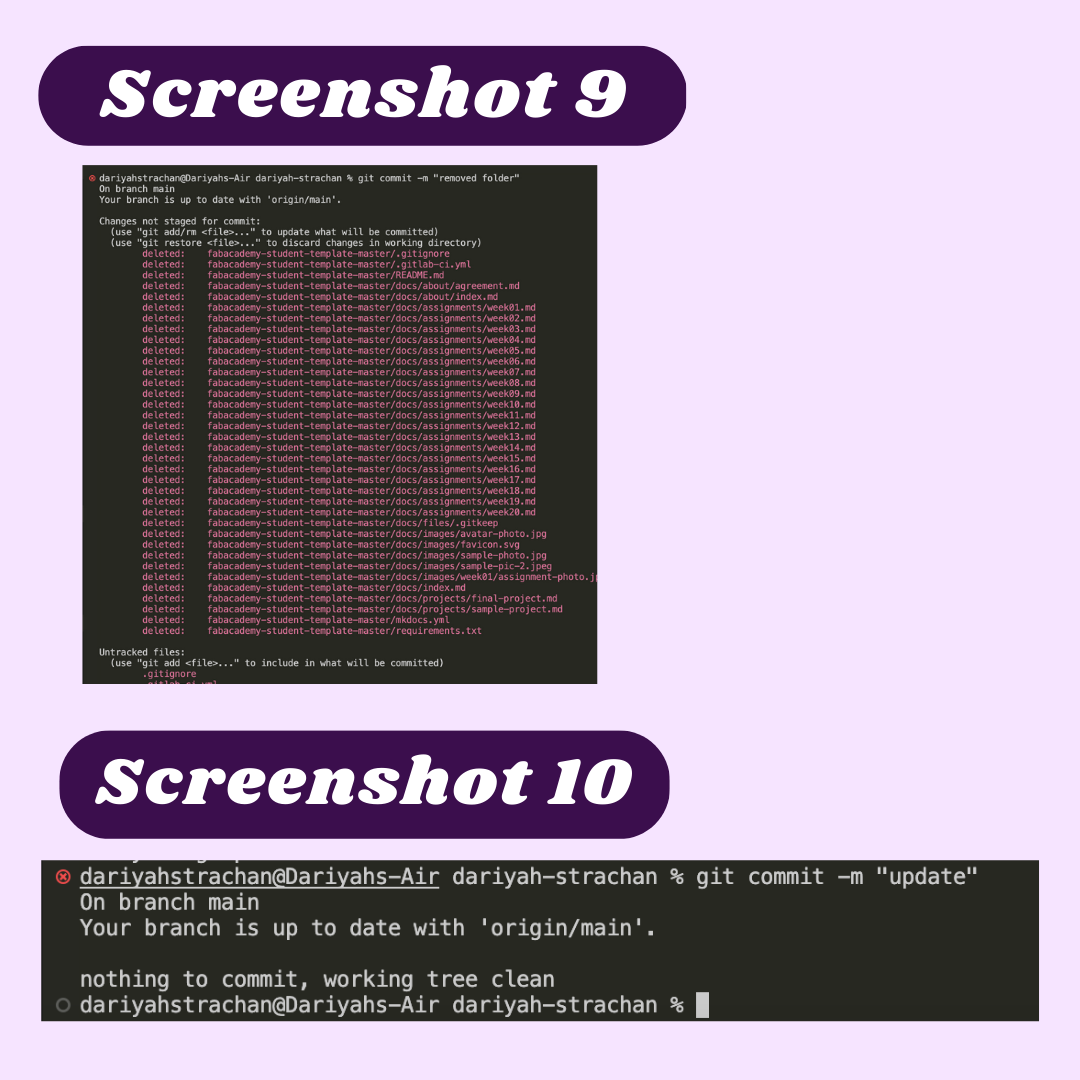
From there I attempted my first commit. I used the git commit -m command to save all of my changes to my site. Everything went through and I thought that I had successfully uploaded my changes. However, when I went to my site to check, it still displayed the default site. I noticed that when my friend would upload to her site, it would display a green checkmark next to her commit (mine did not). I repeatedly tried to recommit it but visual studio code would just say “Your branch is up to date with ‘origin/main’.”(screenshot 10) Whenever I would attempt to push again it would say “Everything is up to date”. This puzzled me and I was unsure of how to approach this issue. I would make a series of minor changes to my mkdocs.yml file and try again to commit/push my changes. Every time they would show on my git hub home screen, but they would not update on my actual site. After about 2 days of fiddling with visual studio code in an attempt to fix my problem, I asked a third person for help, Adam Stone. He told me that in his visual studio code, he had extracted everything out of the template folder and deleted it. Unsure of if that would actually help, I tried it. I immediately noticed that everything that I dragged outside of the folder would turn green. After I removed all of the files and deleted the template folder, I again used the git commit -m command and it loaded as usual. I then used the git push command and I got this error message(screenshot 9). I then used the git add . command to include the files. I then pushed it to my site (screenchot 11) and the green check appeared and my site uploaded (screenshot 12)