Week 15 - Wildcard
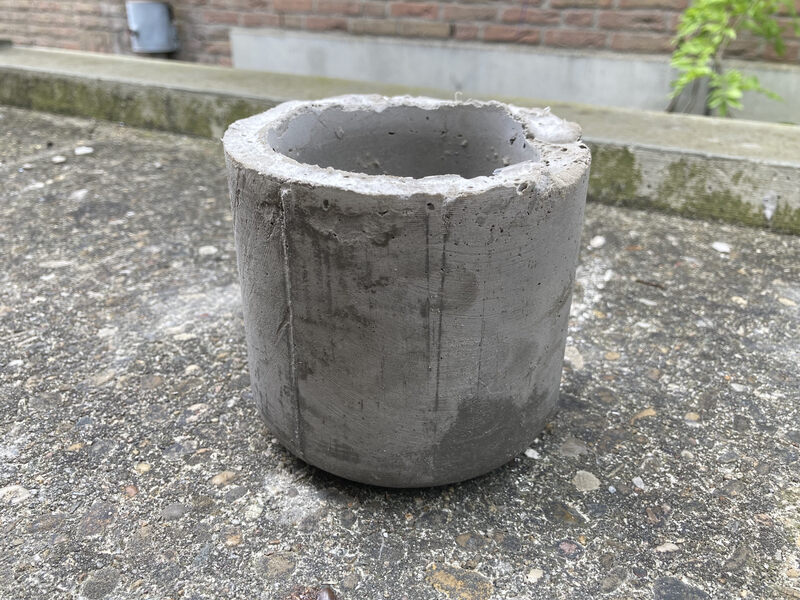
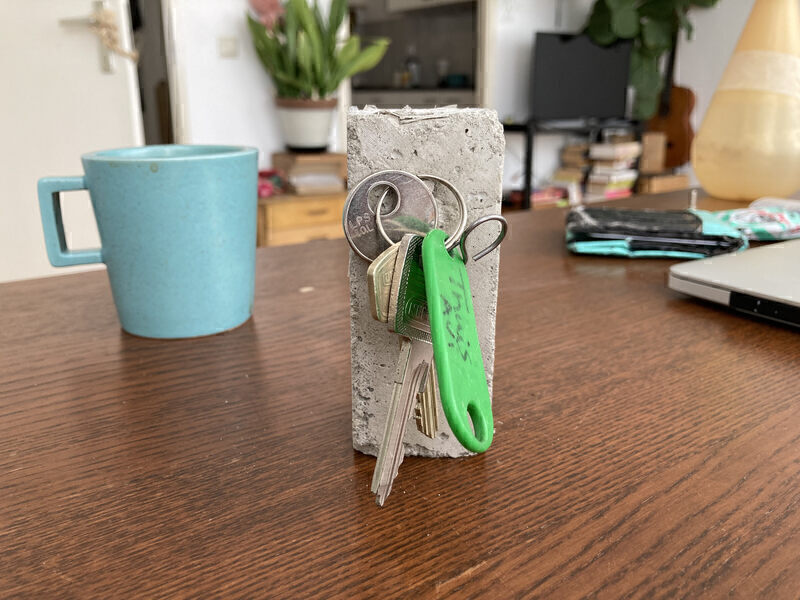
This week I wanted to revisit something I had worked on in the past, which is casting concrete into 3D-printed molds. I was inspired by a product that I had seen in a museum gift shop which was a concrete egg holder with a magnet to hold the spoon.
My past attempts had failed because the concrete I had been using became too brittle. This might be due to it being low-quality concrete meant for foundations. I had two ideas to improve the properties of the concrete. The first was to add a fiber. I had heard of adding glassfiber, and apparently there are other types. The second idea was to add cement to change the ratio of cement to sand to gravel based on this guide to concrete mix ratio.
I wasn’t able to obtain suitable glassfiber within on time but I was able to buy these polypropylene fibers at a hardware store. polypropyleen
Testcoupons
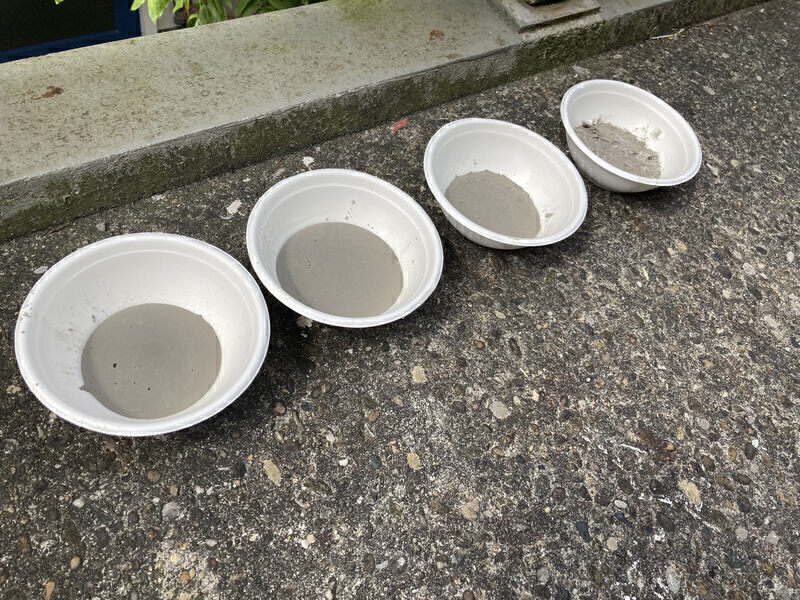
- 0:25000 fiber:concrete
- 15:25000 fiber:concrete
- 100:25000 fiber:concrete
- 200:25000 fiber:concrete
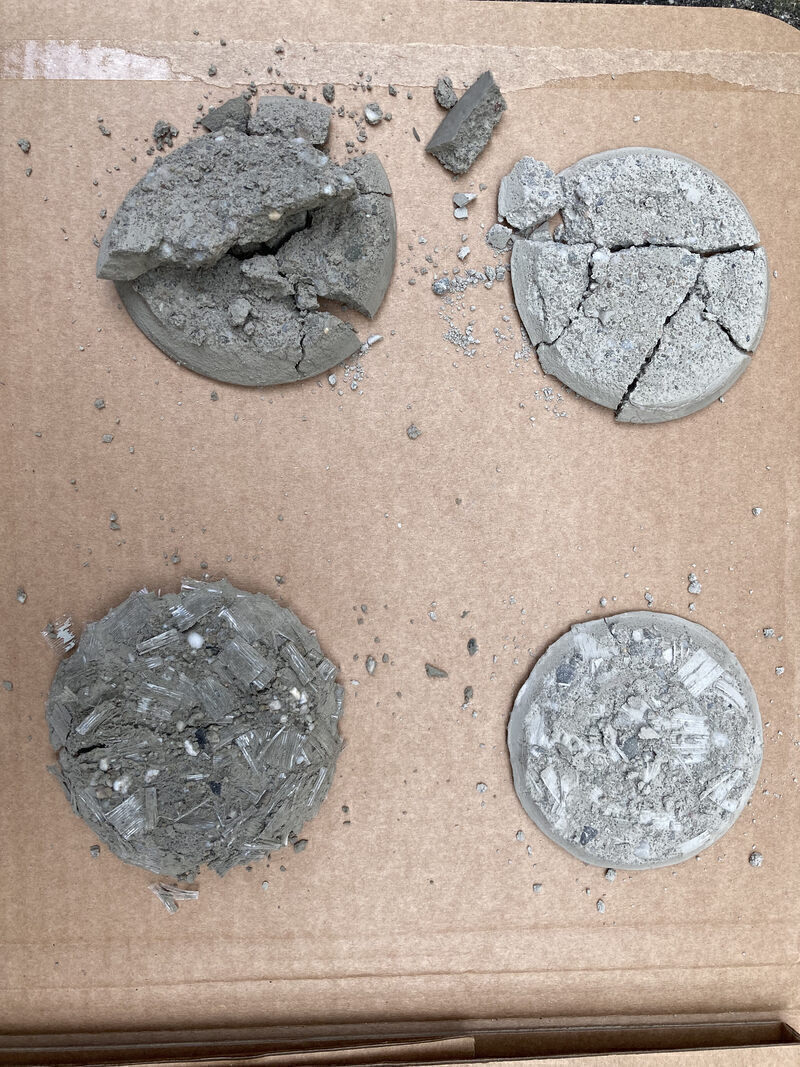
Based on these results the fiber is definitely helping the resilience of the concrete, but are not enough by itself to reinforce the concrete to make it useable for my intentions.
Concrete key blocks
For the first attempt, I mixed the concrete with water until it was saturated and not too thick i.e. relatively easy to stir. I added a small amount of fibers, approximately 15 grams.
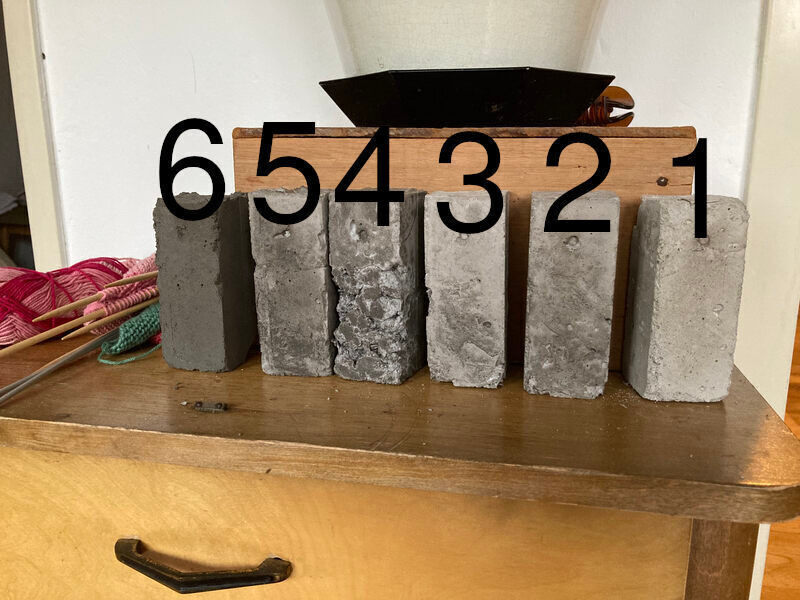
- Too sandy (normal concrete with fibers)
- Okay (extra cement 1:3, fibers)
- Okay (extra cement 2:3, fibers)
- Too dry (extra cement 1:1, extra fibers)
- Okay (extra cement 1:1, fibers)
- Too wet (extra cement 1:1, fibers, extra water)

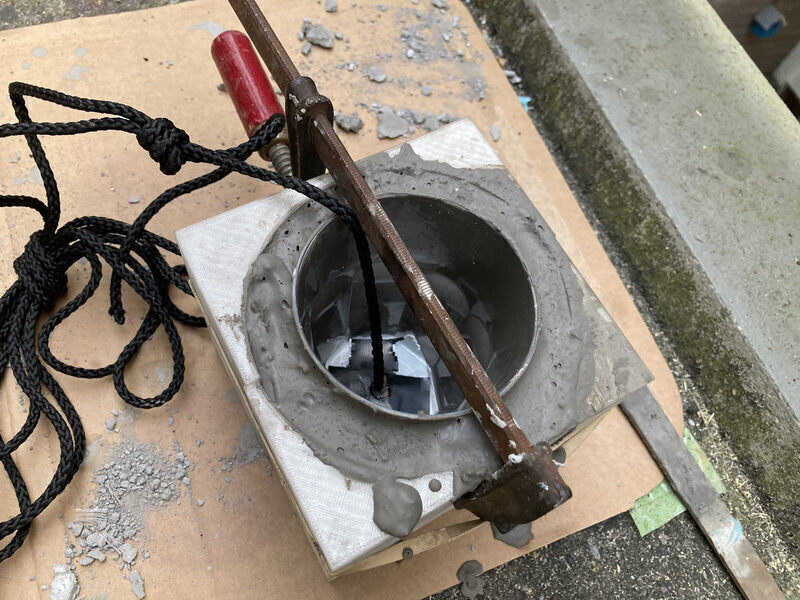
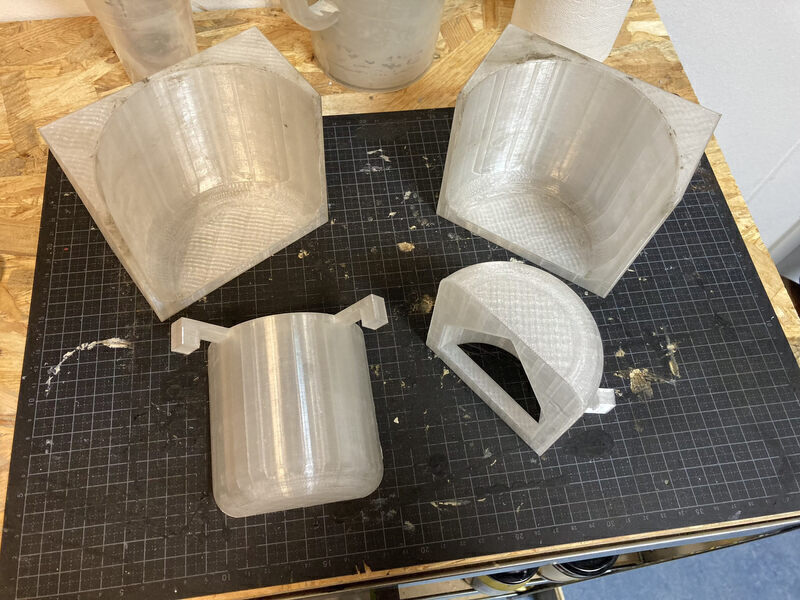
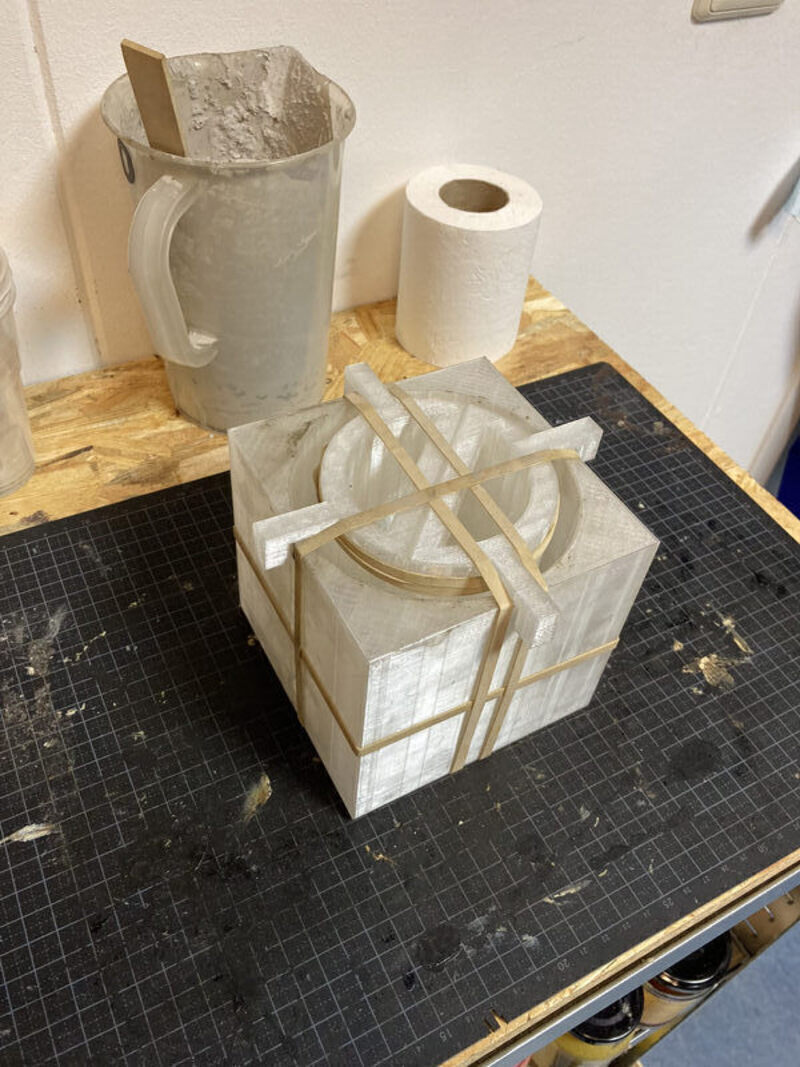
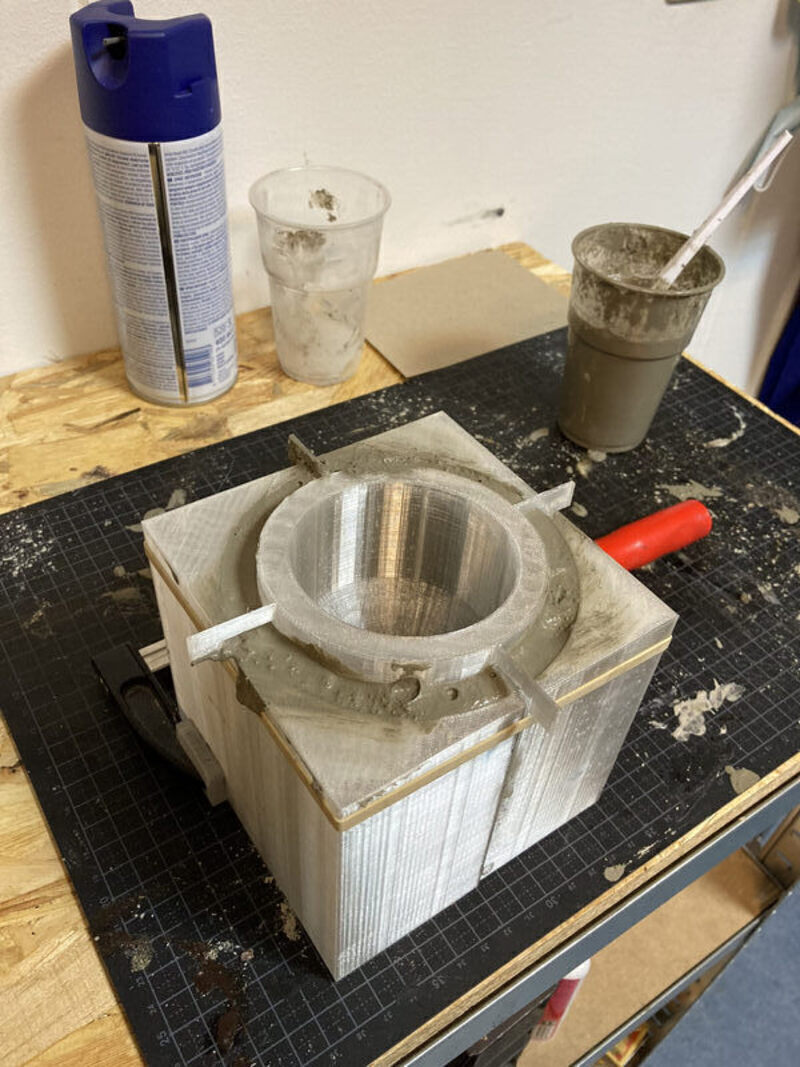
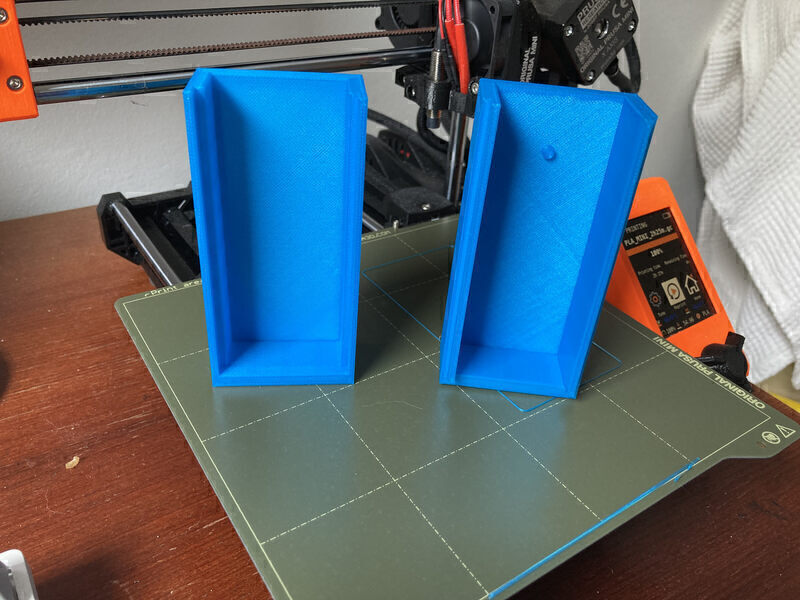
3D-printing molds
During the molding and casting week, we used subtractive methods to create a mold in which we casted Oomoo to create the mold negative. As an alternative I wanted to use additive methods to create the negative mold directly from PLA.
When creating a mold using 3D-printing methods, there are a number of consideration. Firstly, you need to make sure the mold parts stay in place when casting the material. The density of the material might cause it to push mold parts out. Secondly, you need to consider the extraction of the final product from the mold. This can be made easier by designing the mold in multiple pieces, so that the total adhesion on the parts is spread between multiple parts. Finally, depending on the material, you can make extraction easier by coating the mold with petroleum jelly so that the material doesn’t stick to the mold as much. The model for the mold is here.
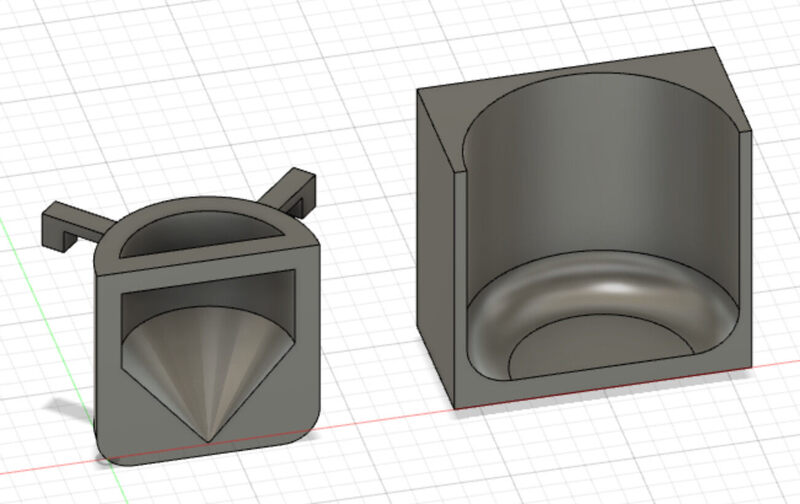
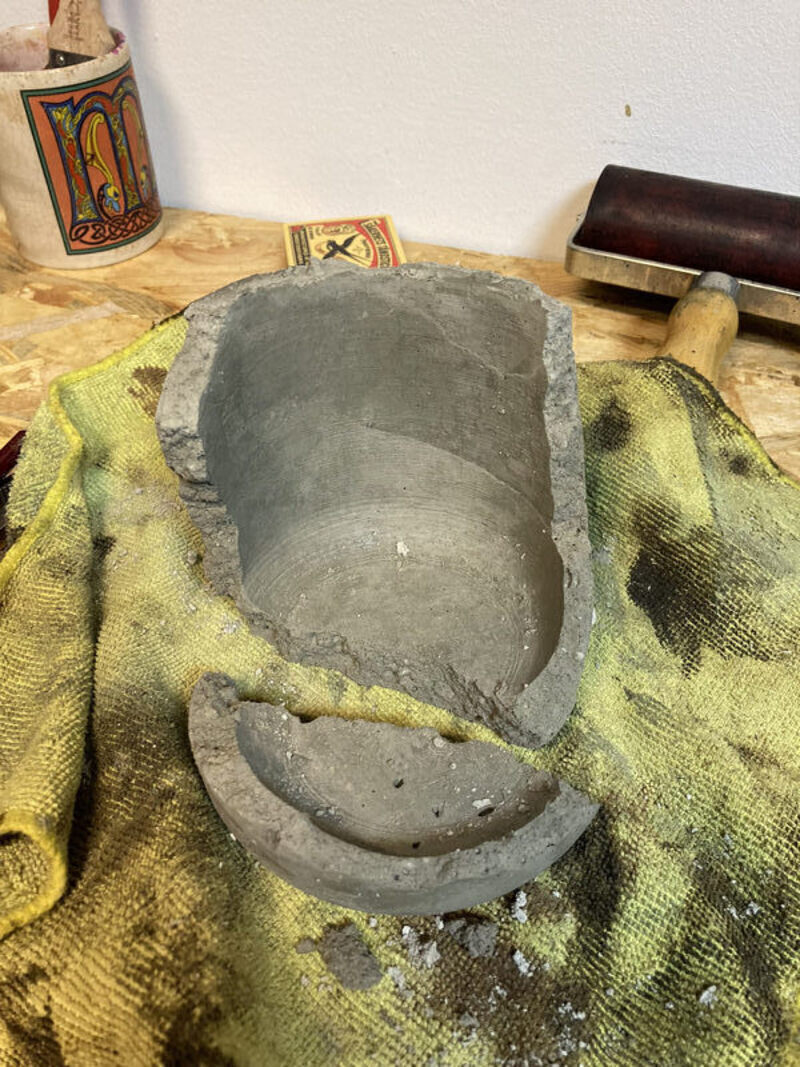
The hooks on the inner cast function as registers, however, they could have been improved to hold the inner mold in place more accurately. Also, it might have been a better idea to use a similar process as the molding and casting week. Perhaps by creating a positive and then casting the negative in Oomoo. The flexibility of Oomoo makes it very easy to extricate.
Retrying the flower pot