Week 9 - Molding and Casting
Introduction
- Registration features are bumps that help align , better practice is to have the whole mold have a continuous seam.
- There needs to be a way for air to escape the mold.
- Stirring should be horizontal and not scooping in air.
- Multiple ways of preventing bubbles, vacuum, pressure, painting the mold with the casting material.
- Pick your tool first and design your mold around that.
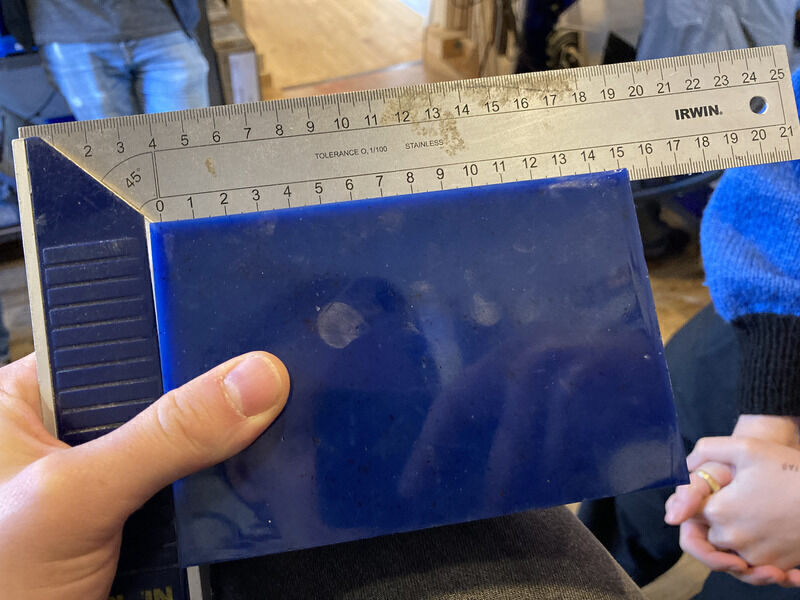
Henk introduced the process to us by milling a non-symmetric rounded shape six times from a block of wax. The process can differ based on what you intend to do, but generally you want to make a model of the negative of what you want your mold to be. The first step is to measure the block that you want to use to create your mold.
Then you can proceed to attach your block to the sacrificial layer using screwed-on slats and double-sided tape.
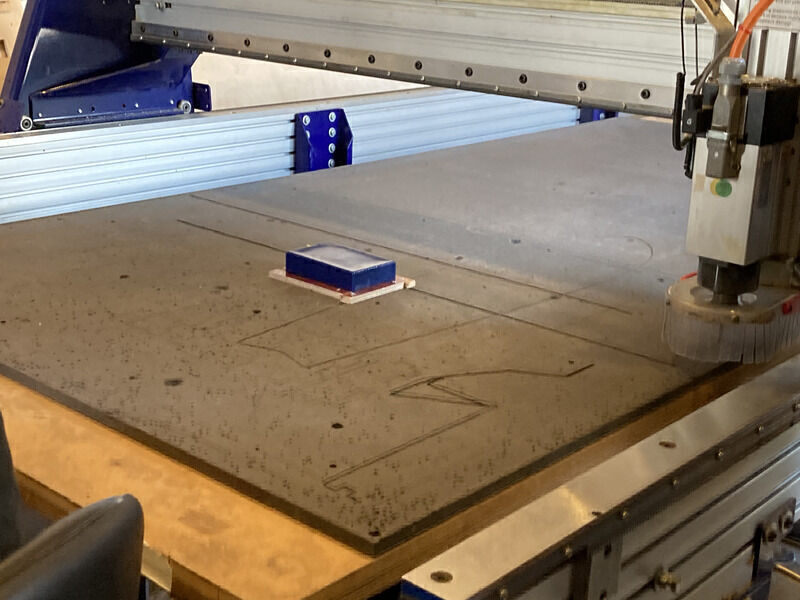
Set up your job in VCarve and start your job as usual (more on this later).
Group assignment
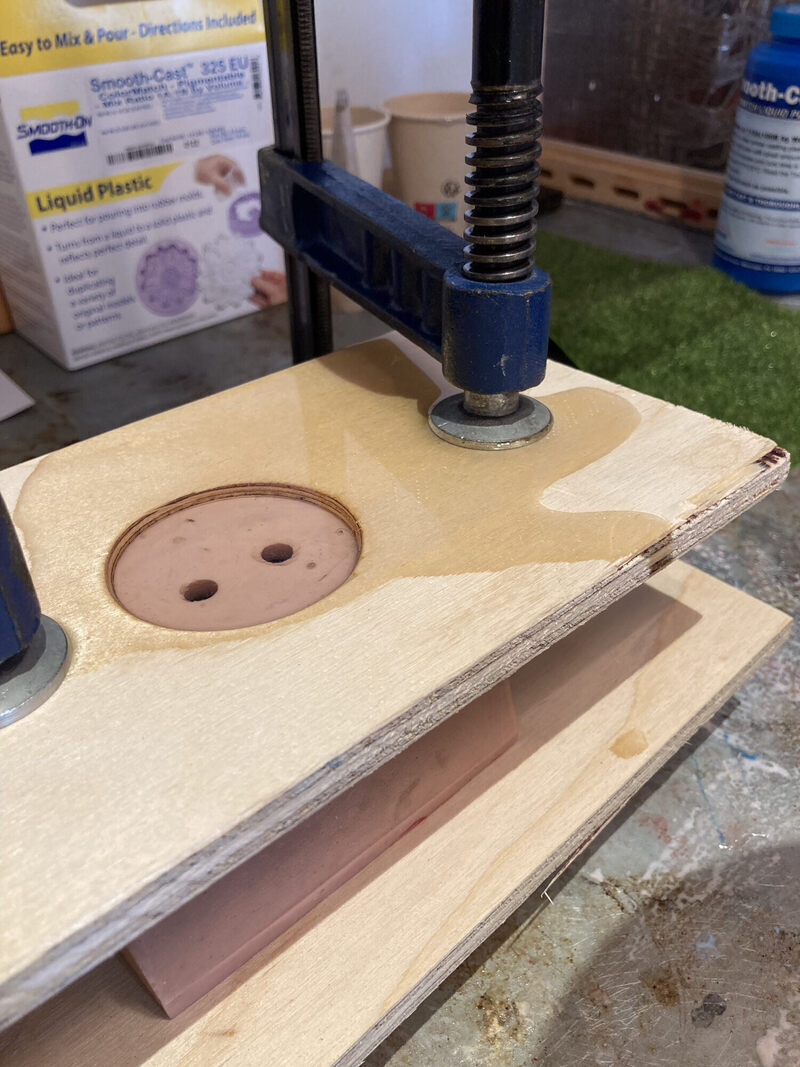
For the group assignment I worked together with Benjamin to characterize the properties of Smooth-Cast 325. Smooth-Cast 325 is a two-part transparent urethane resin. The instructions described Smooth-Cast 325 as being skin-irritant and should be used cautiously. The Waag is supplied with an air purifier and safety equipment.
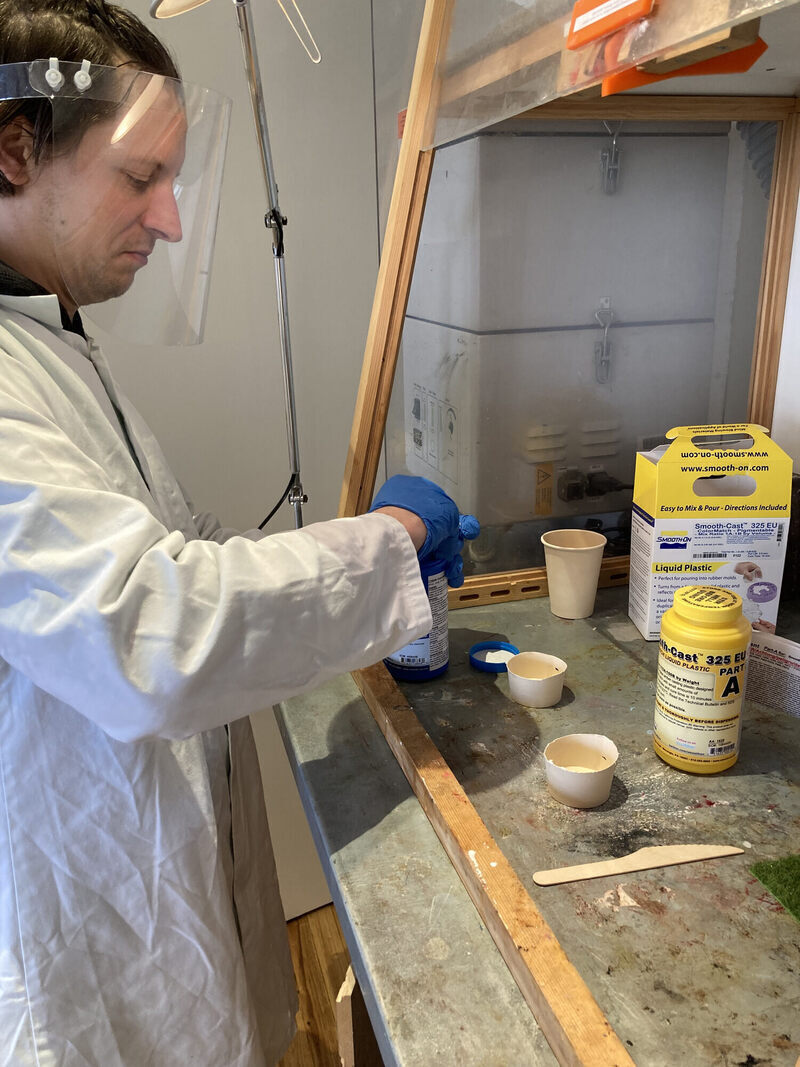
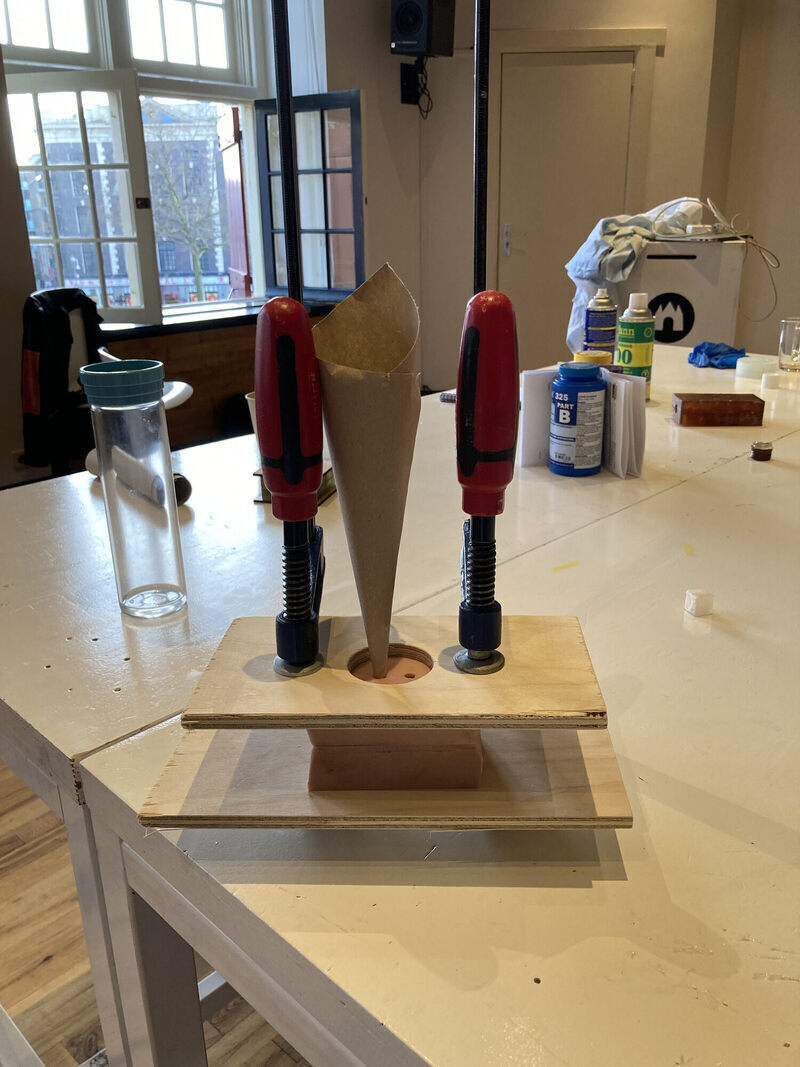
We used a mold that was created by a student from one of the previous years and created a funnel out of a piece of paper. We also prepared two pieces of wood and clamps to keep the cast tight. The material the cast was made out of was quite inflexible.
Smooth-Cast 325 has a very low viscosity and is therefore easy to stir. The ratio is also 1:1 to the process is simple. We estimated the amount of mixed casting material we would need and put lines on the cup for the right amount. Once we had mixed the two parts the mixture became quite warm quickly.
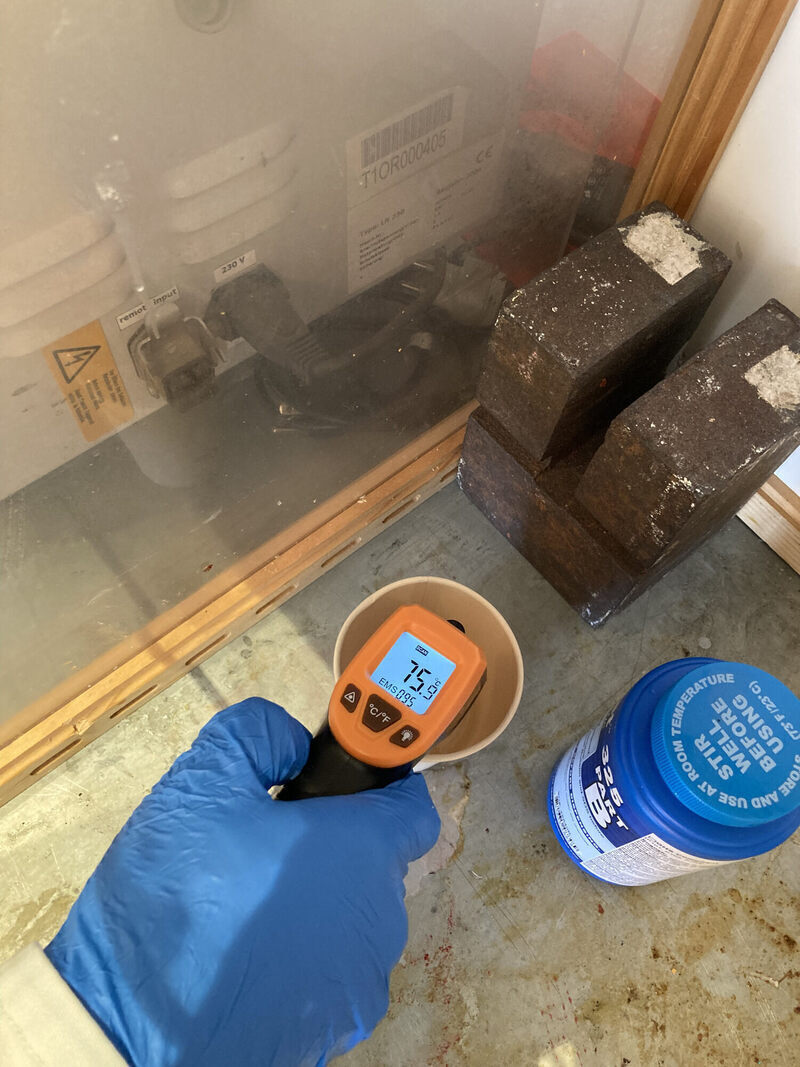
The ‘pot life’ is said to be 2.5 minutes, so we mixed the parts together for that time, however, during pouring the mixture already solidified. It turned out that when mixing the two parts for the entire pot life you would have to pour extremely quickly in order to do the entire cast on time. In our case we were using a mold with a small entrance which would not work.

We set up the experiment again. This time we mixed for only a minute and then poured the mixture. We were able to get all of the mixture into the mold, although some of it overflowed.
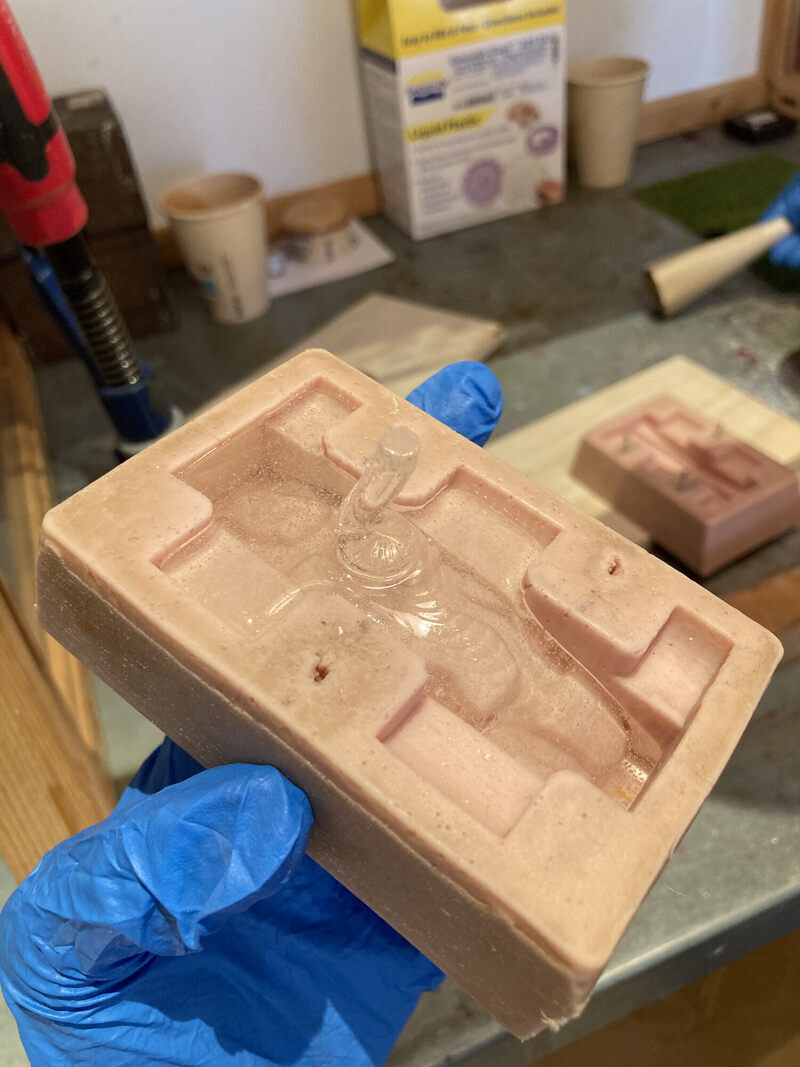
The result looked quite nice, even though we have no idea what we hade just made.
Observations
- The material is extremely quick to work with.
- The material is hazardous and not environmentally-friendly.
- It is possible to use the material in combination with a dye, and therefore very versatile.
- We could easily remove the material from the mold without using a mold release agent.
Individual assignment
Our assignment is to model a shape and create a mold for it. I wasn’t very inspired this week so I used Fusion to create a “Roman column” of which I later learned that there are three types. Doric, Ionic, and Corinthian (1). I think it tends towards the Ionic side of things.
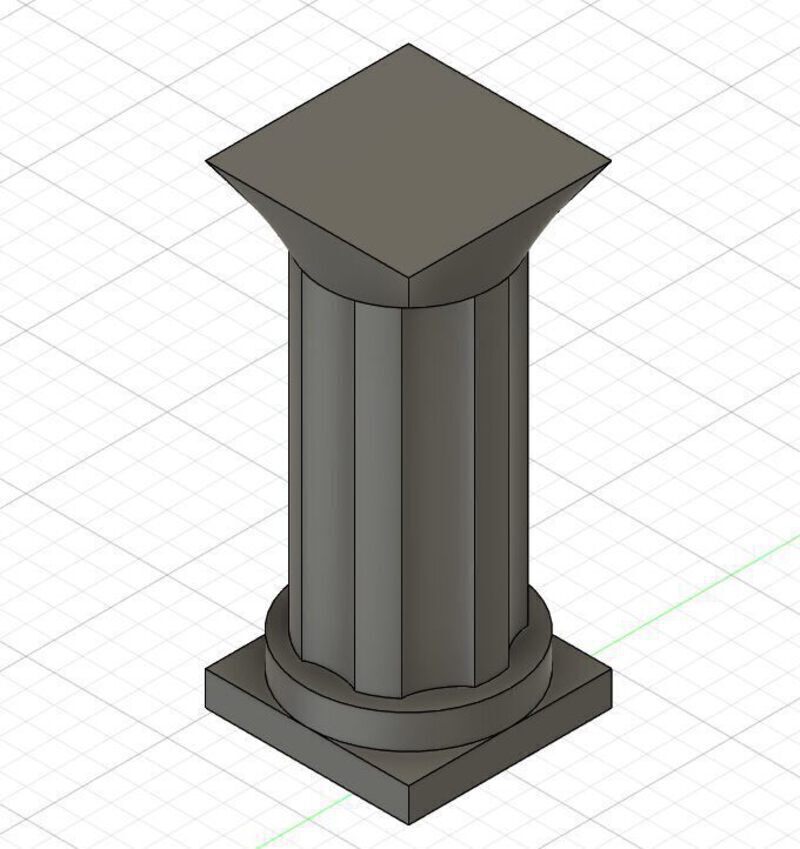
Next, I split and scaled the model so that it would fit into the wax block. I added registration features as positives and negatives to both sides of the block.
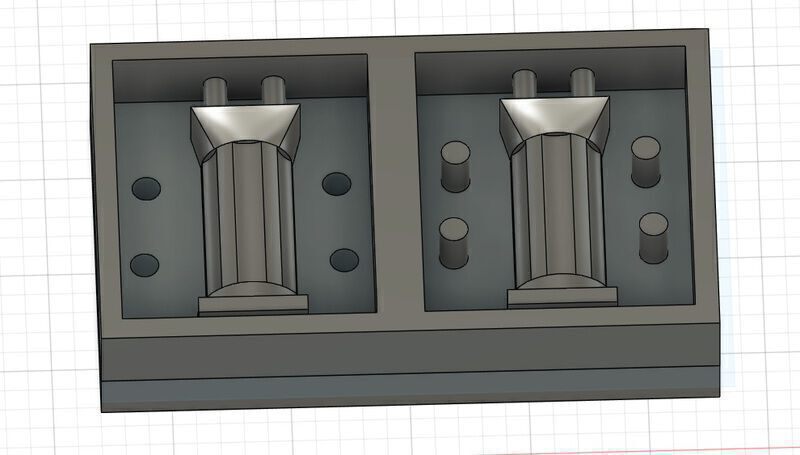
My first step in VCarve was to import the model as a 3D model and setting the dimension of my wax block. Then I oriented my model correctly using ‘Initial Orientation’ and centered the model using ‘Center Model’. Then, I adjusted the zero plane so that the model was slightly below the red line and finally deselcted ‘Discard data below zero plane’.
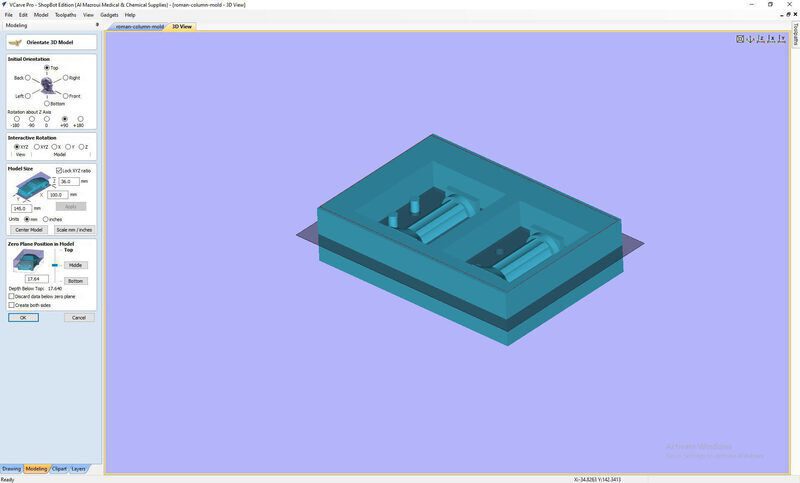
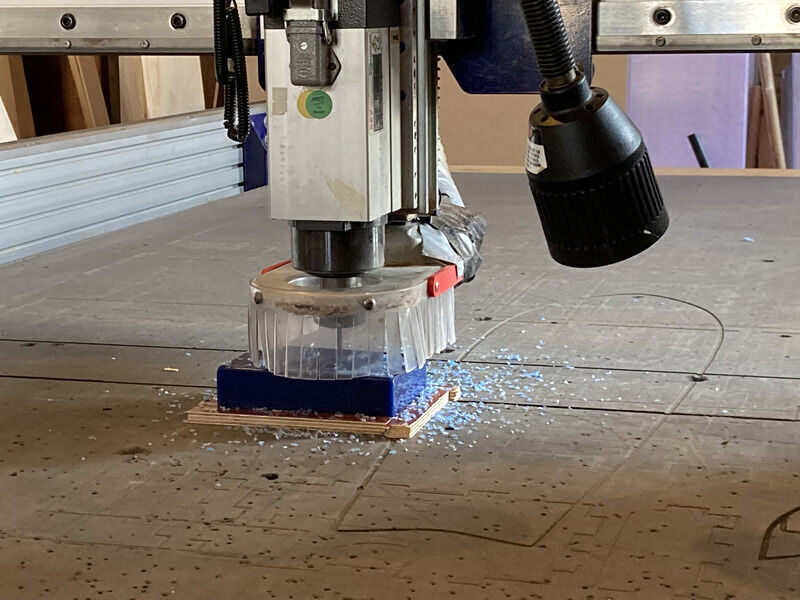
I started setting up the toolpaths, initially using a 5mm roughing end and a 2mm finishing pass. I noticed a difference between the results of the ‘Area Machine Strategy’, with the ‘Offset’ setting resulting in a triangular artifact in the preview, and the ‘Raster’ looking good. So I went with the latter option.
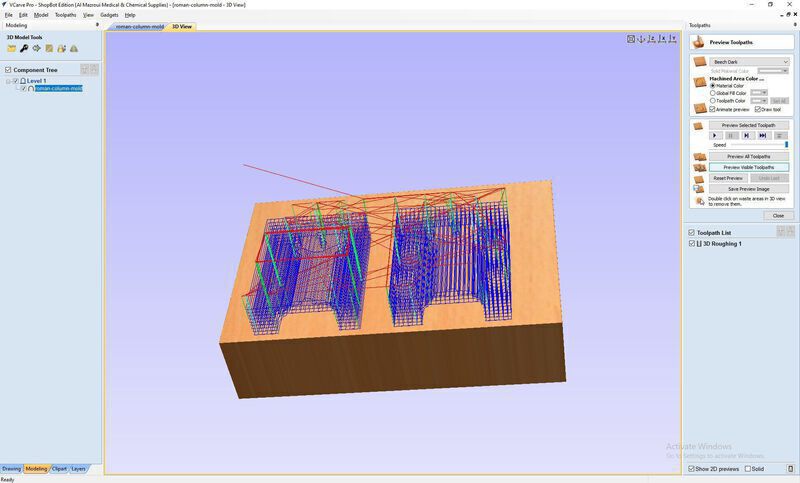
With my setup complete, I sanded the sacrificial layer of the shopbot and attached the wax block using two-sided tape and screwed-in wood pieces. After zeroing in the XY and Z axis, I started milling.
After finishing the roughing job everything looked alright to proceed with the finishing job. I adjusted my toolpath a little before doing so as I had doubt about the 2mm bit clearance. So I quickly changed the toolpath to a 3mm bit. I changed the bit and zeroed the Z-axis again. However, during the milling, the collet hit the side of the wax wall and I had to abort the job.
The depth of my model had been deeper than the clearance of the collet. The milling bit would never have been able to mill the registration features without destroying the wax walls surrounding it. This meant I had to go back my model and adjust it so that the maximum depth is lower than the clearance of the mill from the collet. Sadly I had no choice other than to change my model and start over on a new wax block.
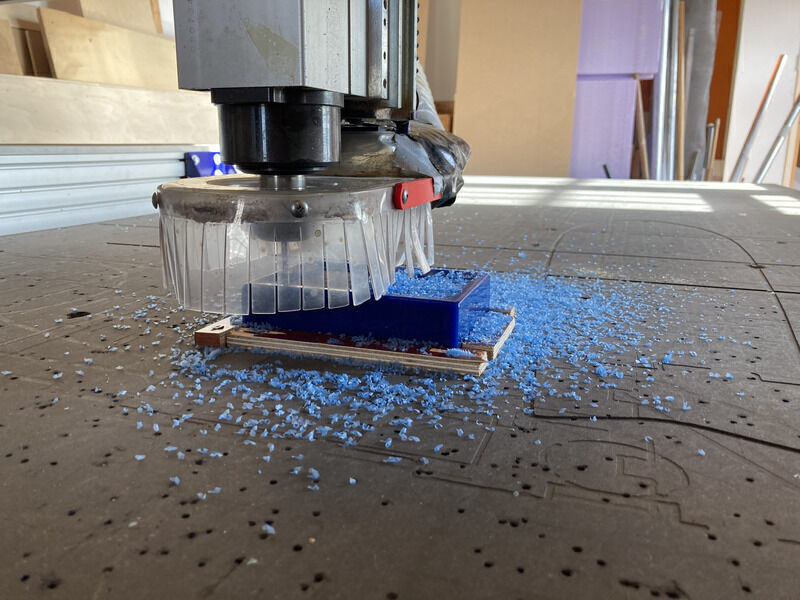
So I restarted the process of designing and accounted for the lower depth I could use in my model. I even overcompensated a little bit by almost making the features flush with the mold walls. I imported the model in VCarve and setup my toolpaths once again. Luckily, this time things went faster. Afterwards, started over with a new block of wax and calibrated the X, Y, and Z-axis.

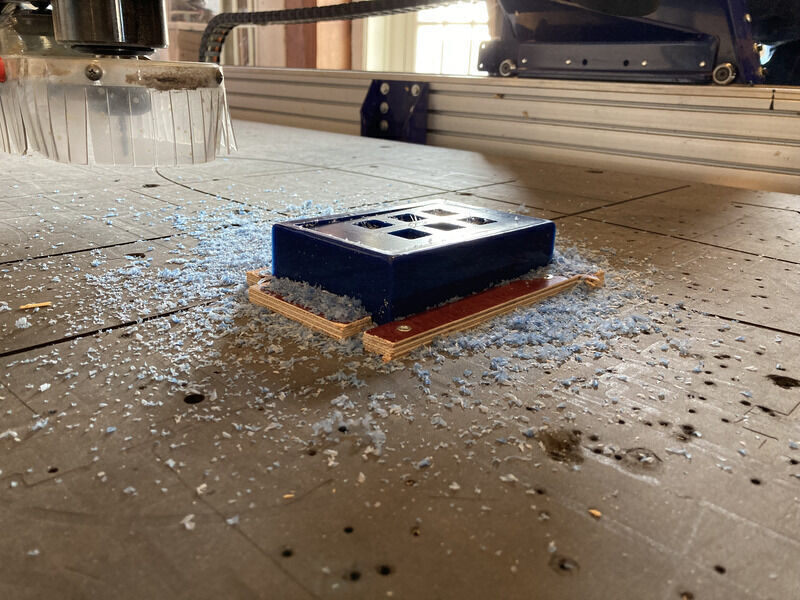
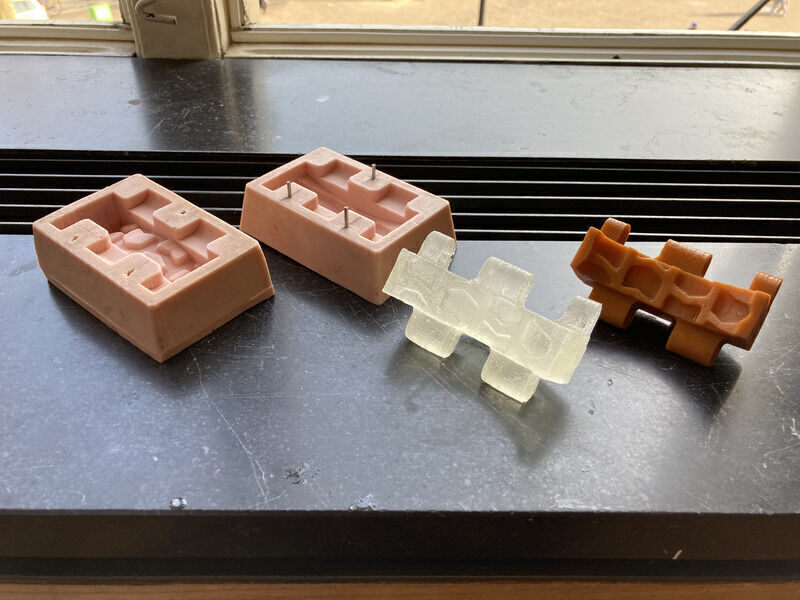
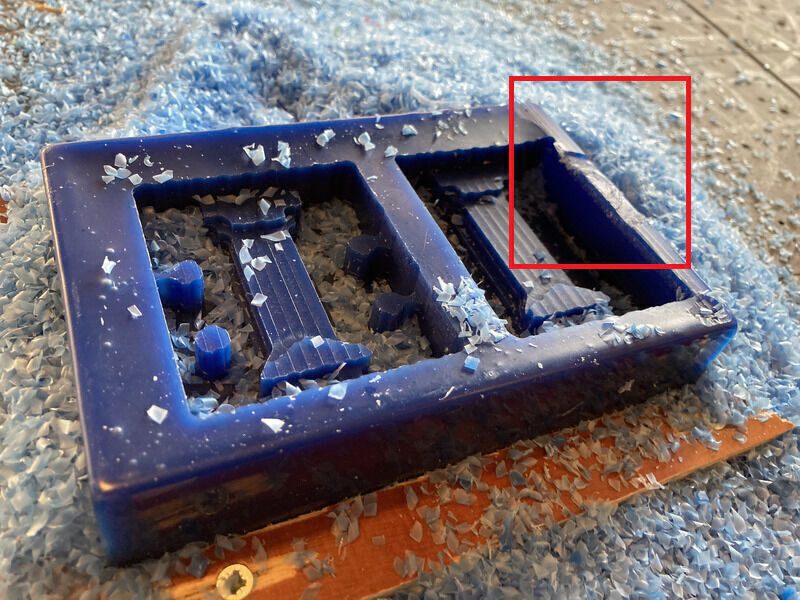
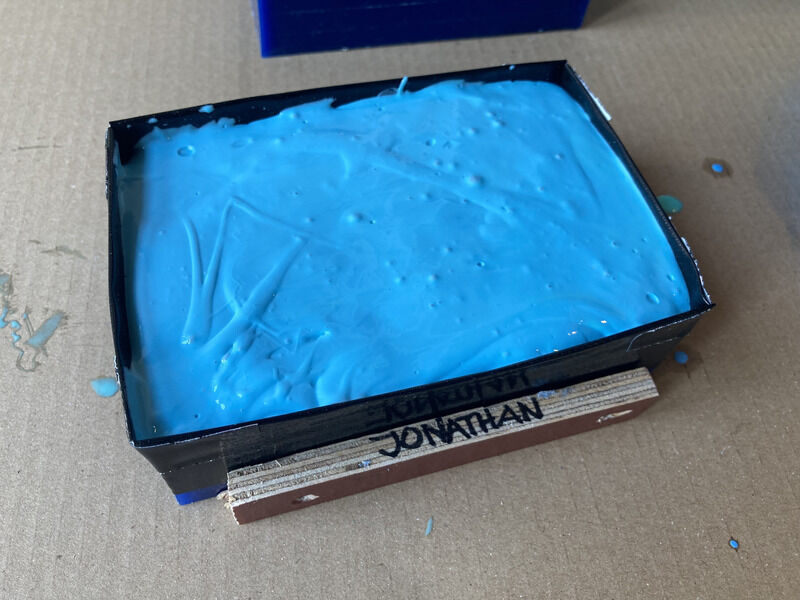
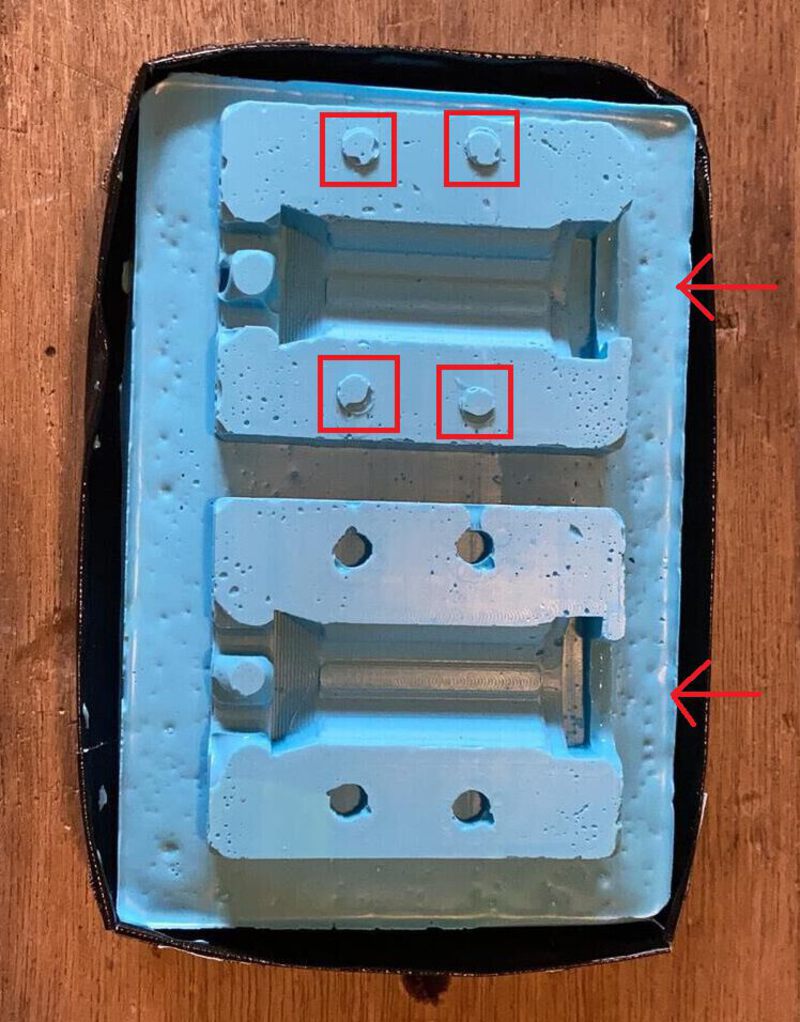
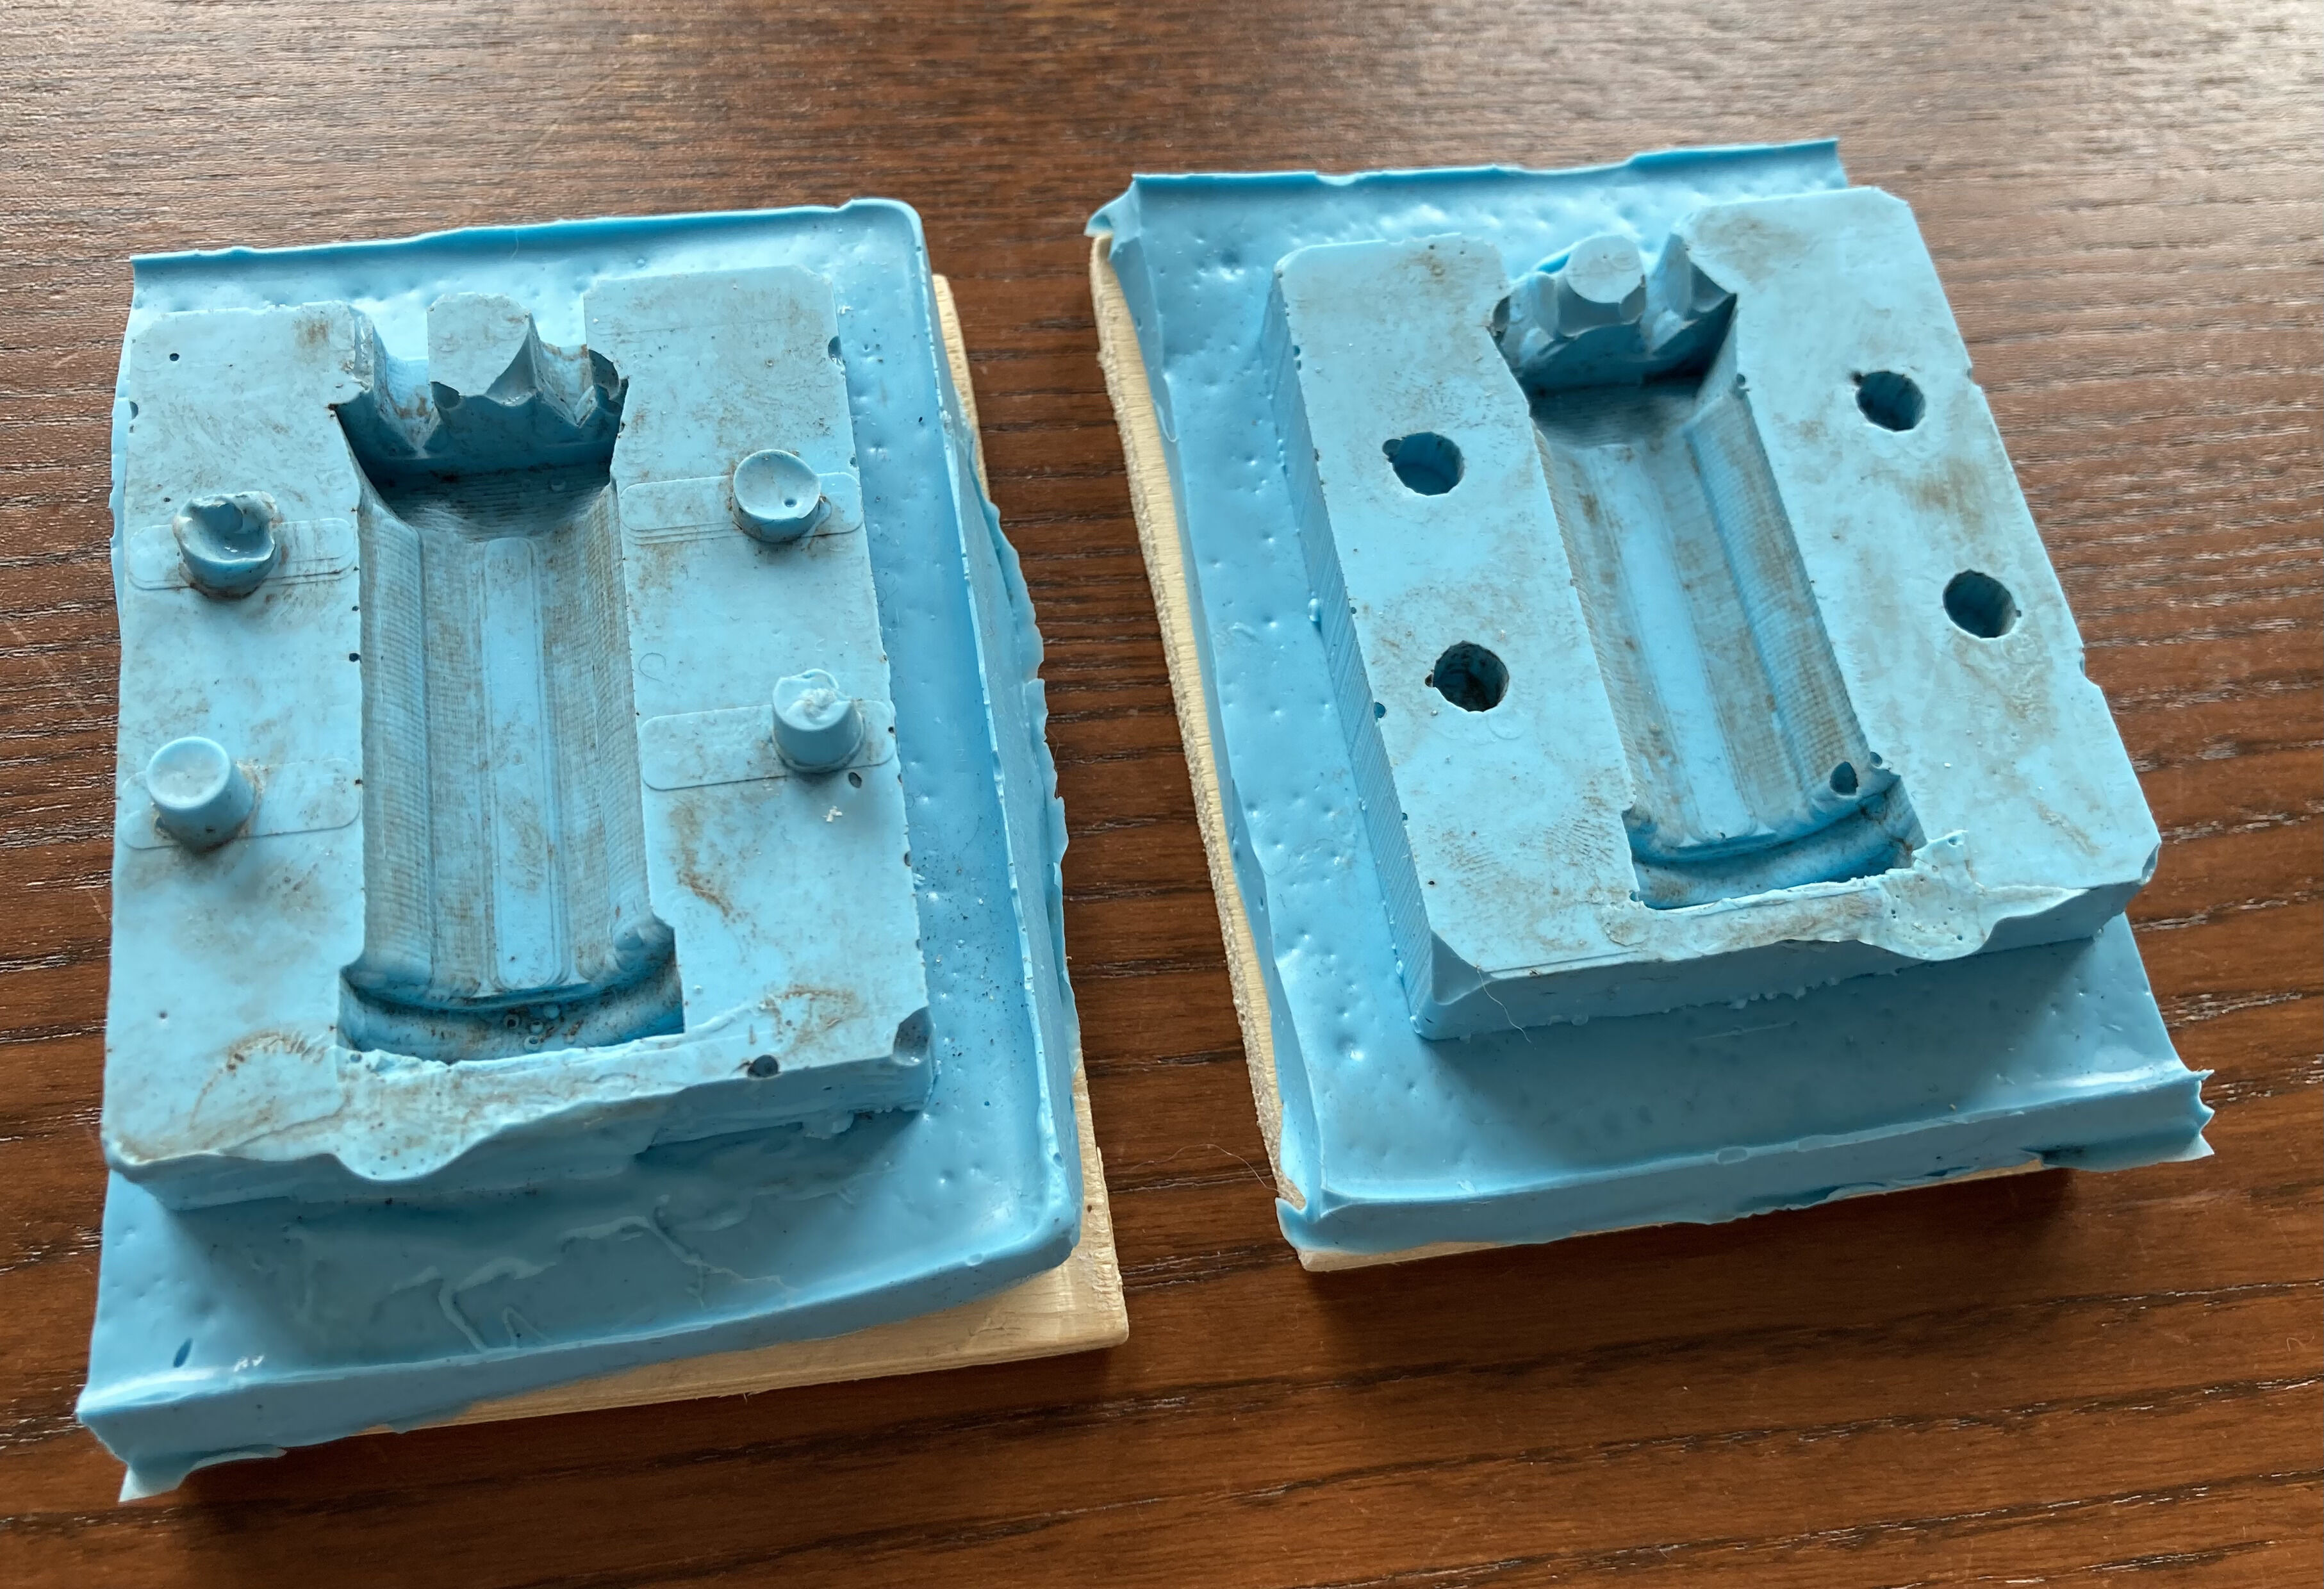
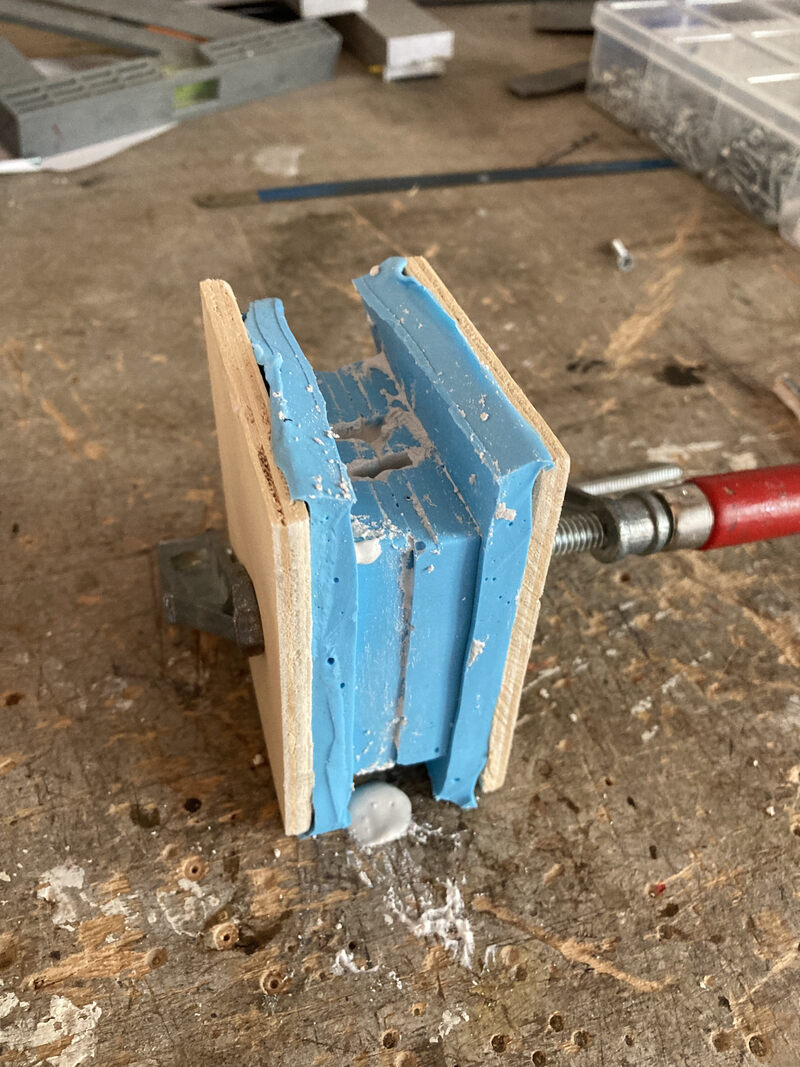
After this, I was finally able to mill the negative of the mold. The milling went well. The roughing took about 10 minutes with the 5mm drill bit, after which I switched the drill bit for the 3mm one. The finishing took around 45 minutes. At all points the clearance of the collet was above 7.5mm, so I really overcompensated when editing my model. Better safe than sorry I guess. I was supposed to drill out the register features, but I forgot and went ahead with casting Oomoo 25. Because I had made the mold more shallow to compensate for the clearance, I added a duct-tape wall so that I could cast a little higher. I was afraid that otherwise the wall thickness would be too low.
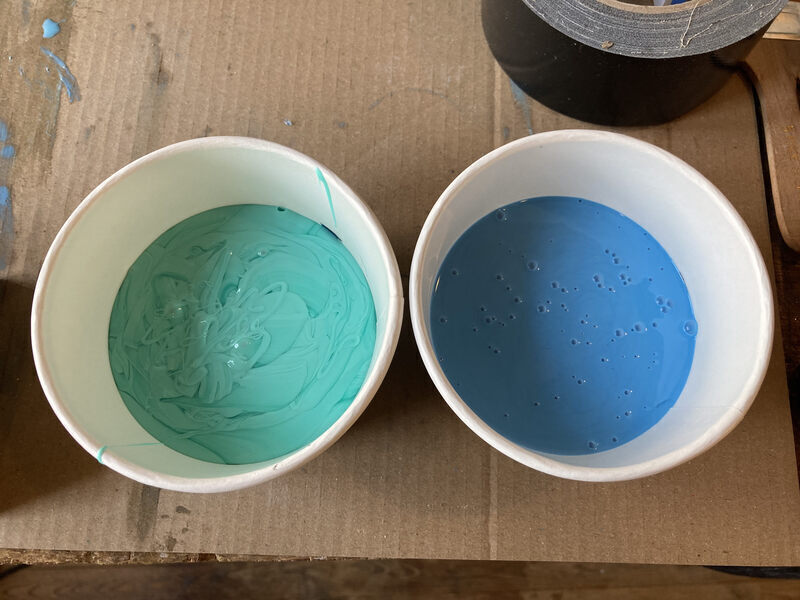
I thoroughly stirred the two parts before mixing them. One part was significantly more viscuous than the other and quite difficult to stir.
The next day, as I was working from home, Paola sent me a picture of the mold (thank you), but unfortunately there had been issues. The first issue was due to my own negligence by forgetting to drill out the registry features. The worst issue was that the Oomoo had not settled between the outer wall of the mold and the base of the column. I would have to create a new mold. I did so by making a little more space between the base of the column and the outer wall using an exacto knife.
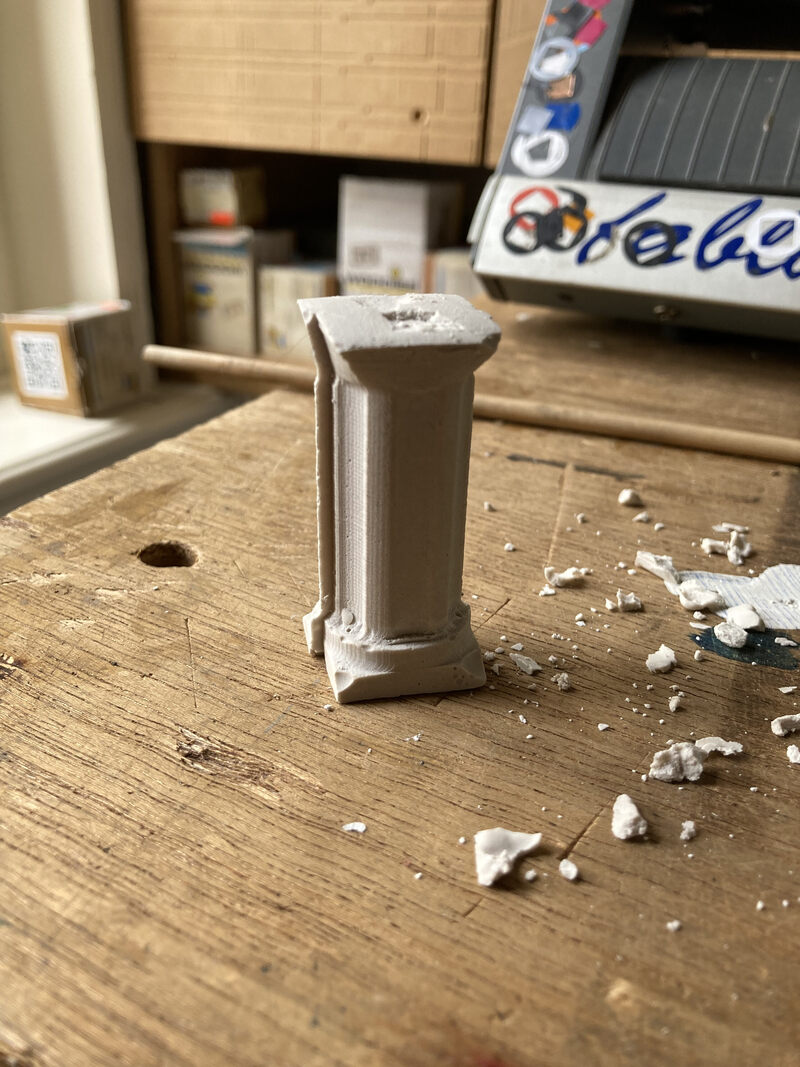
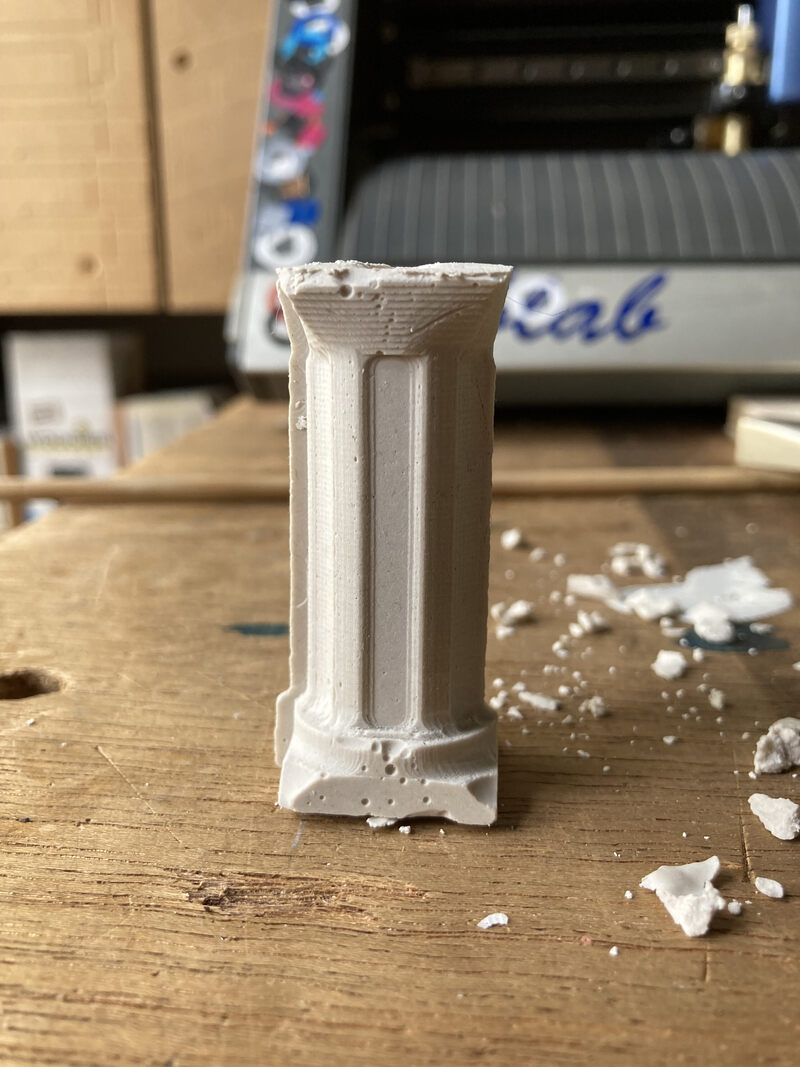
After remaking the mold, I created a cast out of a type plaster because I thought it would look nice as a Roman column.
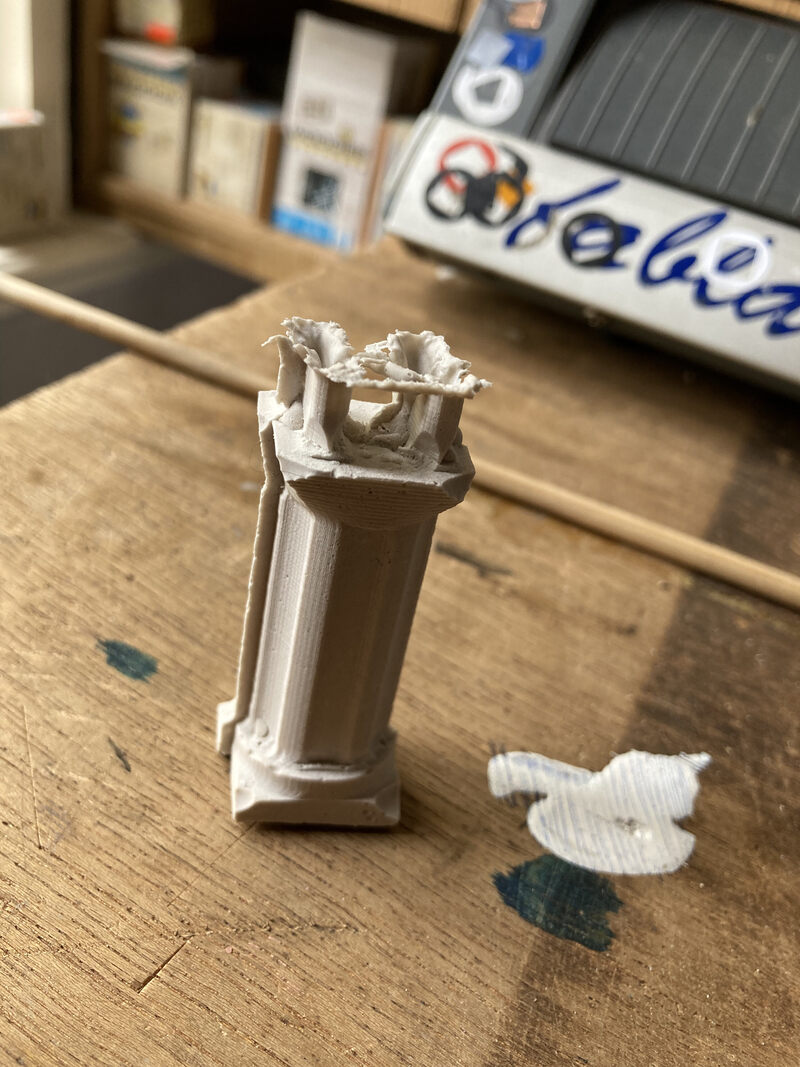
After removing the mold, it seemed that the registers were not aligned perfectly. Also, the hole on the top that was supposed let out air was also filled with plaster by pouring too quickly.
Conclusions
- The process of milling is the most time-consuming part of the process.
- Oomoo looks very flexible and it might be difficult to apply enough pressure to push the mold together without warping the shape.
- Even though I initially considered the properties of the milling bit by removing overhang from my model, I forgot to think about the clearance of the mill from the collet.
- Oomoo is a lot less liquid than I expected after mixing and will not penetrate hard-to-reach areas easily.
- The result looks okay, but the registers not aligning is a big error.