Design & CAD & 3D Printed process
Hand Design
The design of the hand is the most important element in this project, as it designed a parametric design to suit a wide category of people, in addition to that it was designed to be printed in one stage. The effect of the places of the strings on the moment that will move the joint has been taken into account. finally , the great challenge was to design it to can control everything joint separately , I made a lot of test to choose the material, the type of printer and the amount of Clearance.
1.1. CAD
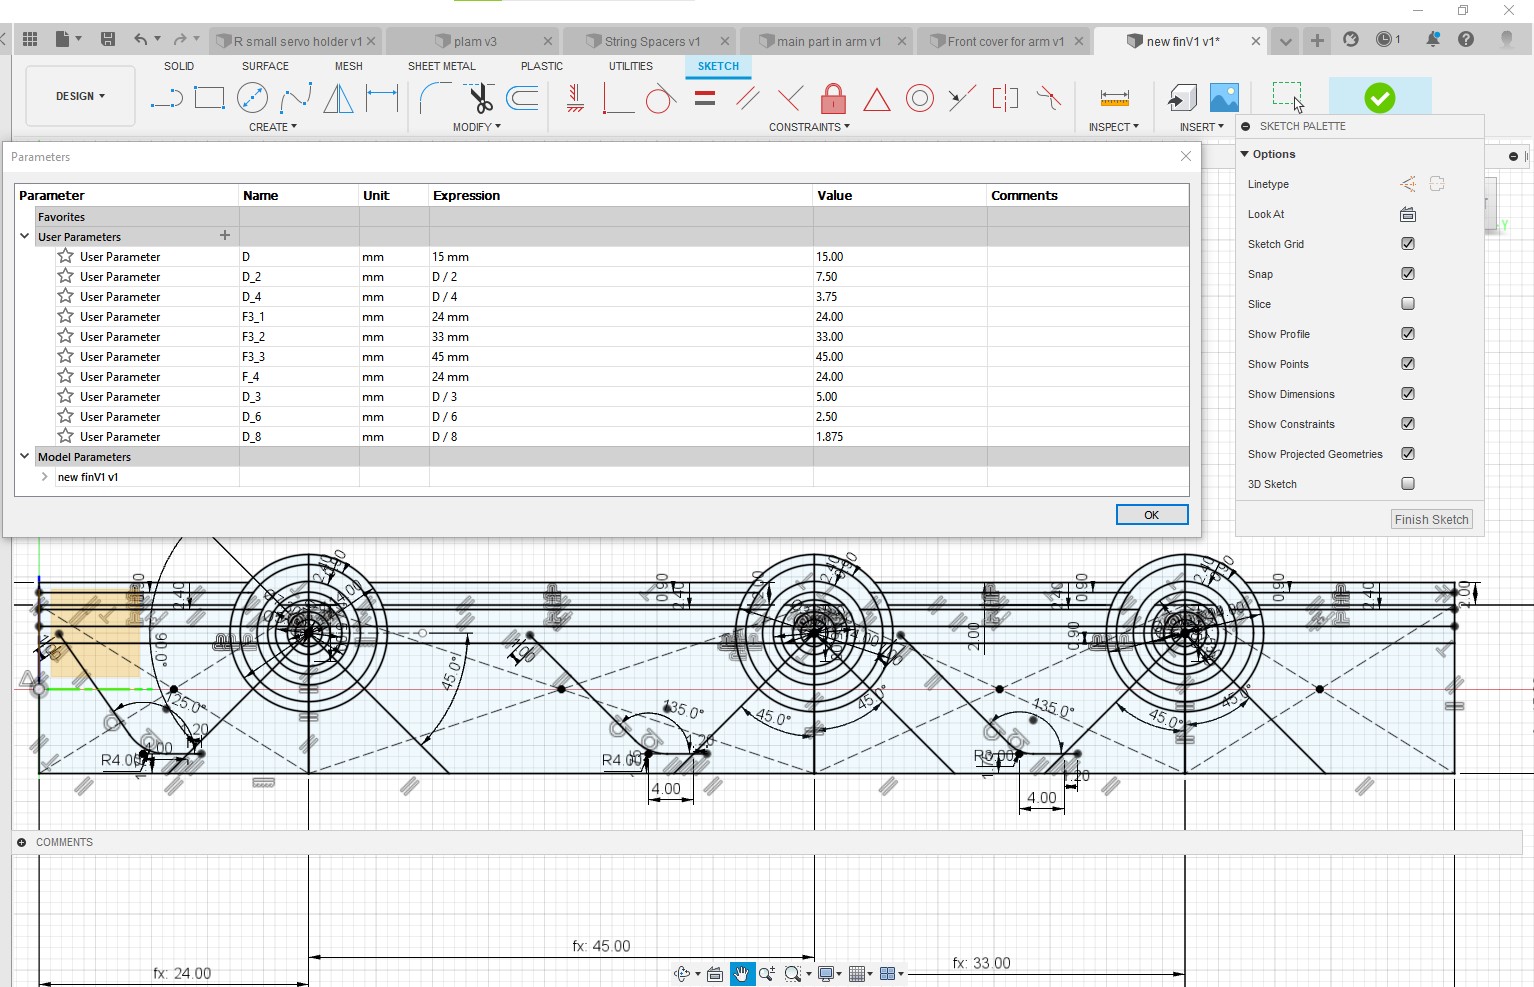
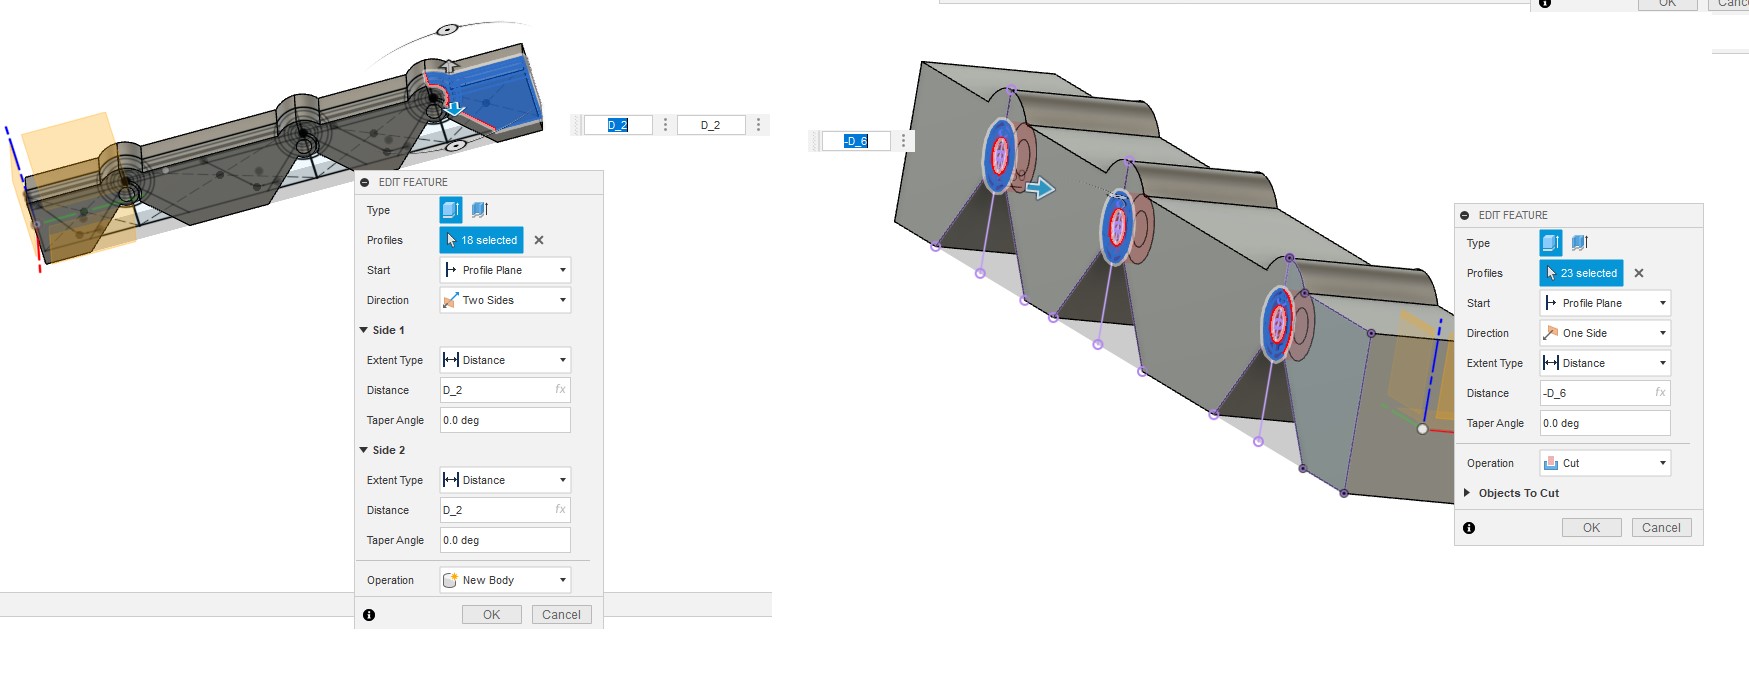
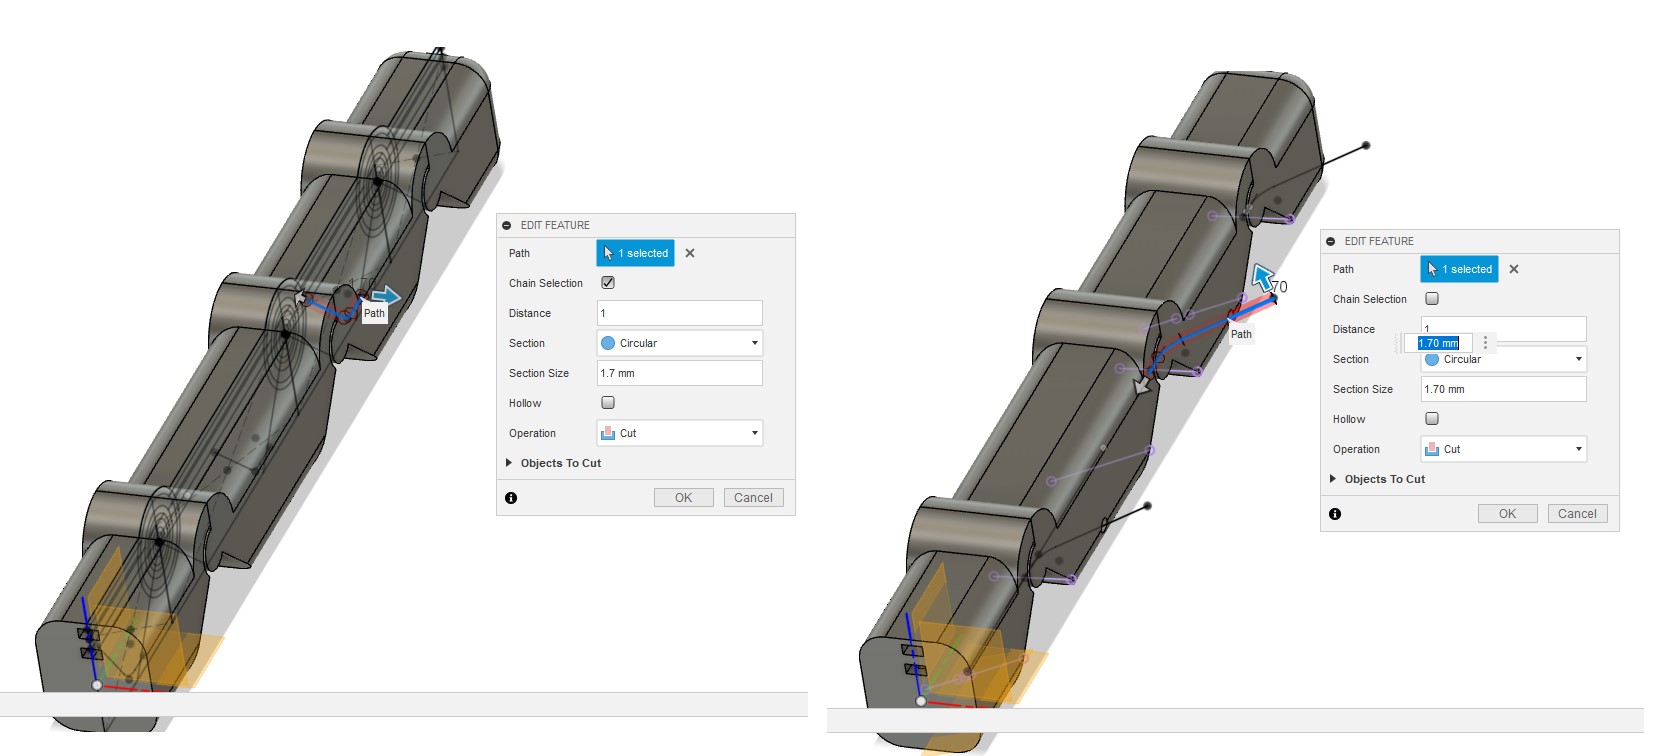
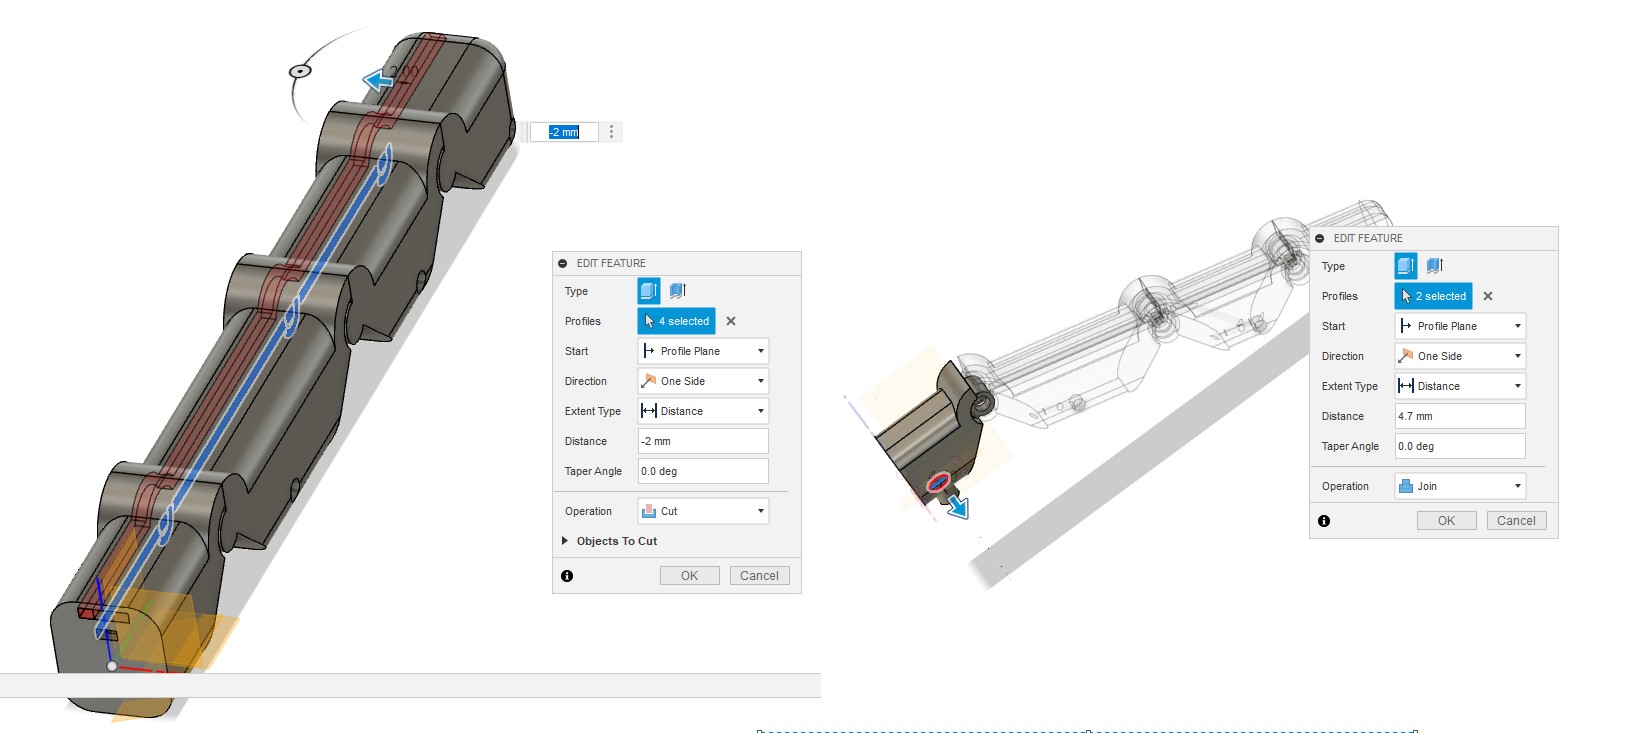
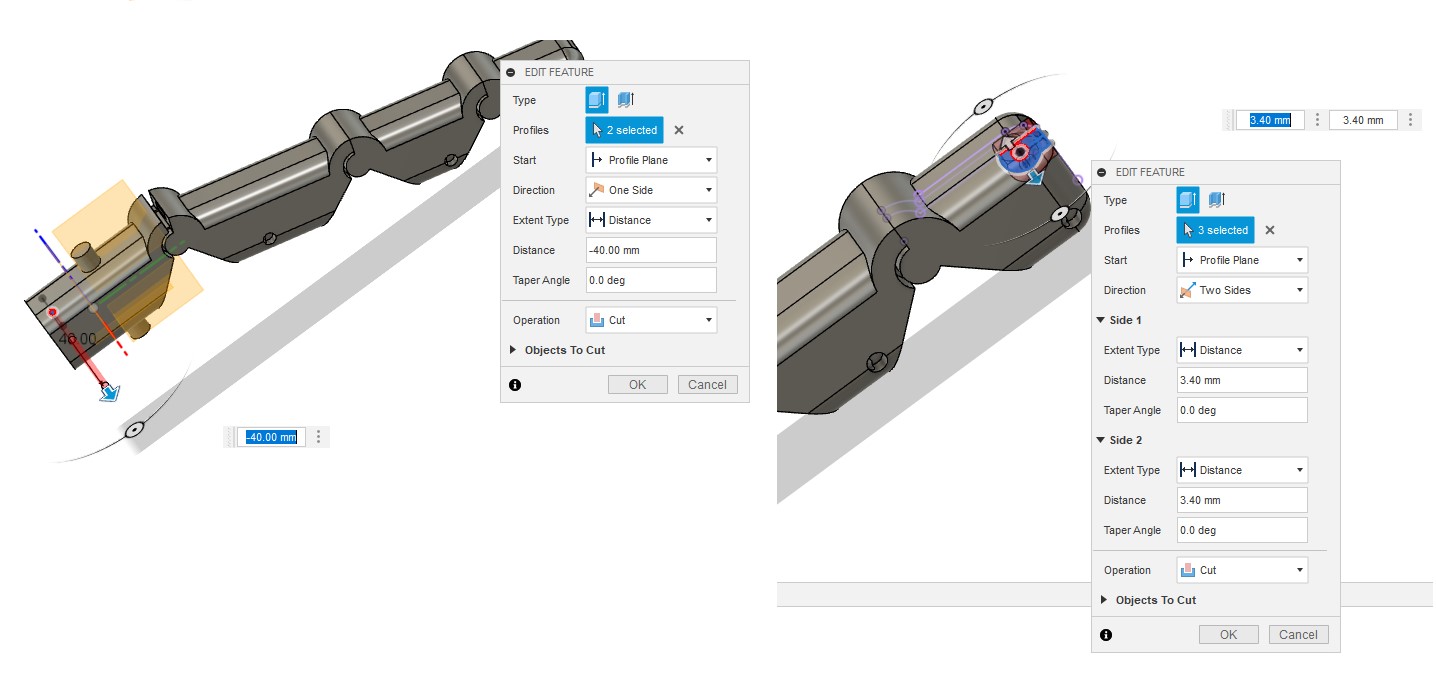
In this section, the pictures show the steps of drawing a finger, where we begin by defining the parameters and then drawing.


 File to Download
The sequence can be viewed better through the Fusion file that you can download
Plam
Fingur
After drawing the finger, the fingers must be assembled on the palm. The palm also contains a place for micro servo and pieces to create a path for the string.
1.2. Testing (material & 3d printer & Clearance)
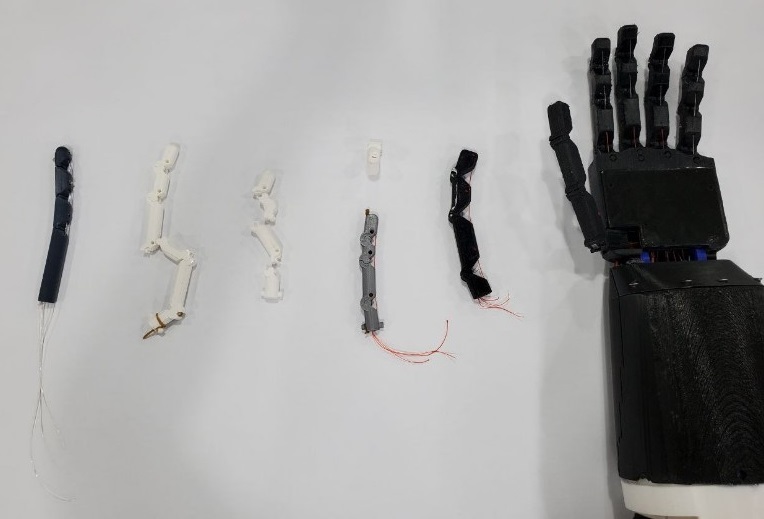
Before adopting this design for printing, finger printing was tested with different parameters, the first finger was made from PLA material with 0.4 mm clearance and the joint rotation axis was perpendicular to the printer bed, but the joint did not move smoothly, It has been reprinted with 0.5 mm clearance. at this point n we got the first finger working fine.At the same time I have tried to print the joint parallel to the bed of the printer.I did this experiment to see if it was possible to print the hand horizontally to reduce the amount support and for more stability , but the direction of printing changed the circles to elliptical shape , so the movement was not smooth.
The main reason for my continuing testing is to try to increase the amount of force that the finger can deal with it, so I printed the finger using a SLA printer with Rigid 10K. I print three finger and tried it, the first was broken before putting it in alcohol, the second after putting it in alcohol, and the third after curing.
After that, I returned to the FDM printer to test another material. I started with nylon and it was a good choice. The material have high strength and has the ability to absorb shocks, the first experiment did not work because of the difference parameter between PLA material and nylon, so I raised the clearance to 0.65mm after that We have successfully printed a finger that has smooth movement joints, can carry more forces, and the channels are clean from inside (have not been closed).
1.2. Principles & Section & Force analysis
As mentioned previously, in addition to the possibility of printing the finger in one stage, each joint can be controlled separately. The methods of work will be explained in the following paragraphs. One of the aspects that is takes into consideration in the design is catching force, the humans usually need more force to catching than releasing. so I worked to increas the amount of force by increasing the distance D as much as possible ( Therefore, you notice the protrusion of the joint outside the finger )which increases the amount of moment, that moves the finger.
The image below represents a section of the model showing the details of the finger from the inside, mainly the channels. The channels can be divided into three branchs. The upper channel (higher than the center of the joint) is used for rubber. The principle of finger action in this project differs from the rest of the projects at this point. other projects usually used motor to move the joint in both directions. In this model, the rubber works to keep the finger in a straight position. the rubber keep the finger straight by creating counterclockwise moment on all joints, and there is the main channel that passes from the center of the joint and is used to collect the threads inside it and finally the sub-channels that connect the thread to the main channel.
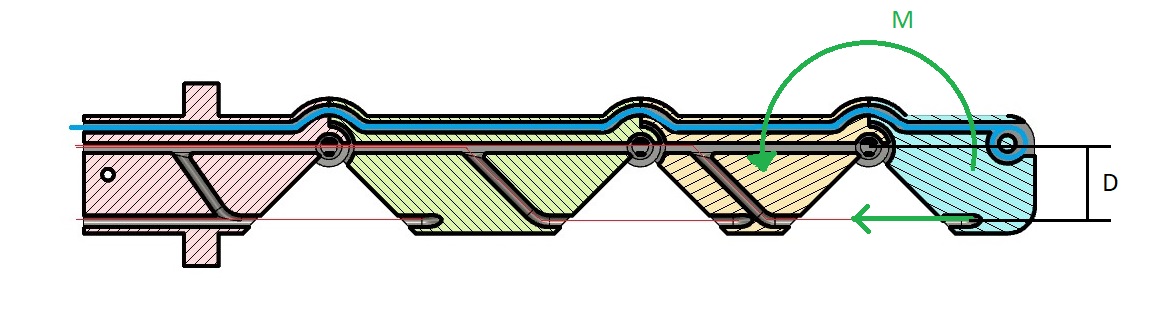
The location of the main channel is very important because it passes from the center of the joint, eliminating the effect of the sring of the first joints on other joints, for example, when moving the sring responsible on the first fingertip from the right, the sring creates a moment on the first joint due to the distance D between the sring and the center of the joint (the sring represents the direction of the force) and when The thread passes from the center of the second and third joint, and does not affect them.
1.4. Slicing for 3D printing
File to Download
You can download a Cura file that contains the support block through the following link
Plam.3mf
 Resalt
The support was planned to be printed with a breakaway filament, but the filament we had in the lab has many problem so I printed with same hand material which is nylon . The nylon support was not good choice.
2. Arm Design
The general function of the arm is the connection between the hand and the end of the existing arm, but it carries many other functions such as containing places for motors, batteries and electronics, and it also has a part to install it on the existing end of the human arm. It is always preferable to be well closed to protect the internal parts, and it should have a beautiful external appearance.
2.1. Main structure
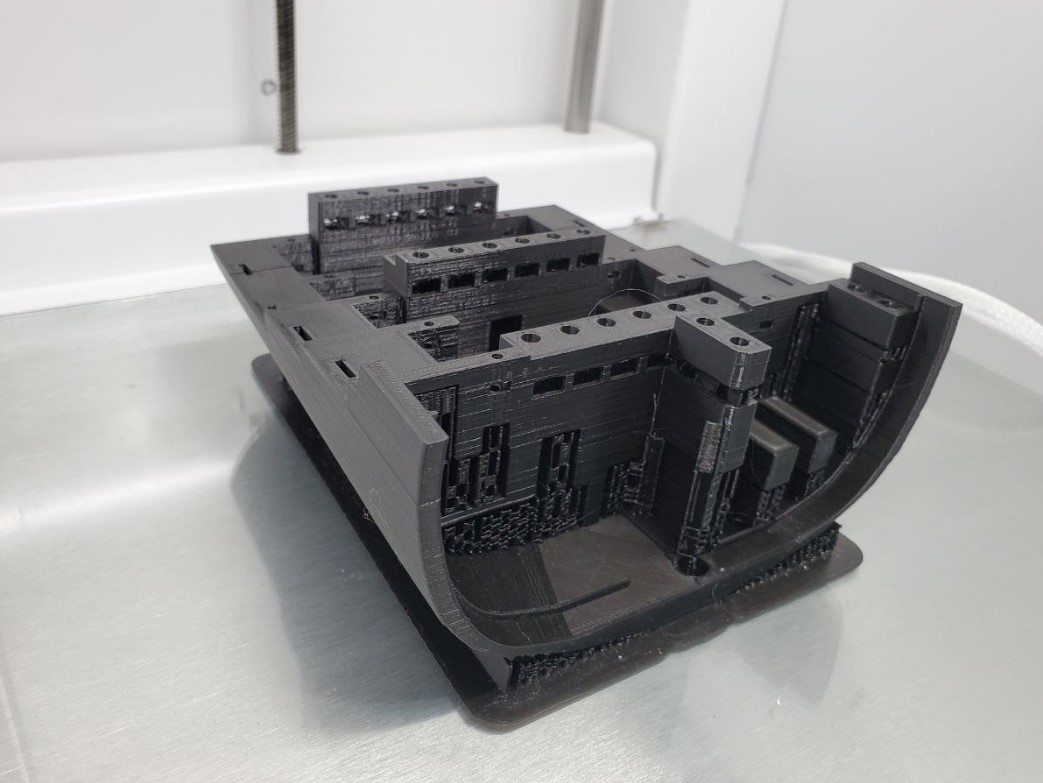
The Function
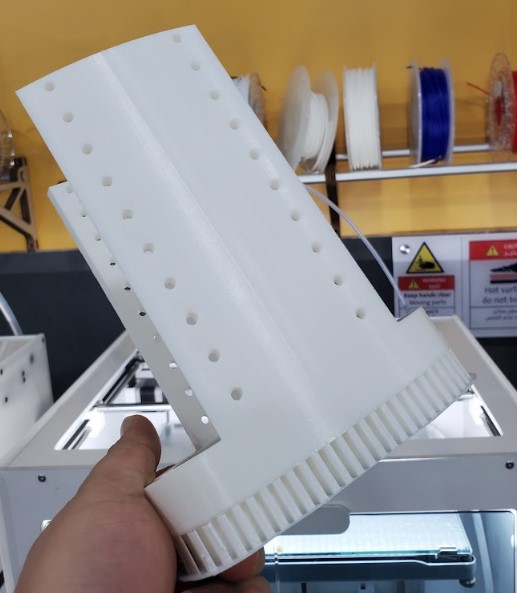
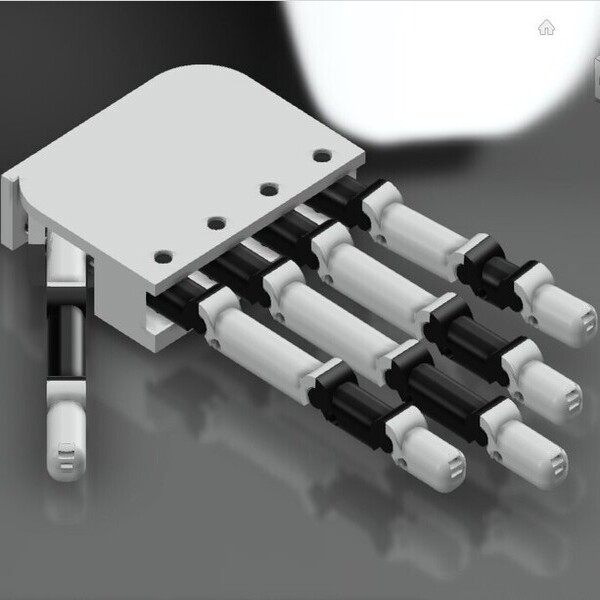
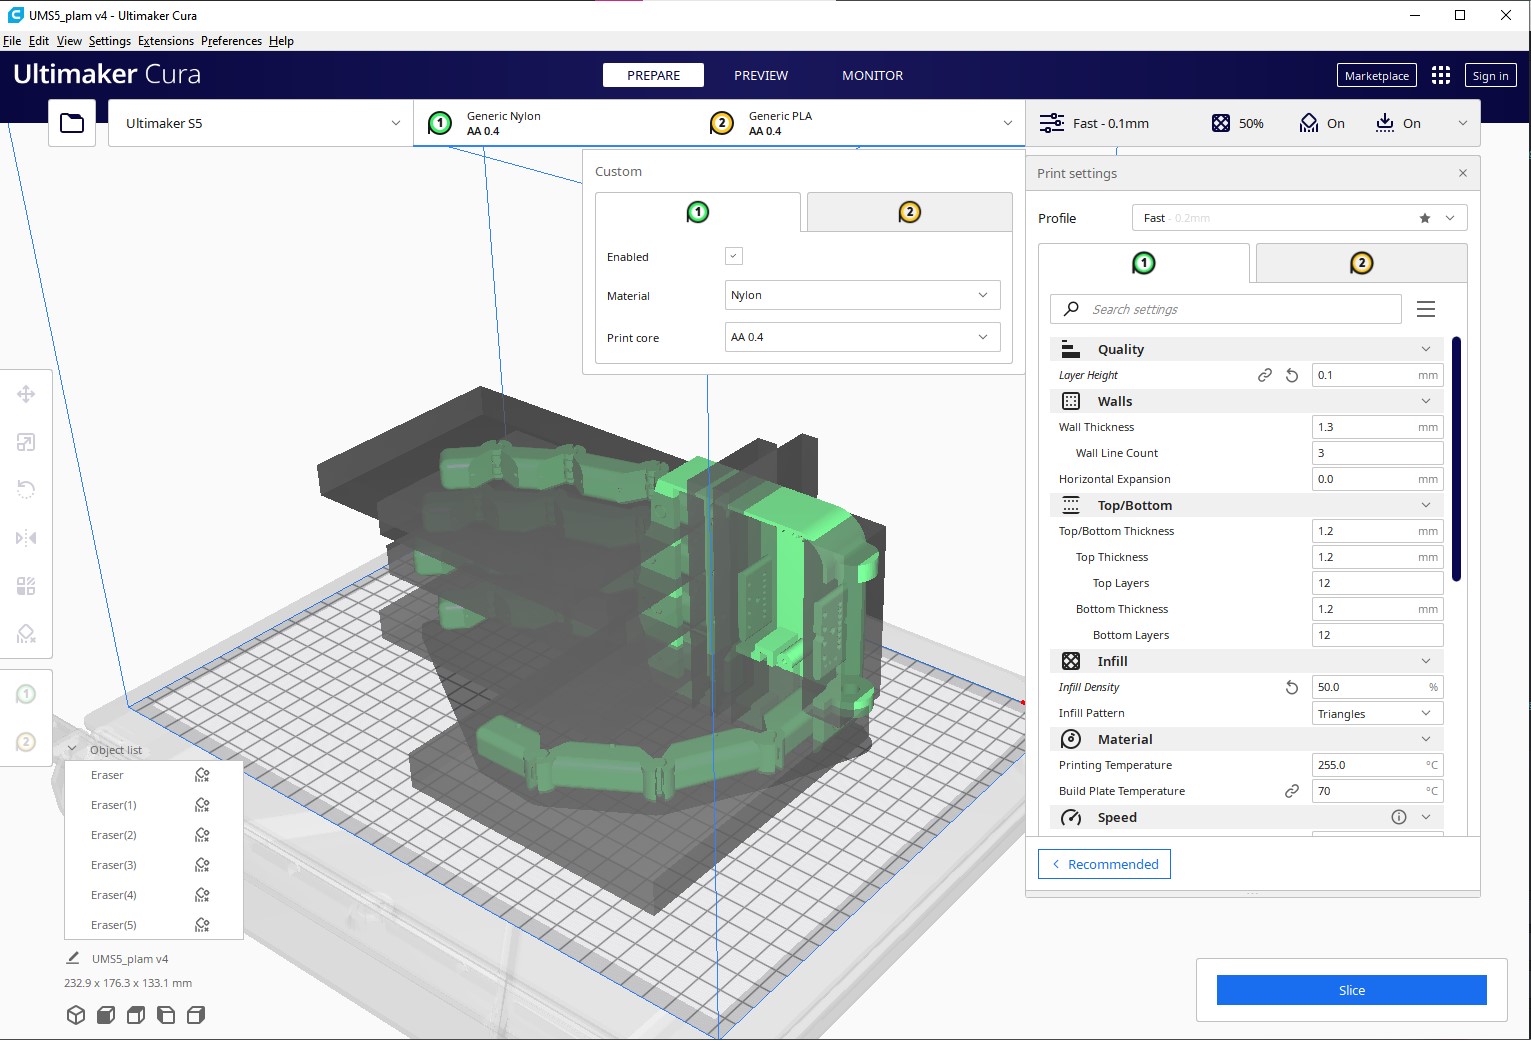
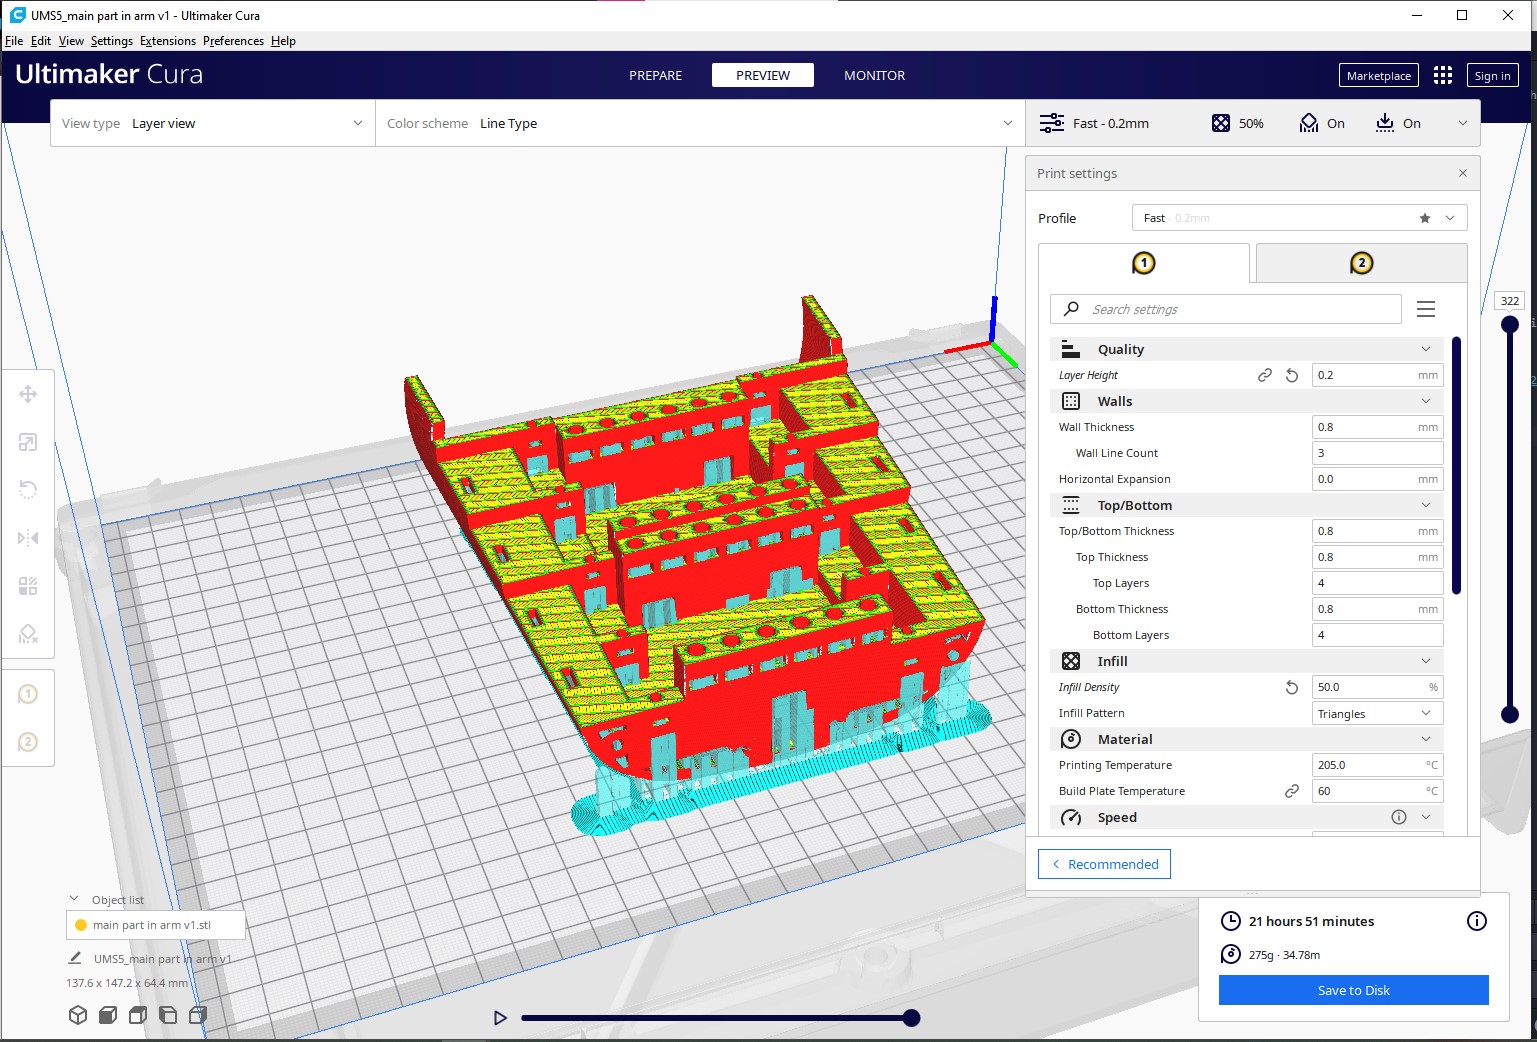
This is the main piece of the arm, as it contains places to install the servos motor, which accommodates 6 servo motors and 8 micro servos motor. The most difficult part in this piece was to find the best arrangement of servos to exploit the size. It also contains channels for motors wires and contains a lot of nut to install all parts of the arm.
File to Download
Main structure
Slicing for 3D printing
For printing of this piece, it does not contain anything special, as the default settings were used as shown in the image below.
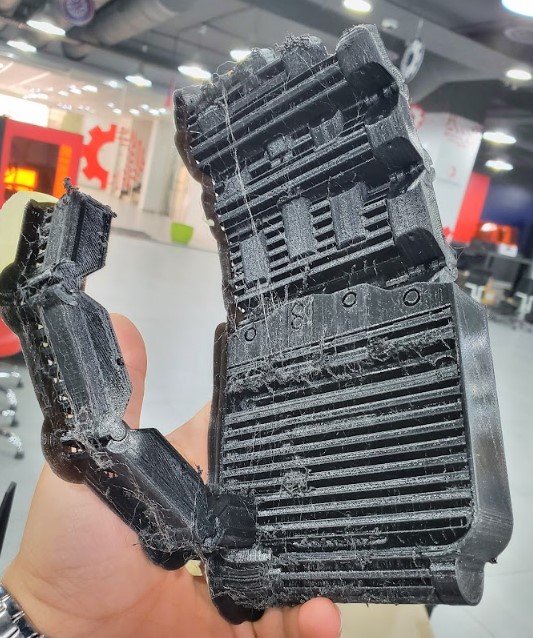
 Resalt
It is preferable to use a breakaway filament to support because the support located in places that are difficult to remove
2.2. Front Cover for arm
The Function
The function of this piece is to cover the front of the arm in addition to helping to hold the connection between the arm and the hand.
File to Download
Front Cover for arm
Slicing for 3D printing
For printing of this piece, it does not contain anything special, as the default settings were used as shown in the image below.
 Resalt
It is preferable to print it in this direction to get a good surface finish.
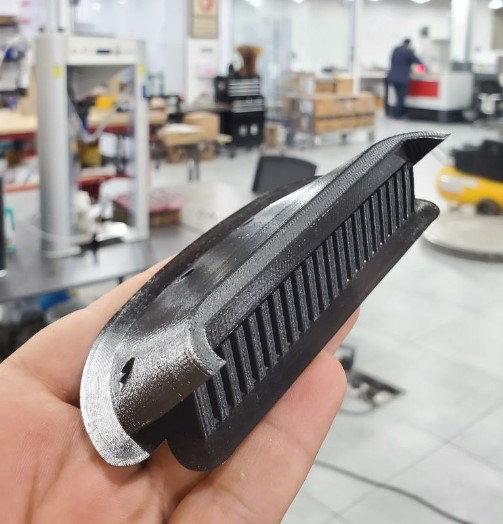
2.3. String spacer
The Function
This is one of the most important parts of the arm as it is used to give a specific path of string from the hand to the actuator.
File to Download
String spacer
Slicing for 3D printing
It was printed in this direction to reduce the amount of support and it is important to put a block support at hole for not closing it.
 Resalt

2.4. Servos
The Function
The servo motor is the actuator in the prosthetic hand I used two sizes of servo motor that depend on how much torque is required to move the joint.
File to Download
Micro servo
Servo Motor

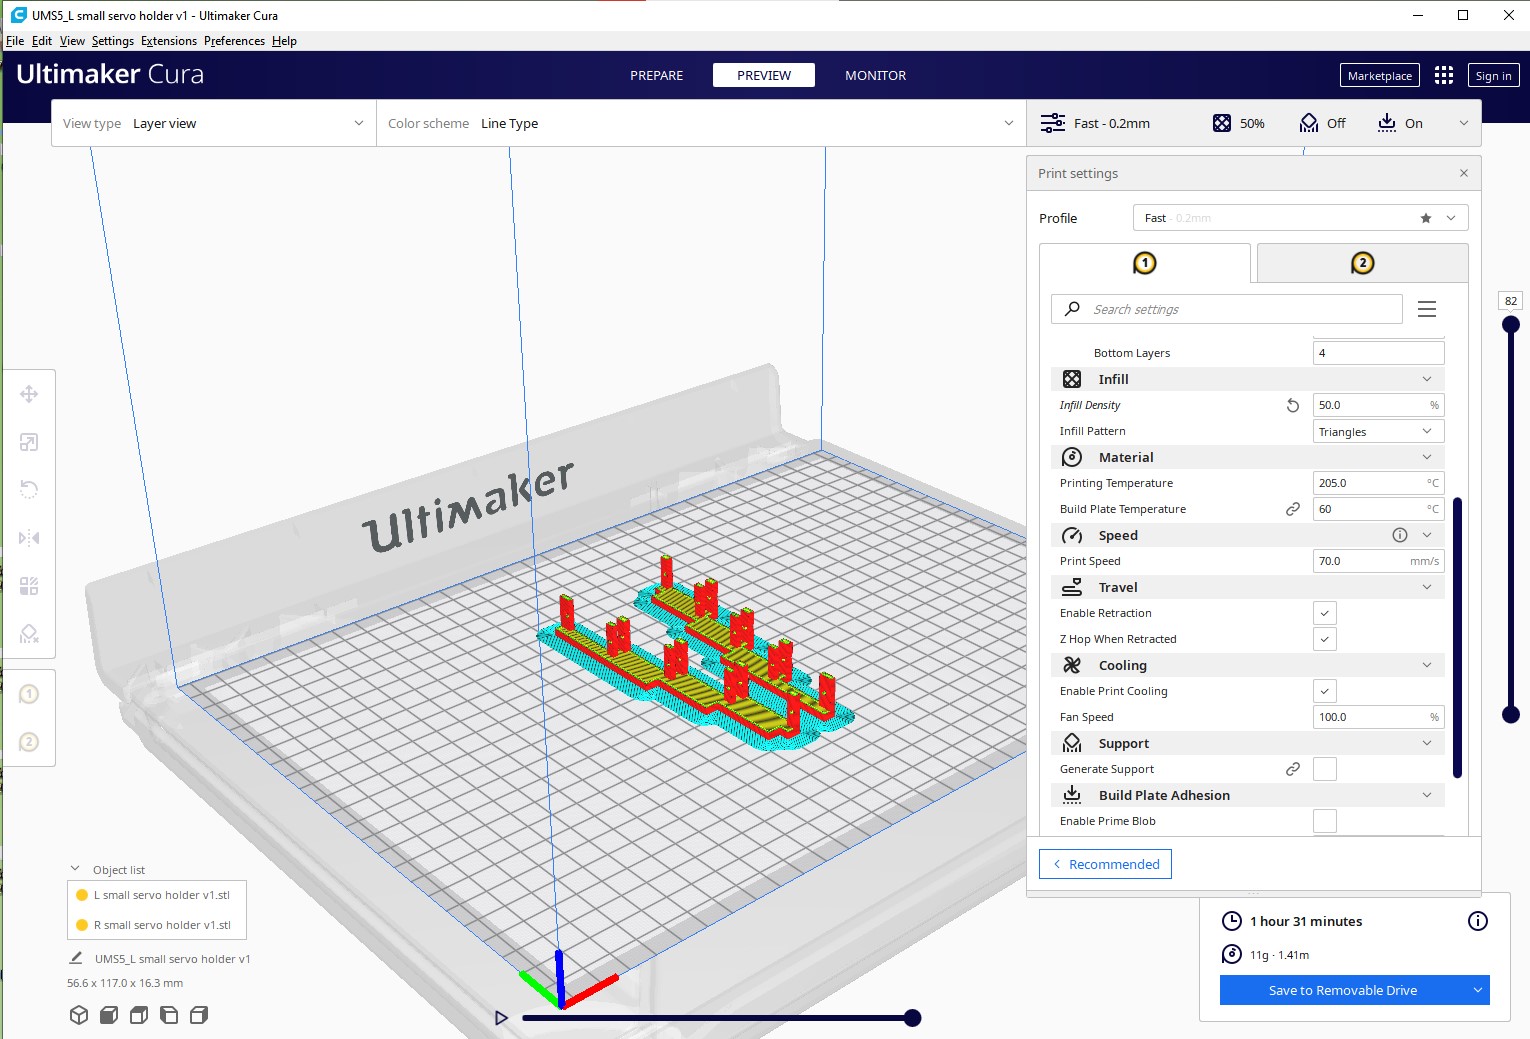
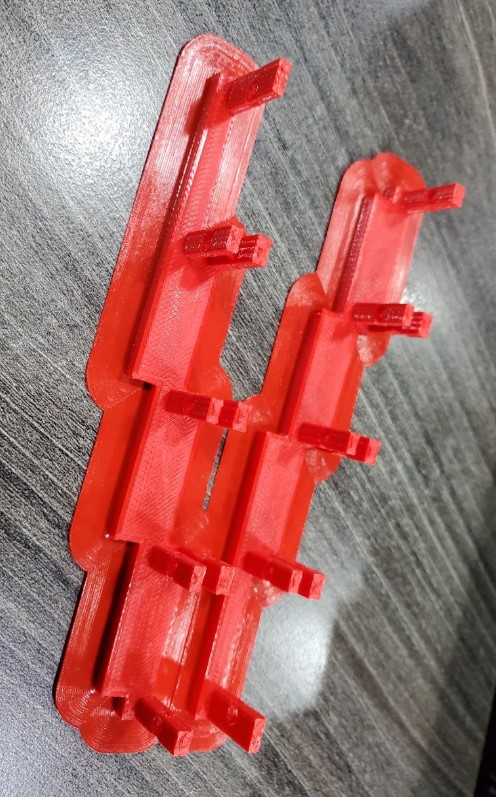
2.5. Small servo holder
The Function
This piece is used to fix the micro-servo and keep the vertical distances between the motors.There are two pieces of them mirrored, one on the right side and one on the left side.
File to Download
Left Micro Servo Holder
Right Micro Servo Holder
Slicing for 3D printing
For printing of this piece, it does not contain anything special, as the default settings were used as shown in the image below.
 Resalt
2.6. Arme Cover
The Function
This piece is used to cover the parts of the arm. This piece contains pins for alignment. It is also characterized by being built with screws from the inside, meaning that it does not contain any screw on its outer surface. as we will see on the assembly page.
File to Download
Arme Cover
 Slicing for 3D printing
It was printed in this way to save time, but it is preferable to print it vertically. This will add more support, but you will get an excellent surface finish.
 Resalt
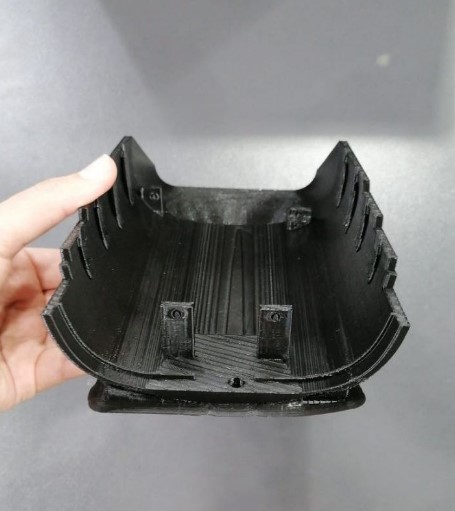
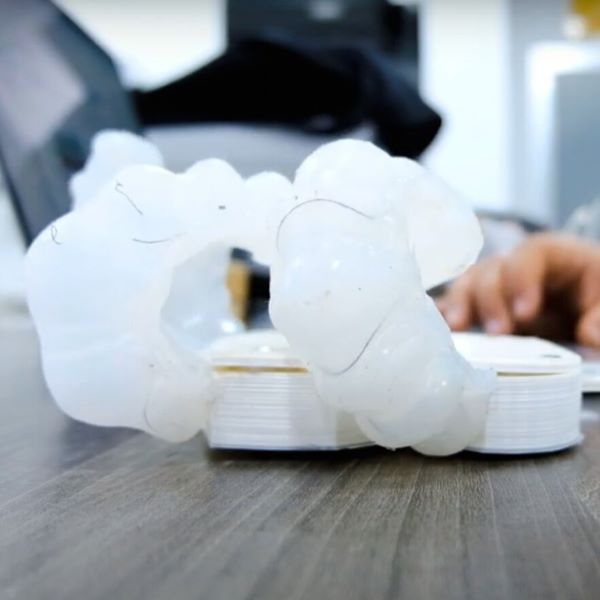
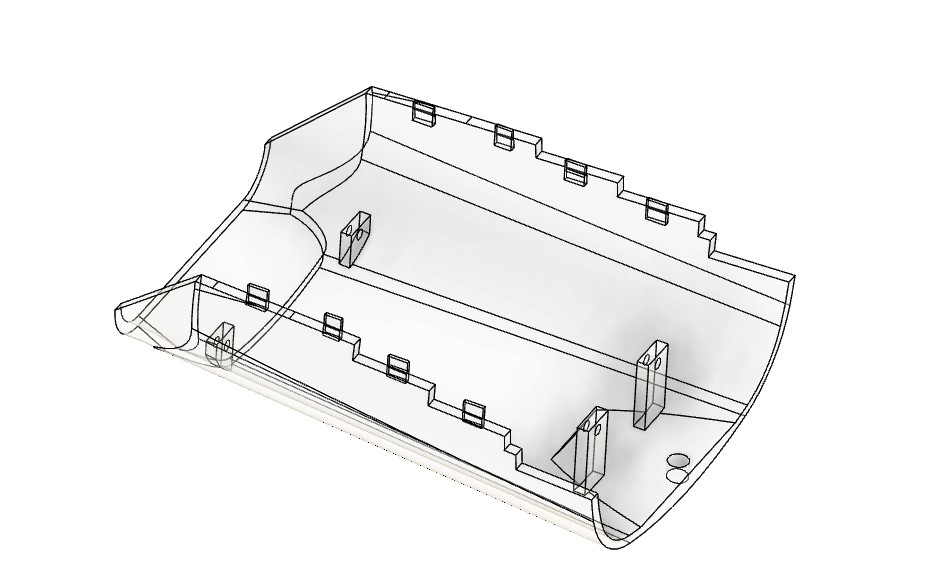
2.7. Arm Socket
The Function
This piece has been designed to install the prosthetic hand on the human limb. This piece is designed to be printed with Tpu. A fabric and sponge will be placed over it and fixed by placing tightening ropes that will be installed on the side end.
File to Download
Arm Socket
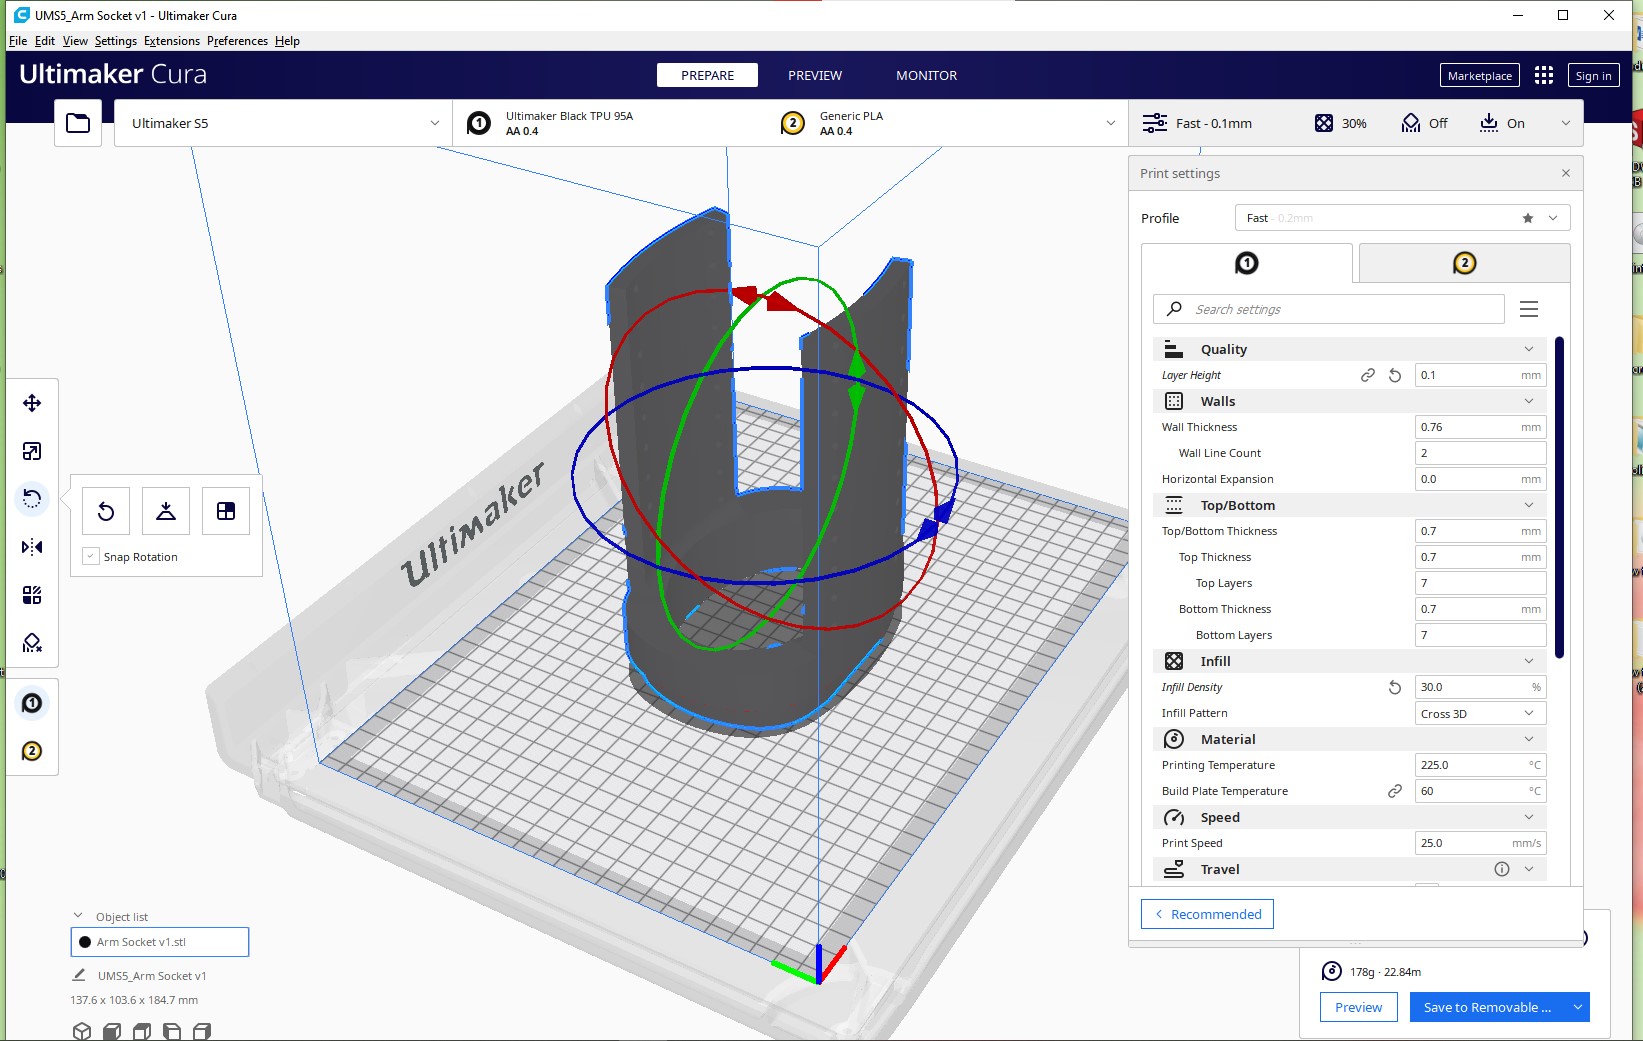
Slicing for 3D Printing
I started by changing the material to TPU and then reducing the layer height to 0.1mm For a better surface finish.
 Resalt