Week I’ve Lost Count
Much has been happening…
Since my last update I have pretty much settled on the basic innerworkings of it all. I was mostly held by making sure what I could actually get here in Portugal. We might be in Europe but it’s such a small market a lot of stores and items, especially more technical stuff is very hard to find over the counter or even just ordering within the country. The only things still in Limbo that I don’t have yet are the metalic skeleton I modeled and hopefully can get a company to cut it with a laser or water jet and a bigish flat coil spring. But more on that later on.
I’m confident I can finish the project in time but am getting a bit nervous as the deadline keeps getting closer and I still need to figure out those 2 details.
Sensor Time!
After the last update I kept researching Angle Hall Effect sensors and eventually I settled on the AMS AS5600L.
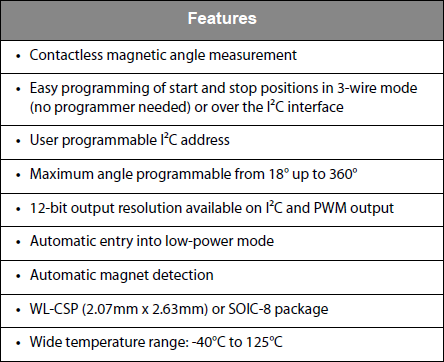
Look at all this marketing talk!
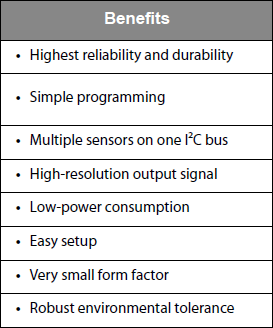
Many features, wow.
It’s actually a pretty serious and complex piece of kit as the block diagram shows. 12 bit register means it has a sensibility of 0-4095 which deviding 360° by 4096 gives me 0.088ish degrees. Realistically it’s at least 2-3x more precise than regular encoders. Plus the fact that it has no moving parts so extra reliable.
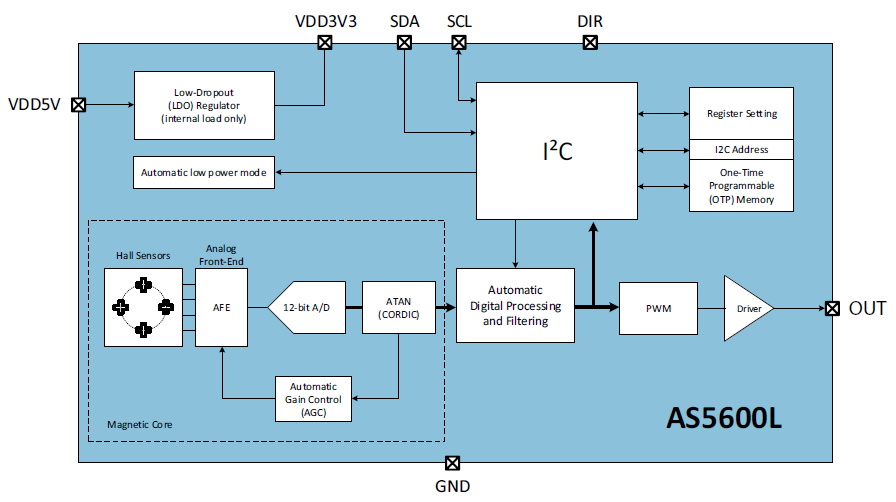
But in all honesty 80% of the reason I got the AS5600L was becauses they were one of the few in stock.
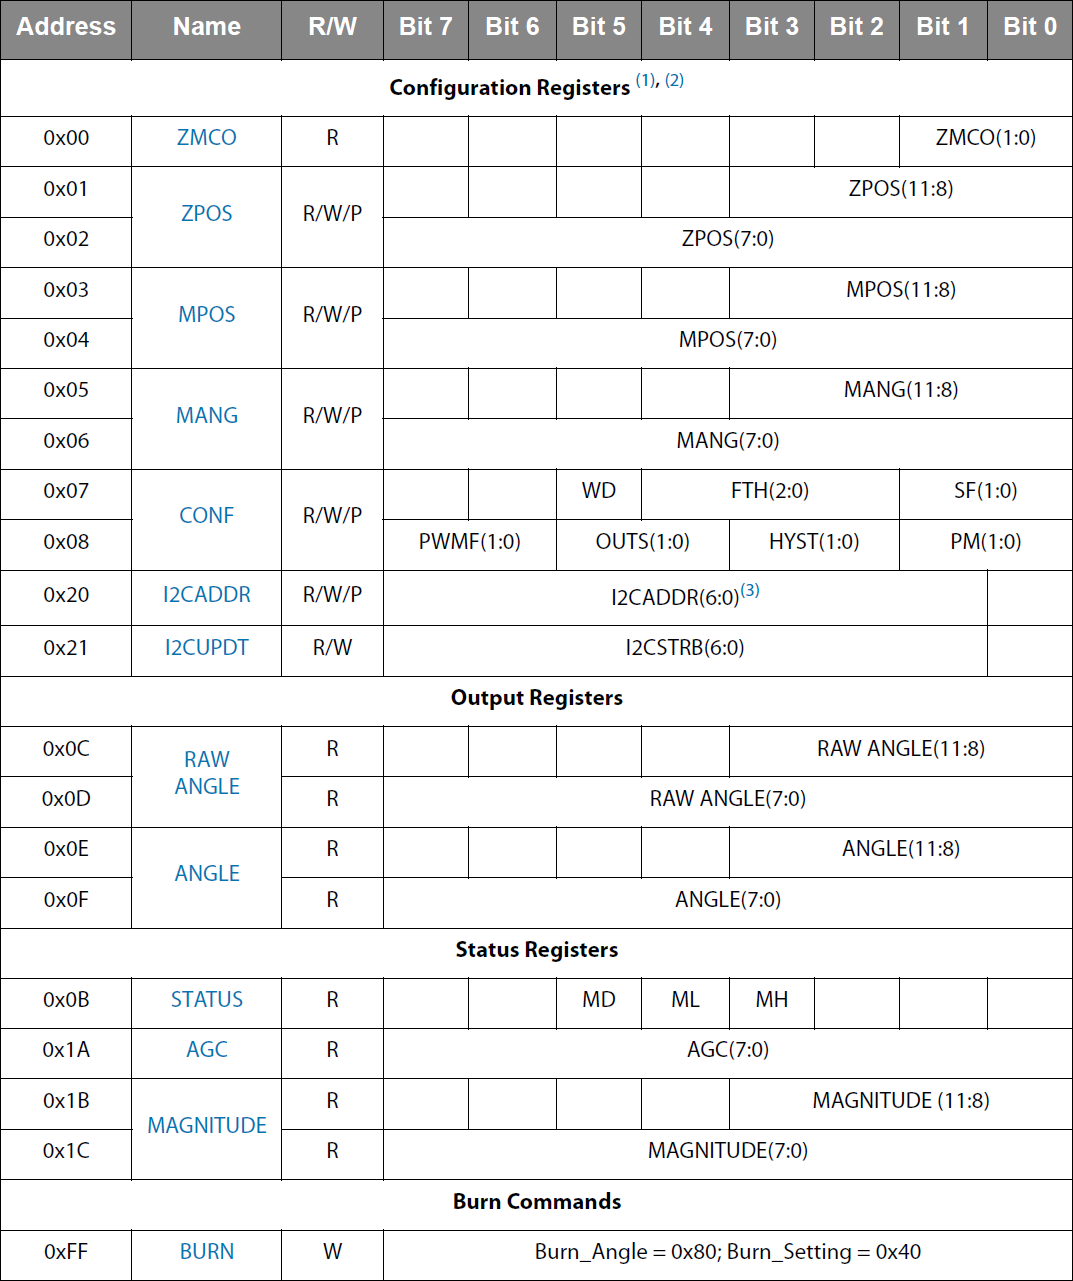
All these registers mean lots of i2c practice.
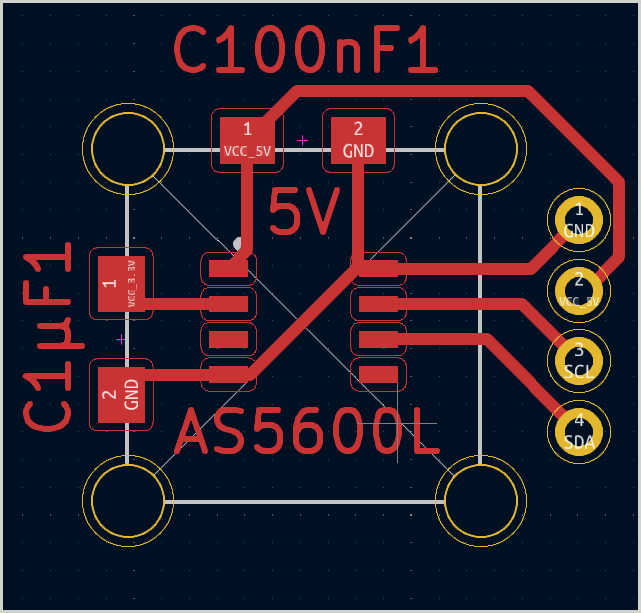
For input week’s assignment I had to wait for the sensors to get in but I started working on the daugter board (and a Universal Testing Fixture for SOIC chips that I’ll try to upload documentation on later.) Once the sensors arrived I started trying it out on an Arduino and it worked!
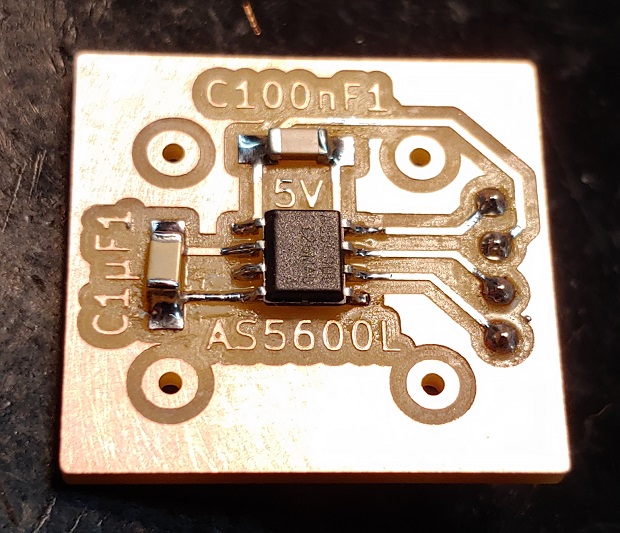
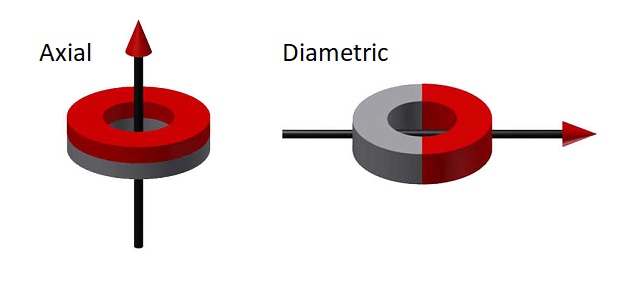
Turns out finding diametric magnets was way harder than I was expecting. Took a week or 2 to figure that out… For testing purposes I just used a regular axial magnet on it’s side to check the status registers and eventually get some preliminary angle readings.
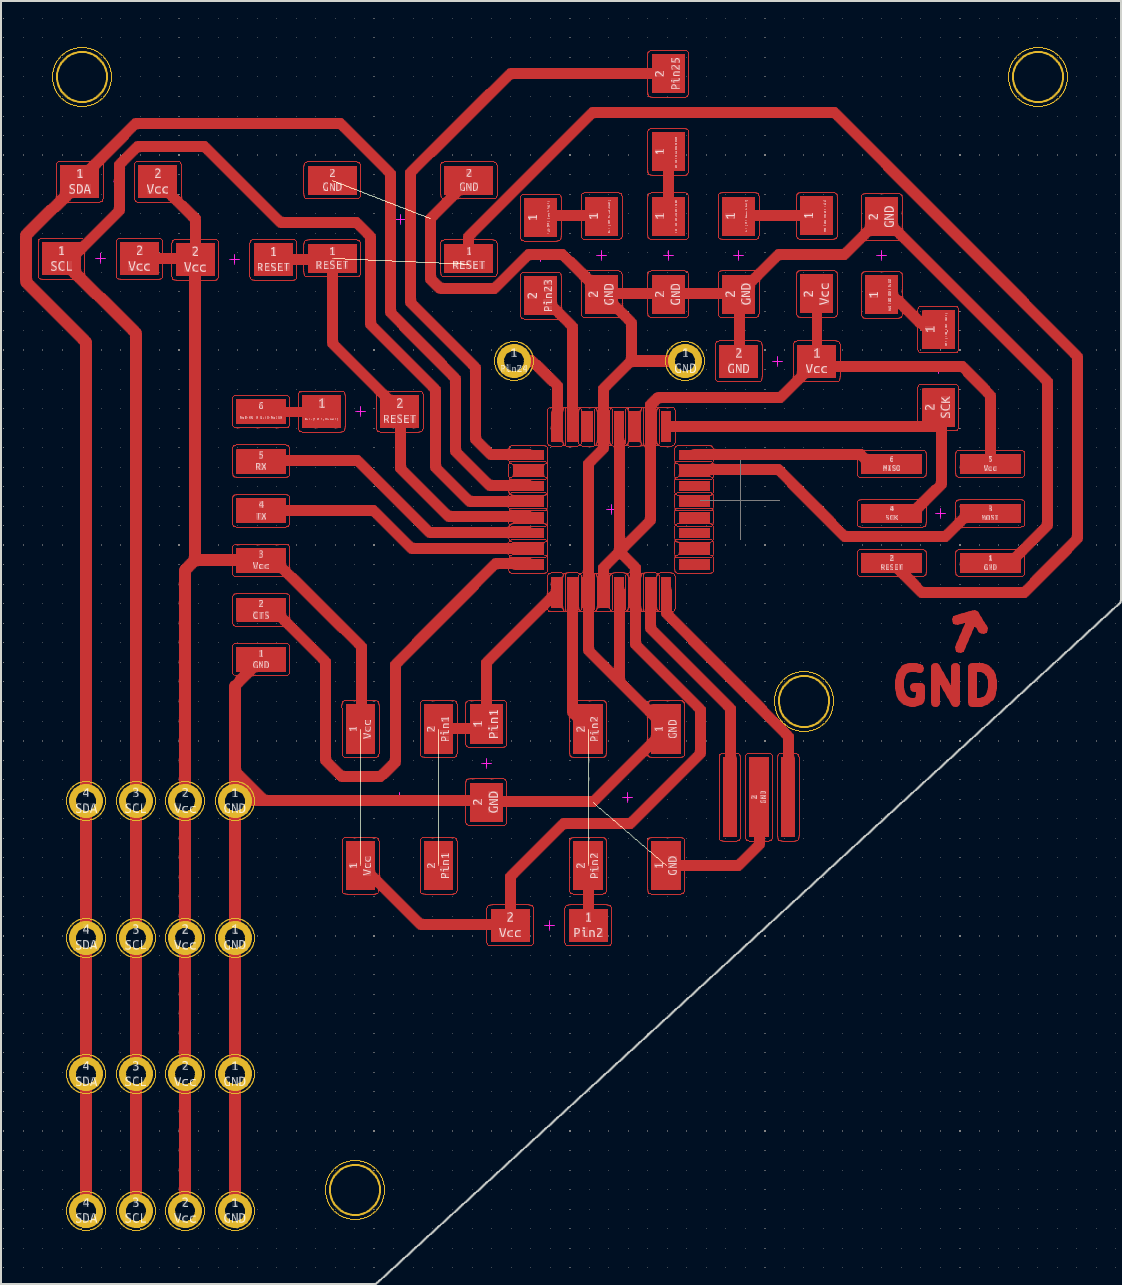
In theory I finished the motherboard too, but 1st attept at milling it failed because the V-bit was done for and only scratched the copper, 2nd try was with a new fantastic square end-mill but the end-mill was much wider and we had to trick FlatCam into still following the disired path between the Atmel Mega328p. Oh, yeah. I picked the micro-processor I’ll use. It’s an Atmel Mega328p. Which happens to be a in a TQFP32 package so the pins are much tighter together which meant FlatCam would refuse to remove the copper between the pins. I didn’t change the traces so they ended up too fragile. I’ll have everything up on the Input assignment page.
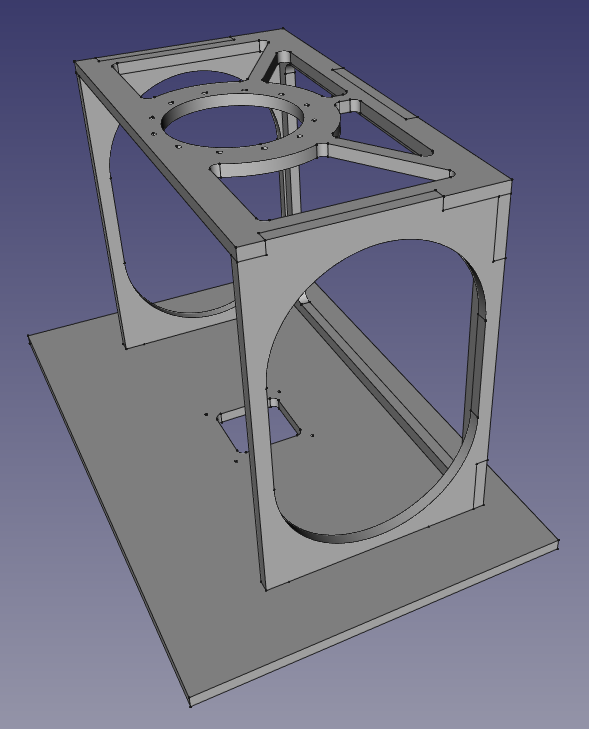
I was going to do some thermo-formed masks for wildcard that I had been talking with my instructor since we 3d scanned our faces and the Mayku FormBox at the FCT Fablab had never been used. Was a good excuse to use it but I was going to have the oportunity to get a quick tutorial on soldering from a friend of the family this week so I ended up modeling some parts to have cut and try to solder. I already sent them the .step files and I’m waiting to hear back from the company that was most receptive to help.
That said I did 3d print a Slew Bearing I got from here. I think it was during 3d print week that someone posted about Christoph Laimer’s youtube channel and I thought it looked pretty neat so I bookmarked it. Ya never know when something like it could be useful and well it ended up being quite useful.
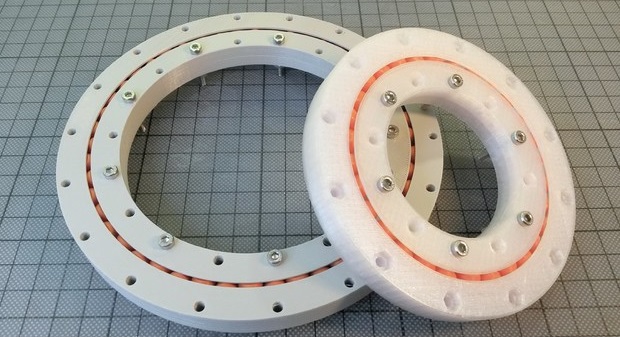
(These aren’t mine, it’s printed but I couldn’t go to the Fablab today so my instructor got them printing. I left the code ready off the slicer but they took quite a while so Filipe got them printing for me today.)
Hopefuly I can get the parts cut so I’ll have more details on the Wildcard page. If I can’t get them cut I’ll have to revise the structure for weaker materials but worst case scenario it should work with mdf. Even if it’d ruin my plans of having none or a transparent shell to show off the interior. Maybe add some LEDs #PCMasterRace #RGB4Life
Conclusion of which ever week this is…
Found 3 companies that make springs in Portugal, 1st doesn’t make flat coil springs, 2nd one doesn’t work with flat coils as long as I need and I’m sure the 3rd one does work with the kind of spring i’m looking for but they haven’t gotten back to me so I don’t know yet if they have any long enough without being too big to be usable or if I have to order an obscene ammount of them… Only emailed them today so I’ll wait a bit more. If I can’t get new springs I’ll just “borrow” a couple from measuring tapes.
Assuming the motherboard I designed doesn’t have any critical flaw next step is finishing up some rudimentary code and change adresses on the AS5600L from 2 daughter boards. Which I’m a bit nervous about given the warning:
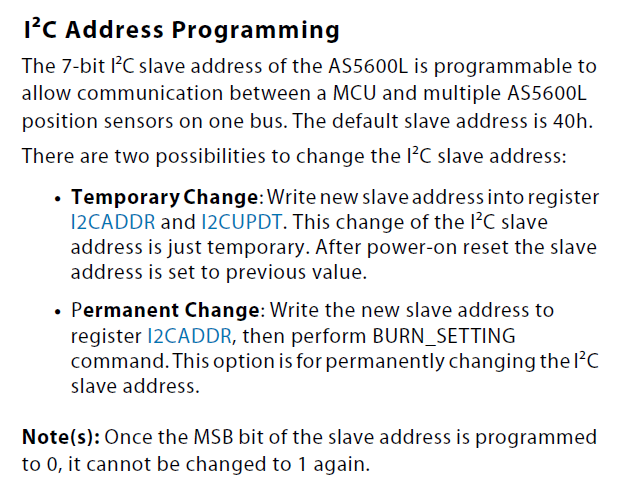
I have a few spare ones which would still work independently. I just need to be sure I don’t somehow end up burning the same address on all of them…