6. 3D Scanning and Printing
Group Assignment - Design rules for the Prusa MK3+
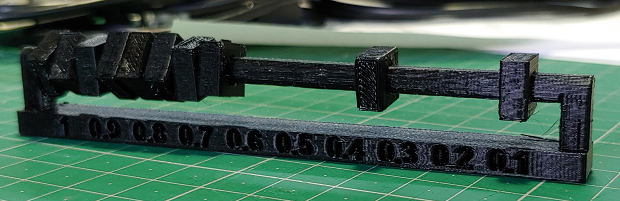
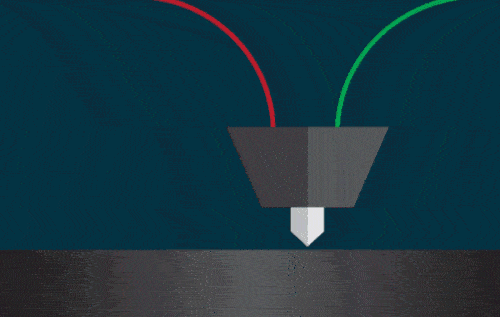
To test how the MK3+ works I used prof. Neil’s .stl test files
Note to self: Printing these with black filament wasn’t smart.
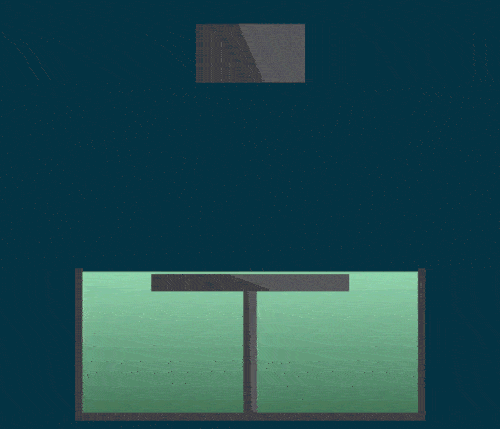
Bridging settings aren’t awful.
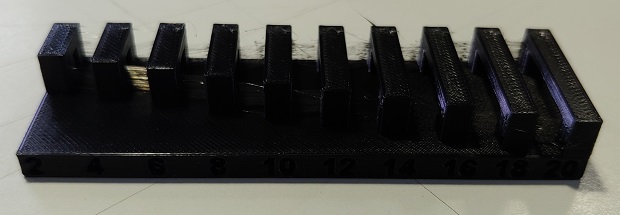
Things only started to go bad at 20mm bridging. Although with some tweaking and a more controlled temperatures it might go even further.
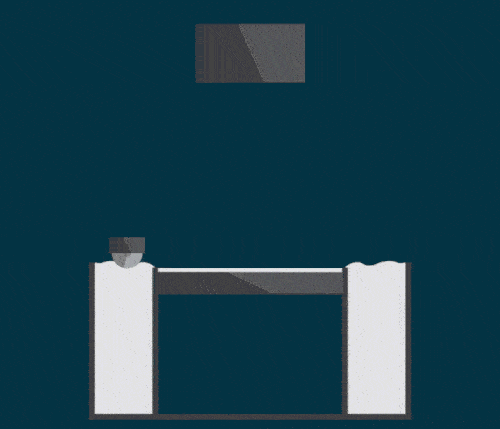
I did an upsy. My first spaghetti!
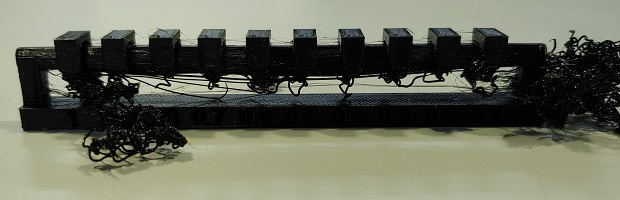
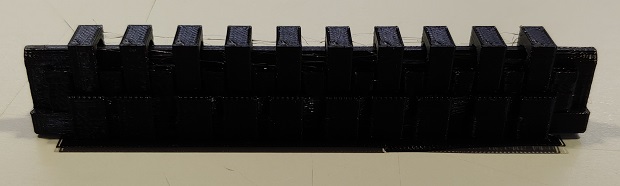
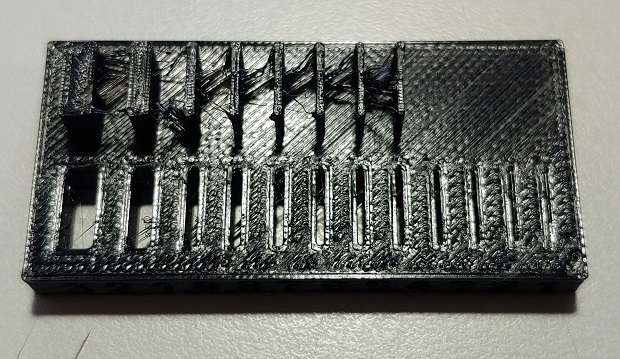
Now with supports.
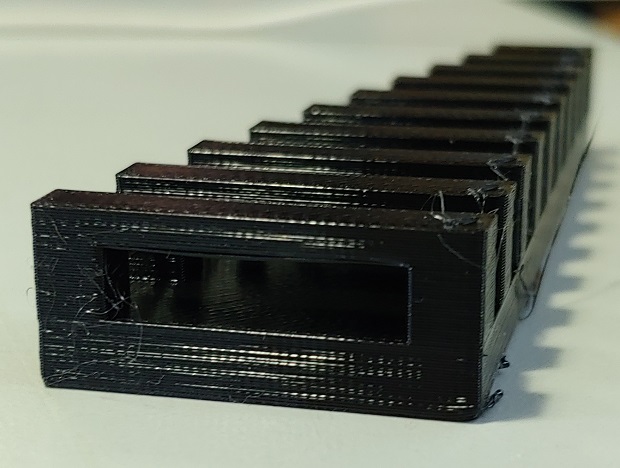
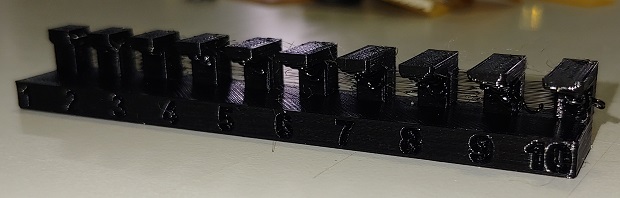
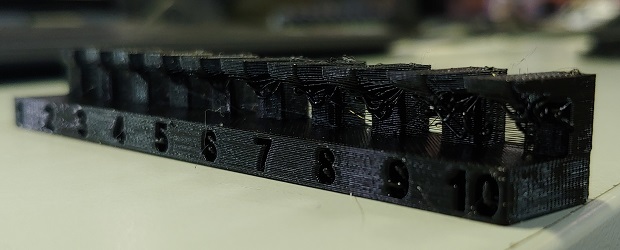
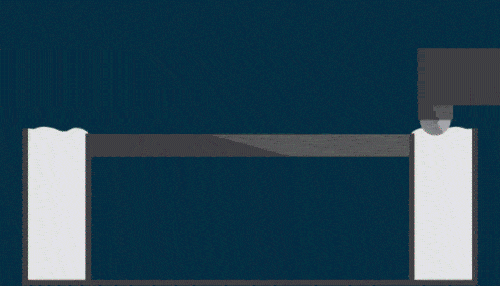
0.1 was fused, 0.2 isn’t but won’t really turn. The layers act as teeth and add a lot of friction when trying to rotate. 0.3 might be the sweetspot without some sanding.
Attempts at overhands above 3-4mm are pointless.
Prof. Neil used an SLA printer for this test but since we were out of resin I used a regular FDM.
Editor’s note 2023
I should add that after trying to print some flat coiled springs for my final project I pushed the limits of how close one could print thin walls together and found that the test file was kind of pointless when doing sort of “thin depressions” into the print volume. Walls could fuse because of where the model was placed, the position and movement speed of the print-head, the way the slicer interpreted very thin walls and very thing empty spacing… For some sorts of models that are pushing the printer to it’s limits a good solution would be for the slicer to have a more complex form generator so it could make models closer to the printer could actually do.
Individual Assignment - Printing
3D printing is the quintessential additive manufacturing process. Unlike processes of old where you start with a big block of stock material and chip away to reveal your object in 3D printing we start with “small chips” and fuse them into a bigger model. Hence the adding.
The workhouse of the lab is a MK3+.
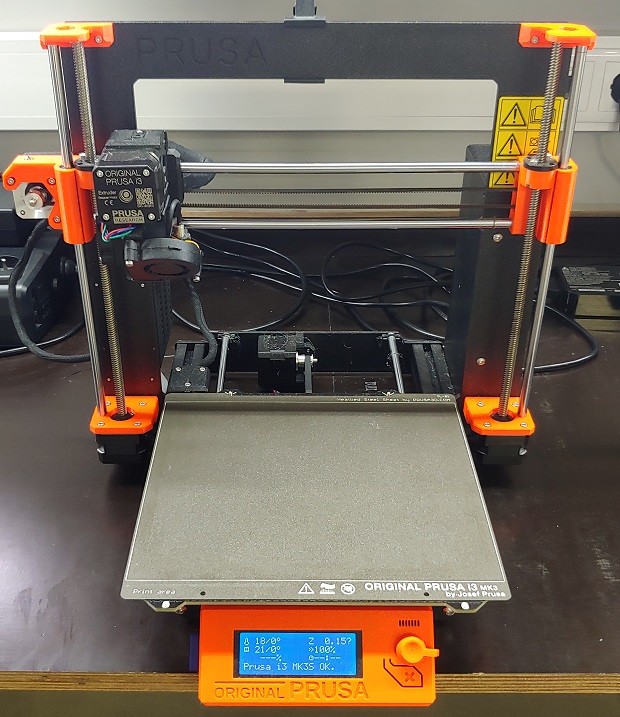
| Spec | Prusa Mk3+ |
|---|---|
| Build Volume (W x D x H) | 250 × 210 × 210 mm |
| Layer Height | 0.05 - 0.35 mm |
| Included Nozzle | 0.4 mm |
| Filament | 1.75 mm |
| Max Travel Speed | 200+ mm/s |
| Max Nozzle Temperature | 300 °C |
| Max Heatbed Temperature | 120 °C |
| Extruder | Direct Drive, Bondtech Gears |
| Hotend | E3D V6 |
| Interface | SD Card |
| Power Supply | 240 W |
| Size (W x D x H) | 500 × 550 × 400 mm |
| Weight | 7 kg |
Mini helps out.
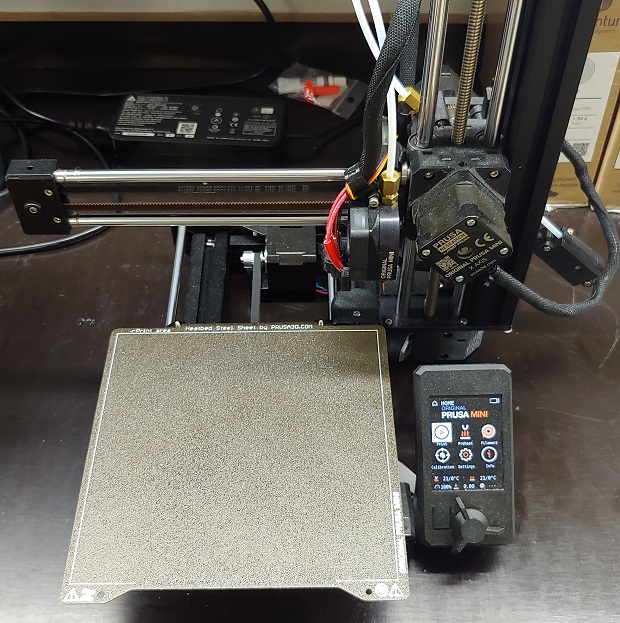
| Spec | Prusa Mini |
|---|---|
| Build Volume (W x D x H) | 180 x 180 x 180 mm |
| Layer Height | 0.05 - 0.25 mm |
| Included Nozzle | 0.4 mm |
| Filament | 1.75 mm |
| Max Travel Speed | 200+ mm/s |
| Max Nozzle Temperature | 280 °C |
| Max Heatbed Temperature | 100 °C |
| Extruder | Bowden System, 3:1 Gearing |
| Hotend | E3D V6 |
| Interface | USB Drive / LAN |
| Power Supply | 160 W |
| Size (W x D x H) | 380 × 330 × 380 mm |
| Weight | 4.5 kg |
There are a couple more printers. Ultimaker is noisy as hell but often has a 0.6mm nozzle installed so also does some larger prints.
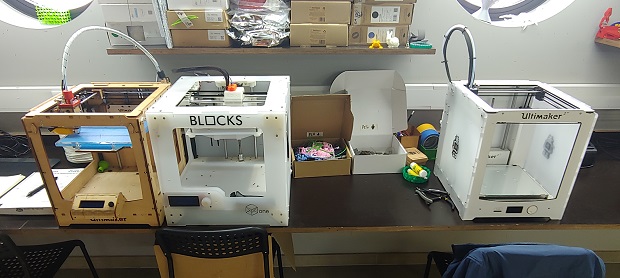
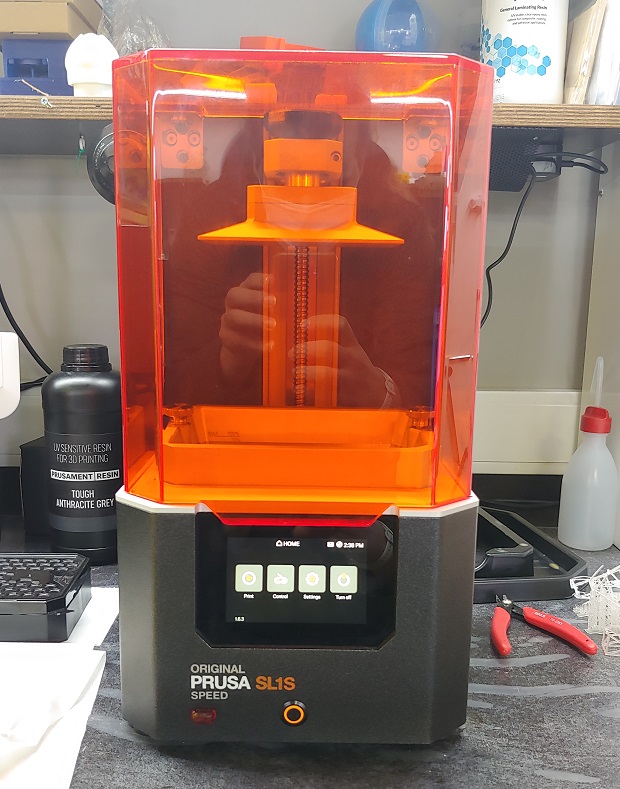
There’s also a Prusa SL1S, but we didn’t have any resin so I didn’t use it.
Found some really nice .gifs of the most common types of printing
First we have FDM - Fused Deposition Modeling. Just melting some plastic and smooshing it into individual layers that stick to each other.
SLA - Stereolithography uses UV light to cure special resins layer by layer.
Selective laser sintering - SLS has a similar concept to SLA but instead of liquid resin it uses powedered substances like metals and lasers to form layers.
Color Sintering is possible by adding pigments to plastic particles for example.
Hard To Machine Model
For this assignment we had to print something that couldn’t be made with regular subtractive methods. More on Subtractive methods in my Computer Controlled Machining assignment.
As by this week I was already behind because I still didn’t have a working TinyISP I was up for anything and when Adrian showed his assignment work during Global Open Time I figured his object would be quick and easy to re-model in FreeCad. So I did just that.
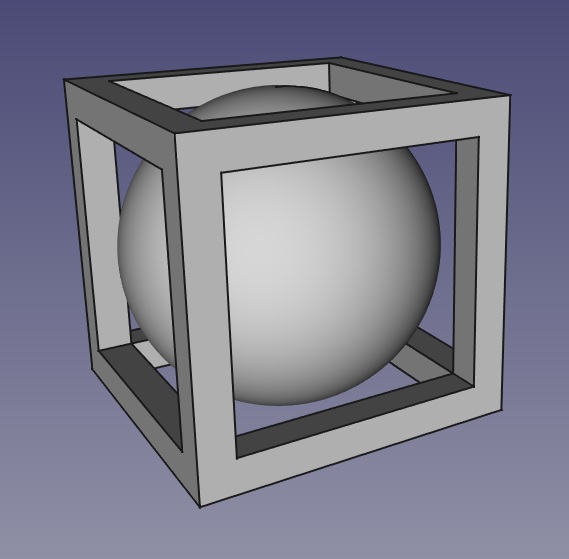
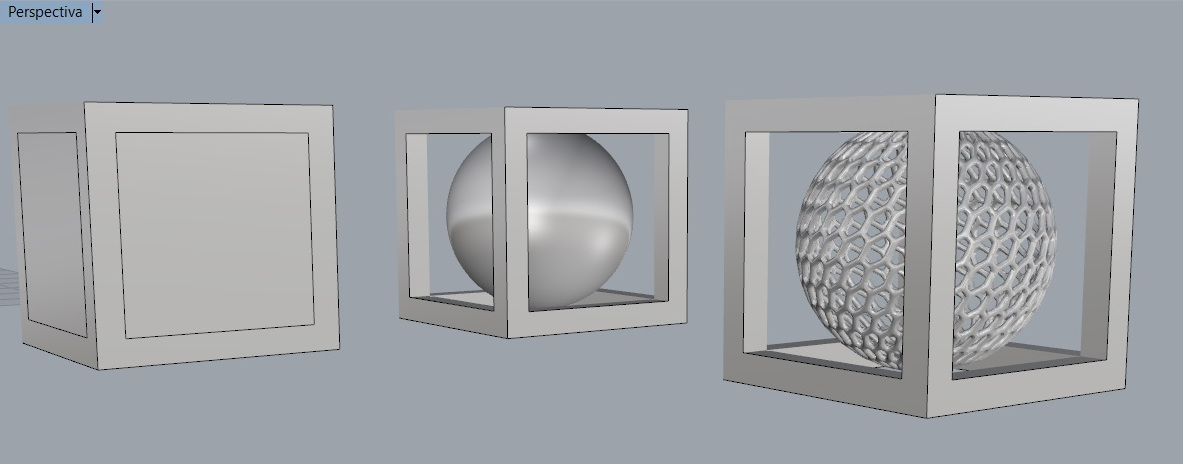
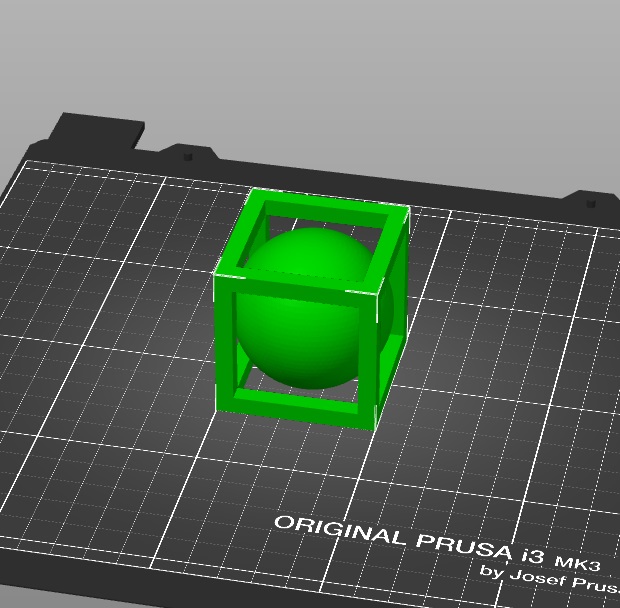
An object within another object is always virtually impossible to machine. It would be very hard to machine everything while keeping the inner object still as it’s finished and the removing the rest of the cavity material. Not to mention it would need a 5-axis machine with very advanced tool-paths made by a very experienced machinists. Not a job for the average maker.
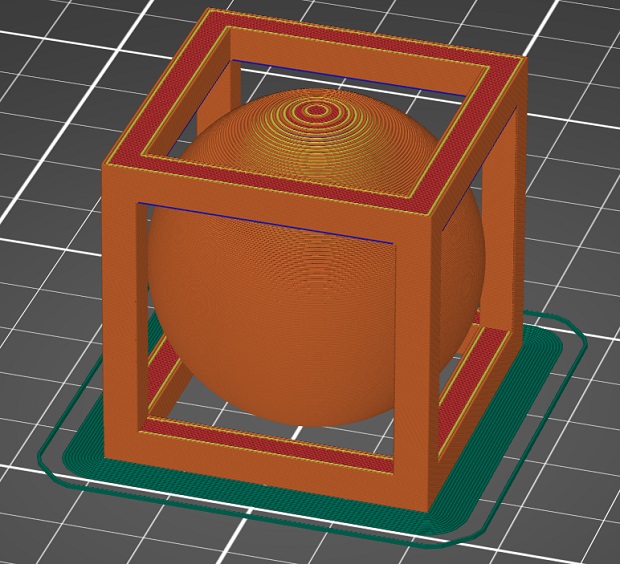
Prusa Slicer And 1st Attempt
Exported an .stl mesh file. Which seems to be the go to file format for 3d printing. After writting this I just thought I had never actually tried importing other file types. Prusa accepted a .step file.
My instructor mostly used Prusa Slicer so that’s what I got used to.
![]()
Couldn’t really get into Cura Slicer the couple of times I tried it. On the other hands I was quite intrigued by Kiri Moto which beyond the slicer for 3d-printing also has other interesting functions. Need to test it more.
Drag and drop works which is nice.
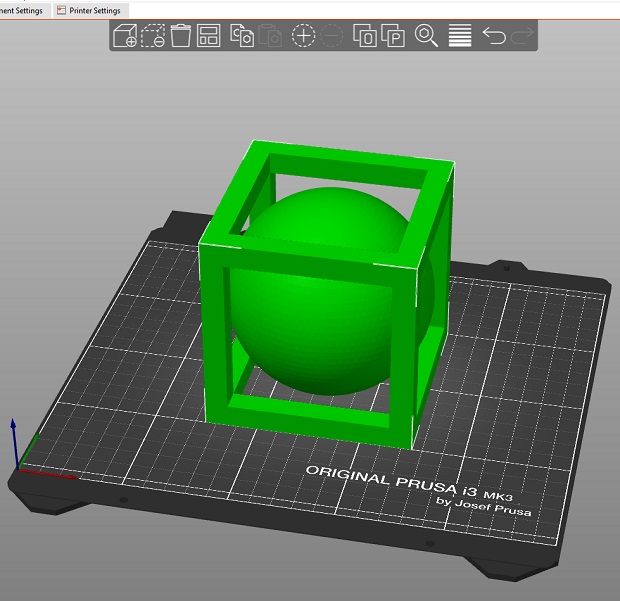
Might have exagerated the export dimensions.
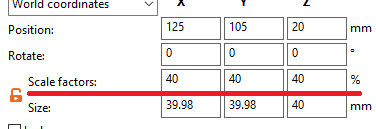
Scaled it down from 10cm to 4cm.
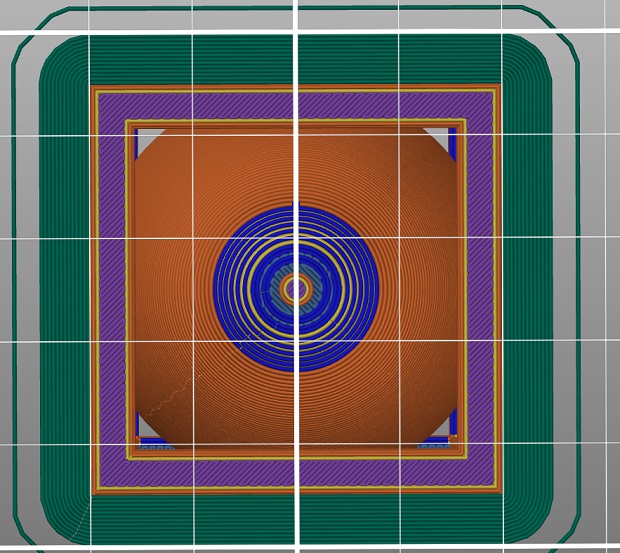
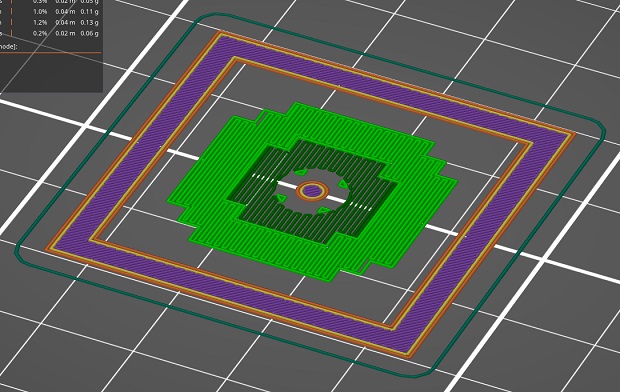
Basic settings with pre-defined profiles and limited customization for quick and dirty printing. Has tons of advanced settings to tinker with elsewhere.
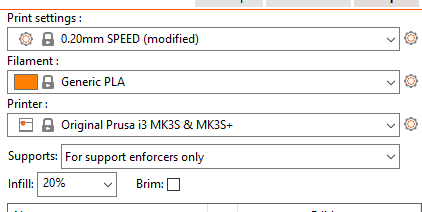
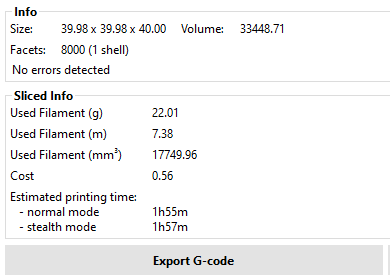
Bunch of useful info and estimates based on set config.
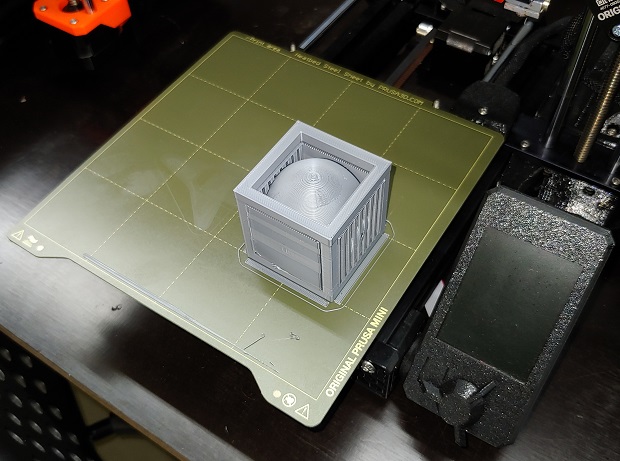
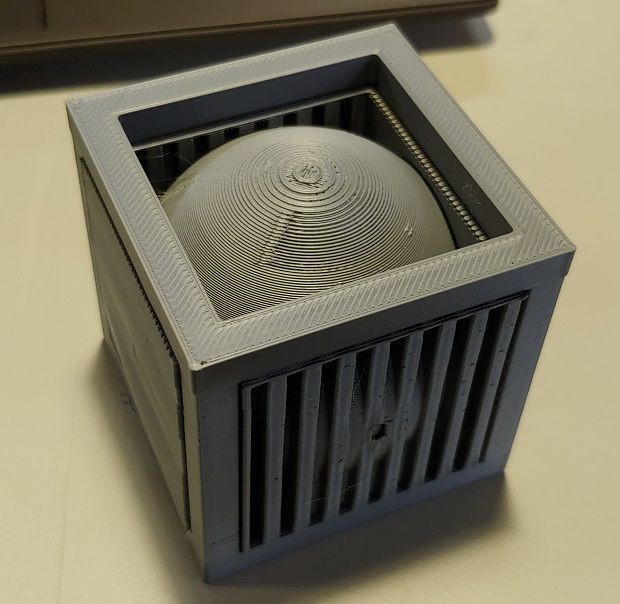
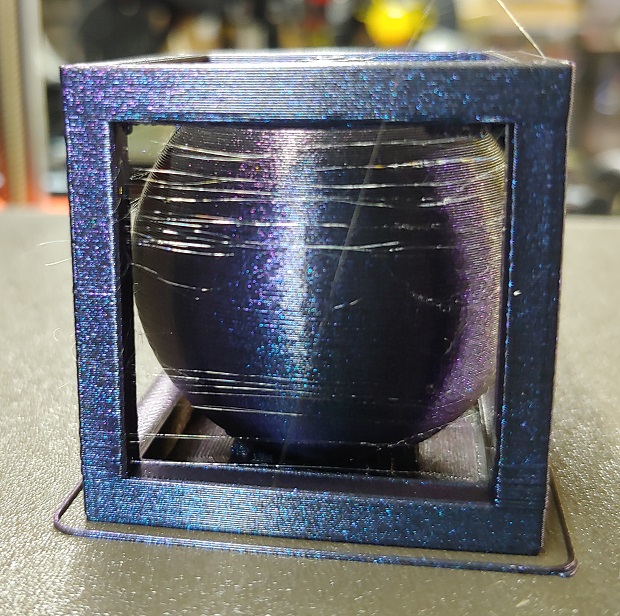
Looking nice.
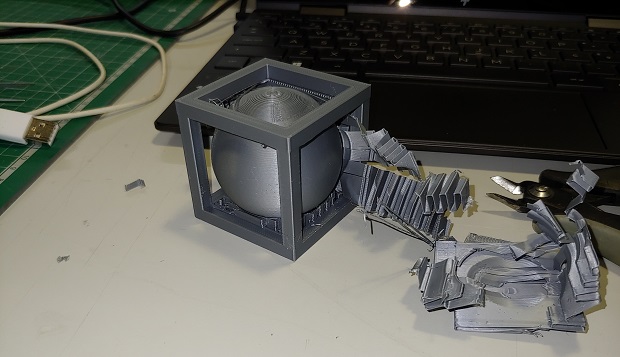
Kinda cheated with supports though.
Pulling everything out. Lots of waste material. If I ever get printers I want to have a way to re-use old supports and failed prints… There are a lot of support related advanced settings that can help cut print time and waste.
Top of the sphere looks great.
Bottom, not so much.
Now Without Supports
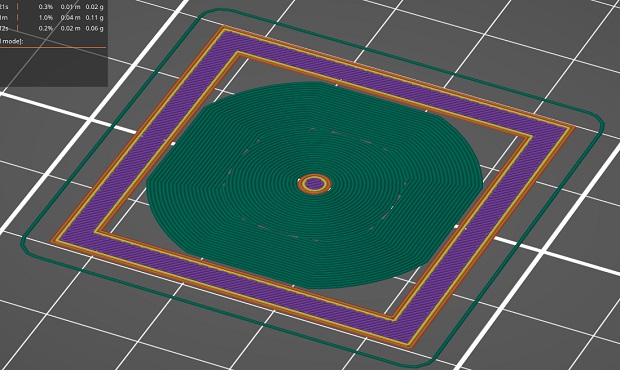
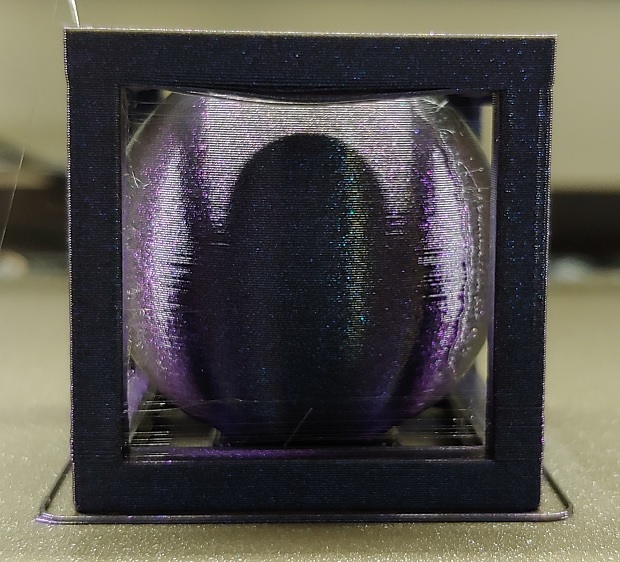
Tried printing without supports and things got interesting.
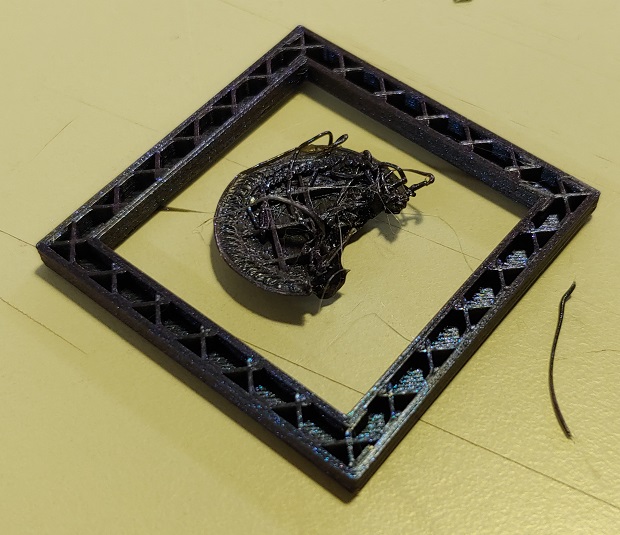
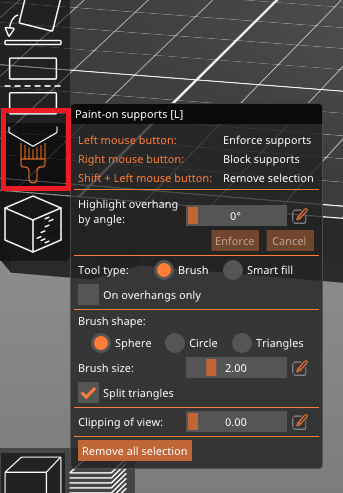
Testing Paint-On supports.
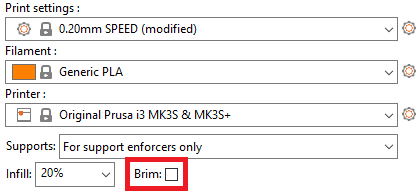
Also clicked for a Brim as insurance.
Still failed… Supports helped stabelize it for a few more layers but it still failed.
Brim was only generated on the oustide.
Started looking for more Brim settings and coulding find anything useful.
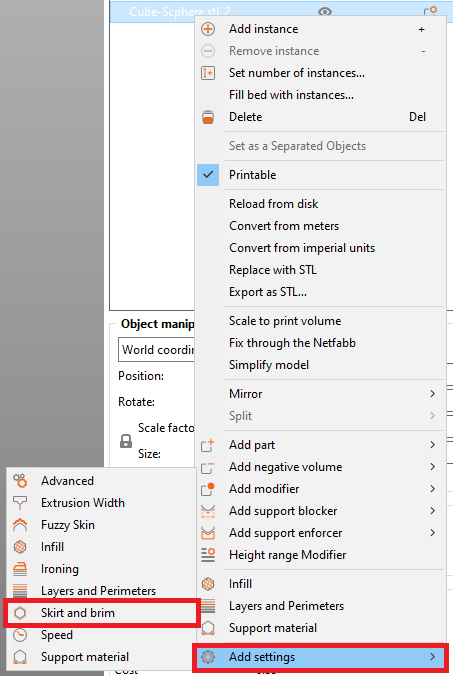
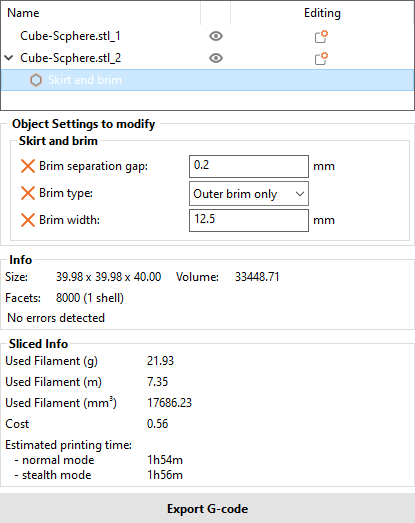
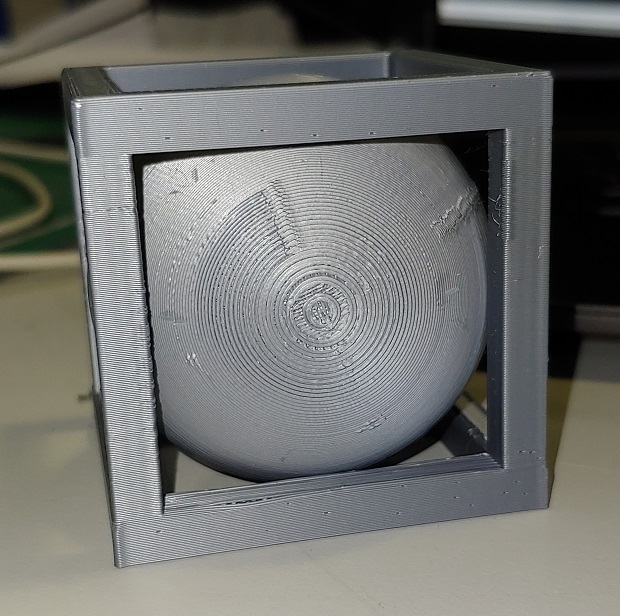
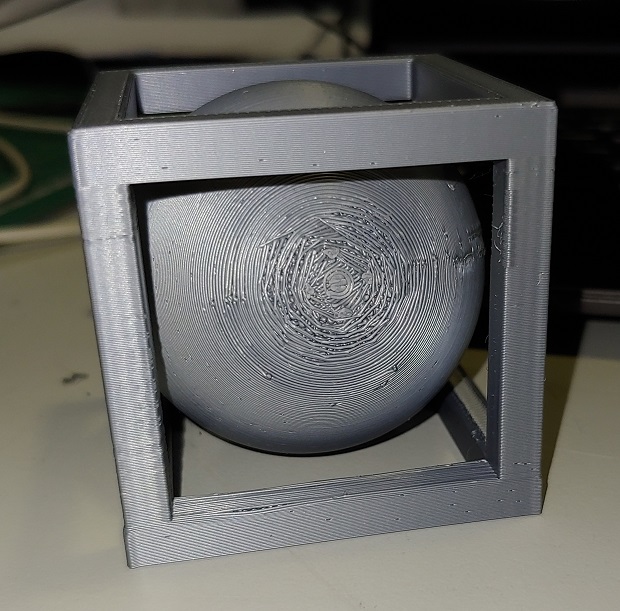
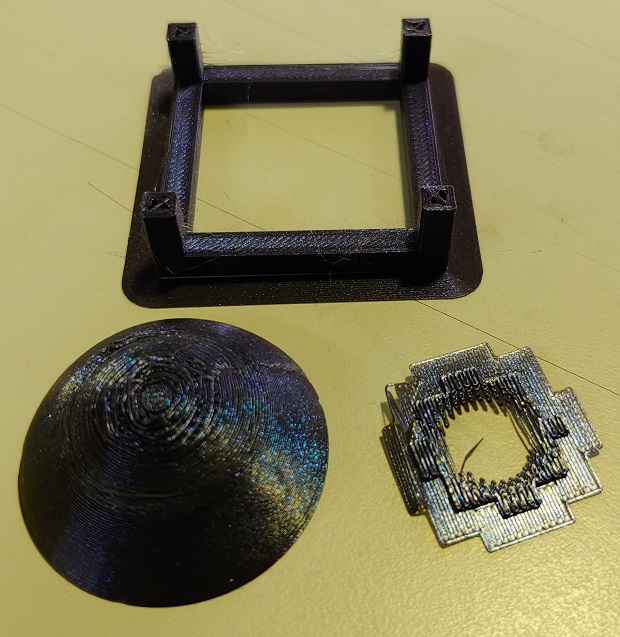
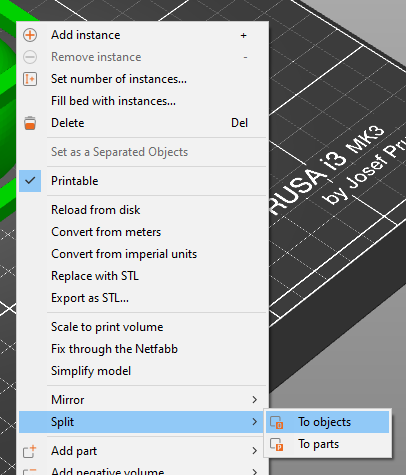
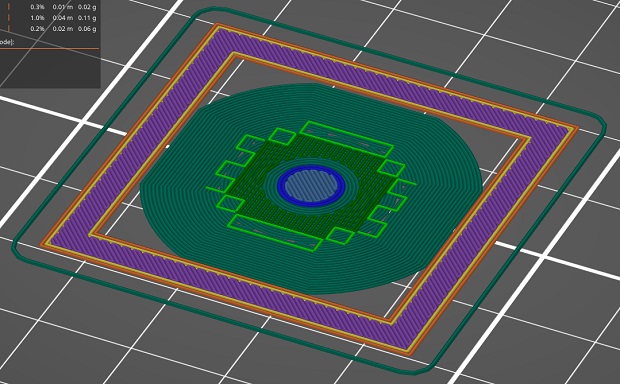
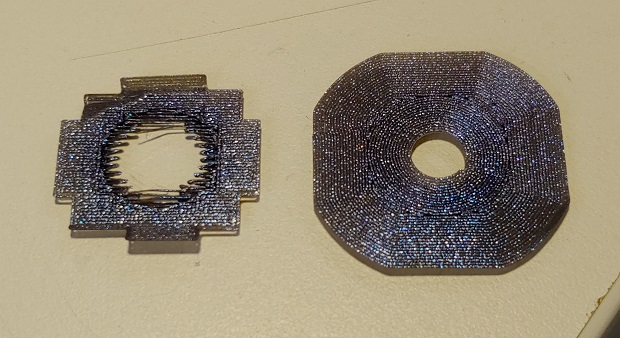
After some attempts nothing changed so I just decided to split the model into the hollow cube and ball.
Painted supports on the ball again and inspected changes to the Brim settings.

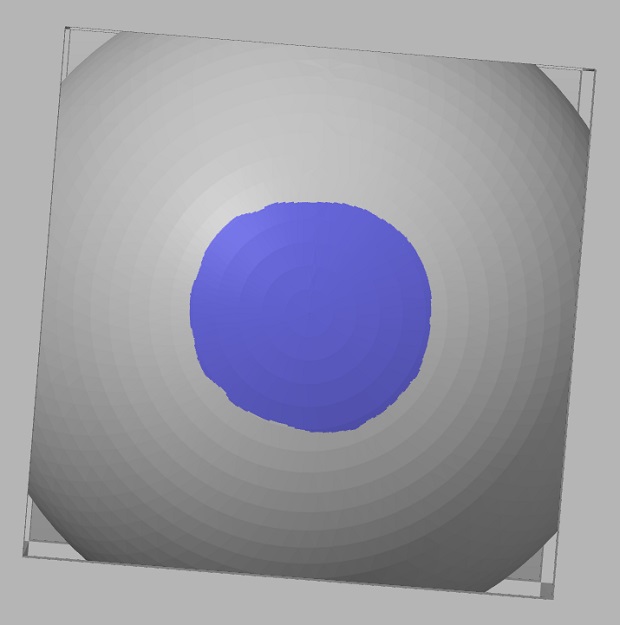
1st layer of painted-on supports like before.
1st layer with a giant Brim.
The layer above the Brim.
Bit stringy but came out pretty decent.
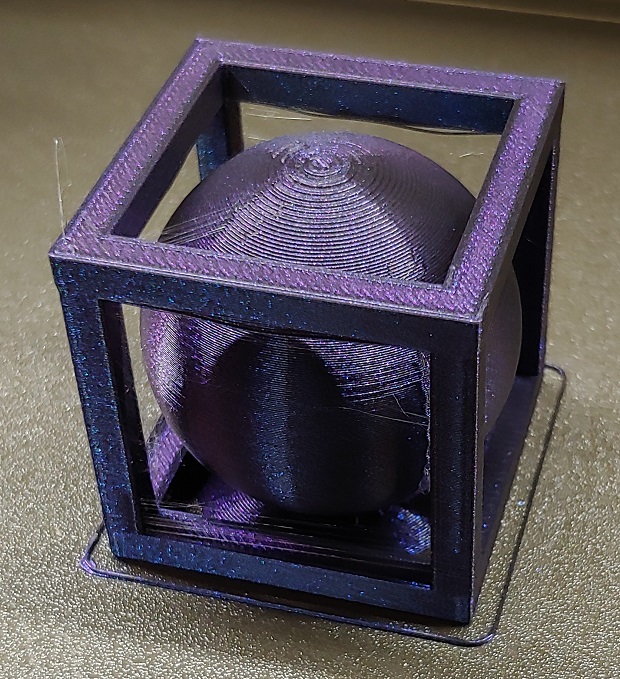
Both 1st layers from beneath.
Not sure what was causing all these strings, maybe too much heat for this specific filament.
Would also explain some saggy bridging.
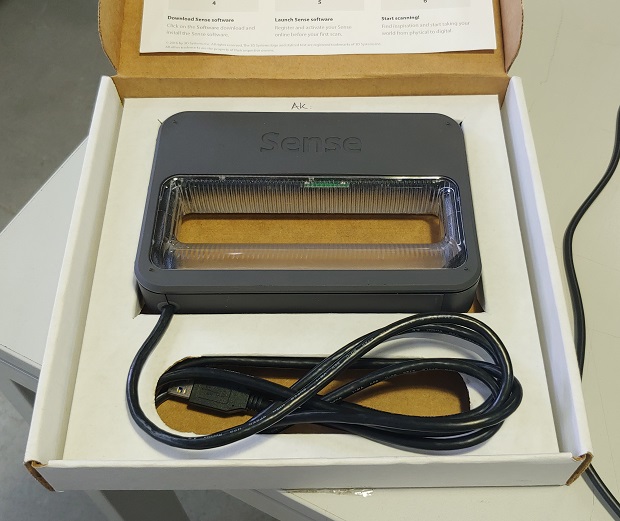
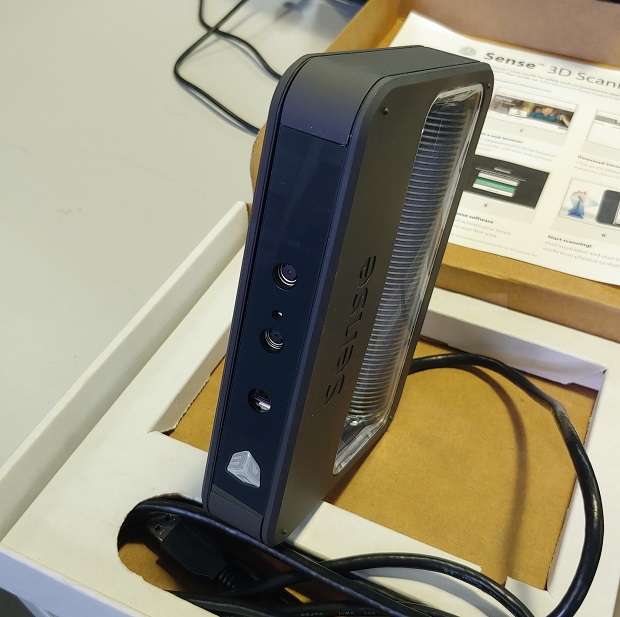
Individual Assignment - Scanning
Also had to scan something so I had to get to know the 3D Scanner at the Fab Lab. It’s an Intel Sense Gen 2.
Looking around search engines will surely get you to this link
Which has a big warning.

Well as long as the software’s still available.
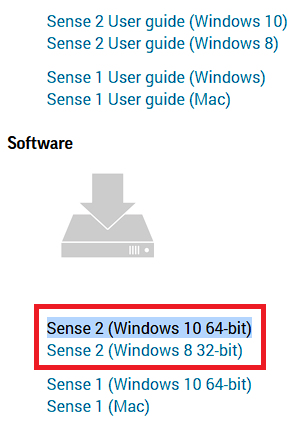
Install and…

Great........... At least Windows detects something.

After some time I finally found the correct drivers here Get the SR300 ones like Windows Devices mentioned.

Forgot to take a print-screen but when running the program for the 1st time it will prompt for an Activation Key. Ours was easy to find.
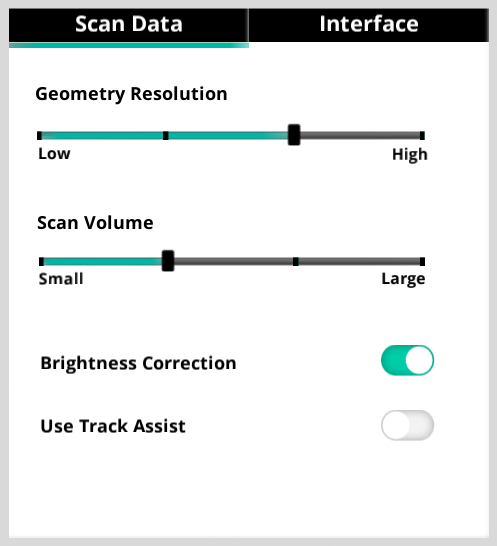
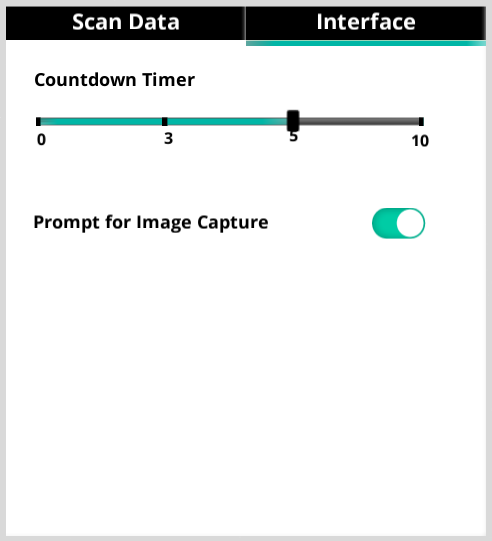
Not a lot of settings.
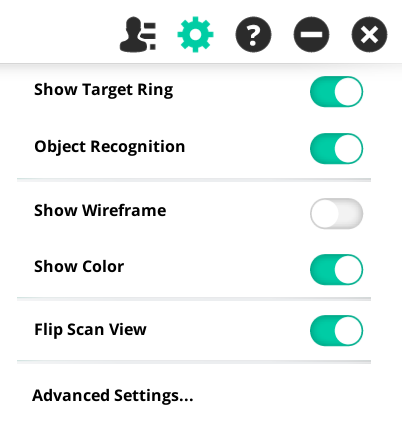
Probably enough anyway.
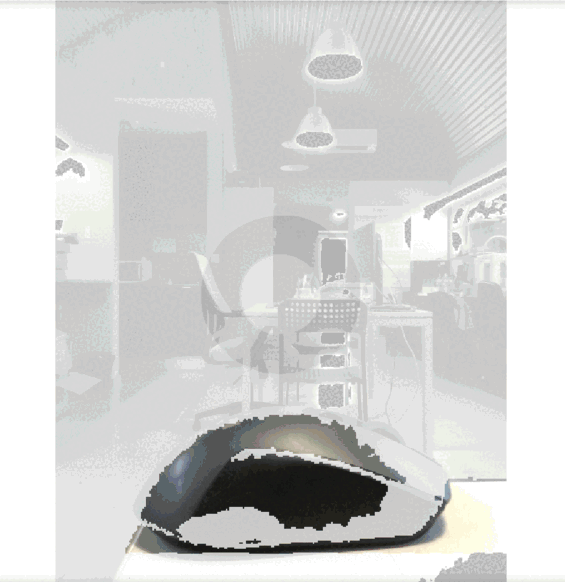
Pick what your scanning.

Click that green button.

Task failed successfully xD
Sense Gen 2 Bonus
As I was searching for pictures to make sure which version I used I came across this good idea:
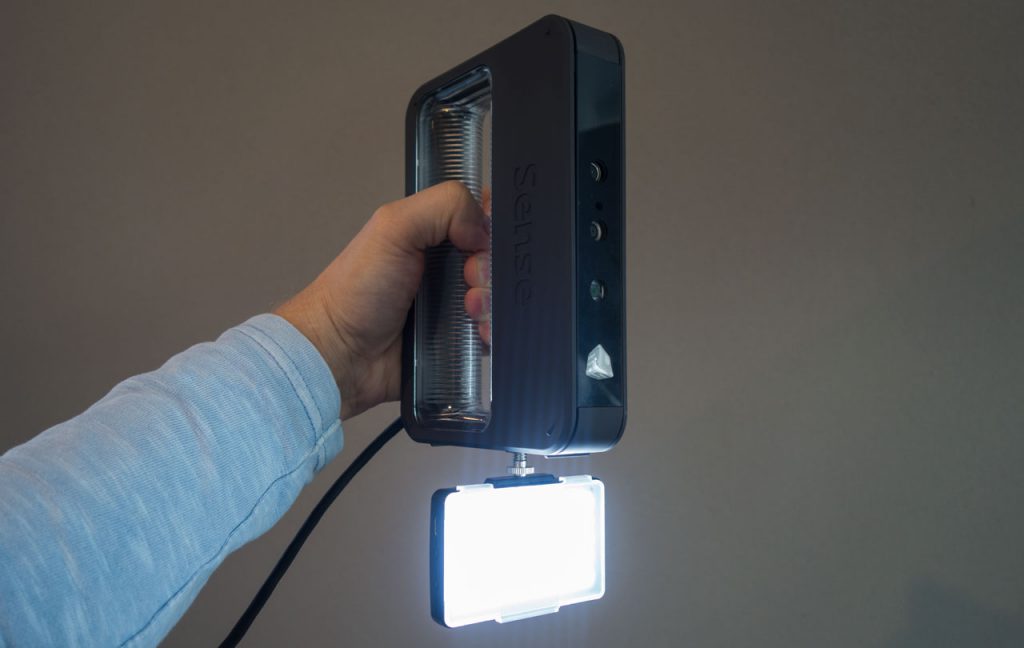
They used the tripod threaded hole to mount a large portable light to help with scanning. Probably a good idea to do with all scanners. Even if they’re mounted to a tripod there must be photography related adapters for this.
Files
Cube-Scphere already exported as .step