10. Molding and casting
This week’s assignment was to design a mold that will be milled (rough cut + three-axis finish cut) and used to cast parts.
These were my files for this week.
I wanted to create a mold for my Final project. I couldn’t think of a functional component for my final project, so I decided to add decorations. I realized that a small cute mold would work as a decoration for my final project. I browsed at cute things which I could do which would make my mirror look nice. I couldn’t find anything that piqued my interest, although that night I had gone out to tar gaze with some of my friends, and the idea struck me. I should do planets!! I love to stargaze so this would add a nice personal touch to my final project.
I went online and search for some pictures of plants. My favorite planet is Saturn, so I decided to design a mold of Saturn.

Fusion 360 Design
To begin this design, I created a new sketch and imported the picture I found on the internet into Fusion 360 as a canvas. I used the Spline tool to trace over the outline of the plant and created a profile of that. Once I was happy with the shape of the planet I drew the wax block using the rectangle tool. To get the correct dimensions, I used calipers to measure the wax block which I was going to use.
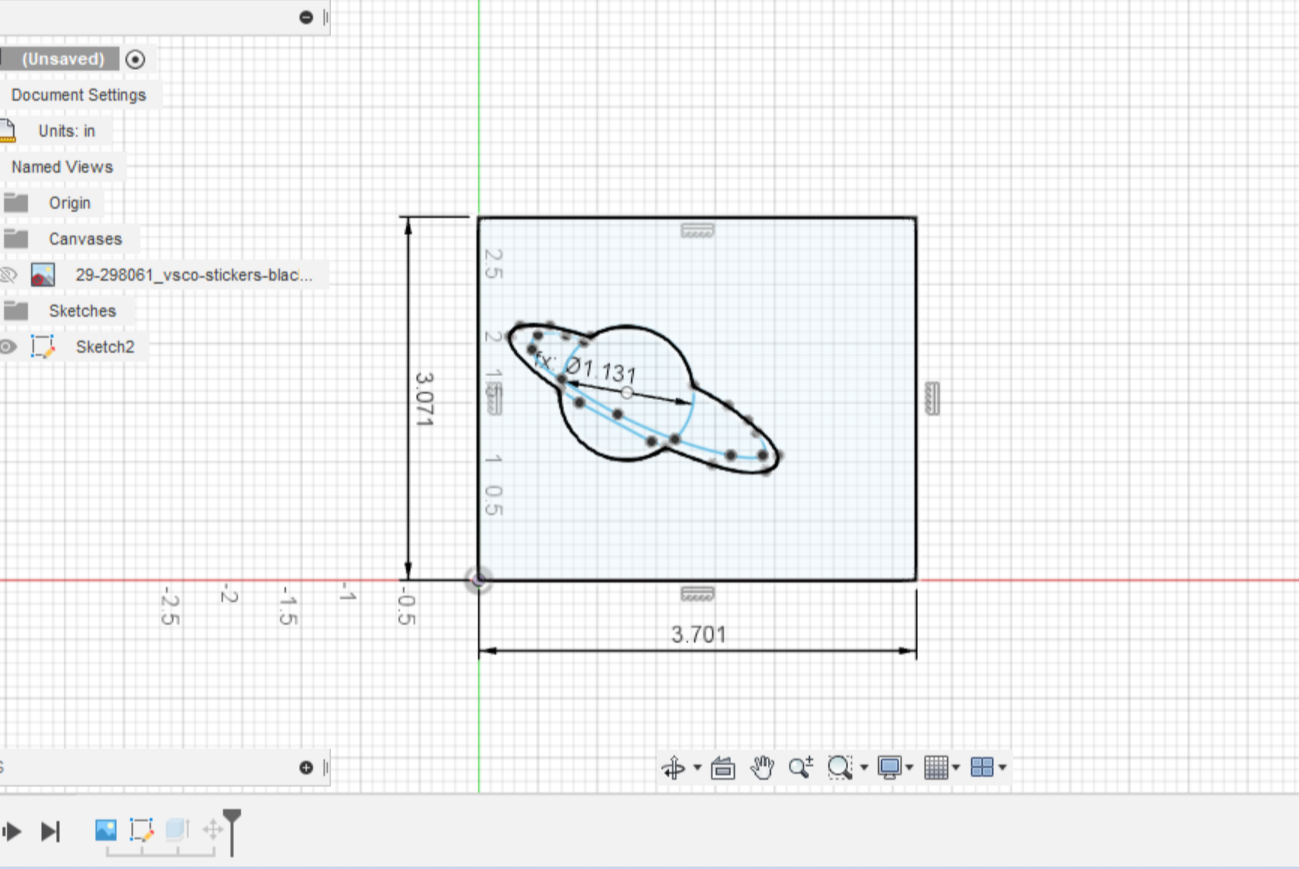
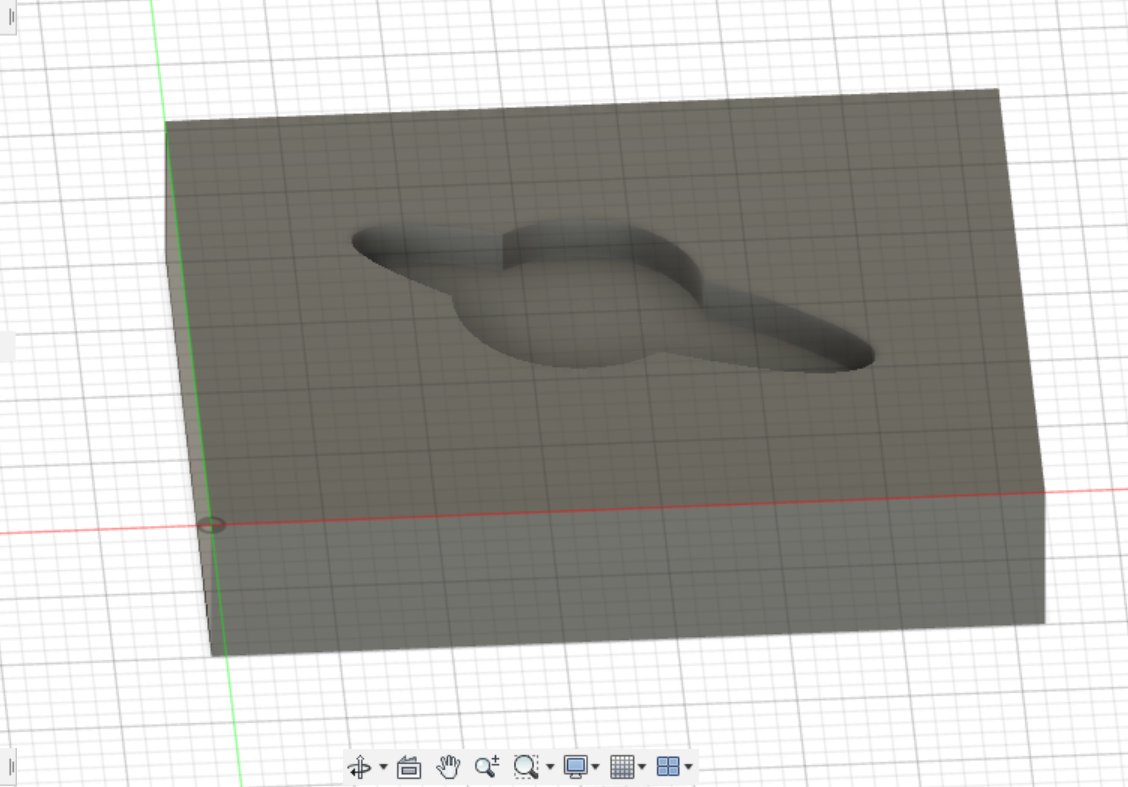
After the sketches were finished, I decided to extrude both the objects. I extruded the wax block to the height which I measured on the calipers, and for the planet, I decided to extrude it 0.20 inches.
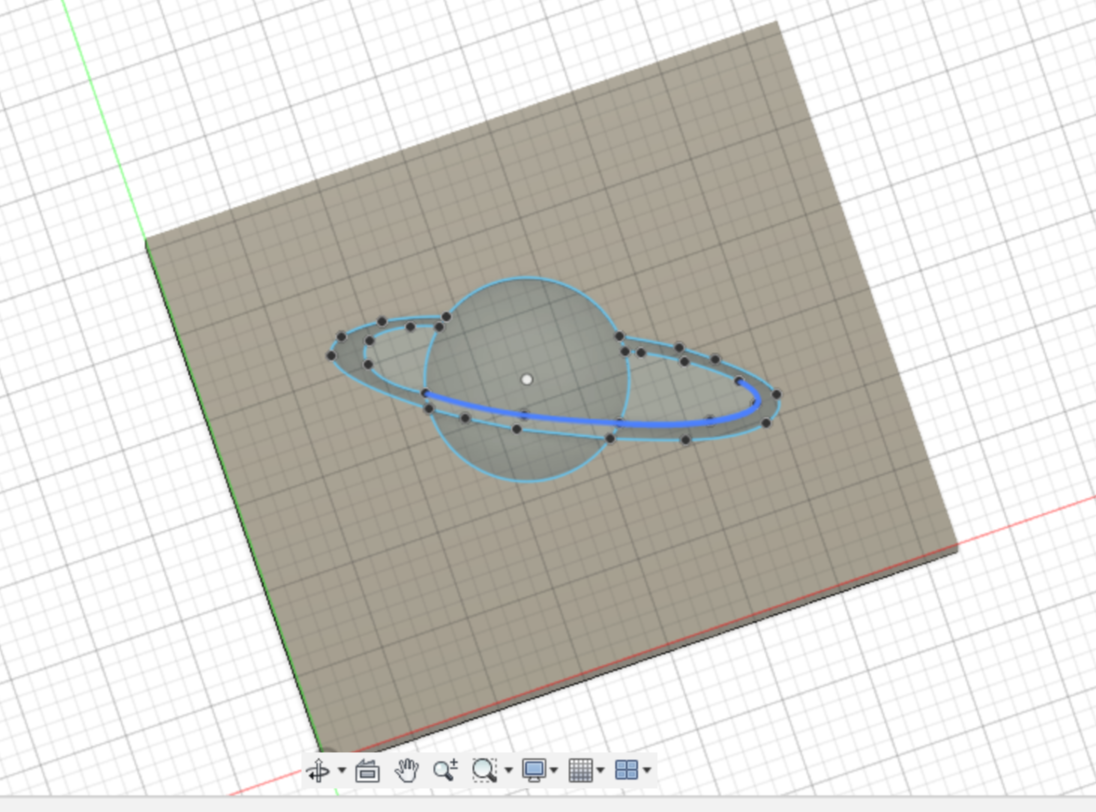
Once I finished extruding both of these objects, I used the feature “Press/Pull”. I watched this video to learn how to use it. I highly recommend watching this video because it teaches you how to make CAM paths in Fusion 360.
Once I was done with the design aspect of the mold, I had to learn to make the tool paths for the milling machine.
I followed this workflow, which taught me how to make tool paths in Fusion 360. This is a VERY helpful workflow and I highly recommend glancing at it. For this design, I made two tool paths. The first is a roughing toolpath and the second is a finishing toolpath.
The roughing and finishing tool paths would both be done by a 1/64th Flat End Mill Bit. To select these bits in the CAM software of Fusion 360, I downloaded this library.
Workflow for CAM Toolpaths
This workflow is an helpful tool that was provided by my lab (Charlotte Latin Fab Lab)
Once Following this workflow, I created the tool paths for my mold.
The workflow and video above show you how to make the Toolpaths.
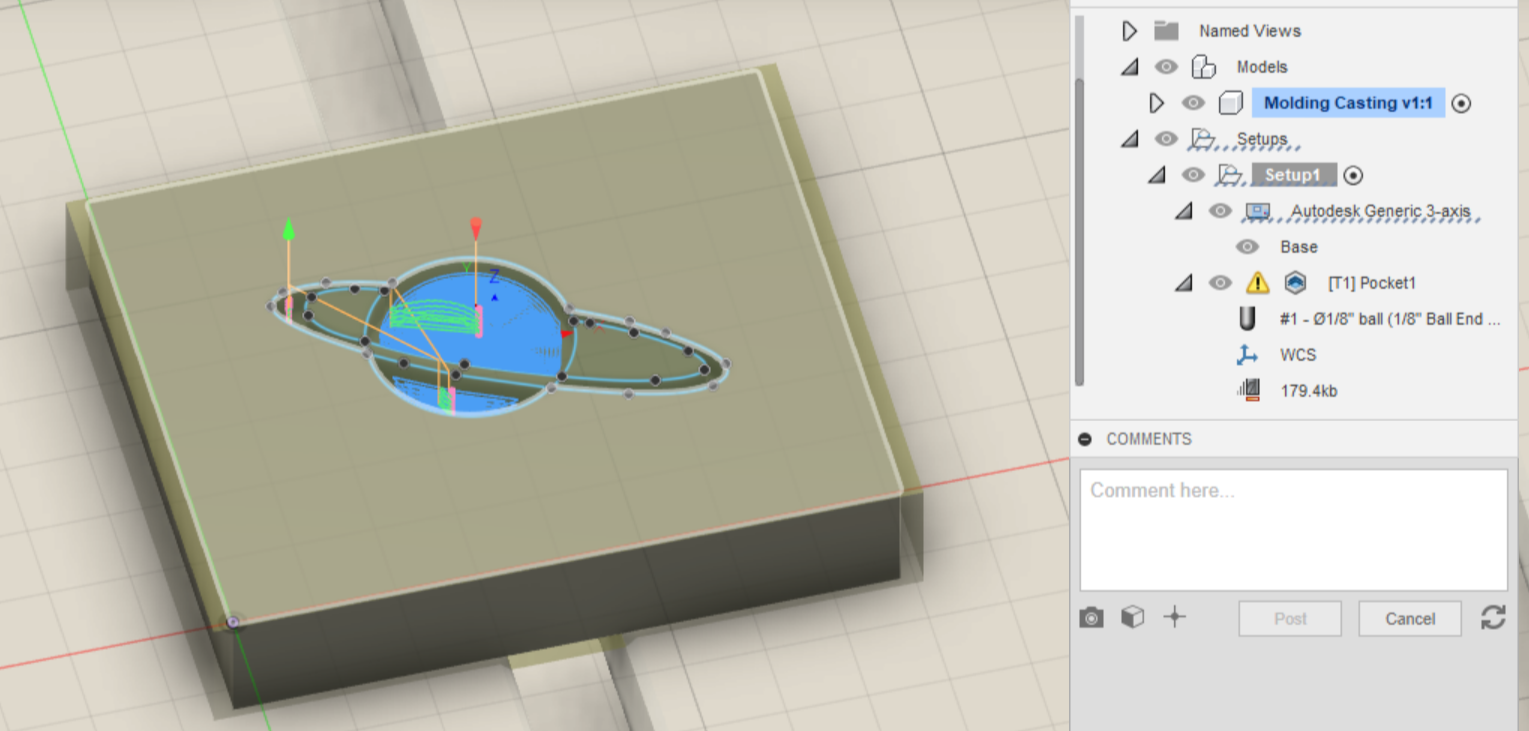
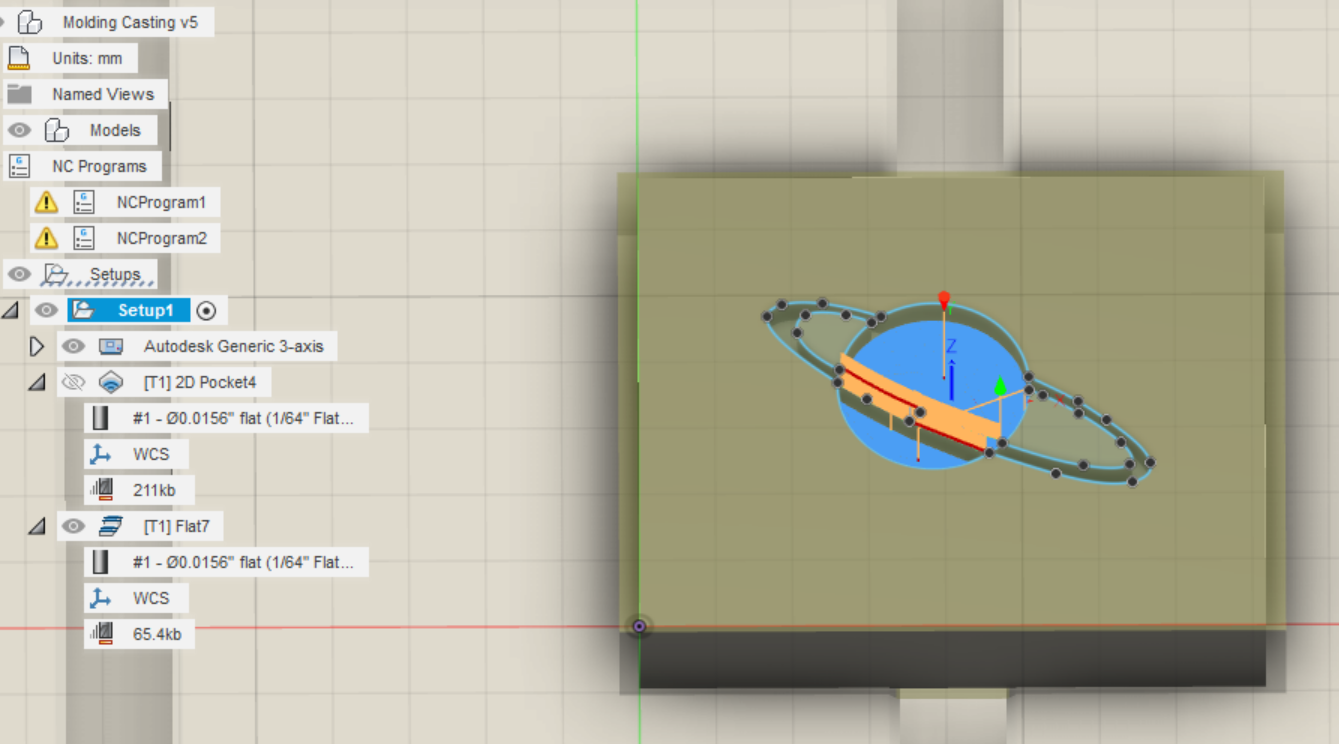
Simulation of Toolpaths
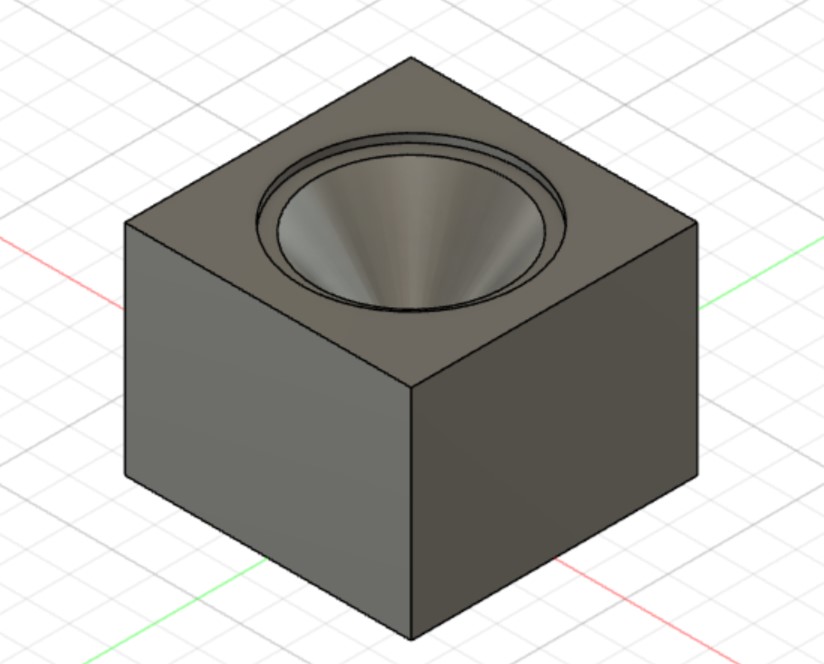
Fusion 360 Model
Milling on Bantam Tools
Once my design was ready, I exported it to Google Drive, where then I can upload it to the milling machine, and start milling my mold. The process of milling wax is slightly different than milling PCBs. I had to use a different bit as well as, skip some steps such as probe material and bit breaker. This is so the bit would not puncture the wax.
Setting up the Machine to Mill
1 . I first secured my wax block with Nitto Tap, this is to ensure that the wax block doesn’t move while it is being milled.
2 . Next, I chose the right bit (1/64 Flat End Mill) which I used in my design in Fusion 360 and placed that in the machine.
3 . I uploaded my design files into the machine and made sure I had all the parameters which were needed.
4 . I referred back to the milling workflow in one of my past weeks and then started to will my wax block.
Molding Cut
3-Axis Finish Cut
After extracting the wax properly from the machine, I started to prep the materials I would need to cast my mold.
From doing the group project I learned about the different types of molds. I learned each of the various curing times and directions on which part to mix and whatnot.
I chose a silicone mold, so I could also add some color to it. I decided to use “Moldstar 20T”.
Helpful Info about Moldstar 20T
| Name | Pot Life | Curing Time | Number of Parts | Result | Rating |
|---|---|---|---|---|---|
| Moldstar 20T | 6 mins | 30 mins | 2 parts. A & B | Lovely Silicon Mold | 4.5/5 |
To use this mixture, I first used 2 dixie cups. In those dixie cups, I poured part A and the second part B. I then poured part B into part A and started mixing the two parts with a popsicle stick. I think I mixed two colors: sage green and bronze. After mixing the two colors, I poured the solution into the wax mold created. After 30-40 mins of cure time, I took my cast out of the wax.
Helpful tip: Always pour excess so the cast goes over the brim so it is eaissr to take off. Especially when you have narrow edges.
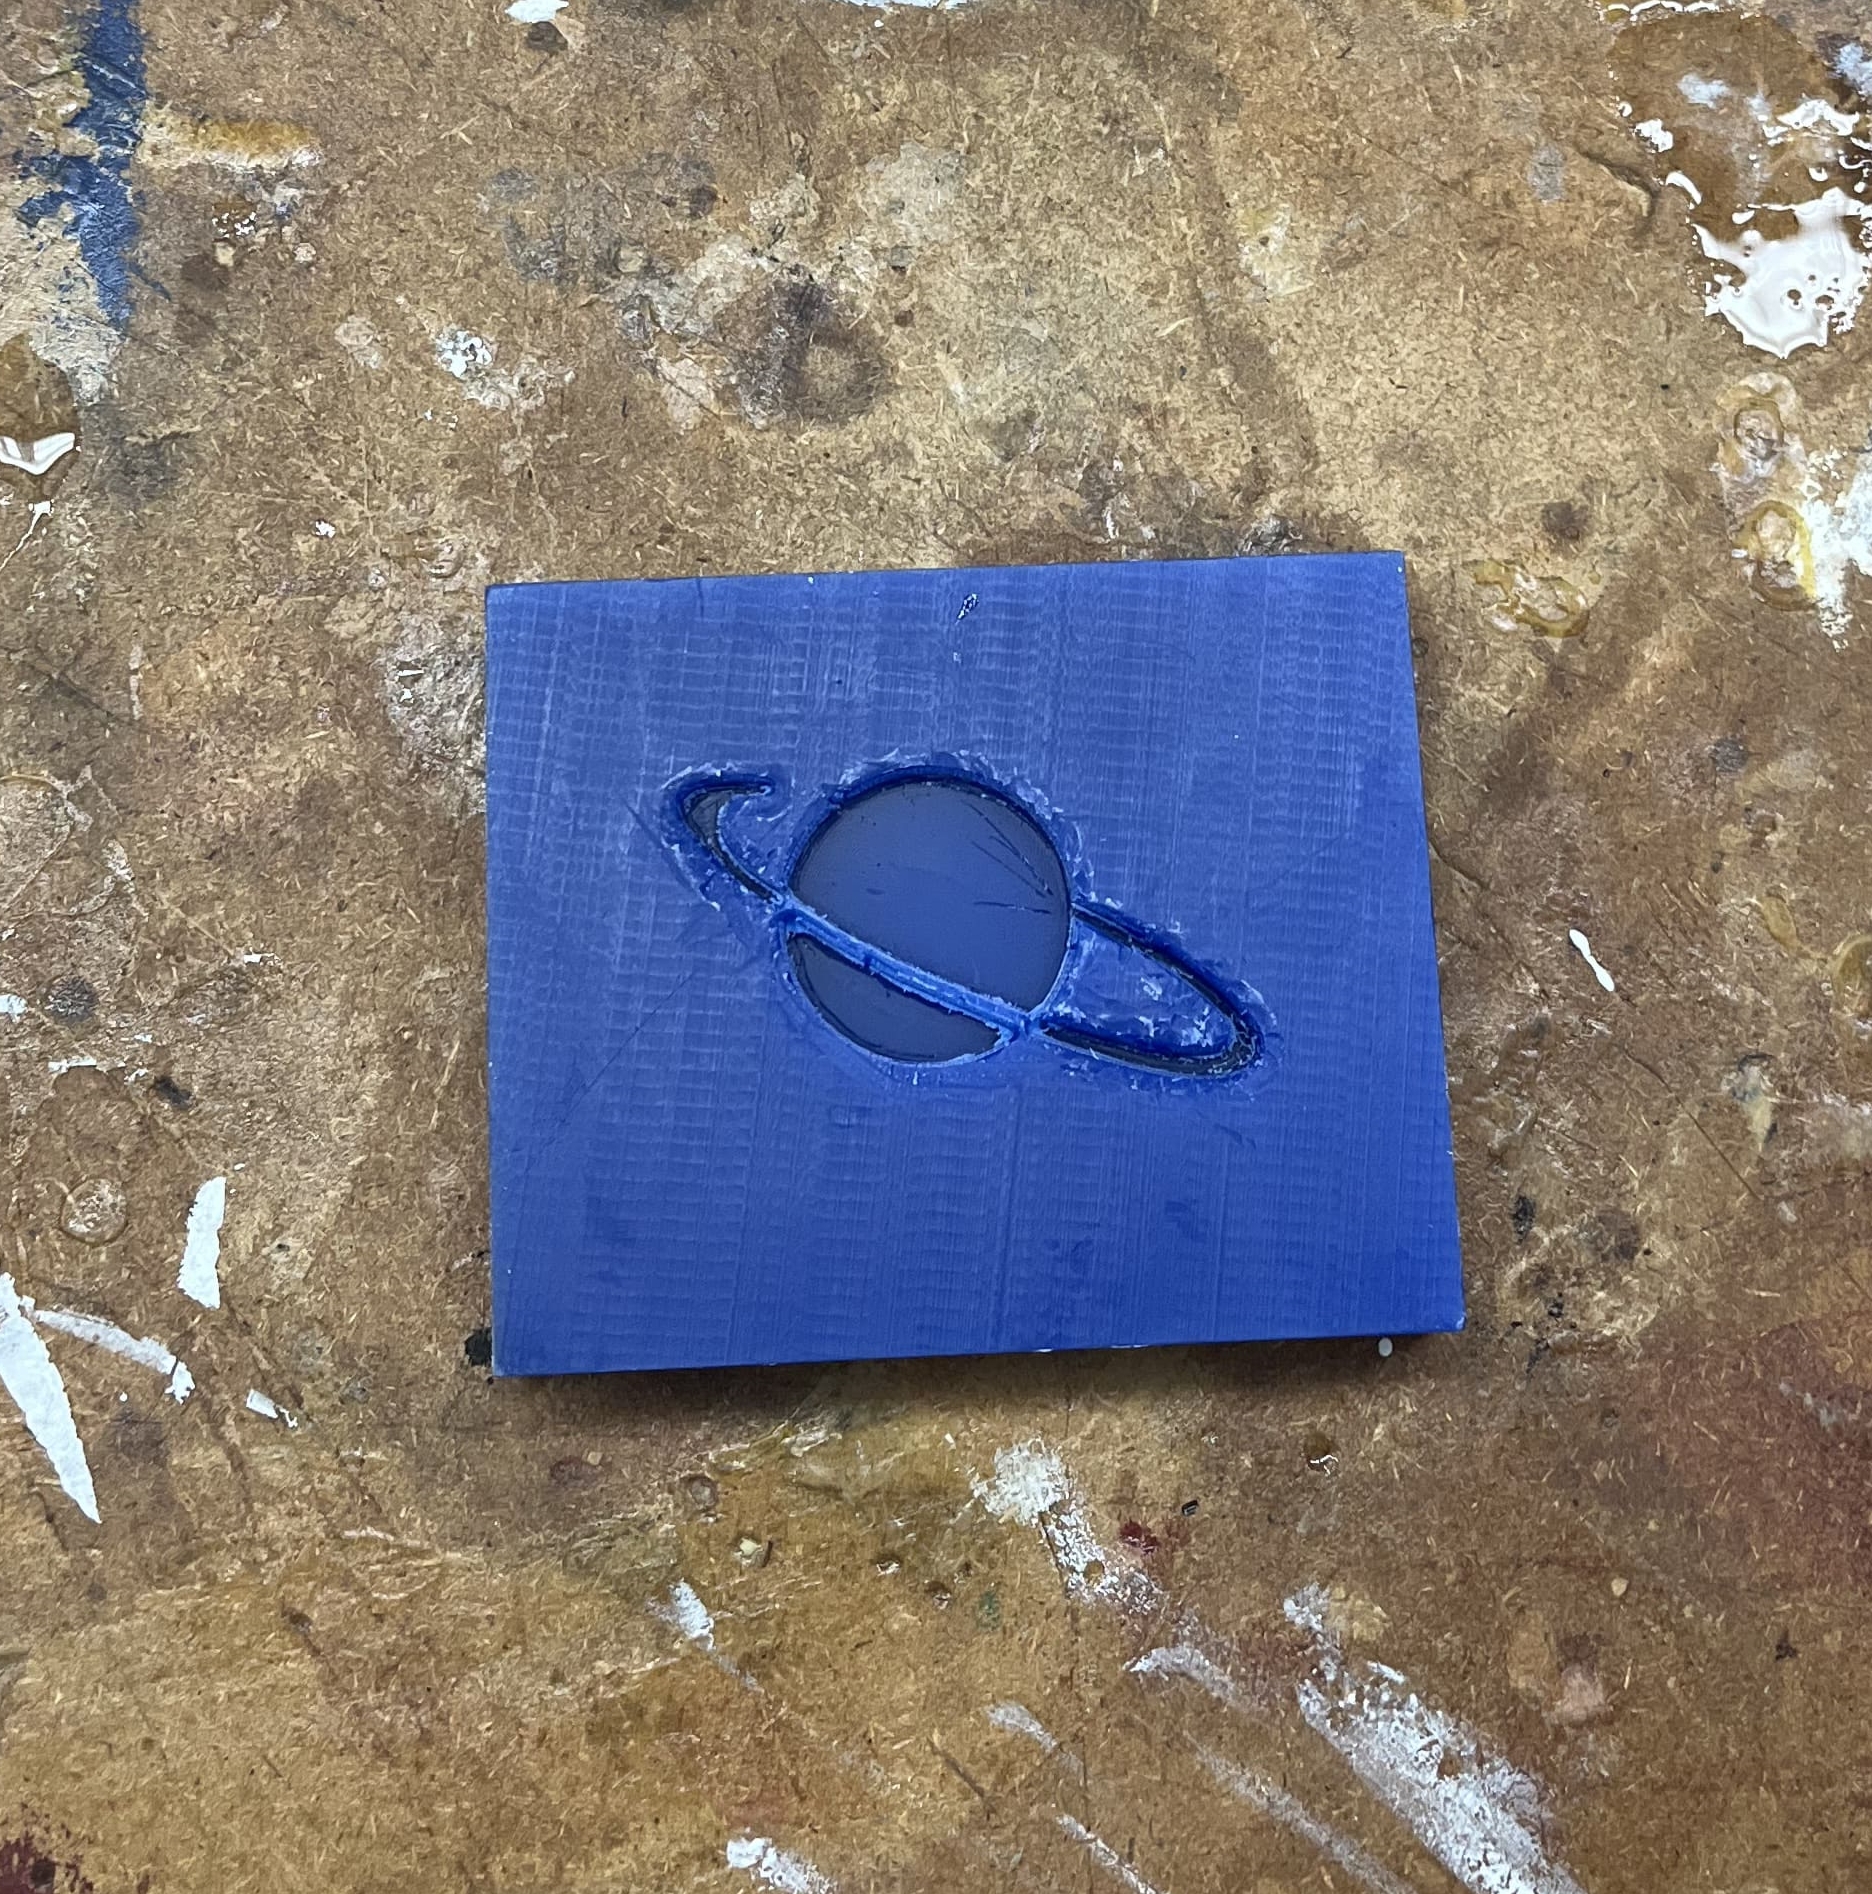
Final Molding and Casting Result
After the 40 mins curing time, I decided that it was time to take my cast out of its mold. This process was kind of stressful because I was afraid that my mold would break since I had designed the rim of Saturn in a very thin manner.
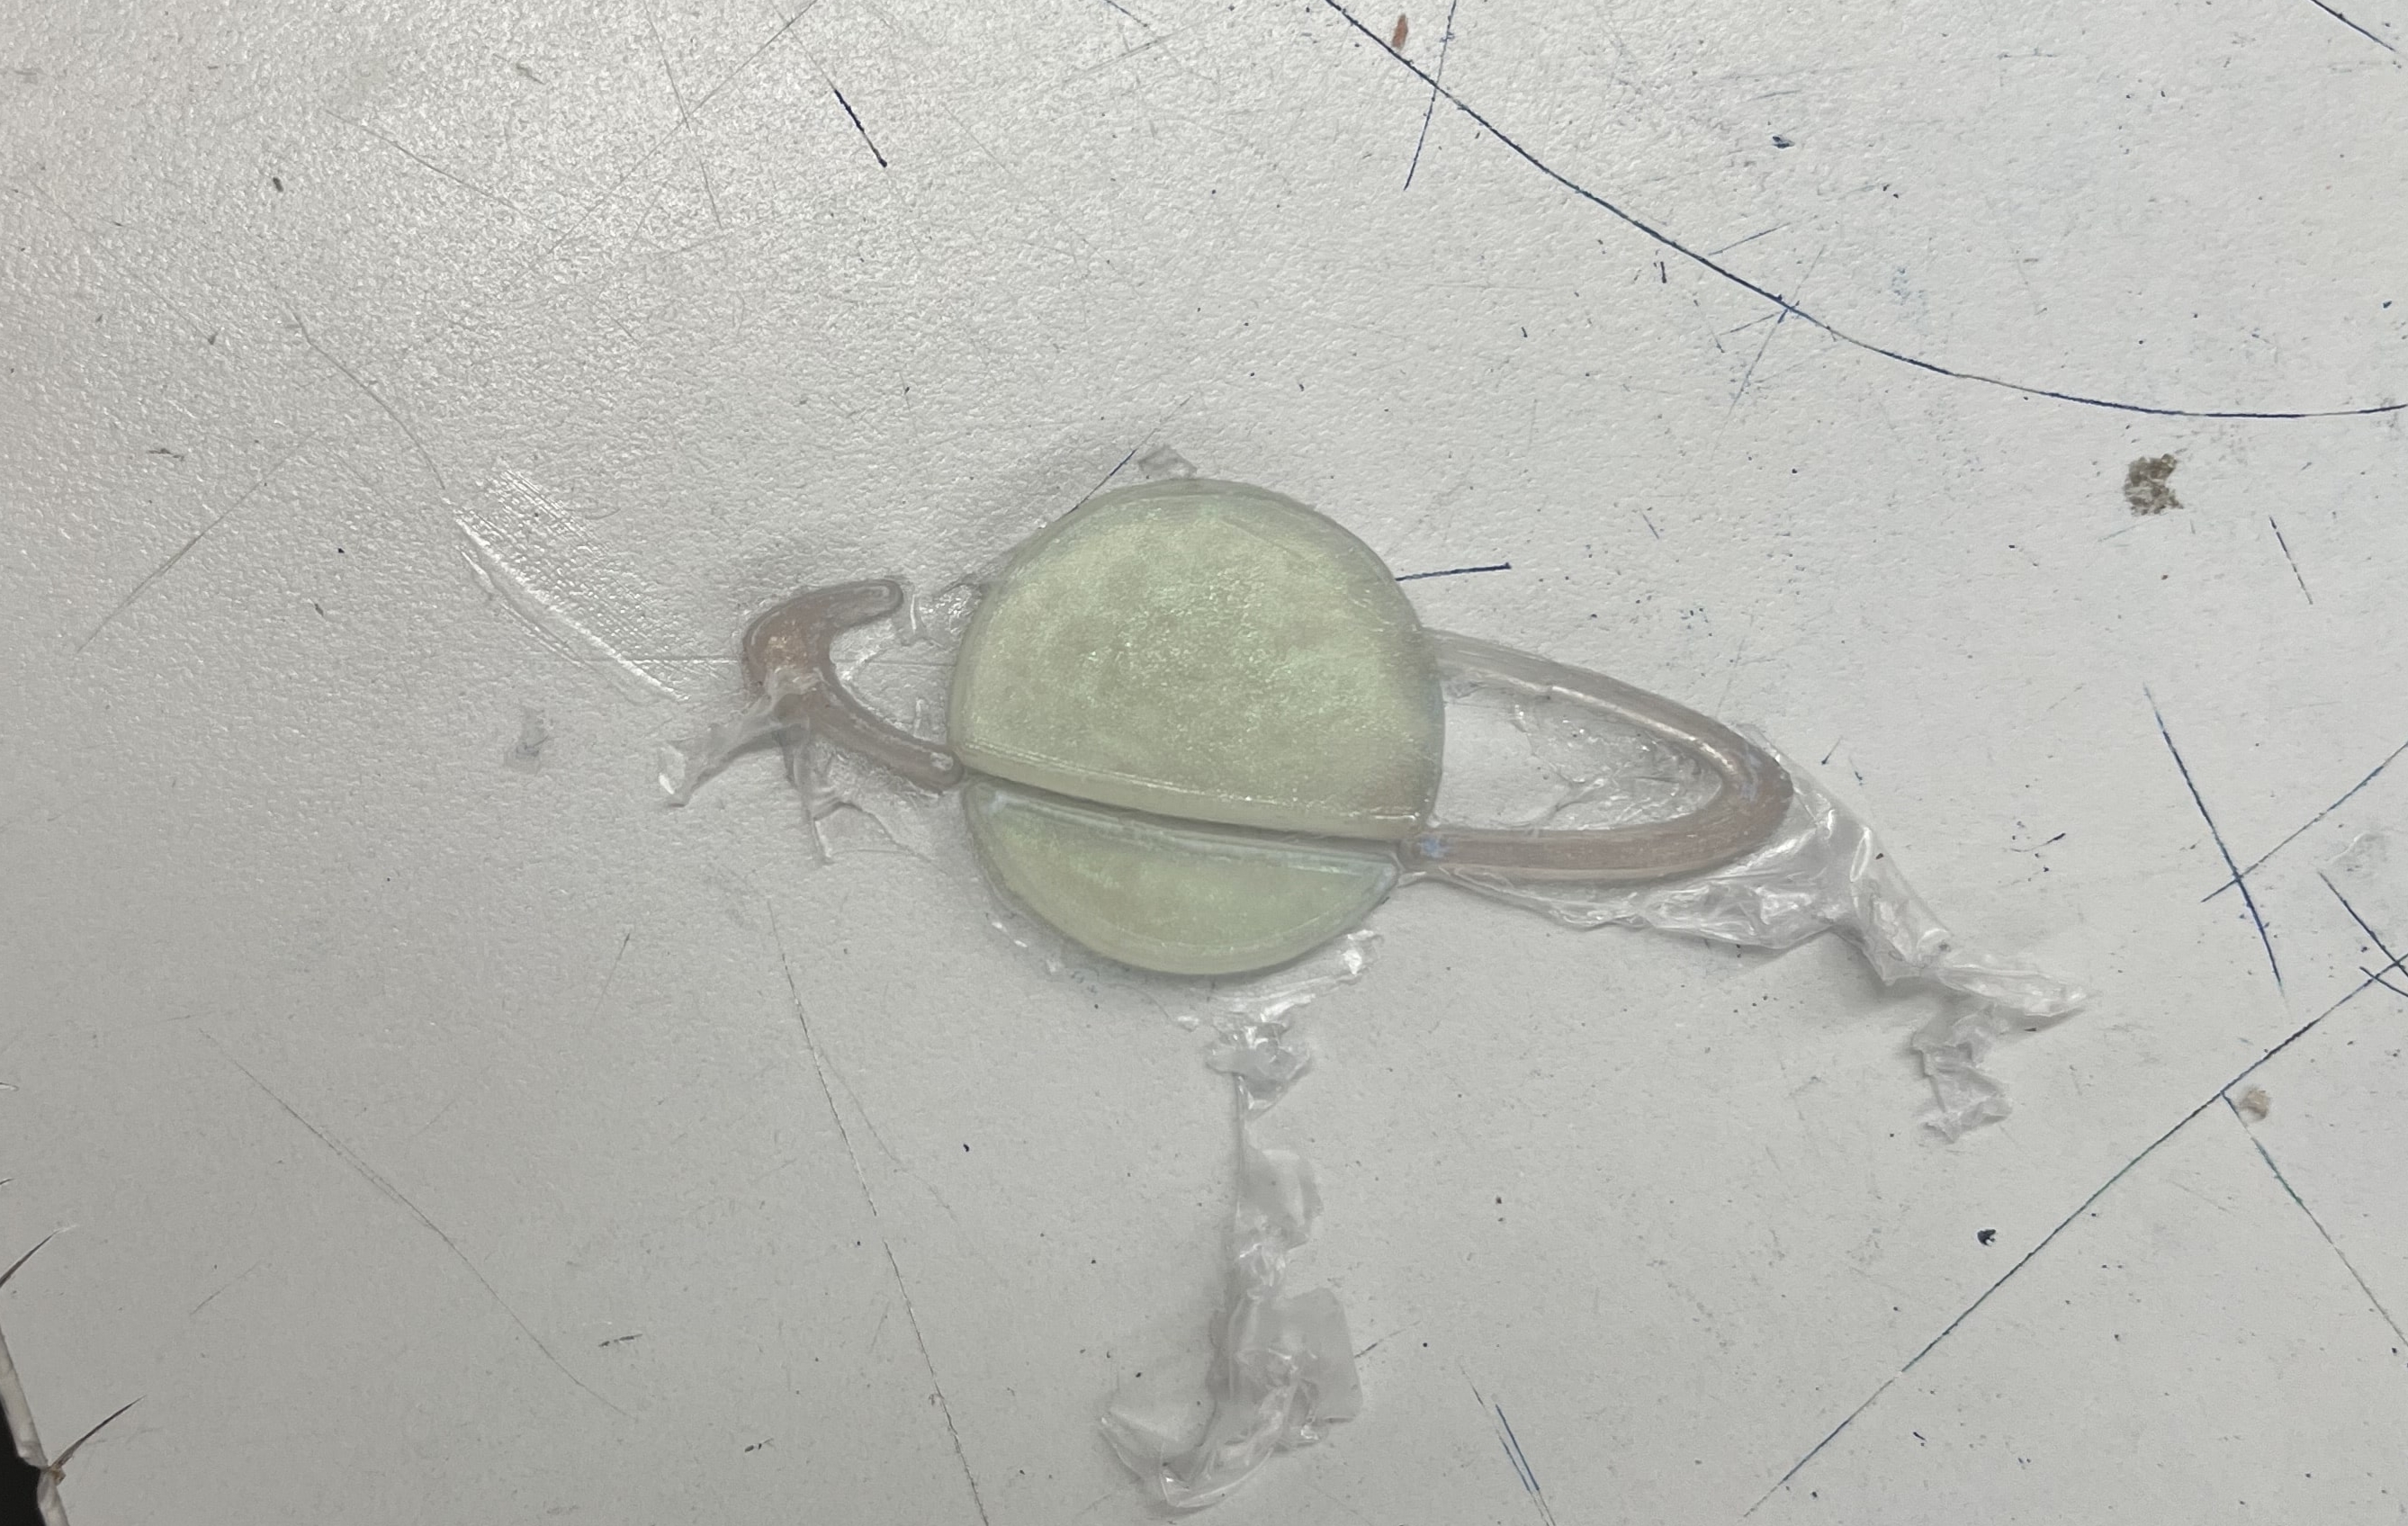
Here is a pic of my molding and casting assignment. I am very content with my results and cant wait to make more molds such as these.
Another Mold
I went back with my Global instructor, and he recommended that I should chose an easier design as the bit of the previous mill started to hit the edges, and the cut was not as clean. So, I went back and did another design which was pretty baseline.
I followed the same steps as I did above, and I created a small icecream cone mold. My classmate Alaric Pan did something similar to this.
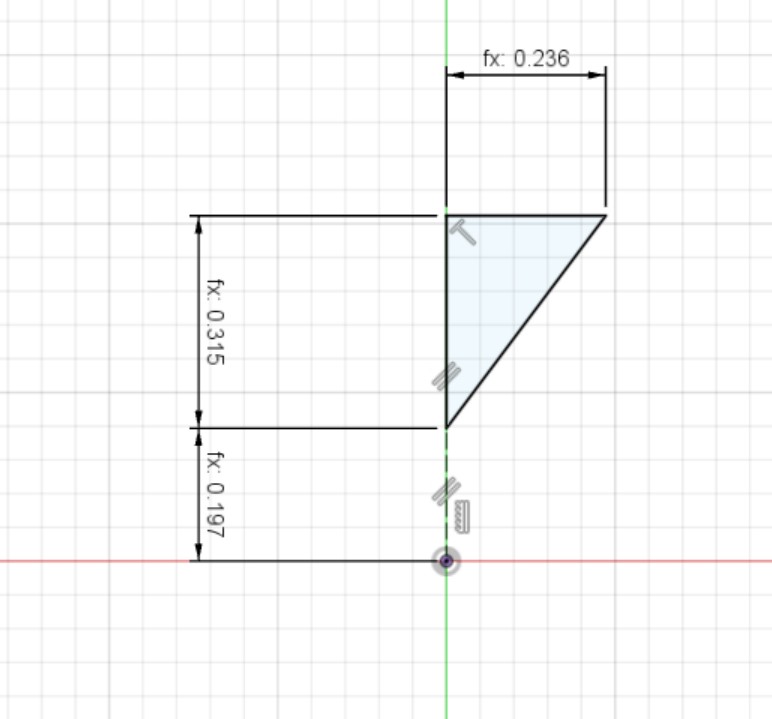
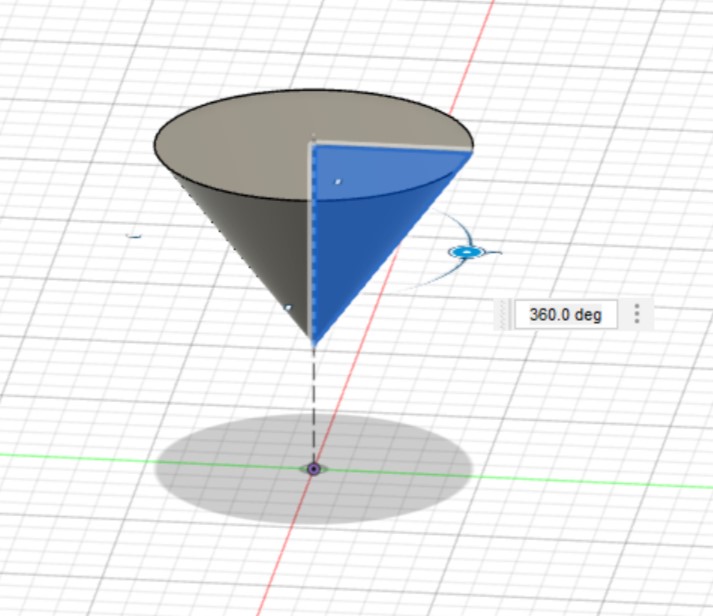
I first created a design on Fusion 360. To do this I first created a triangle, and then used the revolve feature.
But before I did this, I watched this video which taught me how to make the cone.
This is what it looked like:
This is what teh revolve feature looks like:
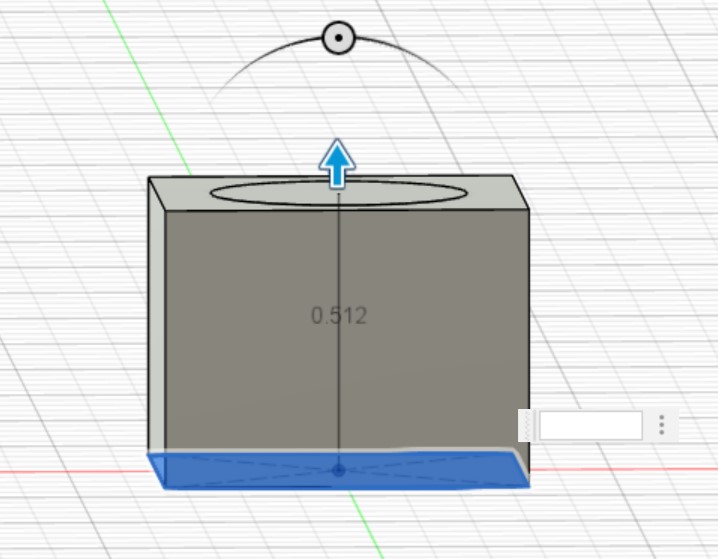
After revolving the feature, I created another sketch. This sketch was to make the base of the mold. In this case the wax block.

Then I extruded the wax block like so:
To make the cut eaiser I used Alaric’s idea of adding a lip/edge to it.
This would help it cutt better, this is what it looked like:
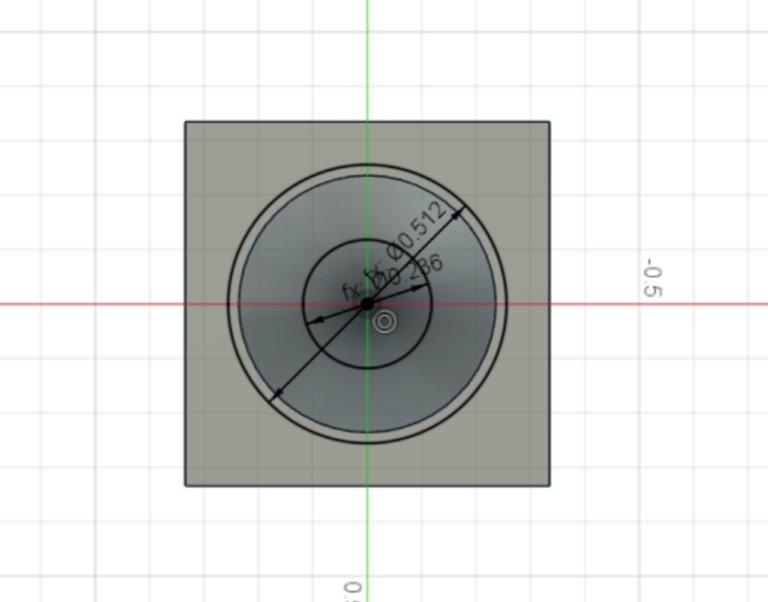
I used the extrude feature to cut inside the shape so it make a little lip. This is what it looked like:
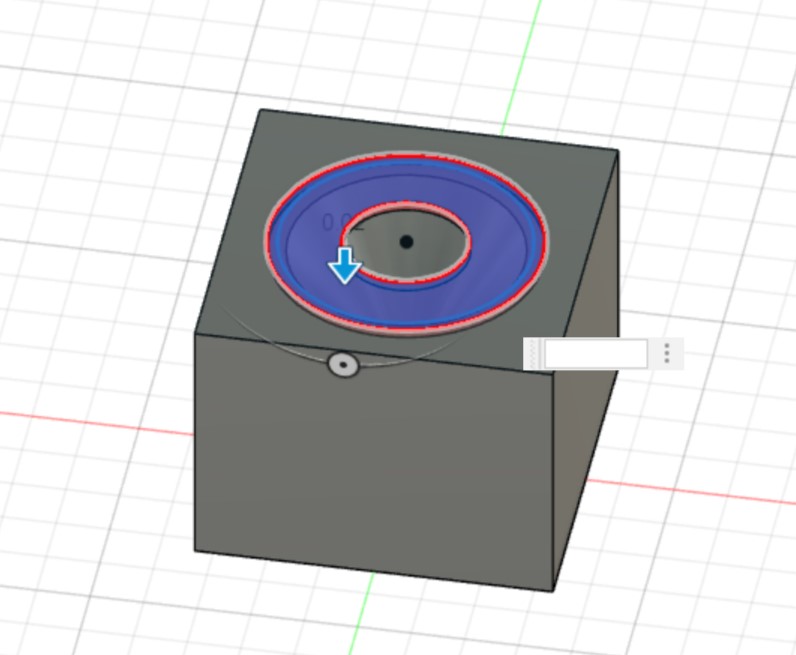
This is what the final fusion file looked like:
Here is the fusion 360 file:
Cam Tool Paths
To make the CAM Toolpaths, I followed the steps above. This is what my CAM Toolpath looked like.
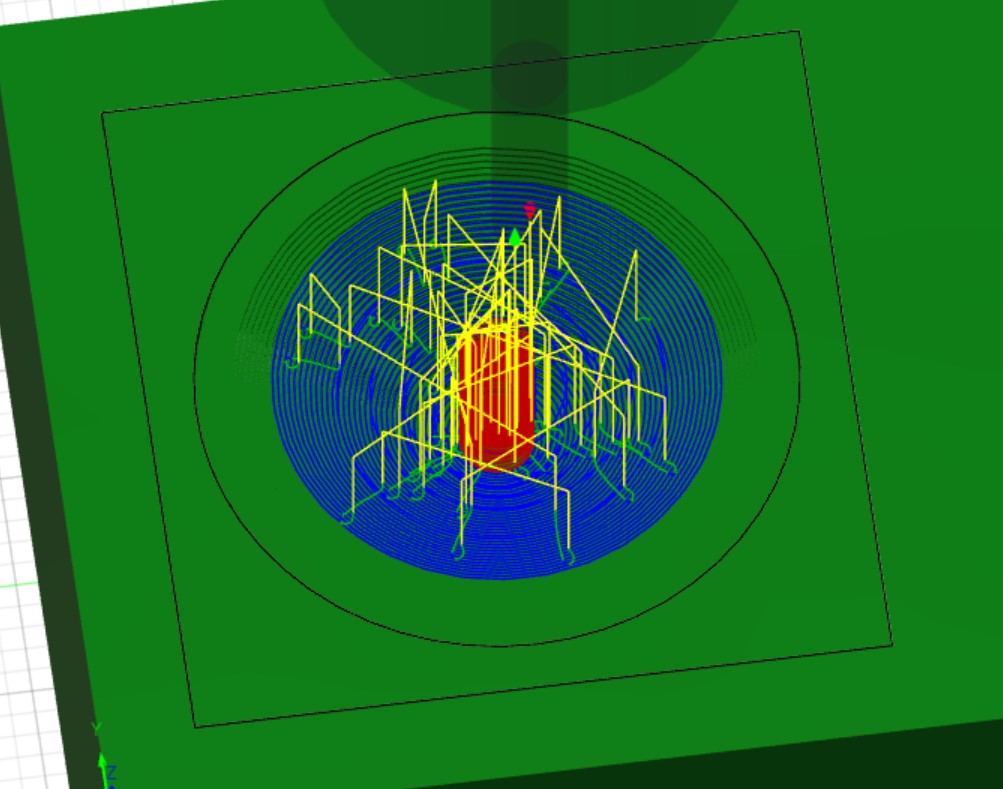
ONce this was looking good, I followed the workflow above, and exported this fusion file into Google Drive.
Milling the Toolpath
To mill the toolpaths I designed, I first used a 1/8’ inch bit, which was selected in my Fusion 360 file for my toolpath.
After selecting my bit and preping the machine, I ran the file.
This was the process:
After milling was done, this is what the wax block looked like;
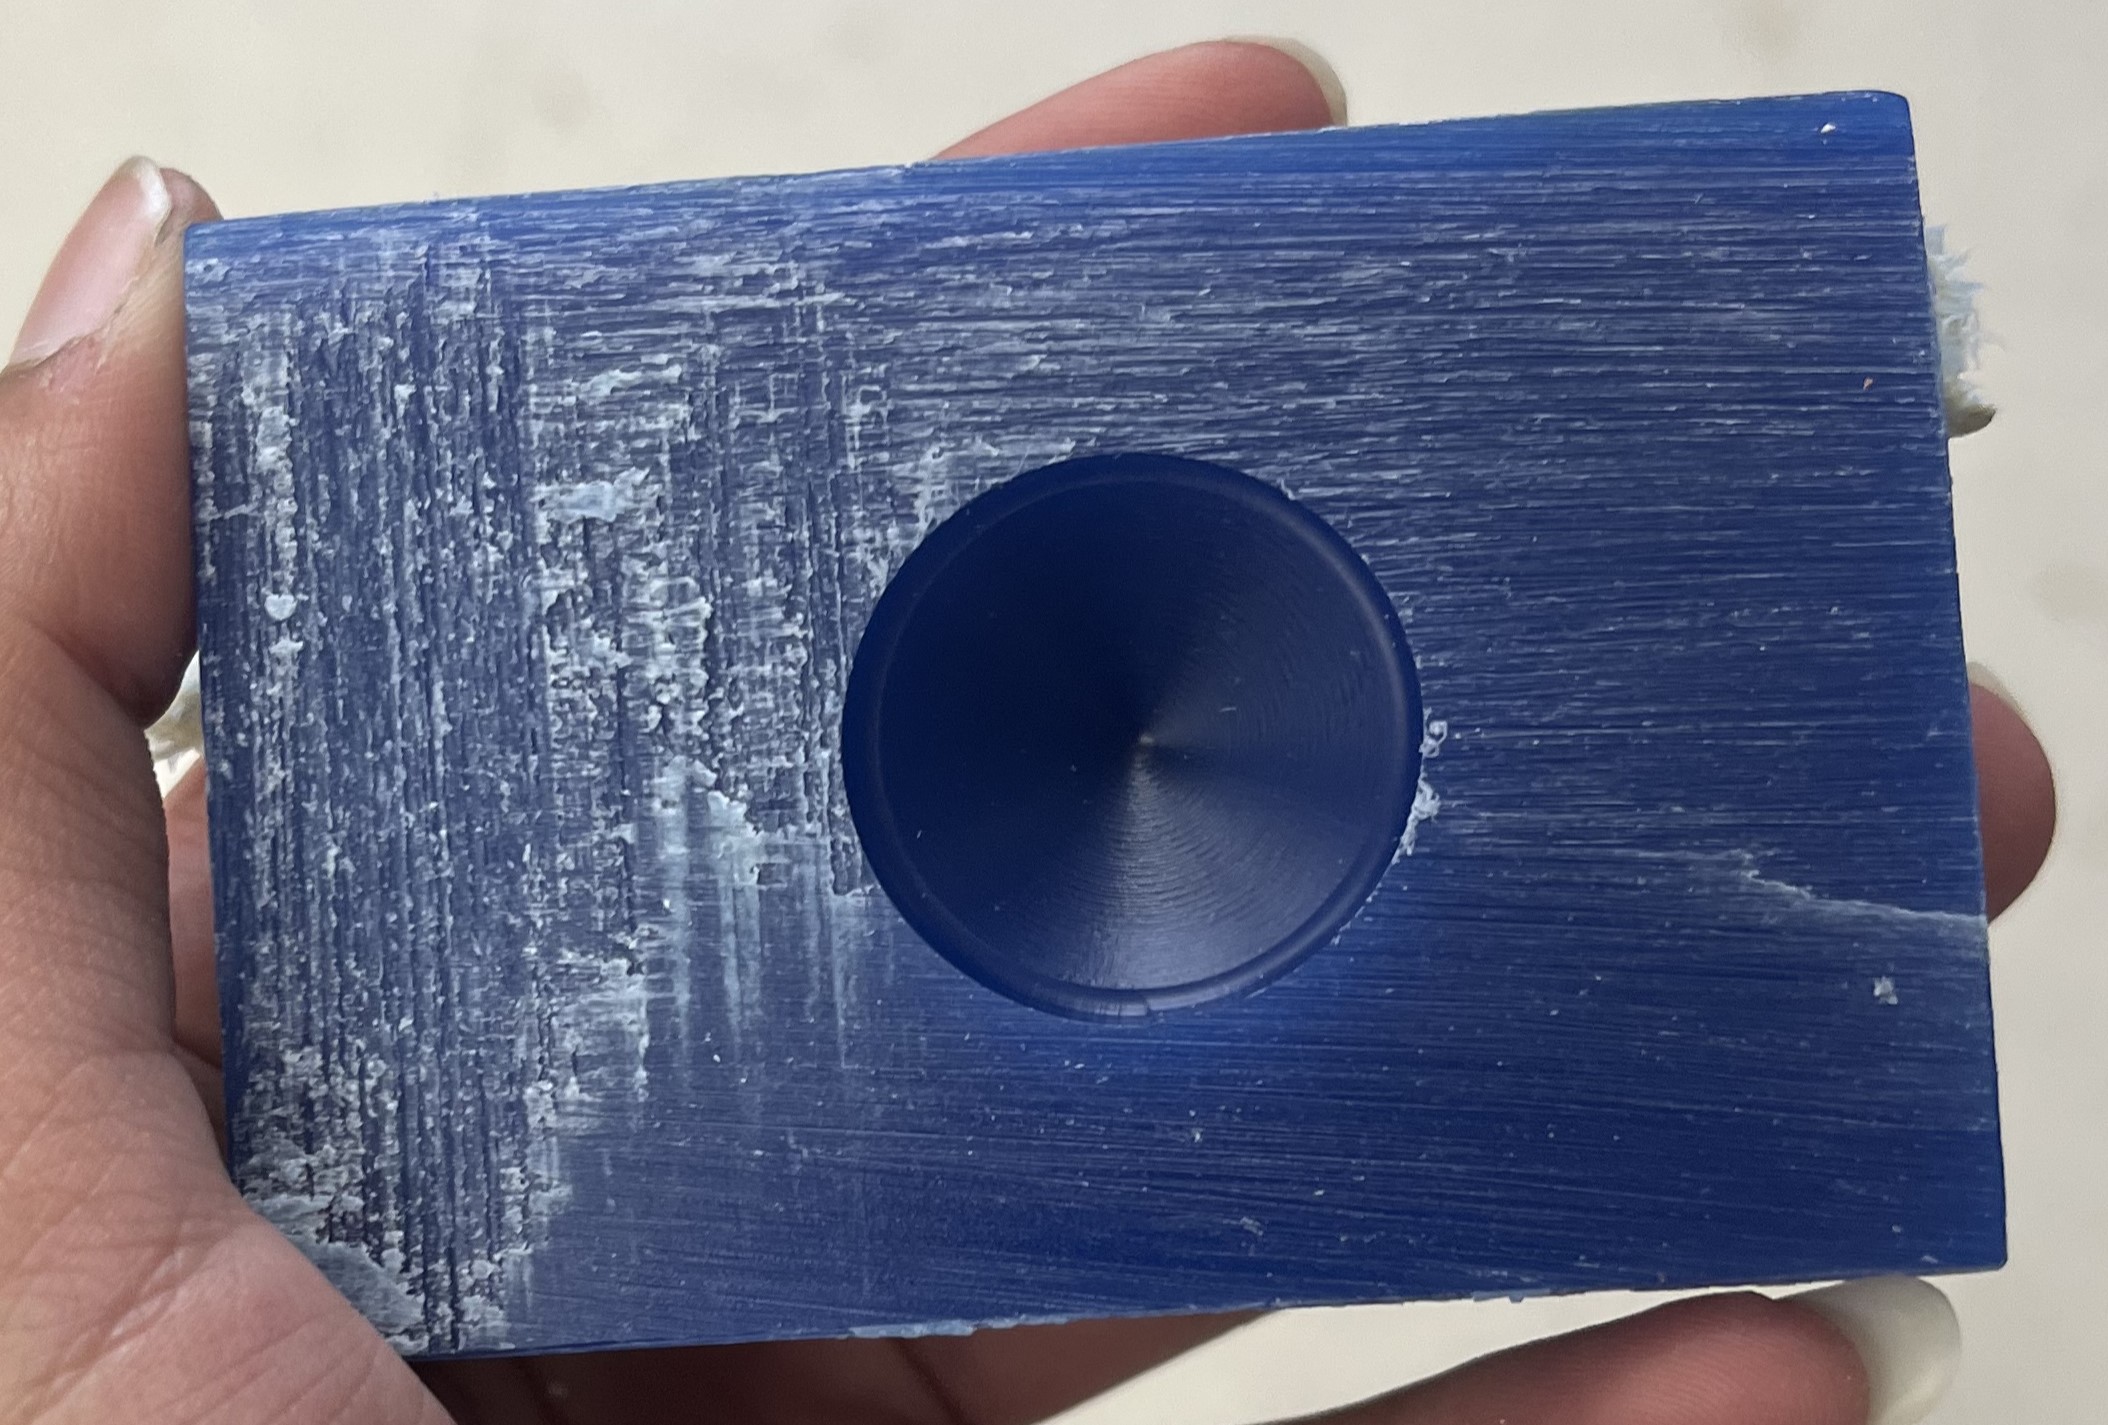
Nice and smooth!
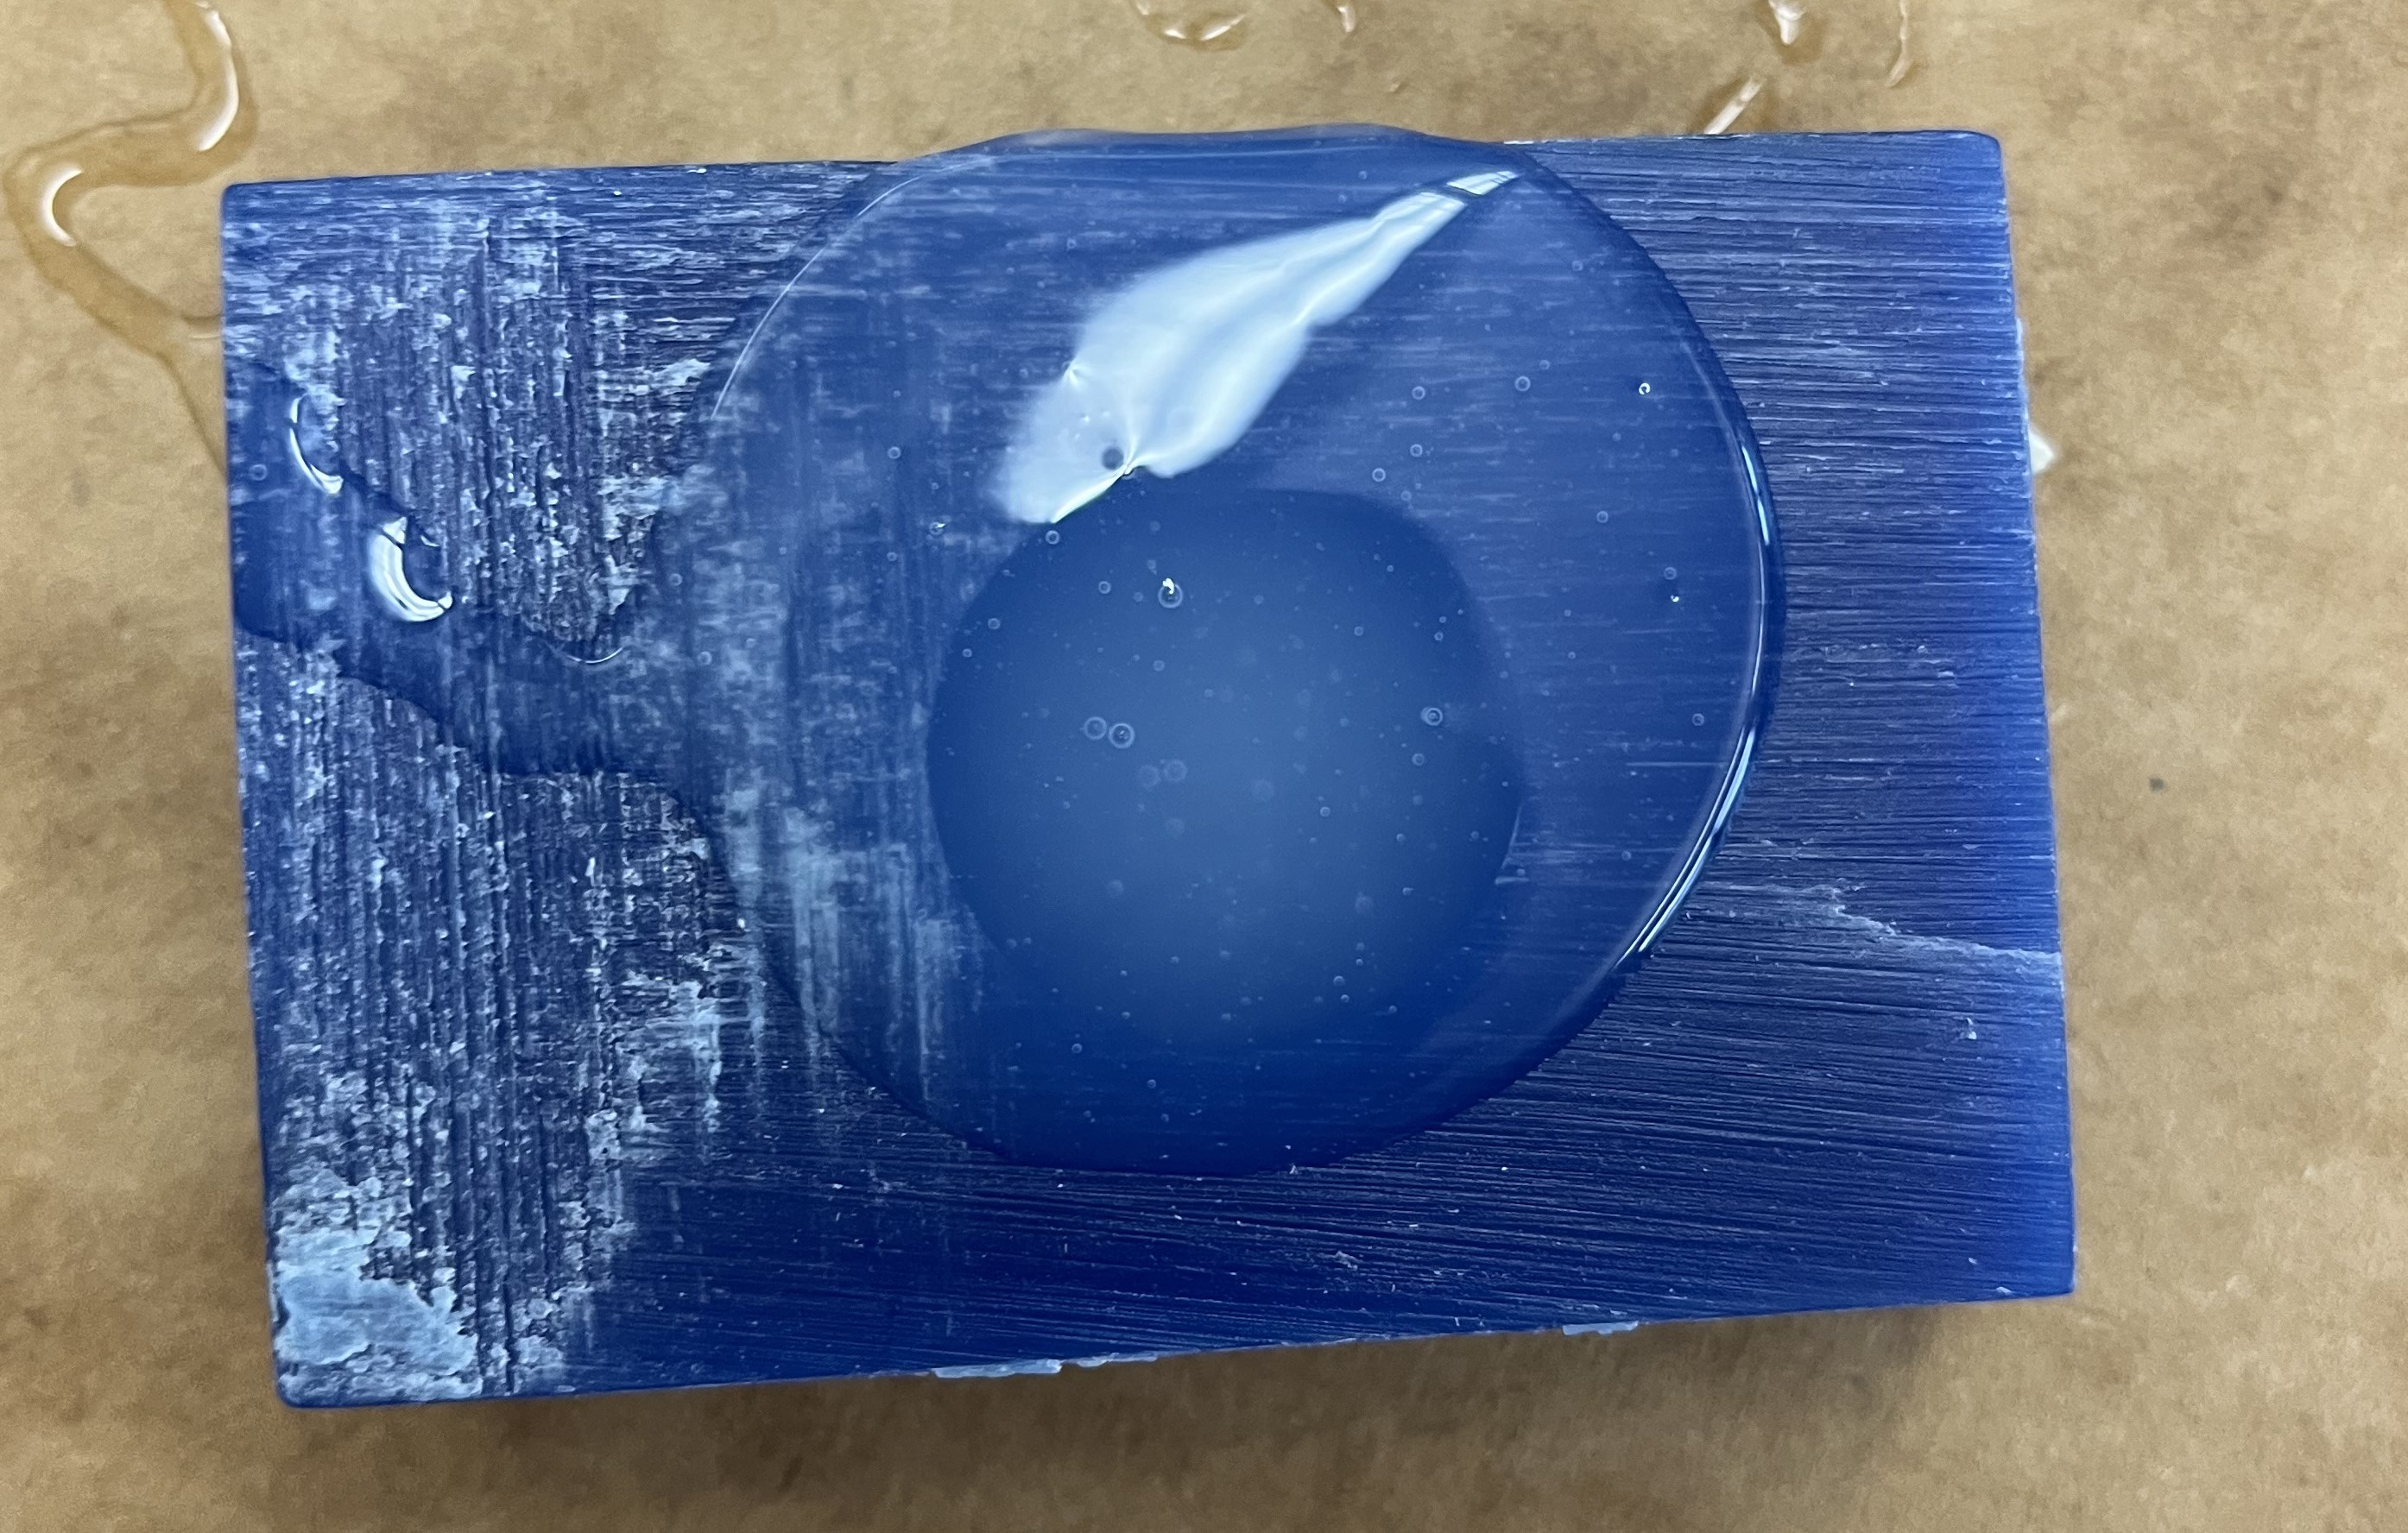
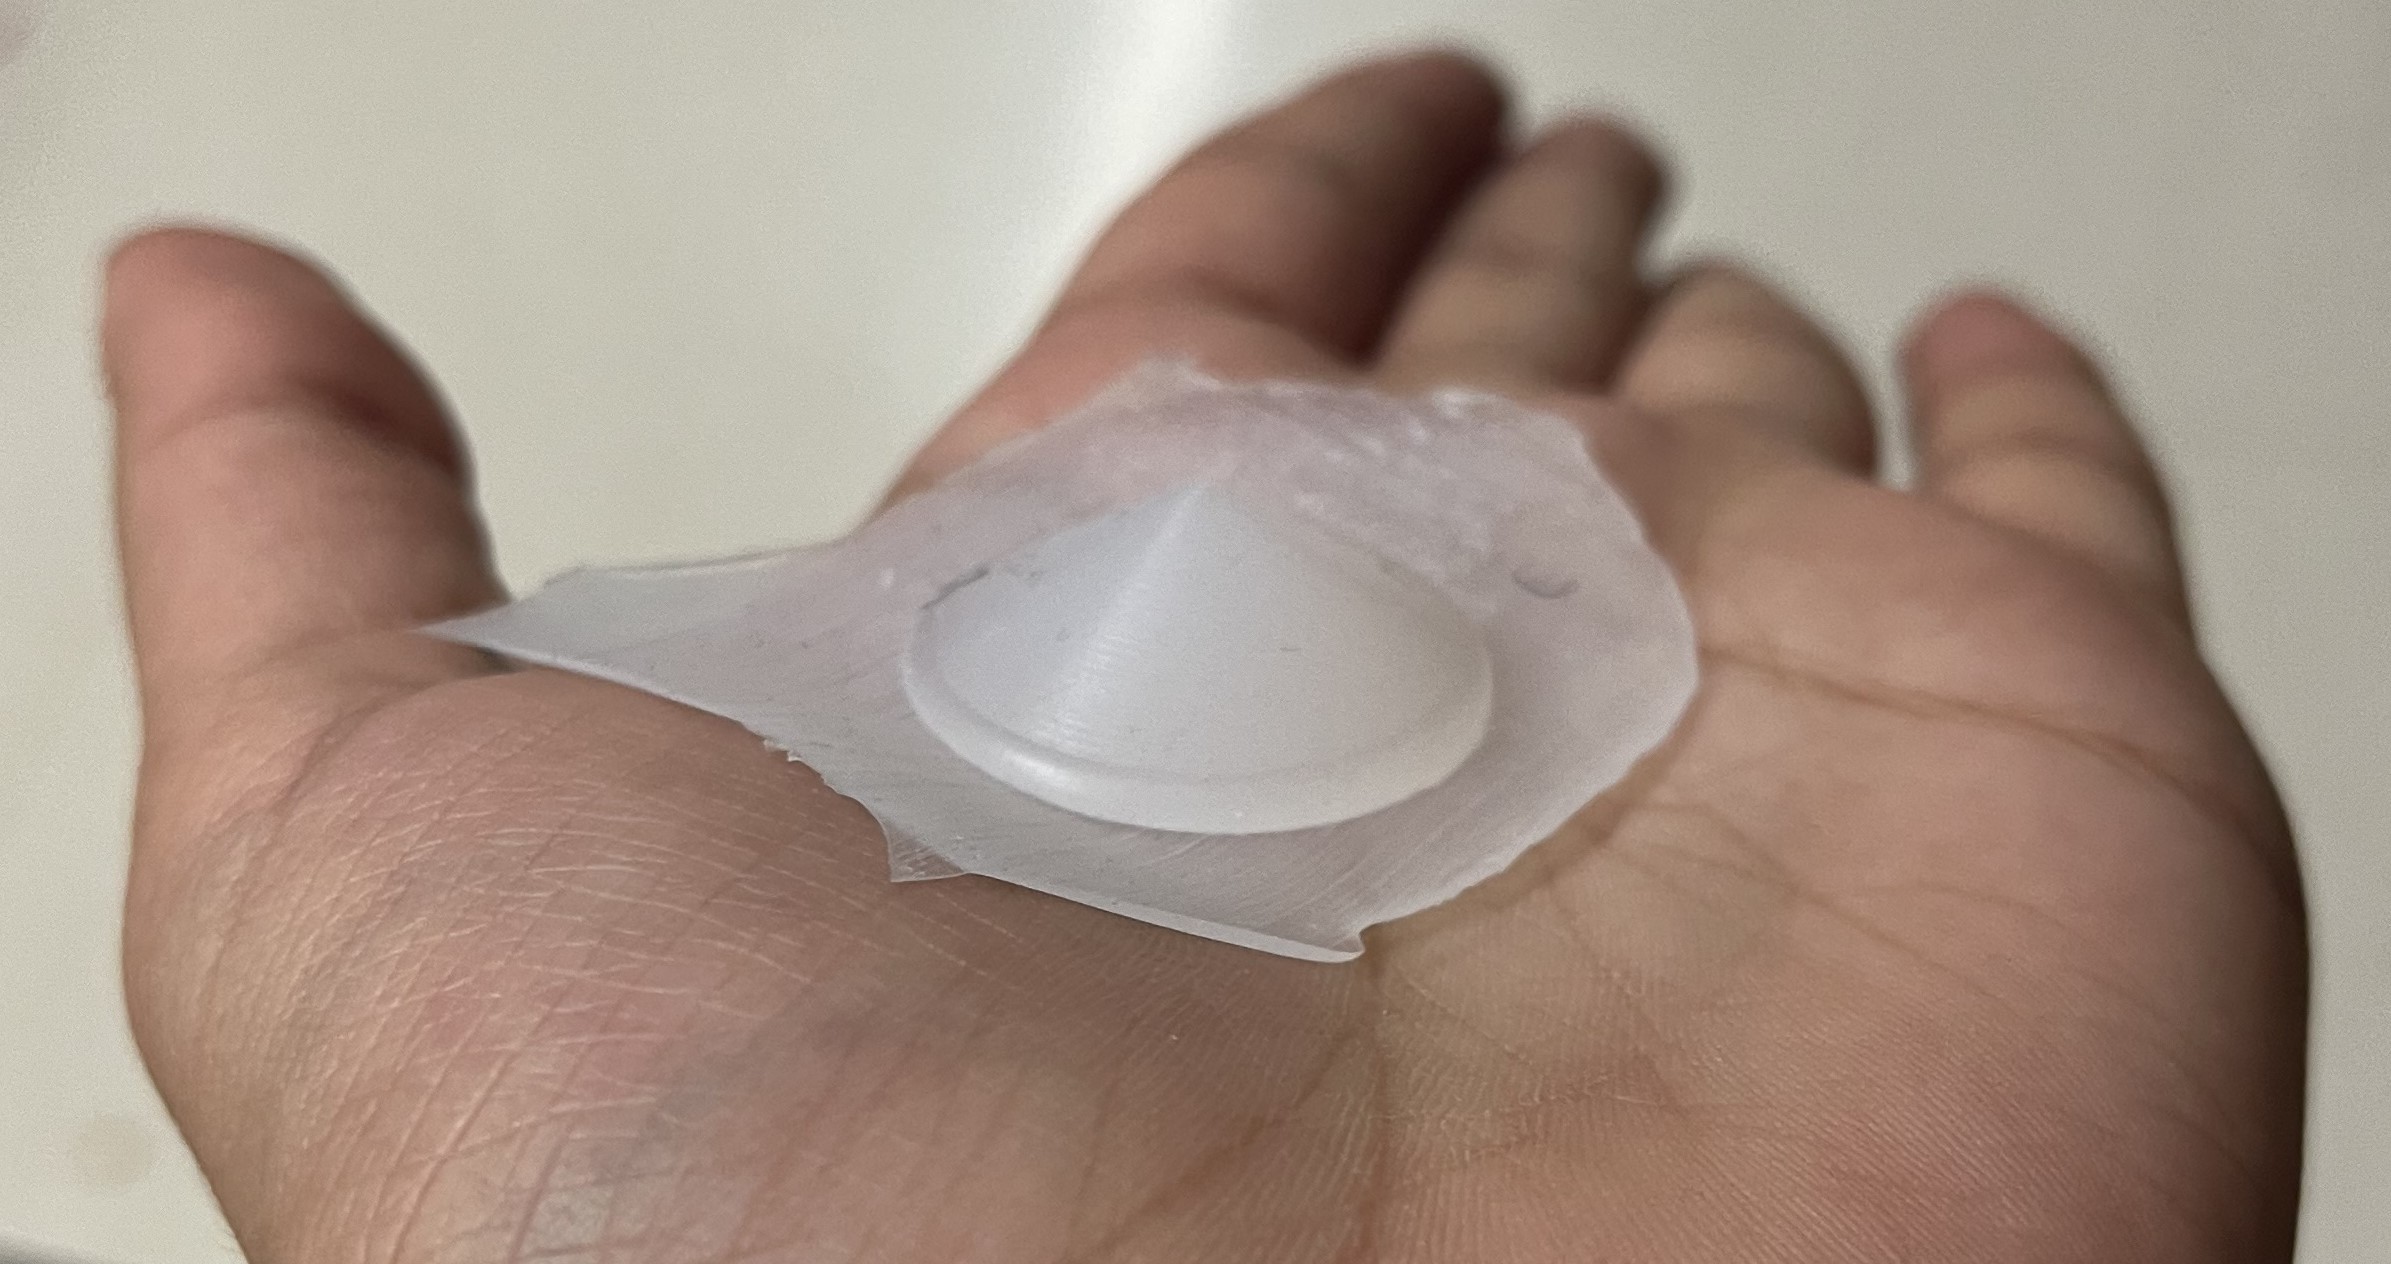
Casting the Mold
To cast the mold, I used the same materials as I had used above in my pervious molding and casting attempt. I used Moldstar 20T, and this is how it turned out!
Final Molding and Casting
Takeaways
I learned many cool things this week such as what exactly molding and casting meant. I was very confused as to what process this was, although, through Neil’s lecture and presentations from my professors, this was very easy.
New things I learned:
-
Learning how to make CAM toolpaths
-
Learning how to mill into wax
-
Learning about the different types of materials that can be used in a project such as molding and casting.
Summary
This was was a fairly easy week, the main focus was to get the design files right, and the rest would fall into place. I followed various workflows and did some research to make my final product successful. This is one of the many weeks that I only had to complete the assignment once and not have many test tries!! WOOO!! I getting better at this, and I am so happy :))
Group Work
This week’s group work taught me the fundamentals of molding and casting, starting with the different materials, their pot times, and curing times. At first, I didn’t even know what pot or curing meant, so I went on a quest on Google and found out. My job in my group work was to mix, pour, and extract molds for certain types of molds. We read the safety data sheet. Here is a link where you can access our group website.
These were my files for this week.