18. Wildcard week
These were my files for this week.
This week’s assignment is one I have been waiting for a while.
The assignment was to design and produce something with a digital fabrication process (incorporating computer-aided design and manufacturing), which has not yet been covered in another assignment.
I have always wanted to buy a little embroidery machine and start my business designing and manufacturing designs for customers. Although this ended because of the prices of these machines and the thinking process of “how many times will I use this”? So as you get the hint… I have not brought an embroidery machine YET.
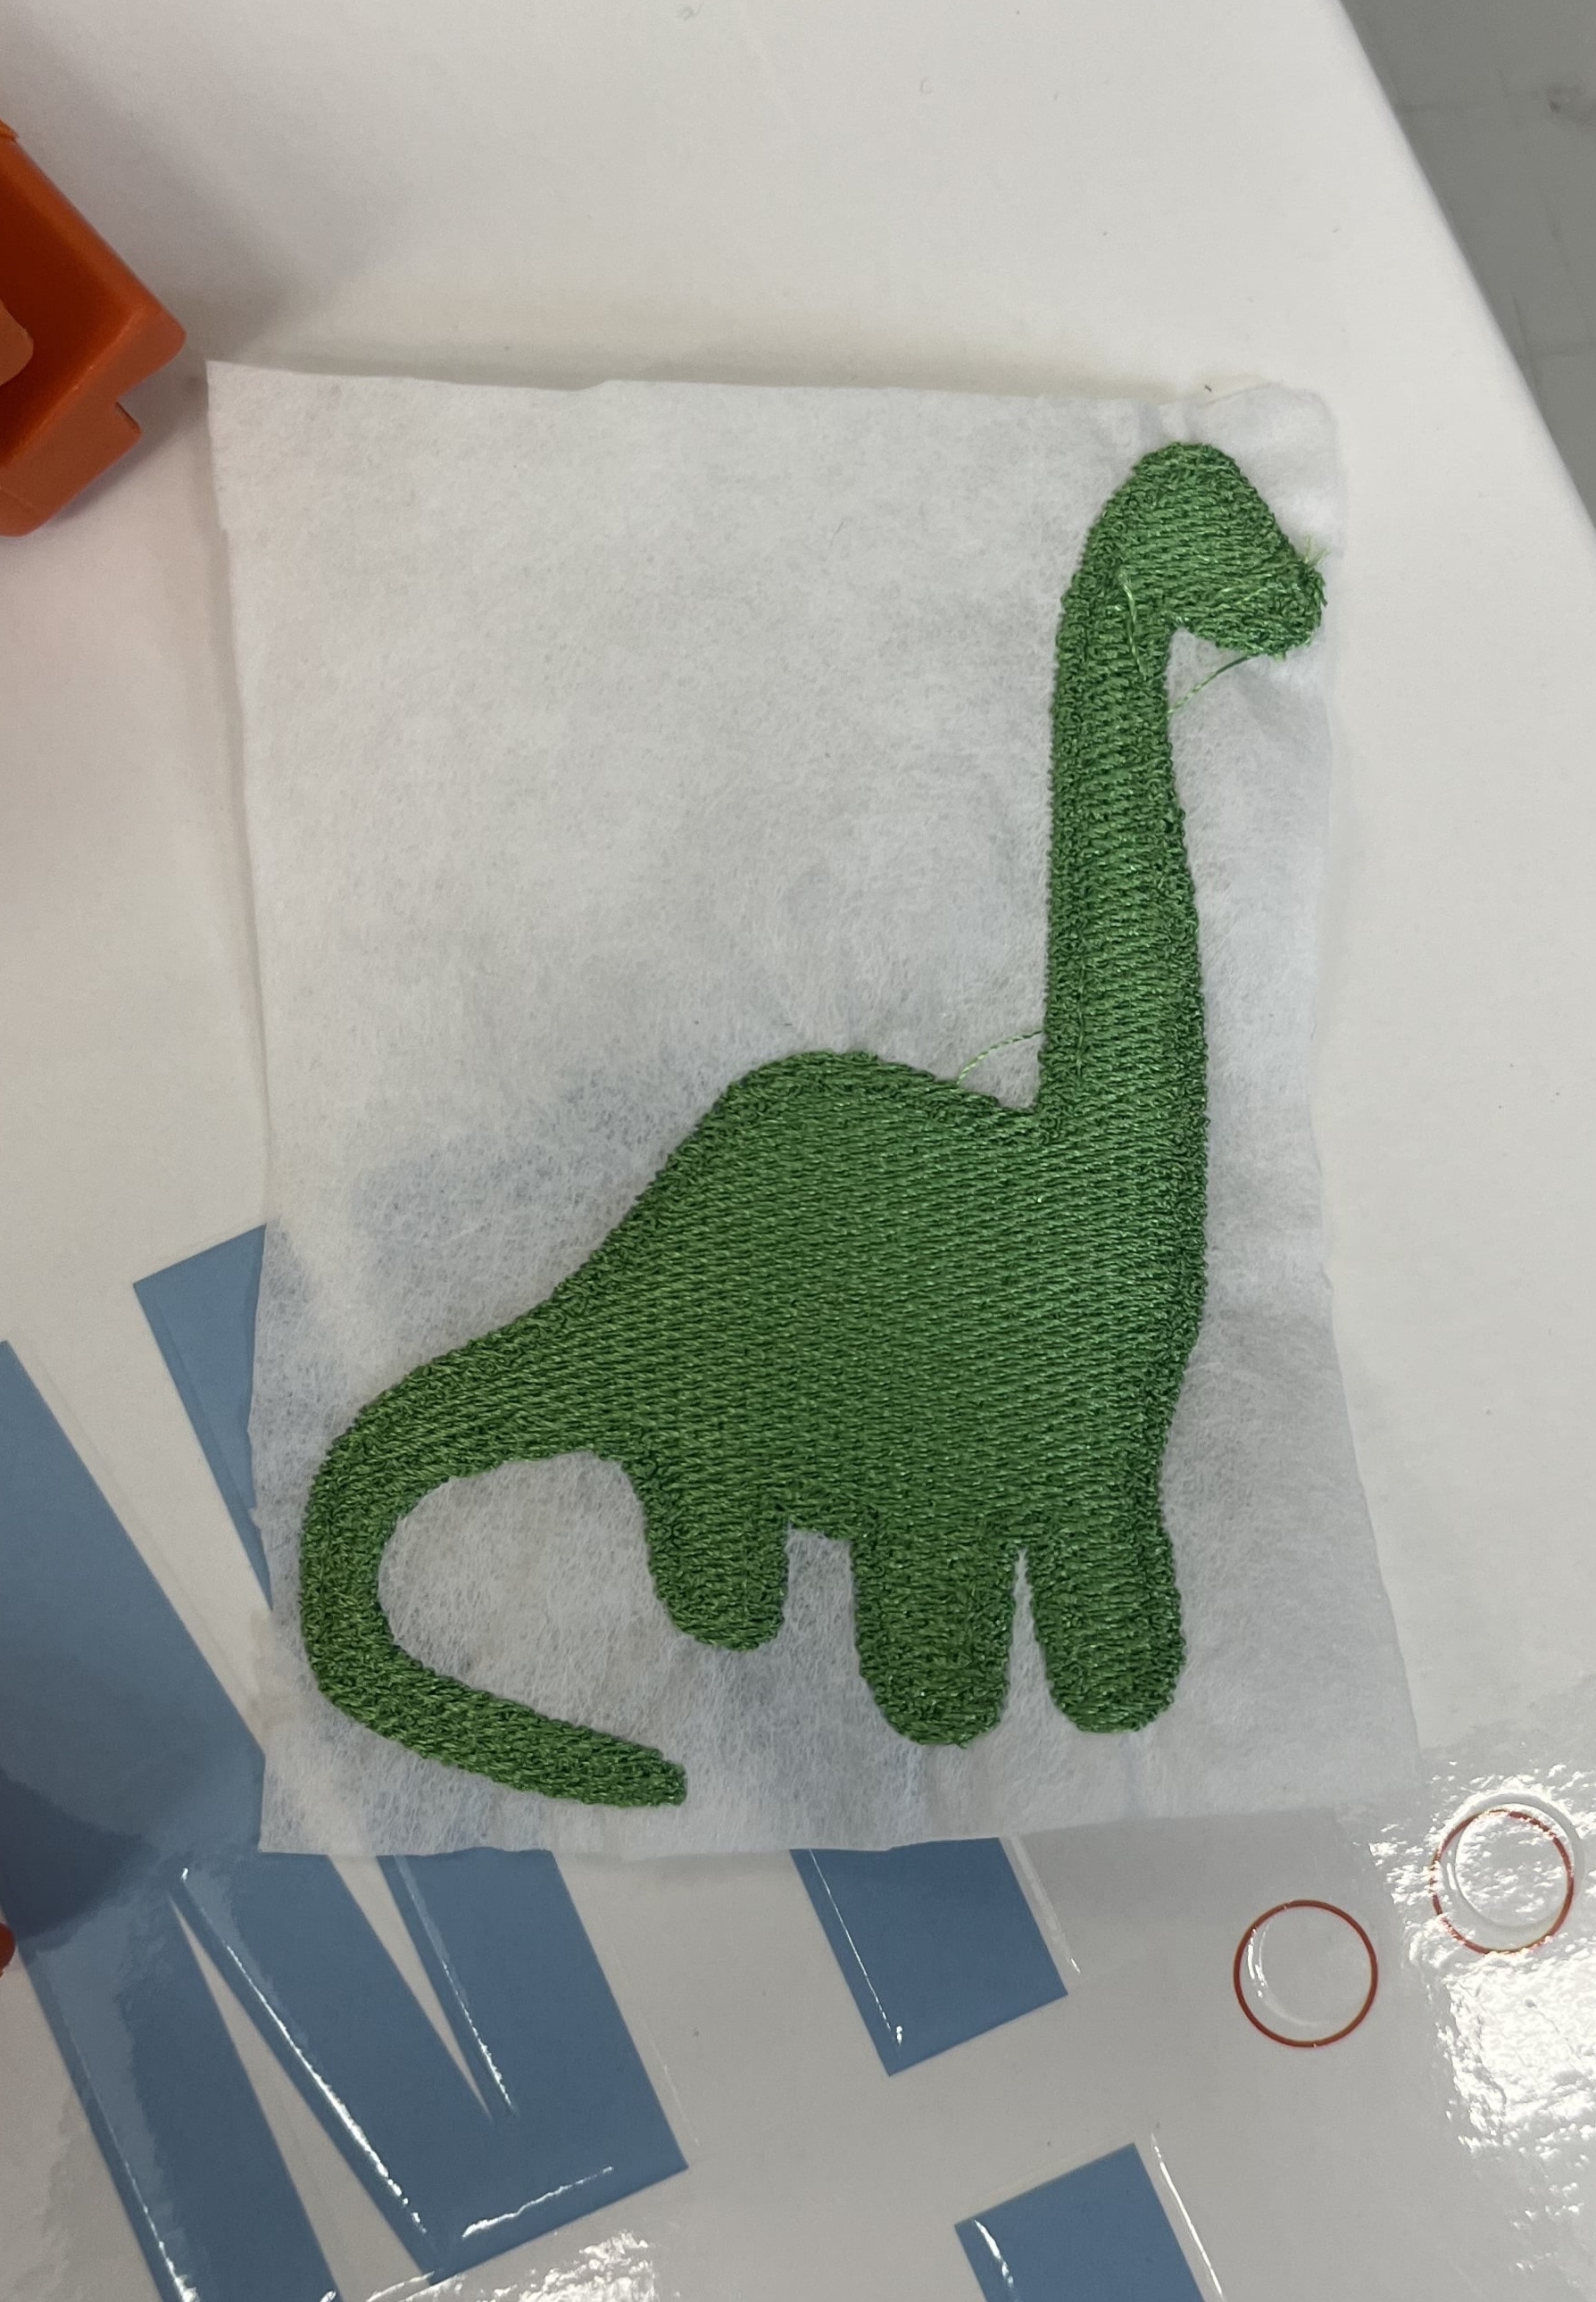
To gather ideas for this week, I decided to embroider something fun that relates to me. I tried to find ways to see if anything fit with my final project, but I could not think of much. Then I decided to gift this piece of embroidery to my friend whose birthday was coming up. I decided to do an embroidery of a dinosaur (brachiosaurus)
For this week, the machine I will be using is the Brother SE 600 which was brought in by Nidhie Dhiman
To first understand what was required and how to do this, I watched a video shared by one of our Fab colleagues Nidhie Dhiman
After watching this video I understood the overall process of how the machine works and the steps needed to accomplish my task. I learned the basics: How to start and configure the machine to embroider your design.
Designing on Inkscape/ InkStich
To start, I downloaded InkStich, this is an extension in Inkscape so it was very easy to download and navigate. I have already had Inkscape installed, and I have used the application during Week 3 and Week 4 of my documentation.
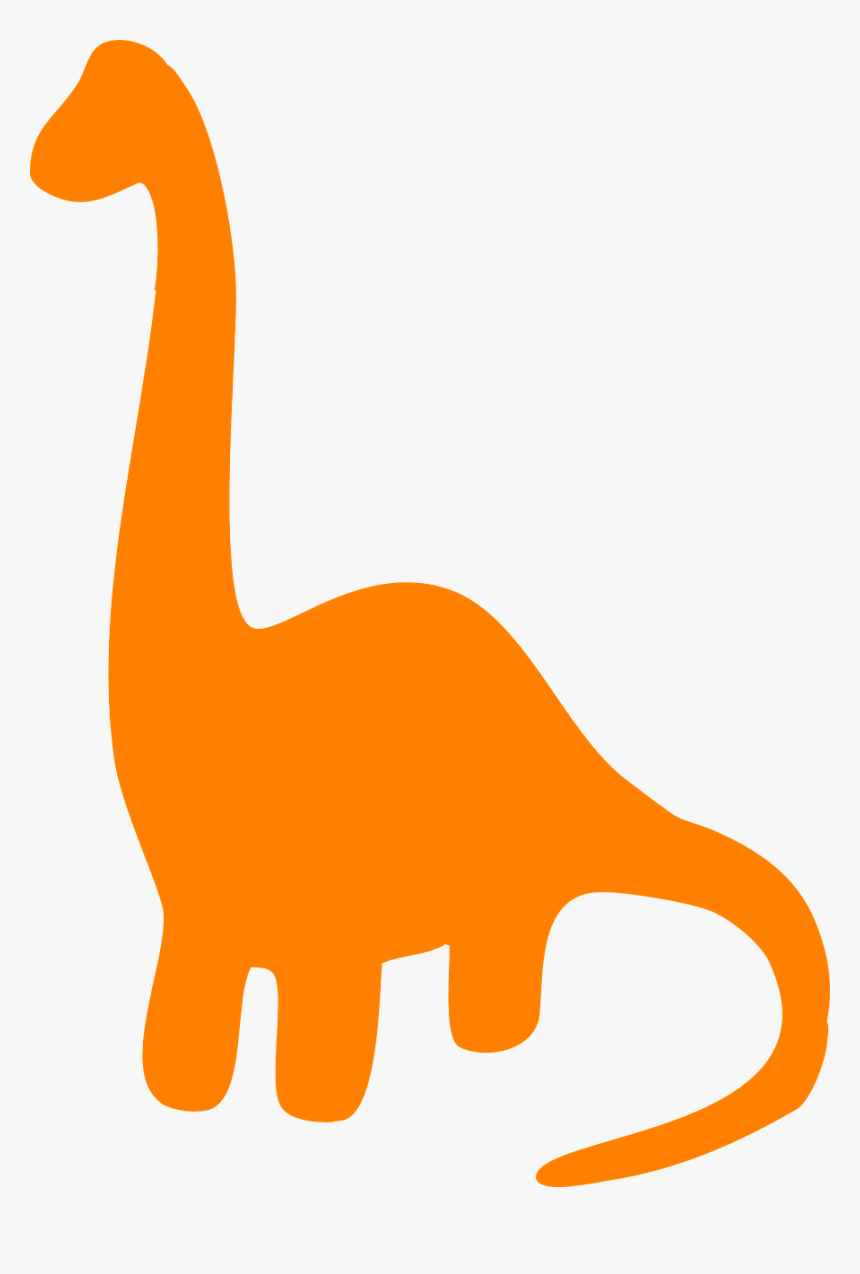
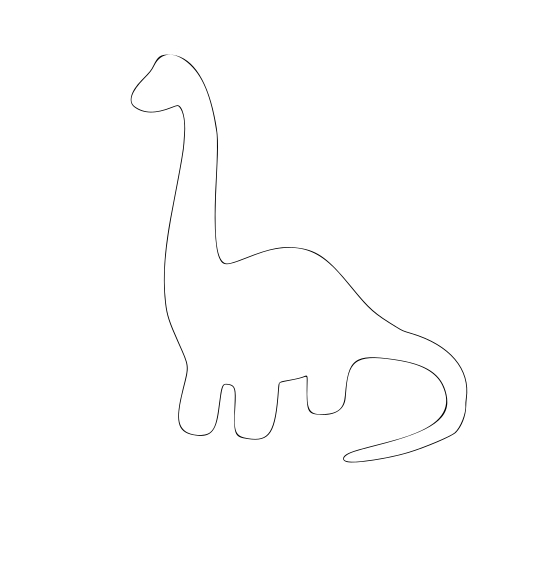
Since my drawing skills aren’t the best, I decided to import a .png so I could trace a bitmap and have an outline that way. To do this I searched online for Dino Shilouttes and found the perfect one.
Find one that’s easy to trace!!
Next, I imported this into Inkscape and traced the bitmap. Tracing bitmaps are a life savior as they save you so much time.
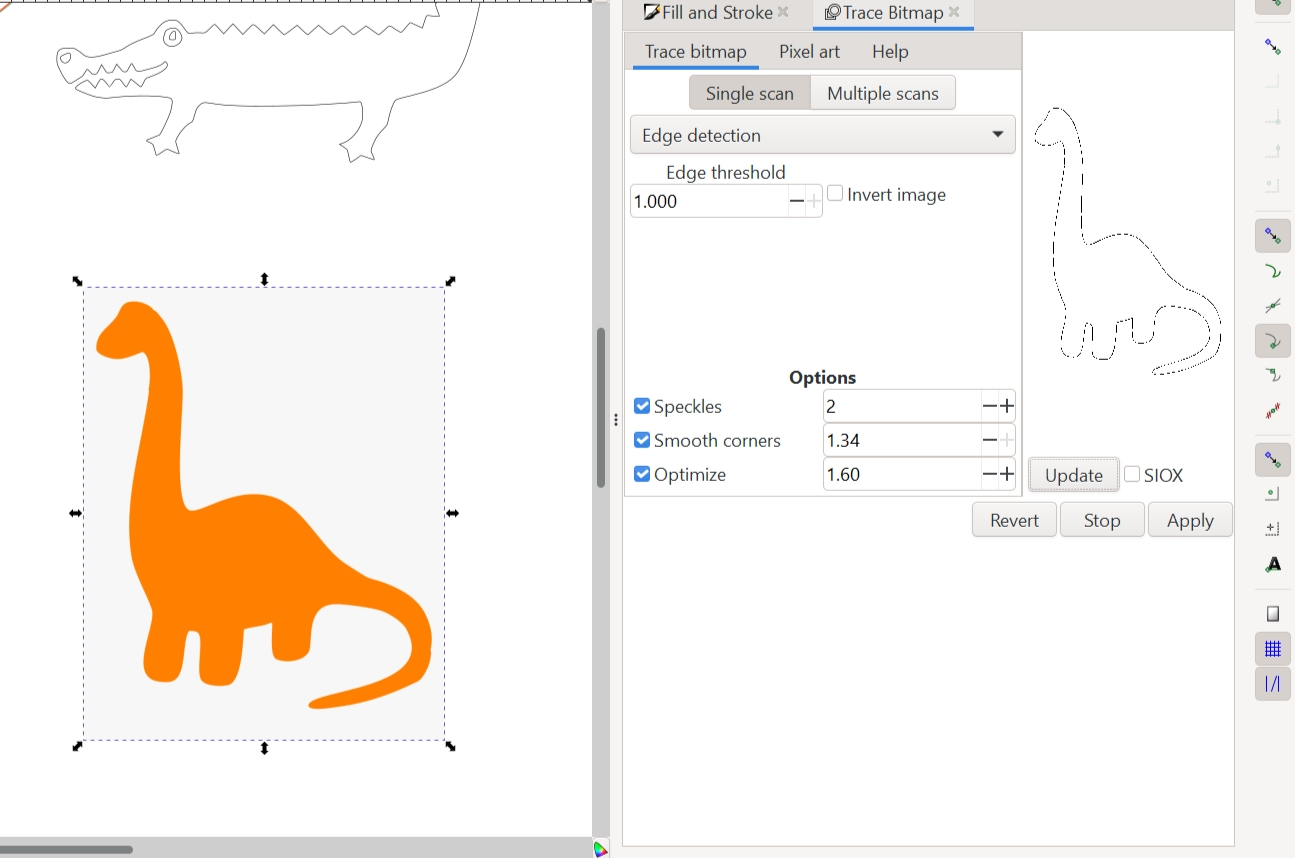
This was how the bitmap turned out
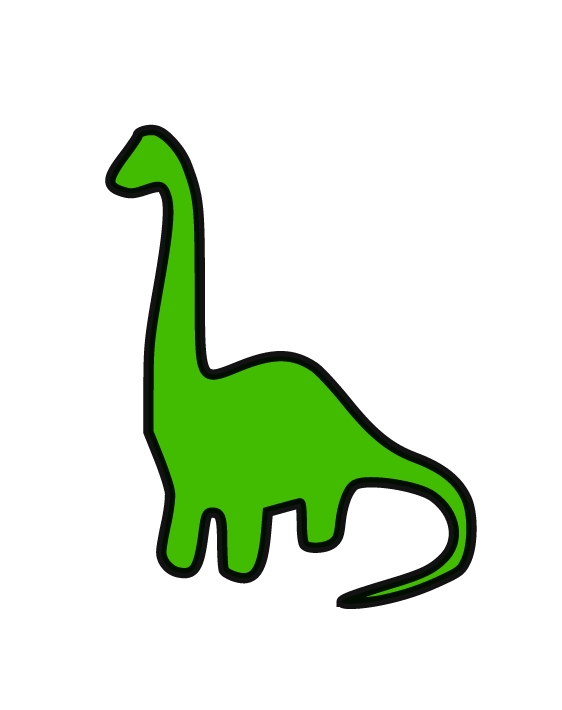
I wanted my dino to have some color, so next, I used the fill/paint bucket tool and painted my dino green. Along with filling the dino with color, I also make the outline thicker and kept the same color, Black. This is what it looked like.
After designing my file, I wanted to see the simulation of the machine and what I would be expecting. I also needed to give the machine the “g-code” or “path” or param that is needed to successfully embroider my design.
To do this I selected the Extensions —> Ink/Stich —> Params
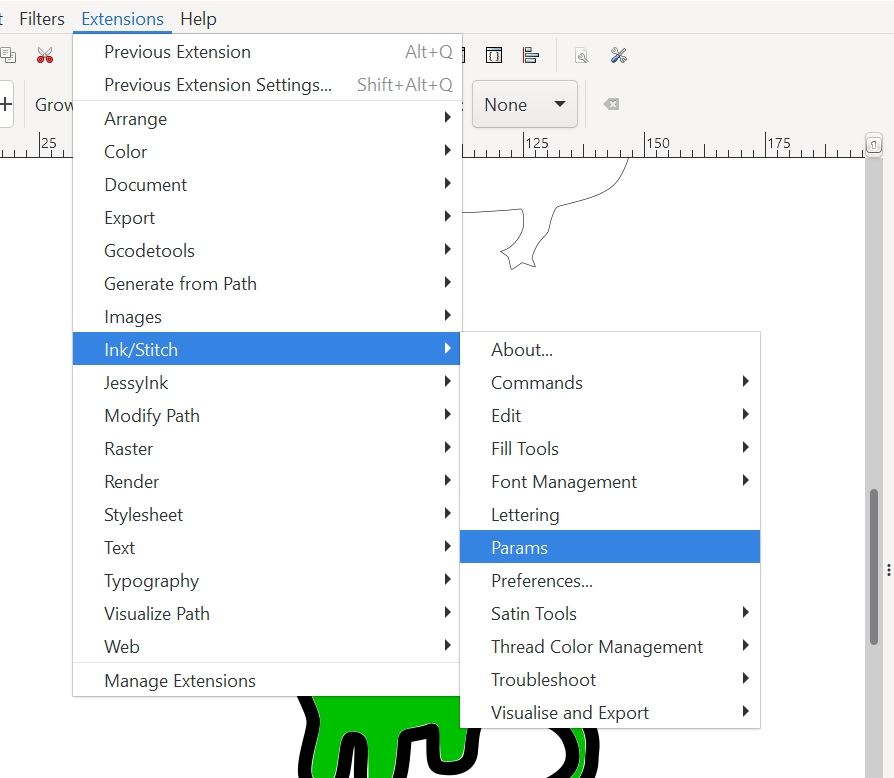
Once this was done, I got to see the actual simulation.
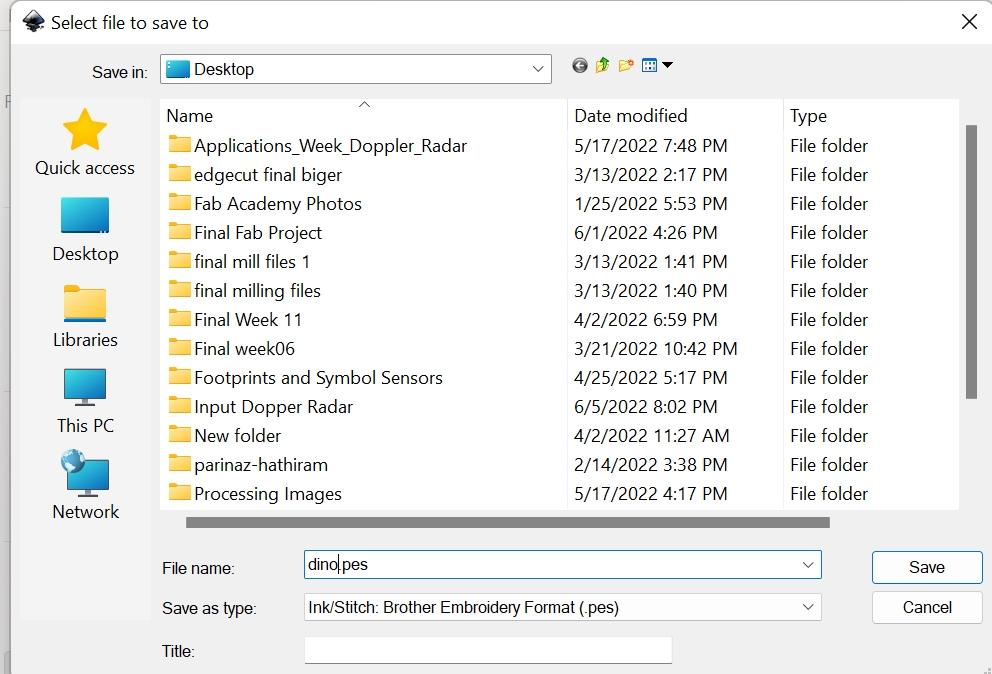
This made me confident and ready to move ahead. The next step was to use the embroidery machine. But before I did that I had to save the file as a .pes so I could upload it to a USB stick and then plug that stick into the machine so the machine could understand its “g-code”.
Using the Embroidery Machine
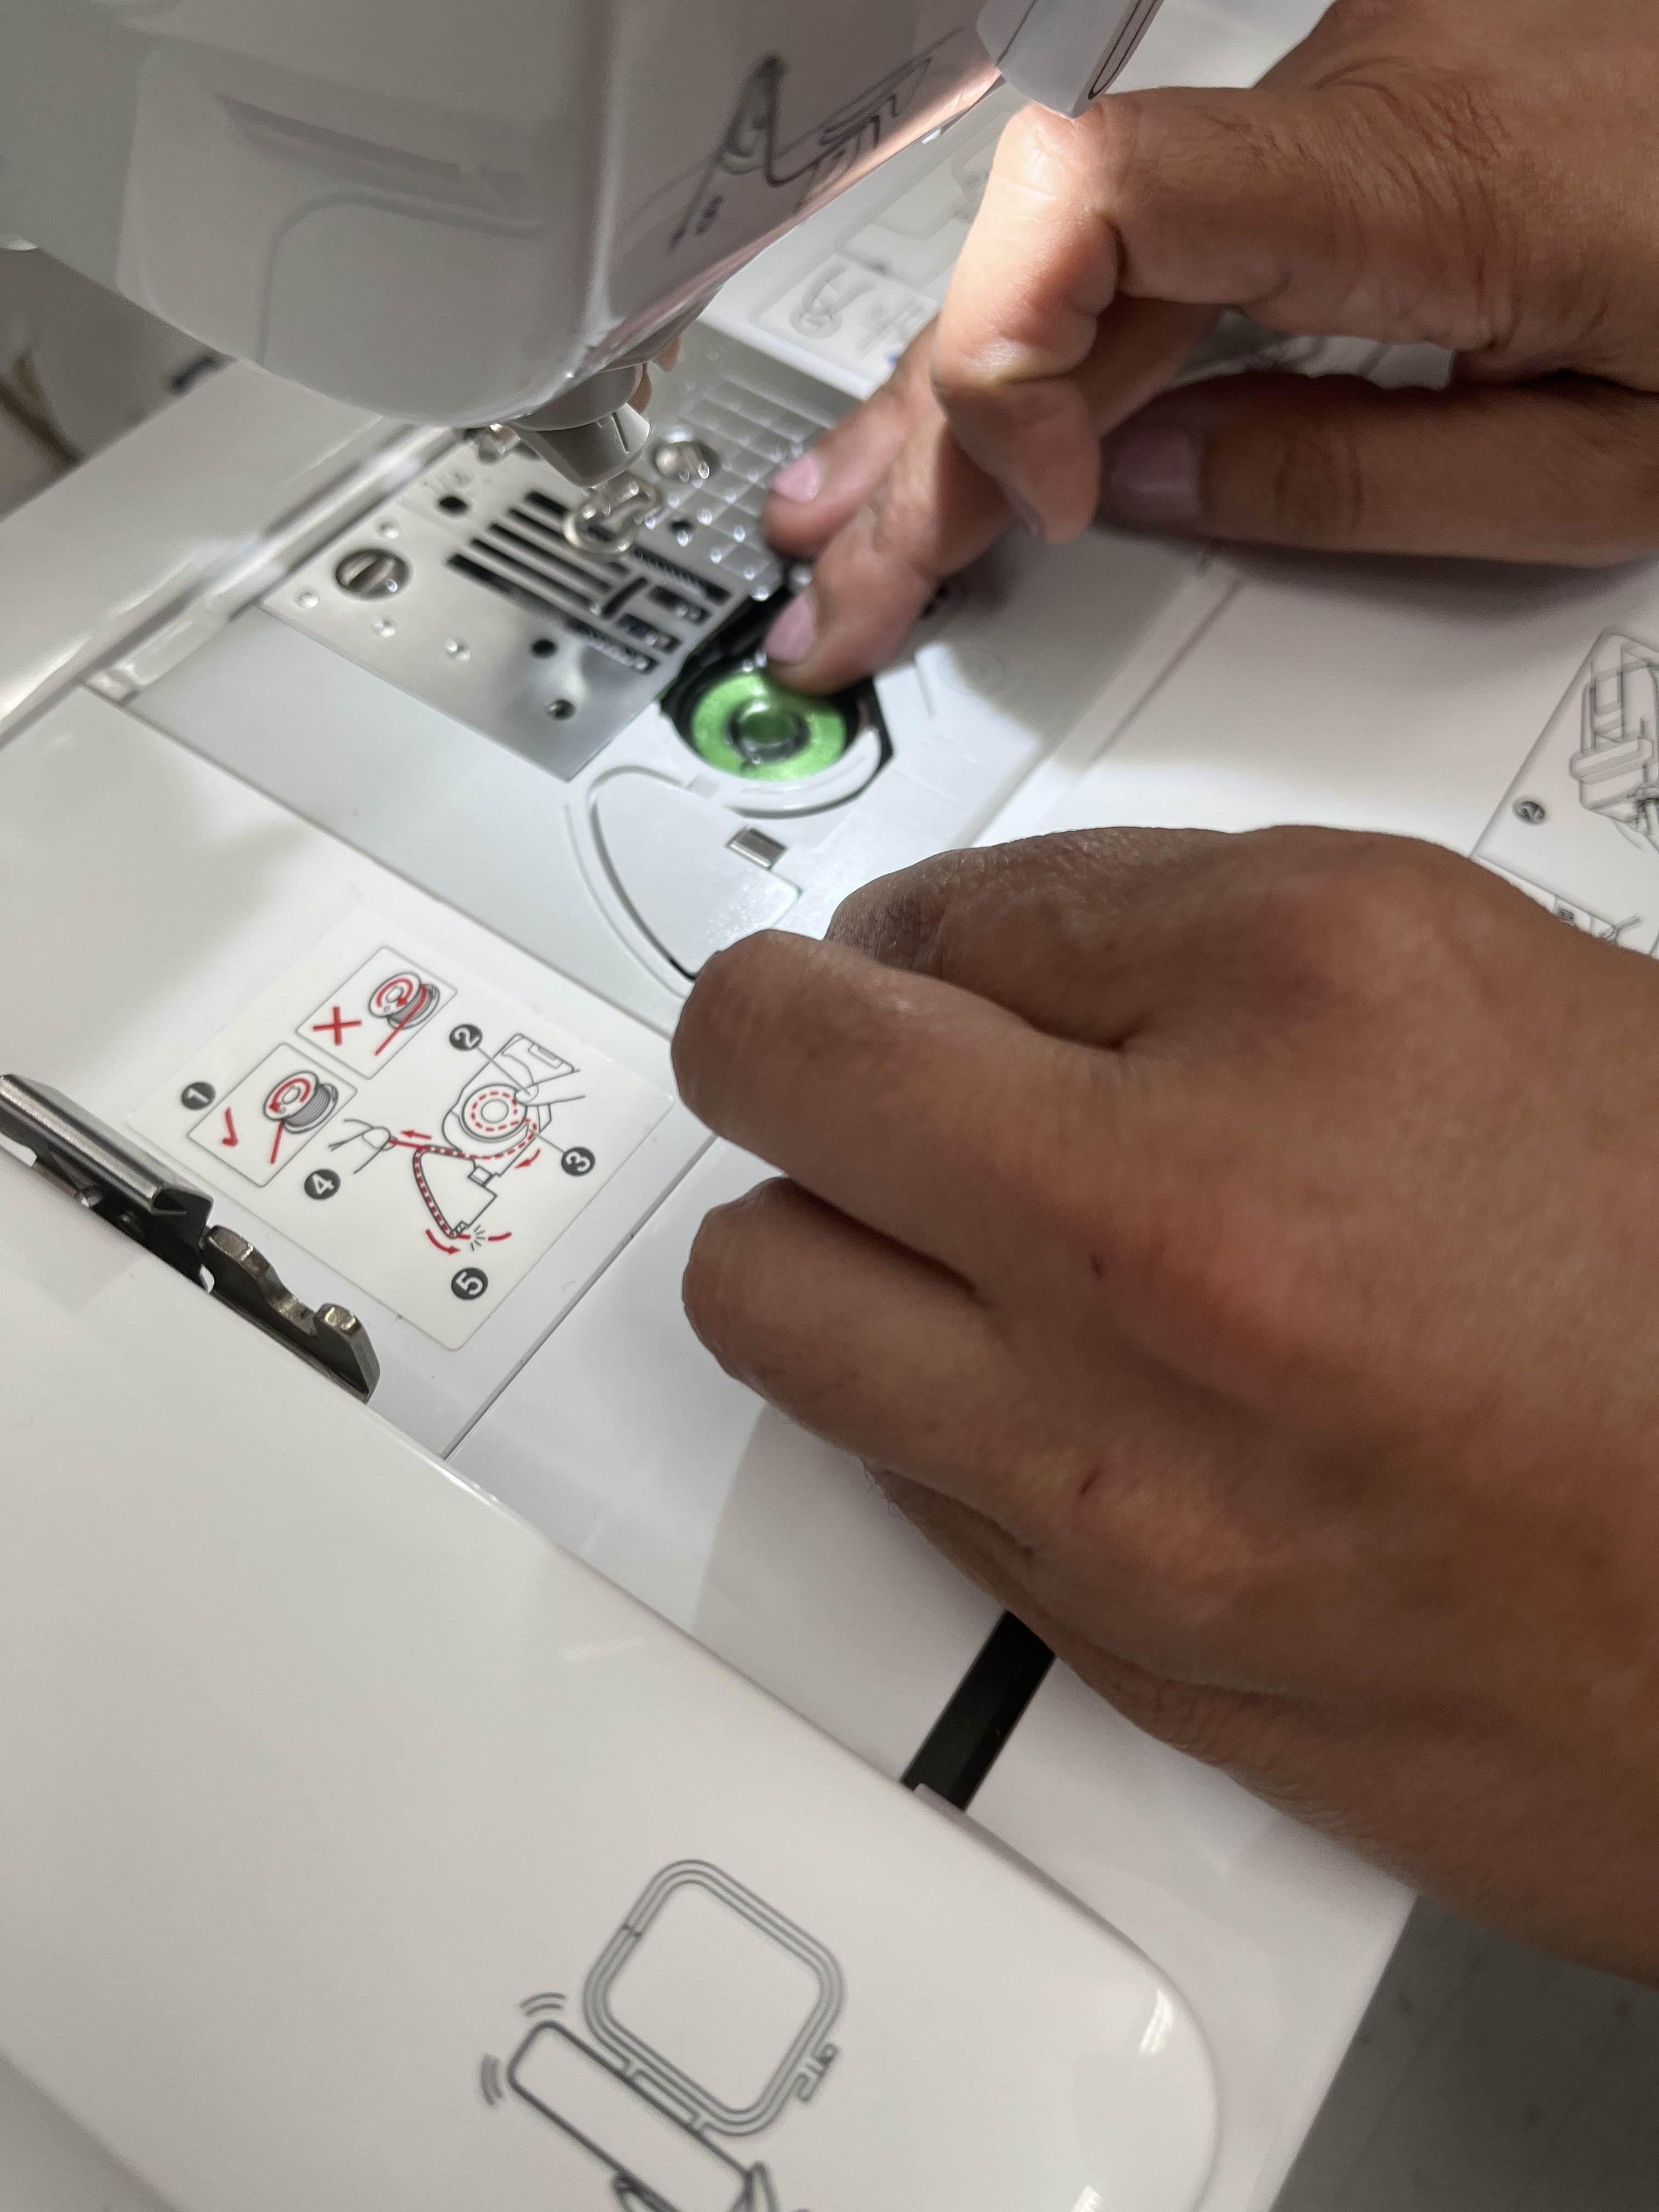
I first, threaded the bobbin into the bottom of the machine.
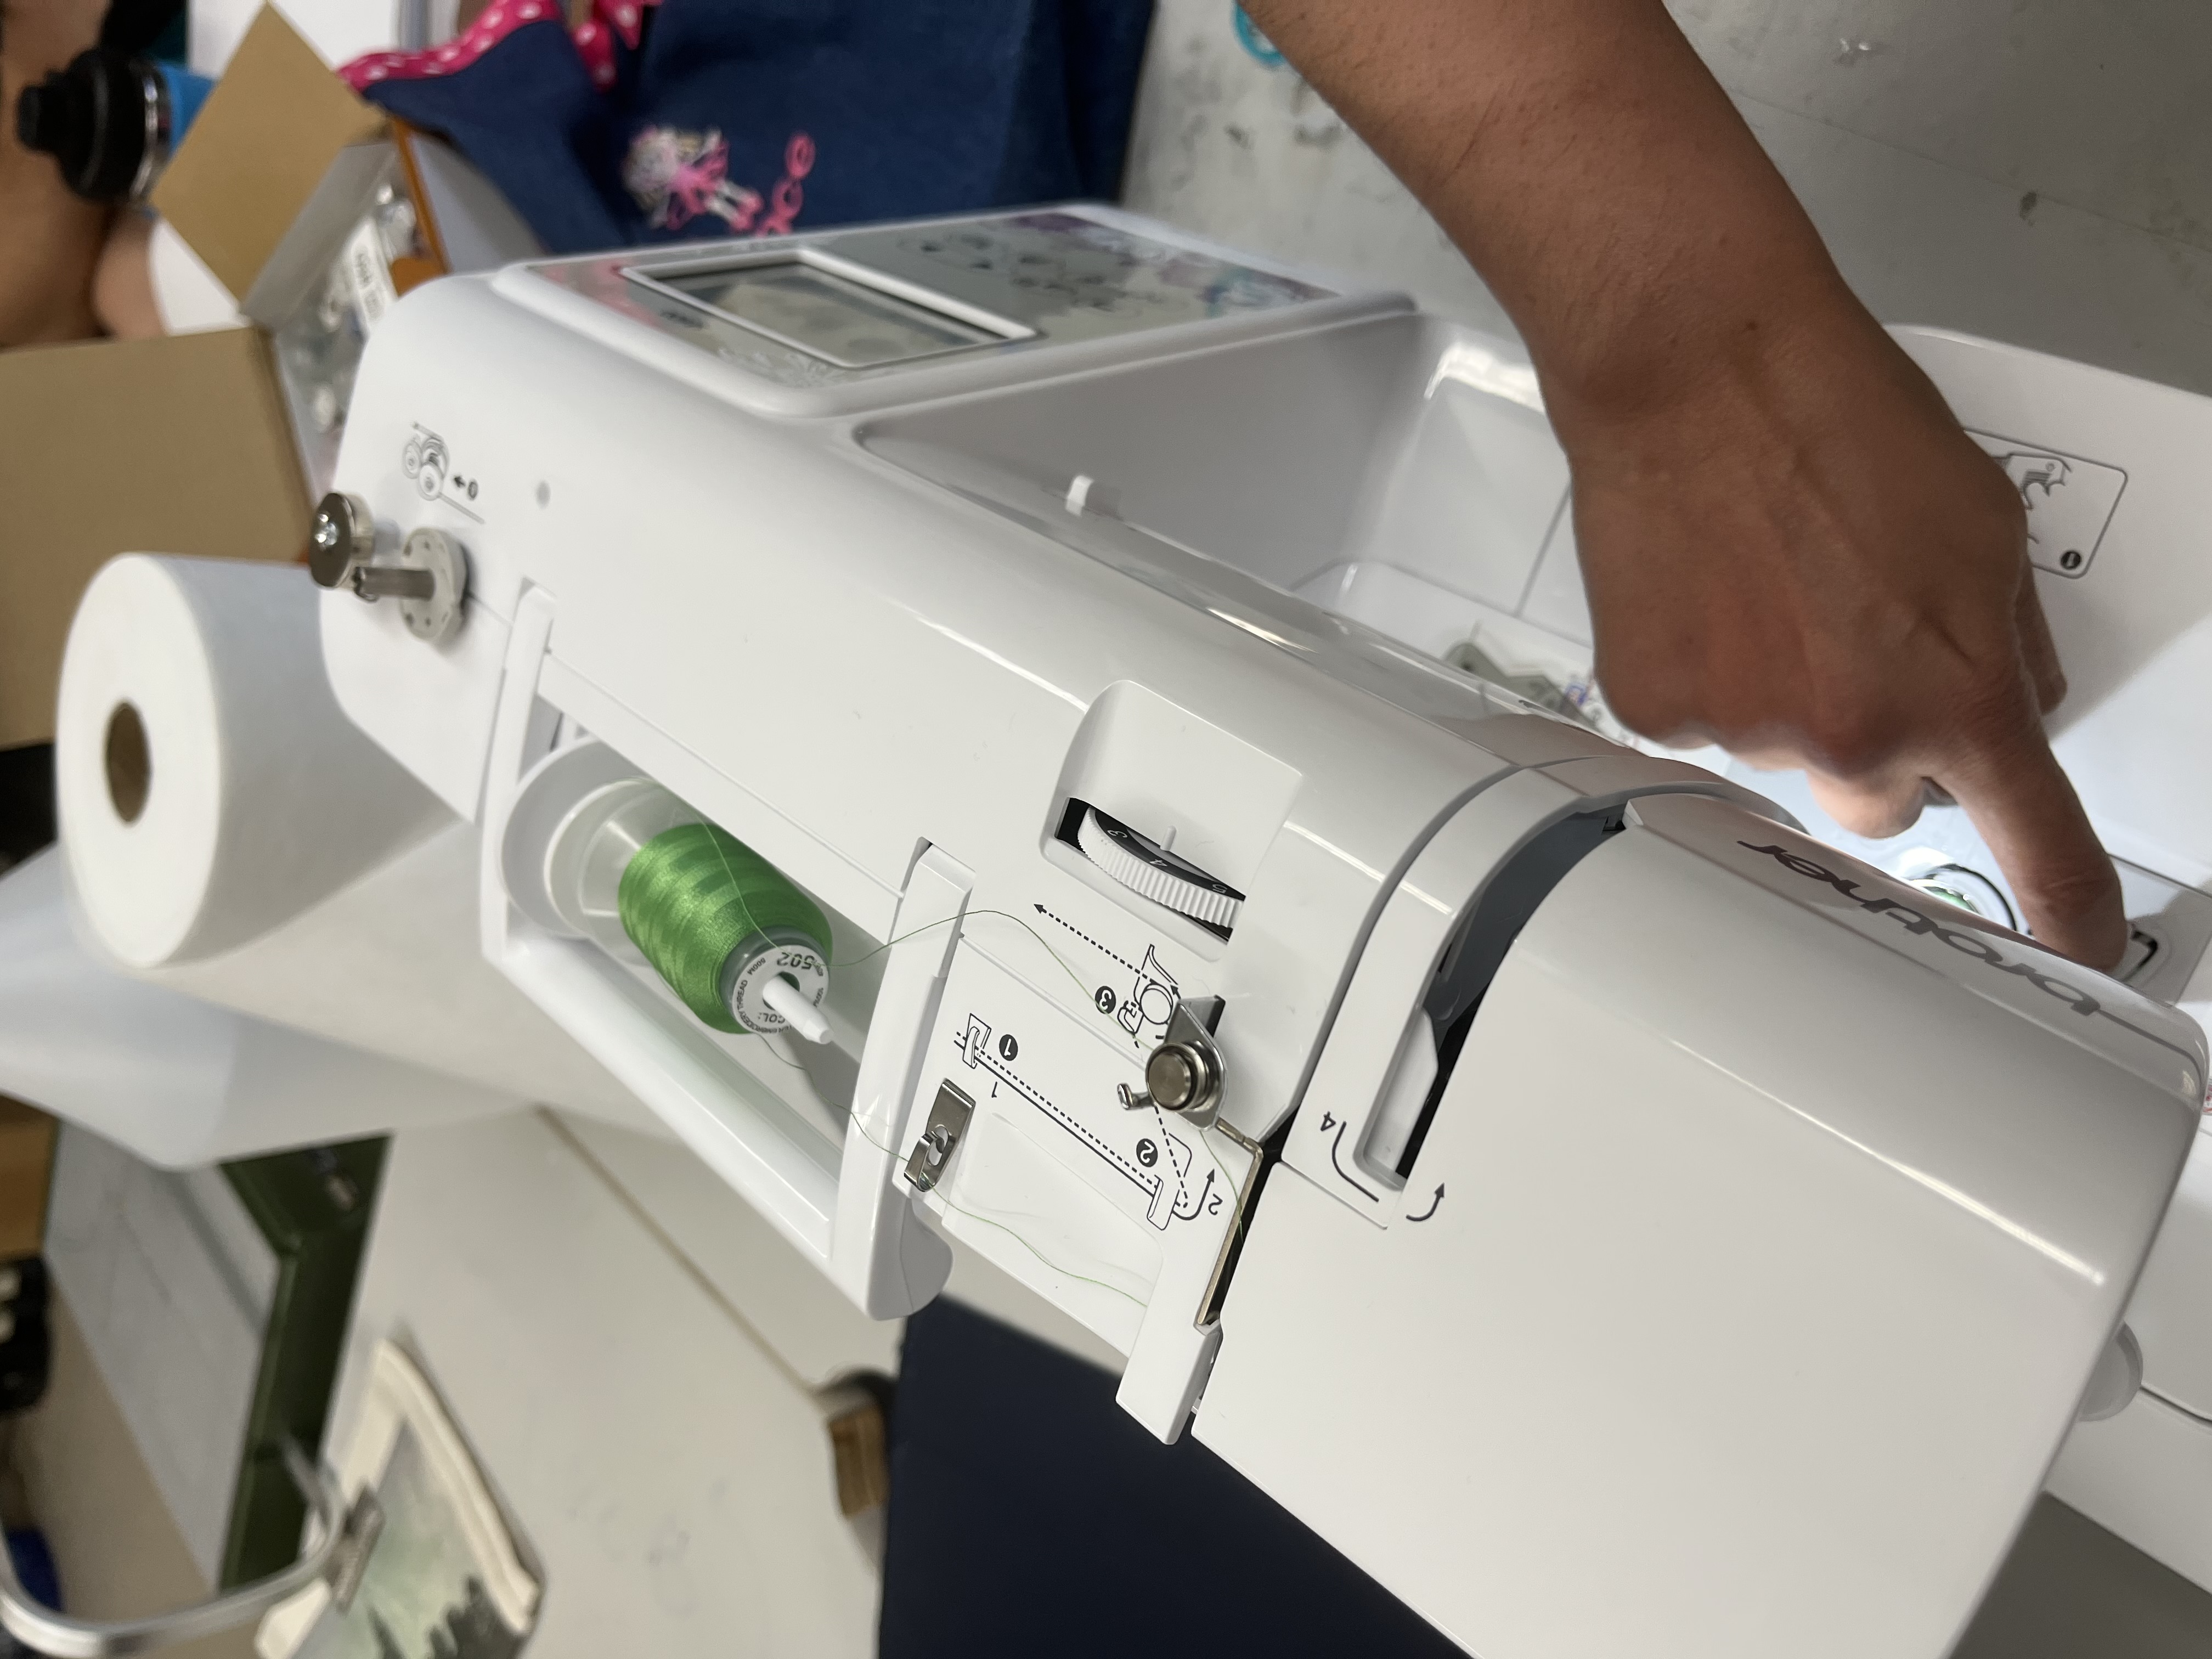
Next, I threaded the color of string I wanted my design to be. In my case, the dino will be green. Hence I loaded a green String.
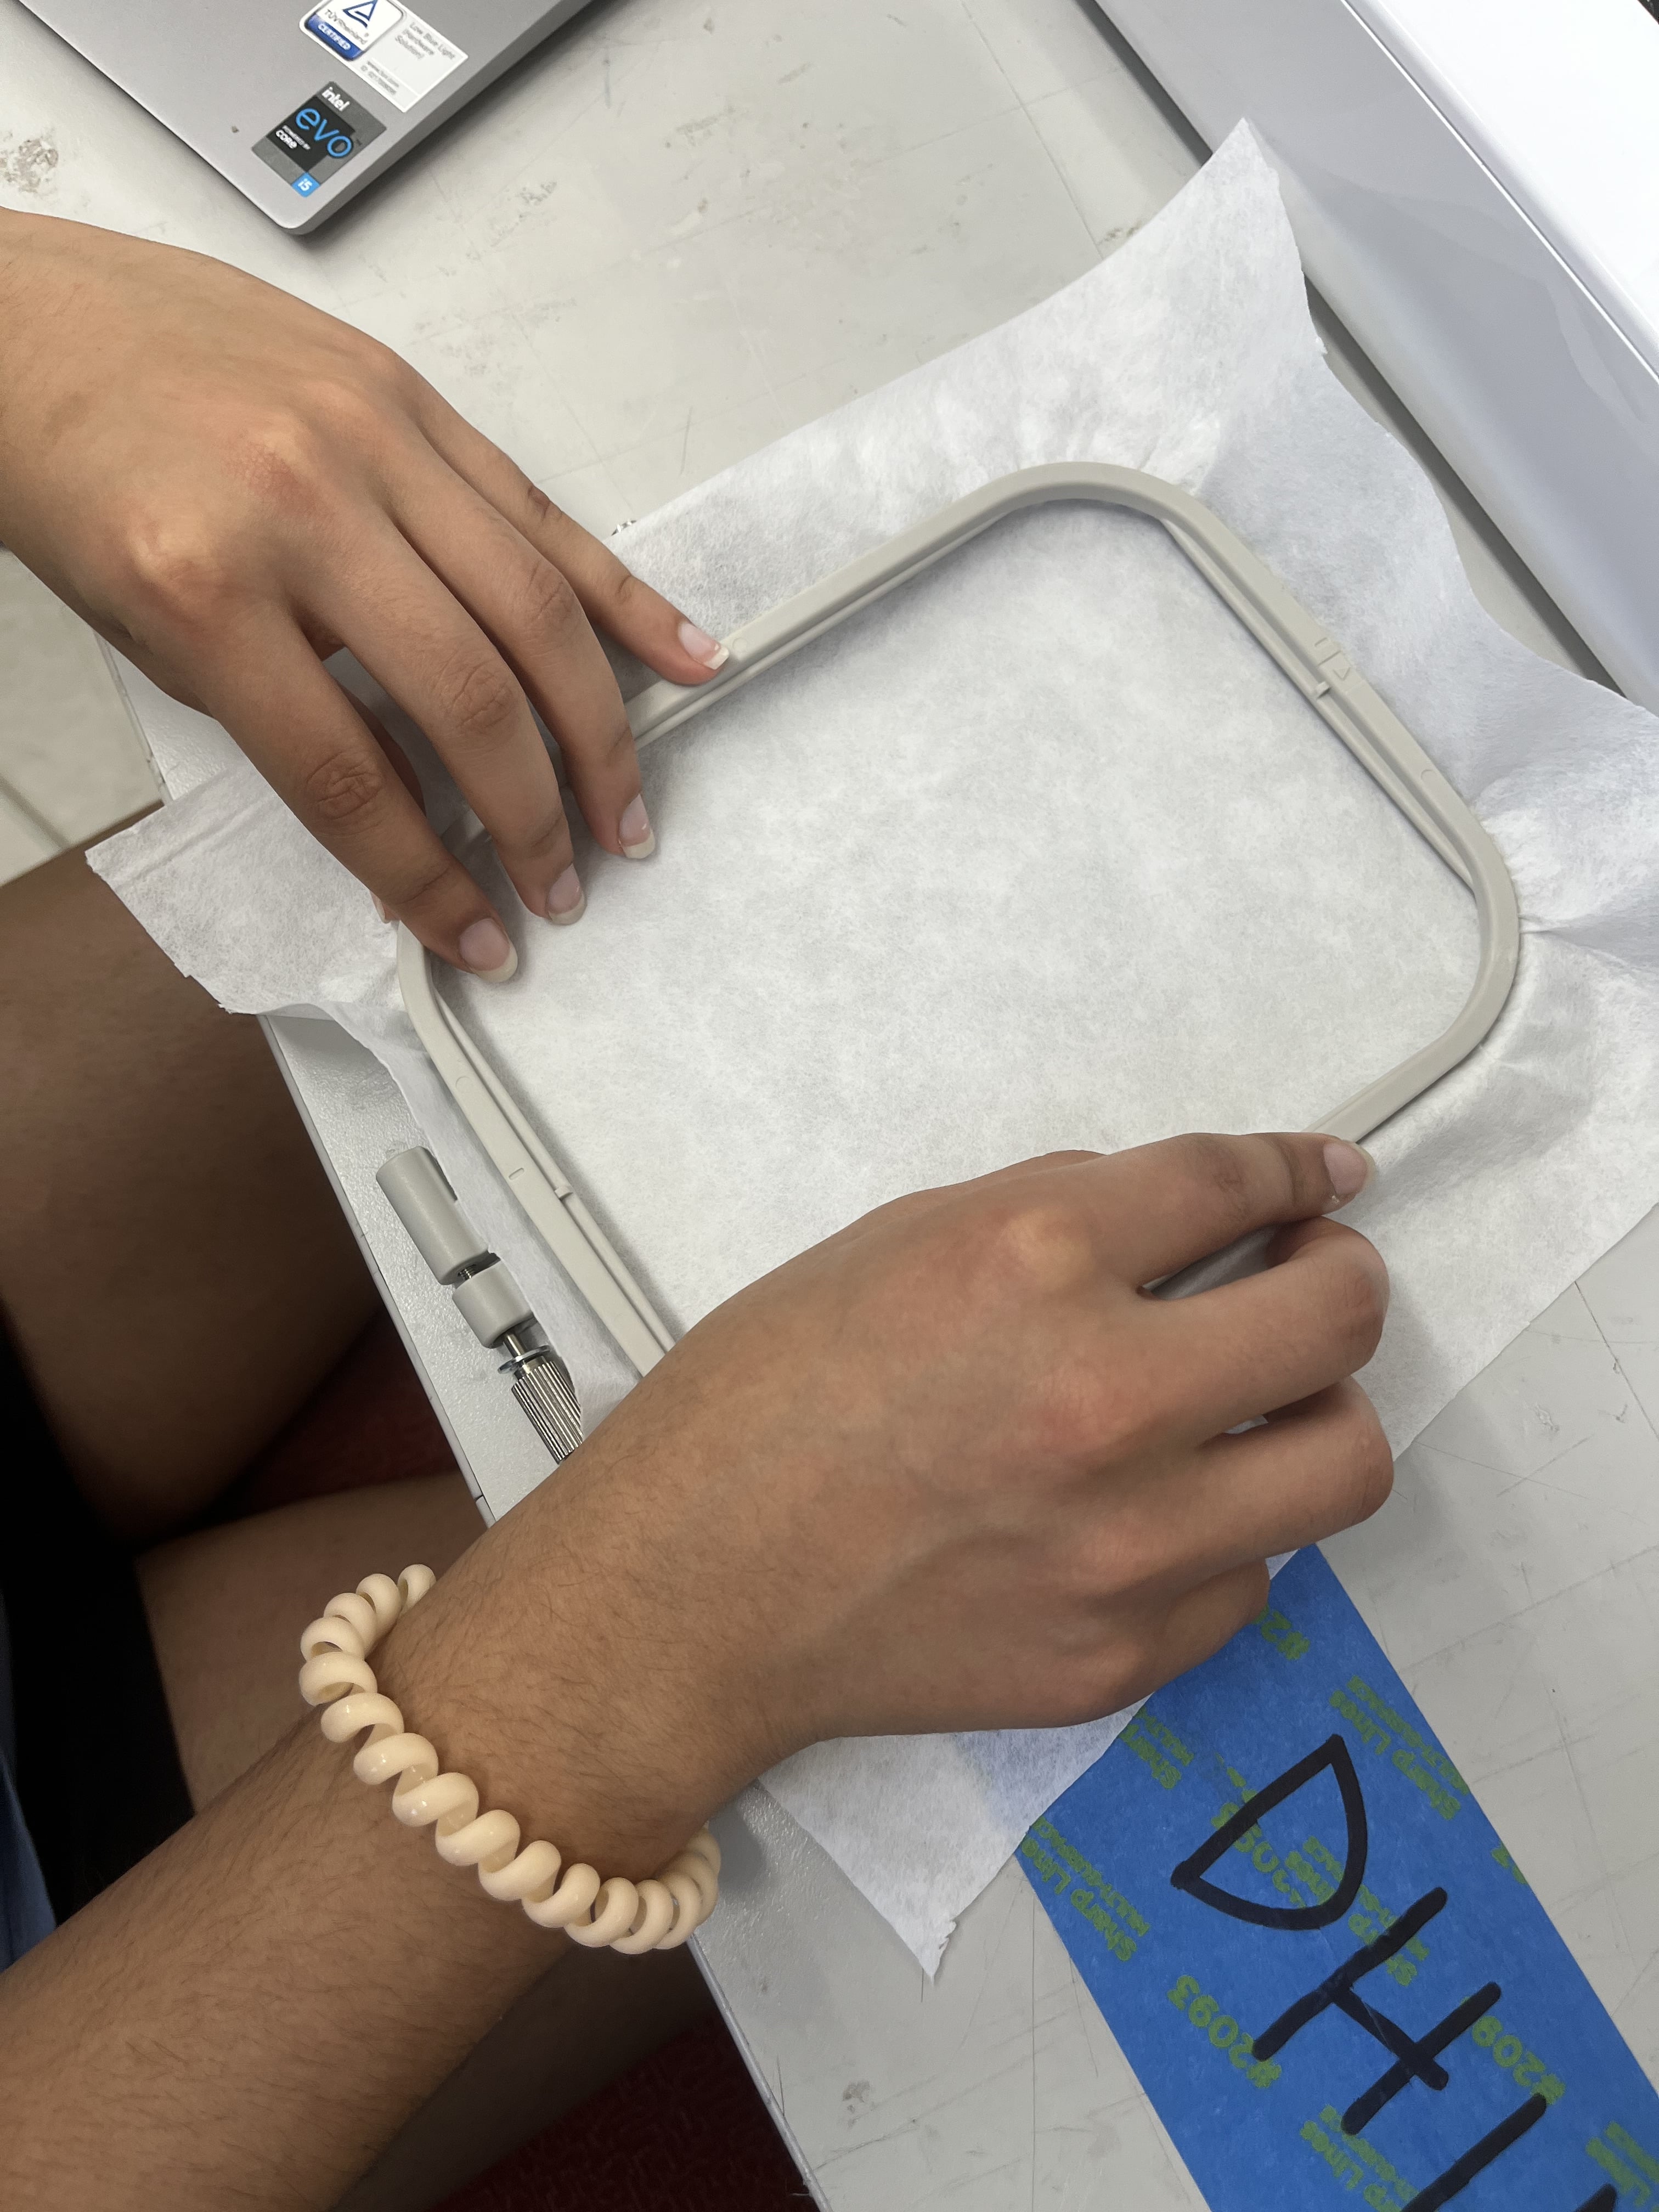
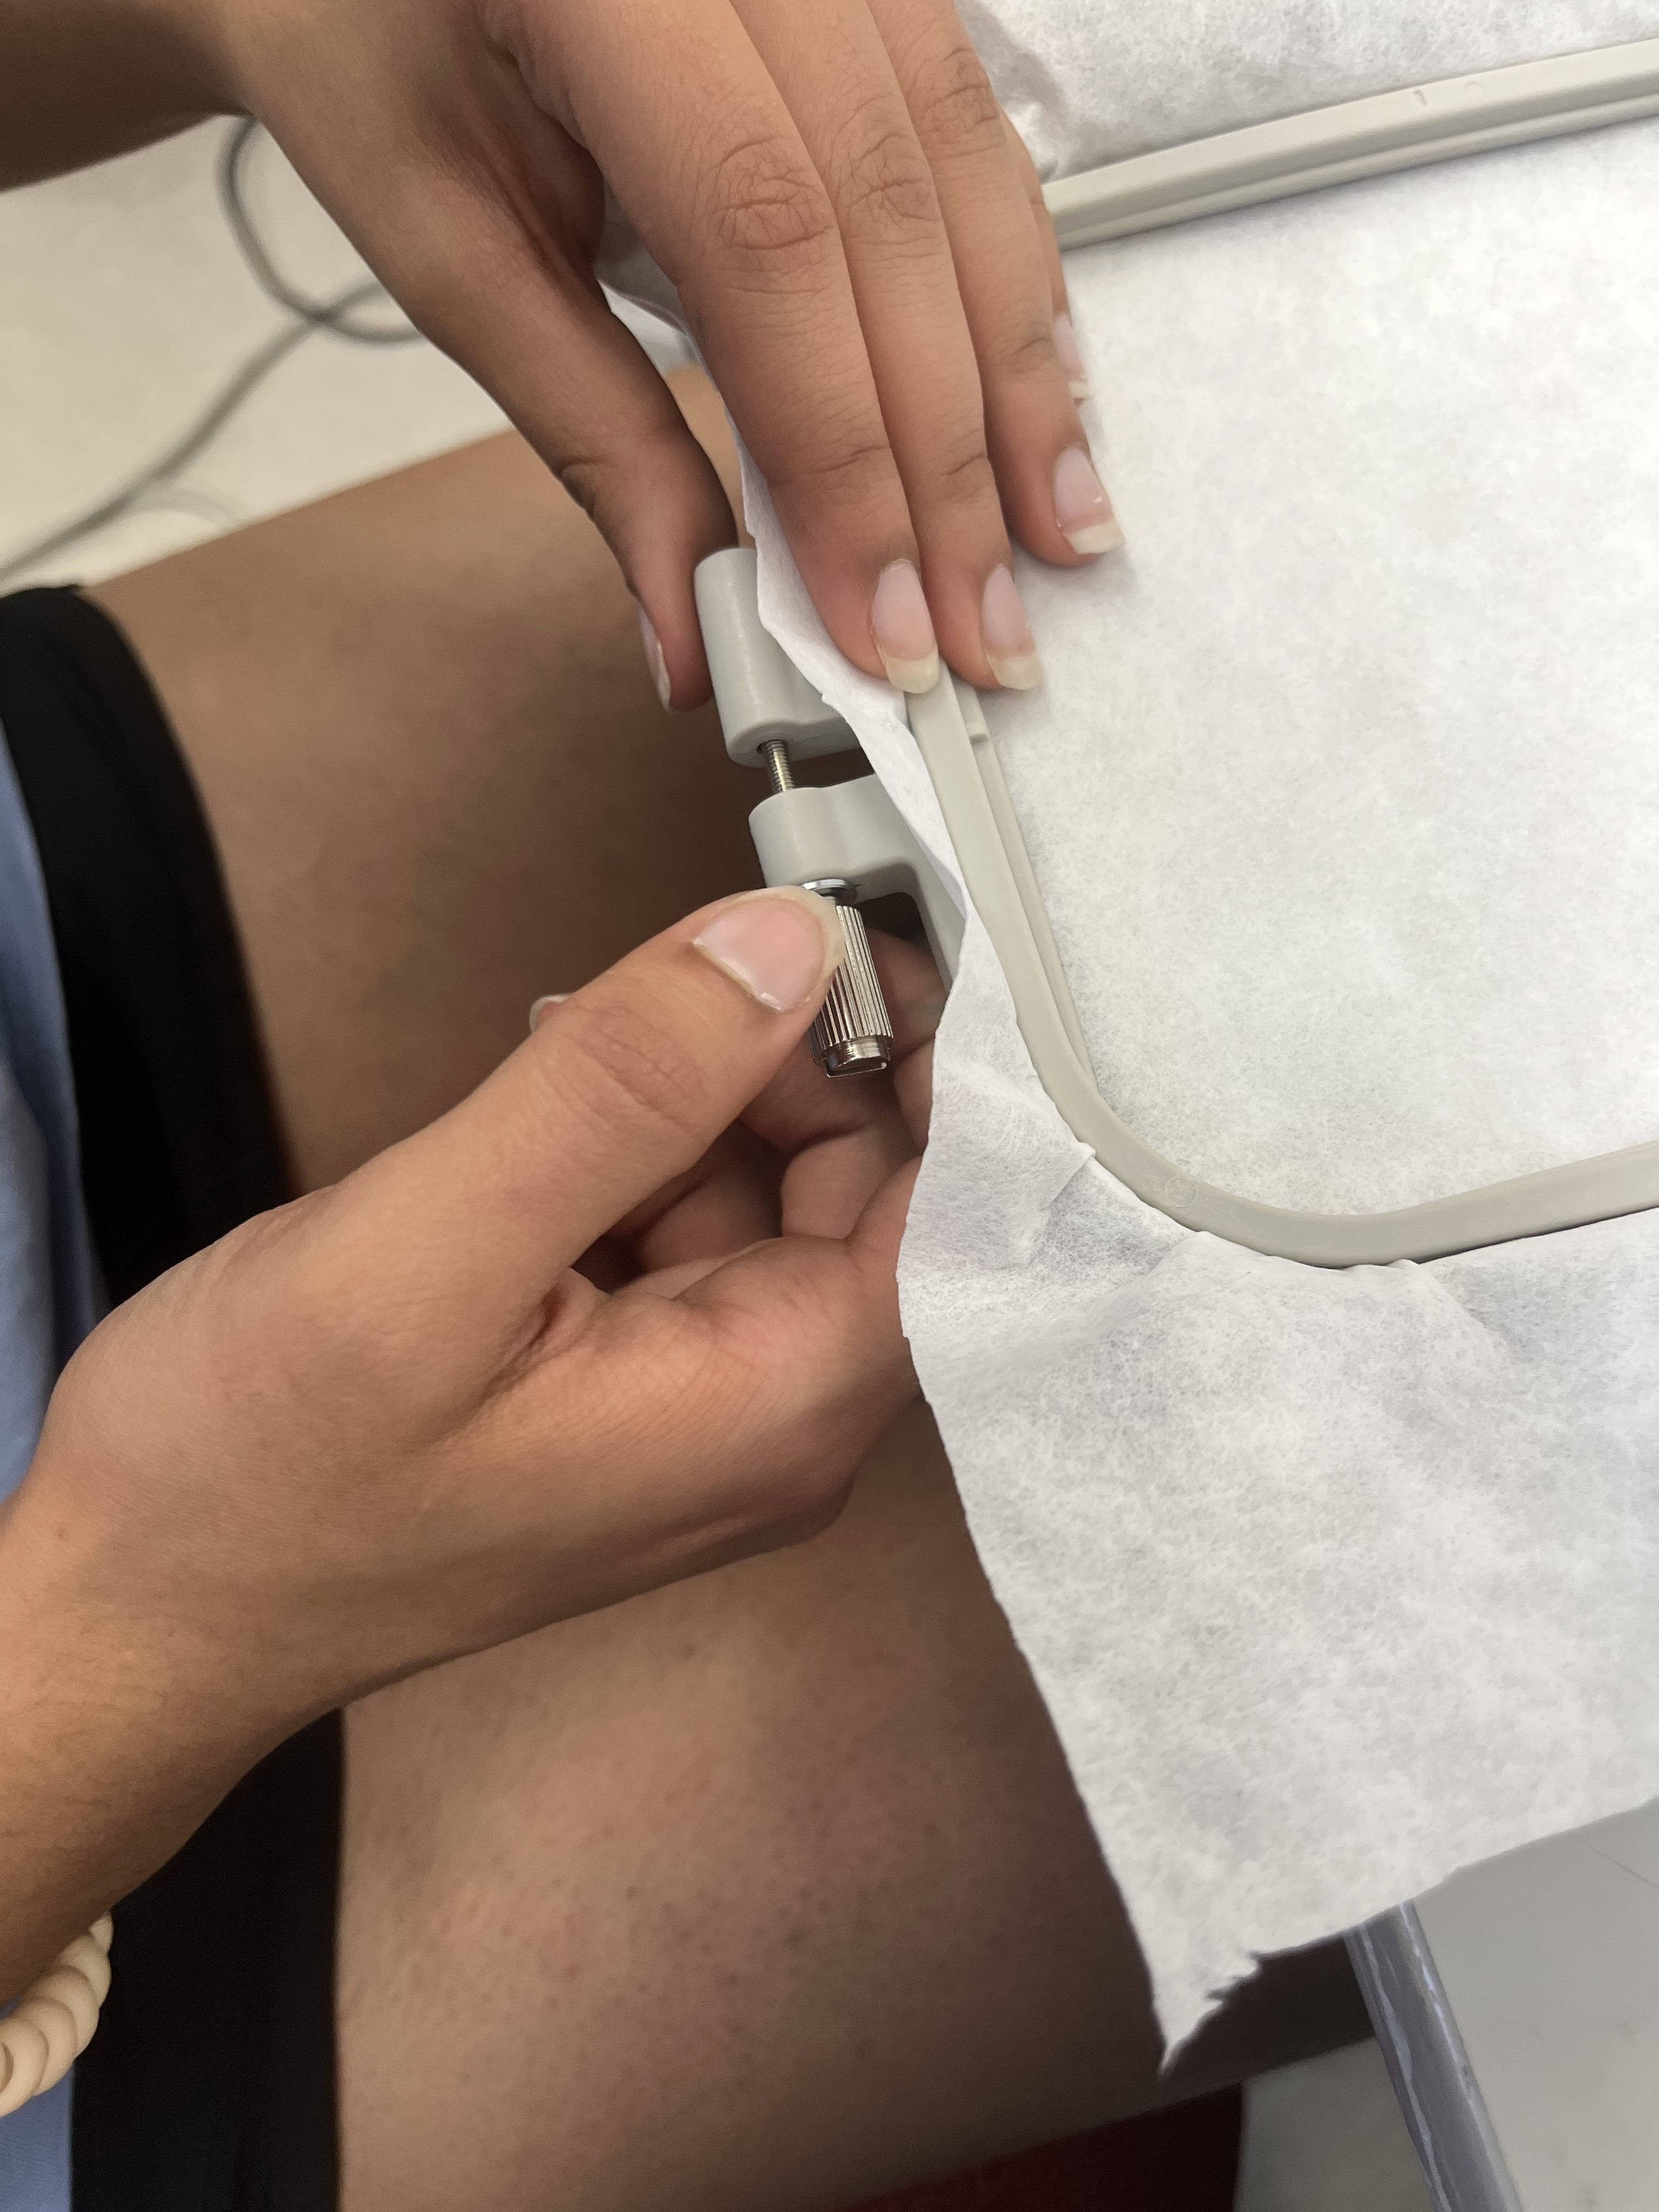
Then, I used a sheet of cloth that I had cut out with a pair of scissors to embroider on. I would then place this cloth in a pair of clamps. This is so the cloth is stretched out and doesn’t move around while the machine is running. These clamps were super easy to put on and take off.
Once this was all set up, I started my design.
I decided to not change my color and keep it the same color, because I had unraveled the black colored string, and it would have been extremely challenging to ravel it back up again. I also thought that adding the black string would have not been very aesthetically pleasing.
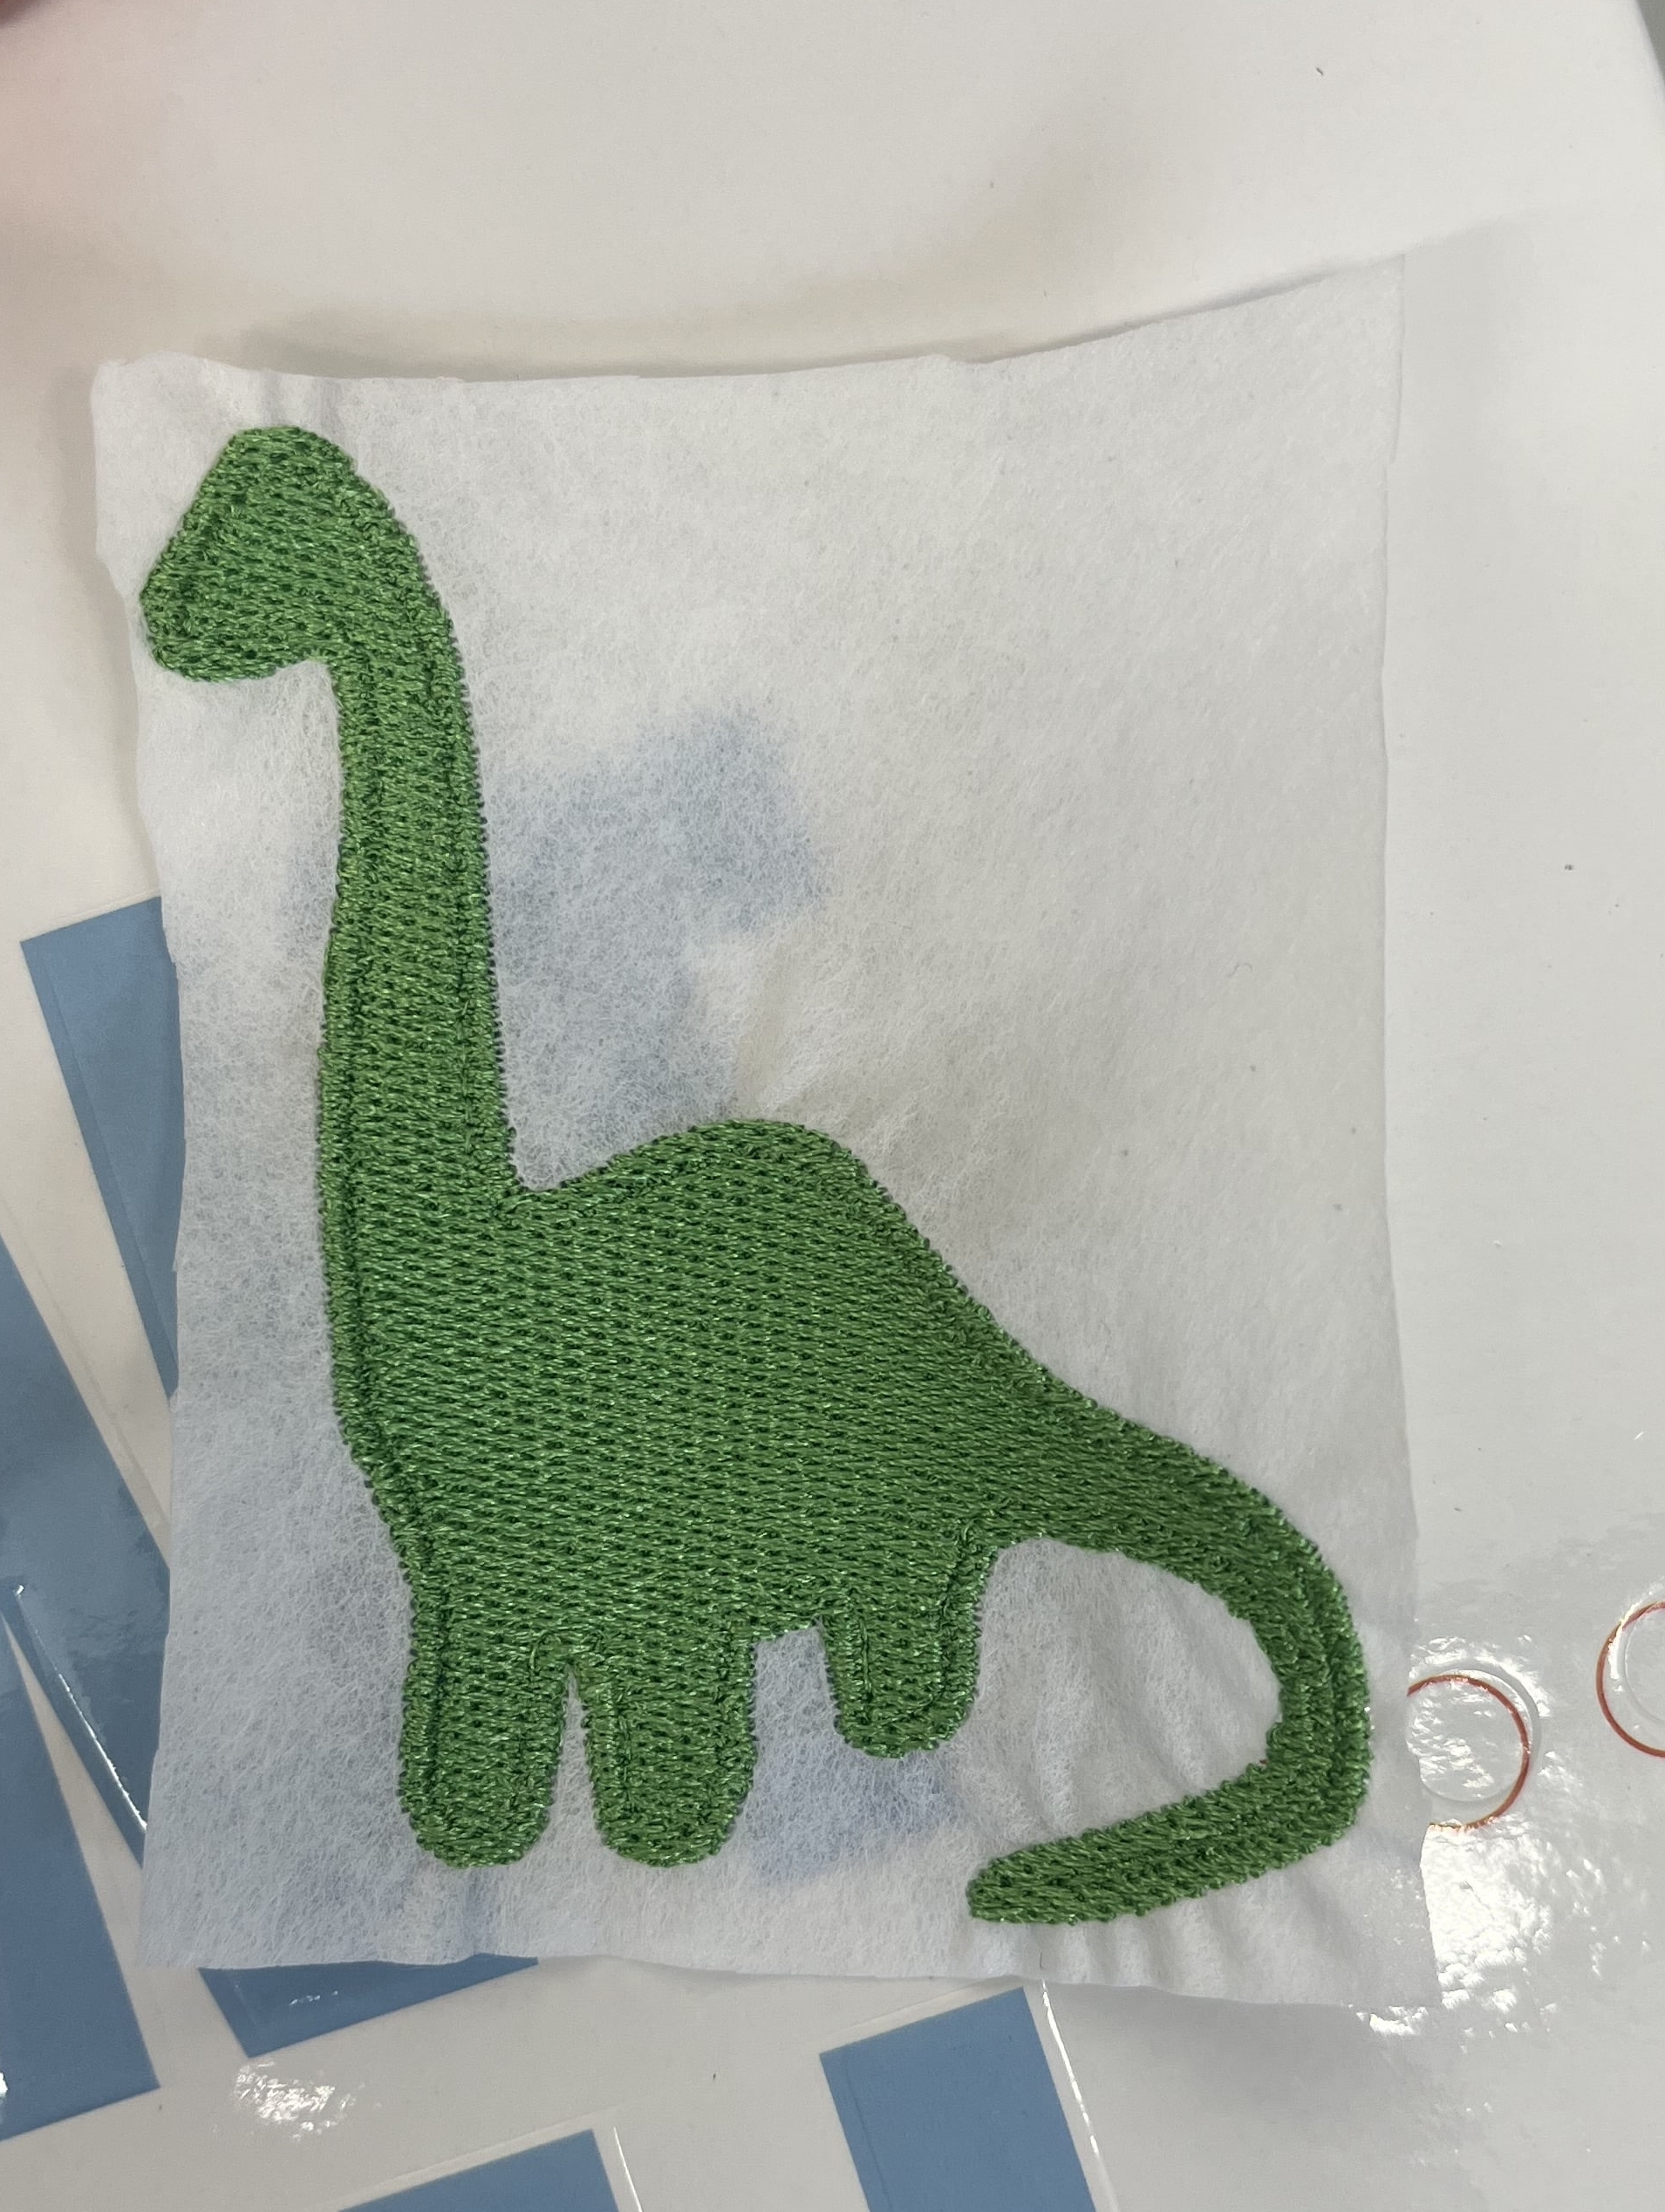
Final Results