Week 1: Principles and Practices & Project Management¶
This week, I practiced documenting and developed my final project.
§ Principles & Practices: Assignment 1 (Plan & Sketch a potential Final Project) §¶
For my final project, I had many ideas.
Ideas¶
One of my ideas was a GPS component that could be used with boards and chips to have a simple way of integrating GPS into projects. I looked online quite a bit and found this was already a thing and would be a useless endeavor, especially considering it didn’t have a lot of depth, wasn’t original, and didn’t incorporate many of the skills I would learn during Fab Academy.
My second idea was a sleep tracking wristband, one which would connect to a mobile device and chart/graph information to analyze the wearer’s sleep patterns and to help assist them with getting better sleep and furthering sleep research. I wasn’t very passionate about the idea, and many pointed out it was similar to what a FitBit already does, so I ended up scrapping the idea entirely.
Final Idea¶
My final idea, the one I am selecting to do, is what I call the Modular Garden. The concept is this: a garden which can be custom assembled to any size and shape to fit the needs of the builder. It consists of hexagonal units as I call them that connect together and serve different purposes. For as far as I have developed the idea, it will include 3 units, an amount which I will likely expand on:
Project Goals¶
What does this idea aim to achieve? It aims to be a prototype idea that could be expanded into a much bigger and more efficient design after Fab Academy. It aims to be a custom size simple to assemble garden that takes care of itself without any need. The final goal is to be able to grow carrots within the growspace with no help or assistance past planting the initial seeds.
What would it look like?¶
It would be a collection of hexagonal “Units” as I am calling them who each serve a different purpose but together create a lively self-sustaining garden.
Research & Design Considerations¶
When modeling even for the first versions, I had very specific dimensions in mind. Since the final goal was to be able to grow a plant, I did lots of research on what plants could be grown in a small space. I originally was interested in growing carrots until I found out the depth they required.
I used this site by Melanie Fincher in order to get more ideas on plants I could use. This site talks about different plants and their light/temperature requirements, aimed to be indoor plants. From there, I looked into Spinach as a plant that could be used to test my prototype. From here, I looked into this site in order to read up on the root depth required for Spinach, this page/article by Linda Ly. Finally, I was interested in the horizontal space the roots required, and for this looked at this site by Marie Iannotti, which gave me my final dimensions of 8 inches by 8 inches for the base, and the gardening units needed 4 inches of space for dirt. I also considered the size of my 3D printer, as I was interested in printing these prototypes and making them easily constructible later on, so that is also what made me land on 8 x 8. I made sure the height of no unit exceeded 12 inches since that was my printer’s build space height. This information is mostly used next week when I 3D model my project with the correct dimensions.
What “Units” will there be?¶
The Gardening Unit¶
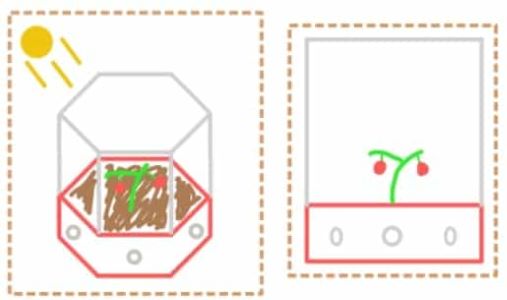
The gardening unit is responsible for housing the actual plants, it includes acrylic walling that can be easily removed (they are magnetic) when connecting to other units or if the builder needs to access a certain unit for any reason, such as planting. It has pipes running through in the under portion of the unit, as seen in the photo as gray circles. These pipes connect to each side and all other units that are attached. they will have stoppers if that pipe were to lead to the outside or a unit that doesn’t connect in that way.
The Master Unit¶
The master unit is responsible for watering and keeping track of the temperature, time, power, etc. It houses all the chips and electronics, and includes a screen and scroll wheel that doubles as a button when pushed in. It waters the plants on a cycle and keeps track of its power coming from it’s solar units.
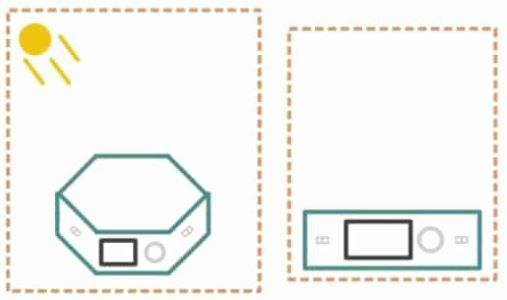
The Solar Unit¶
The solar unit is responsible for harnessing energy and storing it for when it is needed by the master unit. It stores un-needed electricity in a batter.
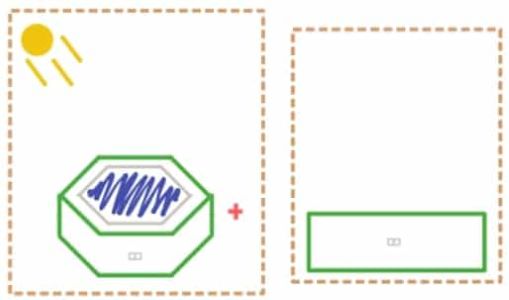
The Water Tank Unit¶

The water tank unit is unit that simply holds water until it is needed by the master. A person can put in water manually, or it can simply collect rainwater.
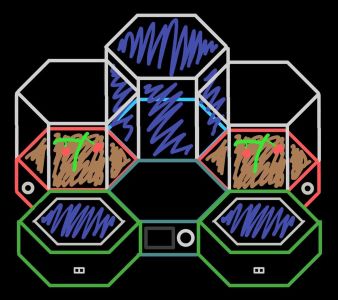
A completed “Array” of Units¶
⚠️ Note: This is a basic first concept of what will be my final project. Many things will be fleshed out and further developed.
Finally, what would this look like all together? It would look like this:
§ Project Management: Assignment 1: Build a Personal Site in your Class Archive §¶
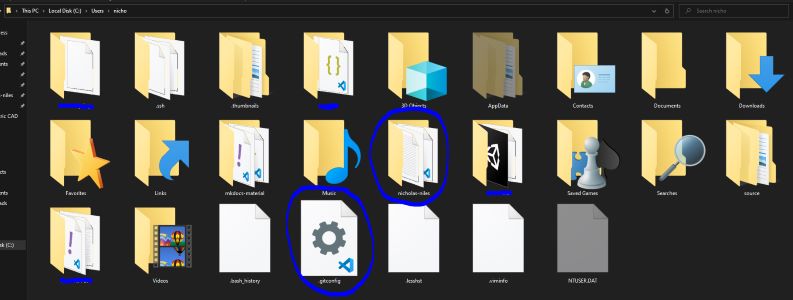
To set up my website, I installed the following programs:
- GitBash - Used to run git commands
- Visual Studio Code - used as a text editor to later edit my site
- Python Environment - used to run python commands to install certain libraries I would need to work on my site
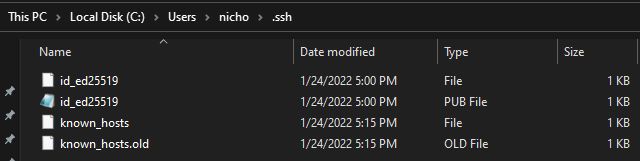
After downloading all the programs, I went through the process of creating an SSH key on my local computer.
One step was making sure it knew which github account the repository was under, using these commands set the config so that it would search using my account which had repository accsess.
git config user.name "Nicholas N"
git config user.email "********@charlottelatin.org"
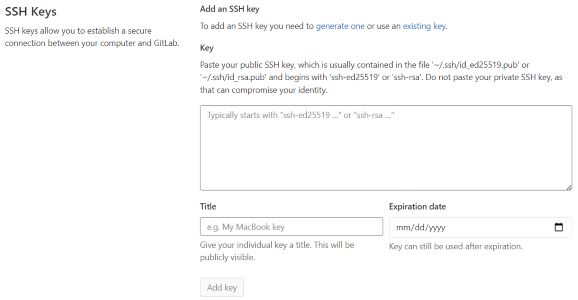
After I created the SSH, I went into my repository’s settings and added the key, allowing me remote accsess to my repository.
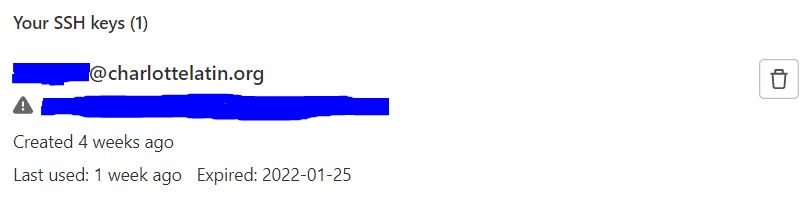
An important thing to note is that when adding my SSH, I made it expire the next day. This allowed me to keep accsess as I was already linked through the key, but it meant that if anybody got my key, they wouldn’t be able to get accsess to my repository since it would have expired.
By navigating to this section on the GitLabs website I was able to add it:
Then I input the correct information, including that next day expiration:
And finally, it was complete:
Then, I cloned my site to my local computer so I could begin working on it.
From here, I attempted making small edits to my website, and then using the commands to send it off. I made sure I understood and could apply the use of commit, push, and clone correctly. After this, I made small changes to my website such as adding the student agreement, changing all the “YOUR NAME”s to my own name, things such as that. I worked on my about me, and of course, began documenting here for the first week of Fab Academy.
Additional Version Control Tools¶
Another tool I wanted to compare to Gitlab was Github, as I was curious about what differences they could possibly have between eachother. I had been using Github specifically for a personal project for some time, so I wanted to list below the differences I have experienced:
Desktop Software¶
One thing about Github is that they have a desktop app that you can use to manage your Repo(s). It looks like this:
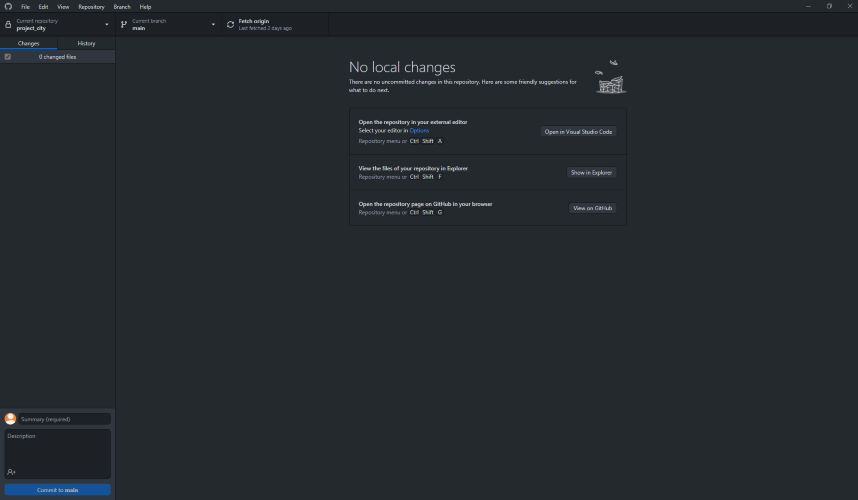
This to me was much easier to manage than using Gitbash like I do for GitLabs, especially the built-in history feature on the Github app:

For me, I always name my commits as one version newer than my prior commit, so having the history built into the app in which I make commits makes it super easiy to name new commits. Additionally, the Gitlab app allows for you to input a description at each commit. This I really wish GitLab offered as it allows you to detail changes made.
Overall?¶
Overall, I like Github better most certainly for personal use due to its ease of commits and such, but I understand that Gitlab likely offers big organizations like Fab Academy much more customization and many more features then Github would for such a large and detailed repository.