1. Principle, Practices & Project Management
This week I worked on defining my final project idea and started with the documentation process (Turns out documenting is harder than the actual work. We tend to forget it a lot).

In the first week we also had a classes with local instructors on the introduction to fabacademy followed by student bootcamp. Then a global lecture, an open time and recitation were organized. Further, The students are also required to sign the student agreement which is available here
Week I Assignment
- Plan and sketch a potential final project
- Work through a git tutorial
- Build a personal site in the class archive describing you and your final project
Starting Point
For the start of the Fabacademy, I begin with setup of some required components in my laptop. The things that i require to work on at this point is the git setup and tutorial, development of website and plan for the final project. The global lecture along with the git tutorial by local instructor was used to setup git and other required components on my system. While it is said that working with Linux or MacOS is easier, I tried to set it up in PC with Windows OS.
Setting Up Git.
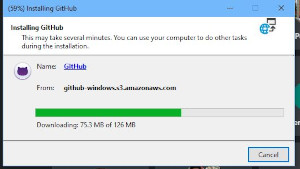
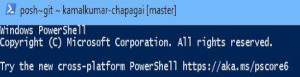
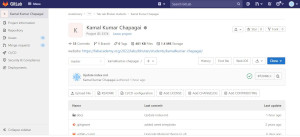
Setting up of Git software is also fairly simple in Windows now. The software is available through the GitHub which also installs the Git Shell that we can use. The software was downloaded from GitHub and customized to work with GitLab using the tutorial of GitLab.
 |
| 
 |
| 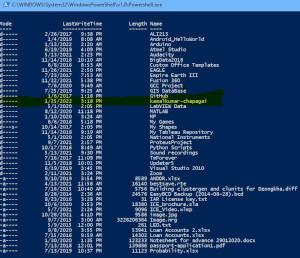
Figure: Git setup, Gitlab account and cloning of website folder from Gitlab
Others steps that we have used for the current work are:
Git commands used
Generate SSH Key
Open Git terminal and type this command to generate your SSH key:
ssh-keygen -t rsa -C "yourmailID" -b 4096
Copy SSH key
cat ~/.ssh/id_rsa.pub | clip
Go in gitlab account and paste key in Profile Settings—> SSH key
Check its linked with your gitlab account
ssh -T git@gitlab.fabcloud.org
Configure your username and email ID :
git config --global user.name "USER NAME"
git config --global user.email "your mailID"
- The username and password were received by mail from fabacademy.
Clone repository in local system
cd Documents
git clone <copylink>
- link is at:
https://gitlab.fabcloud.org/academany/fabacademy/2022/labs/bhutan/students/kamalkumar-chapagai.git
Editing, Commit and Push
cd  folder_ name    // my case is kamalkumar-chapagai
git pull
git add --all
git count-objects -vH   // (check size)
git commit -m"message"
git push
Building Website
Using themes from html5
I have used a number of systems before to build websites. I am familiar with HTML basic for web development with css styling. I have also used theme based web design using wordpress with elementor and page builder. I have also edited website using html5 themes available online. As part of pre-fabacademy we designed a website by editing html5 theme available at https://html5up.net/
 |
| 
 |
| 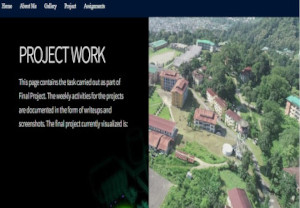
Figure: Previously designed website using themes from https://html5up.net/
Building website with MkDocs
With introduction to Mkdocs, I got interested to learn this method of designing website. This static website generator is especially helpful for project presentation and documentation. Therefore after installing Git and cloning the website file from Gitlab, I proceeded to look for tutorials online to work with Mkdocs. The first setback is, It is not possible to directly view and simulate mkdocs based site locally in Windows OS without installing few other systems.
Preliminary Softwares Required
- Python Installation and upgrade
- Pip Installation and upgrade
- MkDocs Installation
- Adding all to PATH
I followed the tutorial from https://www.mkdocs.org/user-guide/installation/ to install the systems.
Few Setbacks
- Previously installed Python and Pip were outdated
pip install --upgrade pip - PATH not correctly set (PATH set for older version of Python and Pip)
echo %PATH%- Check for correct PATH and rectify

After successful installation MkDocs in windows, I procedded to editing the files in my local and viewed the local site after running the server.

Some of the good references I used are:
Cheat Sheet: https://yakworks.github.io/docmark/cheat-sheet/
Material for MkDocs https://squidfunk.github.io/mkdocs-material/getting-started/
Testing Website and Customizing
- I tested the basic website on local server
- I customized the site by changing colors and themes.
MkDocs requires the themes to be installed manually using
pip install mkdocs_themes
Finally I settled with the Mkdocs_Material Theme with Table of Content and Navigation bar.
Some More Setbacks
Few things that got me strolling were
- Pipeline Error: The pipeline error occured multiple times. Initially I didnot know what was happening and looked around to try and find suggestions. I also created an issue to get help on the same. I kept looking around for a while and finally got hold of the log printed when pushing my local doc into gitlab.
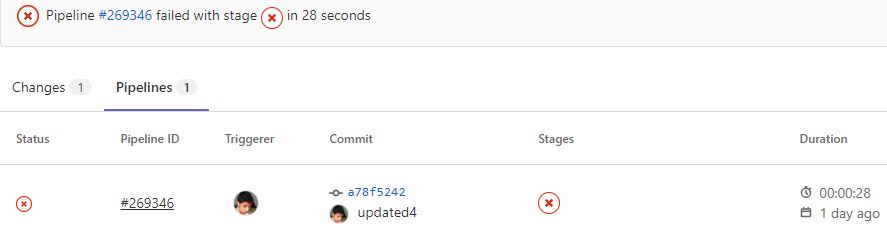
By that time, I had created about 10 pipeline errors before finding out what the error was. There were two main problems:
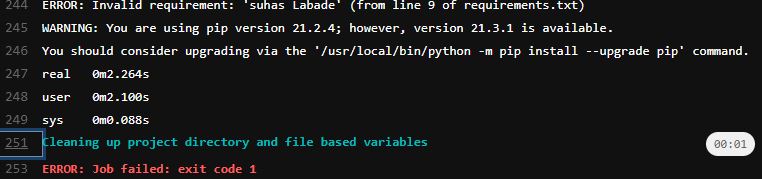
- There was syntax error in requirement.txt file. There was a text typed in to the file that showed as a syntex error. It was corrected after reading through the log file available at: https://gitlab.fabcloud.org/academany/fabacademy/2022/labs/bhutan/students/kamalkumar-chapagai/-/jobs/5325860
- The required theme was not installed in the server. I installed the themes in my local system and then compiled the site. It was working well, so i tried to comit and push the site to the remote GitLab server but kept getting errors. I looked at the error log again found out that there is requirement for the theme to be installed in the remote server. Initially, I didnot know what that meant and how to do it. I looked around online to deduce the error and find possible solutions. The solution is to install the required theme in the remote server throught the requirment.txt file. I included it to look like:
Requirement.txt
Documentation static site generator
mkdocs ~= 1.2.3
mkdocs-git-revision-date-localized-plugin ~= 0.11.0
Add your custom theme if not inside a theme_dir
(https://github.com/mkdocs/mkdocs/wiki/MkDocs-Themes)
mkdocs-material ~= 8.0 -Put the name of the theme that we wish to use.
Final Website
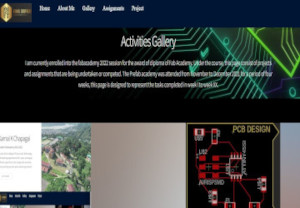
After resolving the above errors, I was able to push the documents to my remote server and view the website remotely.
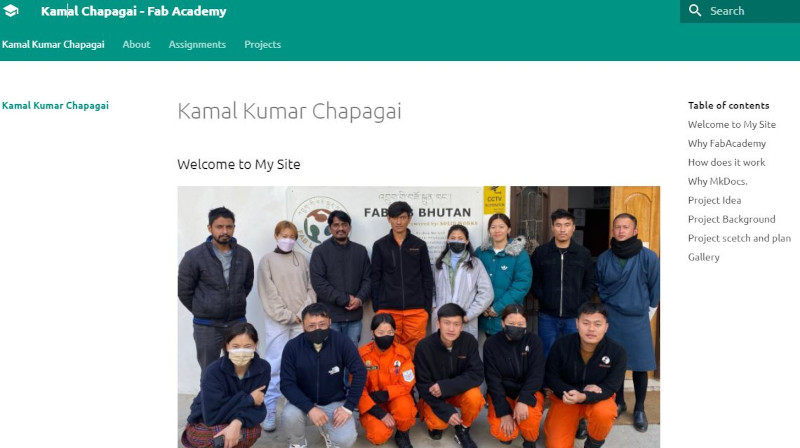
This website will now be used to document all the tasks and activities carried out as part of the FabAcademy2022.
Project management
This week I also worked on defining my final project idea and started getting used to the documentation process. Prior to that we also had discussions with the local instructors on probable projects. We came up with a number of project ideas and presented to the group of students in our lab and received feedbacks on its possibility. These were the topics I presented:
- Rocker/Swing with Baby monitor
- Crawler for disaster application
- Autobot vacuum cleaner that returns to home for recharging
- PET to Filaments for 3D Printing
- Paper recycling (cleaning ink with chemical and drying)
- Tiny Top for learning Similar to pitop but with Attiny
- Smart Clock with LCD display that scrolls the calender of the day
From all the above topics, We finallized that I work on “Crawler for disaster Application”. The detail of the Project will be discussed in the Project Section.
Project Background
Disaster are unpredictable and happens regularly in different part of the world. Few of the common disasters to hit Bhutan are Fire, Landslide, Earthquake and Flood. During such time, people have very less time to make decision and maynot be able to run. This would cause them to be trapped inside the houses. It is very risky for people to go into the building directly and look for survivors as there is chances of another mishap. Therefore, current practice to use excavation to remove the collapsed parts in layer and look for bodies or survivors. However, If we can have a tiny eye that we can send into the collapsed house or any structure before excavation, we can reduce the risk of causing damage to the surviving individuals. Further, we can increase the survival rate of critically injured people if we can embed with suitable sensor to sense presence of life under the rubble.
Therefore, I will be working on designing and developing a small robot that can maneuver through rough terrains and send video signal through to a remote controller or a mobile device.
Project scetch and plan
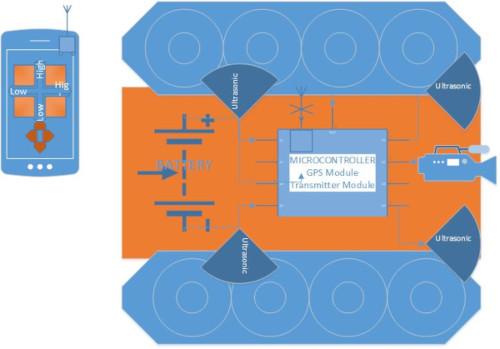
Figure:: Initial Idea of the Project drawn using Microsoft Visio
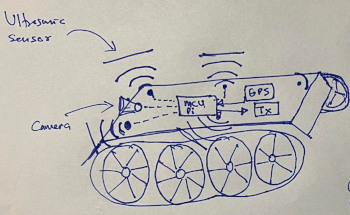
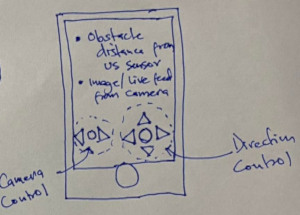
Figure:: Free Hand Sketch of the project idea and application
The initial Idea of the project in presented above. The system consists of an app that will be used to communicate with the Robot to control its movement and display the video inputs coming in. The Robot will resemble a scaled version of tank that can maneuver through rough terrains. It will be fitted with a camera and ultrasonic sensors to visuallize the path and etermine obstacles. At this stage the following are the systems and components i will make use of.
- 3D printing of the body of the system including wheel and chain
- Circuit design to connect the sensors and camera to the Controller board.
- Design of the Application capable of receiving video and sensor inputs.
Project Activities Tracking
| Weeks | Sessions/Topics | Project Tasks | Status |
|---|---|---|---|
| Week 1 | Principle and Practics | Plan your Project and Create Sketch | DONE |
| Week 2 | Computer-aided Design | Create 2D and 3D model of Project | -2D Done -3D working |
| Week 3 | Computer Controlled Cutting | Create and Add logo to Project | After Project Assembly |
| Week 4 | Electronics Production | Design and Produce PCB for Project | Work in Progress |
| Week 5 | 3D Scanning and Printing | Print 3D model of Project Component | Future Work |
Materials Required and Pricing
| sl.no | Description | Qty | Price | Total |
|---|---|---|---|---|
| 1 | ESP32 Cam module | 1 | Nu.900 | Nu.900 |
| 2 | Camera Module | 1 | - | - |
| 3 | Ultrasonic Sensors | 4 | Nu.150 | Nu.600 |
| 4 | DC Motors | 2 | Nu.300 | Nu.600 |
| 5 | Bearings | 5 | Nu.300 | Nu.300 |
| 6 | 3D Printing Parts | 5 | Nu.1000 (Estimate) | |
| TOTAL | - | Nu.3400 (USD45) |
Class on Project Management
In the first week, we also had a session with Instructor from Vigyan Ashram, India who presented the concept of project management and shows us a demo of how to make Gantt Chart to manage projects. The session provided us with the basic handson in making a Gantt chart using GanttProject software.

During the session, we worked on preparing a basic project chart from scratch using the time line and tasks that we have. Then, using that knowledge we started to prepare a Gantt chart of our own to manage the FabAcademy course including Assignments and Final Project.
We used the link: https://www.ganttproject.biz/download/gp30 to download the GanttProject software and used it to make the Chart.
Tasks on Gantt Chart
Initially I created the chart to include all assignments that I require to work on. The chart included all weeks and its timeline.
Project Components Bifurcation
I divided the project to different components as follows based on weekly assignments and tasks:
- 3D Design of the components: Design of wheels and Chain in 3D tool, Assembly and Testing
- Computer Controlled Cutting: Design of body parts and cutting where necessary
- Electronics Design and Production: Design of Communication Circuits, PCB design and fabrication
- Embedded Programming: Programming the Controller for desired purpose
- Input and Output Devices: Communicaing with I/O Devices
- Project Development: Finalizing the components for the project and assembly including final test
- Project Presentation: Final Presentation and Demo of Project to Regional and Global Evaluators.
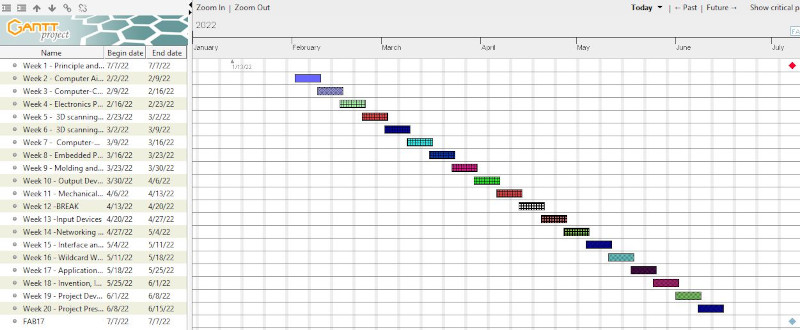
Adding Project Components to Gantt Chart
The project components above has been added to the Gantt chart to allign it with the weekly tasks and assignments.

Things I have done in Project Management
- Downloaded and installed Project Management software Ganttproject
- Completed basic tutorials in making gantt chart using the software
- Created a gantt chart for the FabAcademy course covering the next 20 weeks.
Assignment
- Work through a git tutorial
- Build a personal site in the class archive describing you and your final project
- Plan and sketch a potential final project
- Work through a git tutorial
- Build a personal site in the class archive describing you and your final project