3D printing

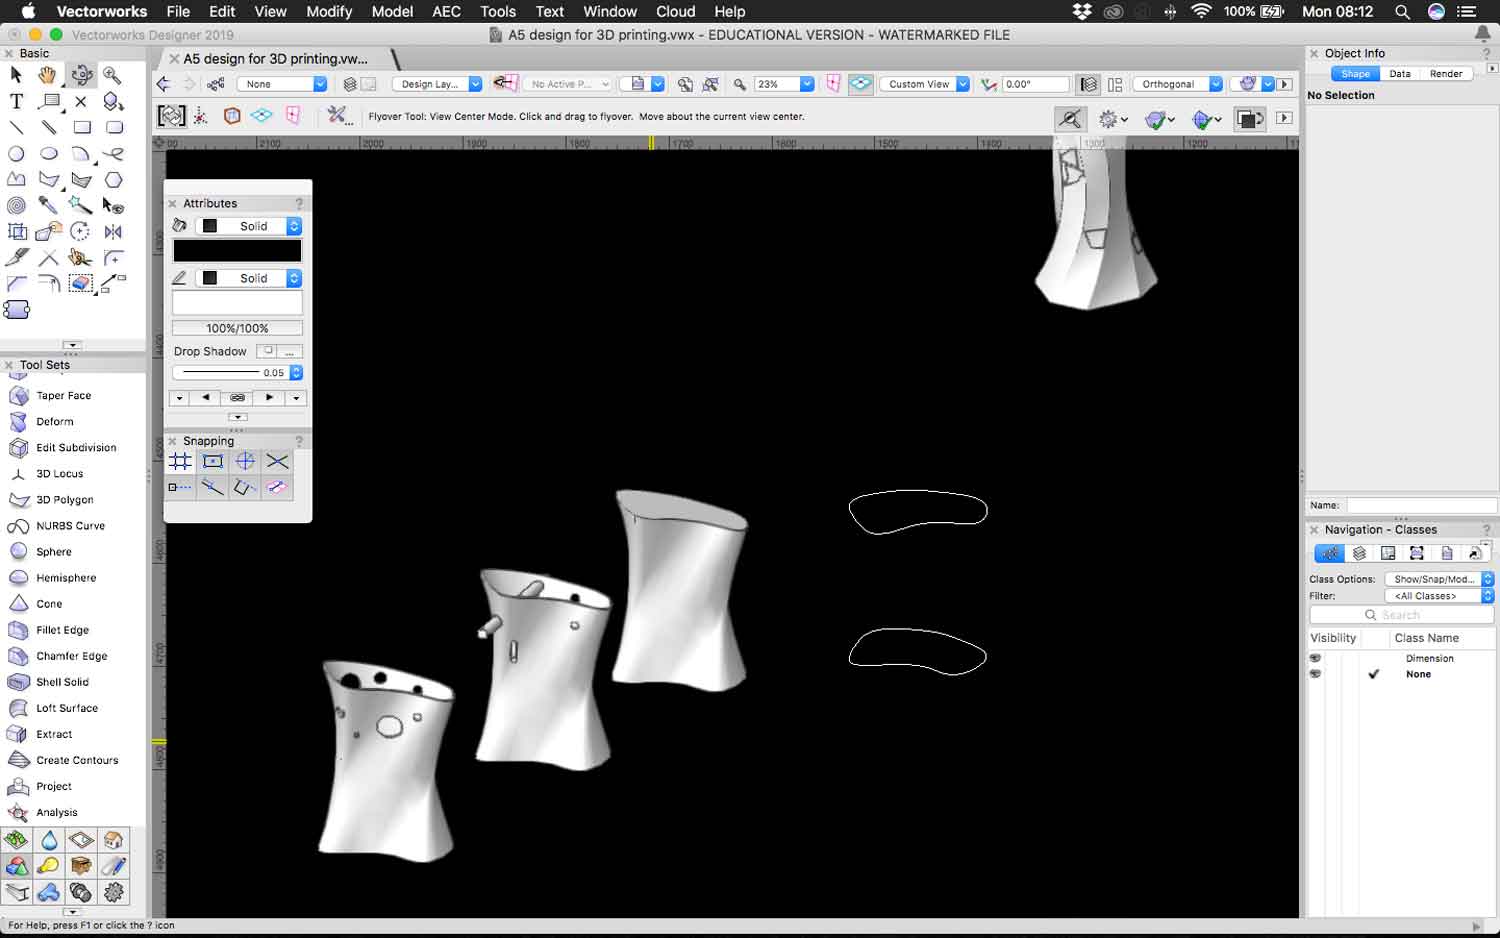
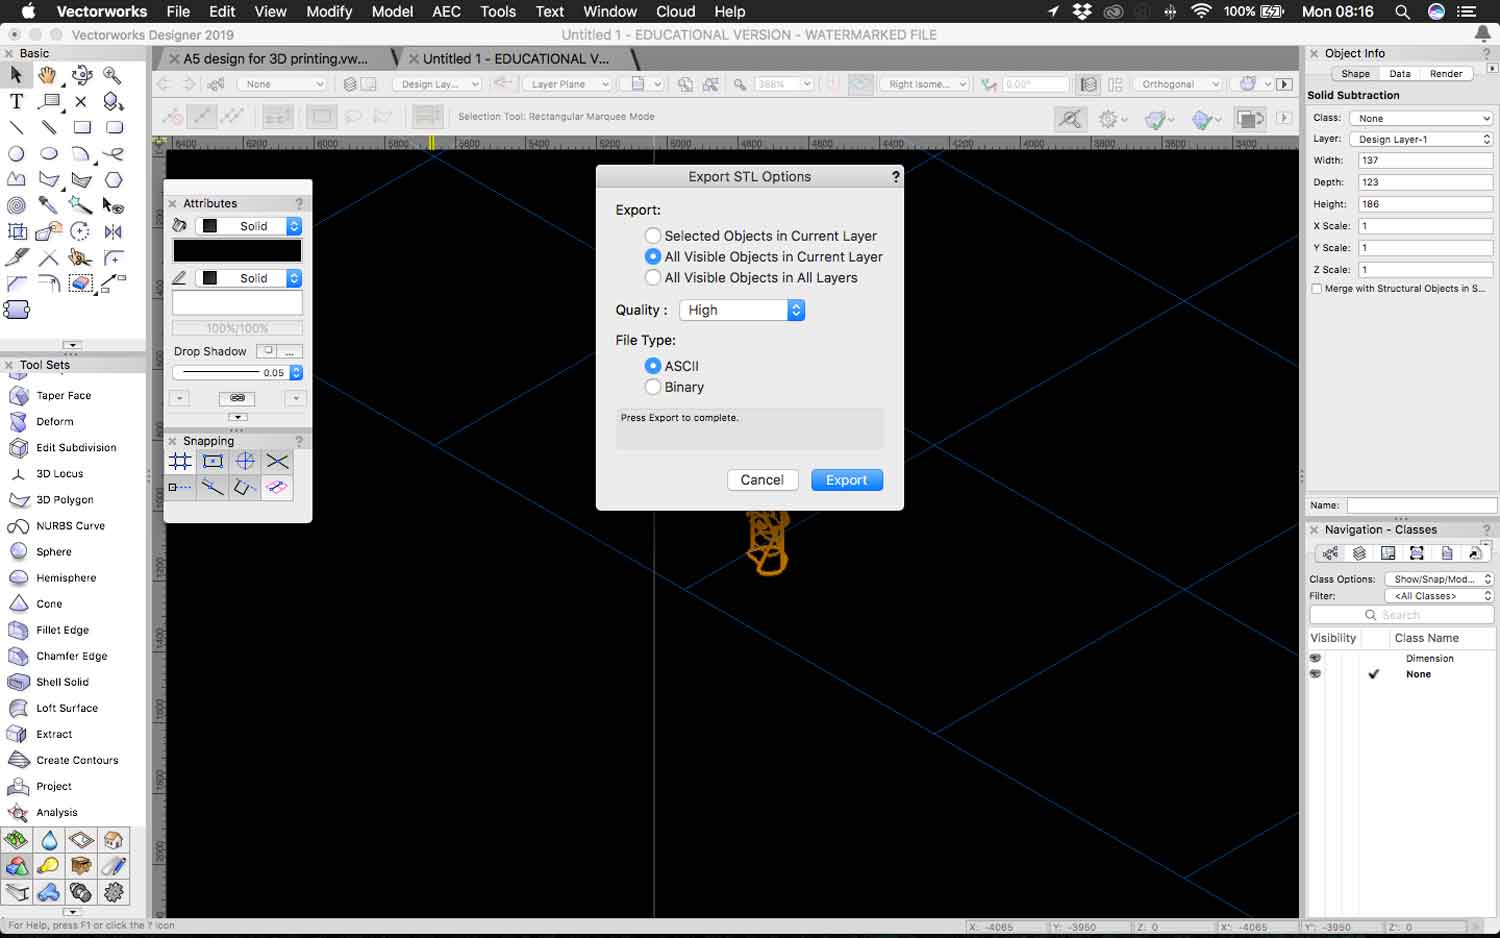
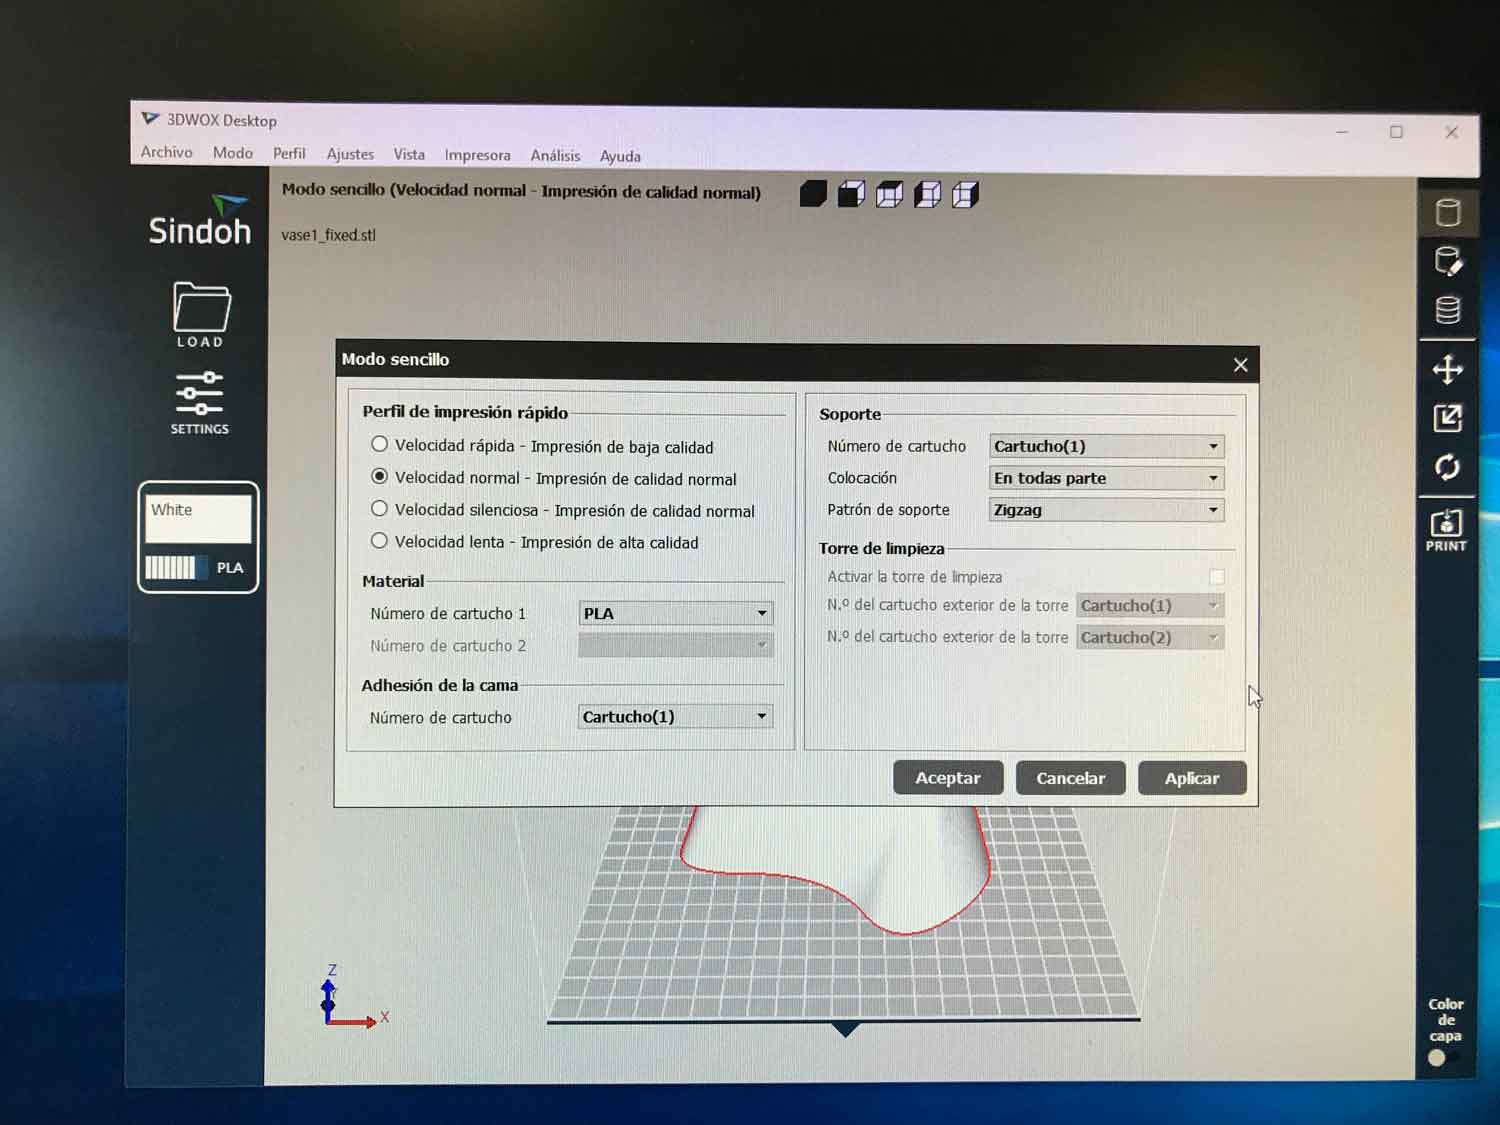
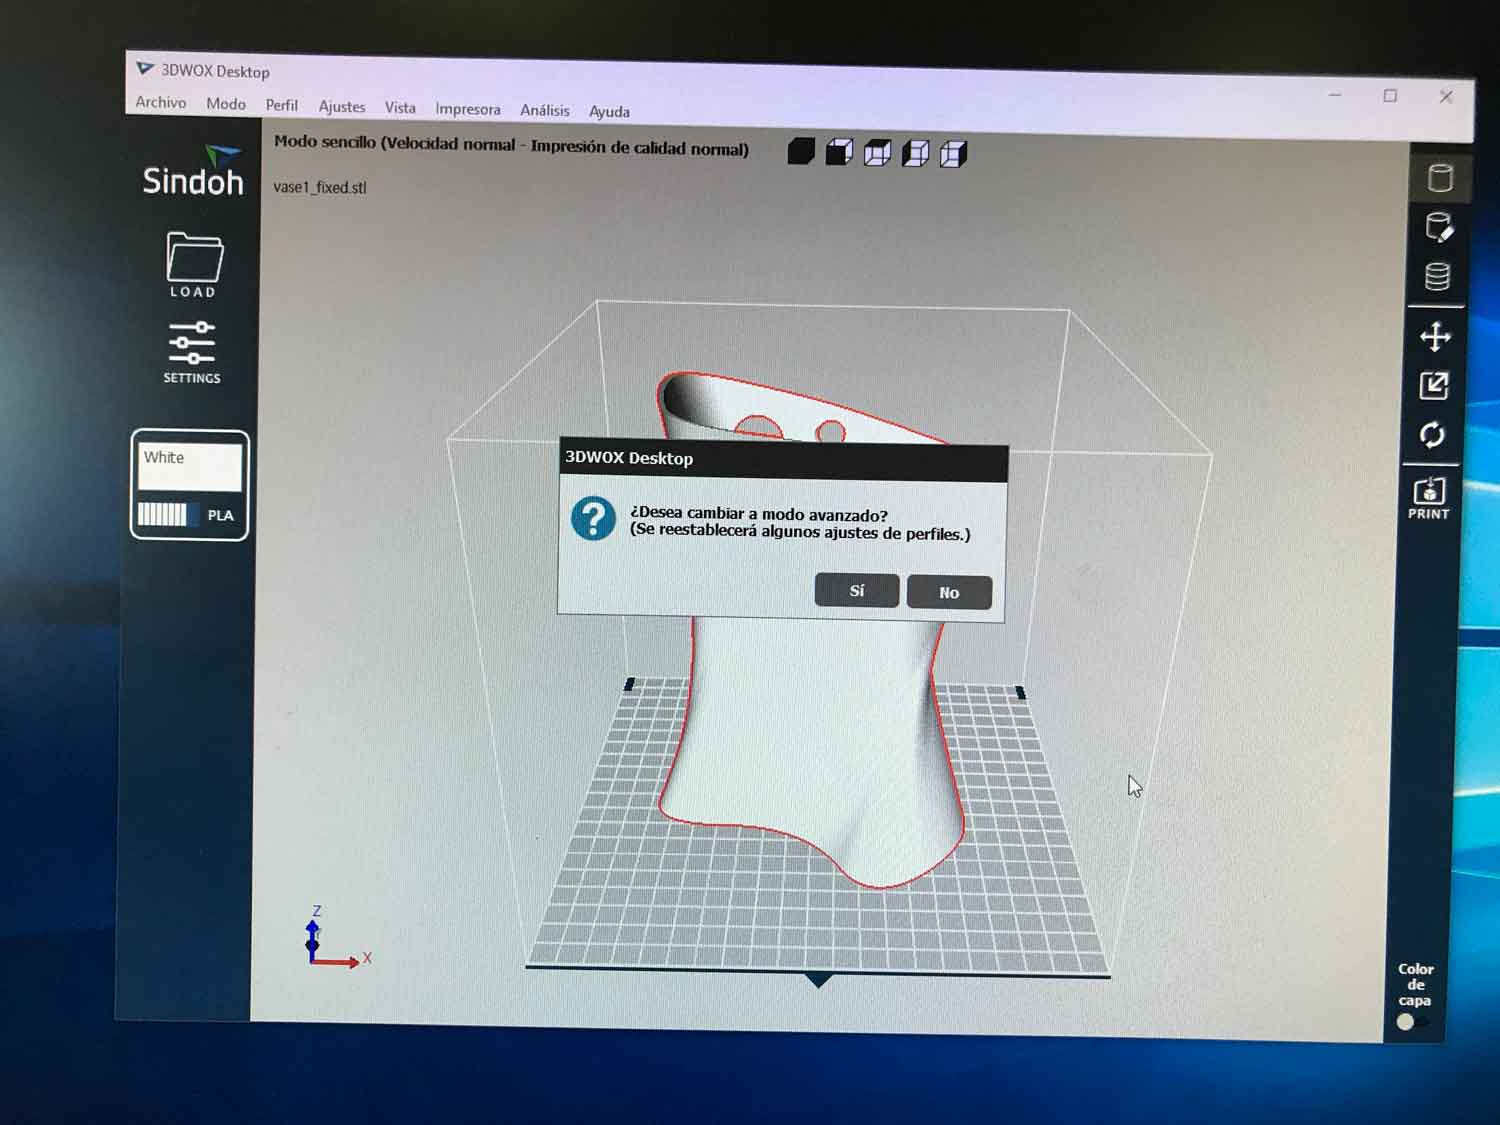
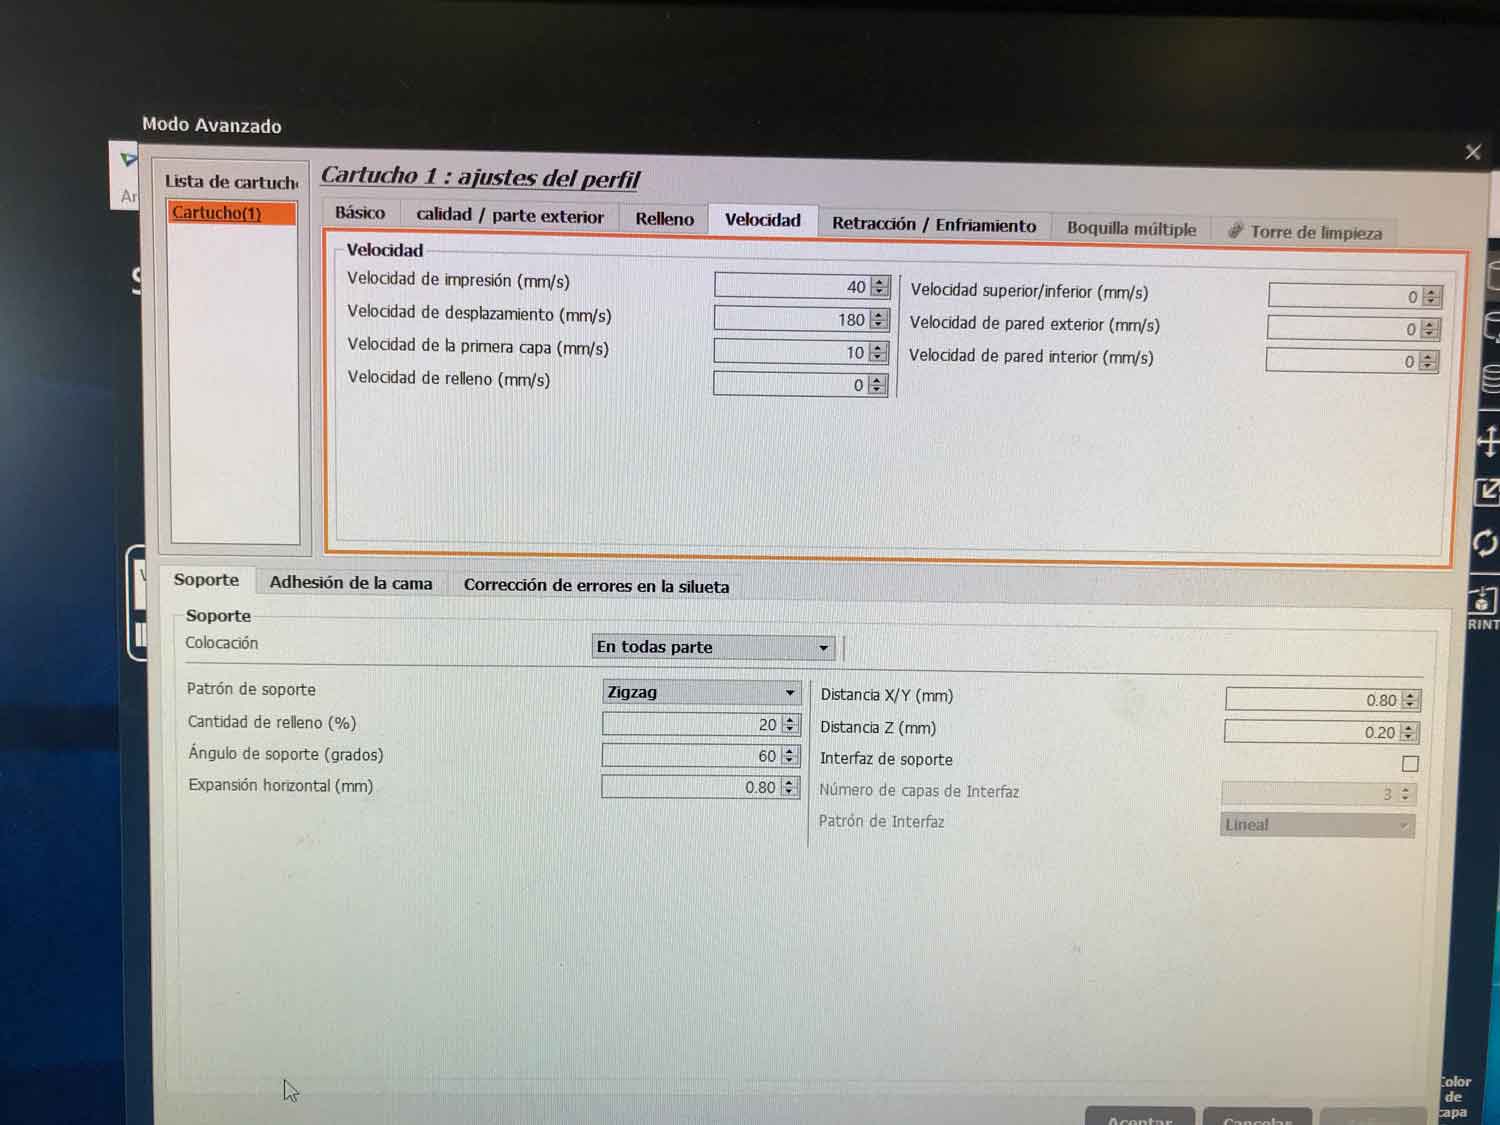
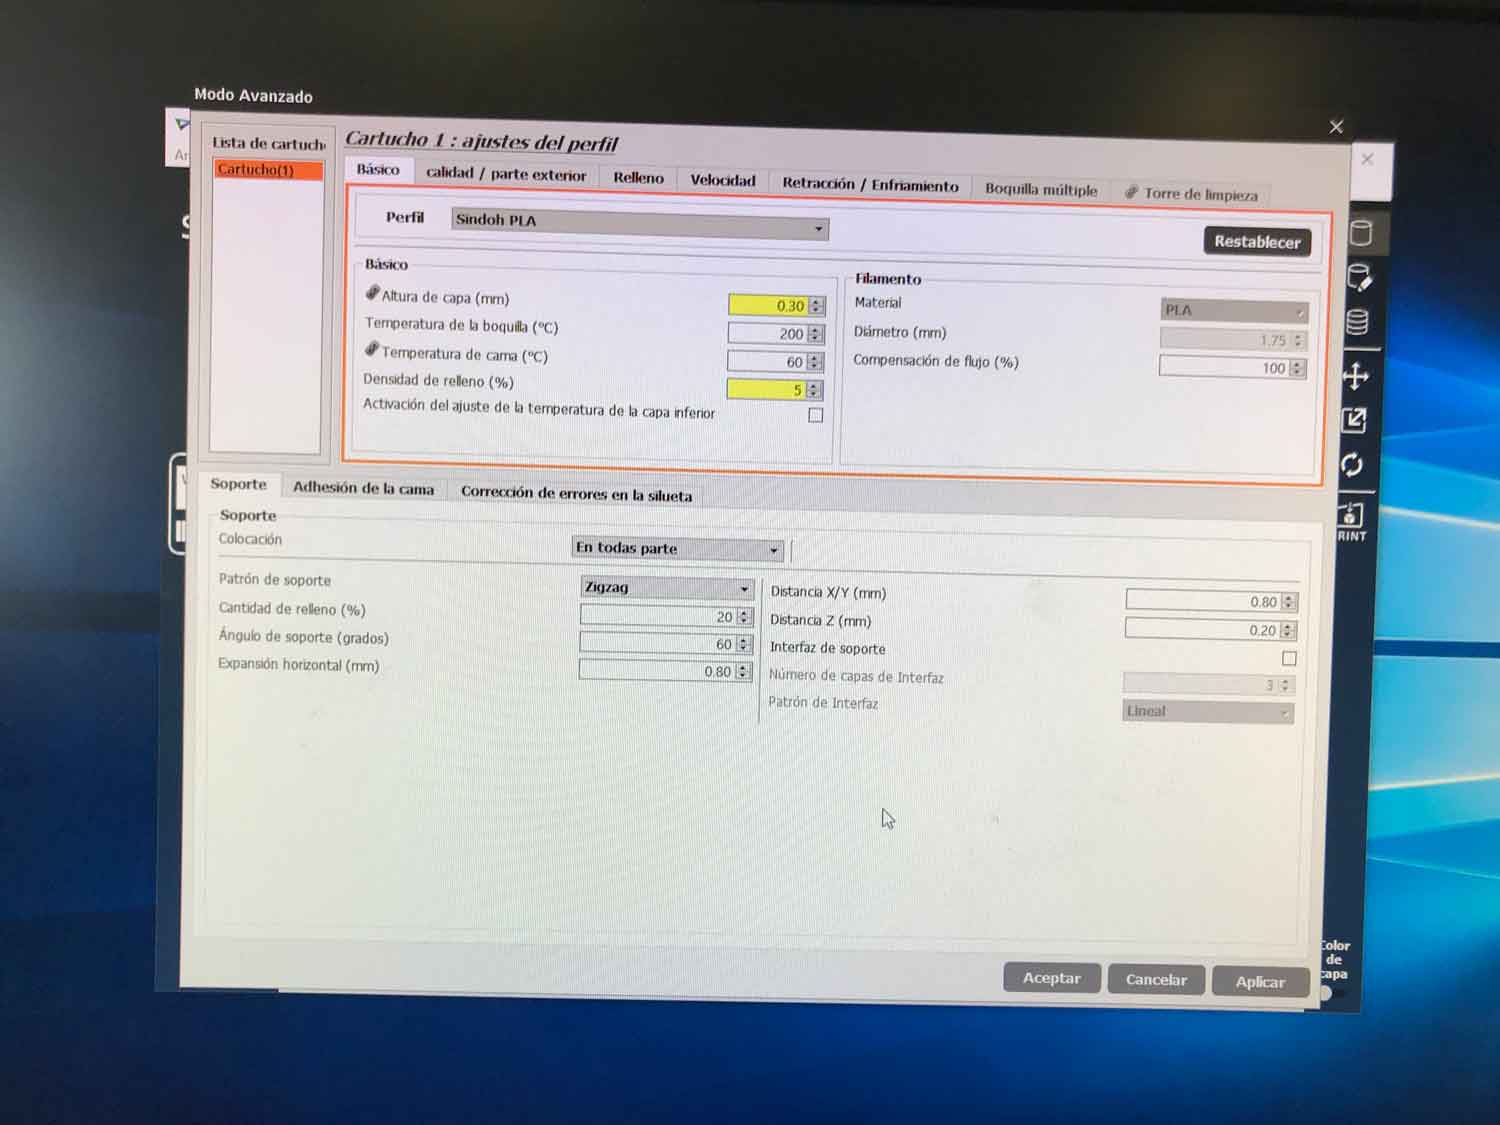
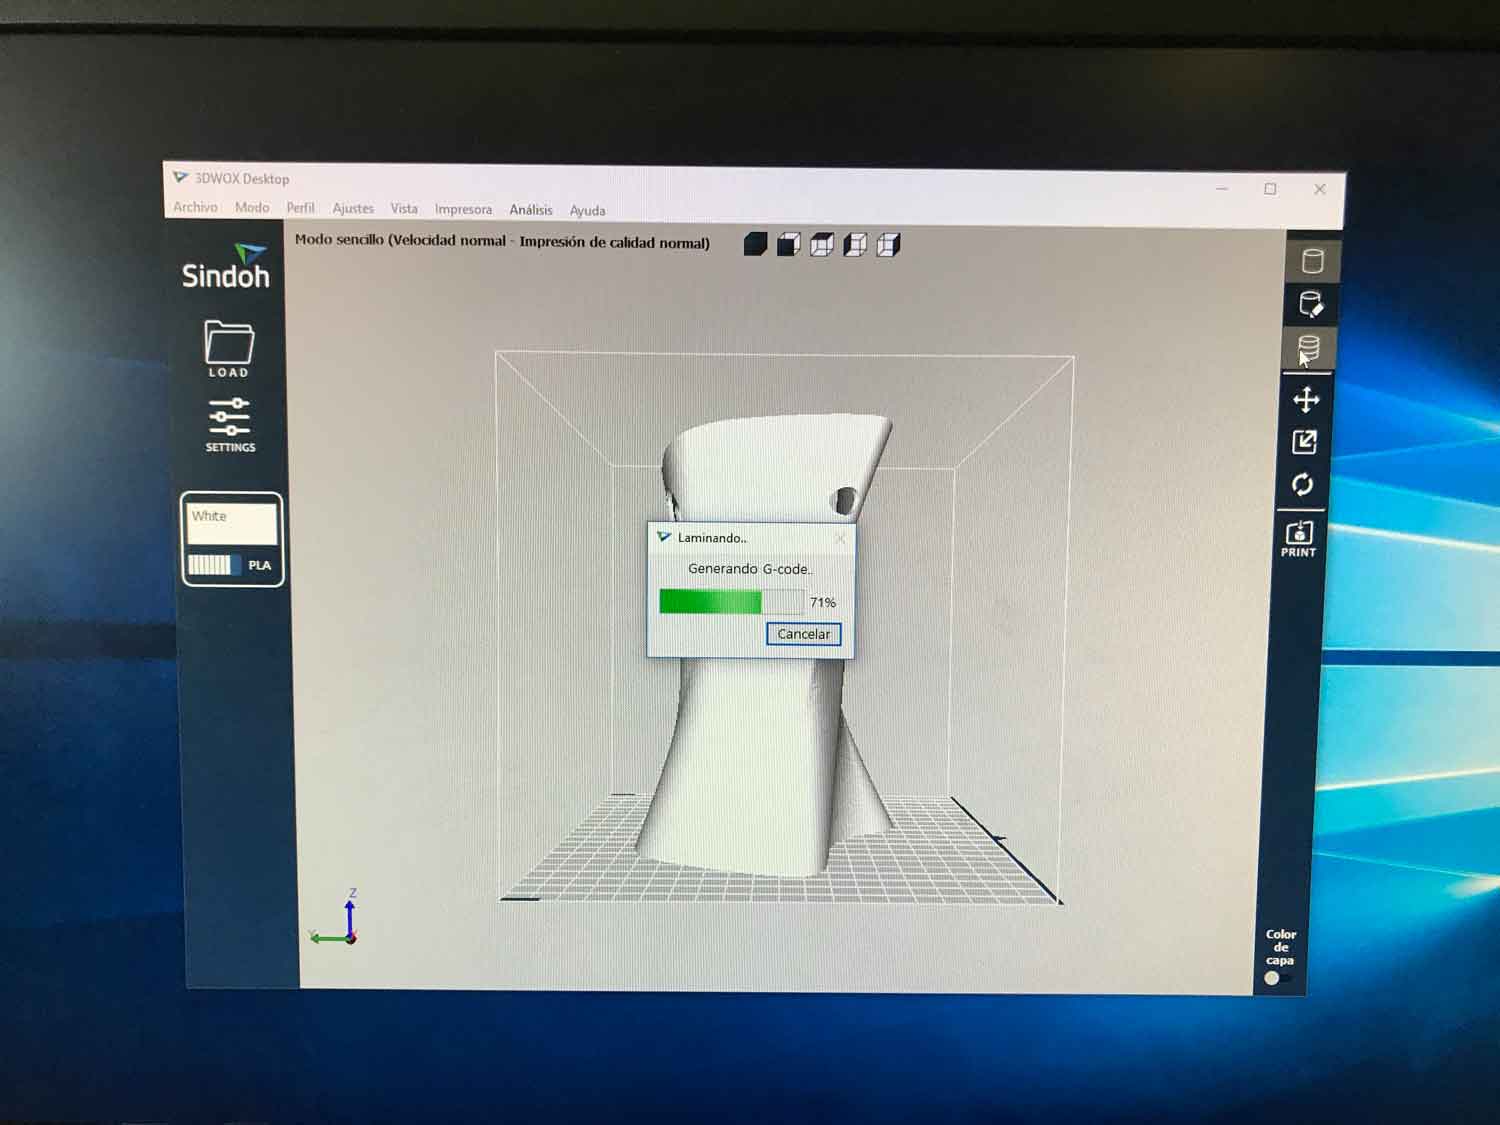
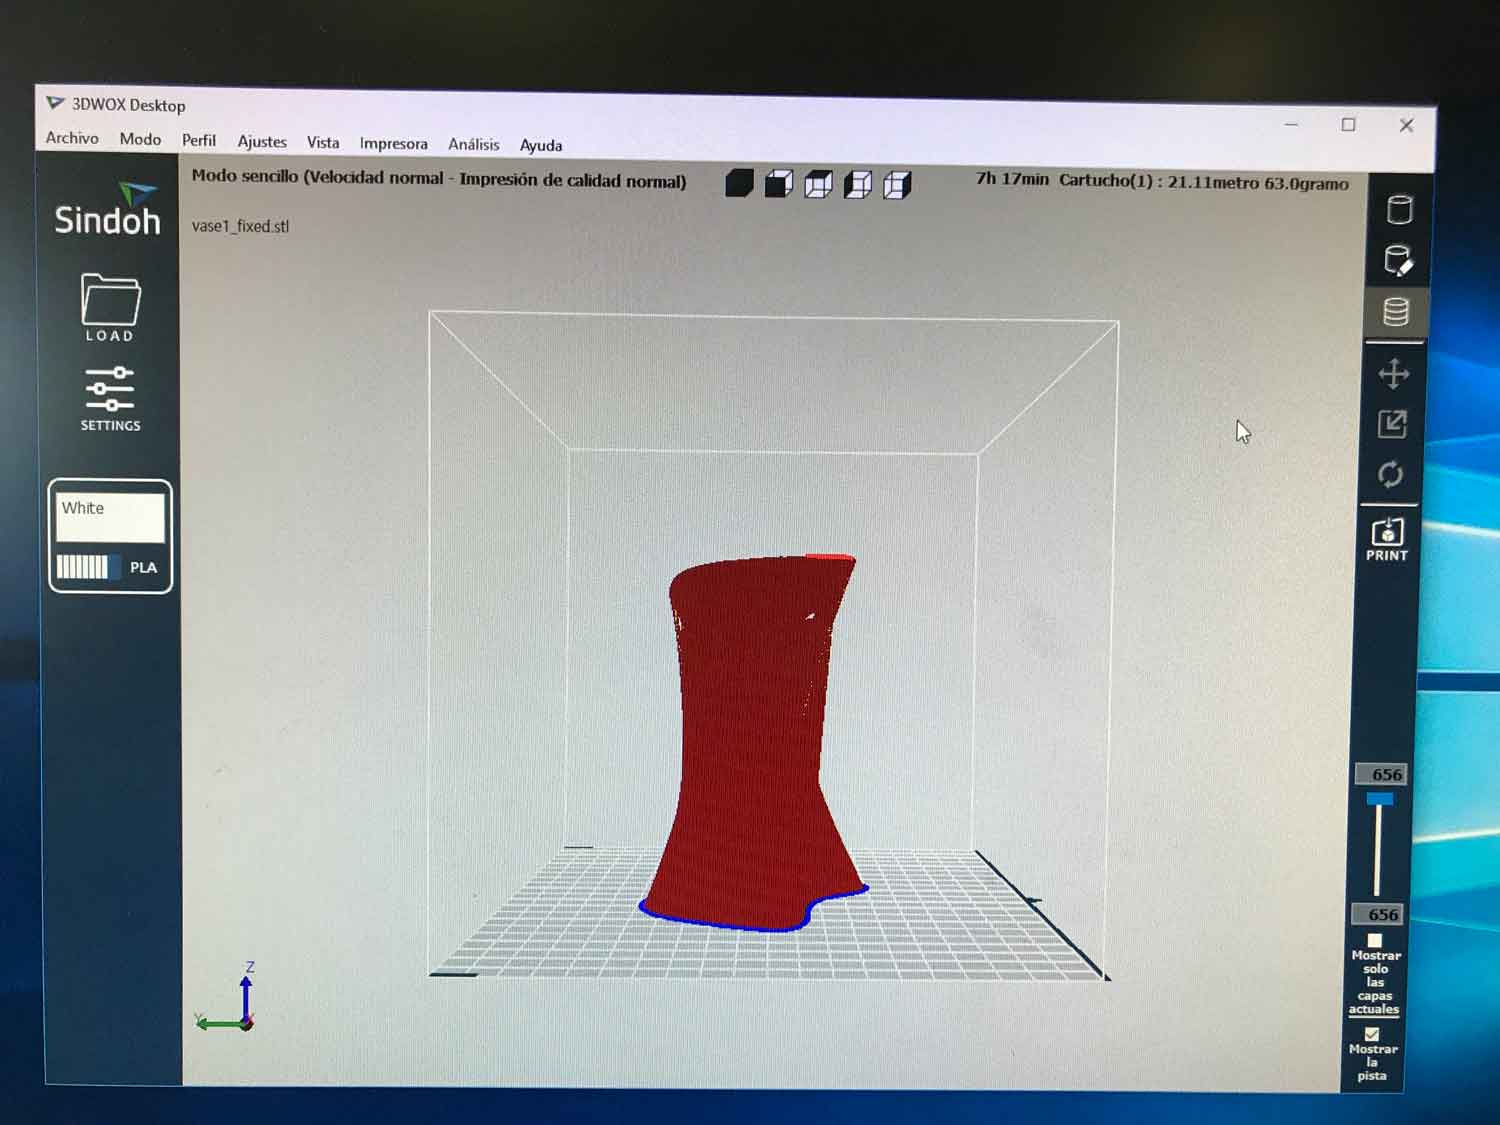
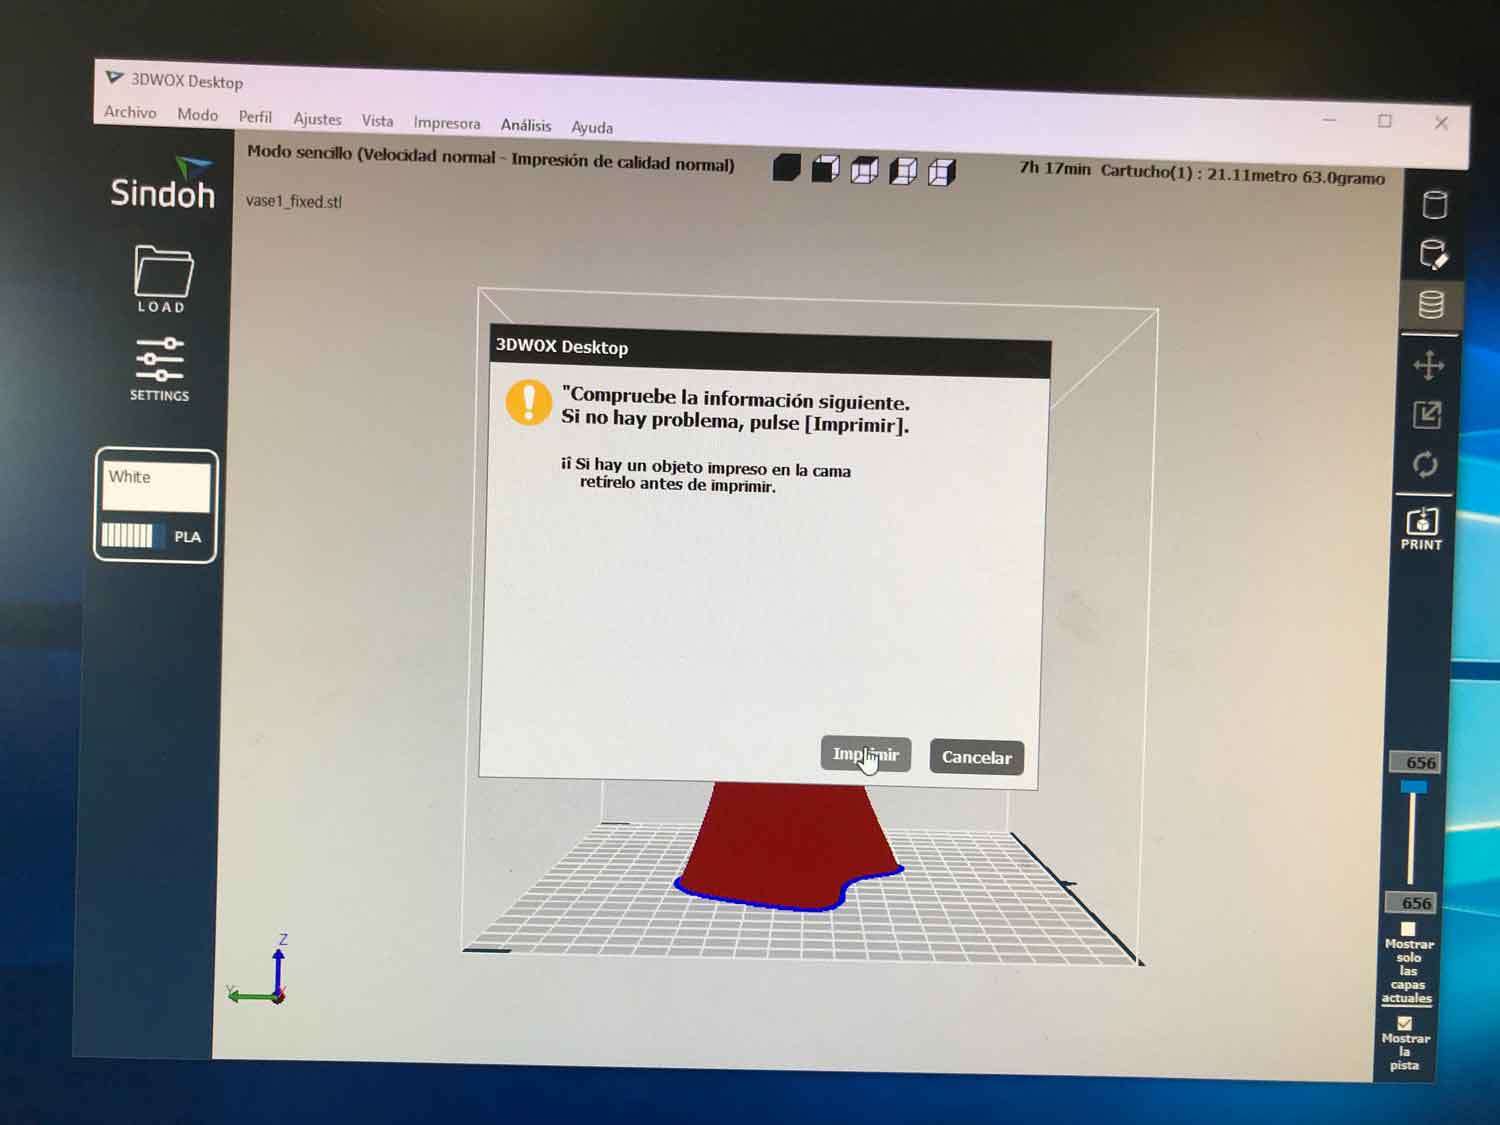
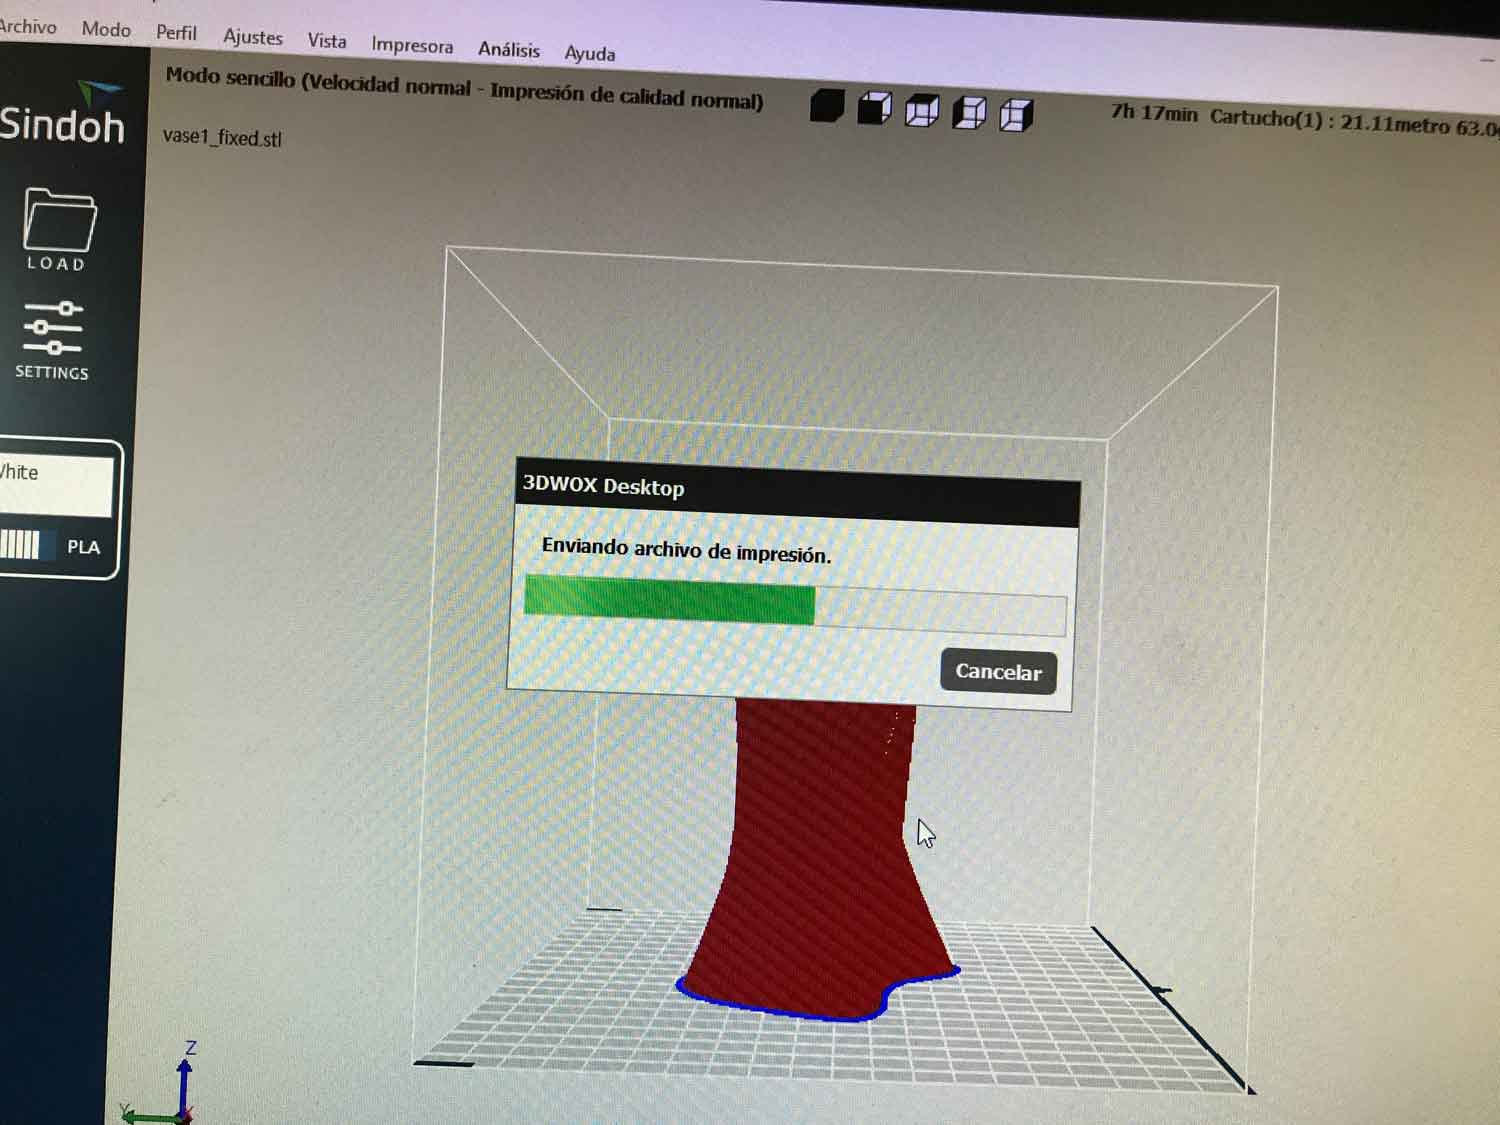
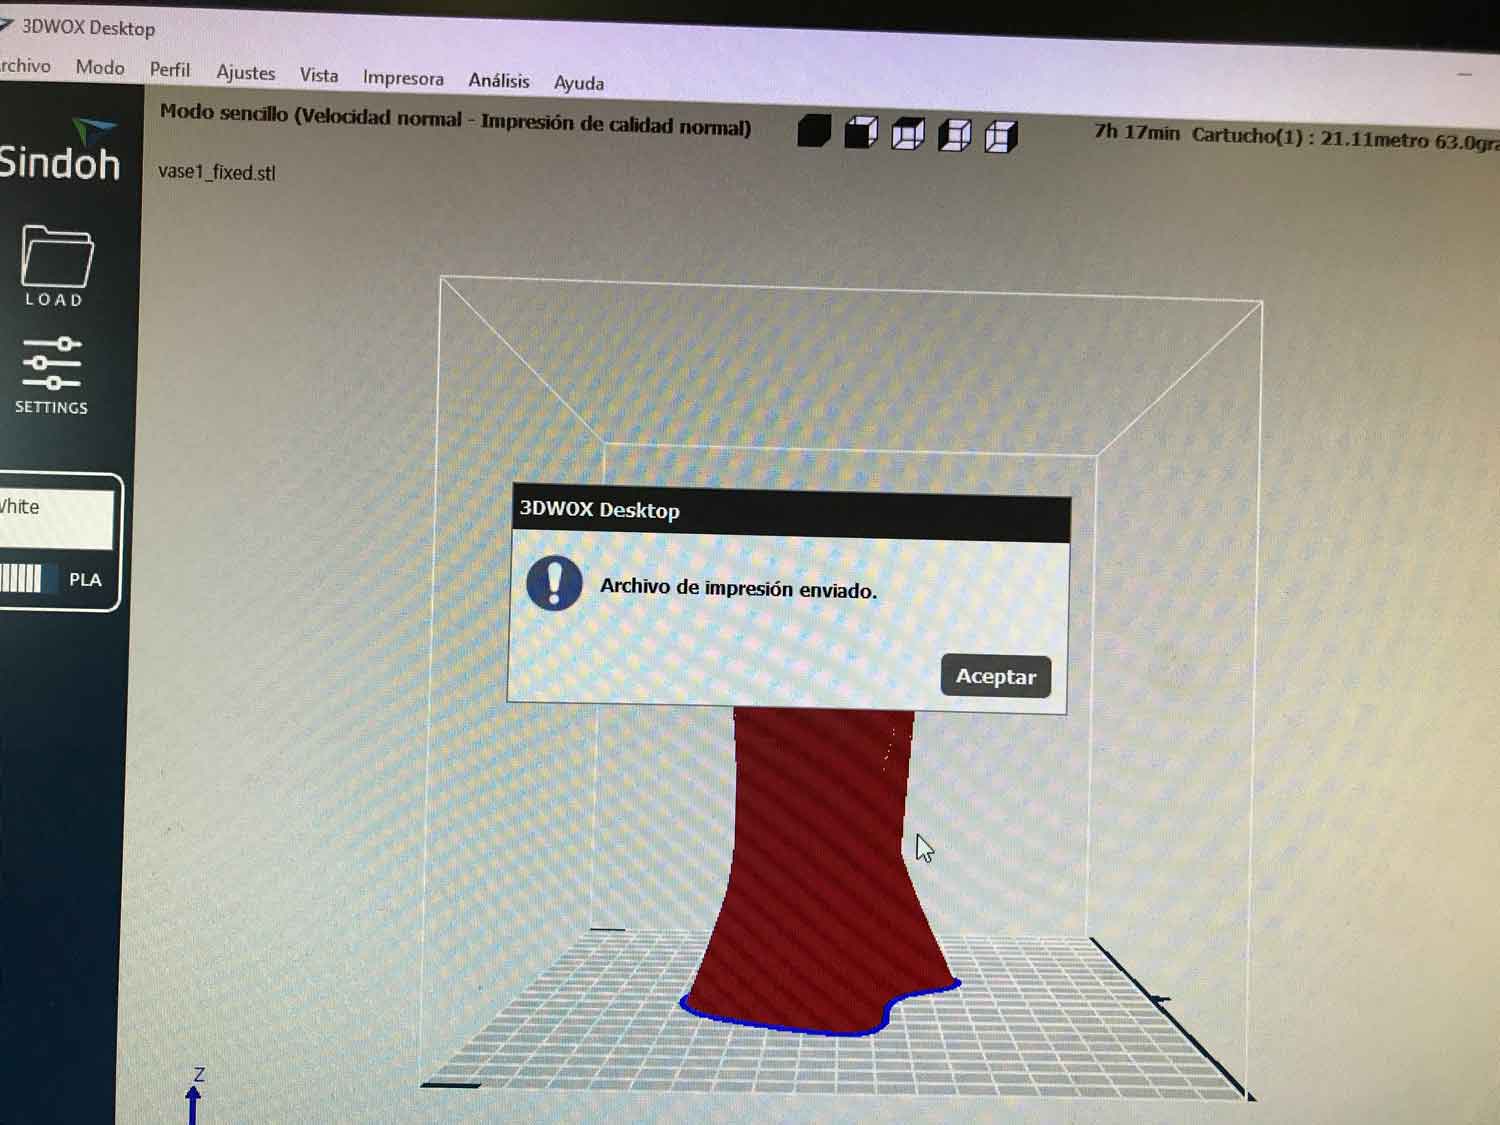
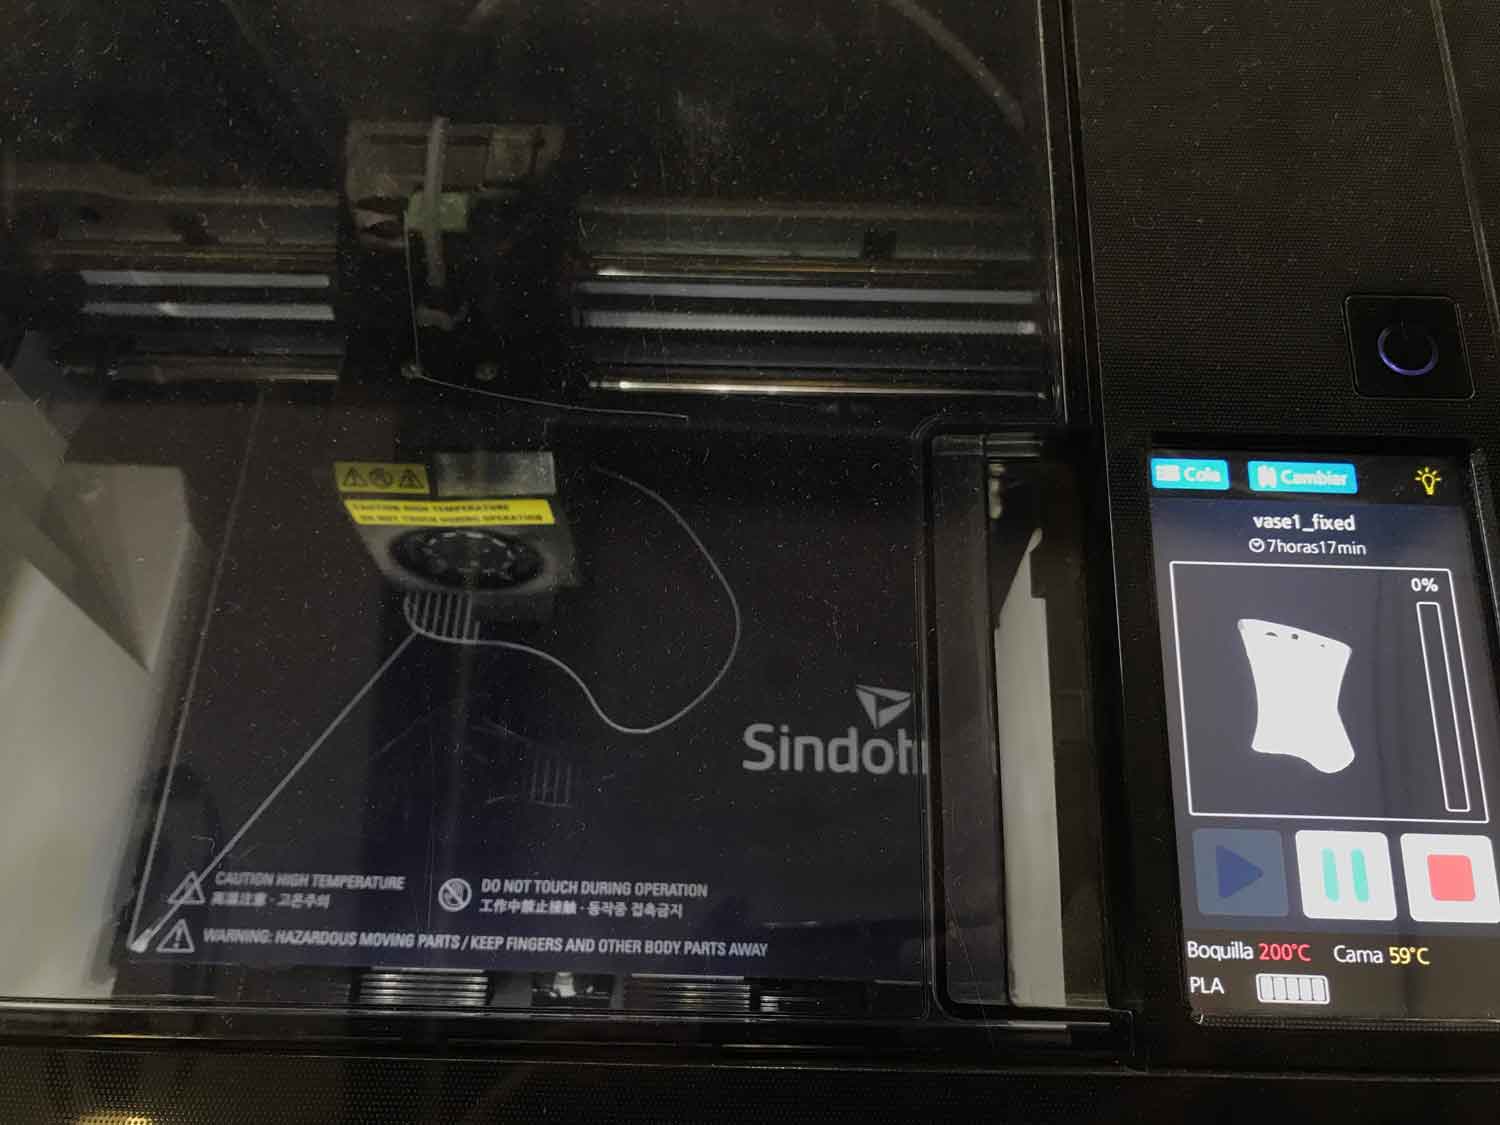
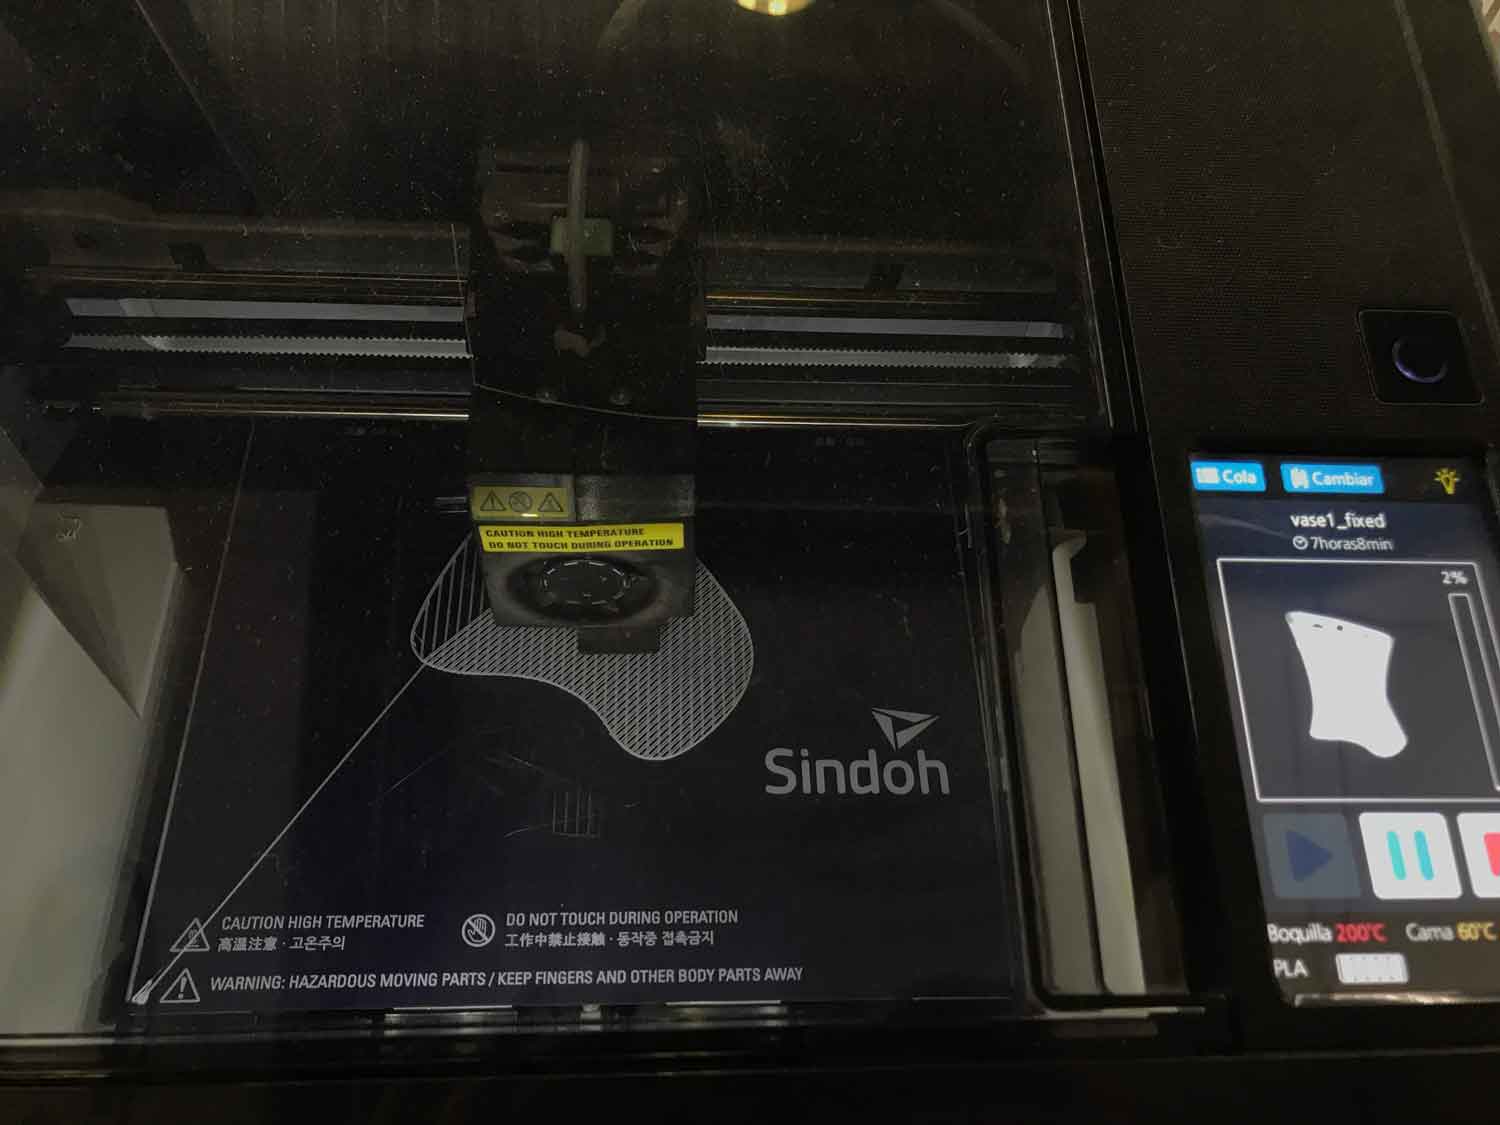
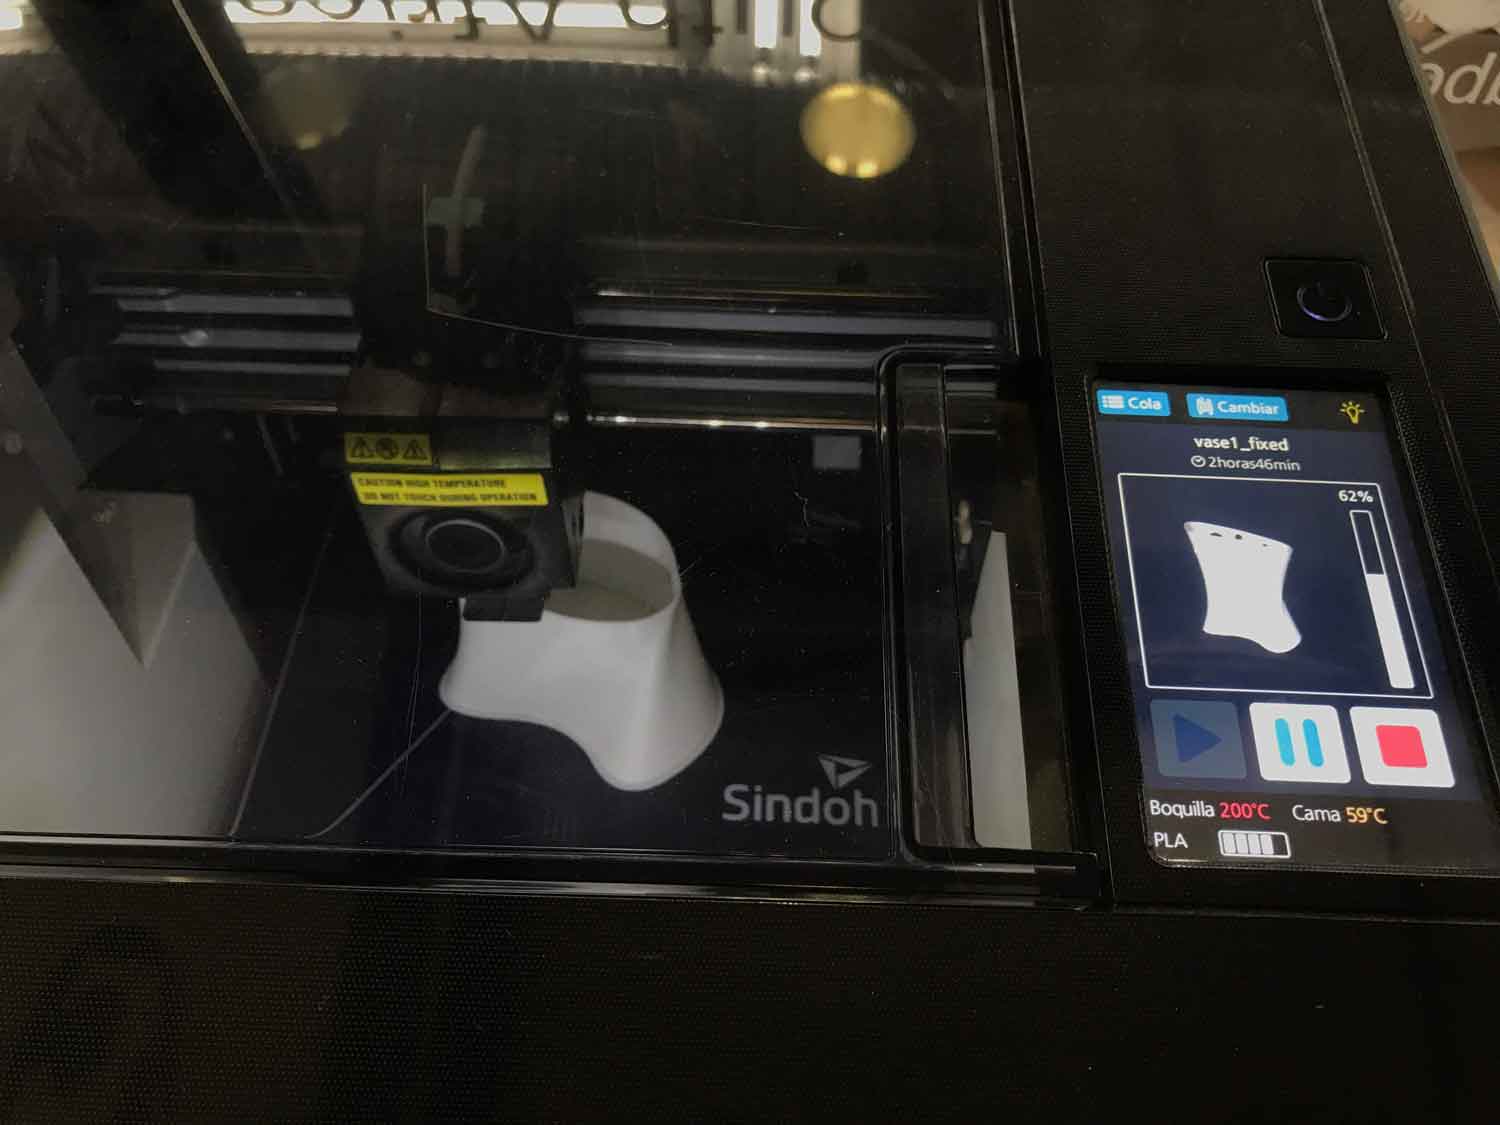
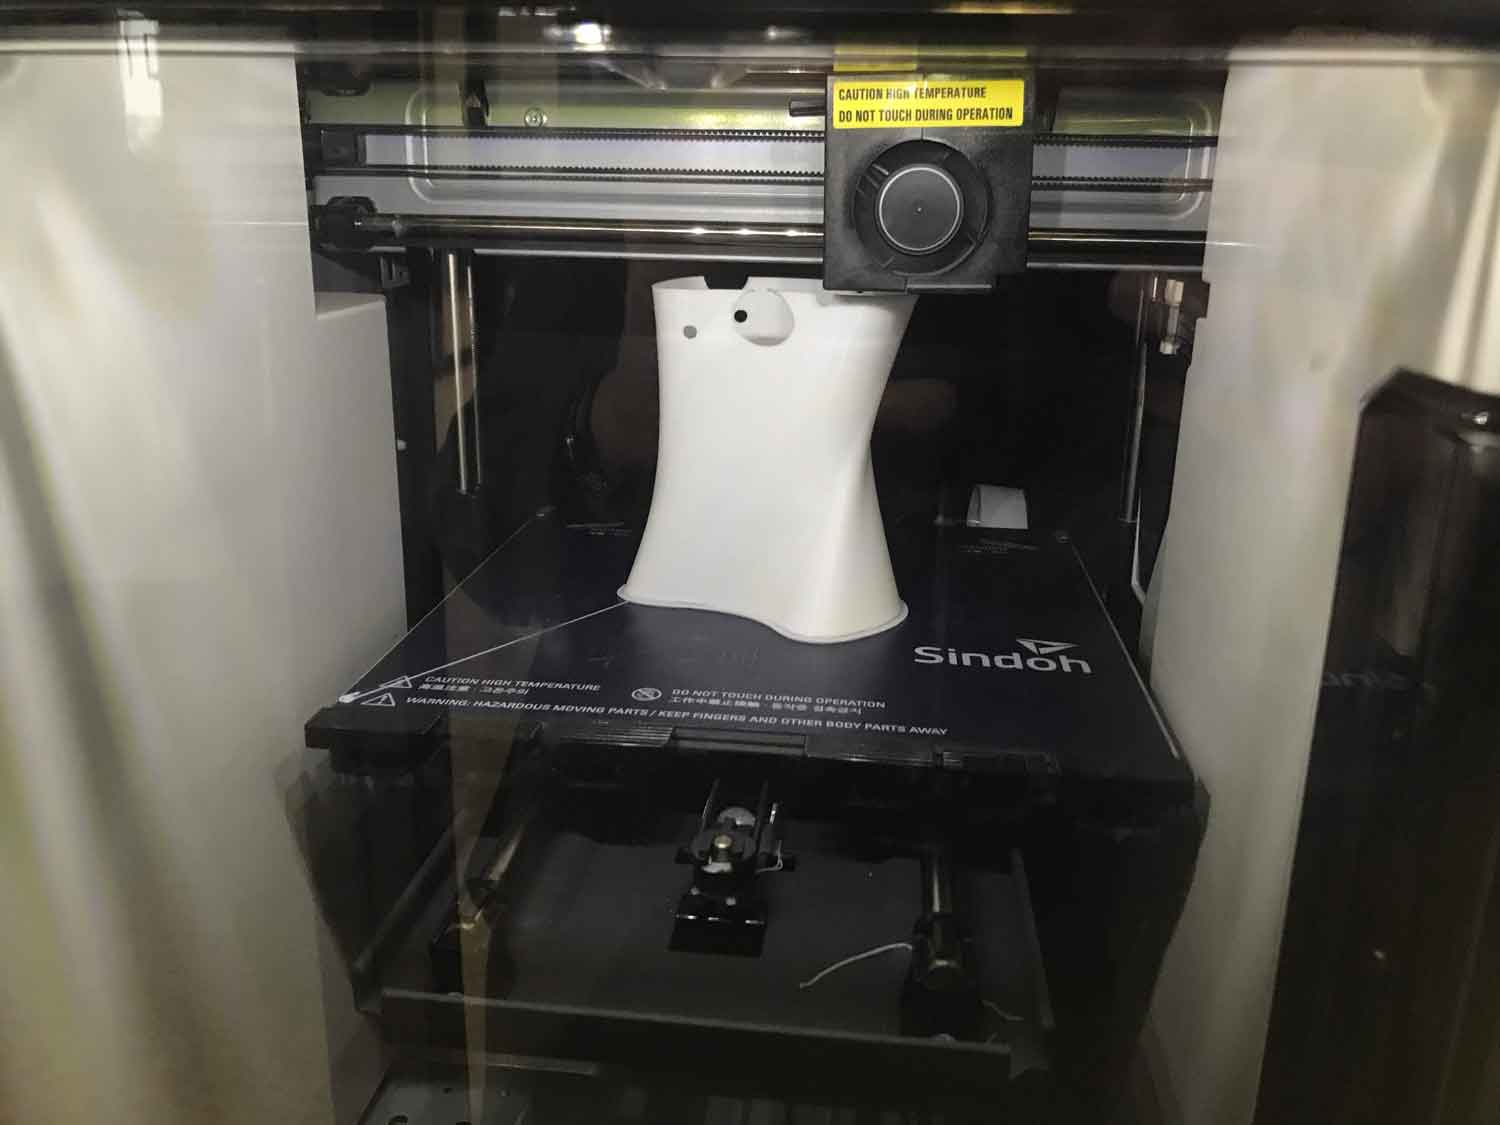
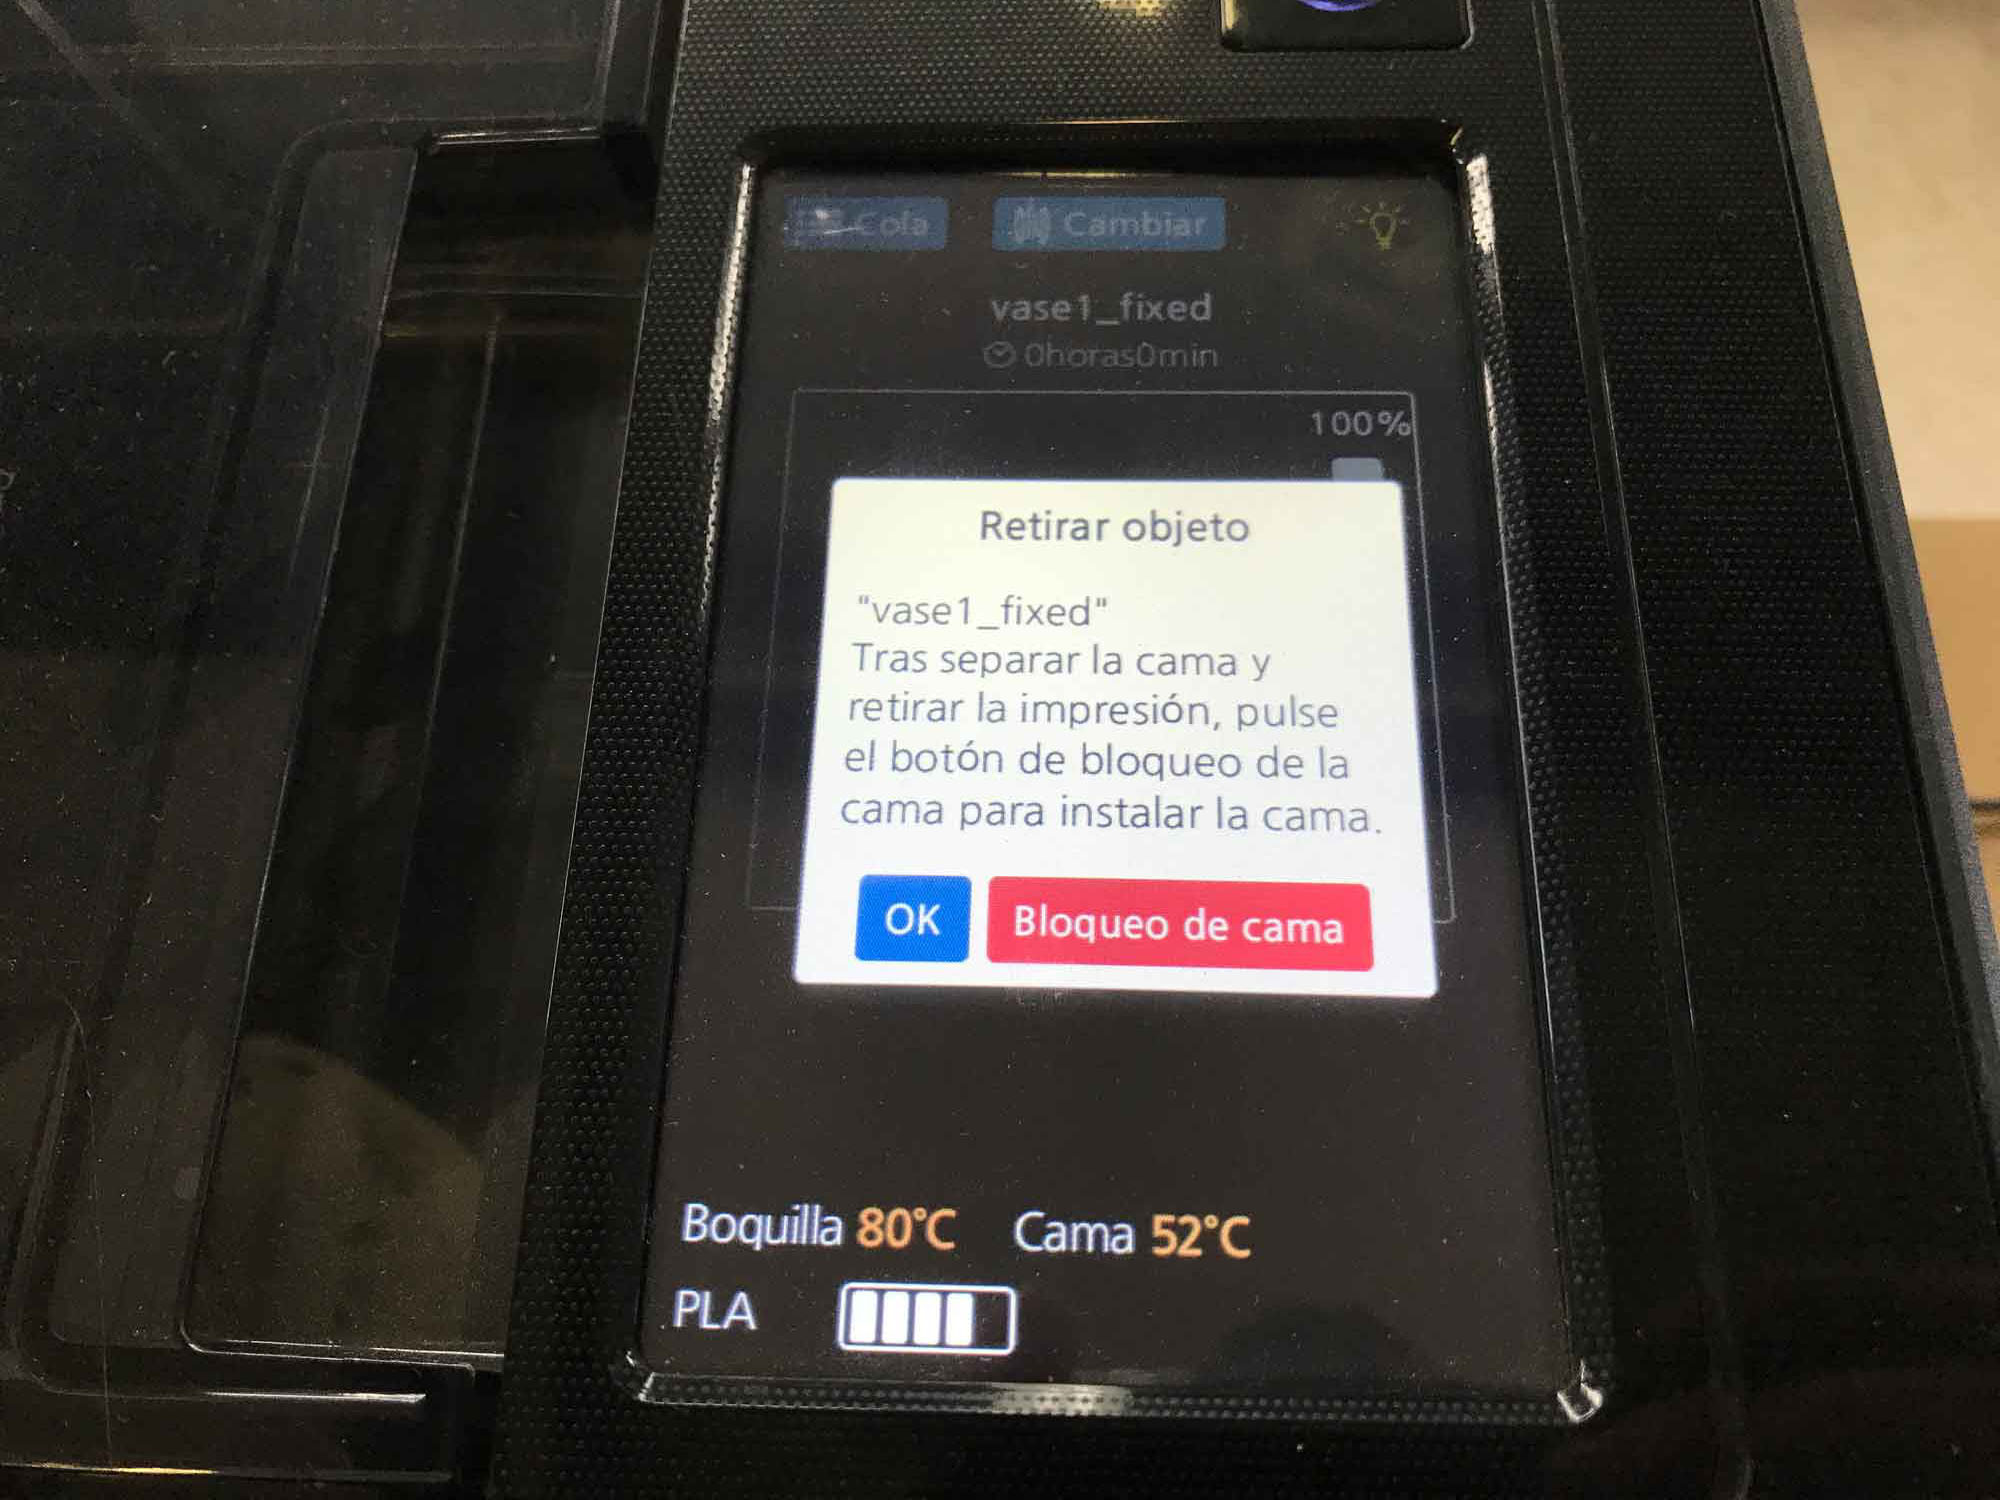
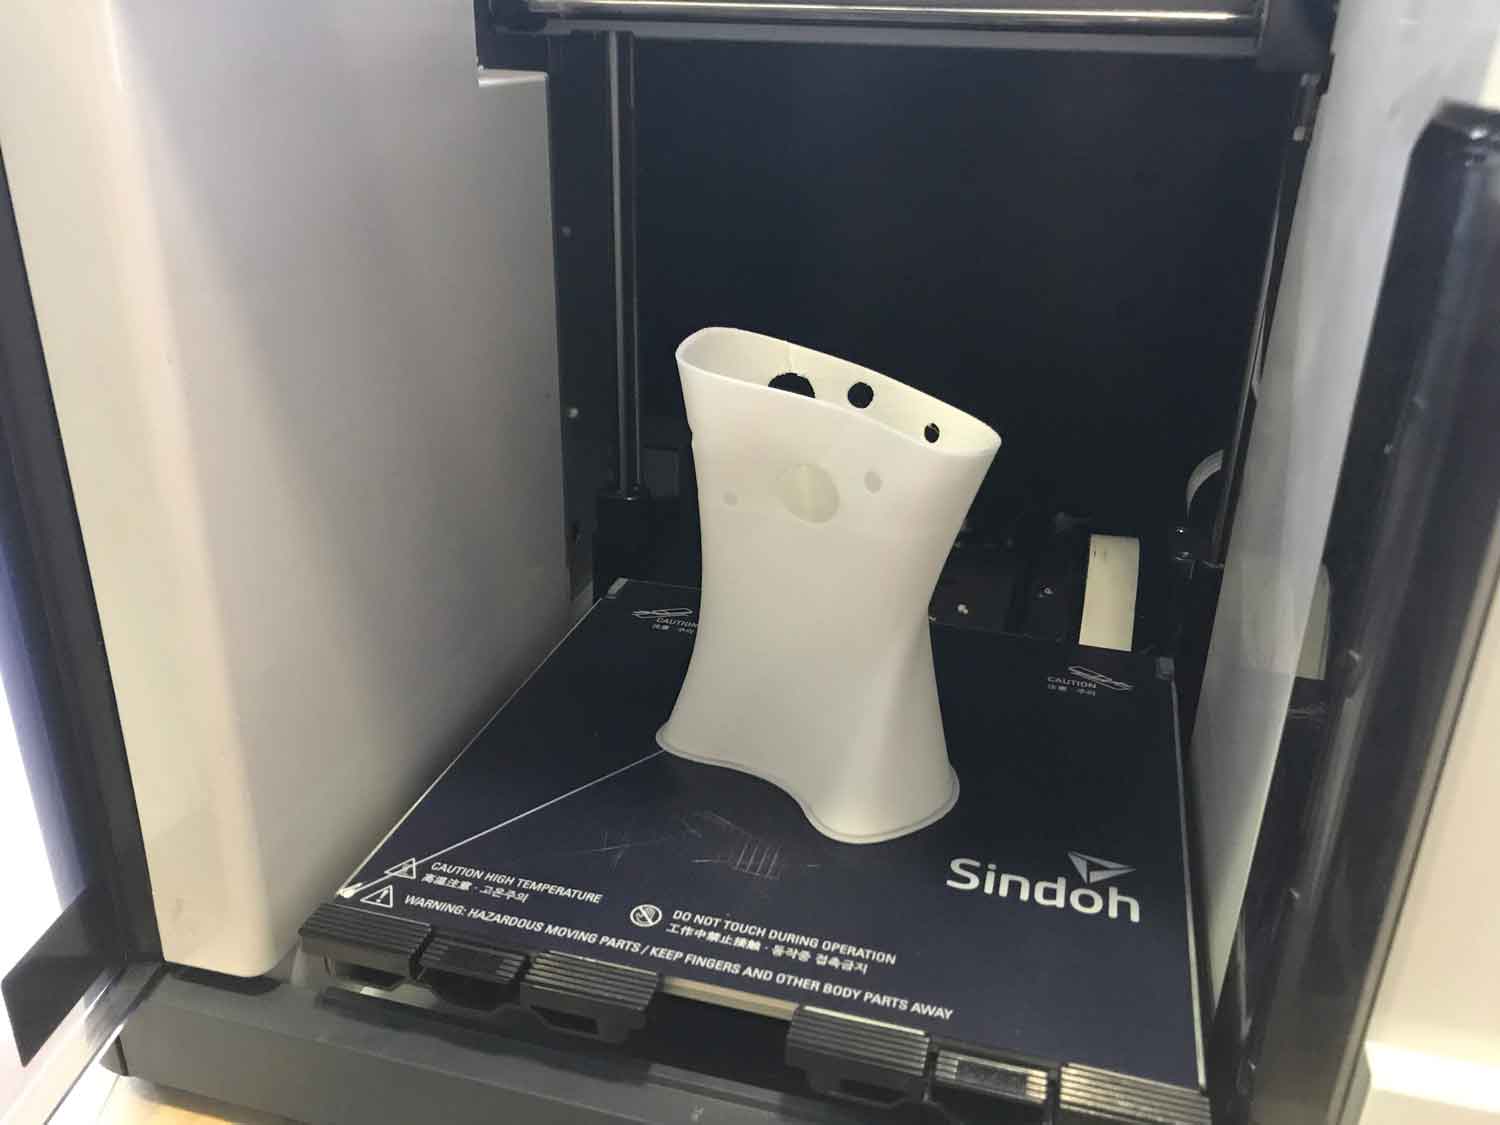
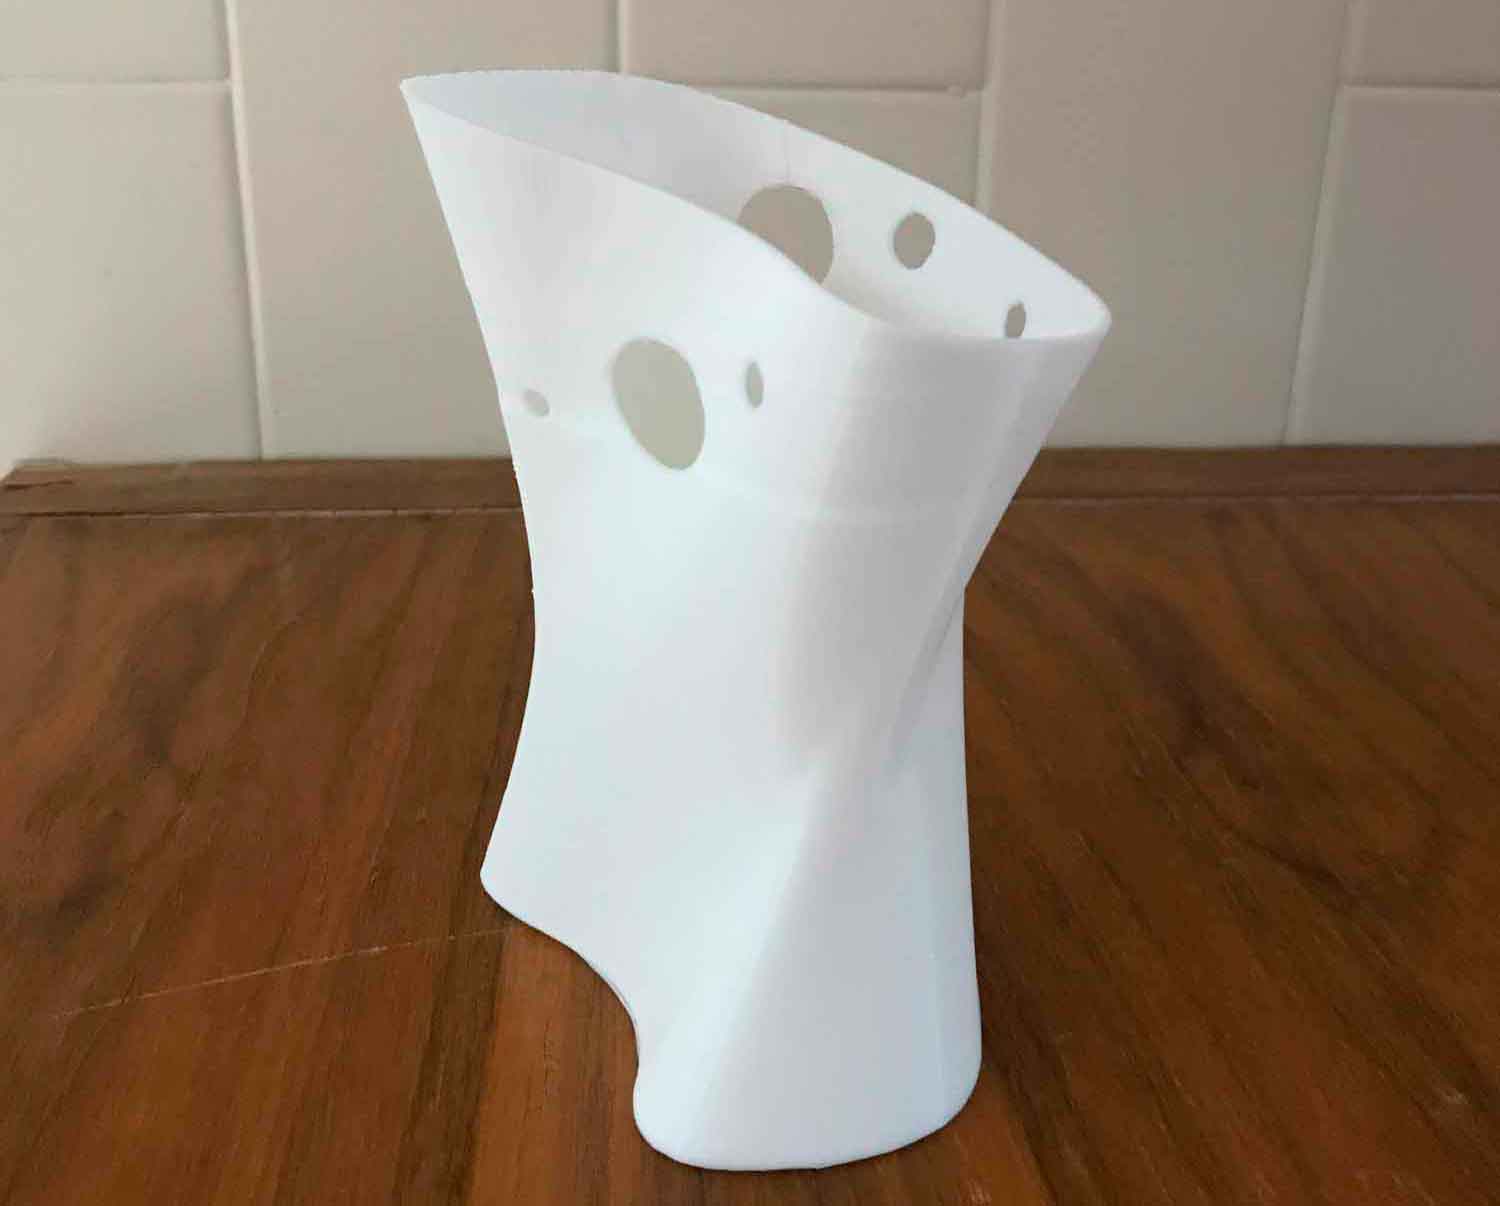
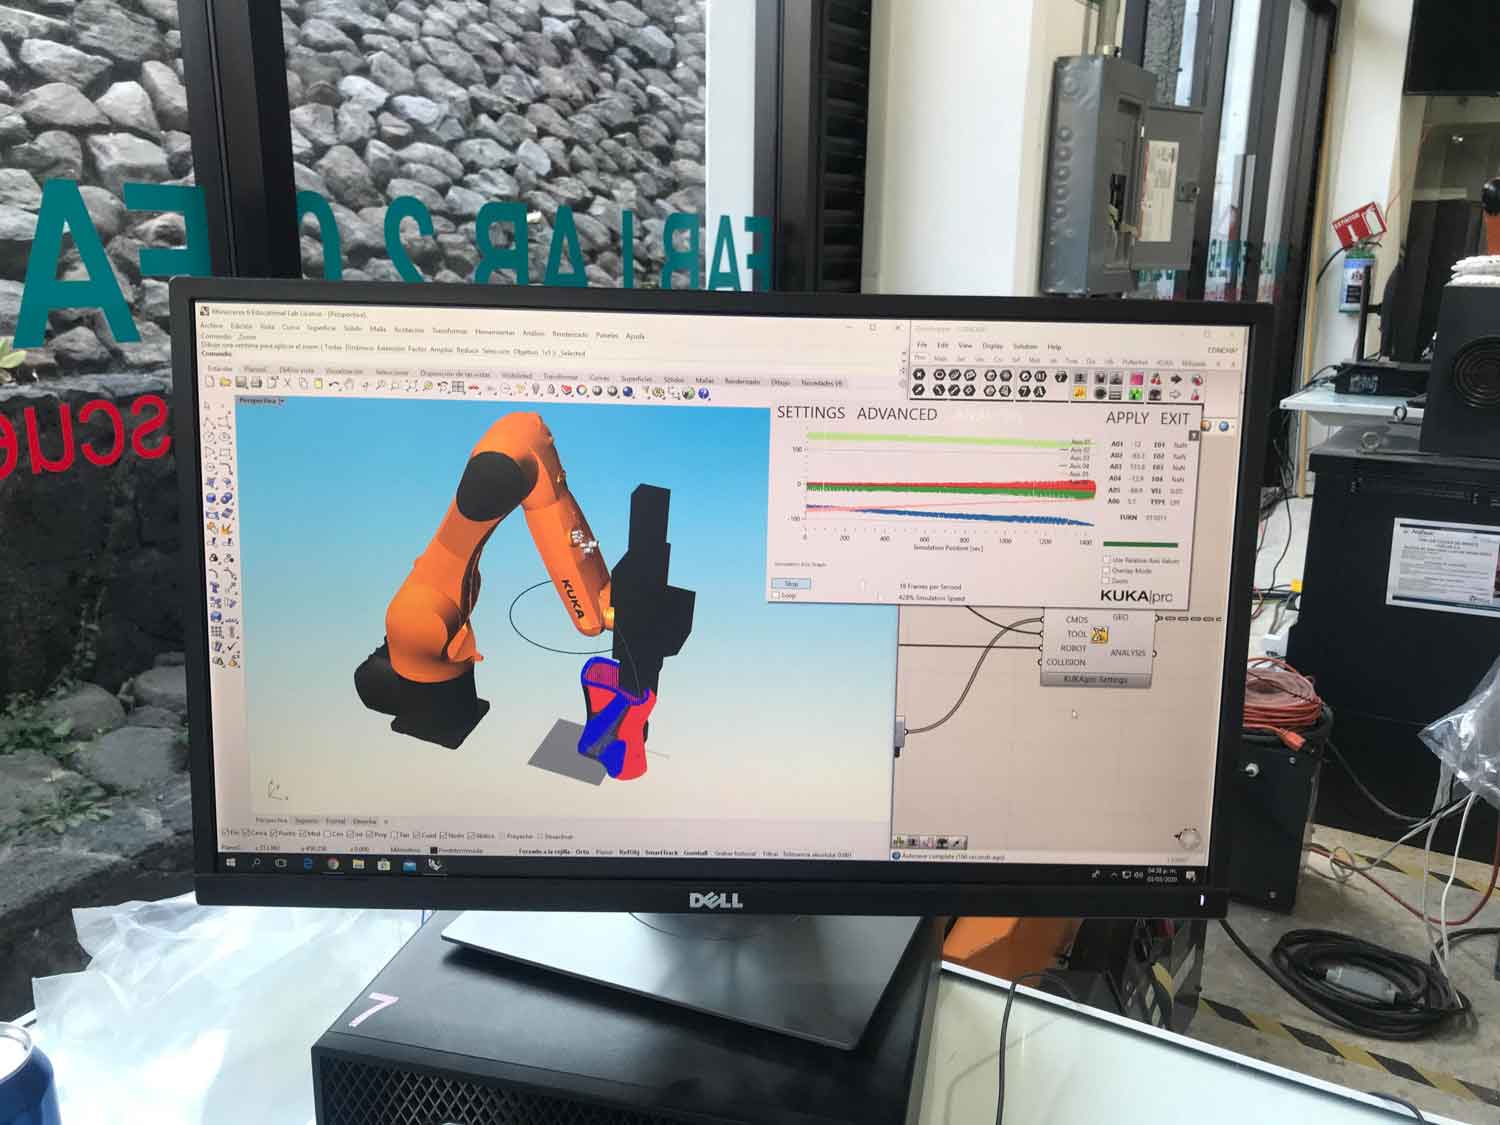
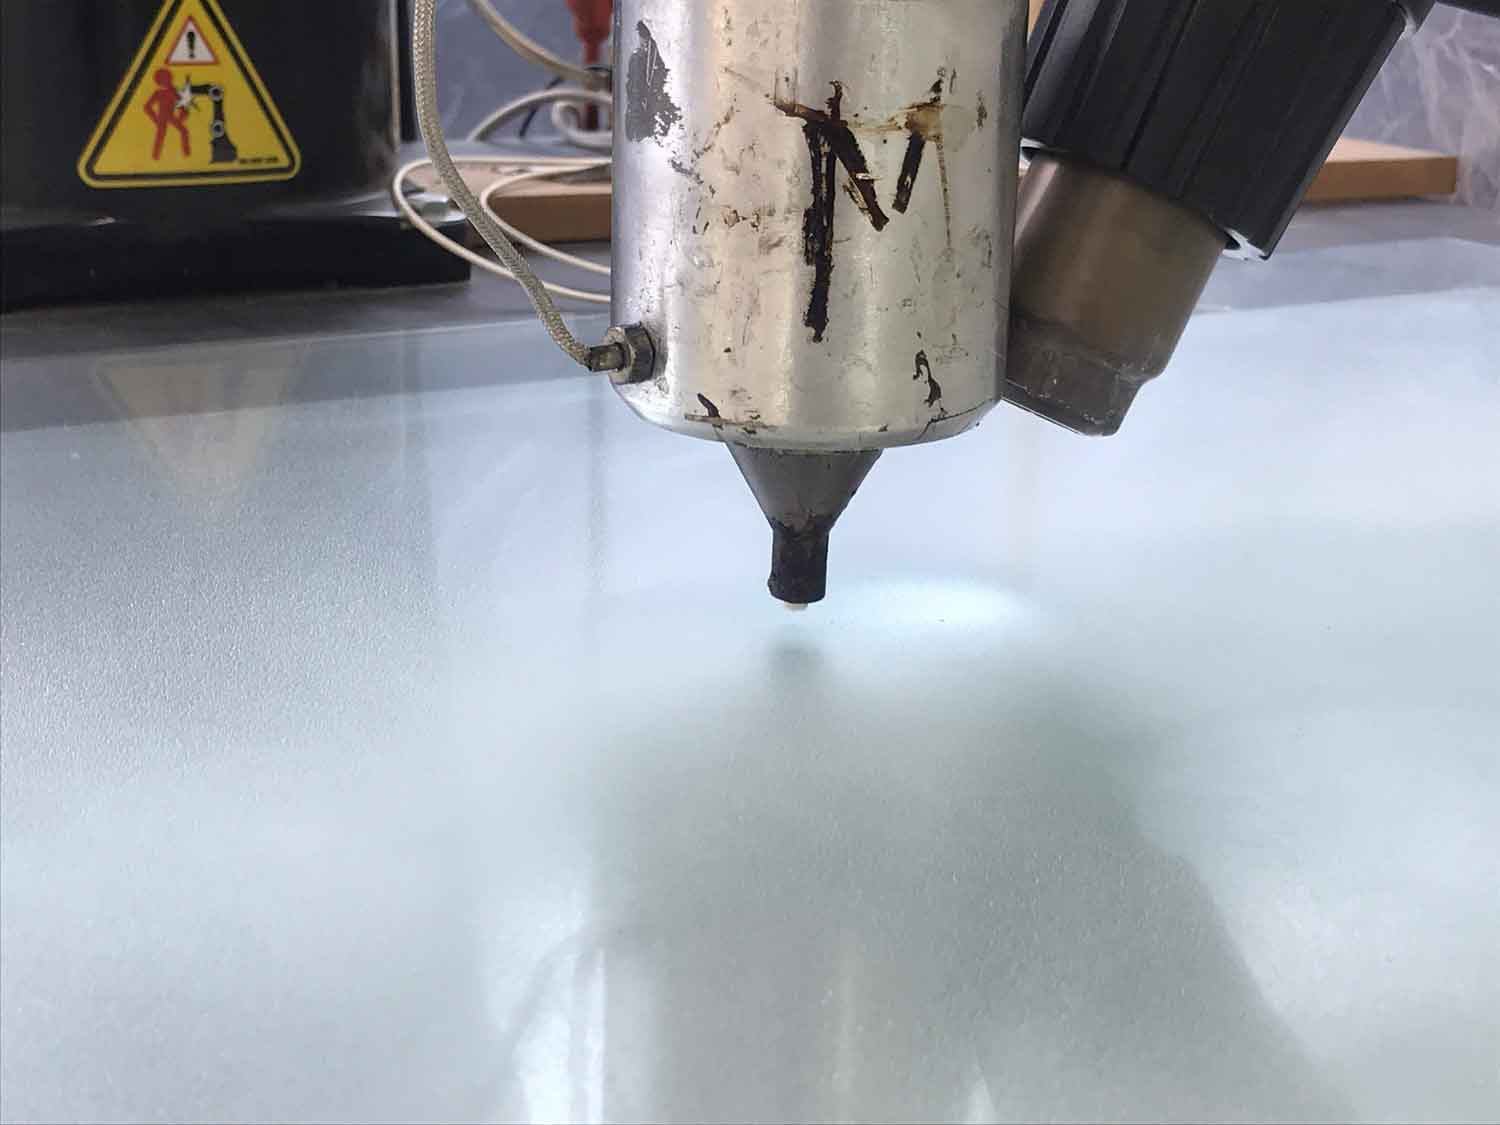
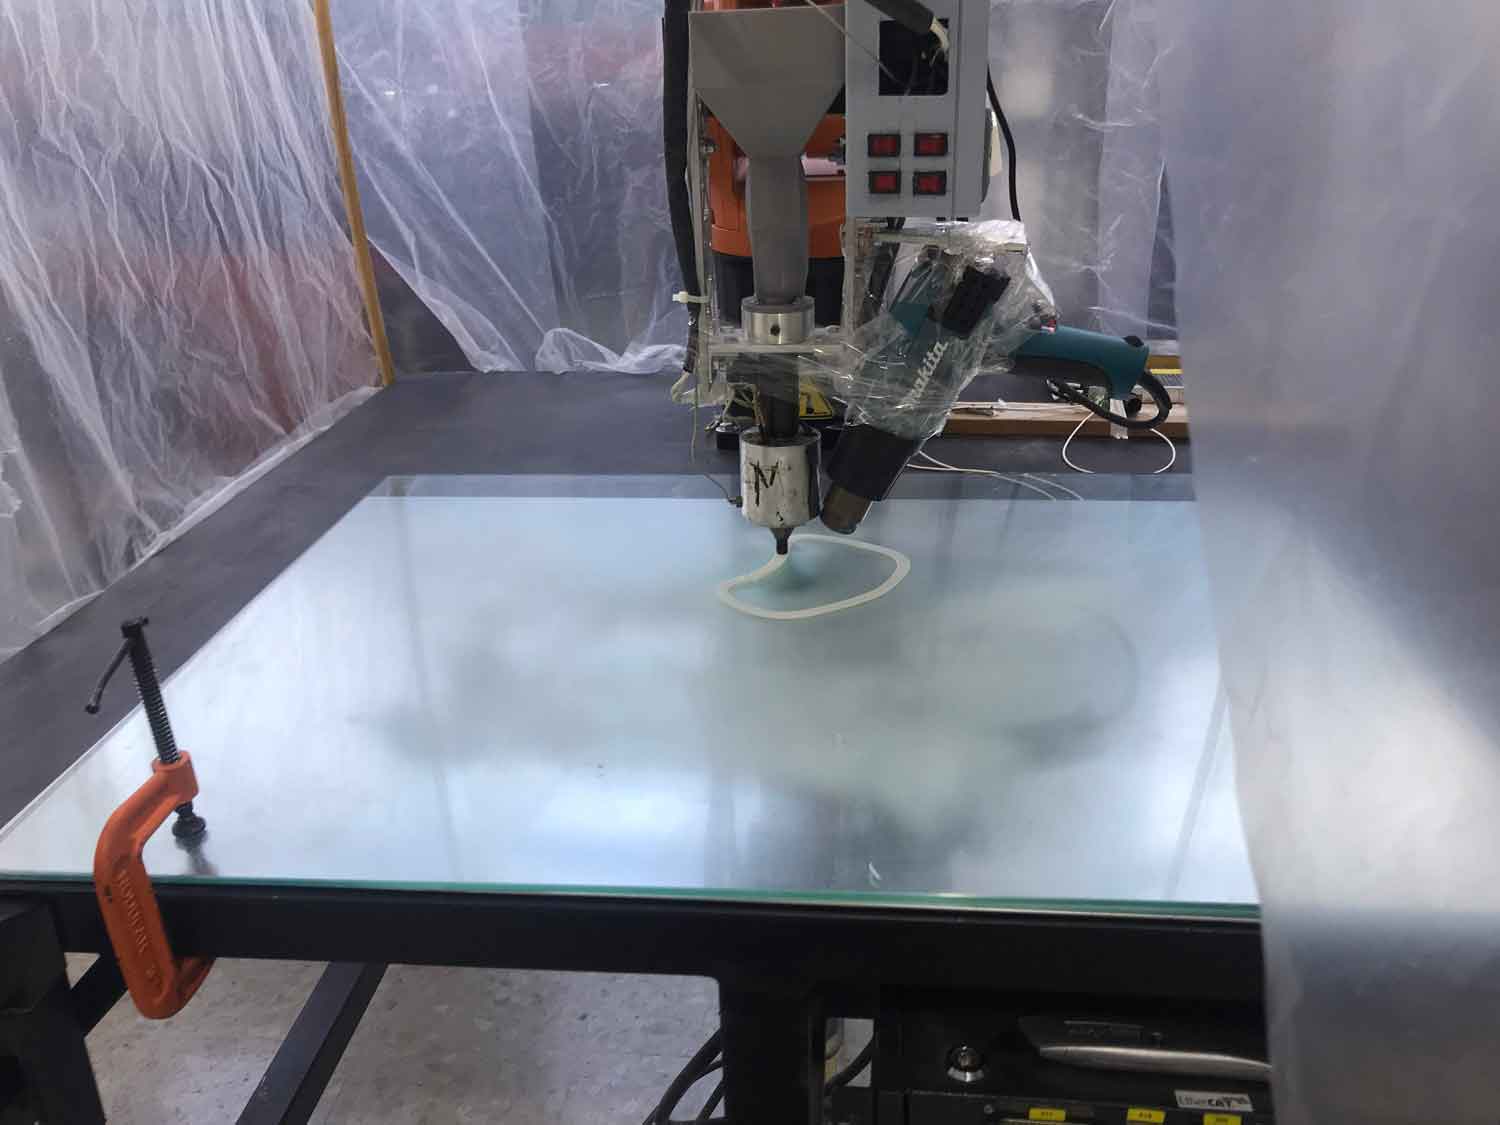
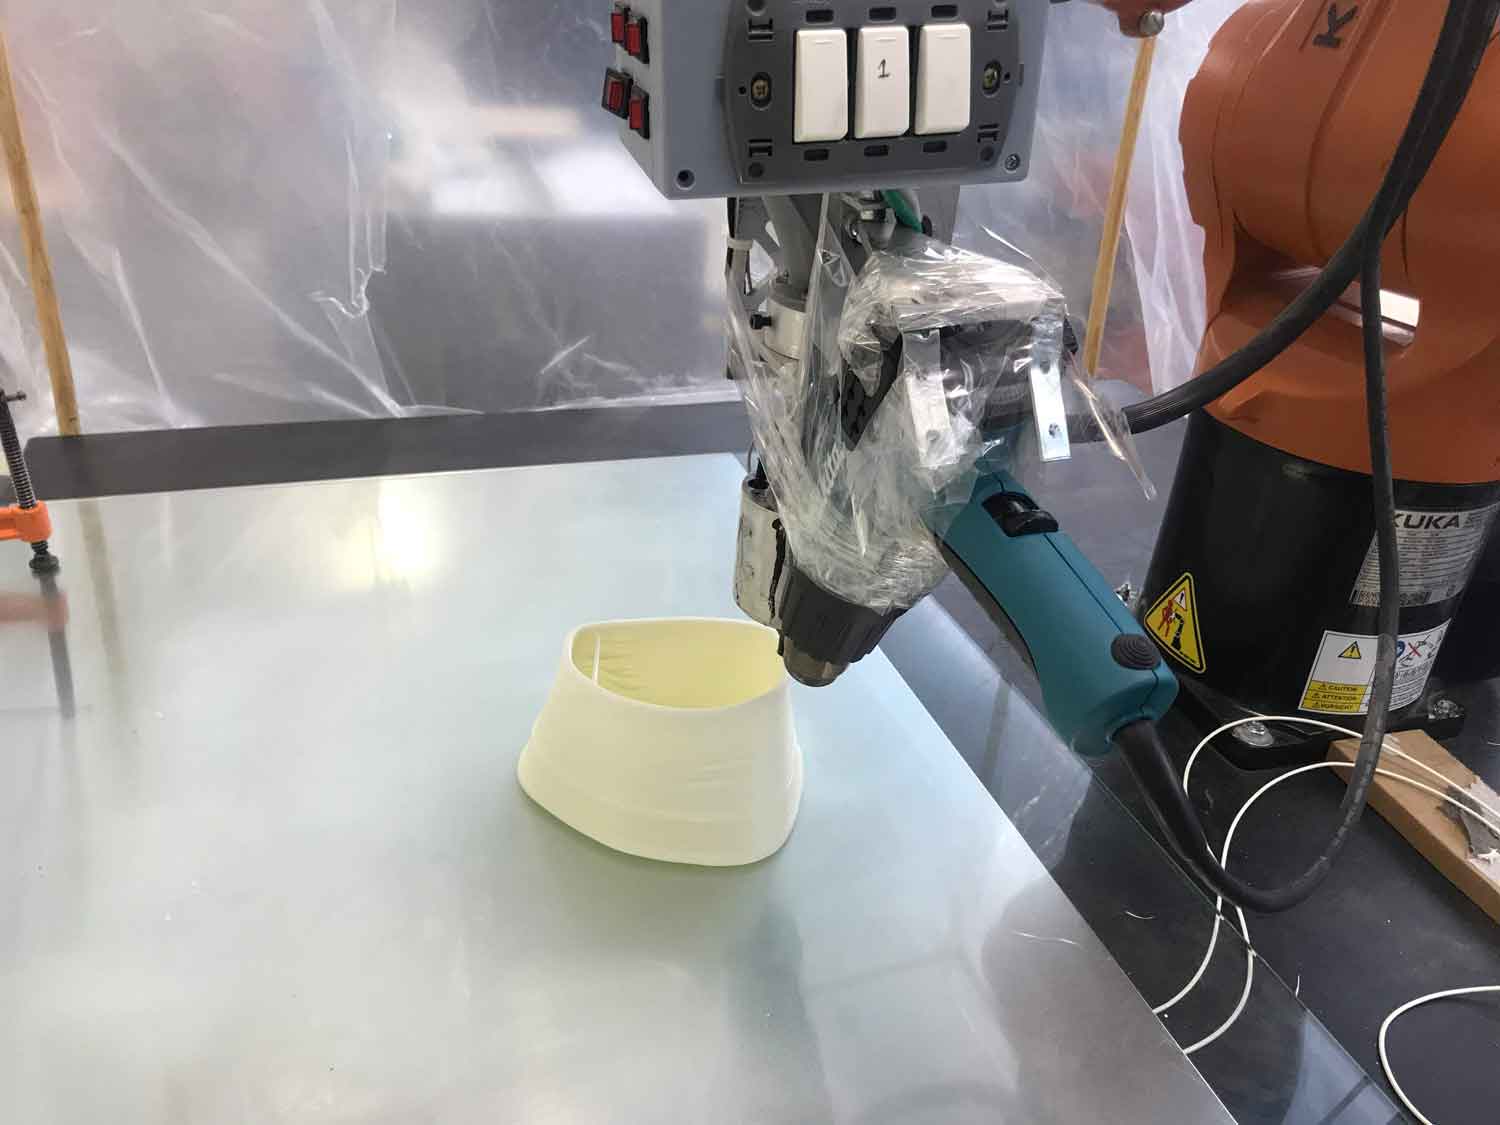
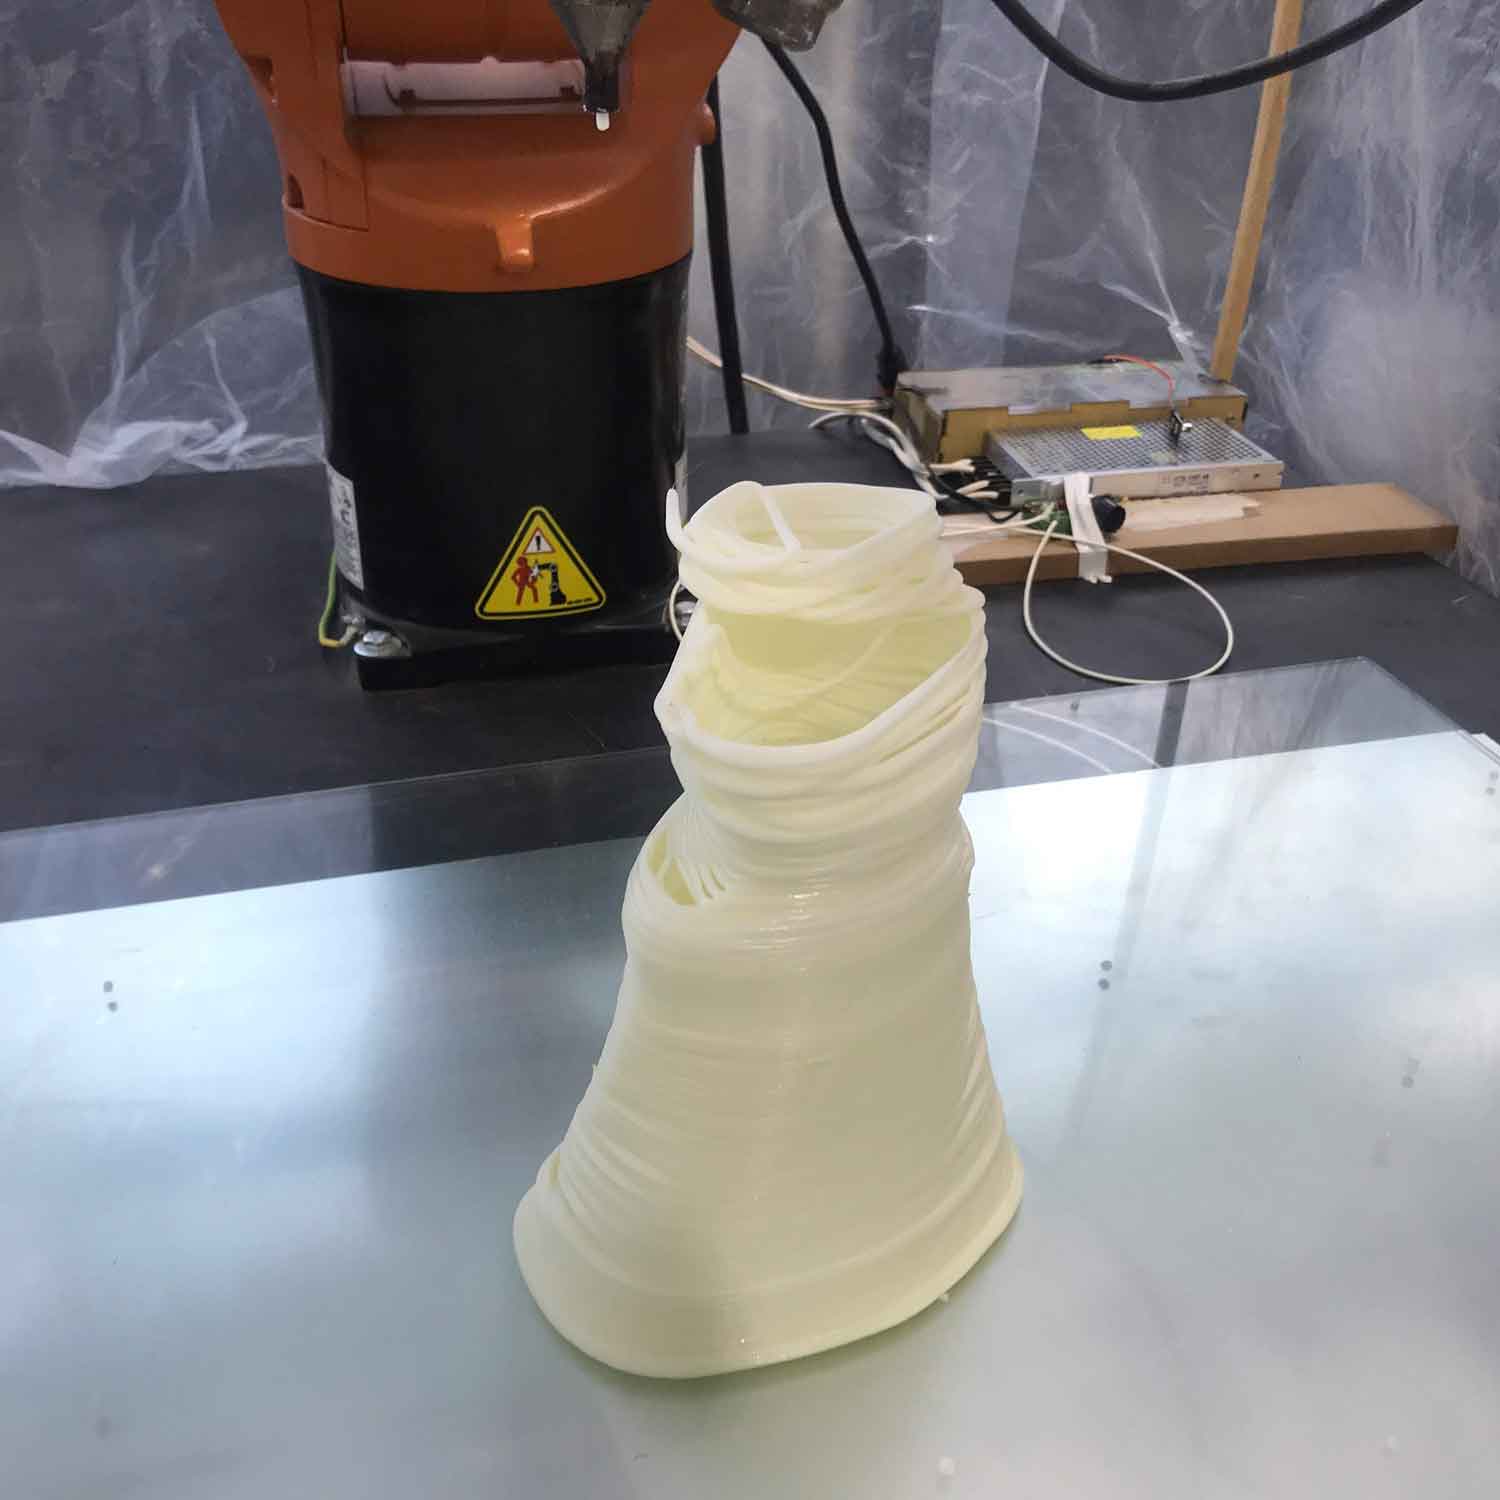
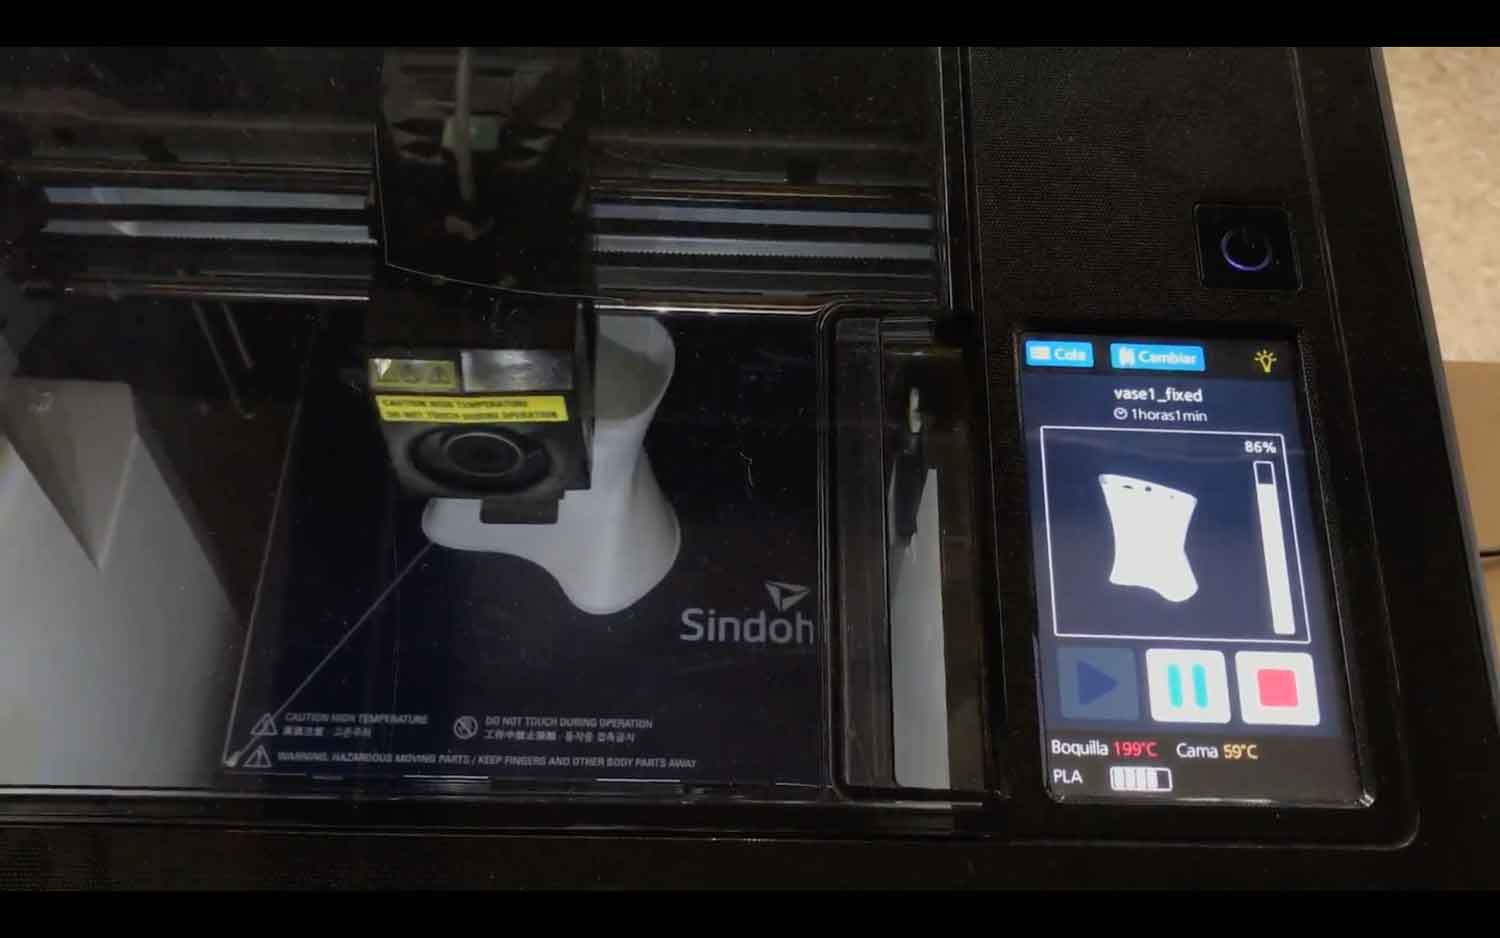
Using Vectorworks I draw an organic 2D irregular form, then I duplicate it and put them in defferent position in the Z axys, Then I convert those irregular forms into NURBS in order to made a LOFT model using the LOFT command to create a 3D solid. After that, with the SHELL command with a 2 mm wall thickness I convert my solid into a 3D Vase object then I substract some cilinders to make some holes in my model, then I export it into a .STL file,  I uploaded the file to NETFABB to get a new verify file to print in 3D. Before start printing my Vase, I opened the file in 3DWOX to set the parameters of printing, of the "supports" , to verify the GCode and to saw the time that the SINDOH 3D printer will spend printing. Here the link to design files:

3D_vase_mode.stl


A5_design_for_3D_printing.vwx


vase1.stl


vase1_fixed.stl


vase_mode_para_KUKA.stl


and the link to the group assigment is: FabLabCDMX.


.
In this image we can see the different steps I made to model the 3D vase, from the two silouettes that form the initial shape using the LOFT function, at the left of those silouettes you can see the complete vase without holes and substracting some cilinders of diferent diameter I made the holes of the vase
We need to export the 3D shape into a .STL modelo to print it in the 3D printing machine, there are some options when you export the file regarding the objects you see in the layer and the file type; select the ASCII option.
When importing the STL file, we can open the Easy Mode settings window where you can check and change some basic settings like the material, the quality of the printing and where to put the support basically, if you already check your settings in the advanced mode it´s ok to open this window, if not, I recomend to use the advance settings because you have more detail settings to choose from.
But is recommended to use the Advanced setting mode because in here we have more controll of the details  of the printing like the speed and quality.
Here is the window of Speed and Support in the advanced settings. The speed of impresion is set to 40 and the displacement speed at 180mm/s for more detail settings depending on the design of the model you are going to print, the inner or outer wall speed becomes critical, but for now the design doesn´t need that kind of detail.
"Layer High" at 0.3mm, for some designs, this setting can be 0.1, depending of the detail that you required.
When ready we need to generate the G-CODE, this code is what the printing machine read, something important: be sure that the filament in your machine and the material that you select in your settings is the same, ex: PLA or ABS
at the upper right corner you can see the time that is going to take printing your model, you can adjust some settings in order to reduce quality if needed to reduce printing time.
befor start printing "be sure that´s there is no objects place it inside the 3D printer". In this case, the computer is connected directly to the printer but some times not, just save your GCODE in an USB and connect to the USB port at the front of the machine and then you would be able to select the file.

sending the file to the 3D printer

starting the print.
Here we can see the "bed" this first layer of printing is the one that goes between the bed of the machine and the bottom of your model, after the printing is ready and detached your model you can take it off.


almost done
This warning is telling us that after we take out the bed to reatire the 3D object we need to push the red button "bed block" befor putting the bed again in its place because this function will lock the movement of the mechanism that holds the bed so we can put it in the right place without moving the support.
ready, it´s done, the 3D printer finished the work and we can take out the bed and retire the object
The final 3D printed piece. If we try to make it in a laser cut machine for example we need it to make in layers, and the result would be in a piece made with "steps" not a smooth surface, we need to glue al the pieces that could be a very fastidious work and we made it in a CNC router we can´t get the whole piece because of the limitations of the movements and of the limitations of the router bits reach.


GROUP ASSIGMENT

We made some tests in the SINDOH and in the RockstockMAX 3D printers and then we print the test parameters, first we print at a speed of 350 and some parts of the printed test did not printed correctly, then we pint at a speed of 180 end the results were better, we got a more defined piece. group assigment


Then, Rodrigo Shiordia and Rafa offer me to use the KUKA robot so they can test some settings and I could get another 3D printed VASE......:

The cover you see is to maintain the hot temperature inside the printing space

  ABS pellets
Adapting a heat pistol to adjust the extrusion temperature

Setting parameters in Grasshopper
Visualizing the KUKA movements
just about to start printing

The printing looks good
but then something went wrong, but the test was a good excercise.
We just know what go wrong:
I refill the extruder with the wrong pellets (without notice) so the plastic don´t "glue" to the model that already was there and start to deform the Vase.


3D scanning


I use a "Structure Sensor" scan adapted in an iPad
Starting the scanner
Adjusting light settings

calibration ok
I scanned a pair of headphones.
The result it wasn´t what I expect, I didn´t gave the scan the time neccesarily to scan the object correctly.


the green spot

a place to re-connect