For this assignment
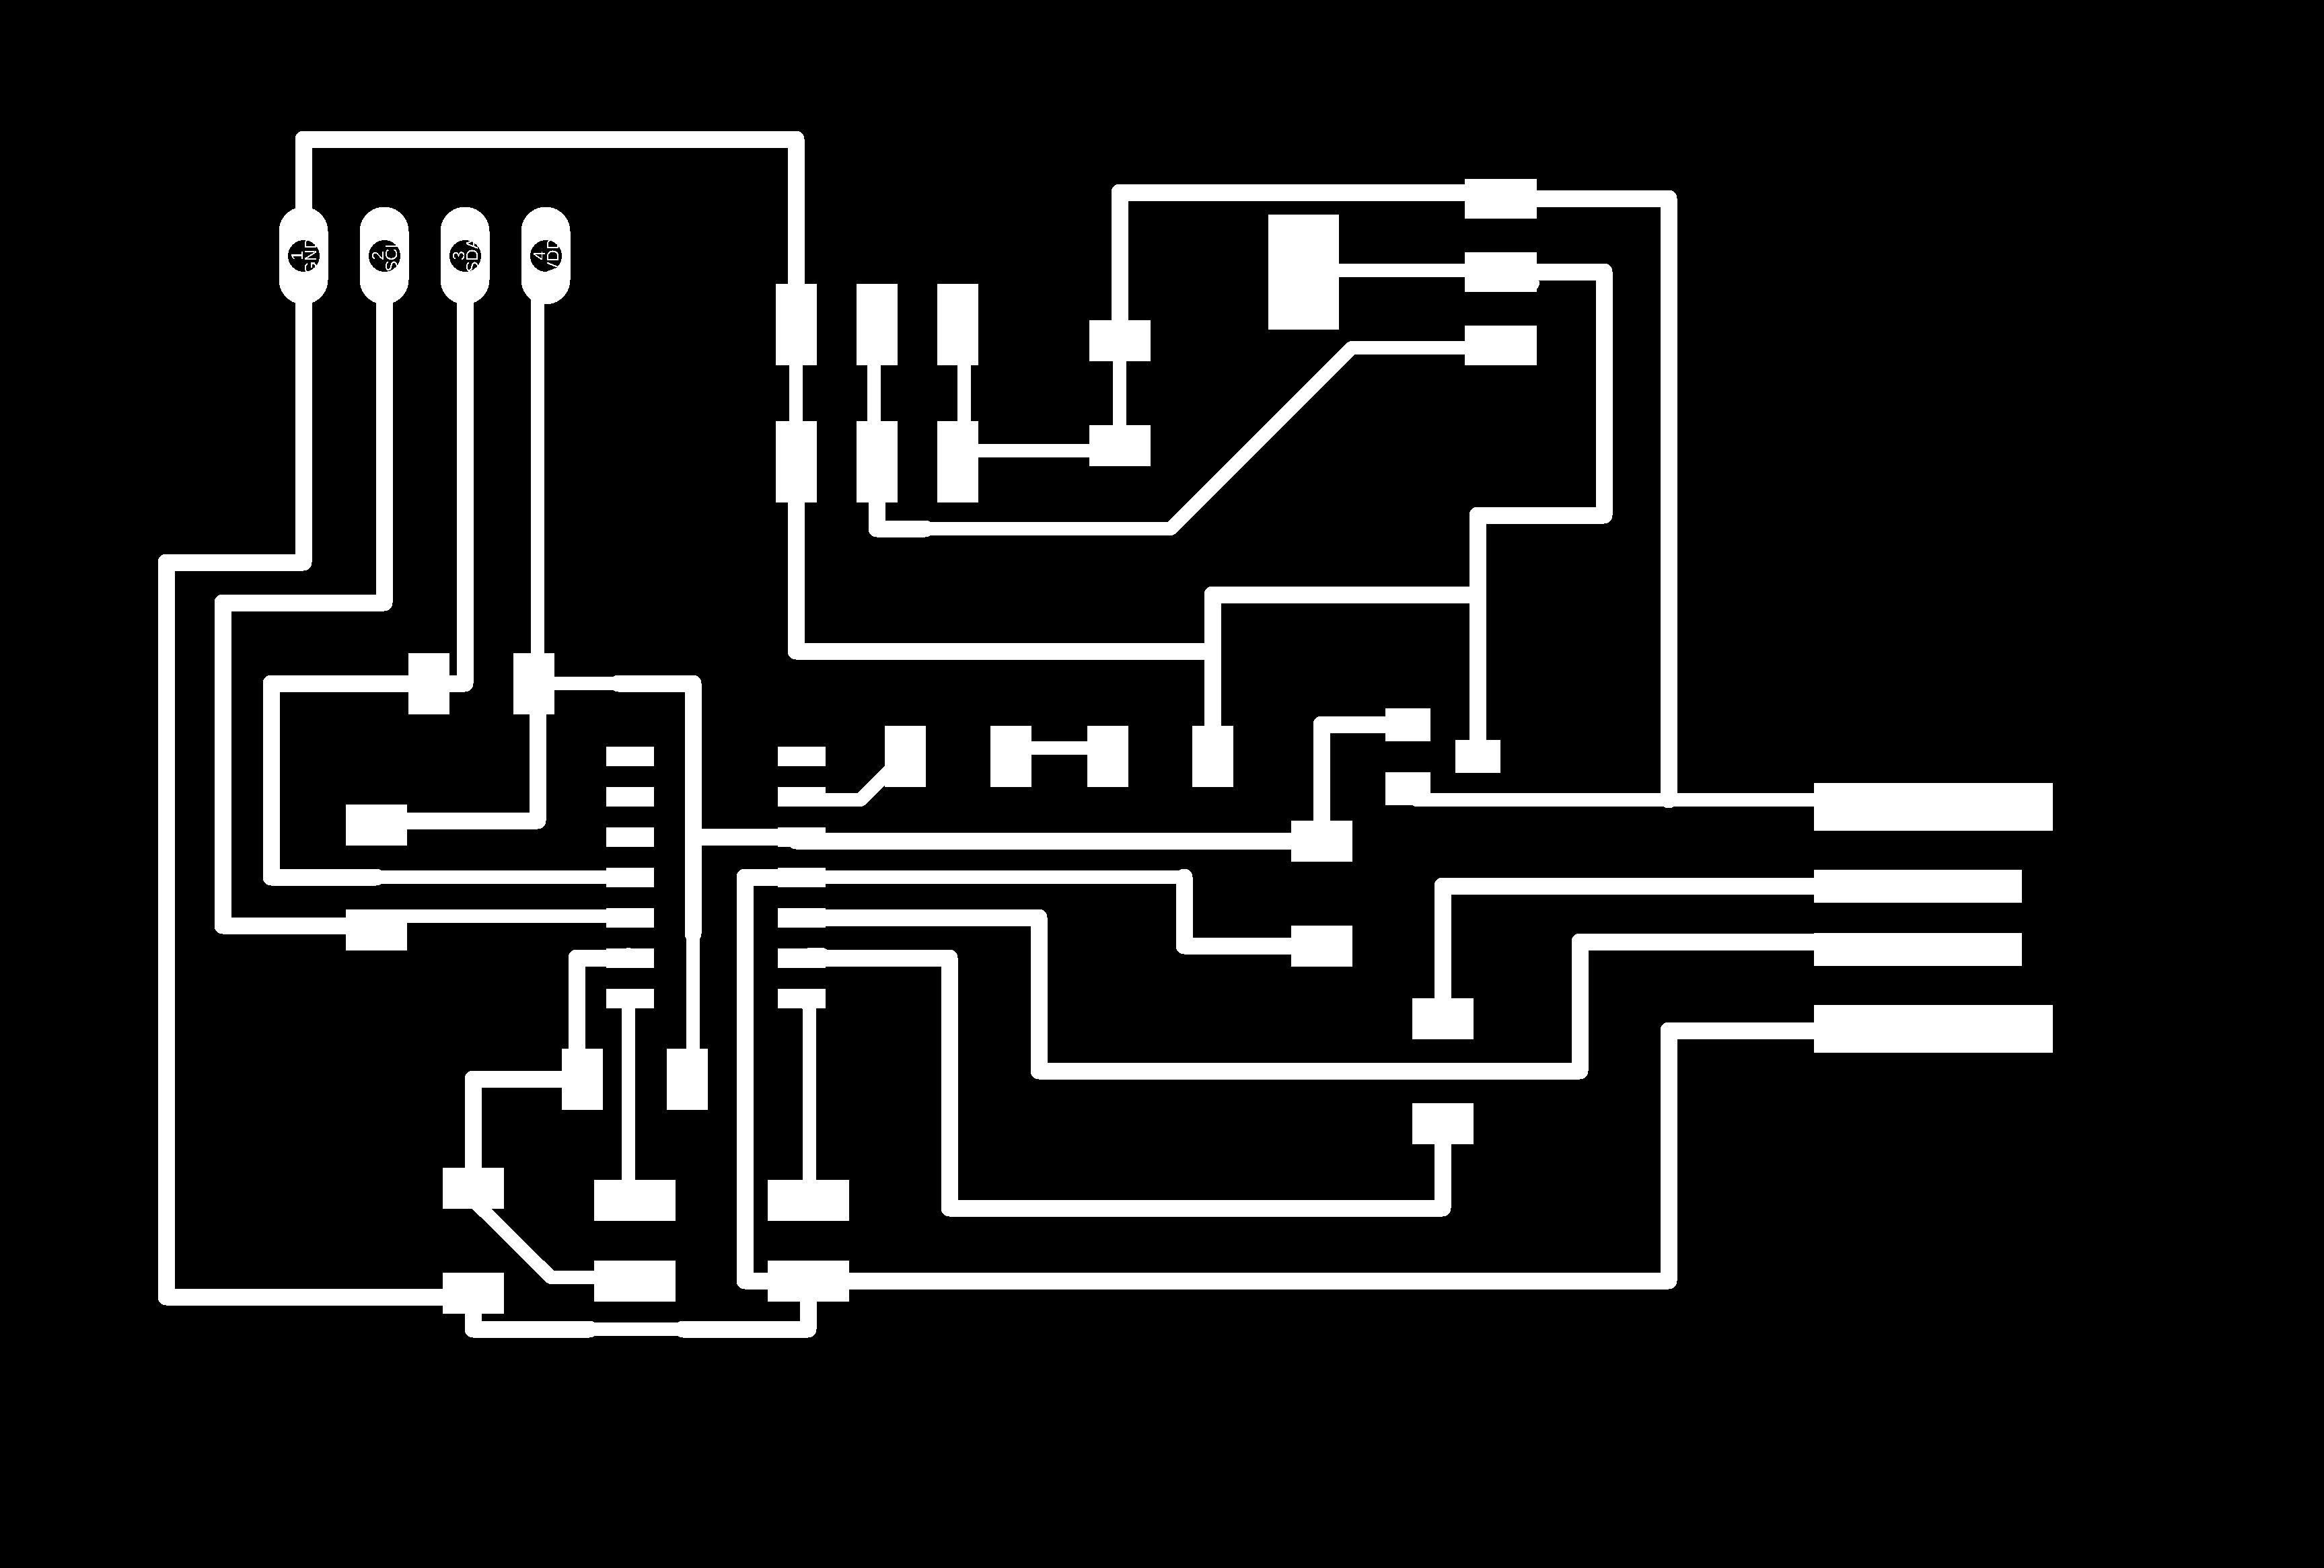
I had to design a new PCB in order to connect pins 5 and 4 of
the SAMD11C (SDA and SCL) to stablished communications between
boards.
Eagle, Modela
machine, weld, programming, SAMDINO, Master and Slave code
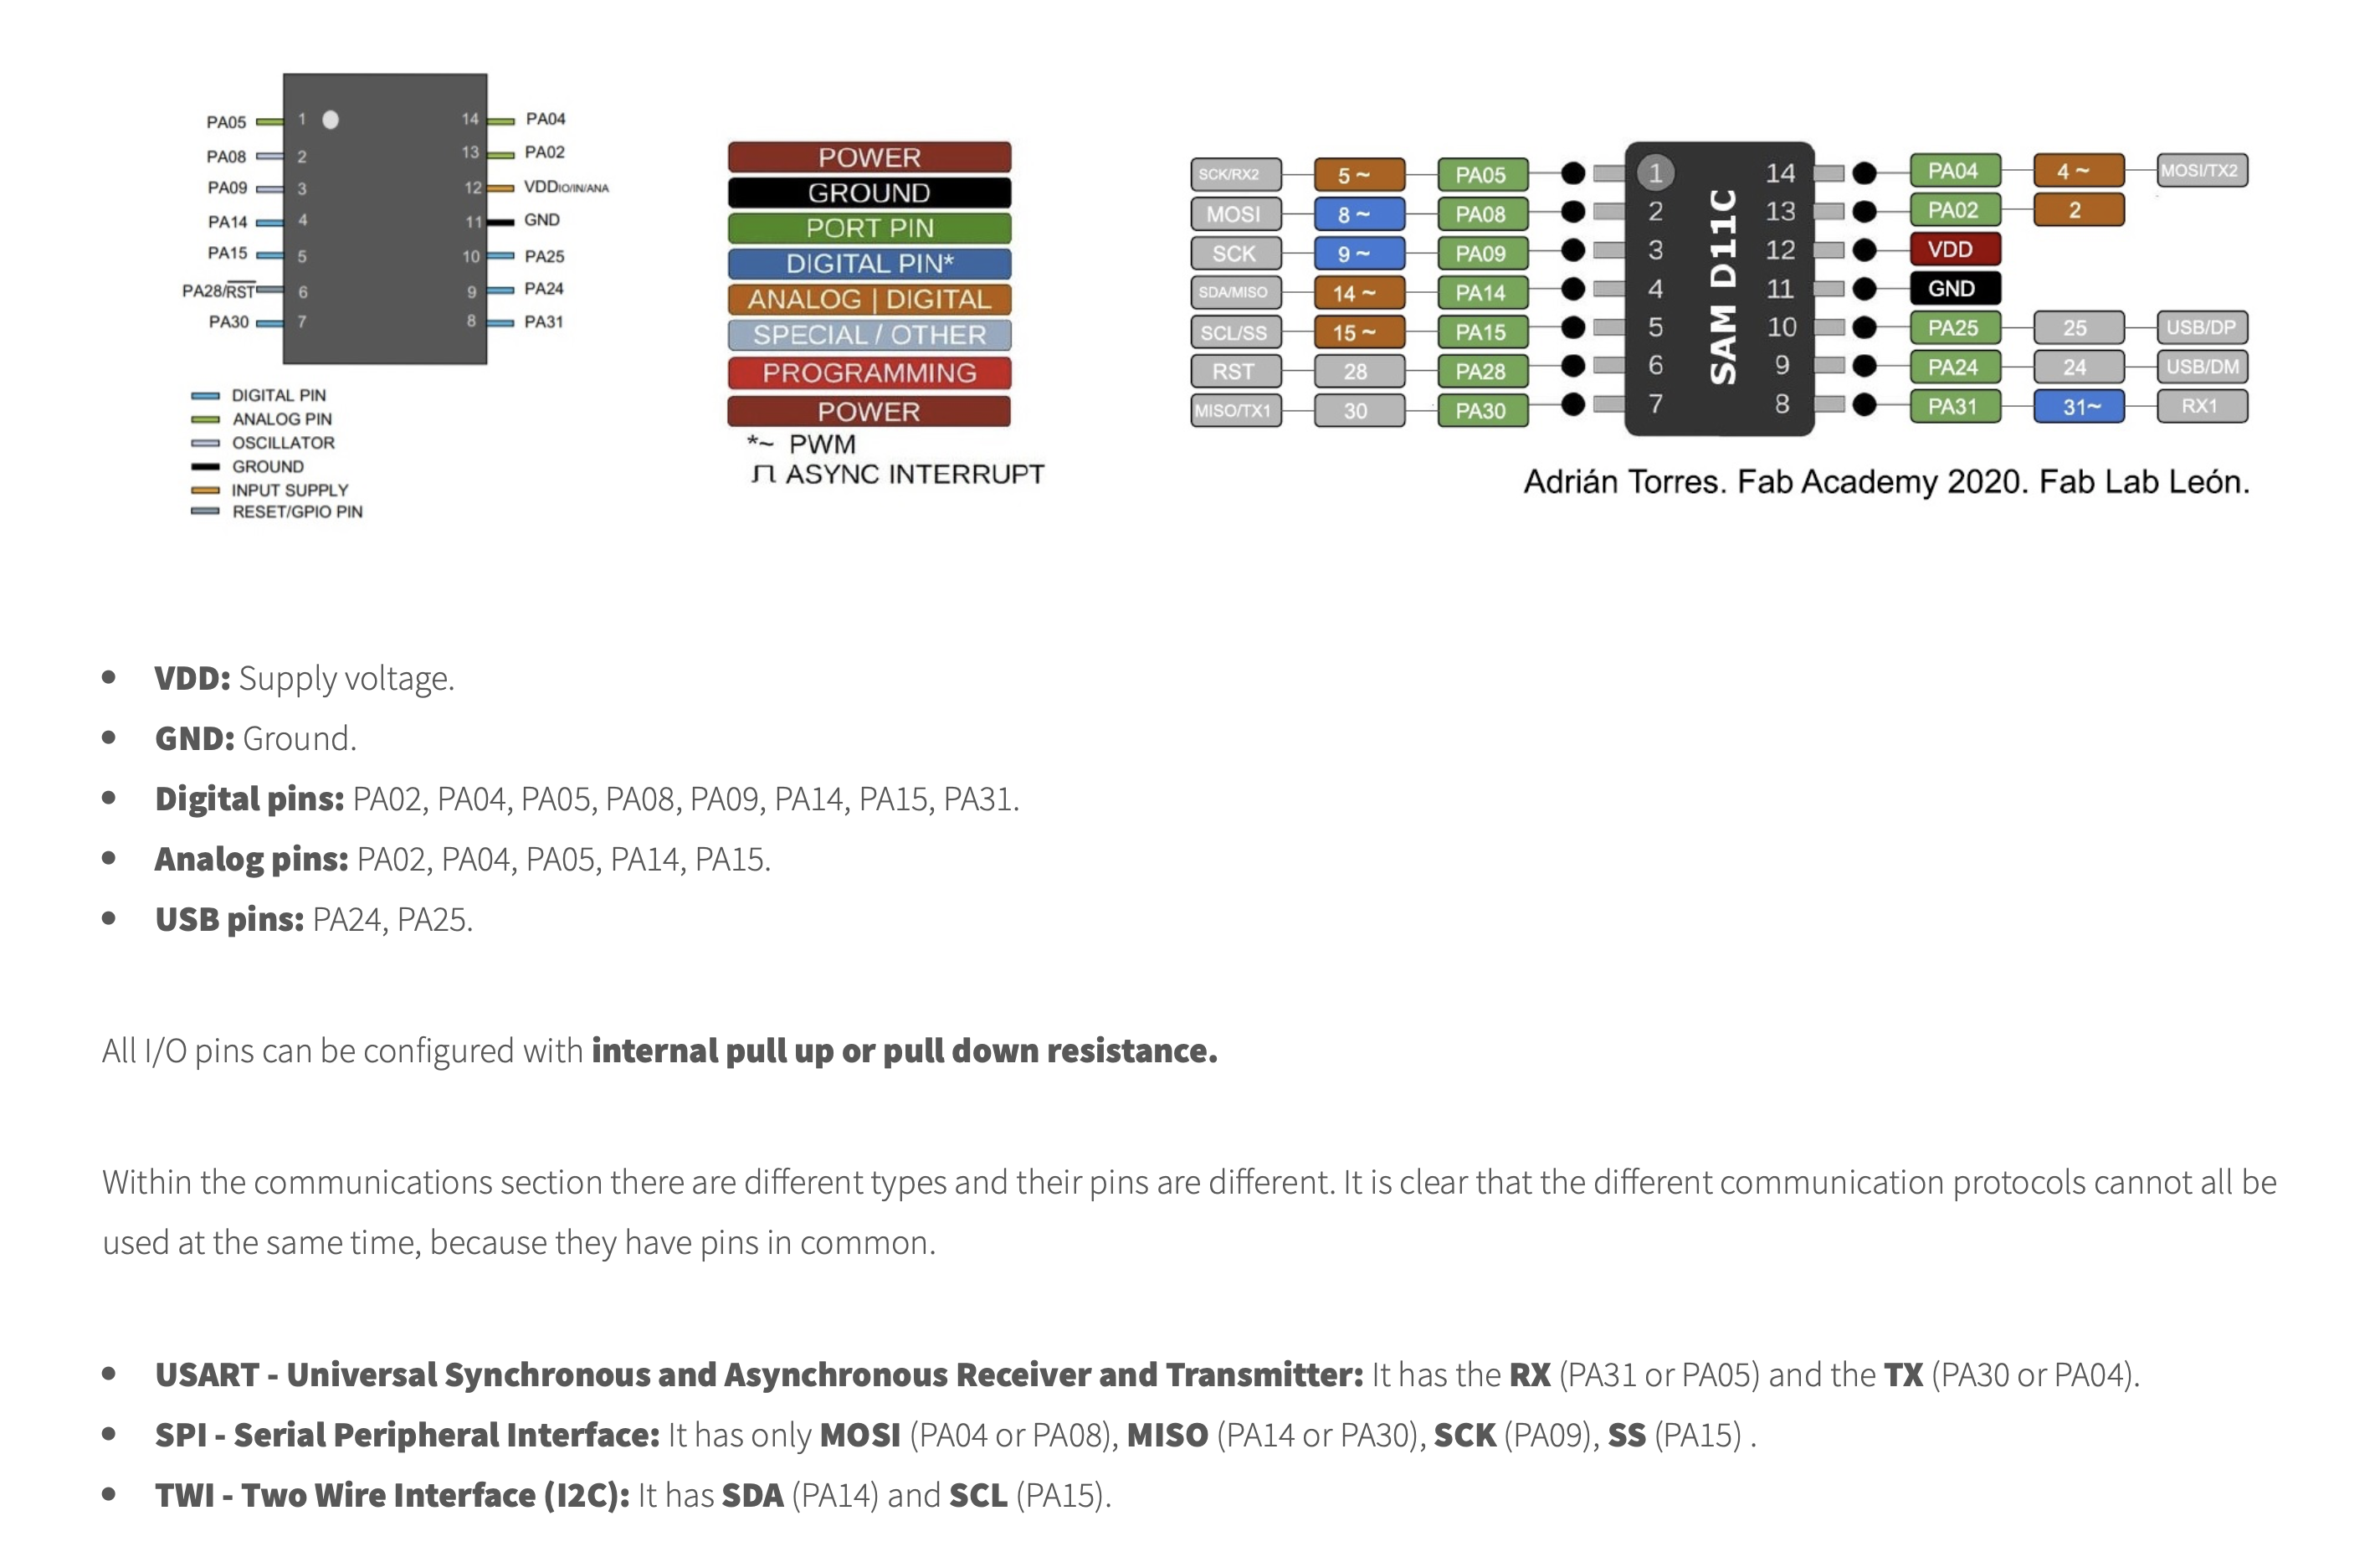
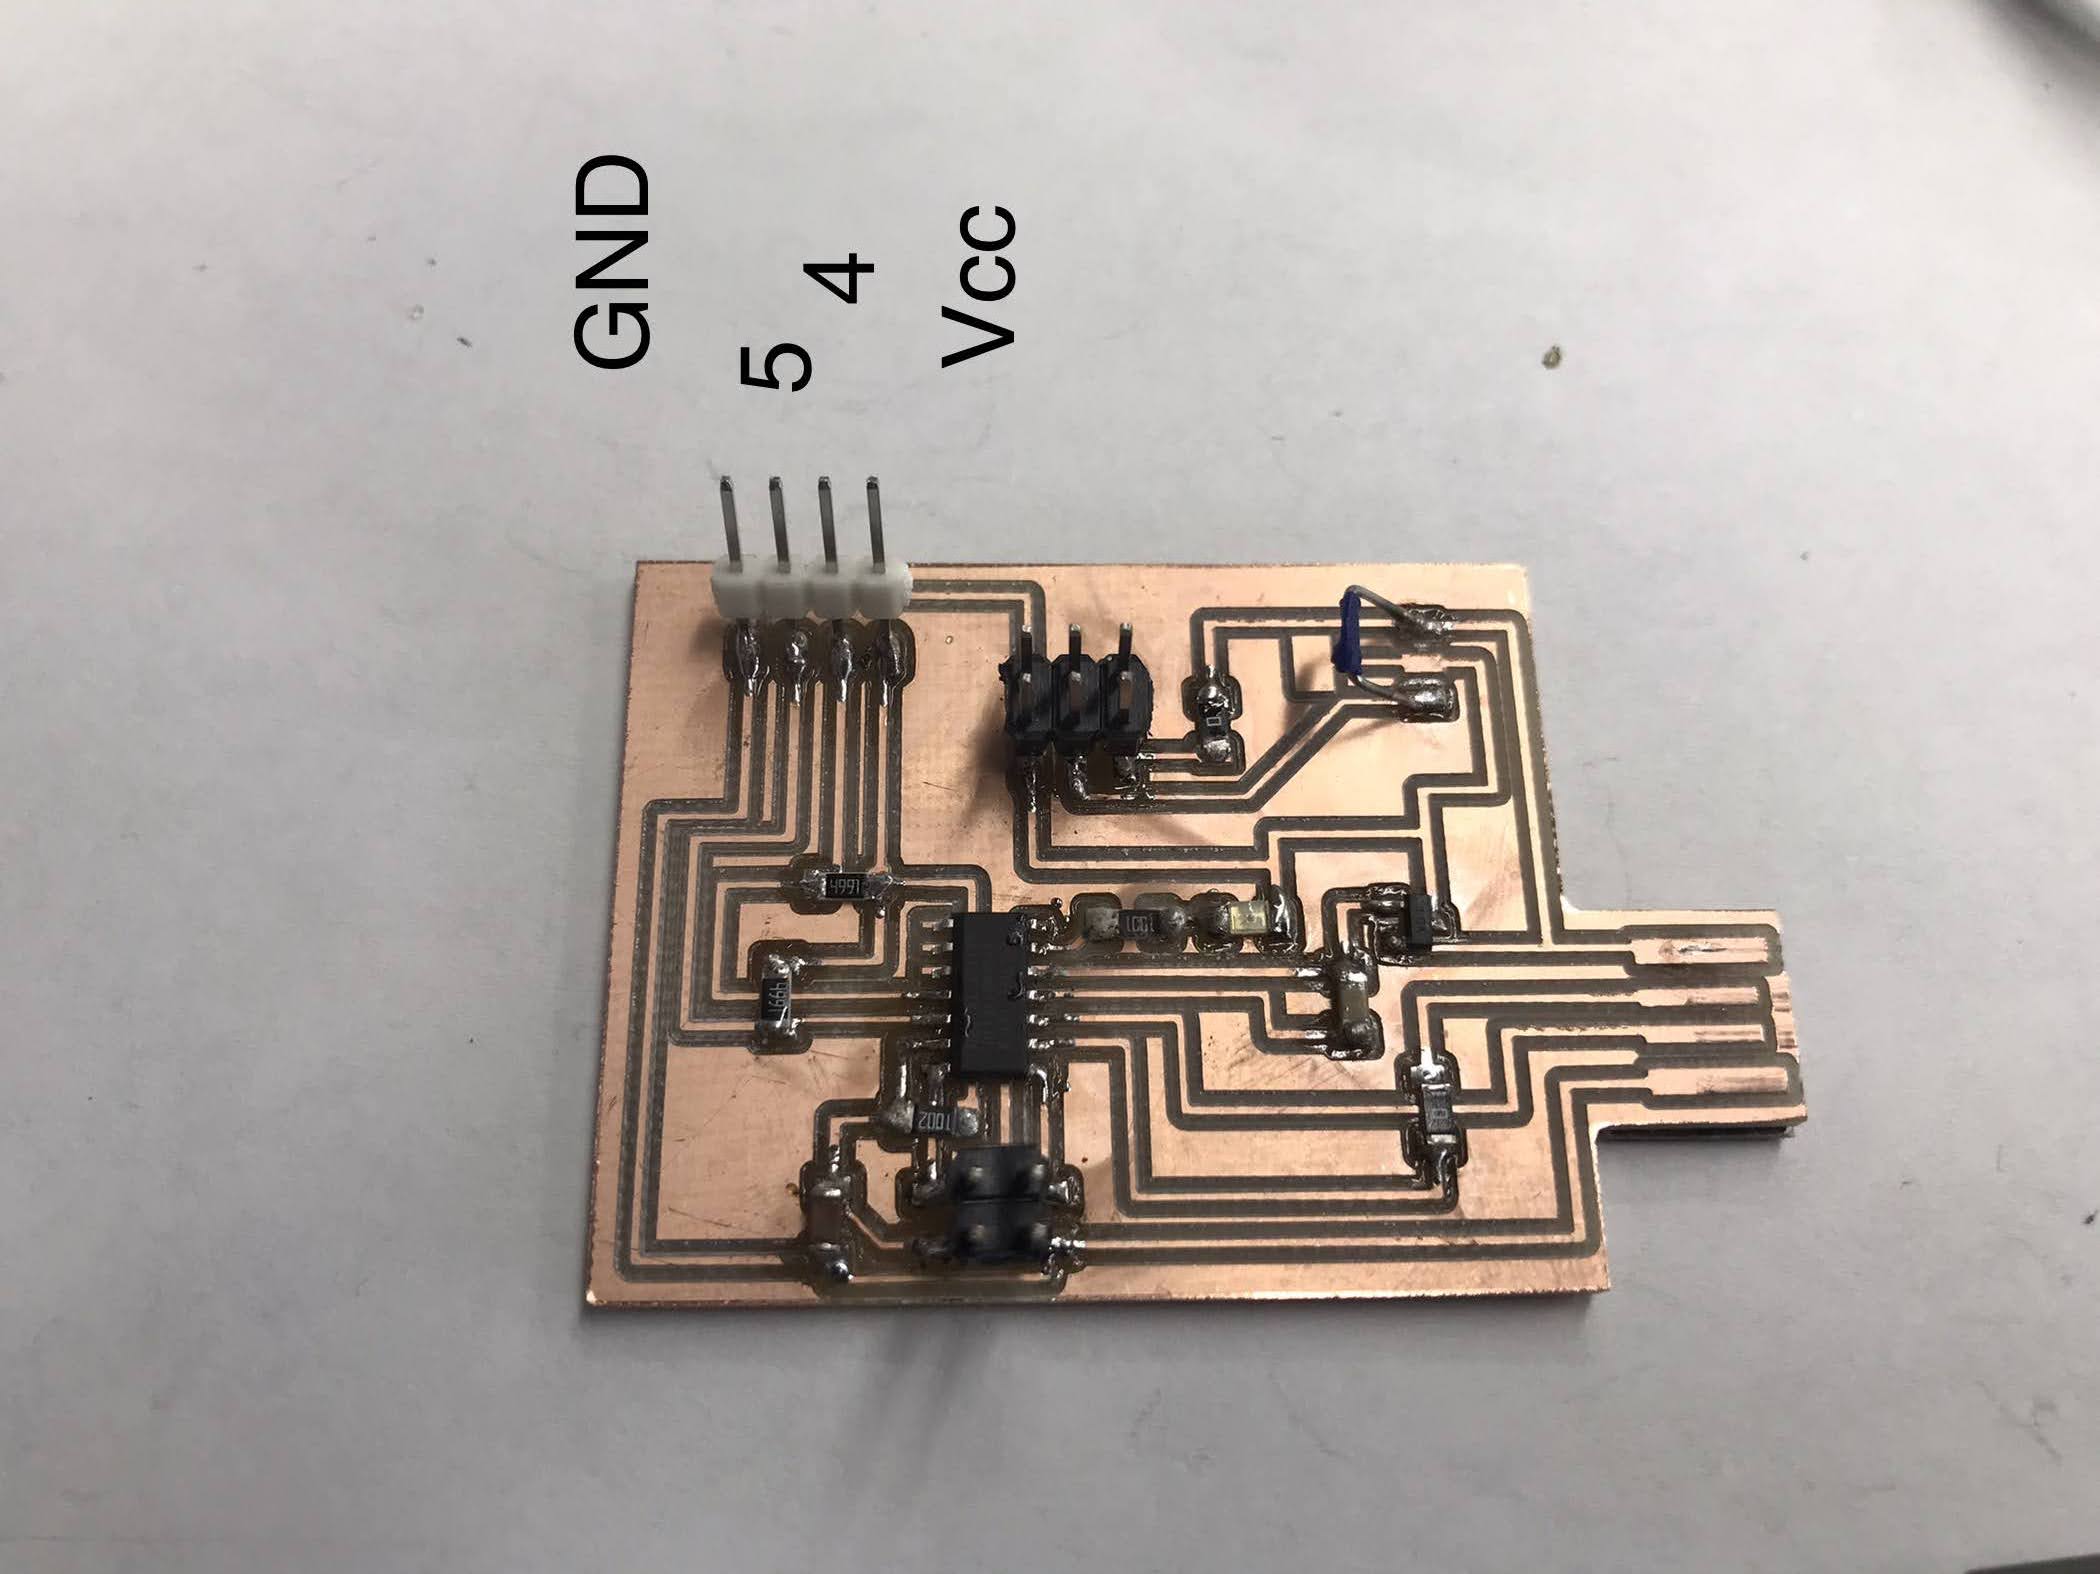
this 4 connections are
important, and also is important to identify wich one is PIN 4 and
wich one is PIN 5

Because I´m using my
board with an Arduino as the MASTER, we need to switch between
Arduino Uno and MattairTech boards to code each as a "Master" and
the other one as a "slave"
Coding SLAVE———
#include <Wire.h> //library for I2C
byte own_address = 1; //set own adress, changed to 2 in another board.
void setup() {
Wire.begin(own_address); //enter the bus on specified address
Wire.onReceive(receiveEvent);
pinMode(2, OUTPUT); //the pin where your led is connected
digitalWrite(2, HIGH);
}
void loop() {
}
void receiveEvent(int howMany) {
while (Wire.available()) {
char c = Wire.read();
if(c=='H'){
digitalWrite(2,HIGH);//turn LED on
}
else if(c=='L'){
digitalWrite(2,LOW);//turn LED off
}
}
}
Coding MASTER—————
#include <Wire.h>
void setup() {
Serial.begin(115200);
Wire.begin(); // join i2c bus (address optional for master)
pinMode(13,OUTPUT);
}
void loop() {
while (Serial.available()) {
char c = Serial.read();
if(c=='A'){
Wire.beginTransmission(4); //number of the "slave" board
Wire.write('A');
Wire.endTransmission();
Serial.println("writing to address 4!");
}
else if(c=='B'){
Wire.beginTransmission(4);
Wire.write('B');
Wire.endTransmission();
Serial.println("writing to address 4!");
}
else if(c=='H'){
Wire.beginTransmission(2); //number of the "slave" board
Wire.beginTransmission(1);
Wire.write('H');
Wire.endTransmission();
Serial.println("writing to address 2!");
}
else if(c=='L'){
Wire.beginTransmission(2);
Wire.beginTransmission(1);
Wire.write('L');
Wire.endTransmission();
Serial.println("writing to address 2!");
}
}
}

The "slave" code, here we
are telling to the board that is connected to the pin #4 to turn the
led on or off texting an "H" or an "L" in the MONITOR
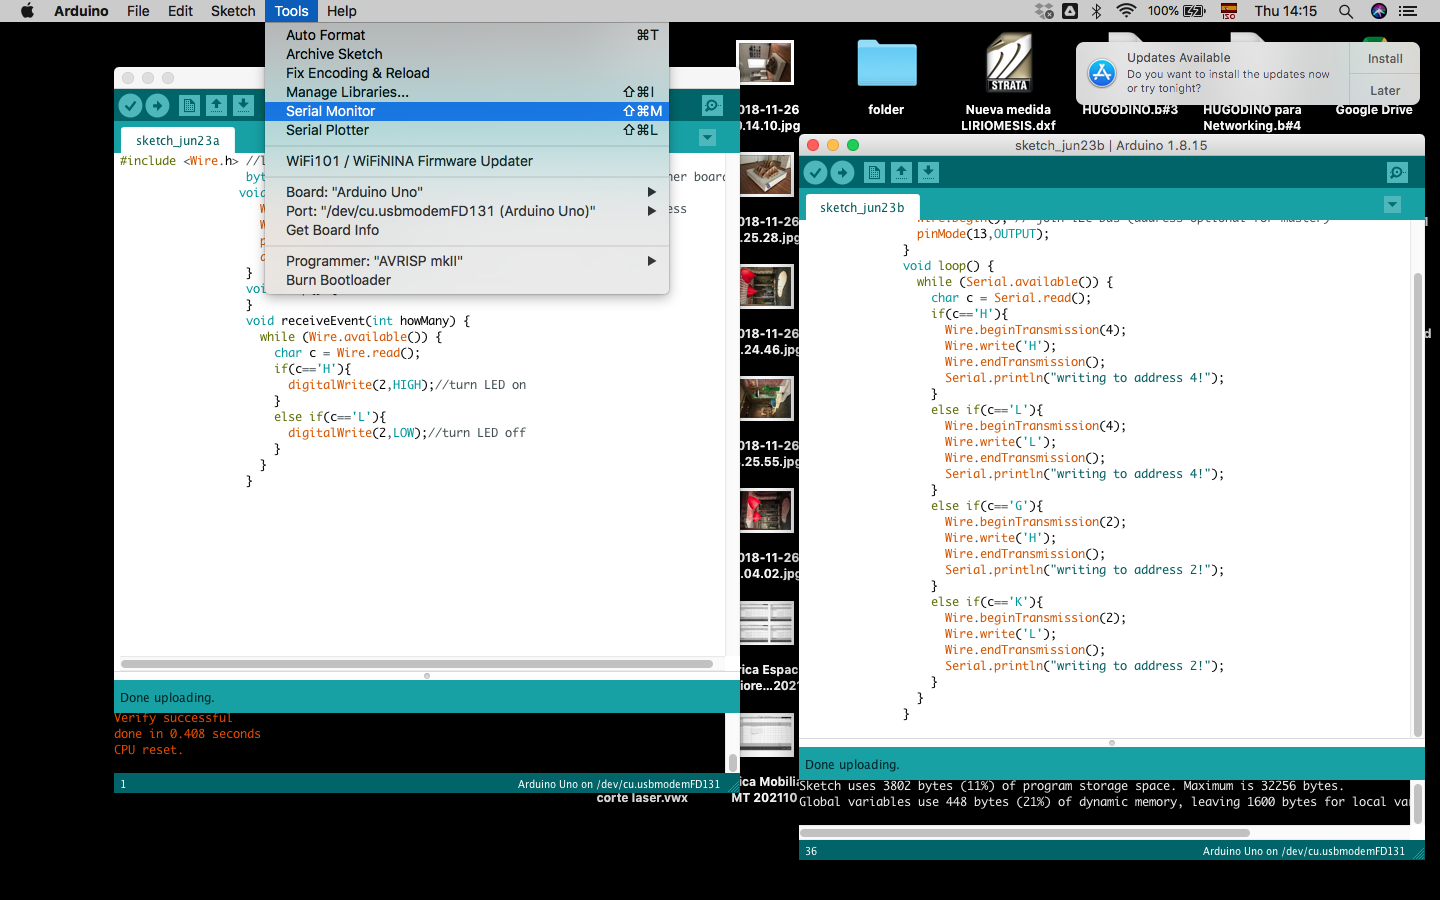
the "master" code, the
MASTER board in this case will be the ARDUINO ONE
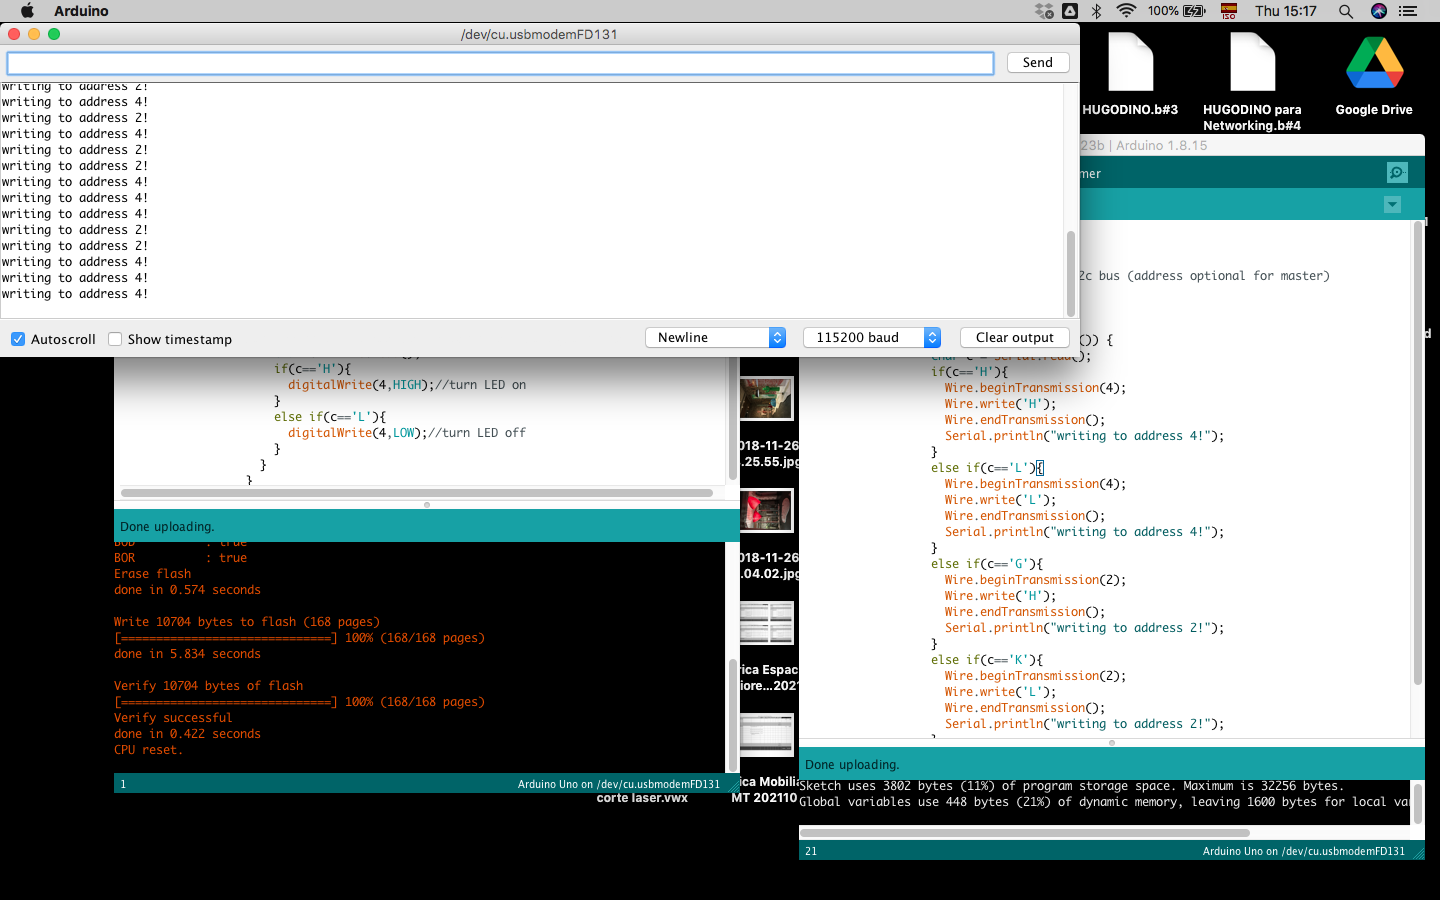
Open the Monitor of
Arduino IDE to communicate with the board, here if we text "H" the
Led goes On and "L" the LED goes OFF
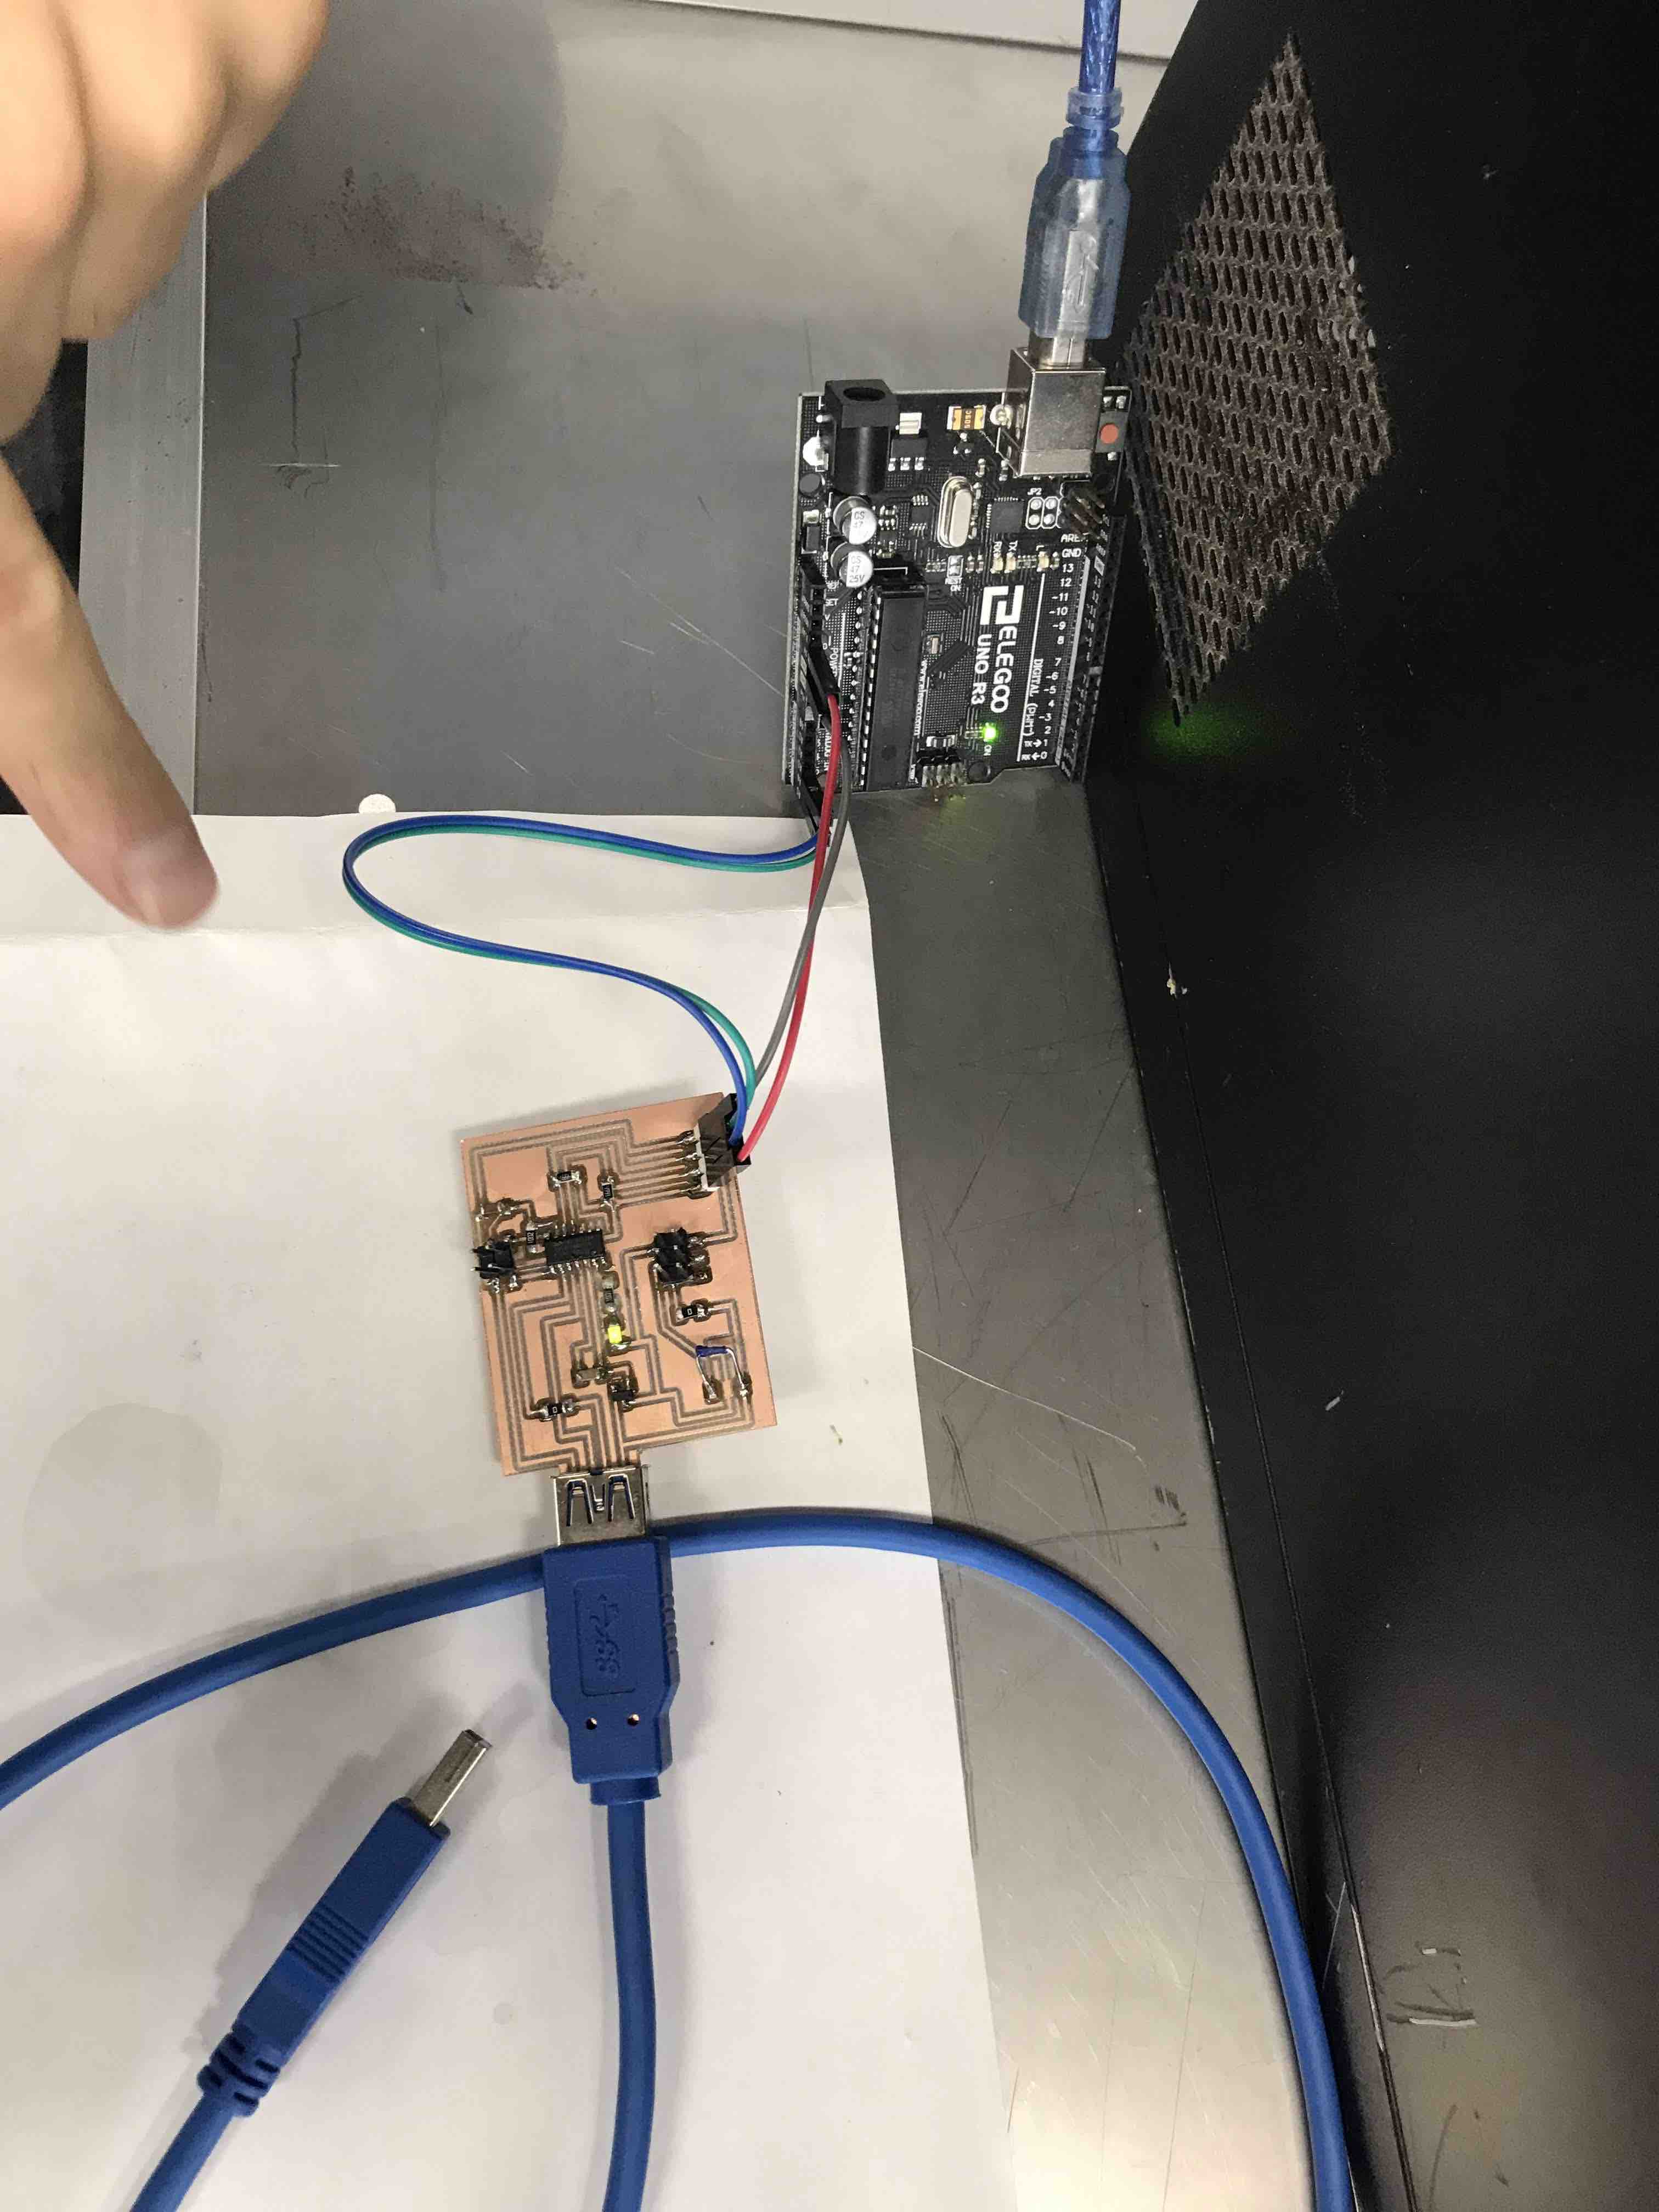
In this video I´m
texting and "H" or an "L" in the MONITOR and when I do this , the
green LED of my PCB turns OFF and ON respectively.
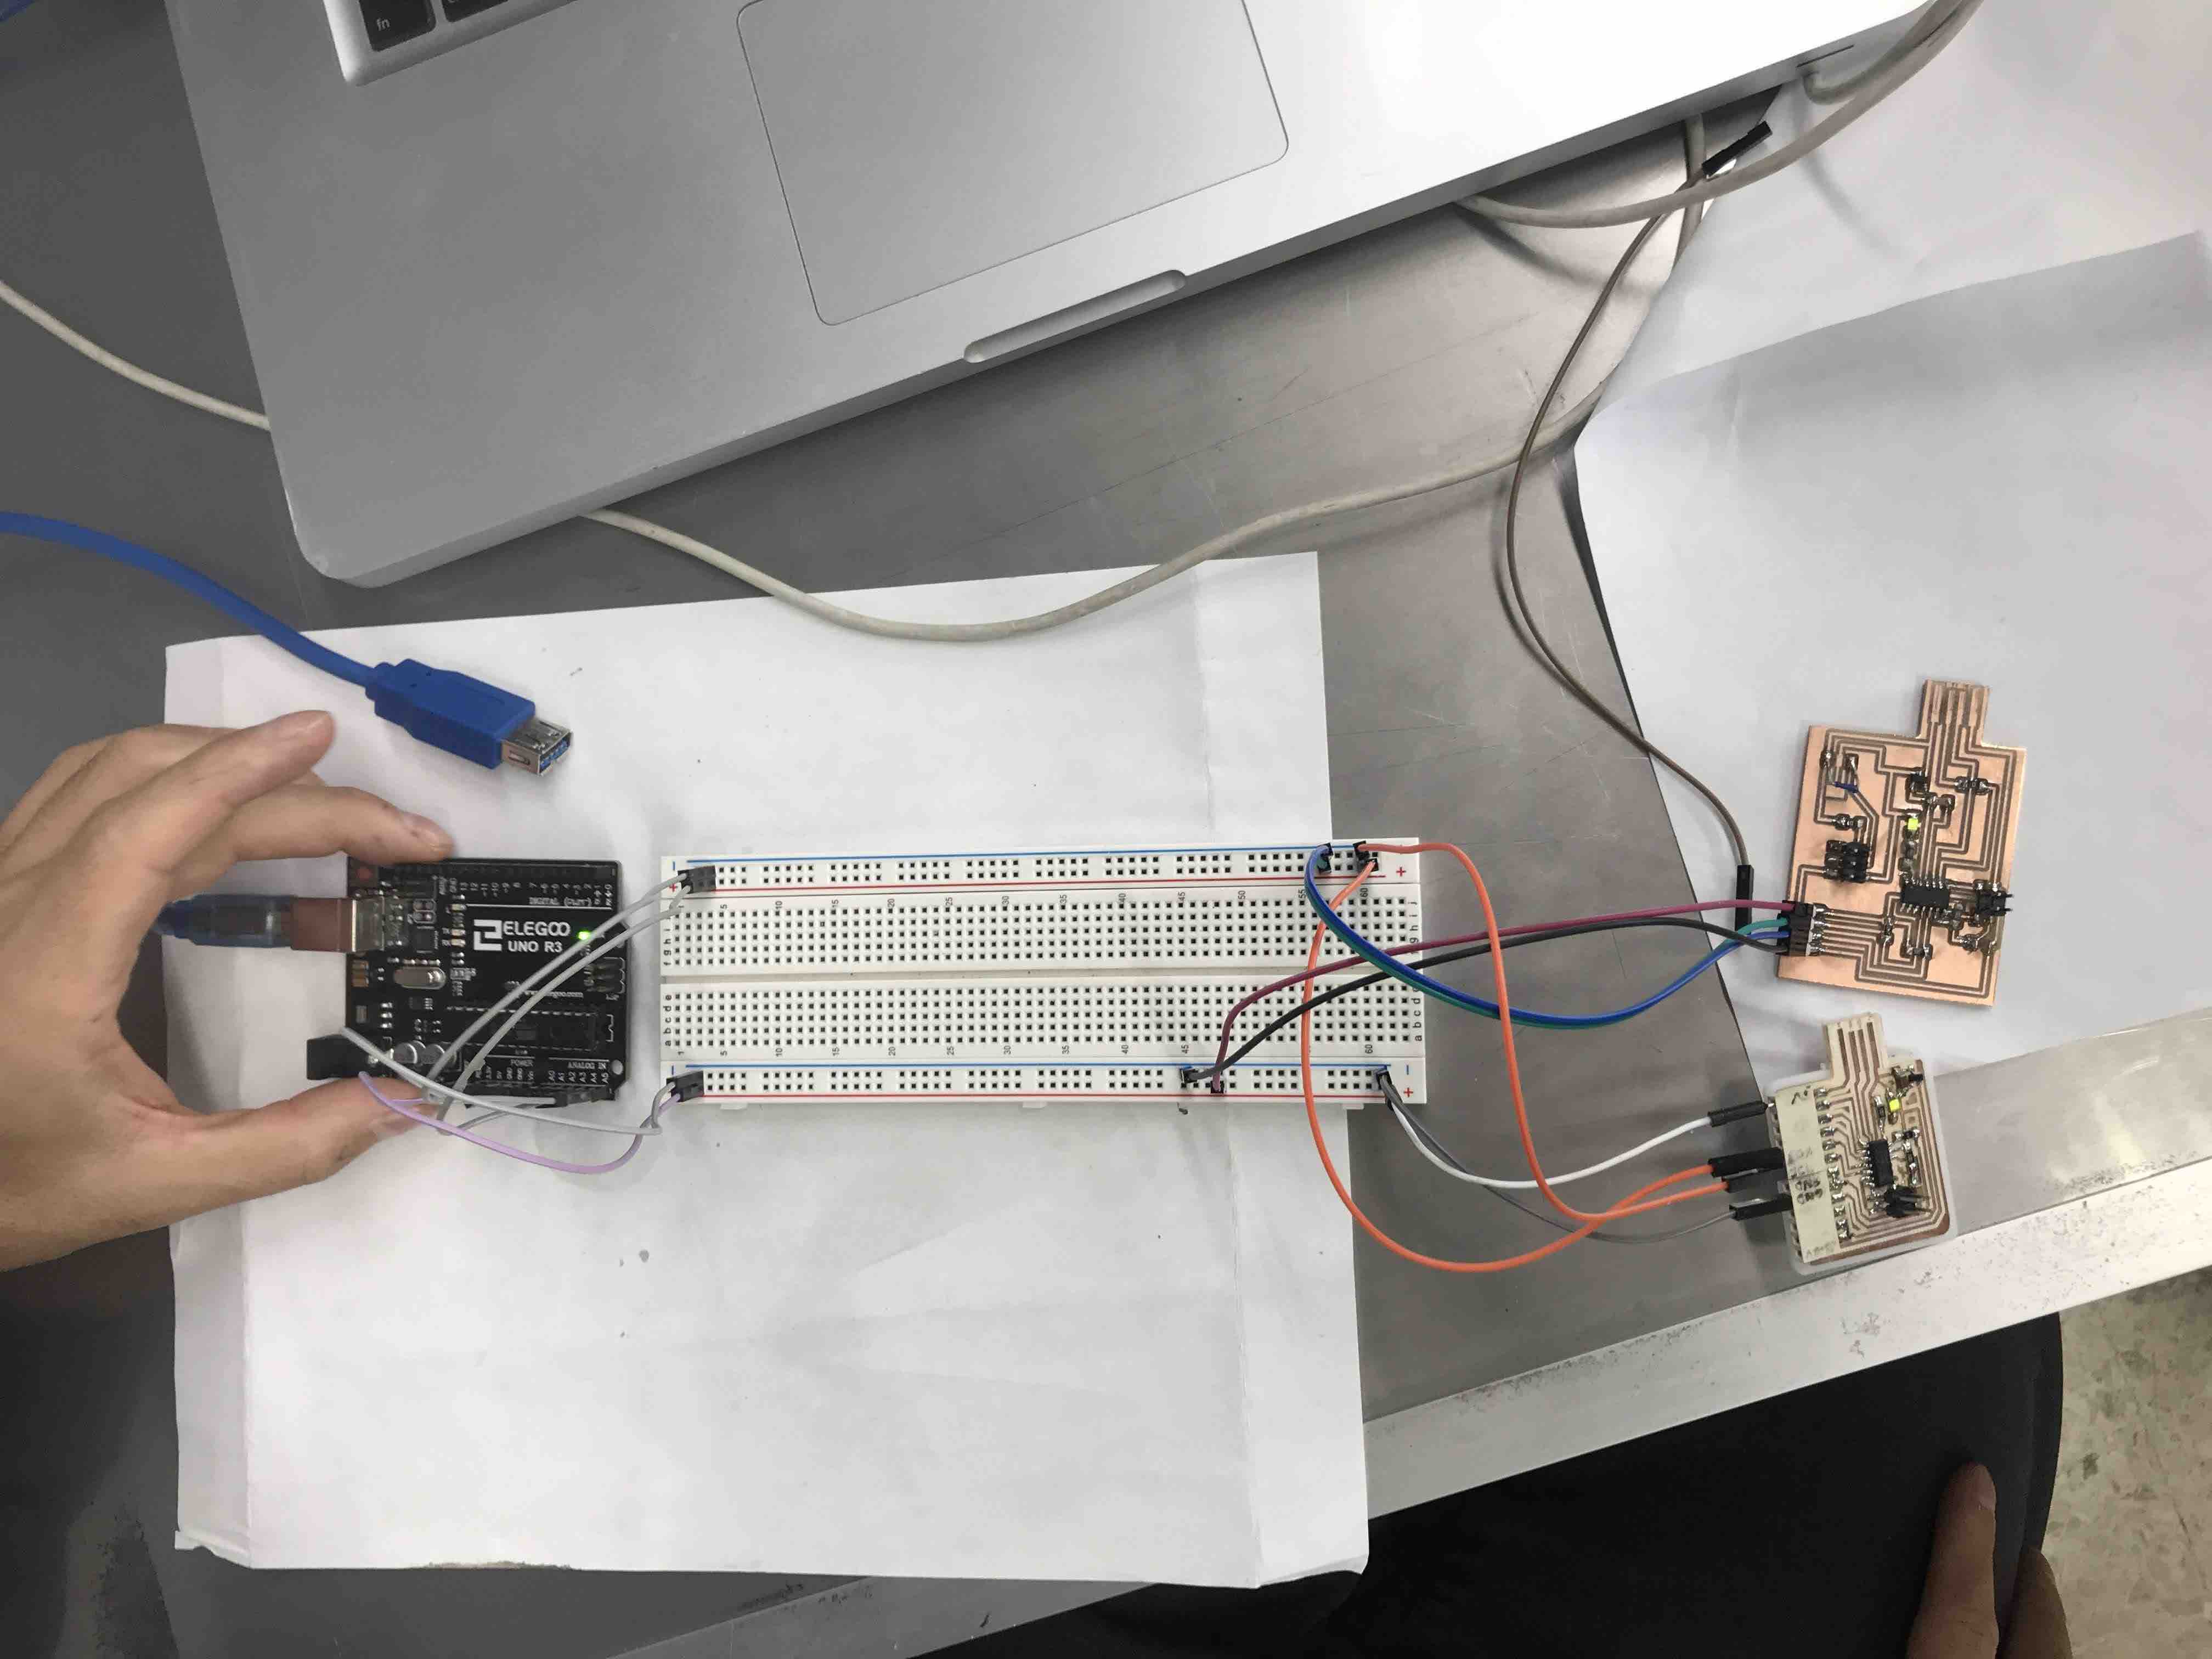
Here, for the group
assignment we connect the Arduino UNO as the "master" and the other
2 PCB as the "slaves" through the breadboard, in the original
"master" code one slave is named as 1 other as 2, 3, 4, etc, so you
can control each one independently.