Molding and casting.
and the link to the group assignment is: FabLabCDMX.
I want to
make the Universidad Anáhuac Logo that is an "A" because i
want to put it on my Final Project, so, I start looking
for a Vectorized image of the "A" logo, but I can´t find
it so I decide to retrace the "A" from the Radio Anáhuac
Logo in Illustrator, after that I opened it in
Vectorworks to transform this 2D trace into a 3D , then I
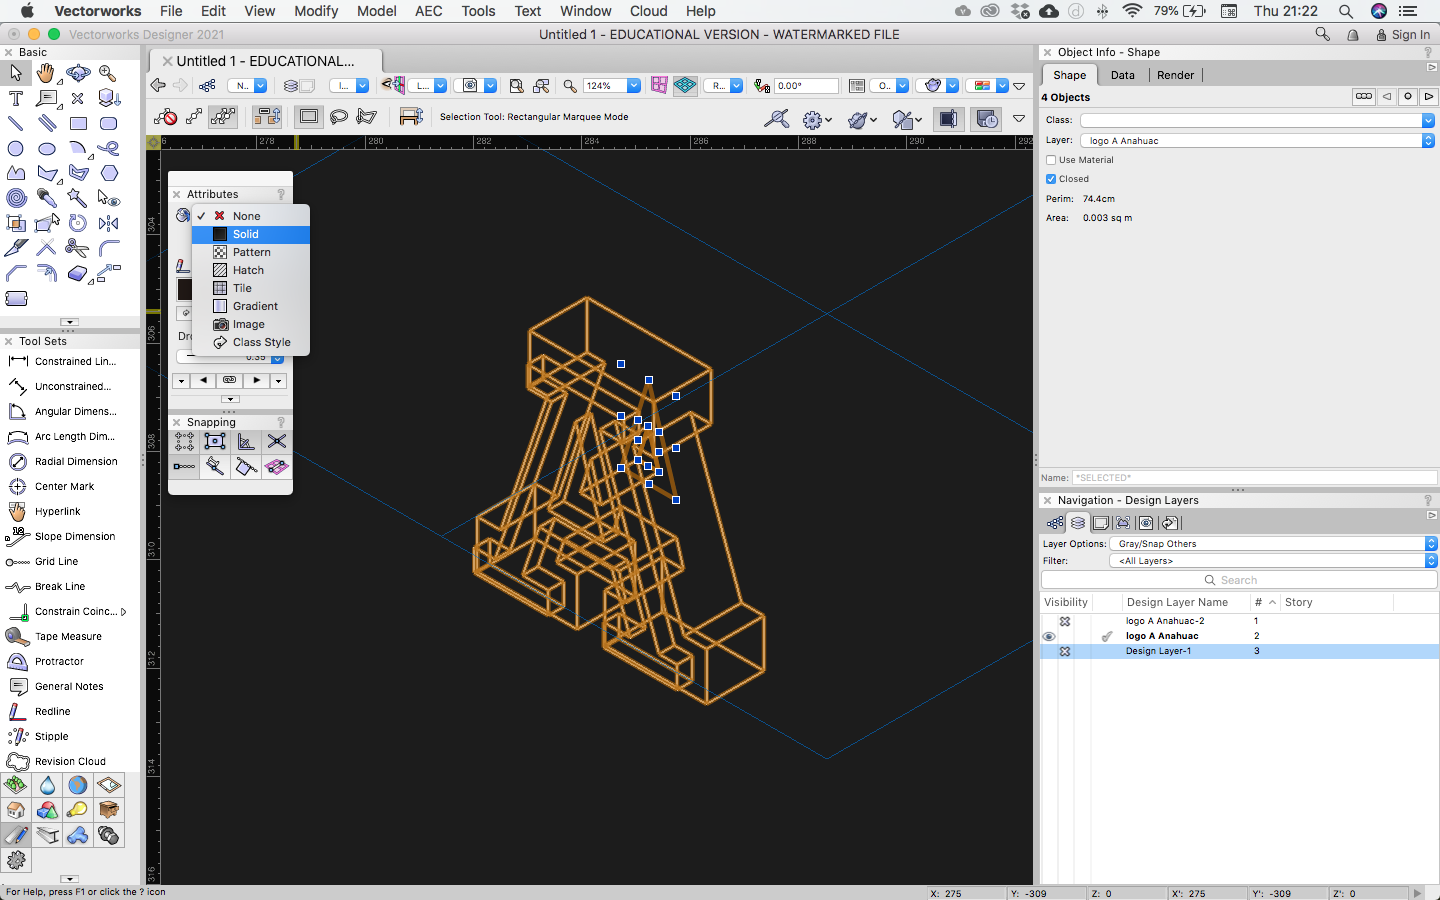
added it to a cube that will be the mold, the positive.
Then I mill the wax cube in the Roland machine to obtain
the mold of the A, then I cast silicone to obtain the
negative silicon mold and then I cast clear crystal resin
to obtain the final "A" logo.
Illustrator,
Vectorworks, RhinoCam, silicone, clear crystal resine,
catalyst, orange color aditive
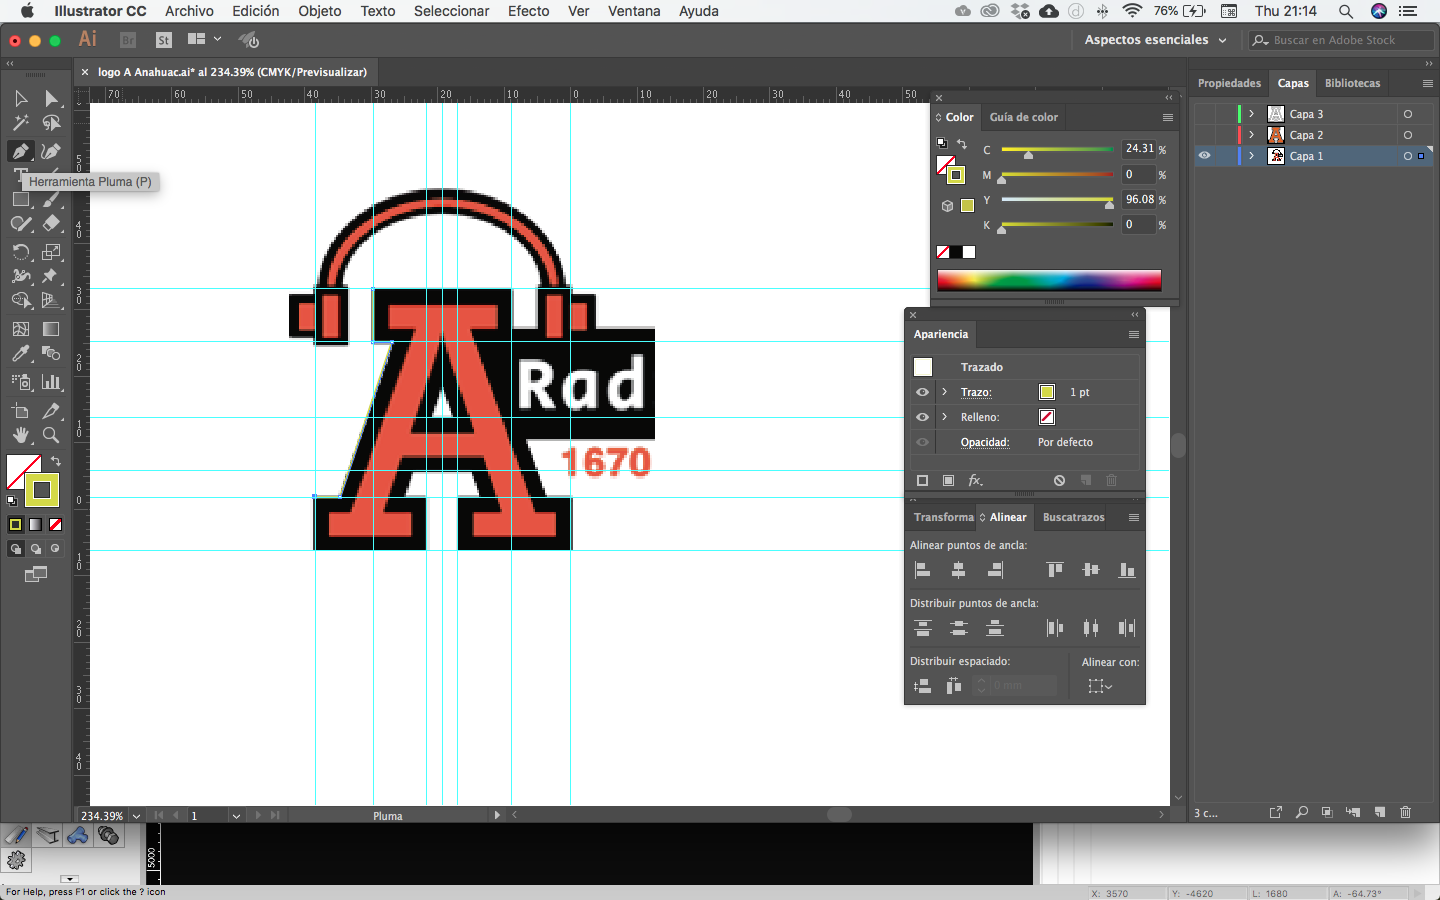
I download it
and opened it in Illustrator
Then I retrace
the logo with the line and pen tools.
I export the A
as a DWG file and then i opened it in Vectorworks to made
the 3D of it. Right now the size of the A doesn´t matter too
much right now, later we will adjust that.
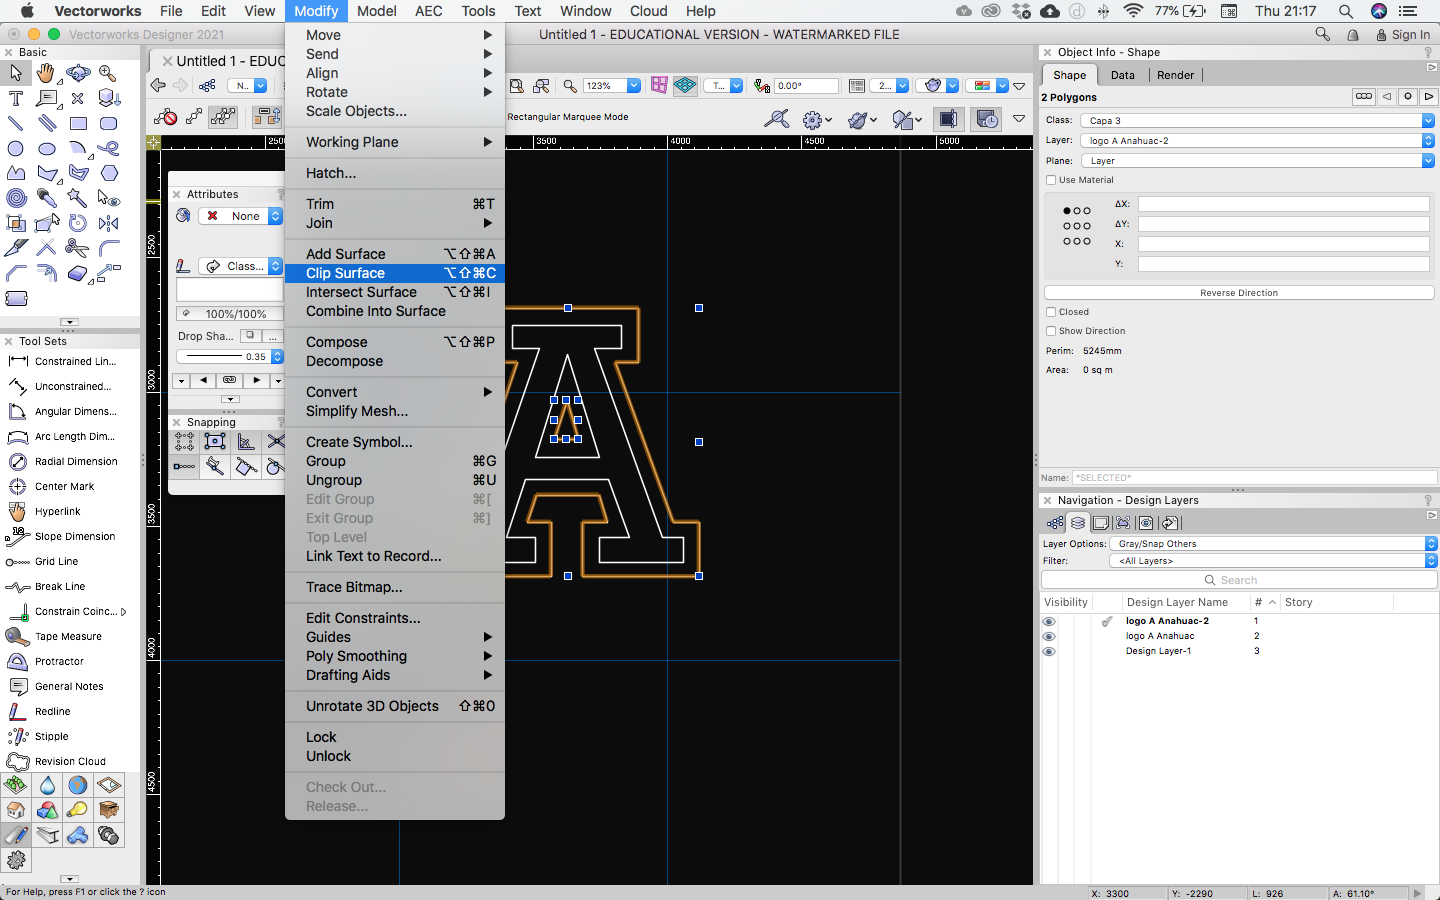
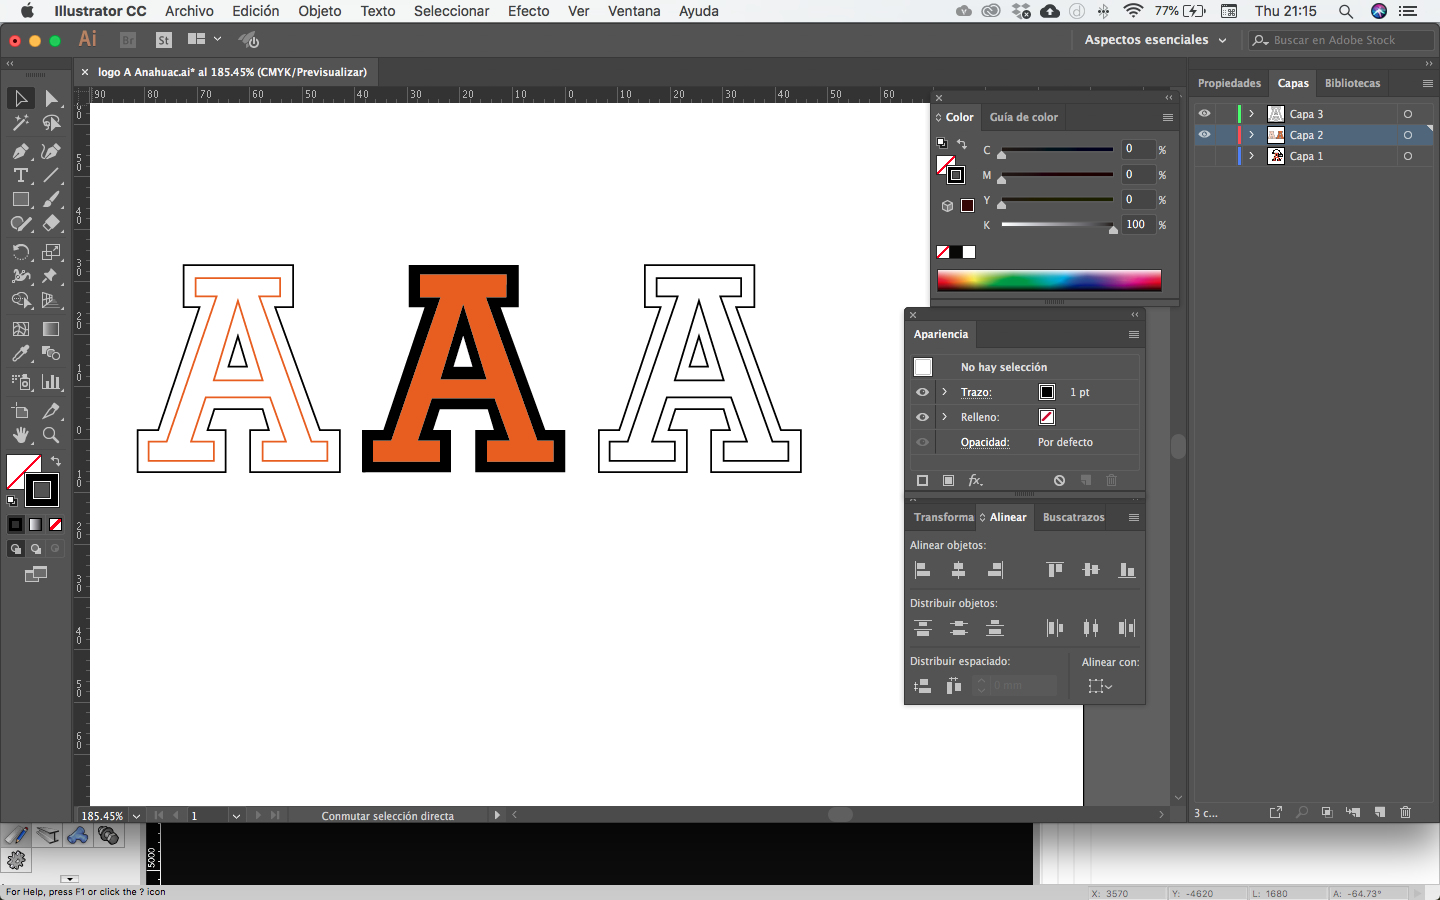
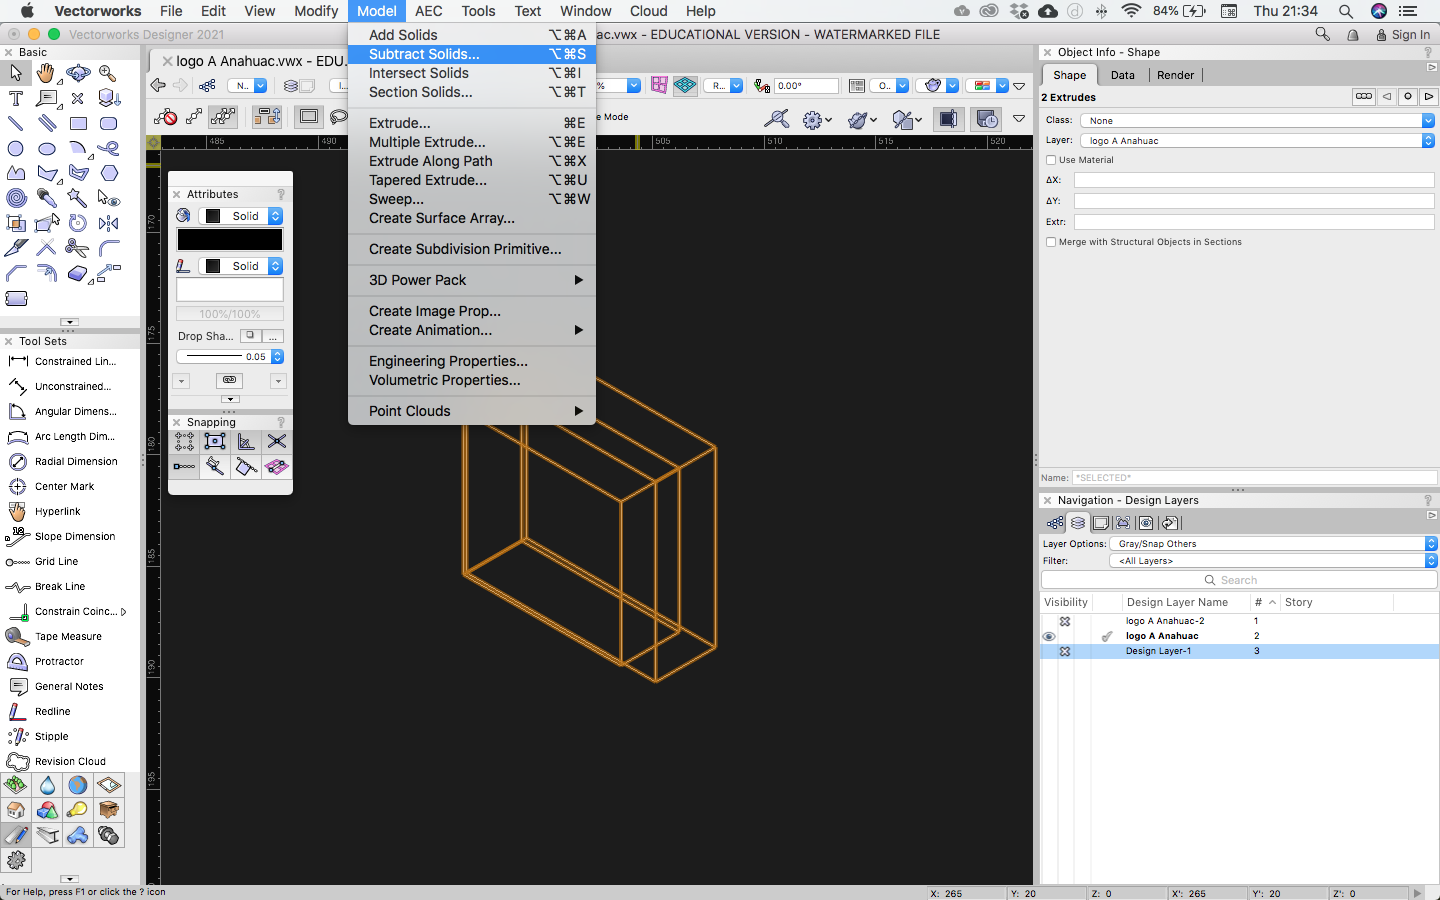
I clip the
center of the "A" logo with the clip surface function.
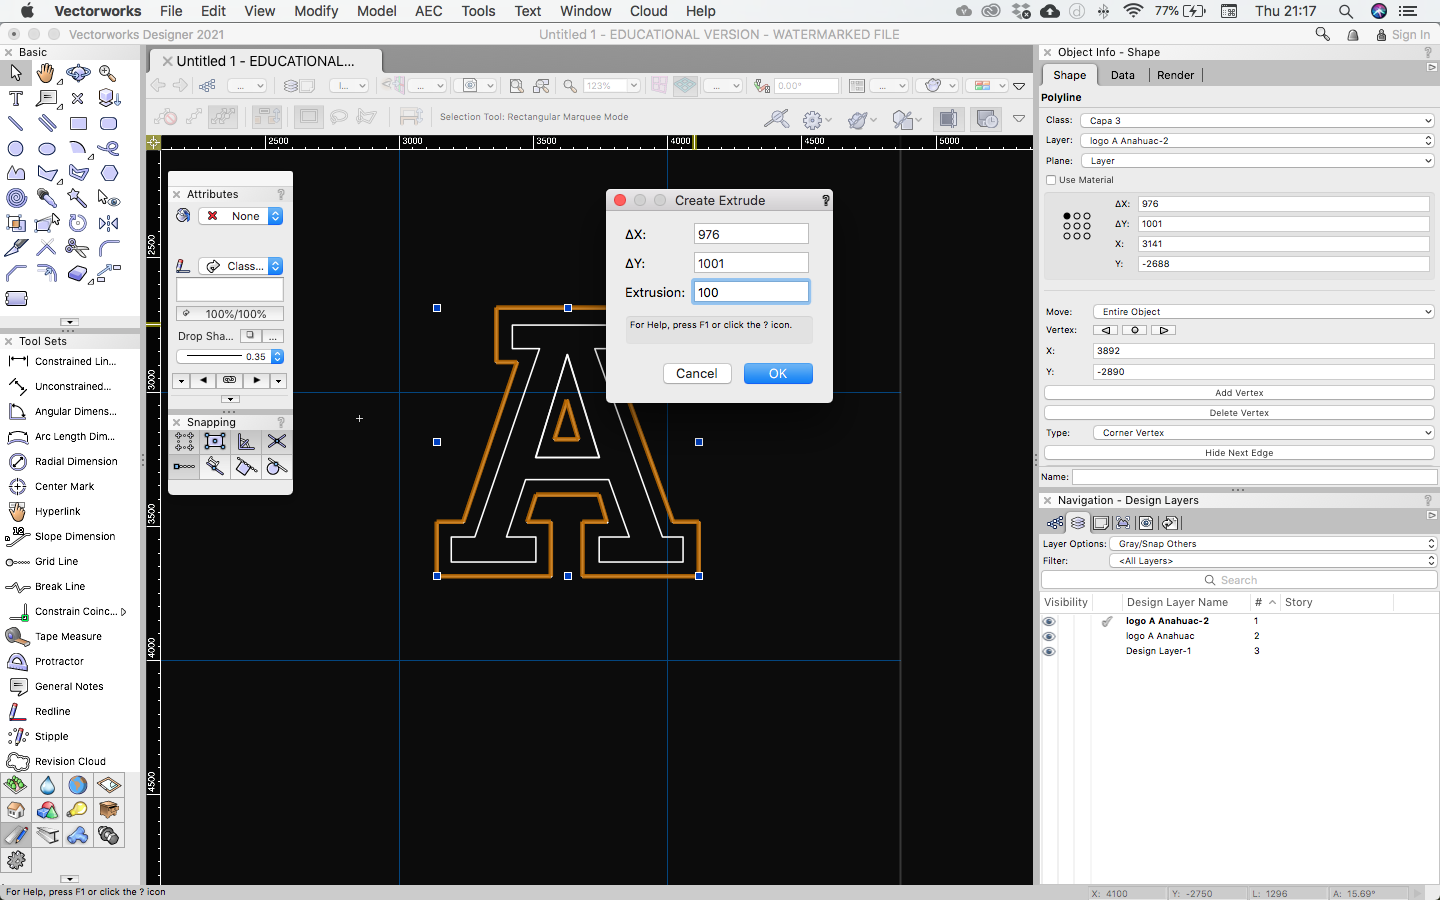
Then I perform
an extrusion of the "A" logo
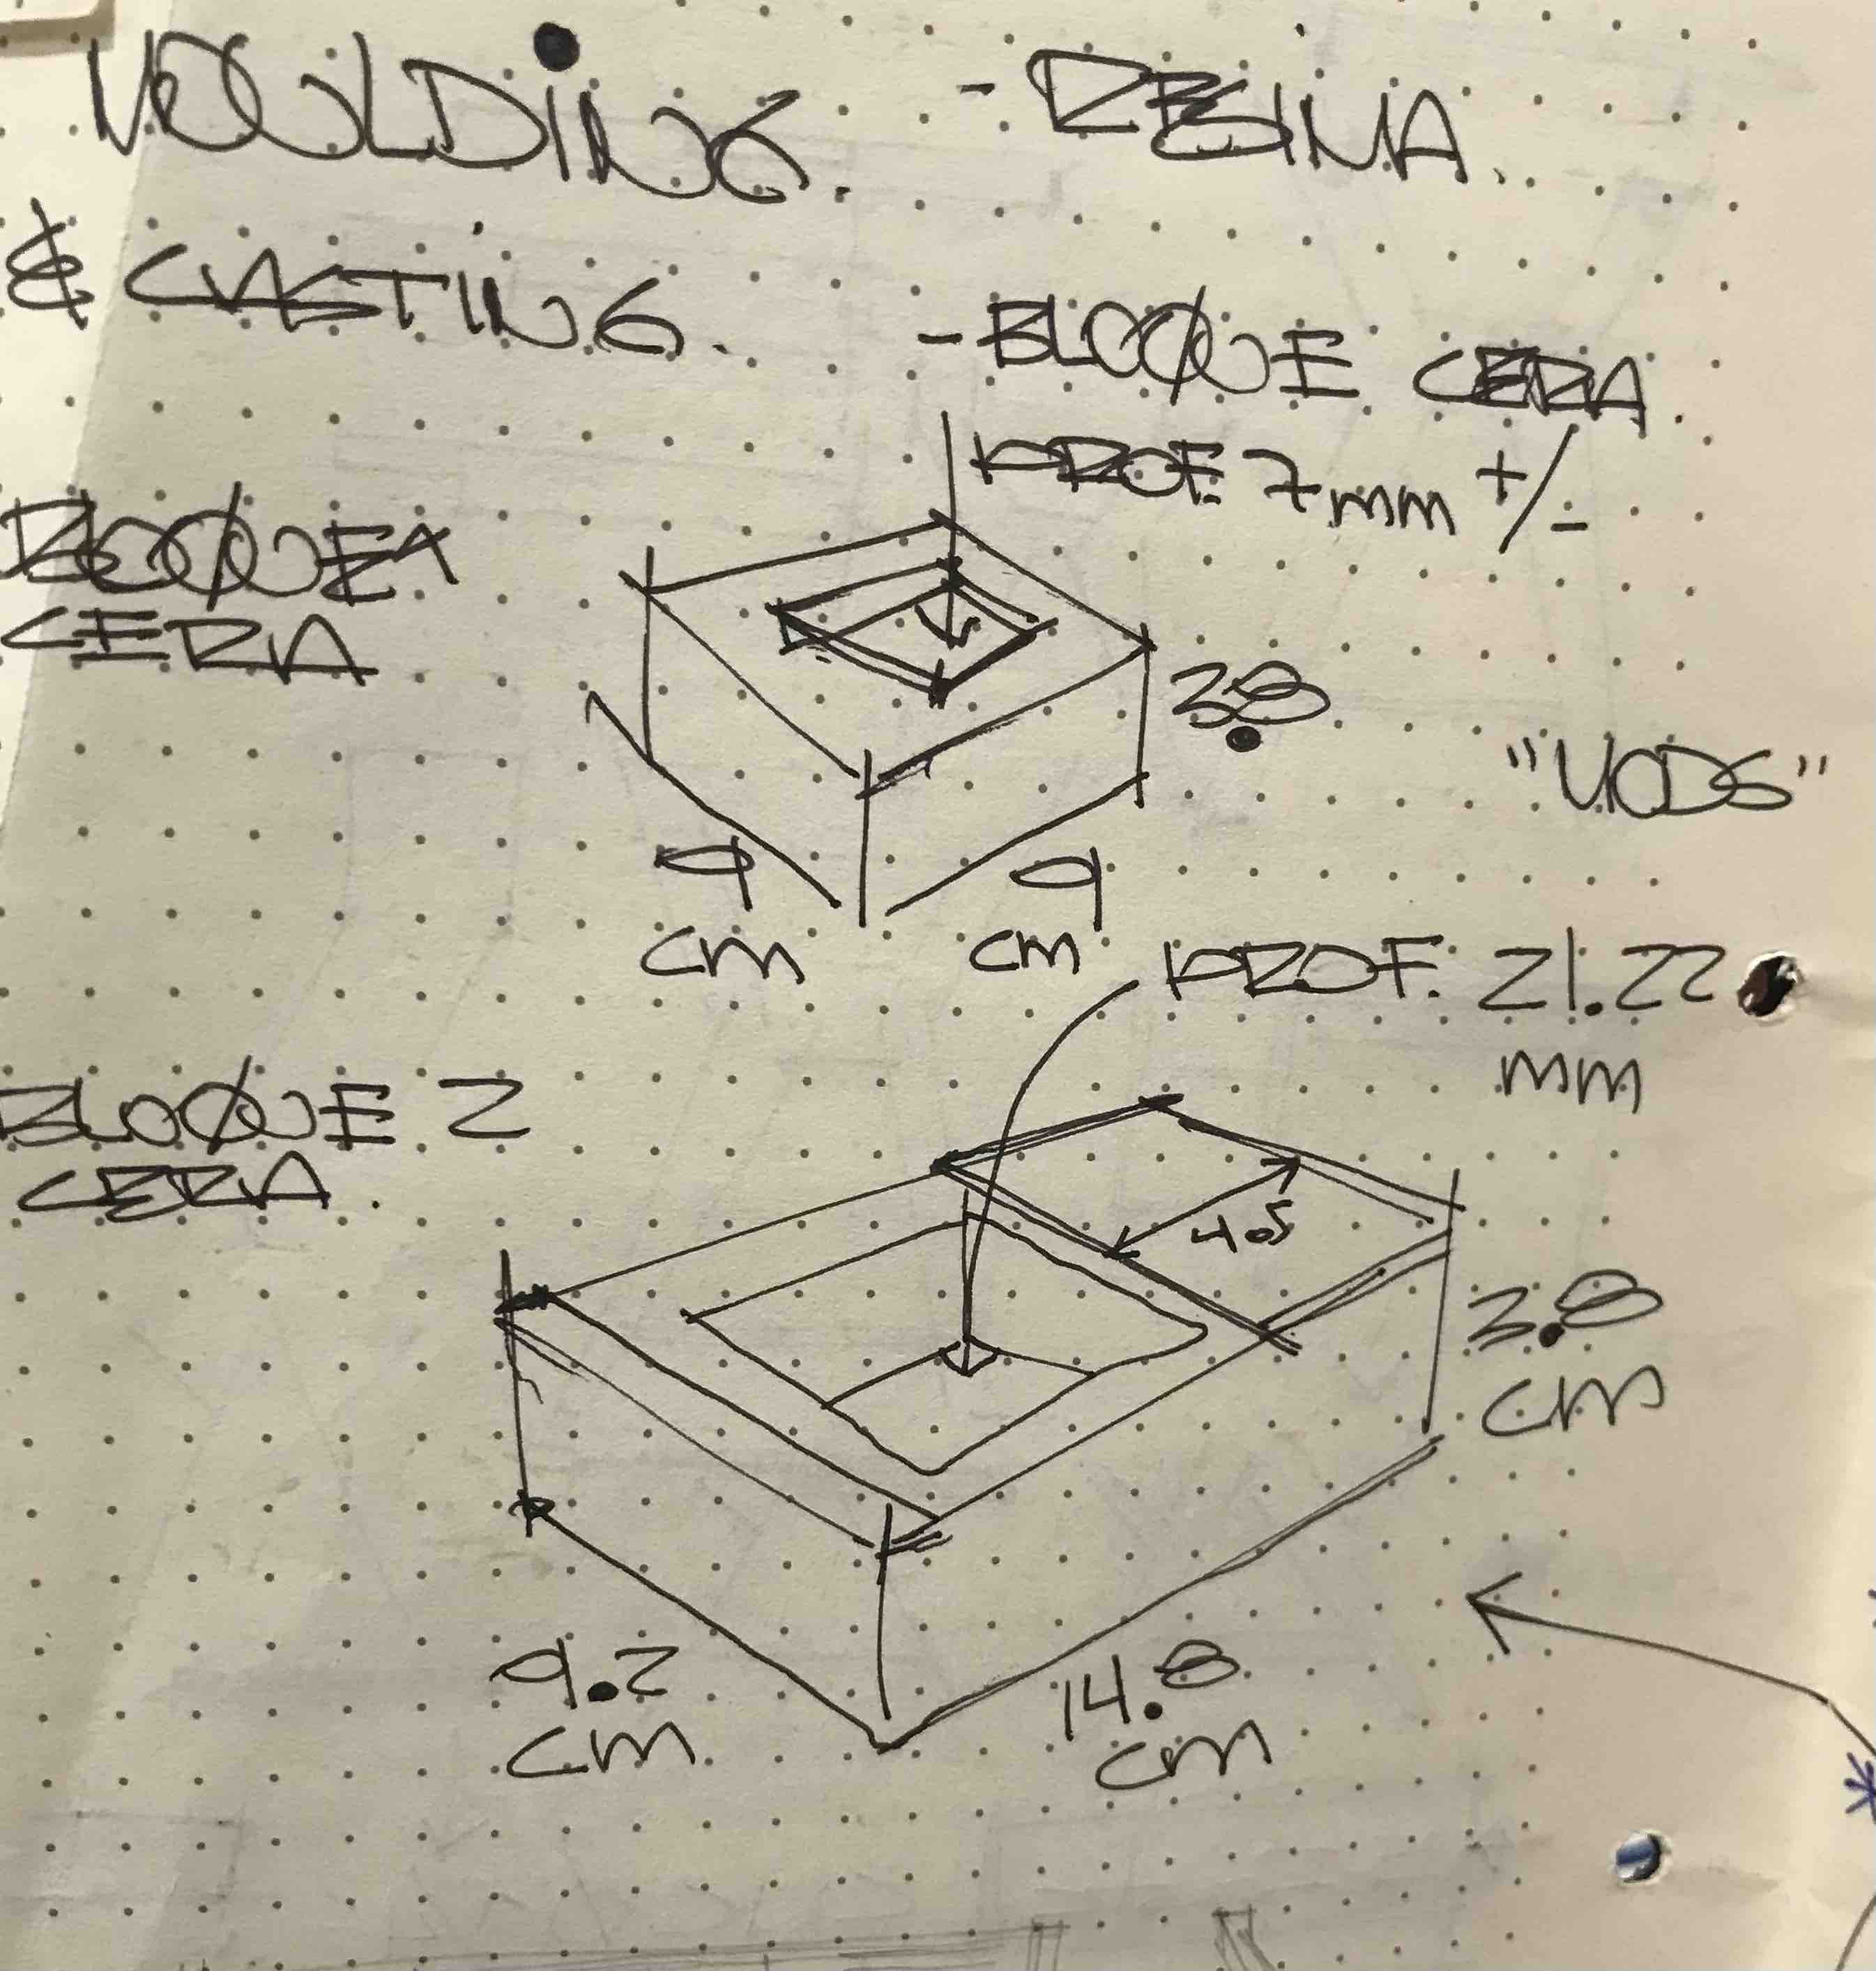
This is the
size of the available wax portion in the LAB, so I have to
adapt my design to that size: 9.2x14.8x3.8 with a free depth
of 2.12cm
Then I draw and
extrude a square of the measures above in order to make the
shape of the wax cube where I´m going to mill the mould of
the A.
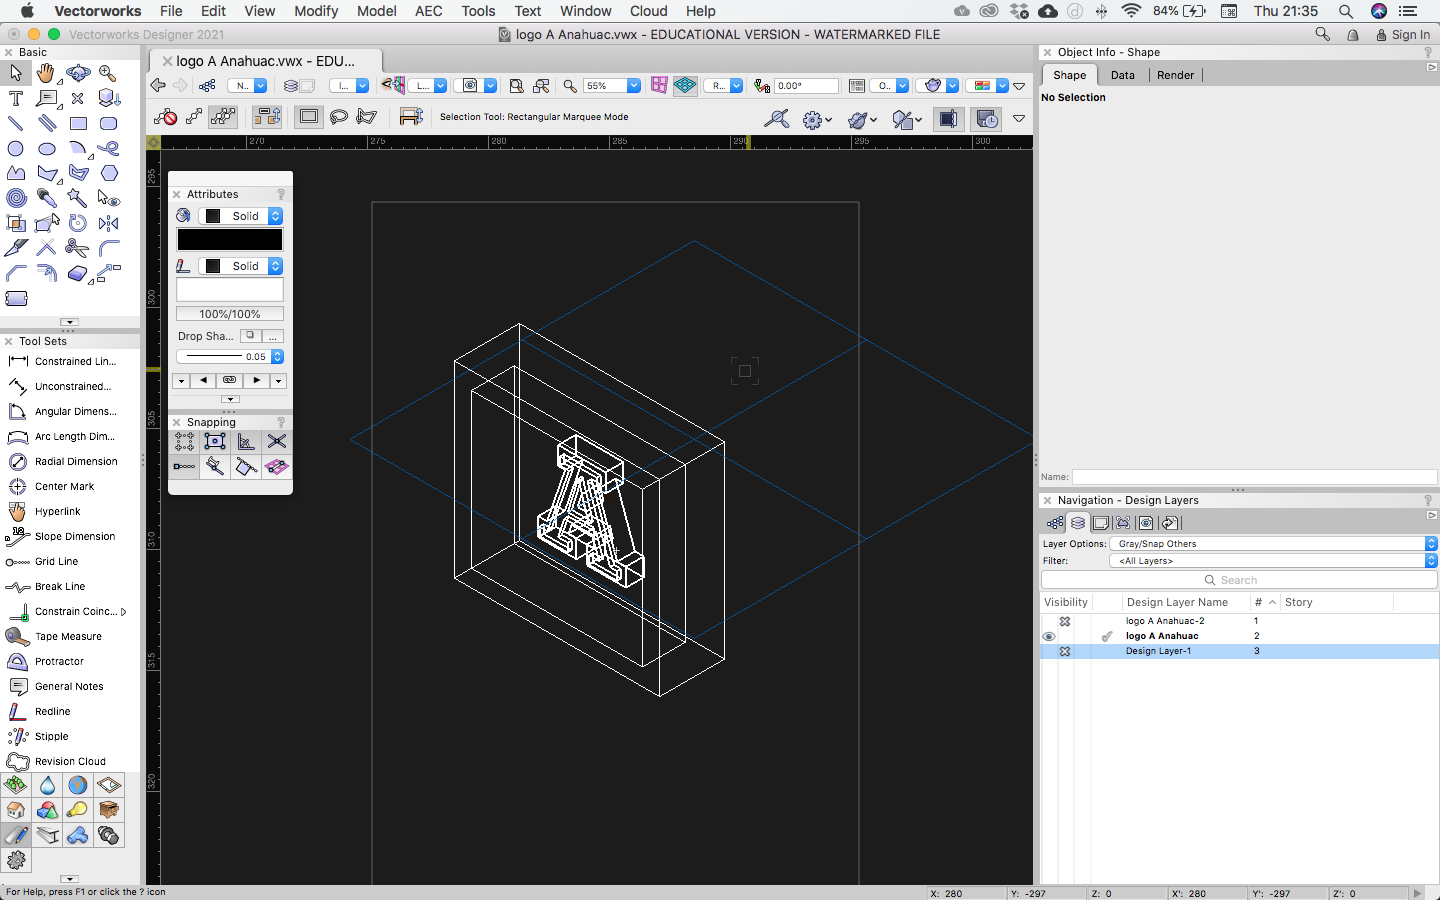
I scale and put
the A inside the cube to see if fits correctly, the size and
depth of the this mold is exactly dimensions of the
available wax.
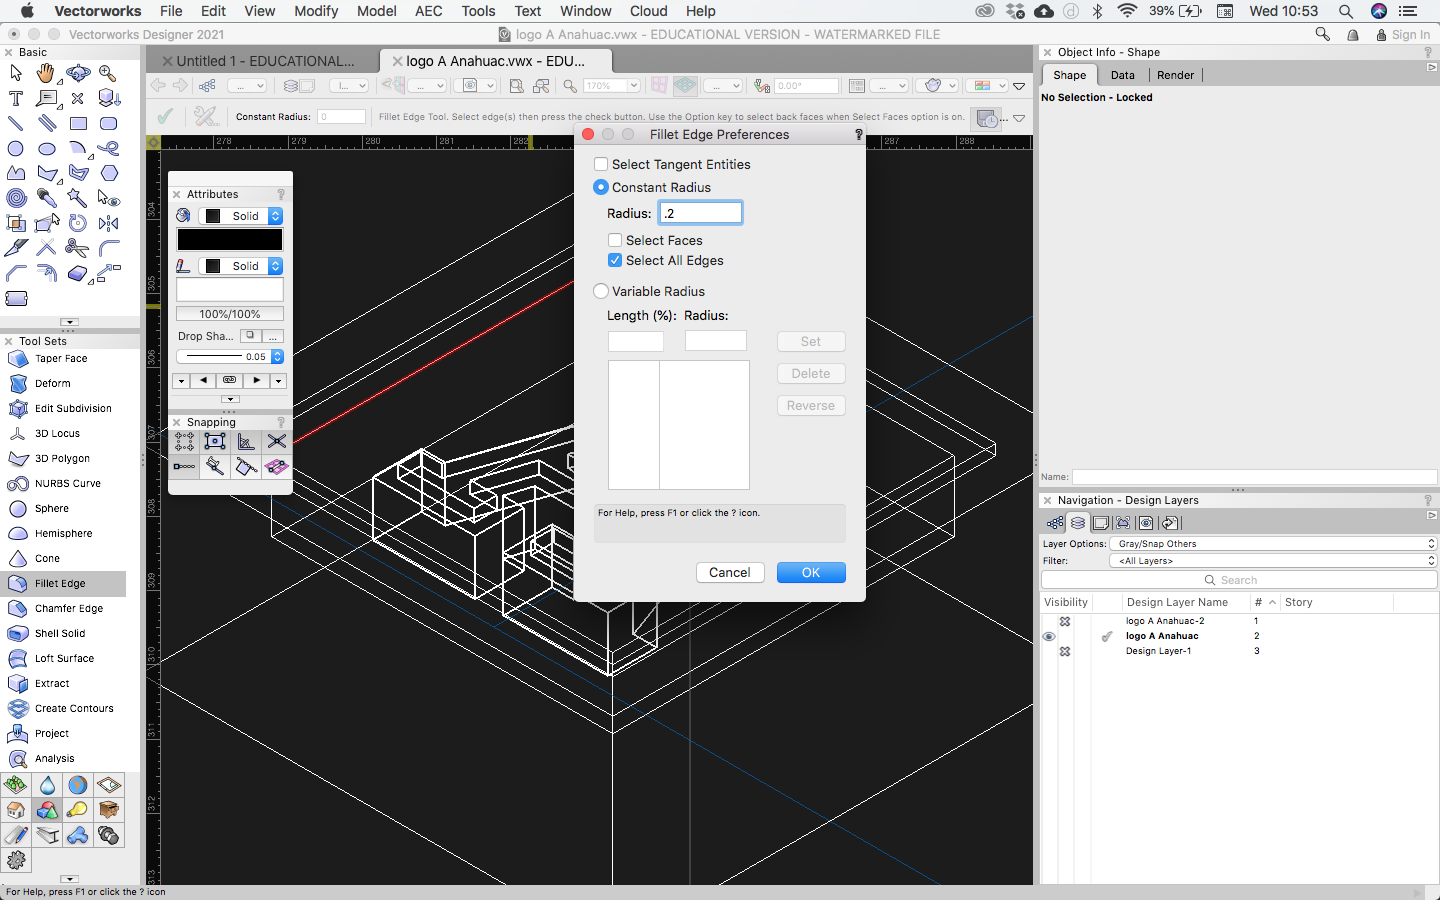
I made a fillet
in all the edges of the mold including the A to avoid
problems to demold the silicon.
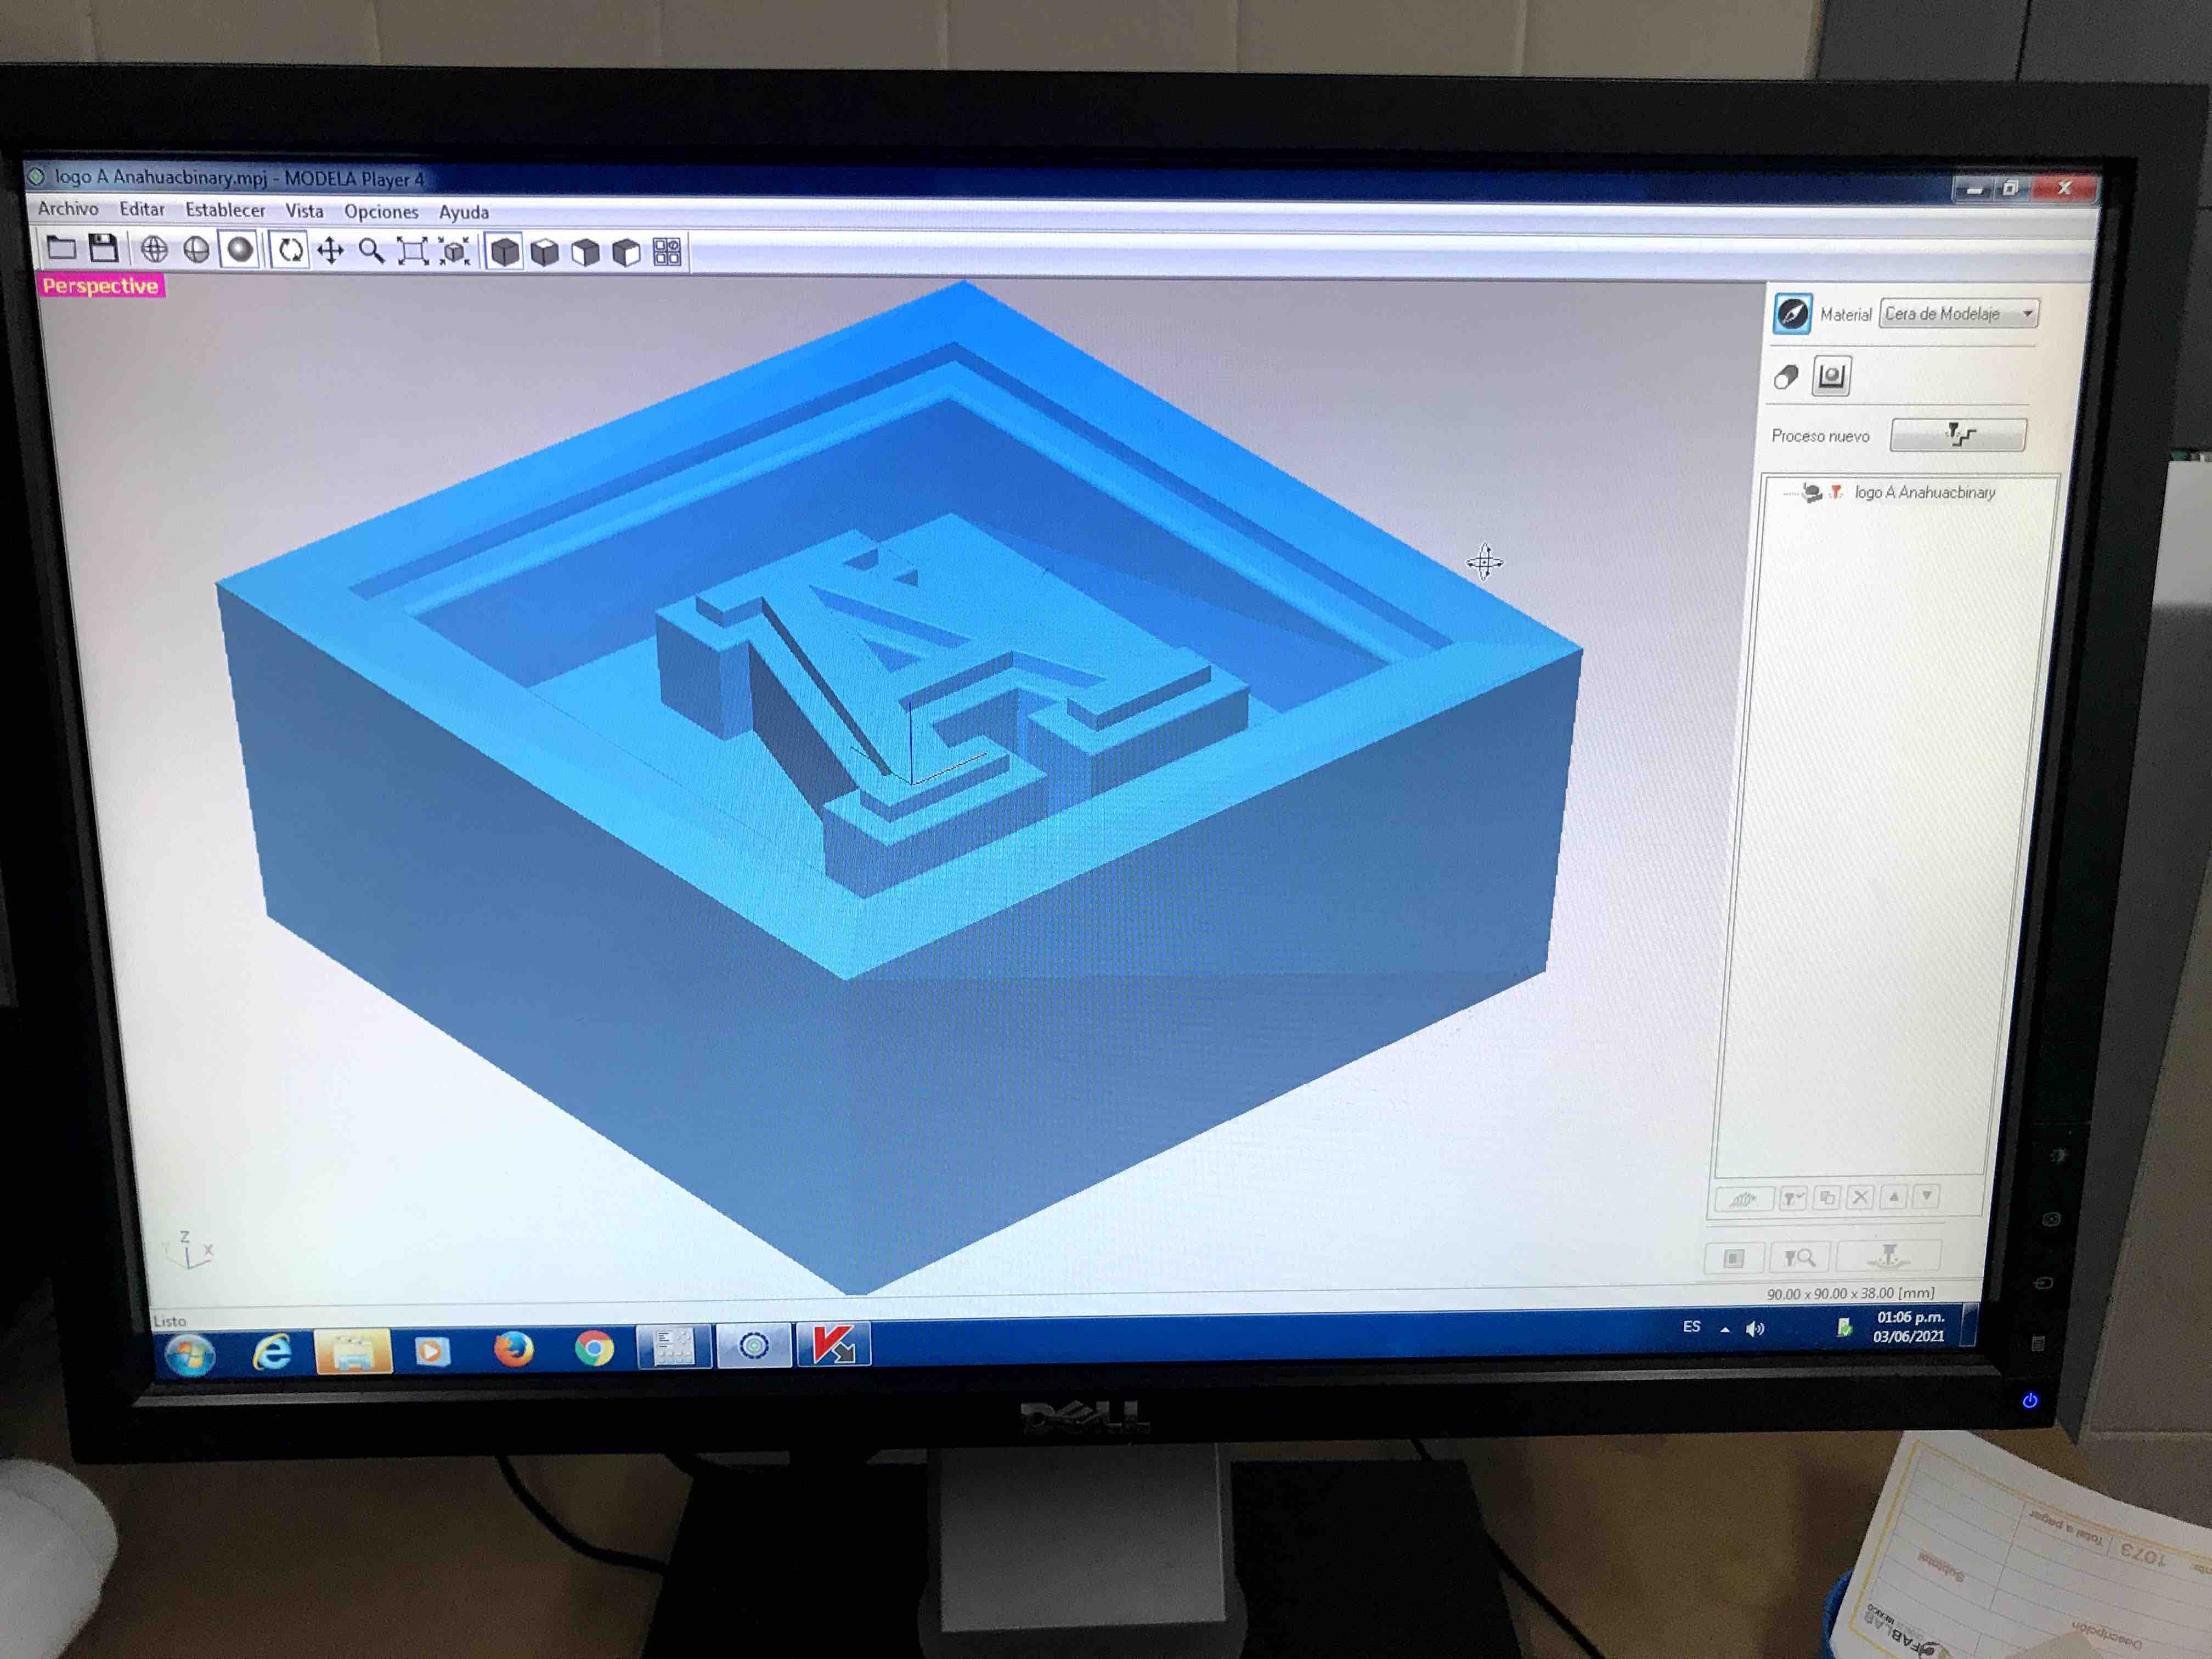
Now we are
going to open the 3D file into RhinoCam to do the setup
before milling
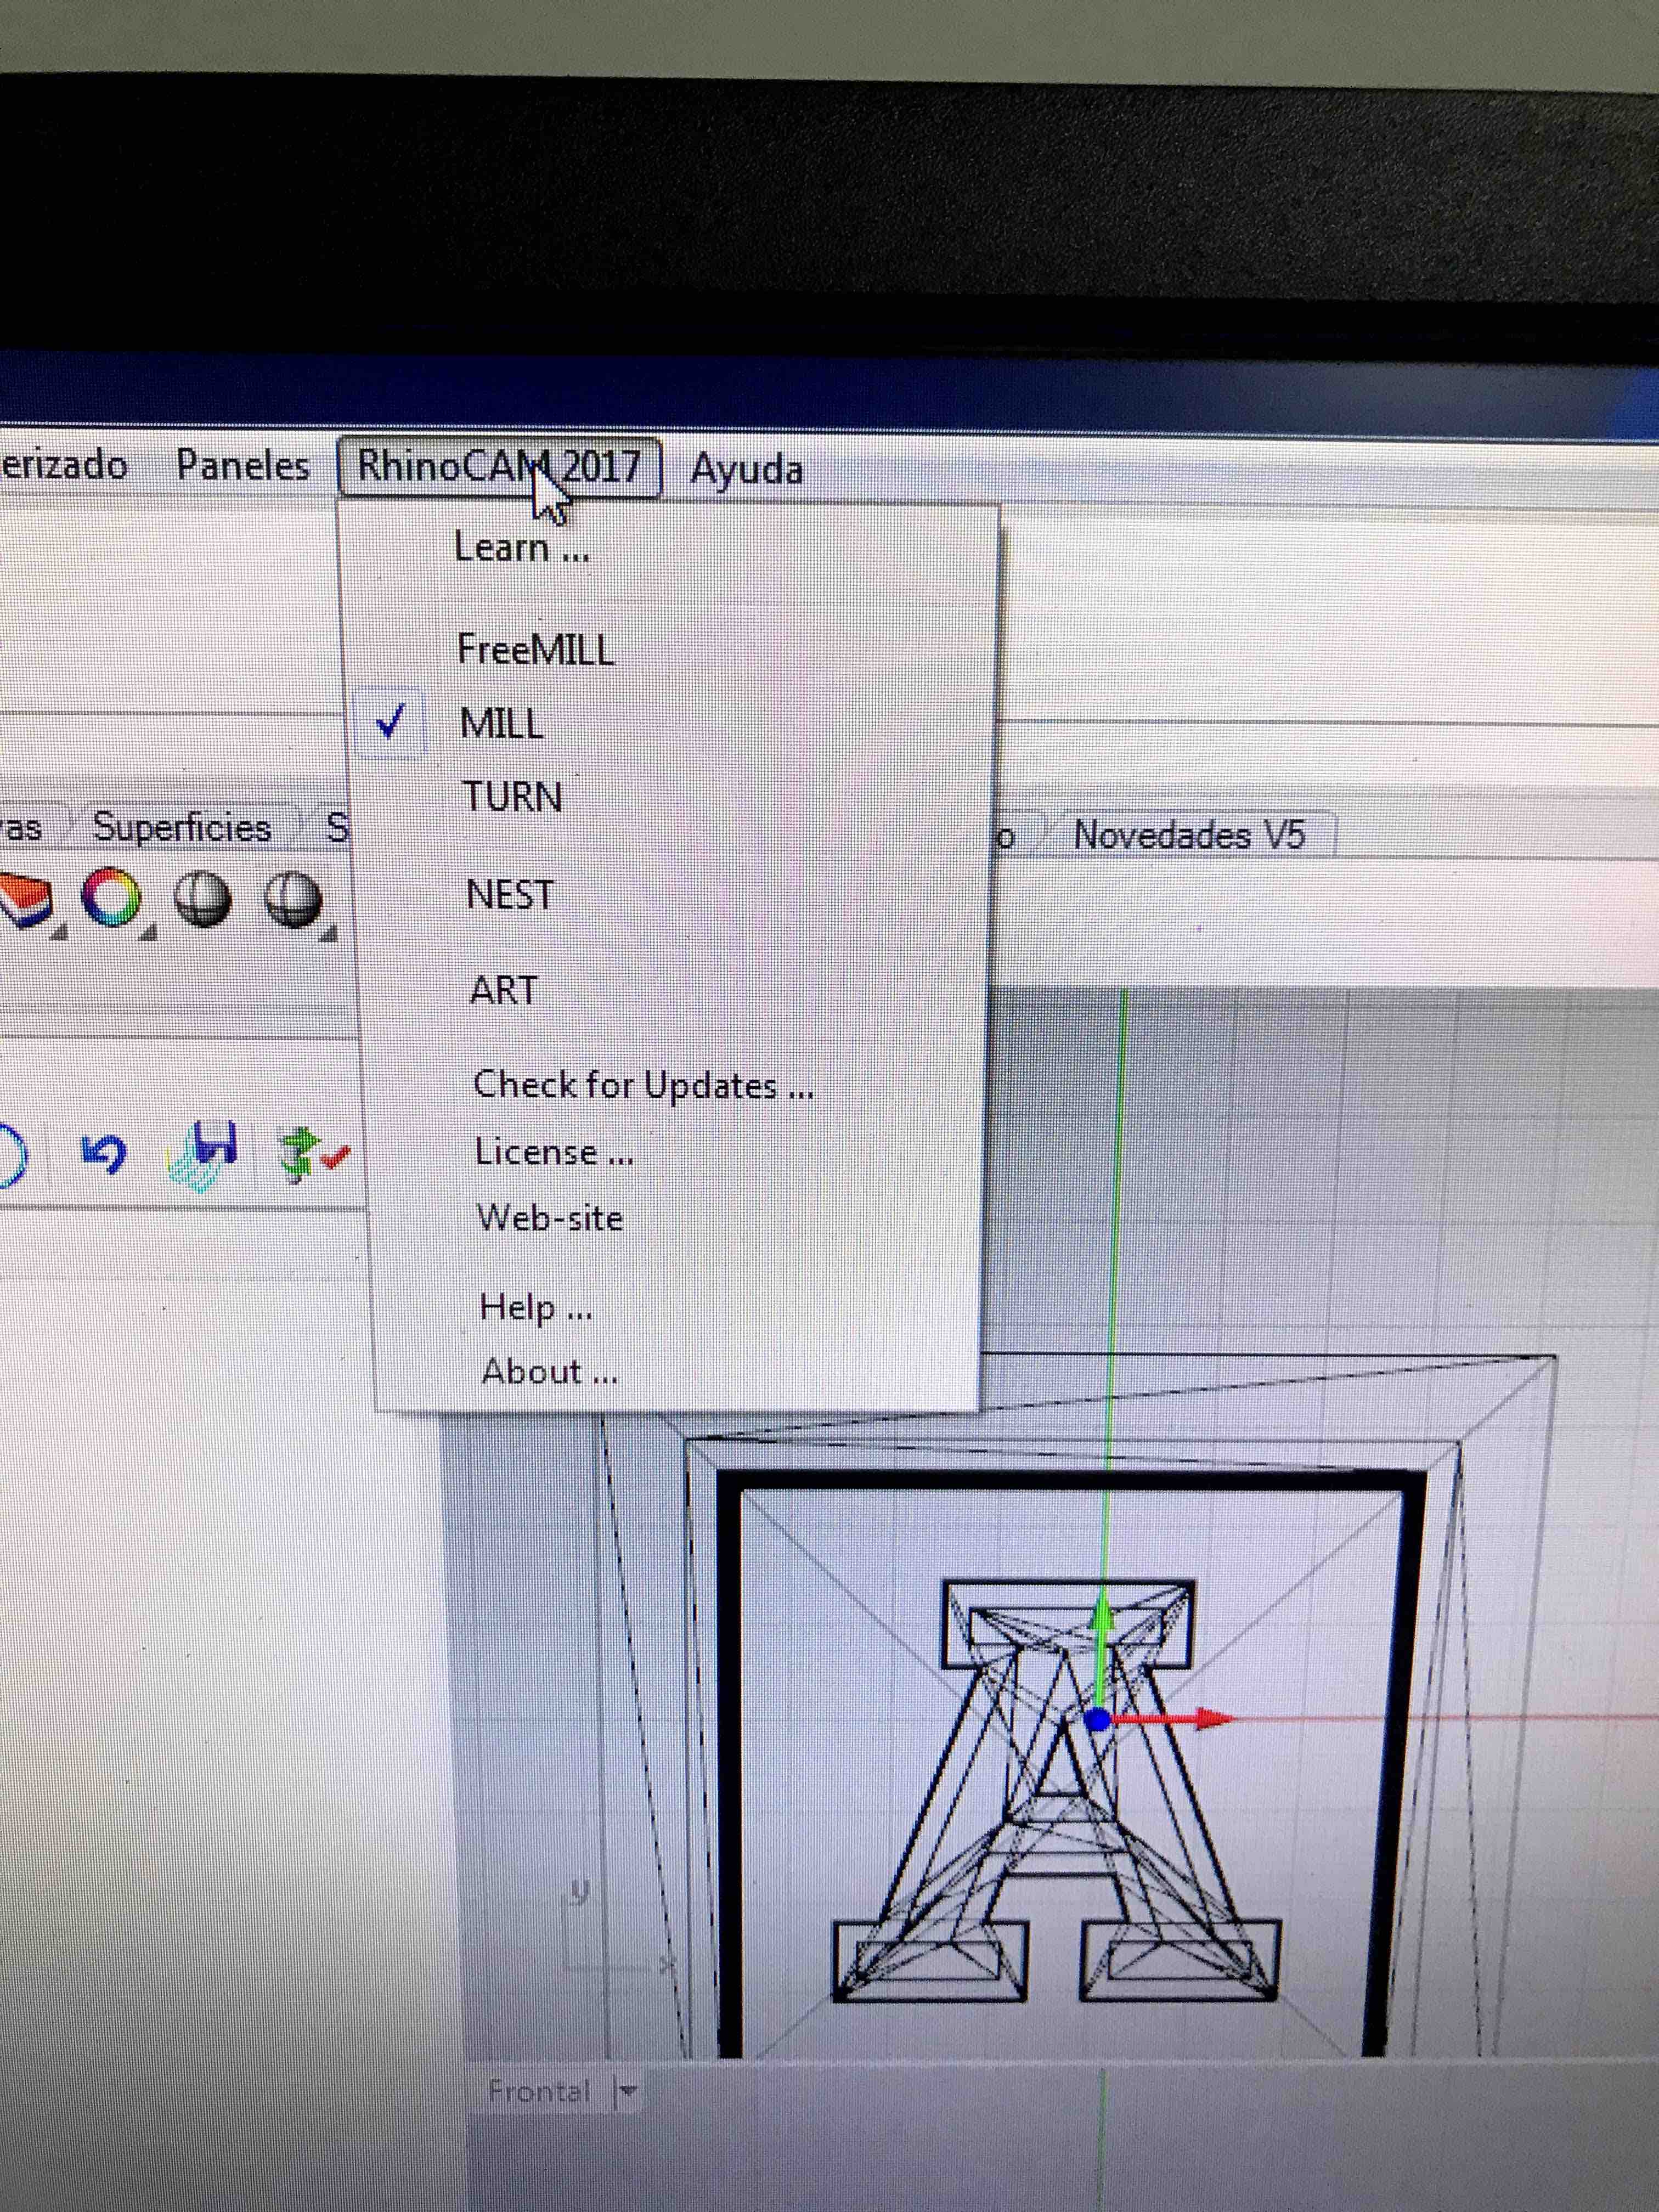
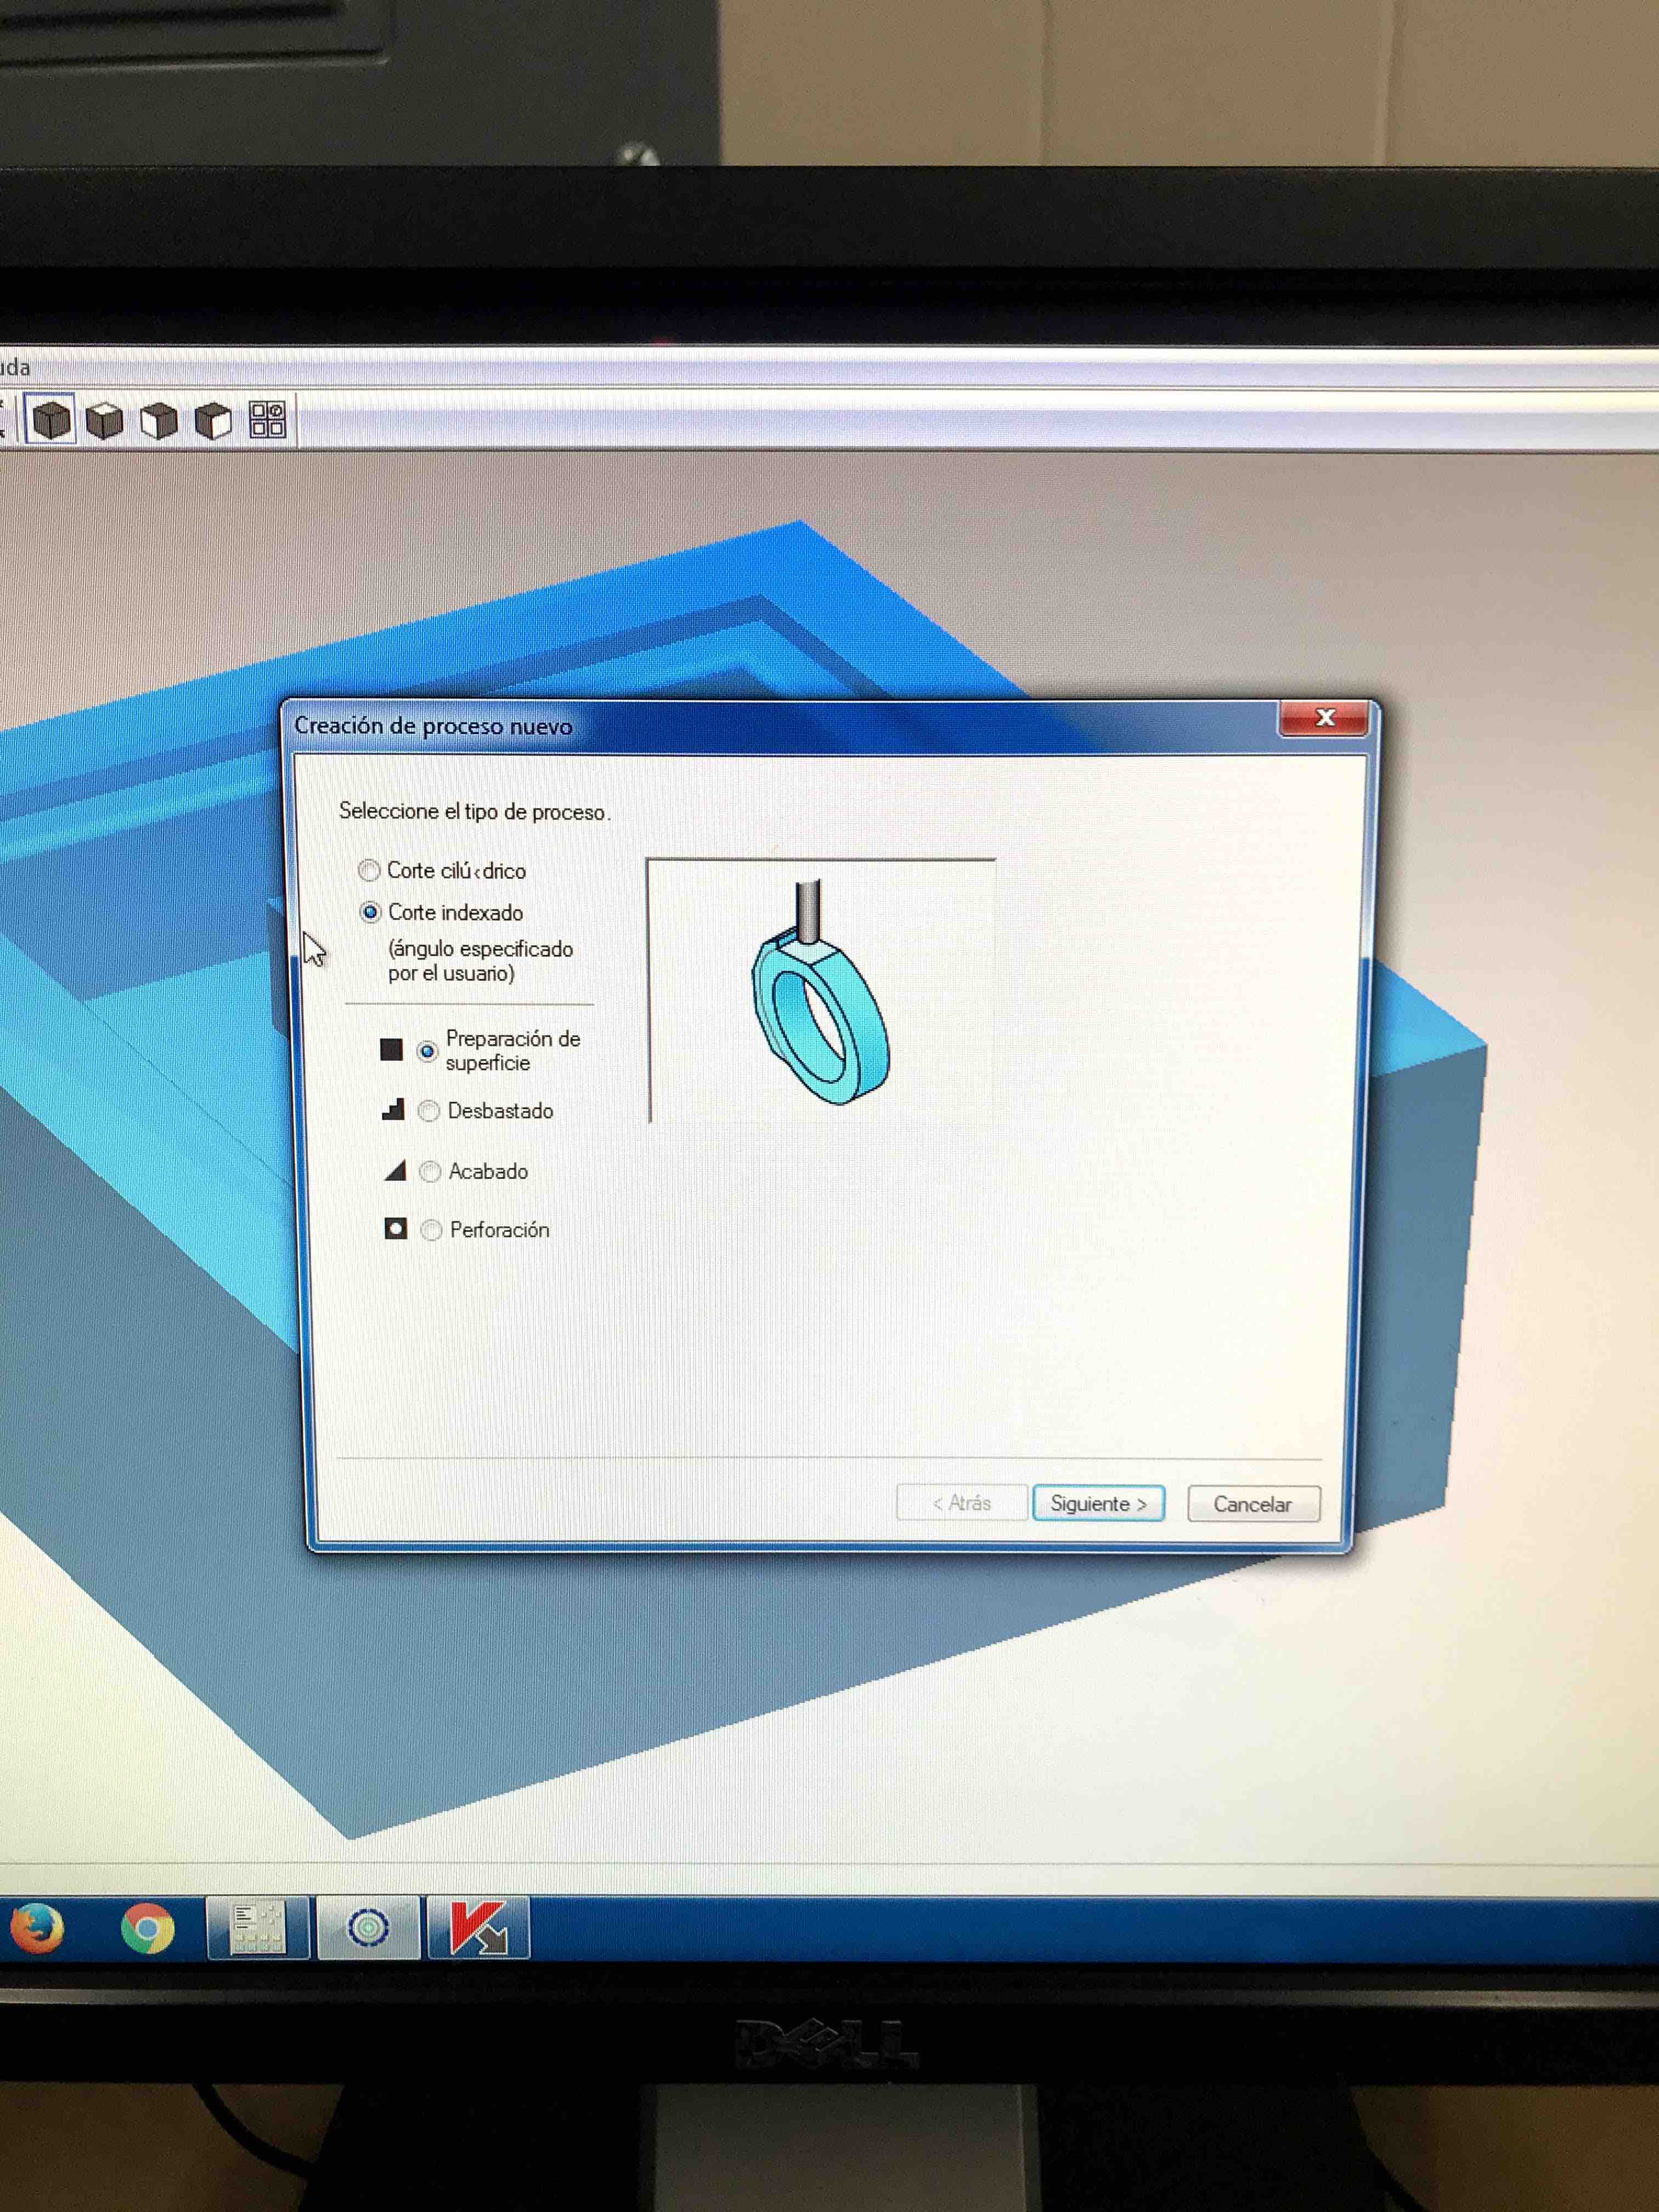
Choosing what
operation we are ging to do, in this case MILL
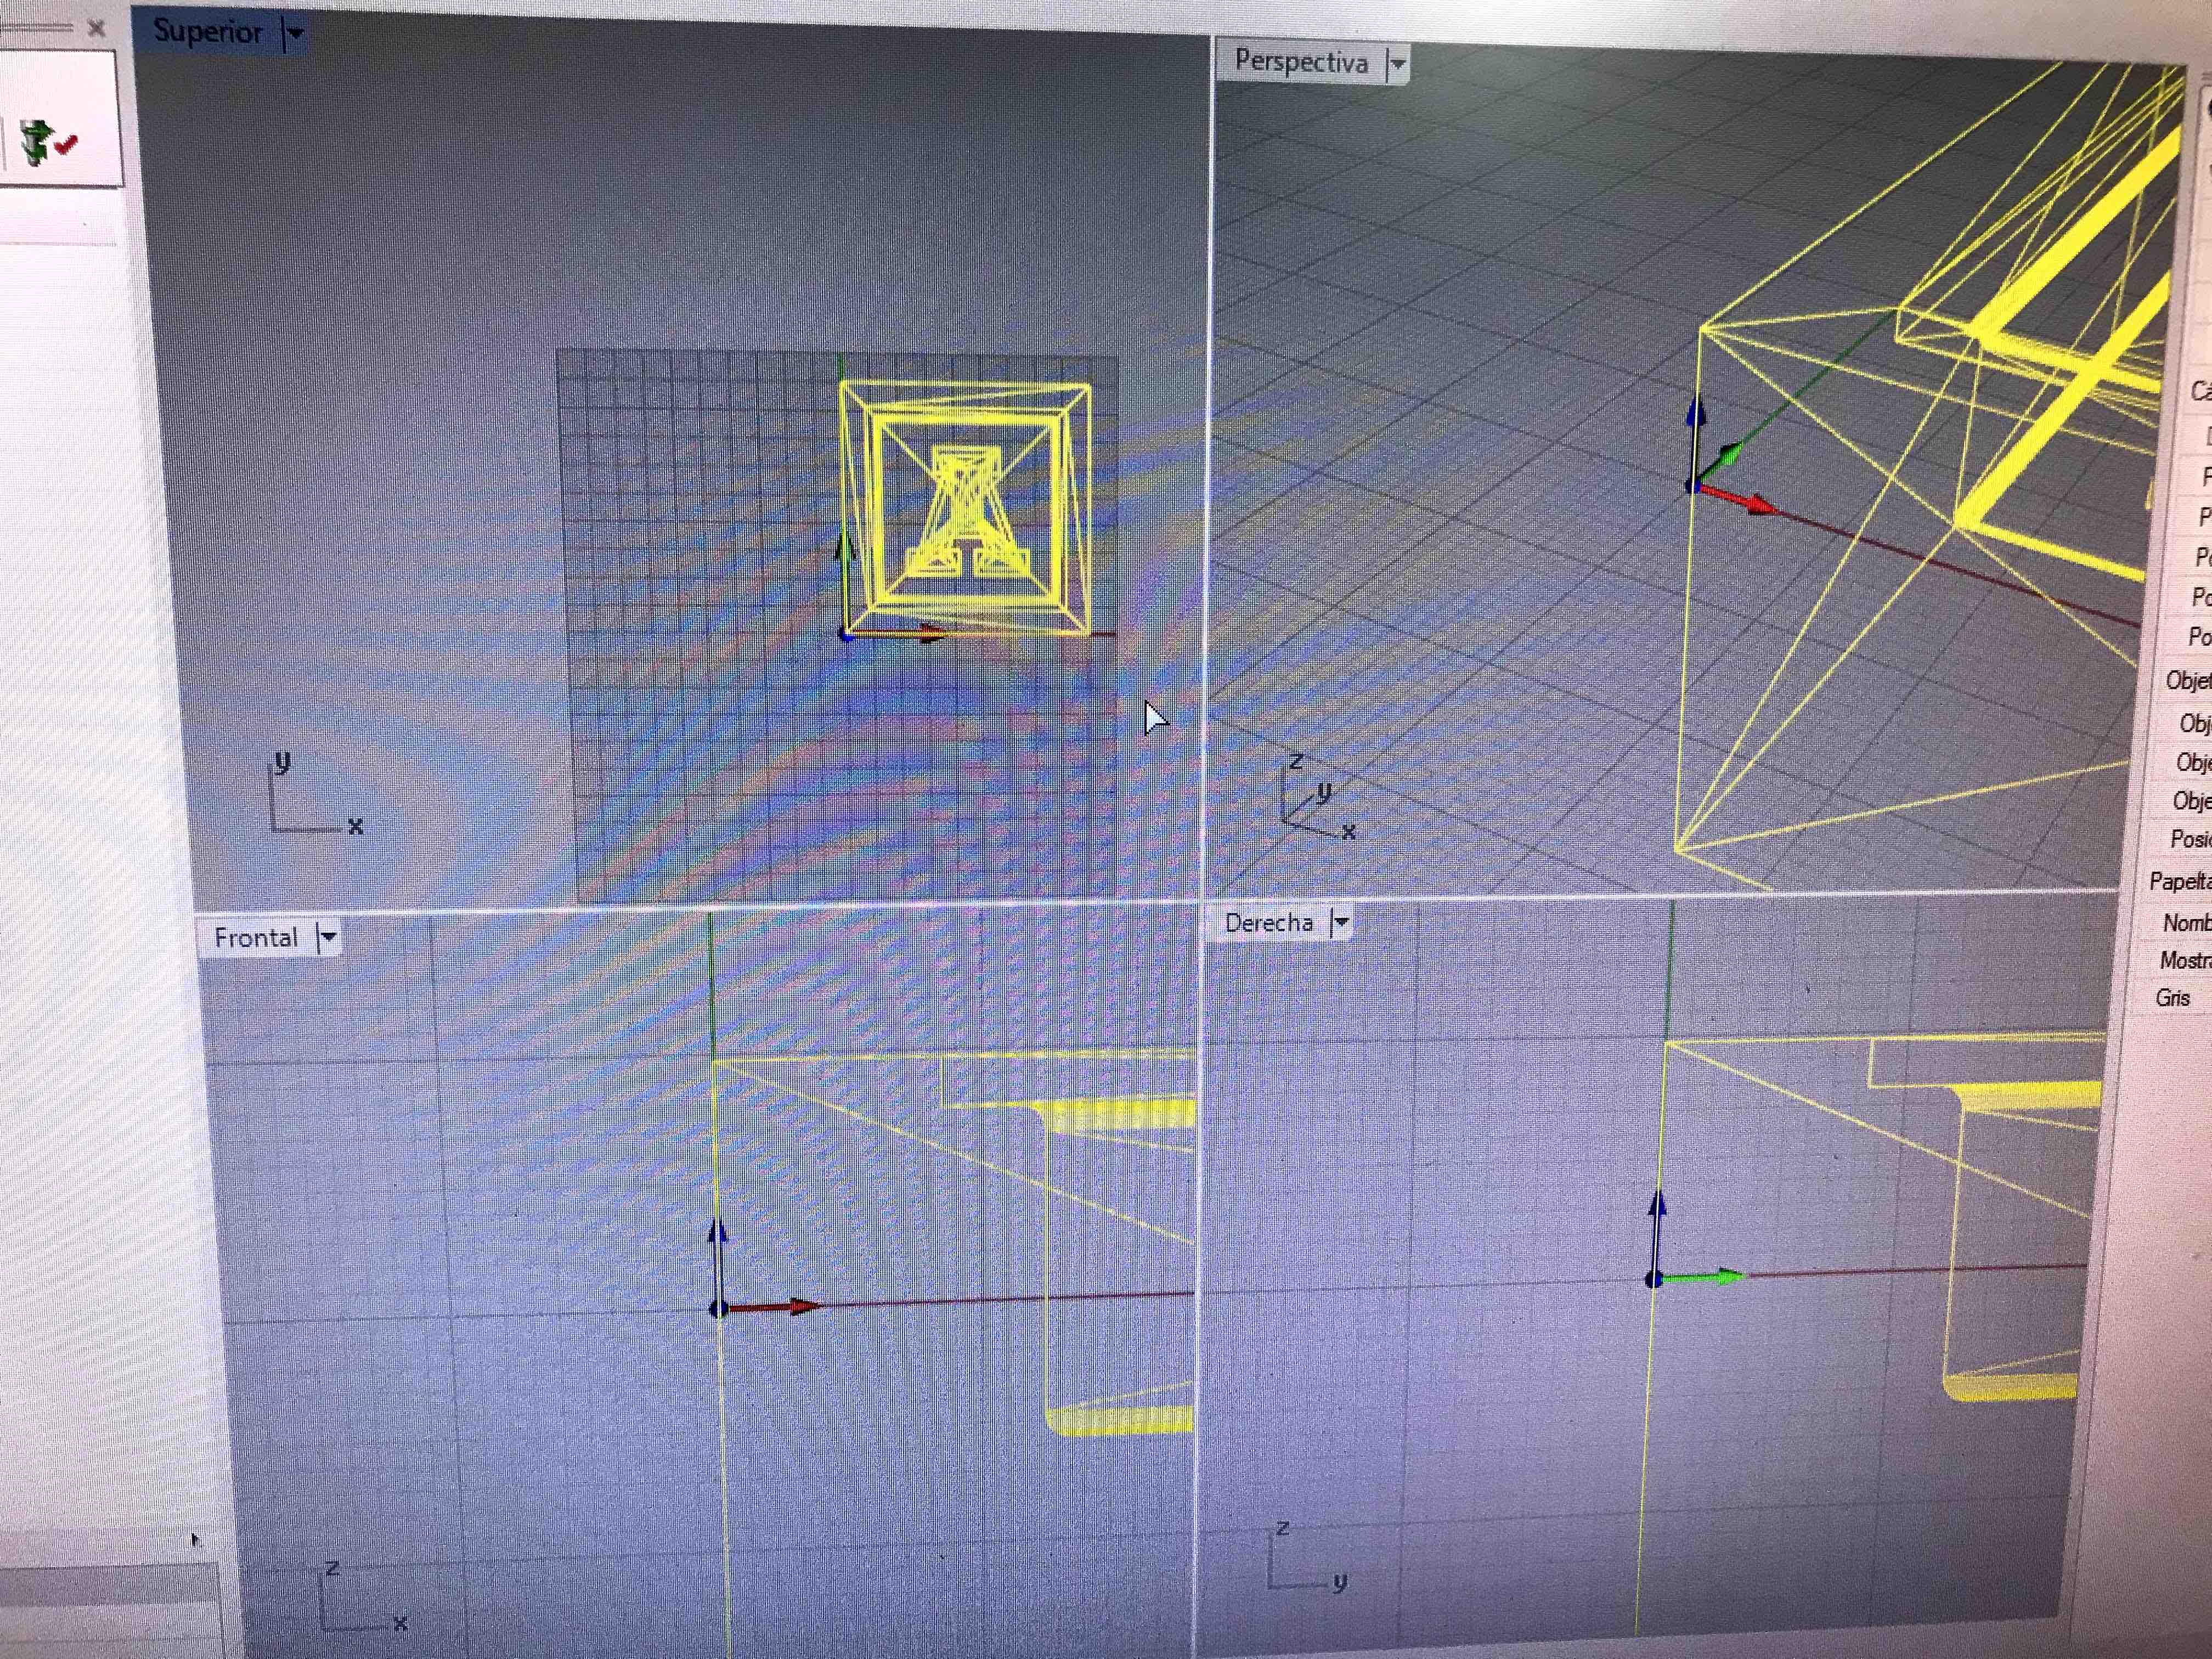
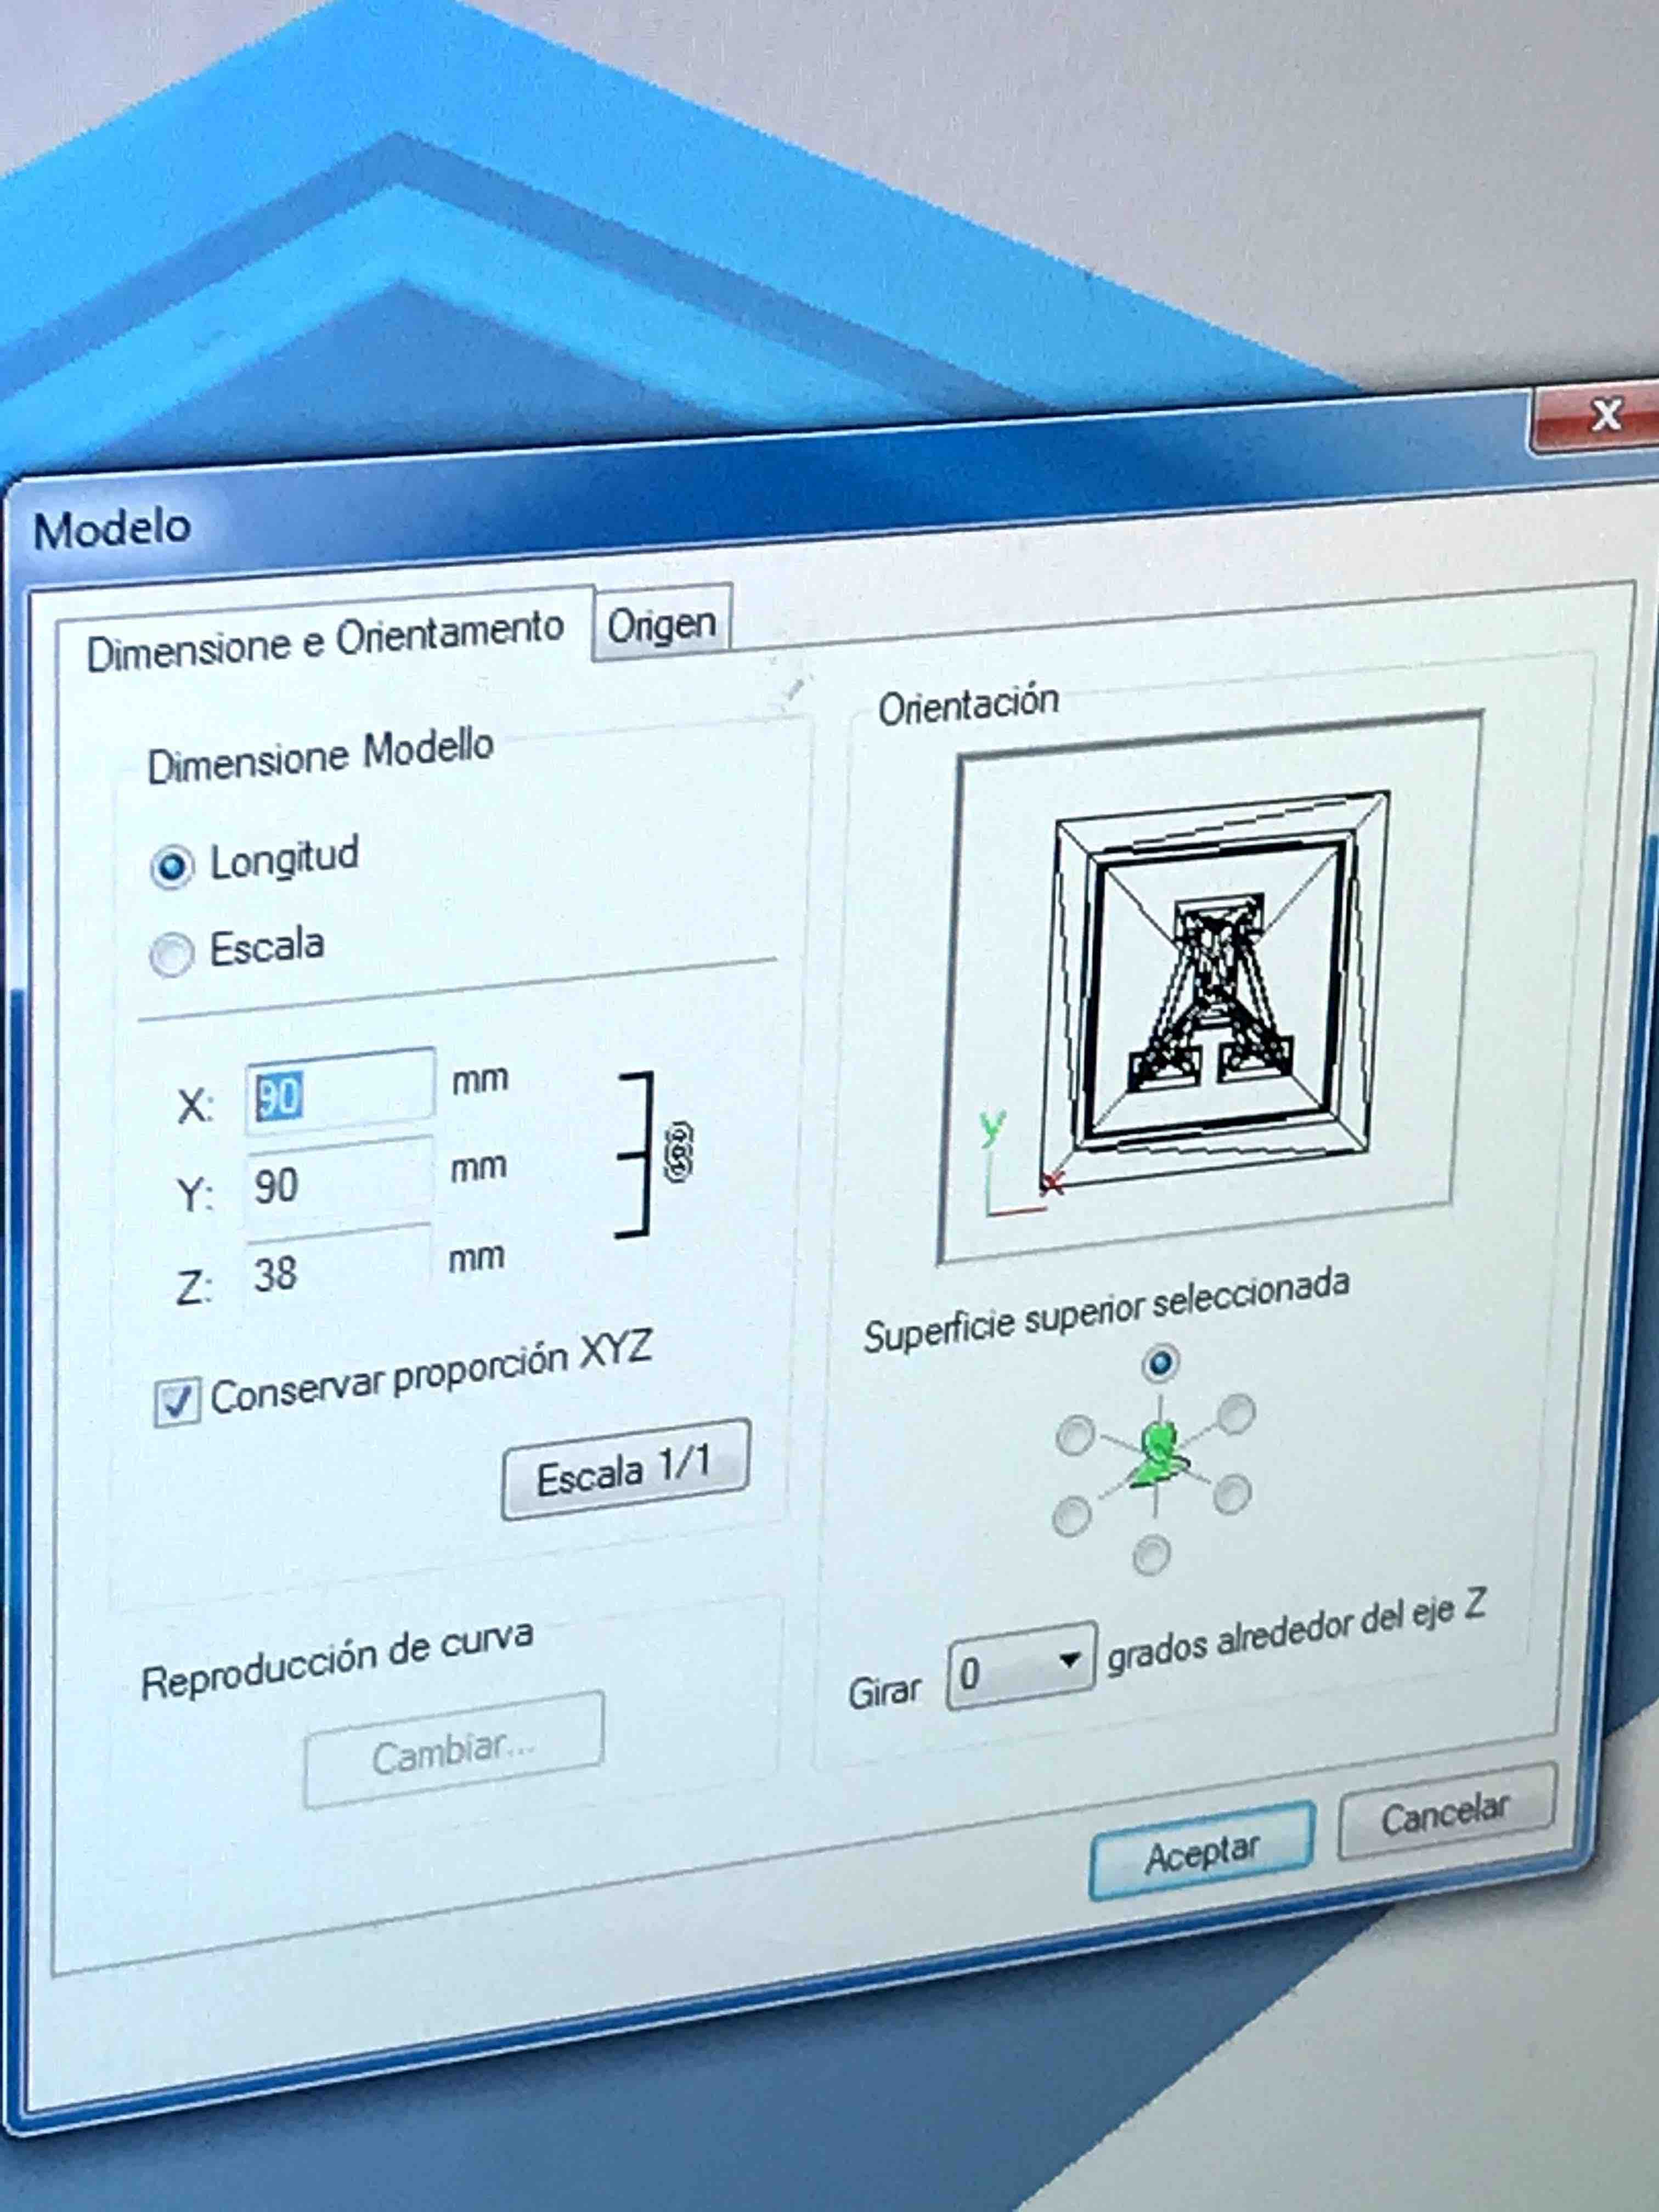
Placing the 3D
object.
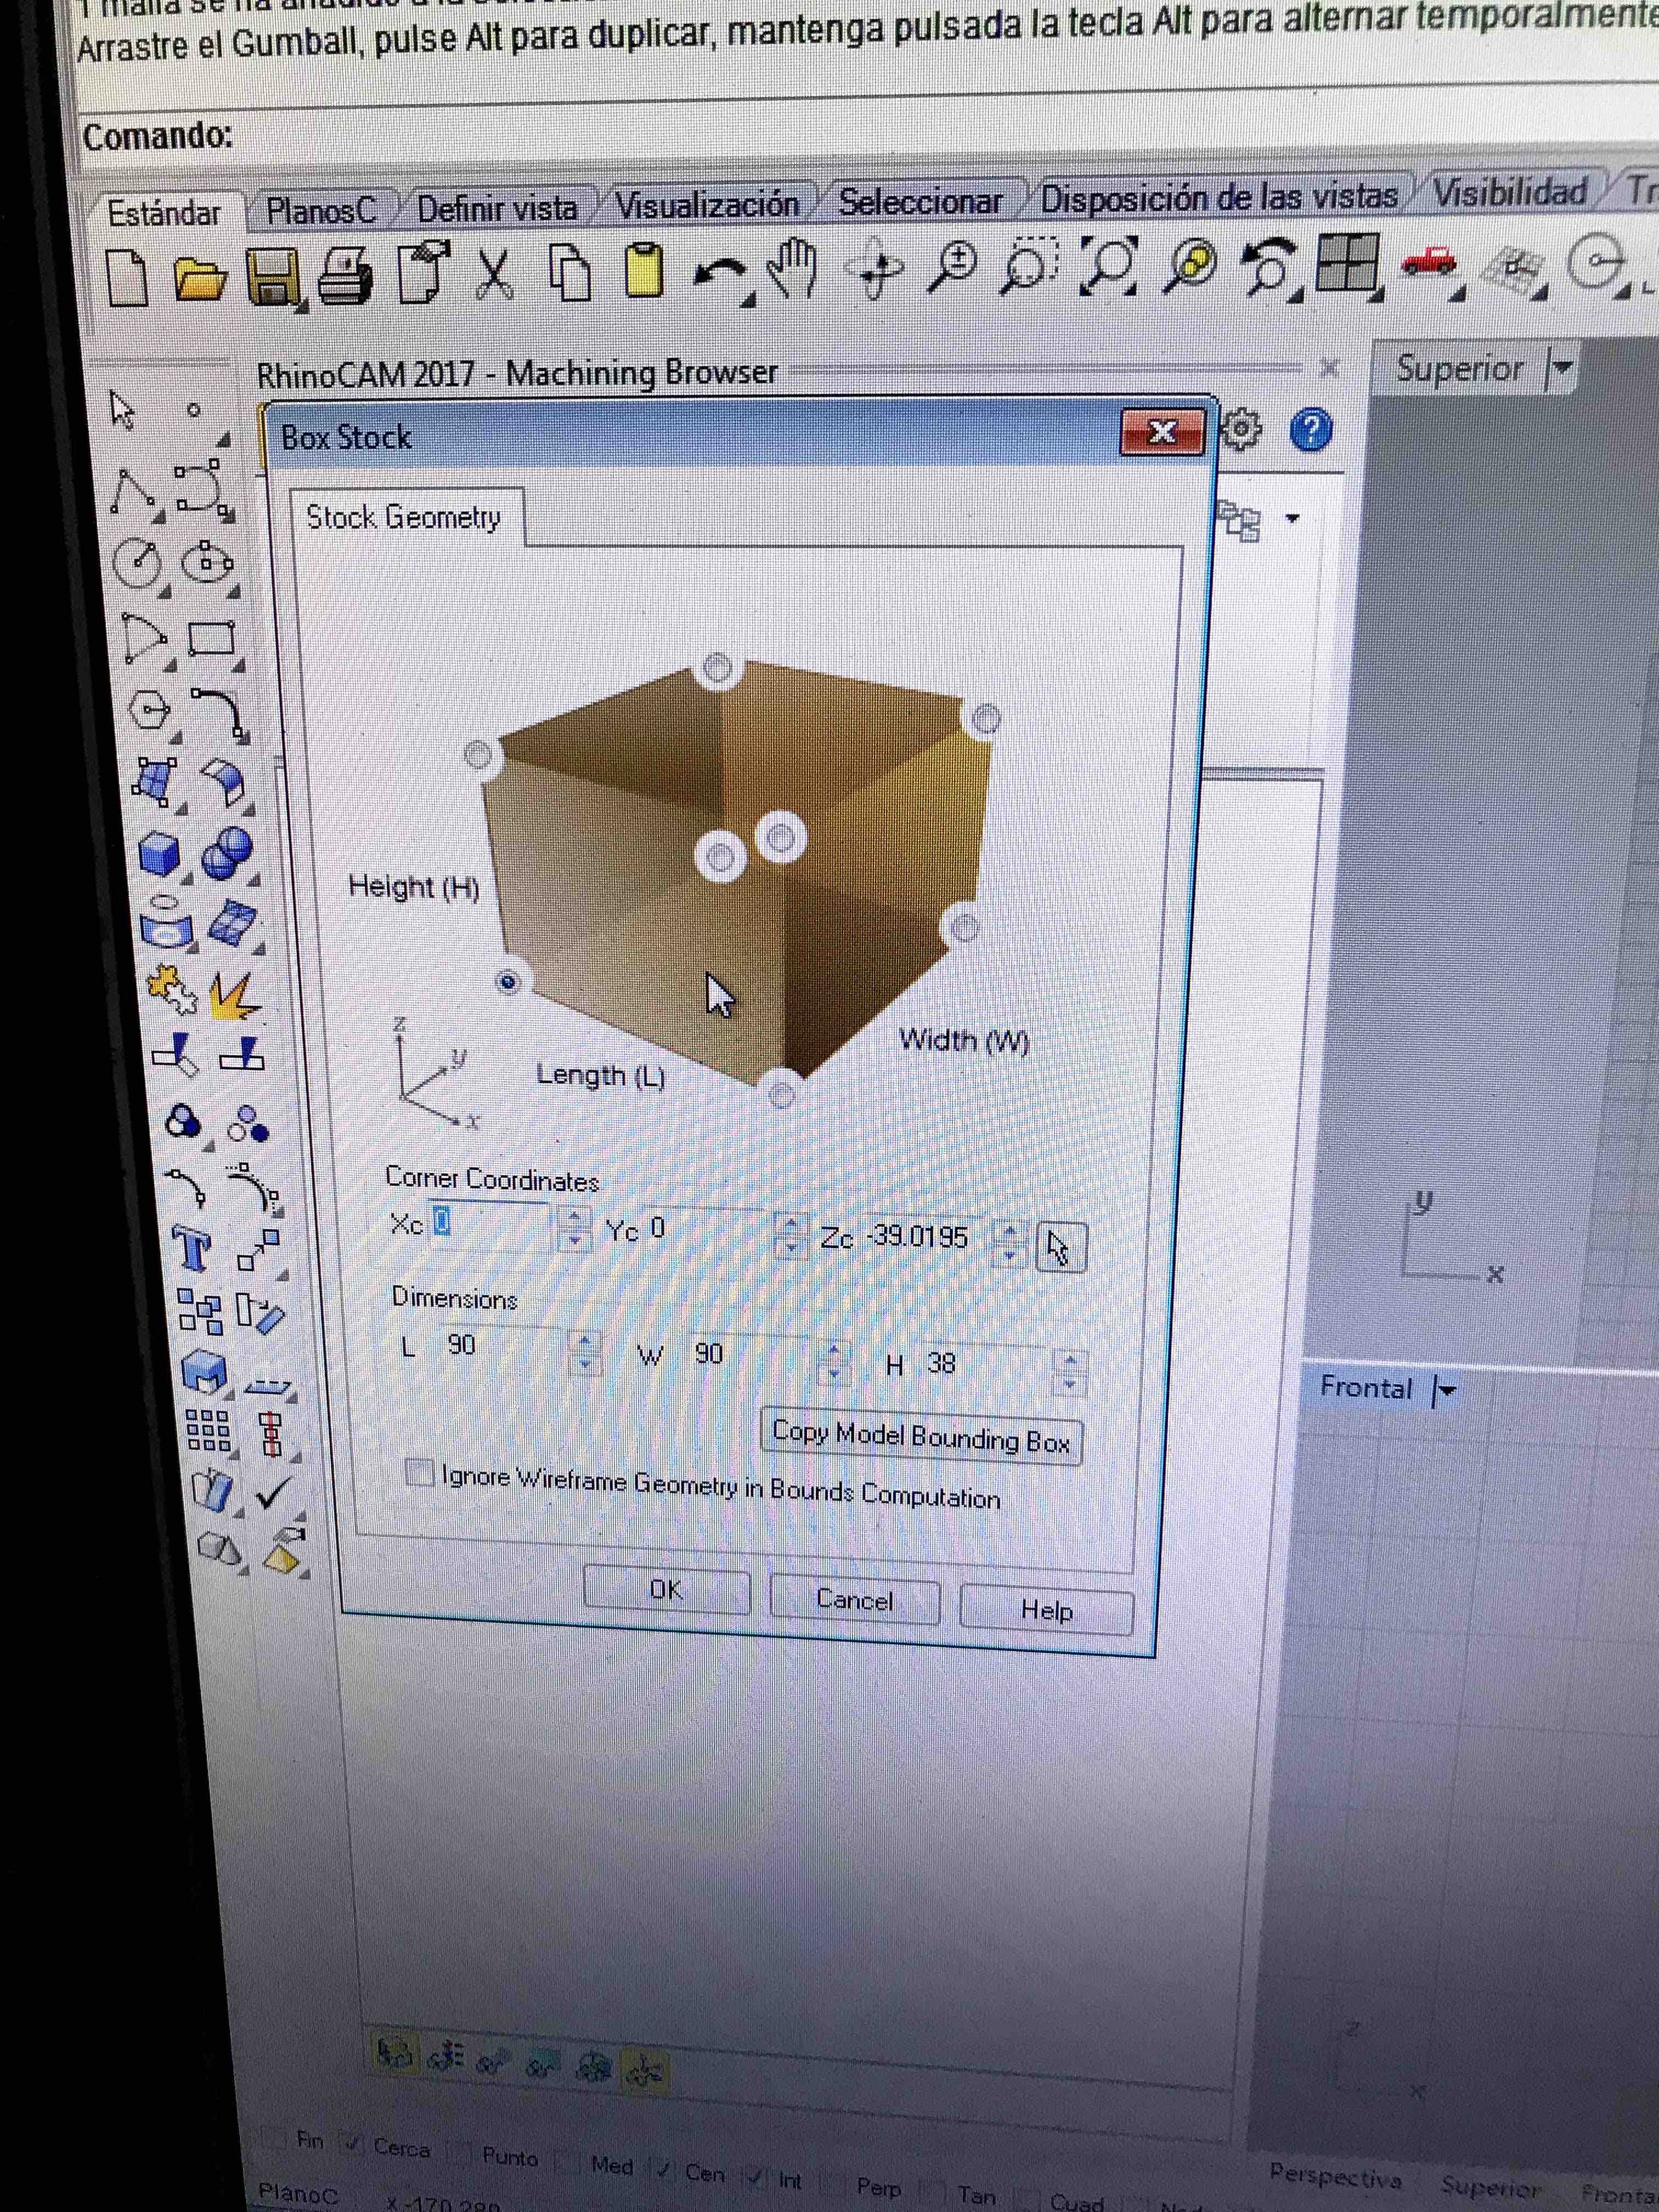
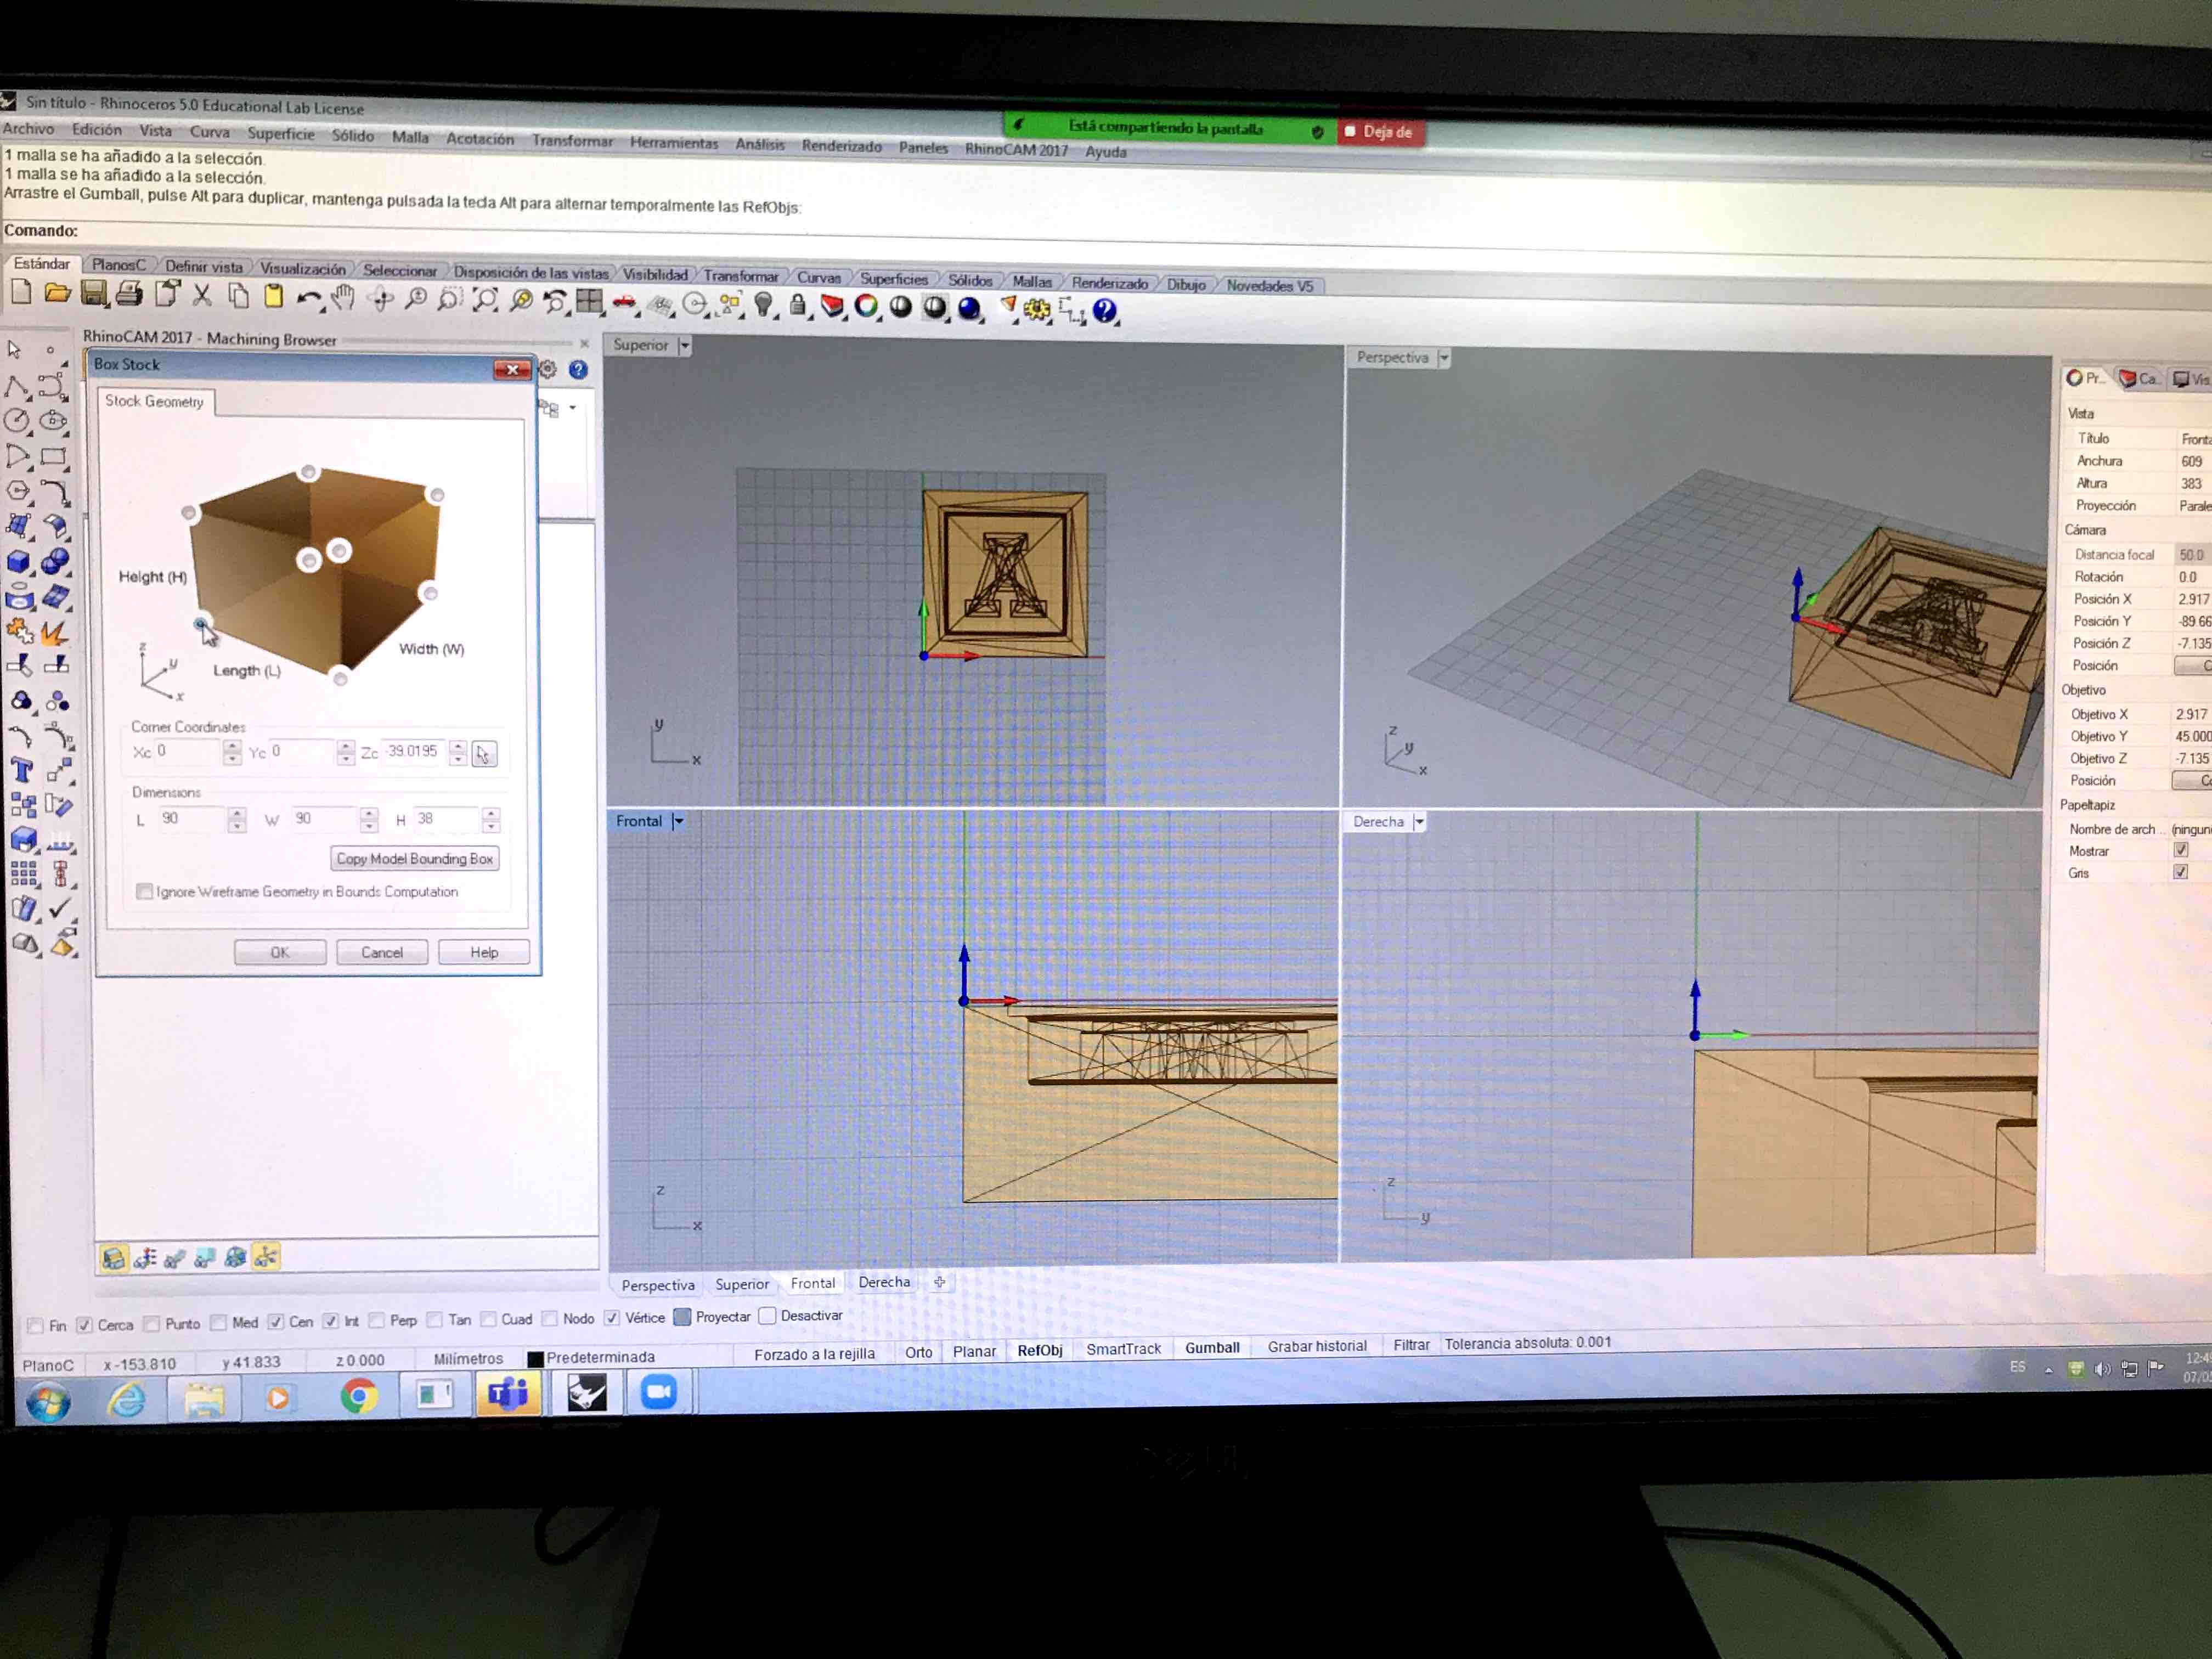
setting the
size of the cube 90x90x38mm
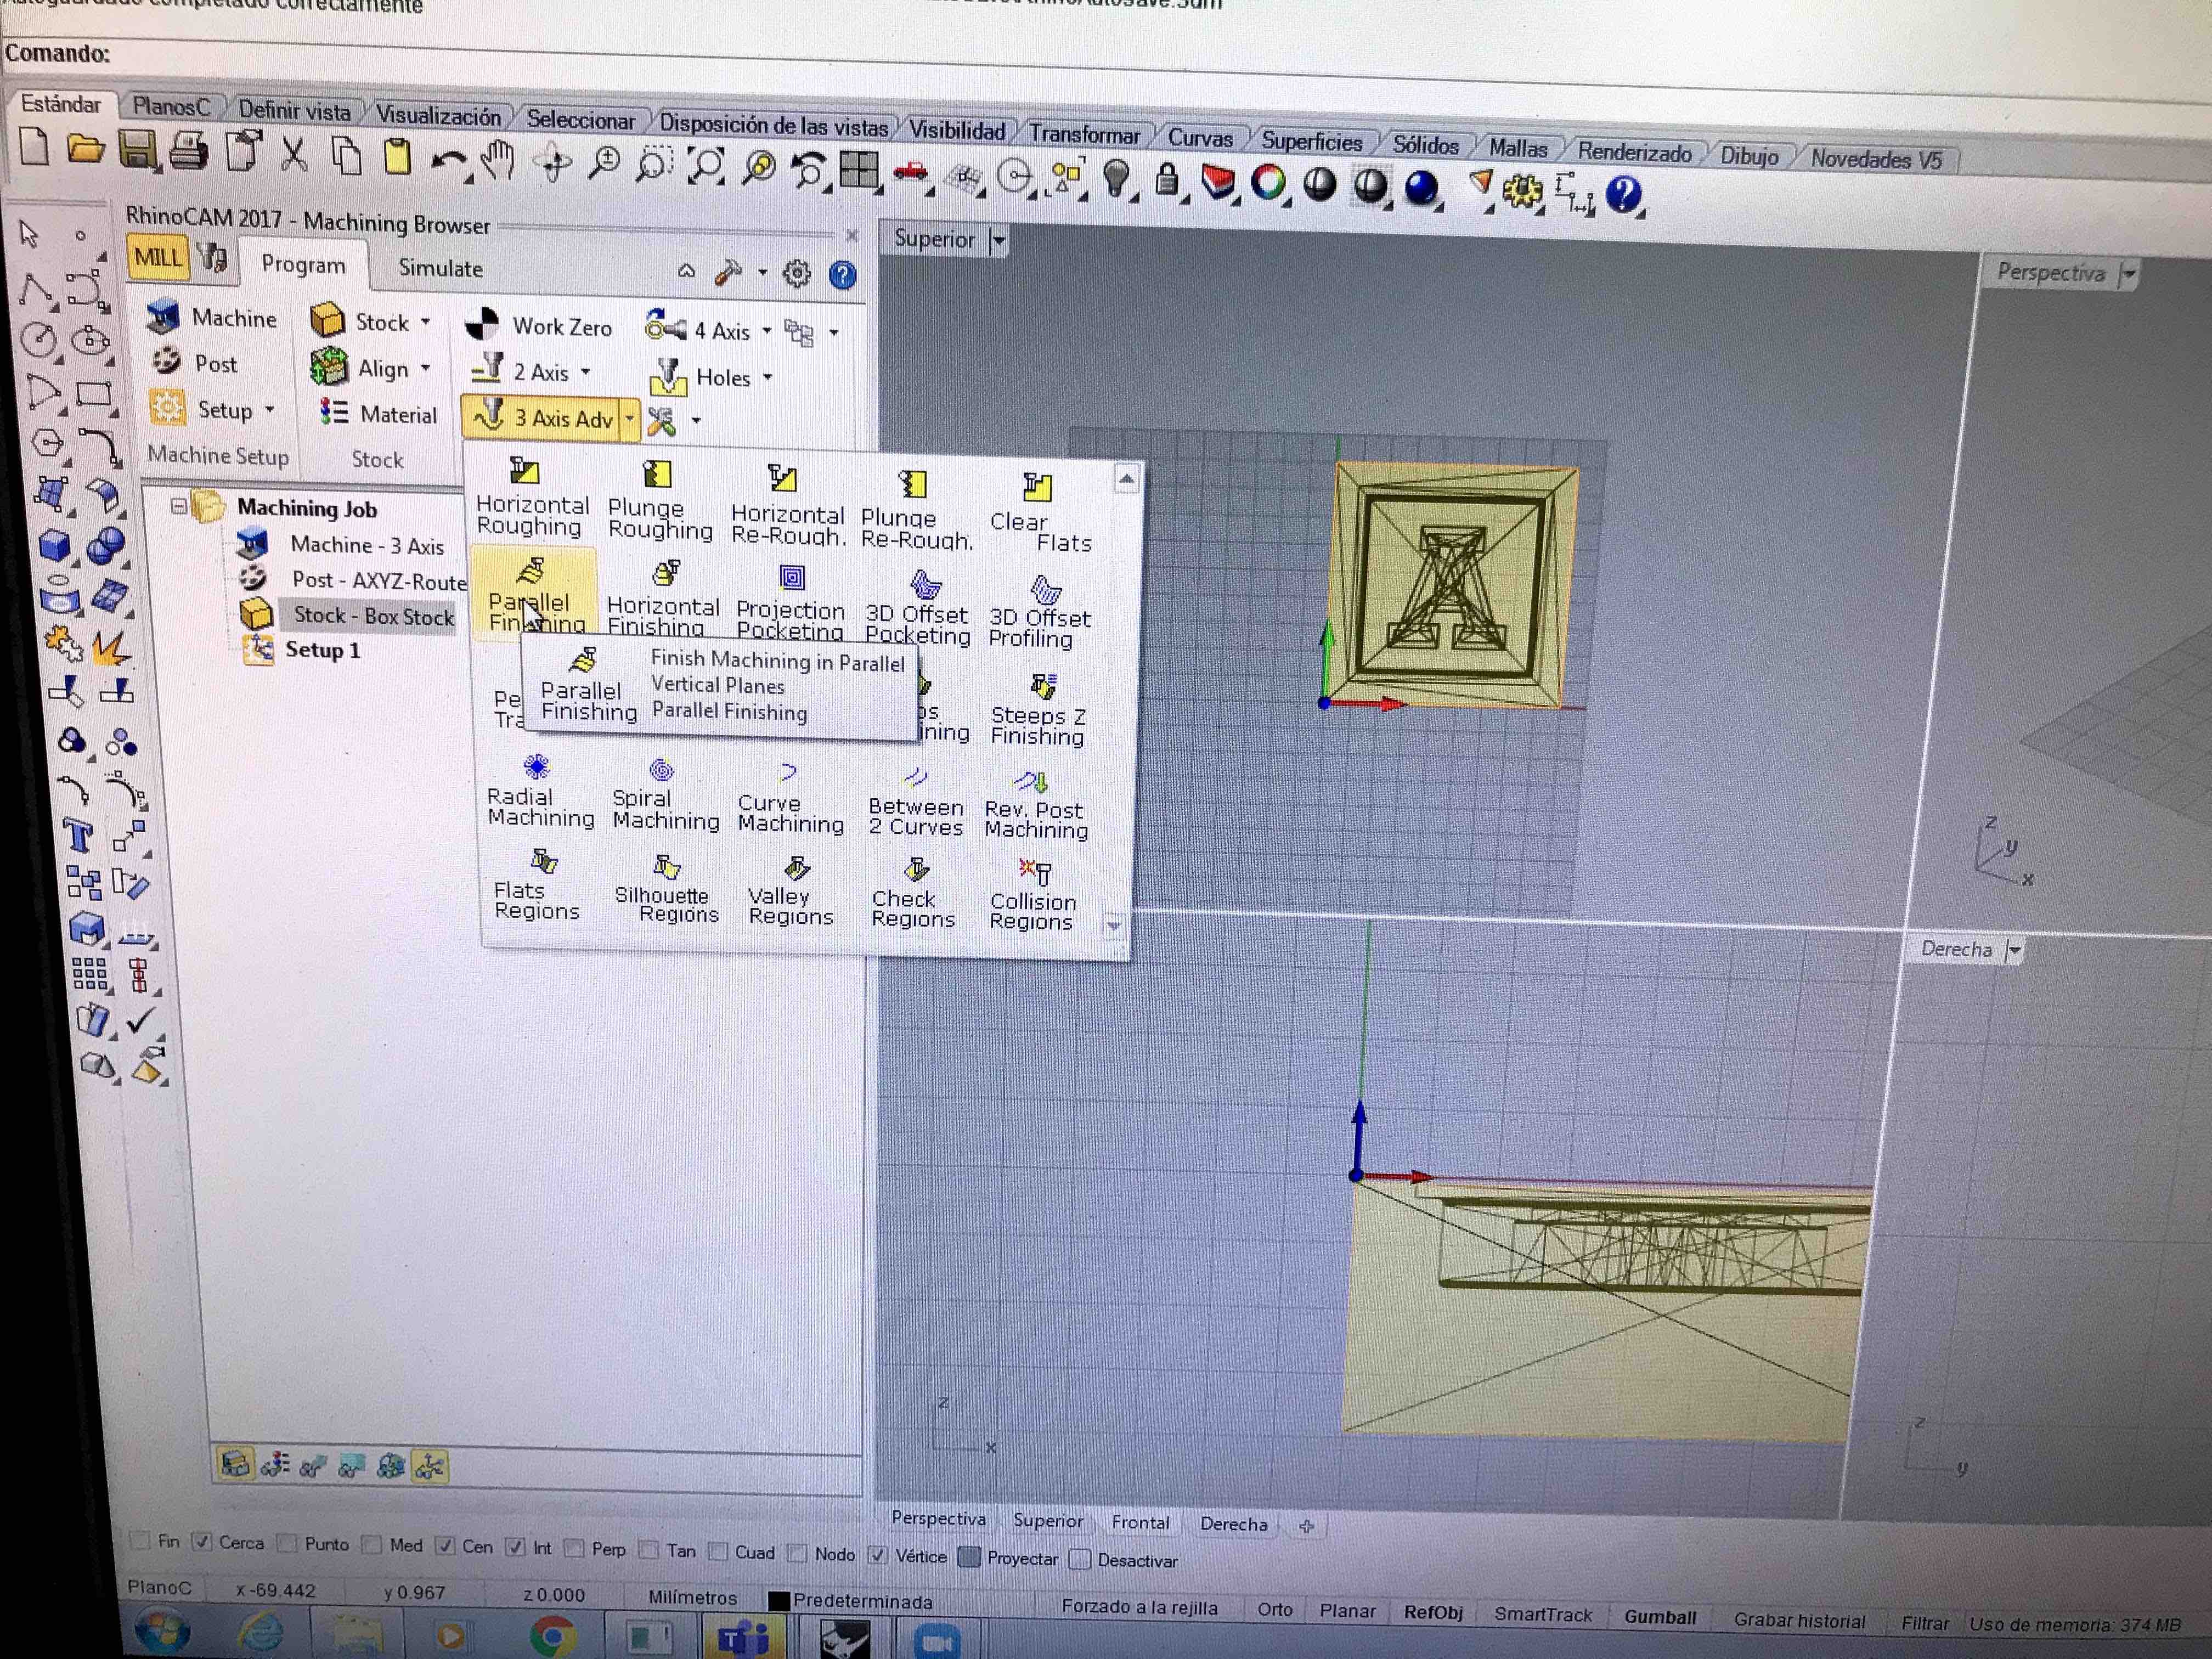
In the MILL
menu we choose parallel finish, this is the initial path
that the tool will do
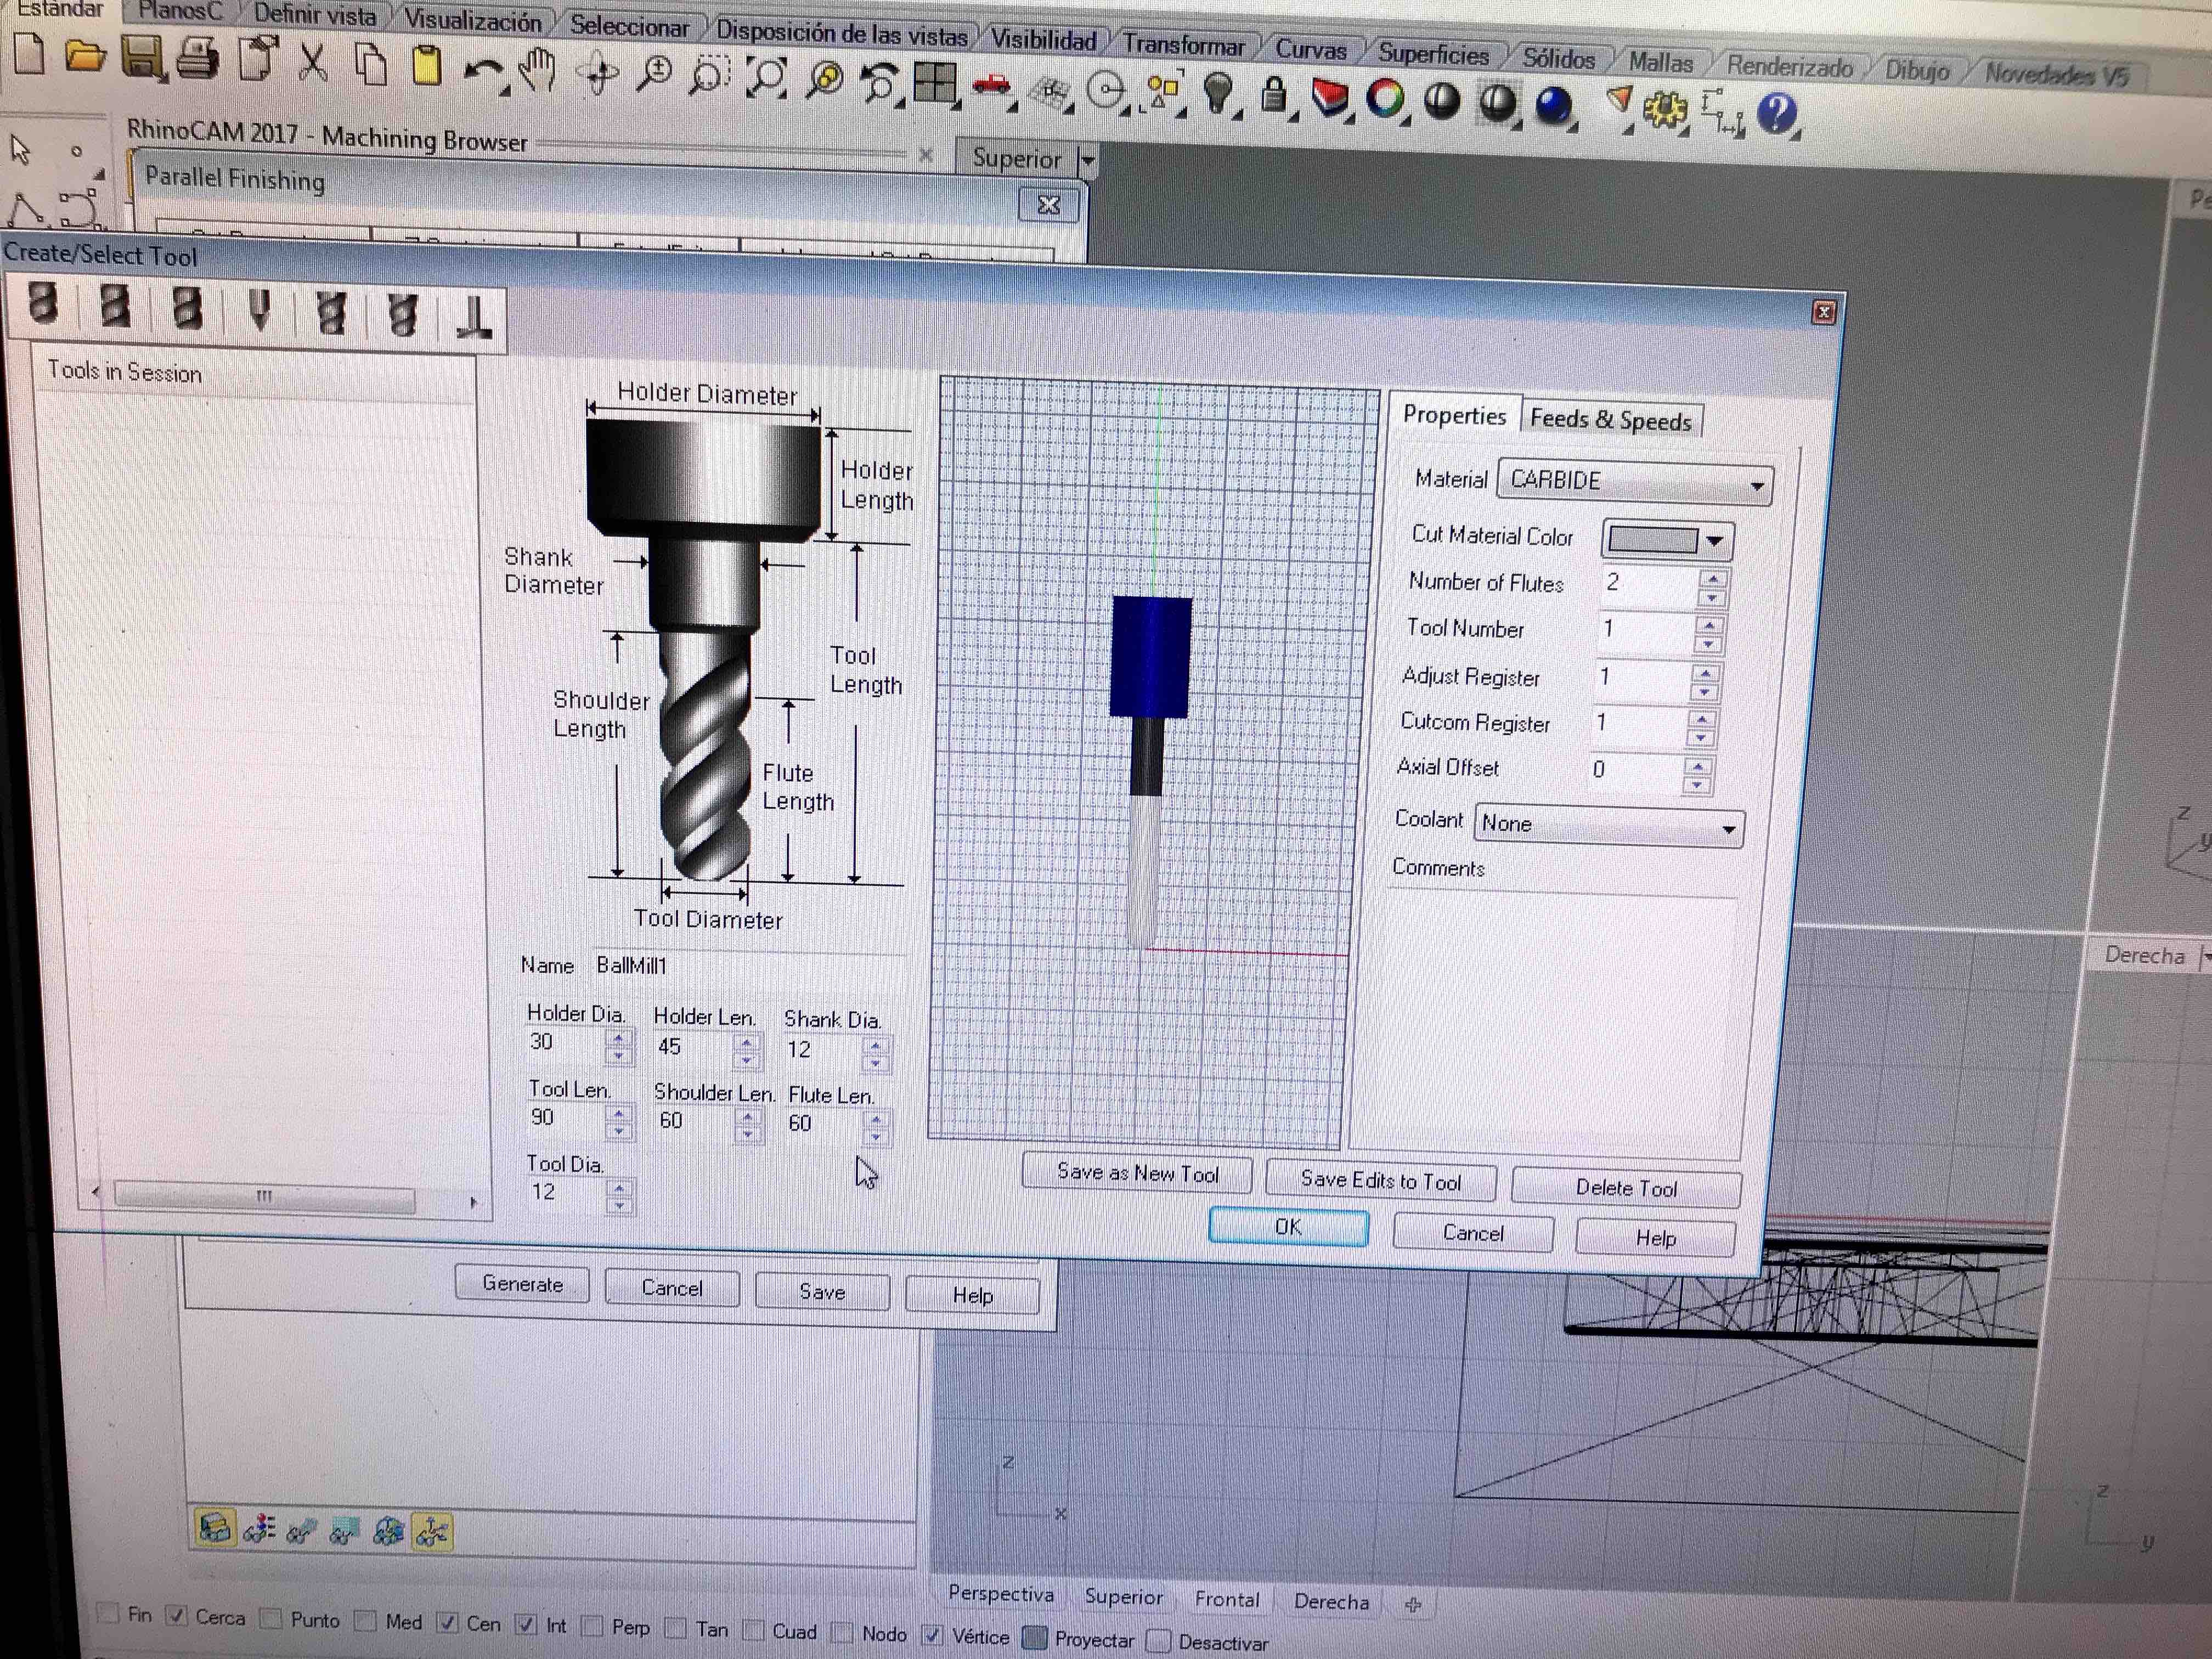
Choosing the
tooling properties of a straight flute tooling

and setting the
dia. of the tooling in 3.125mm.
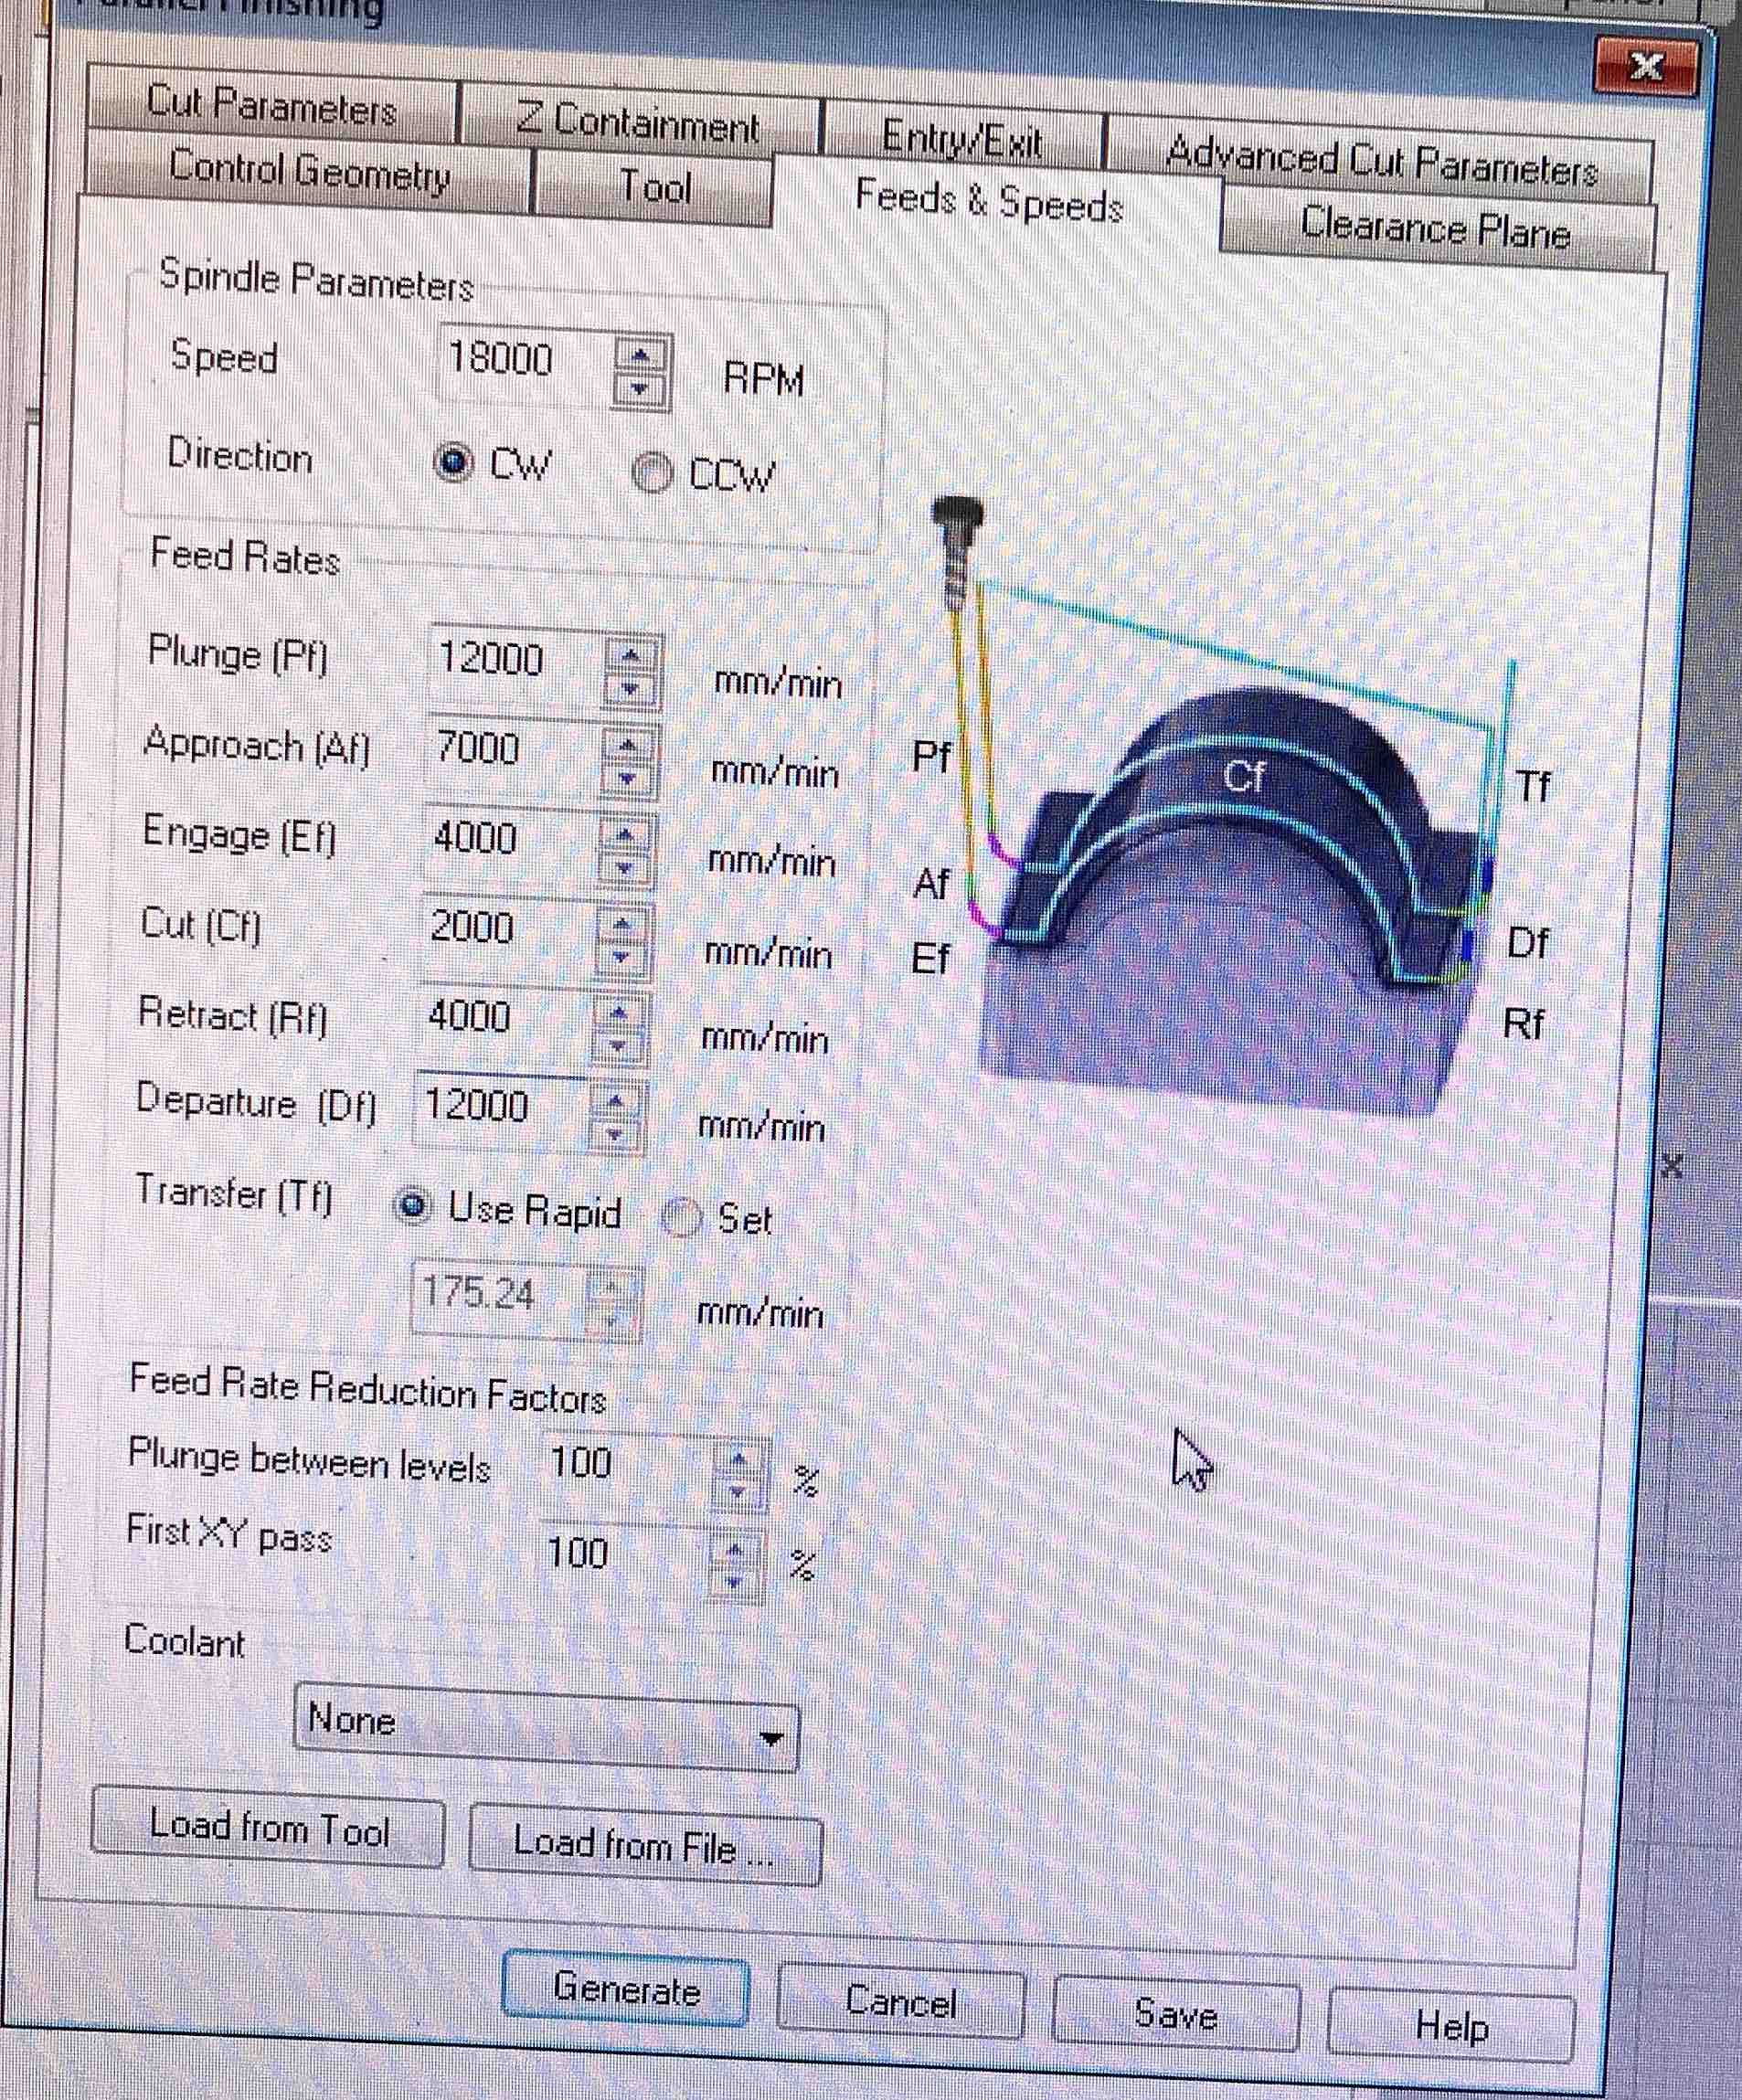
Settings:
rotation 18000RPM durection CW, PLUNGE 12000 mm/min,
Approach 7000 mm/min, Engage 4000 mm/min, Cut 2000 mm/min,
Retract 4000 mm/min, and Departure 12000mm /min.
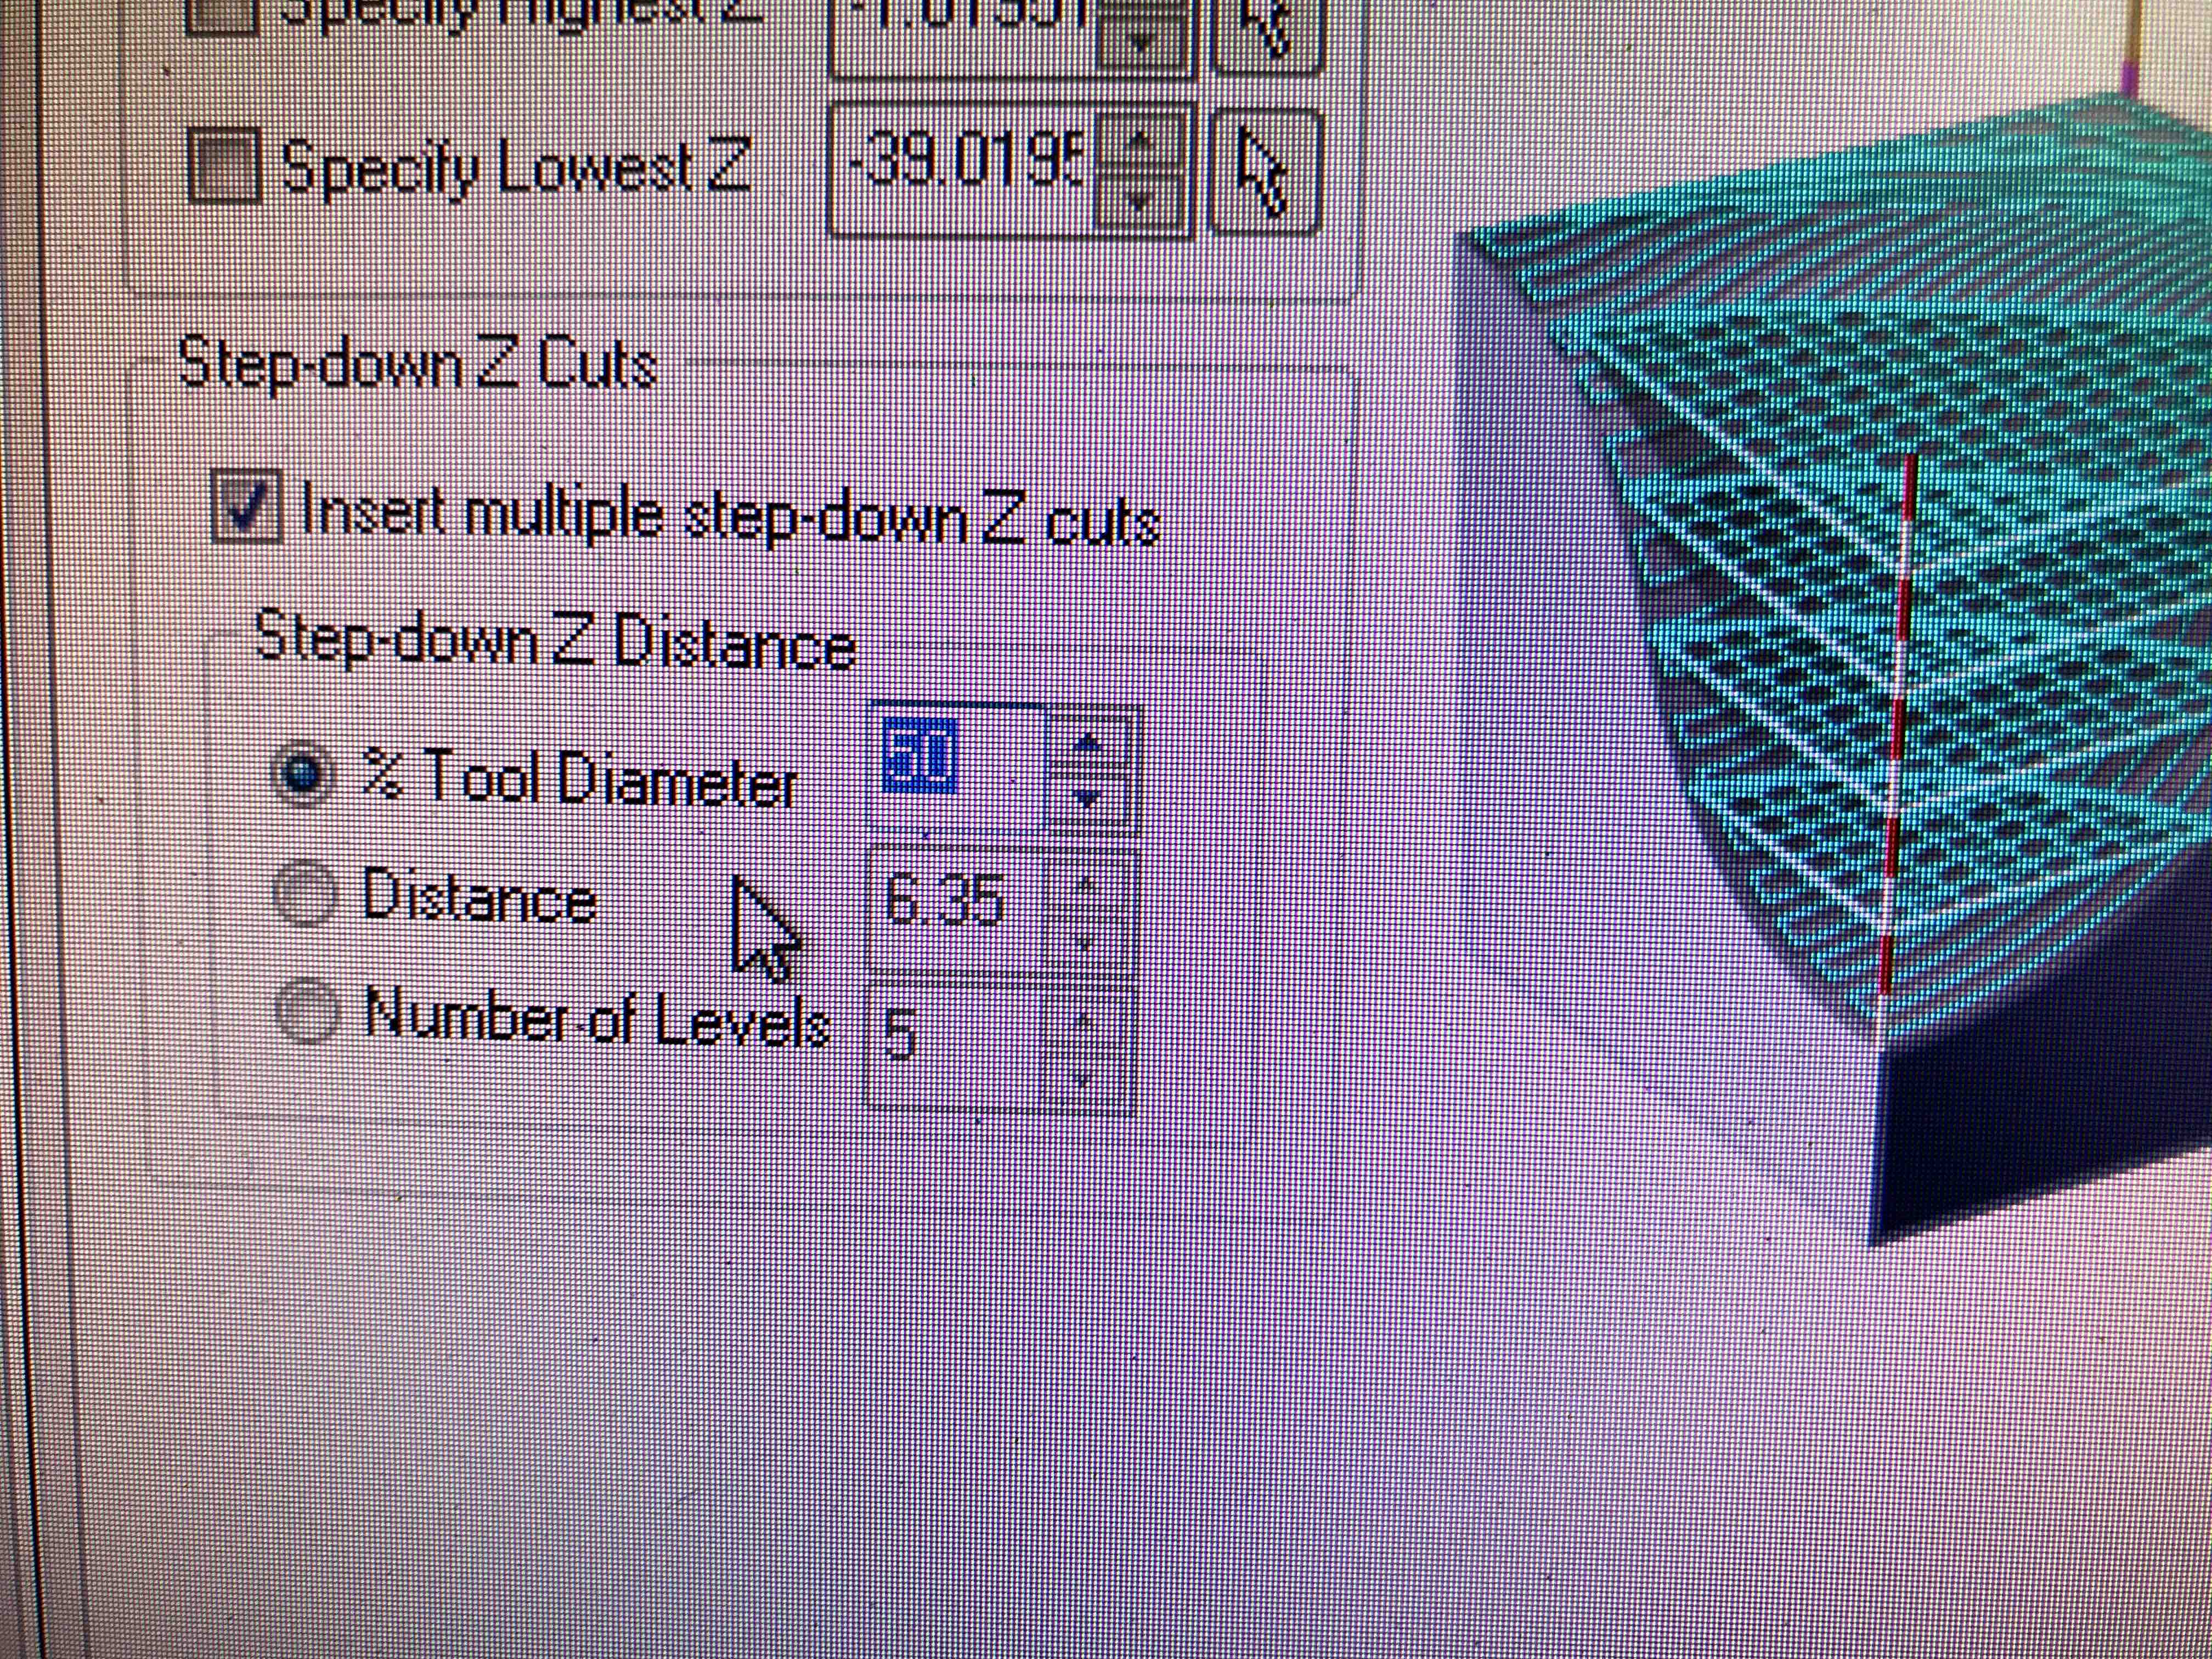
the setup of
the final finish, you can see here that the tool is going to
move in the Z direction steps no more of the 50% of the tool
diameter.
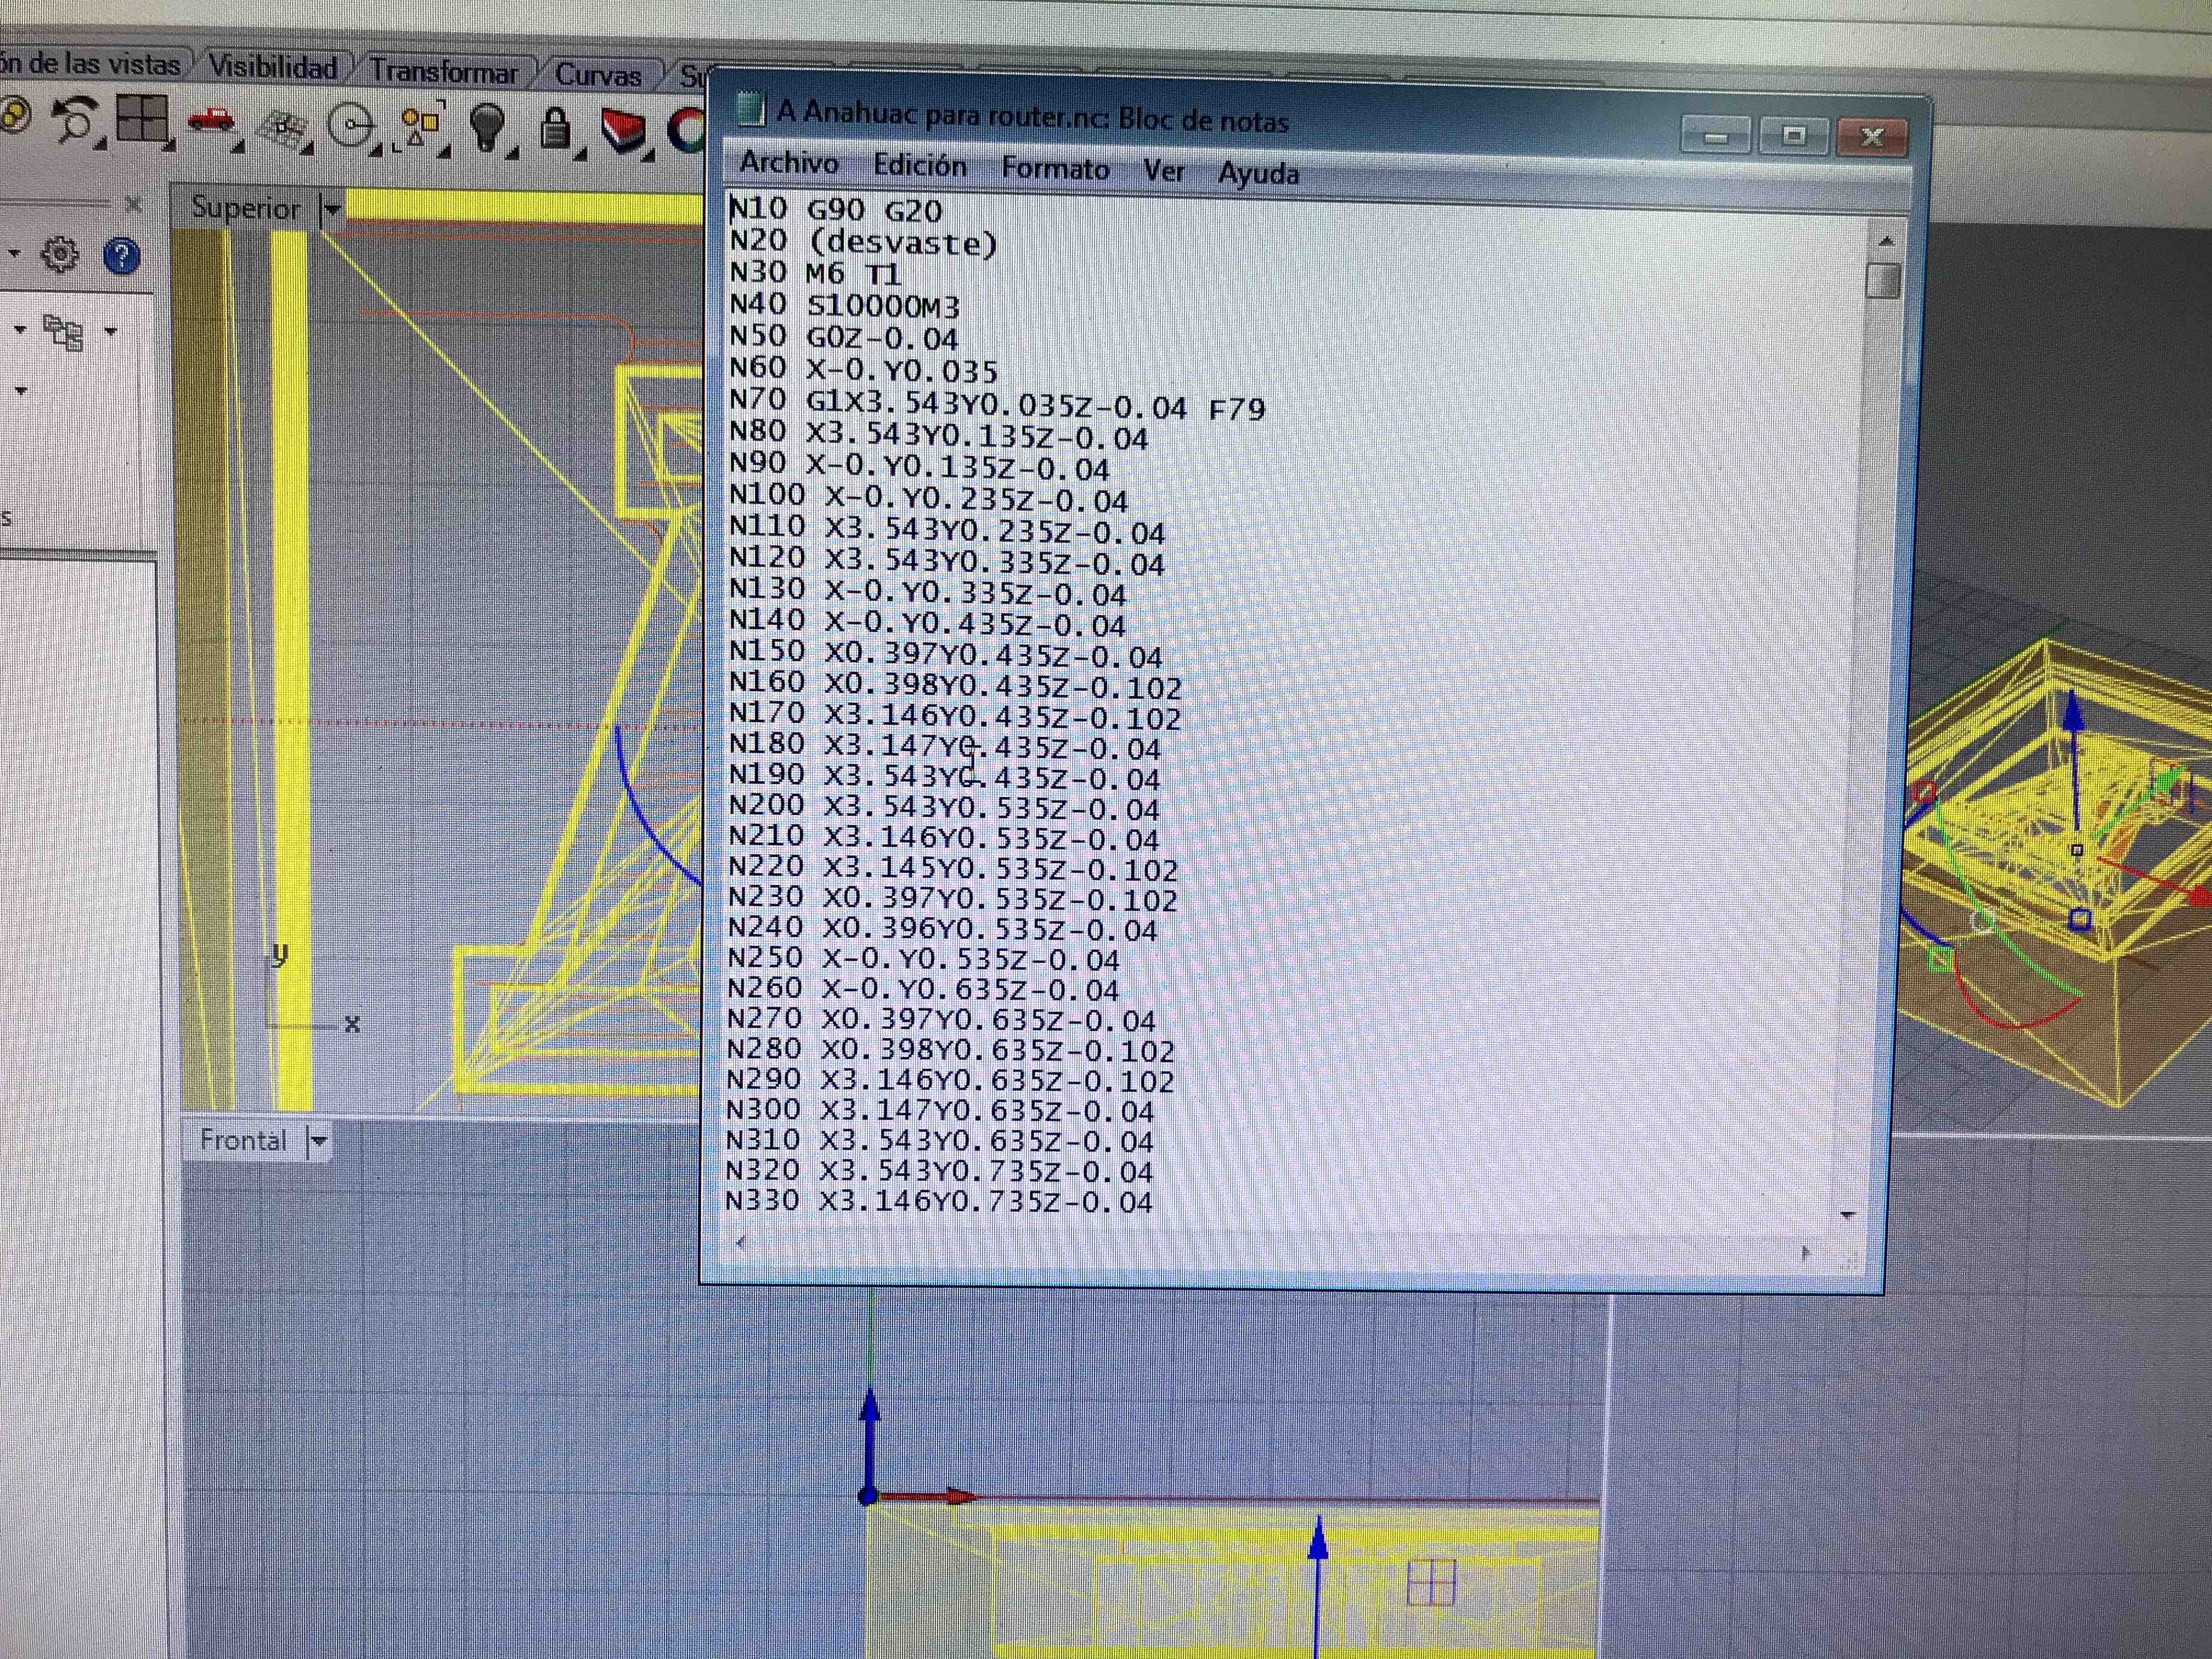
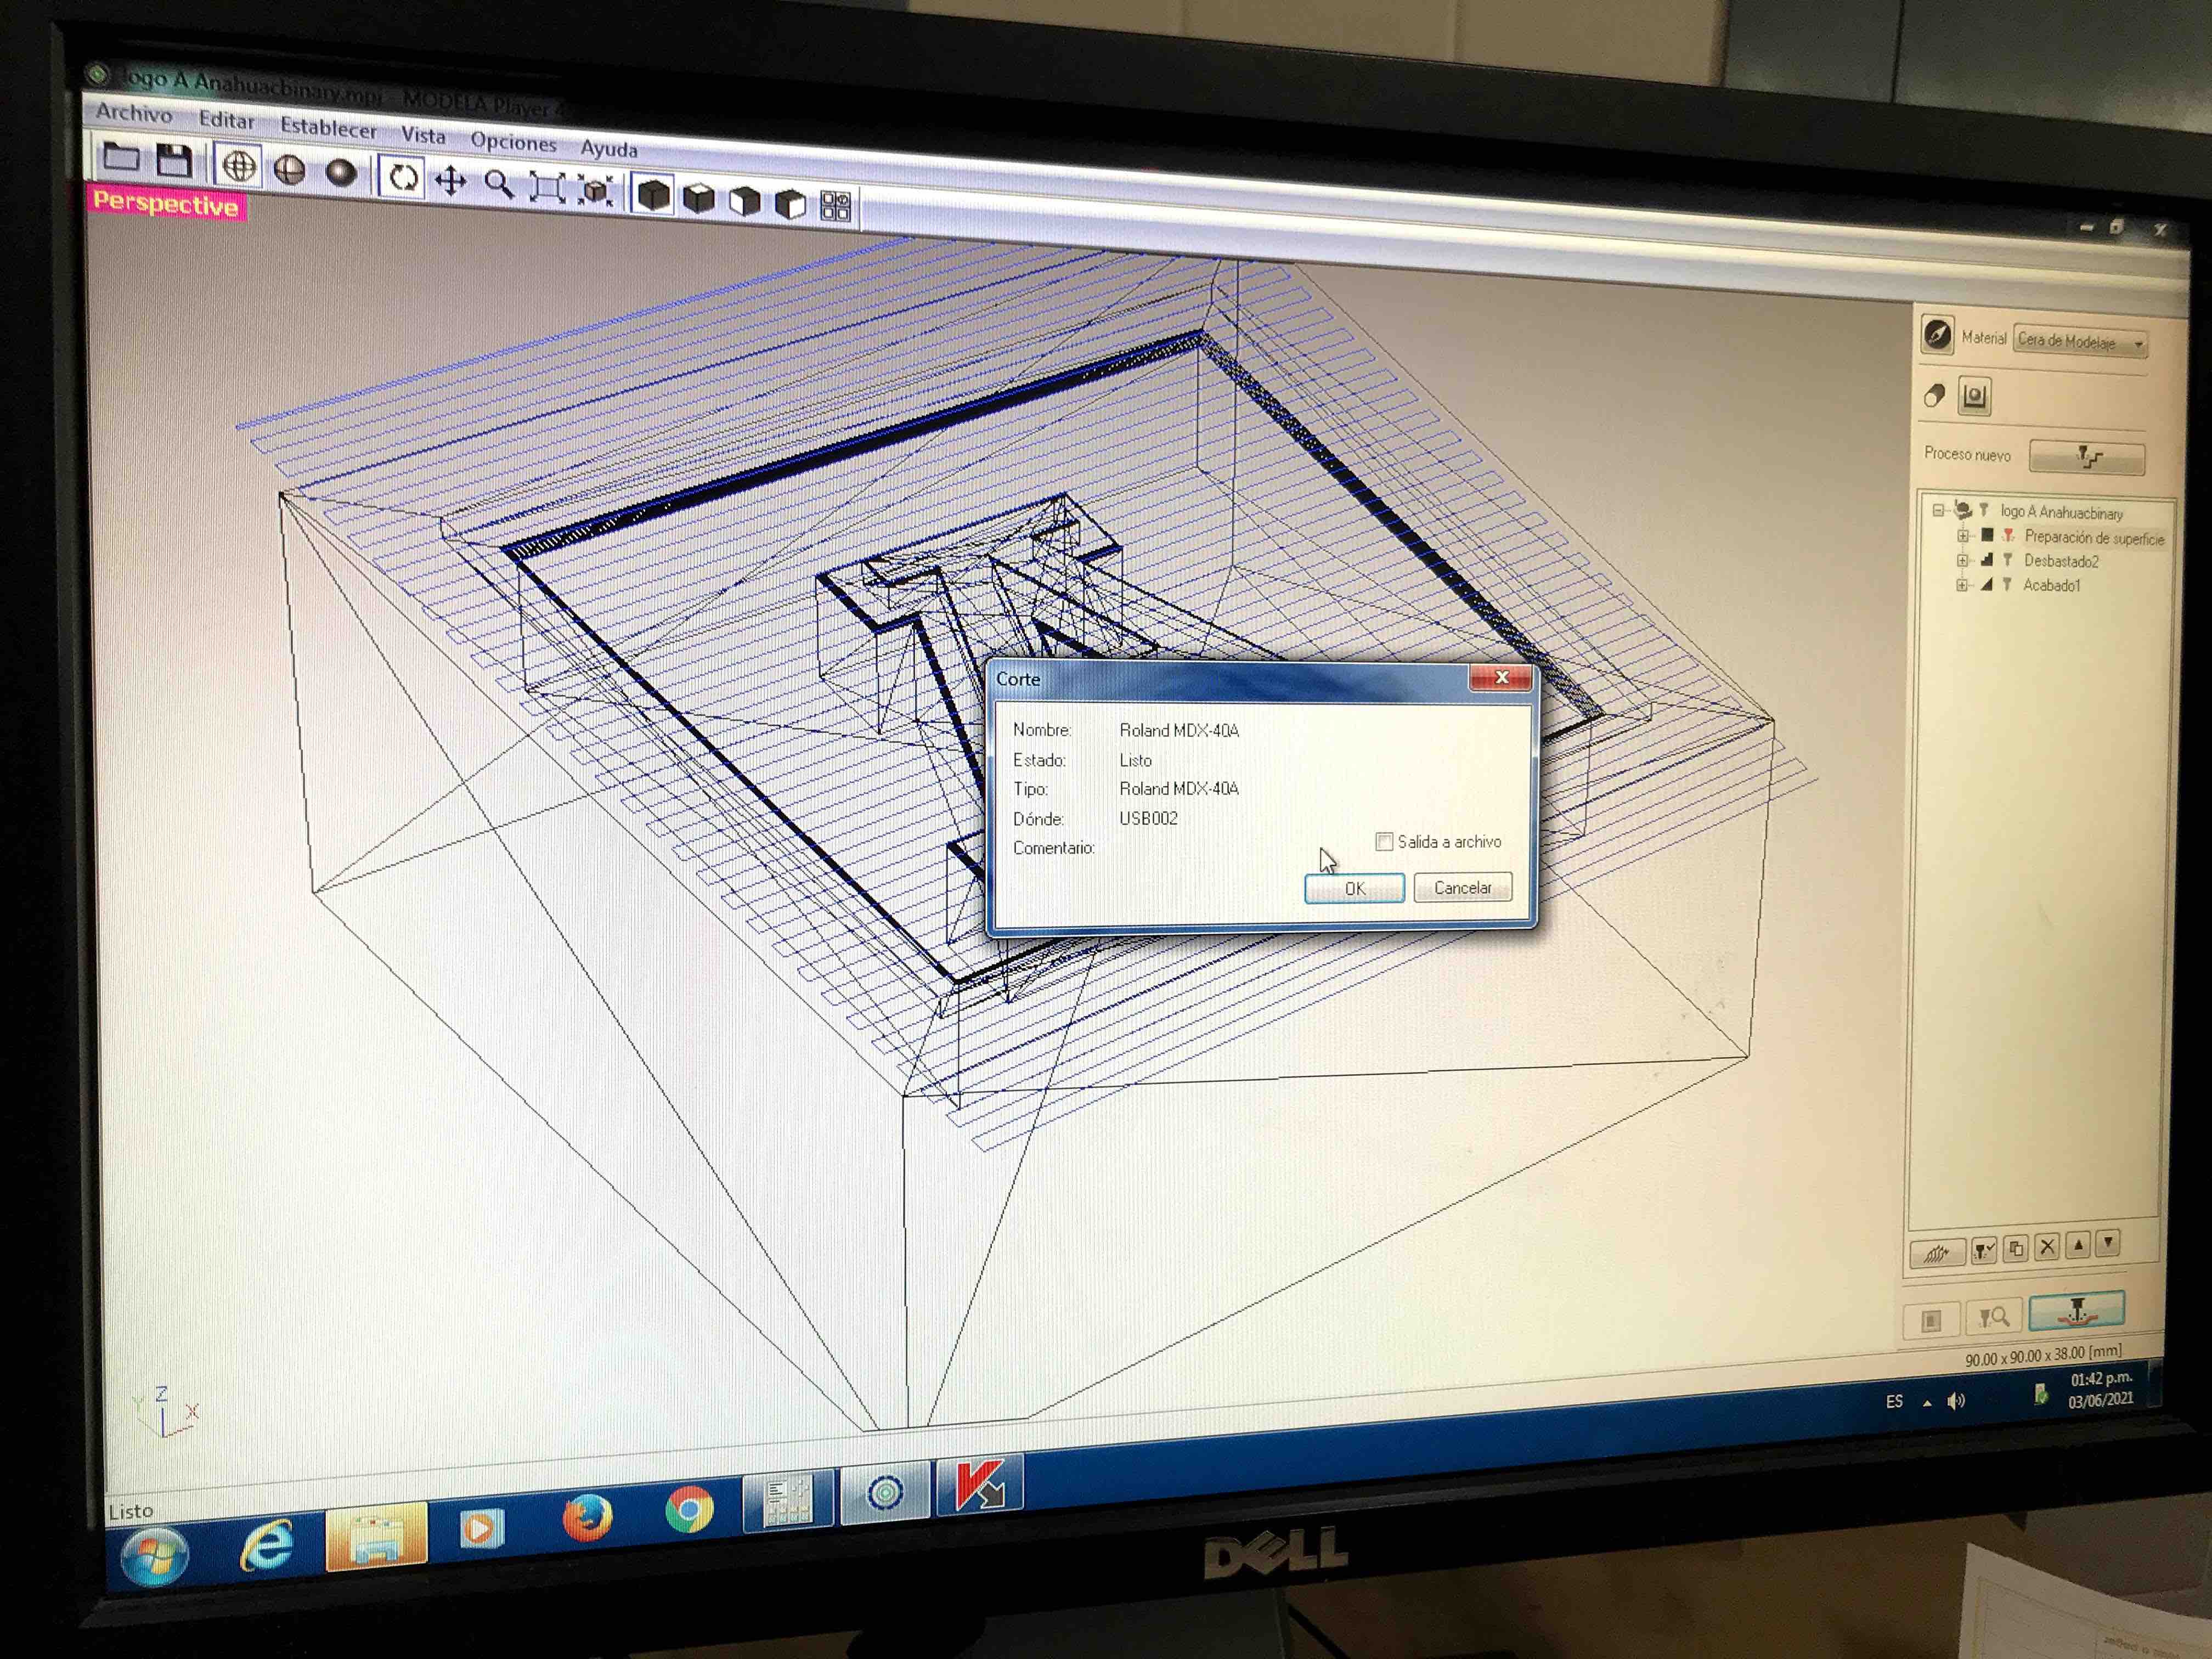
Generating the GCODE
Preparing the
last settings to start the milling process
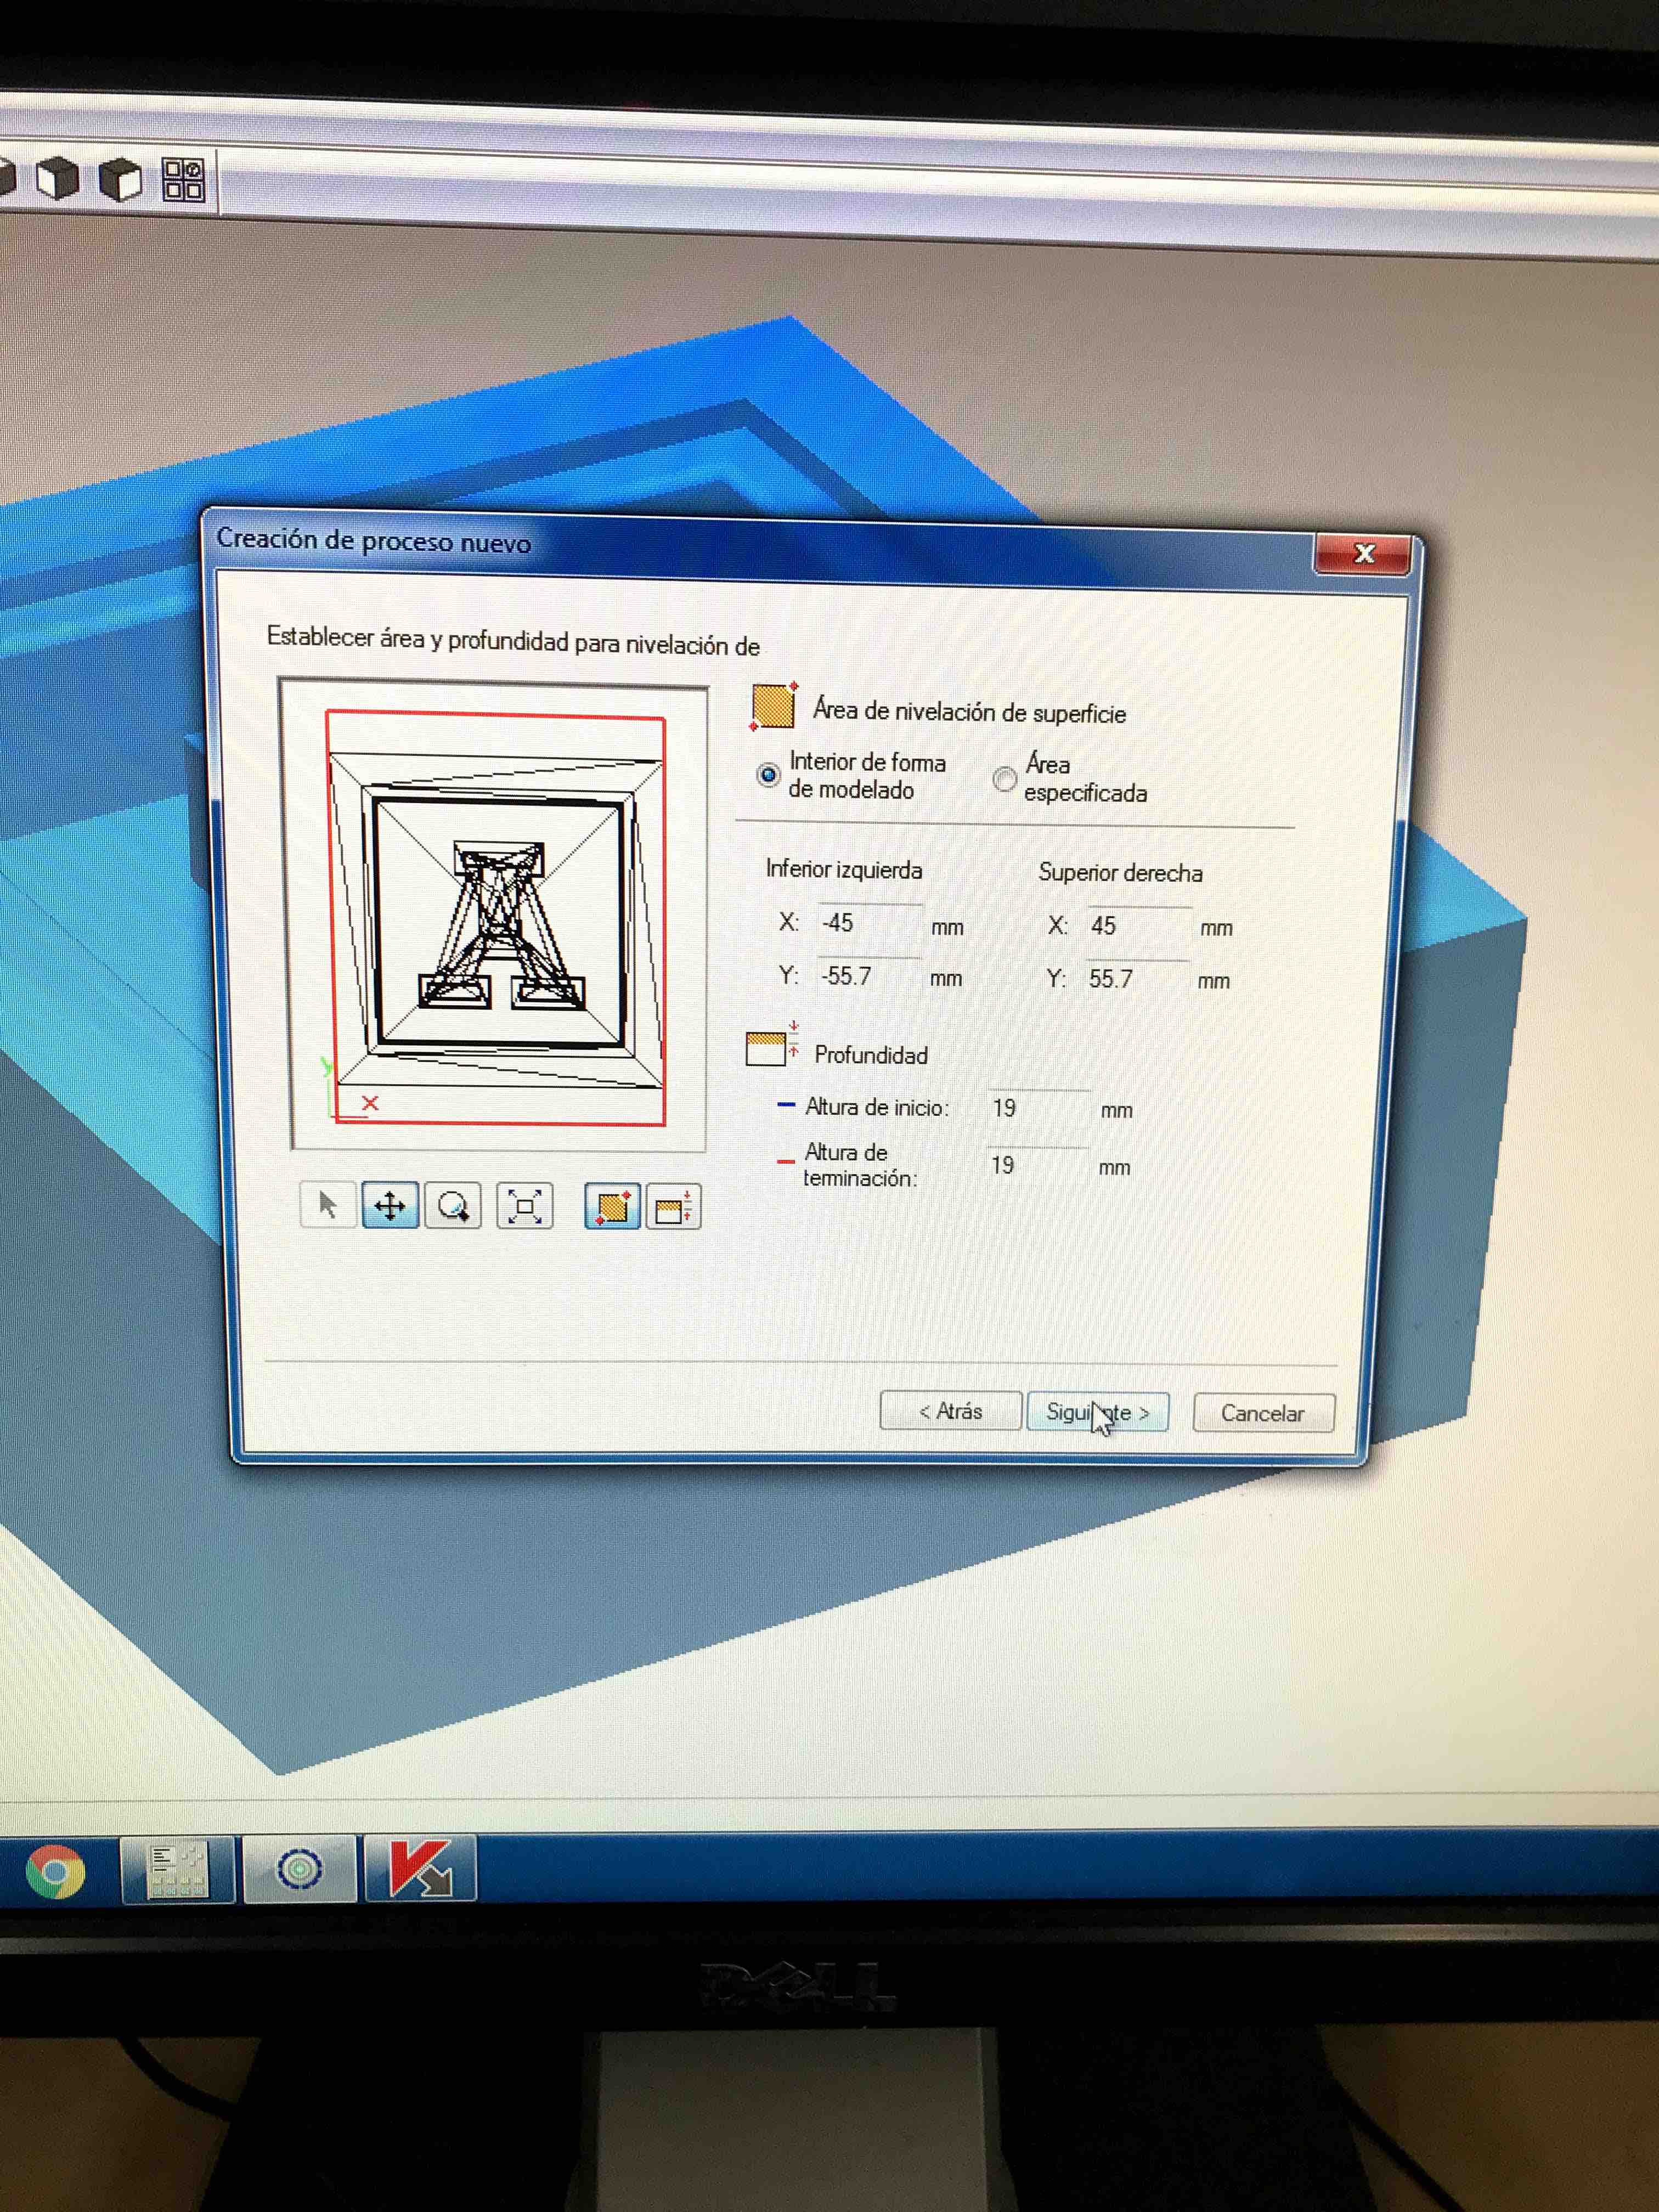
Here we need to
establish the area and depth to prepare the surface to level
it
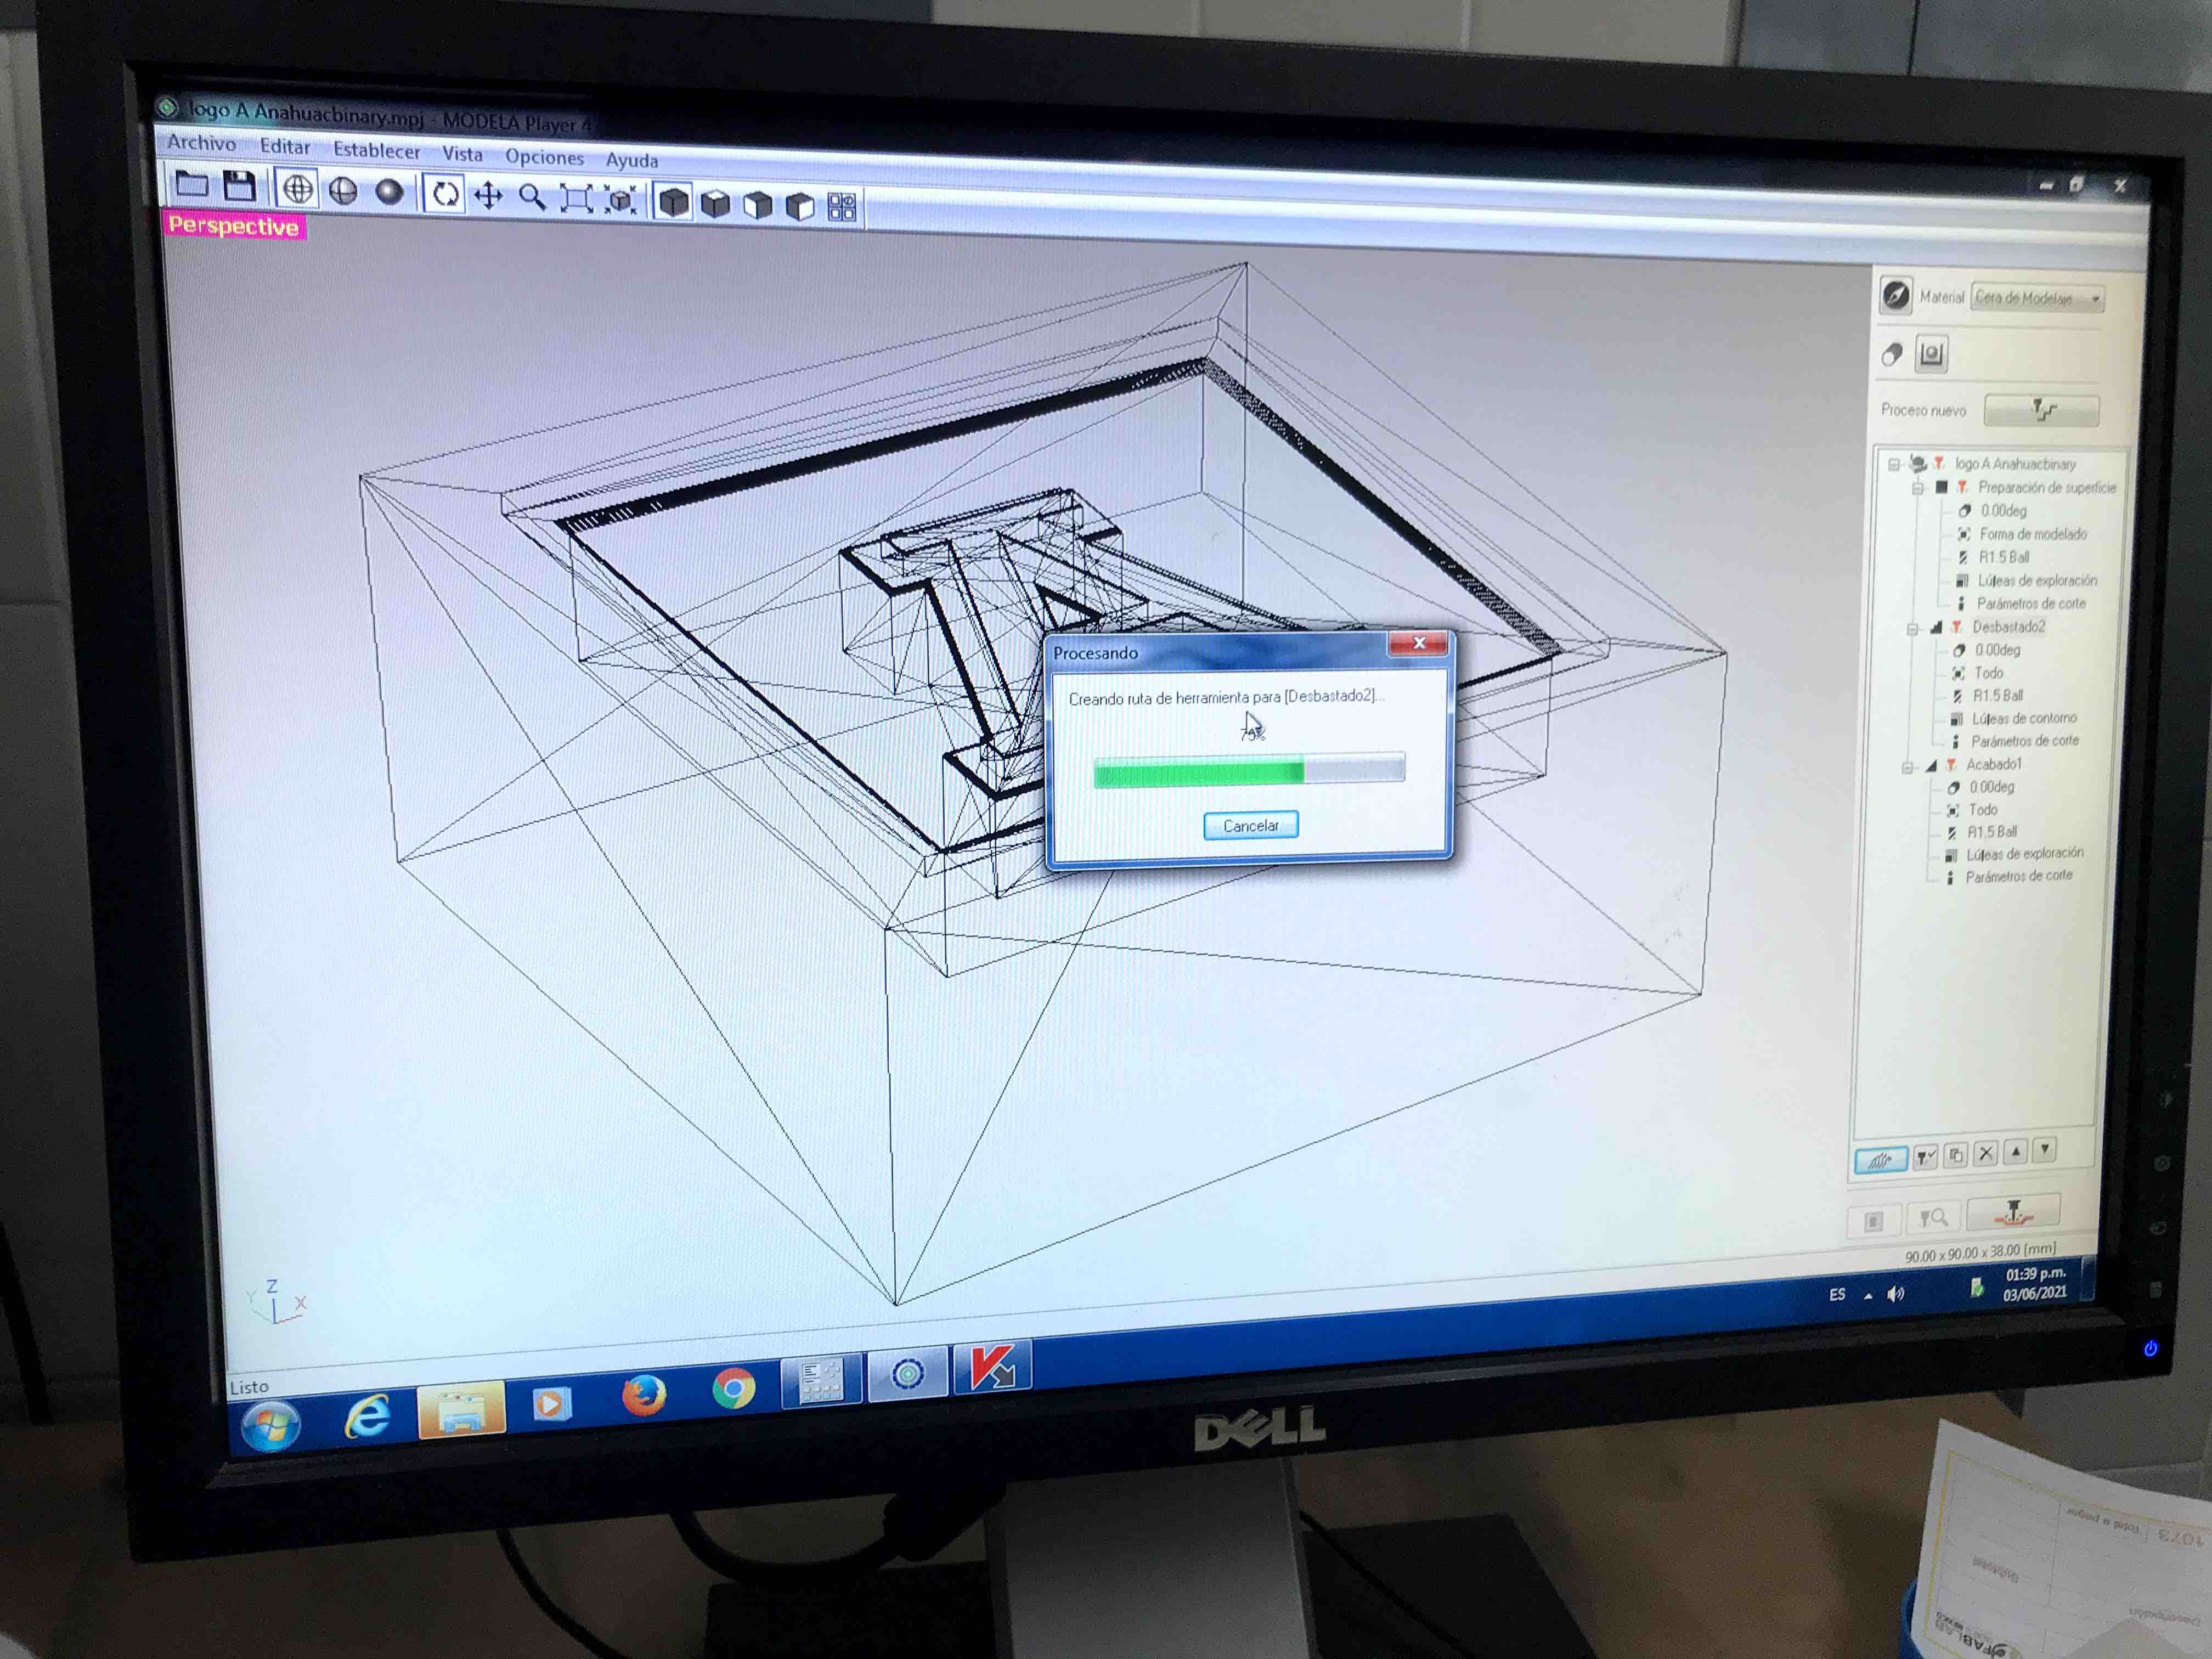
Creating the
path of the tool to follow
Everything
ready
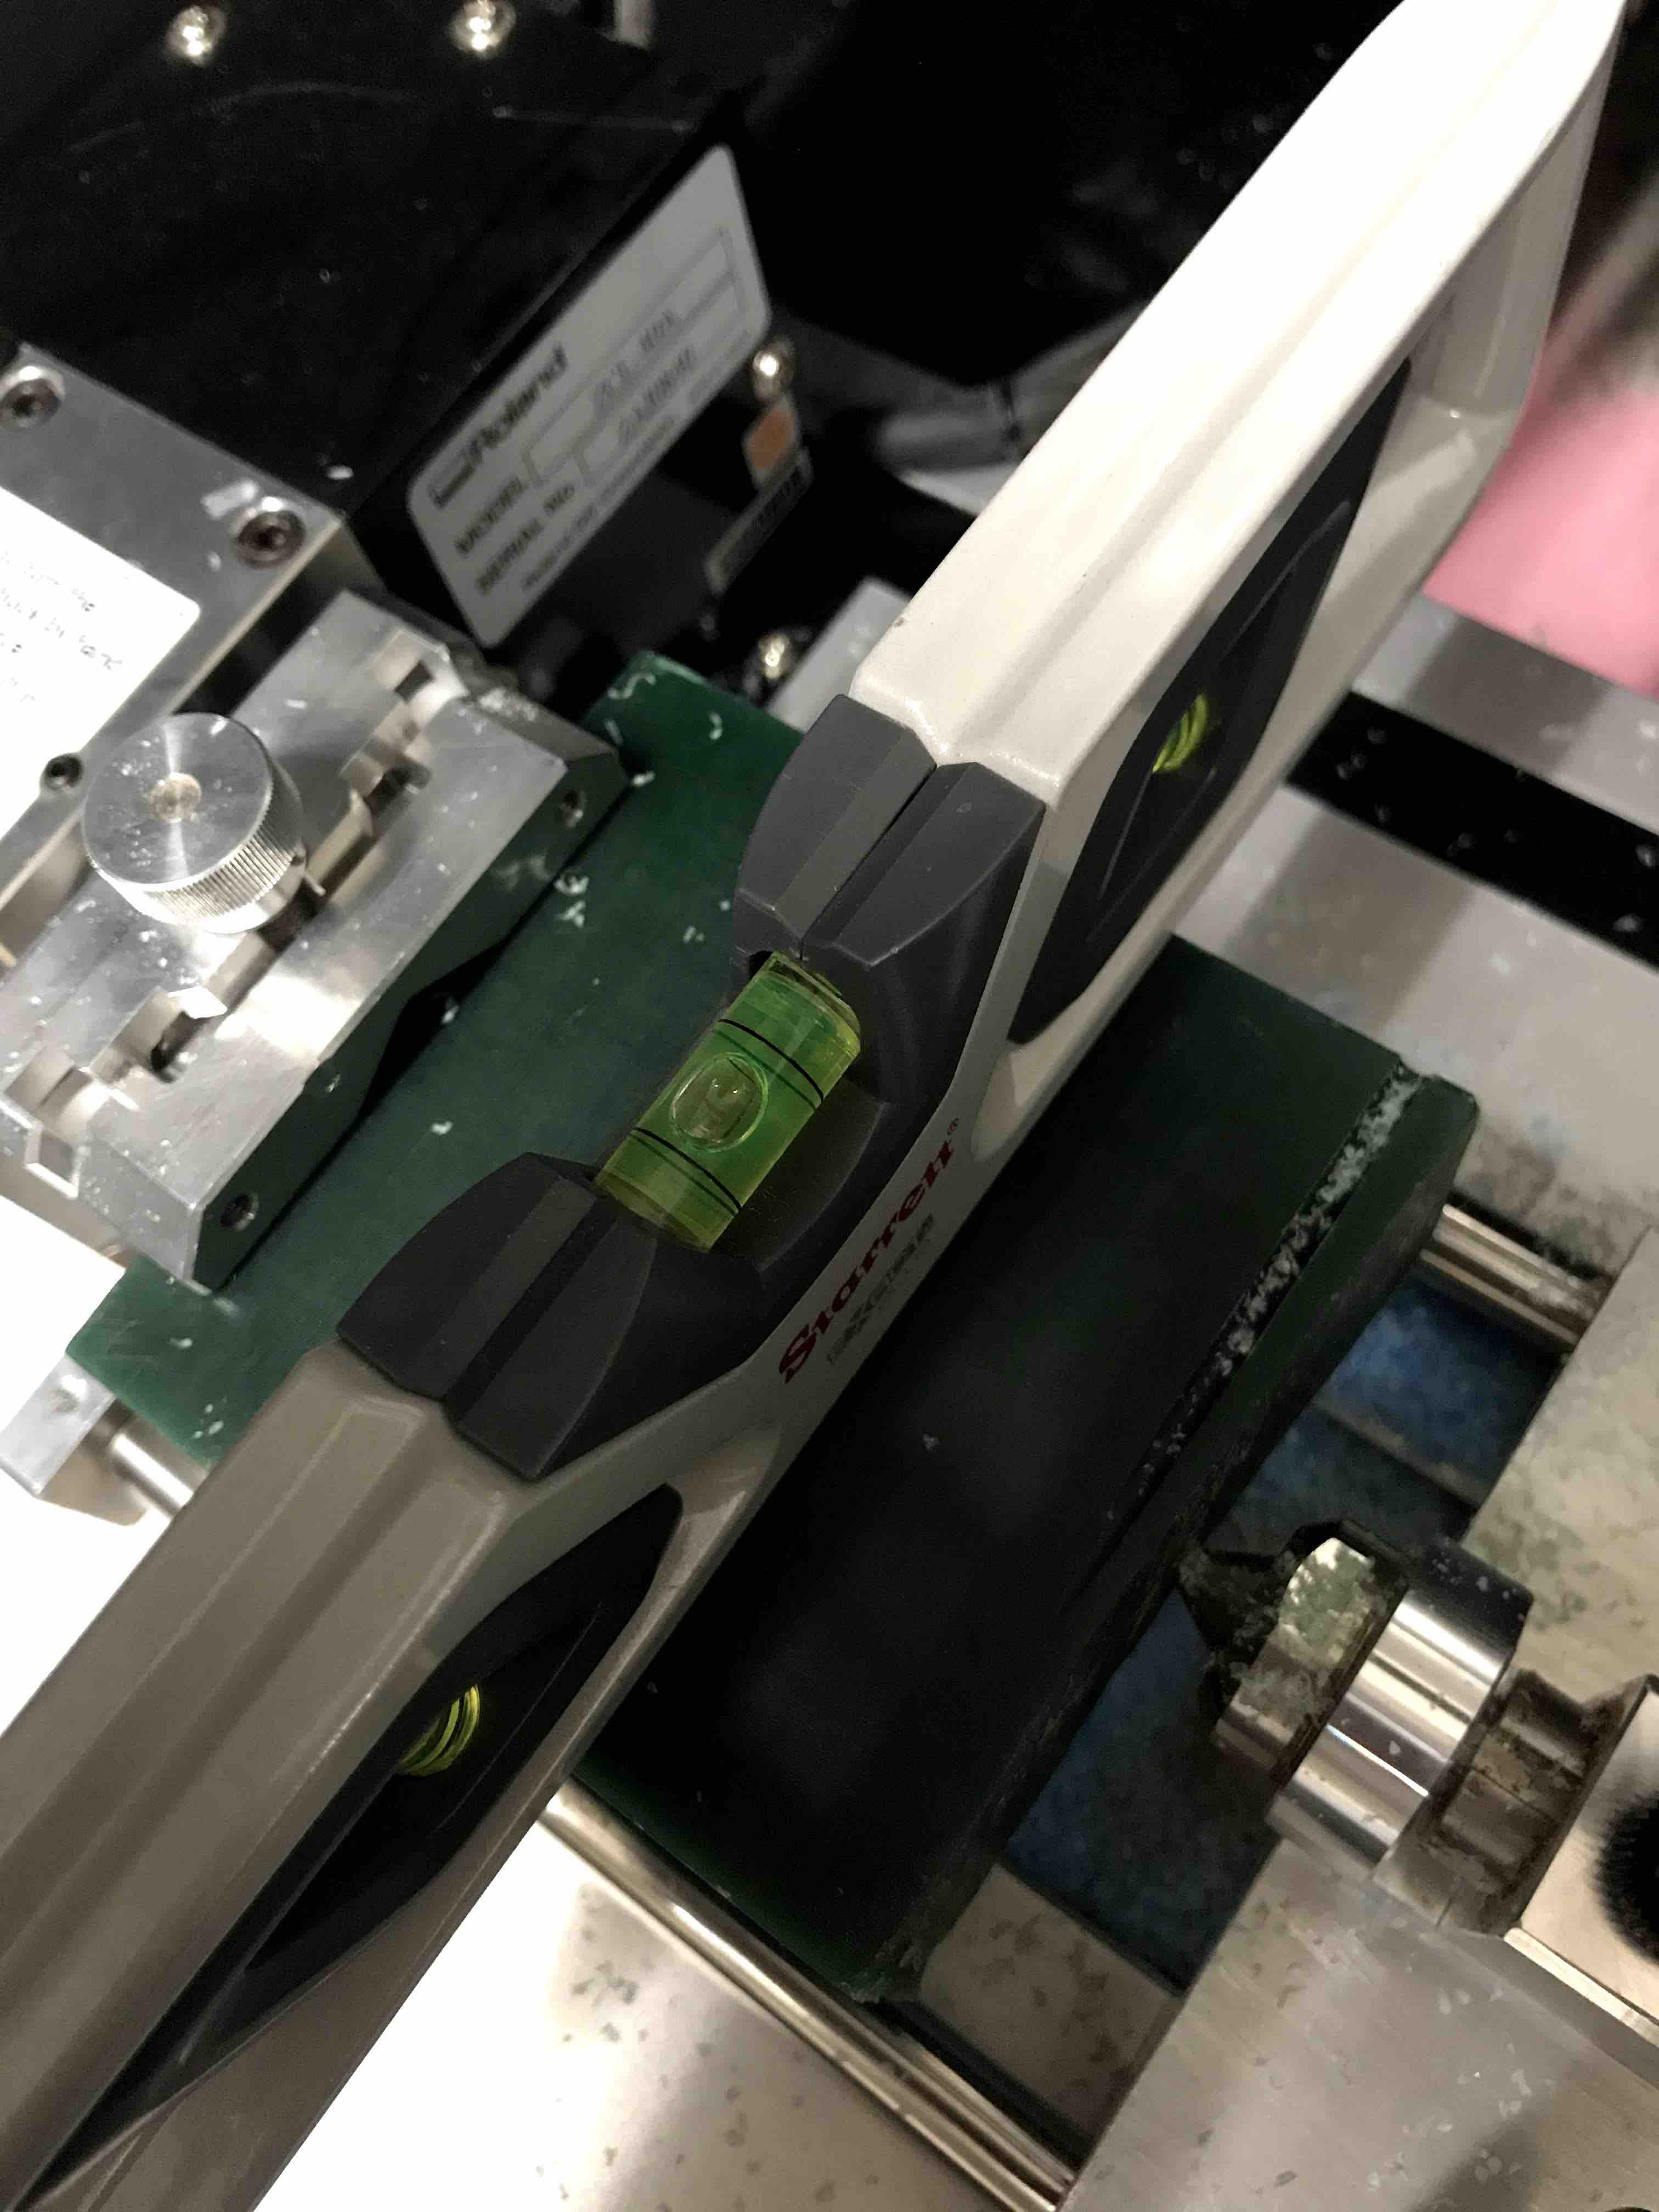
Checking the
correct hold of the wax cube in to the Roland machine and
being sure that is leveled
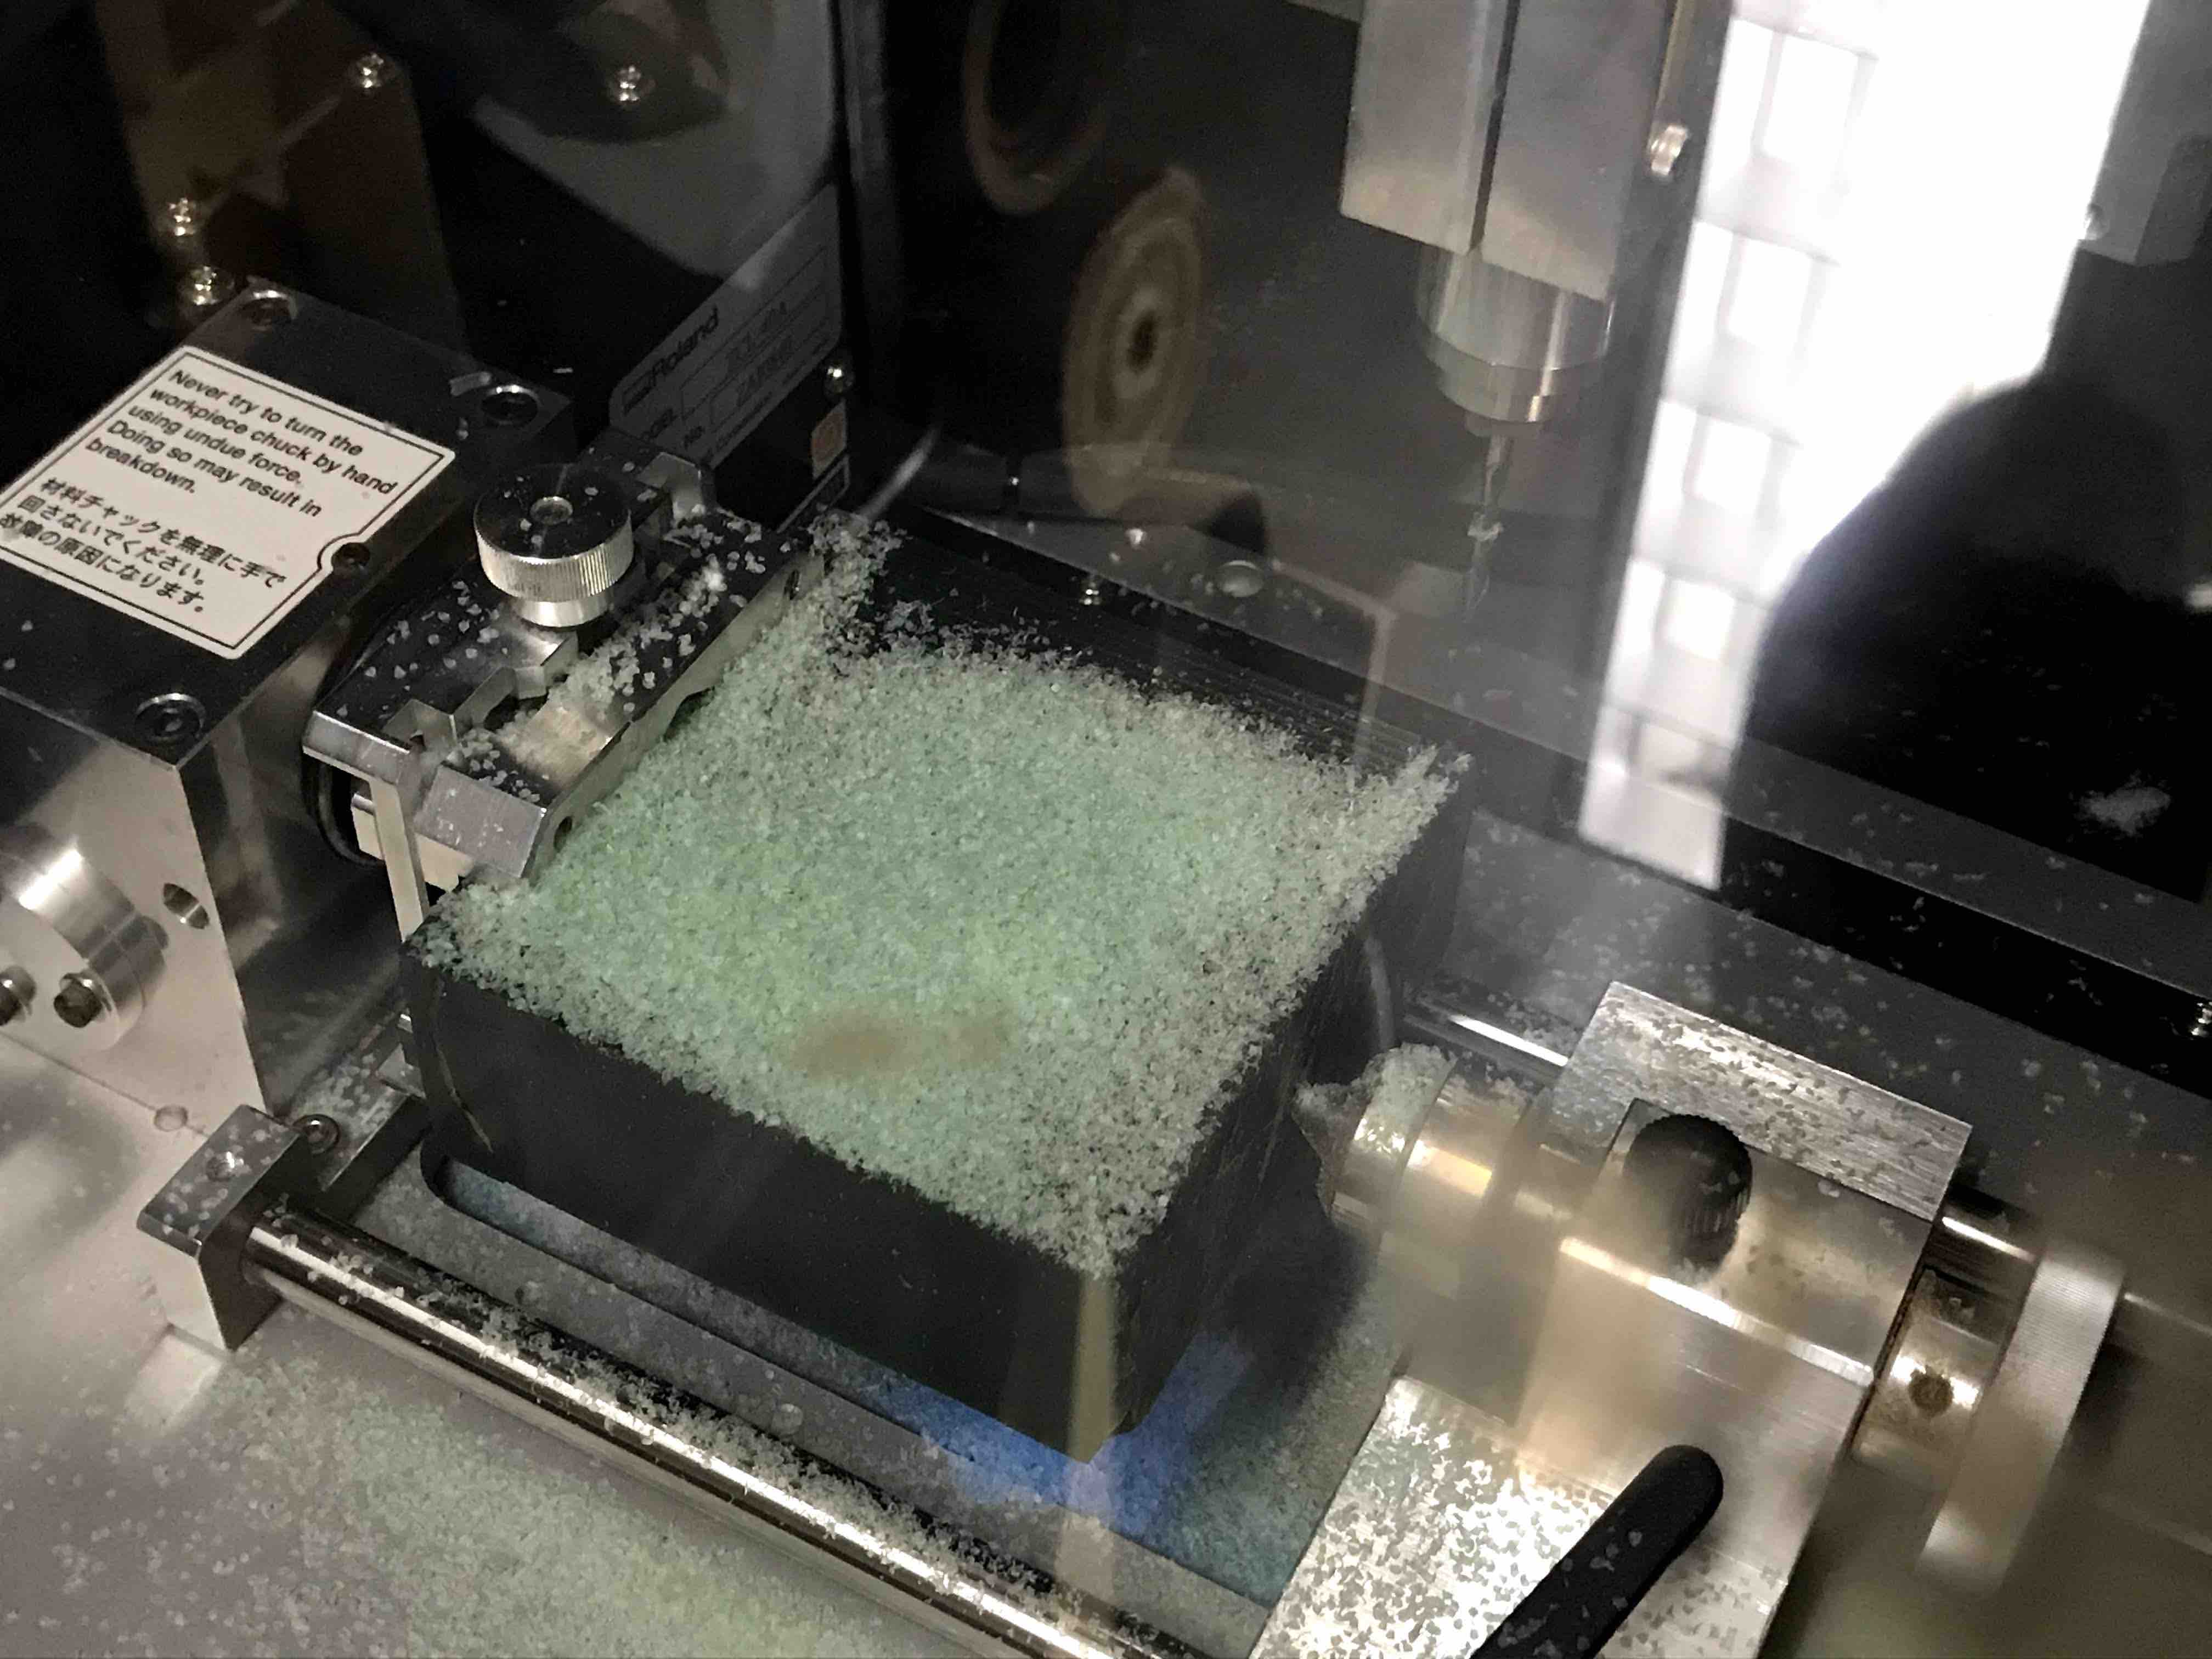
Starting the
milling process
Milling the
last details of the process
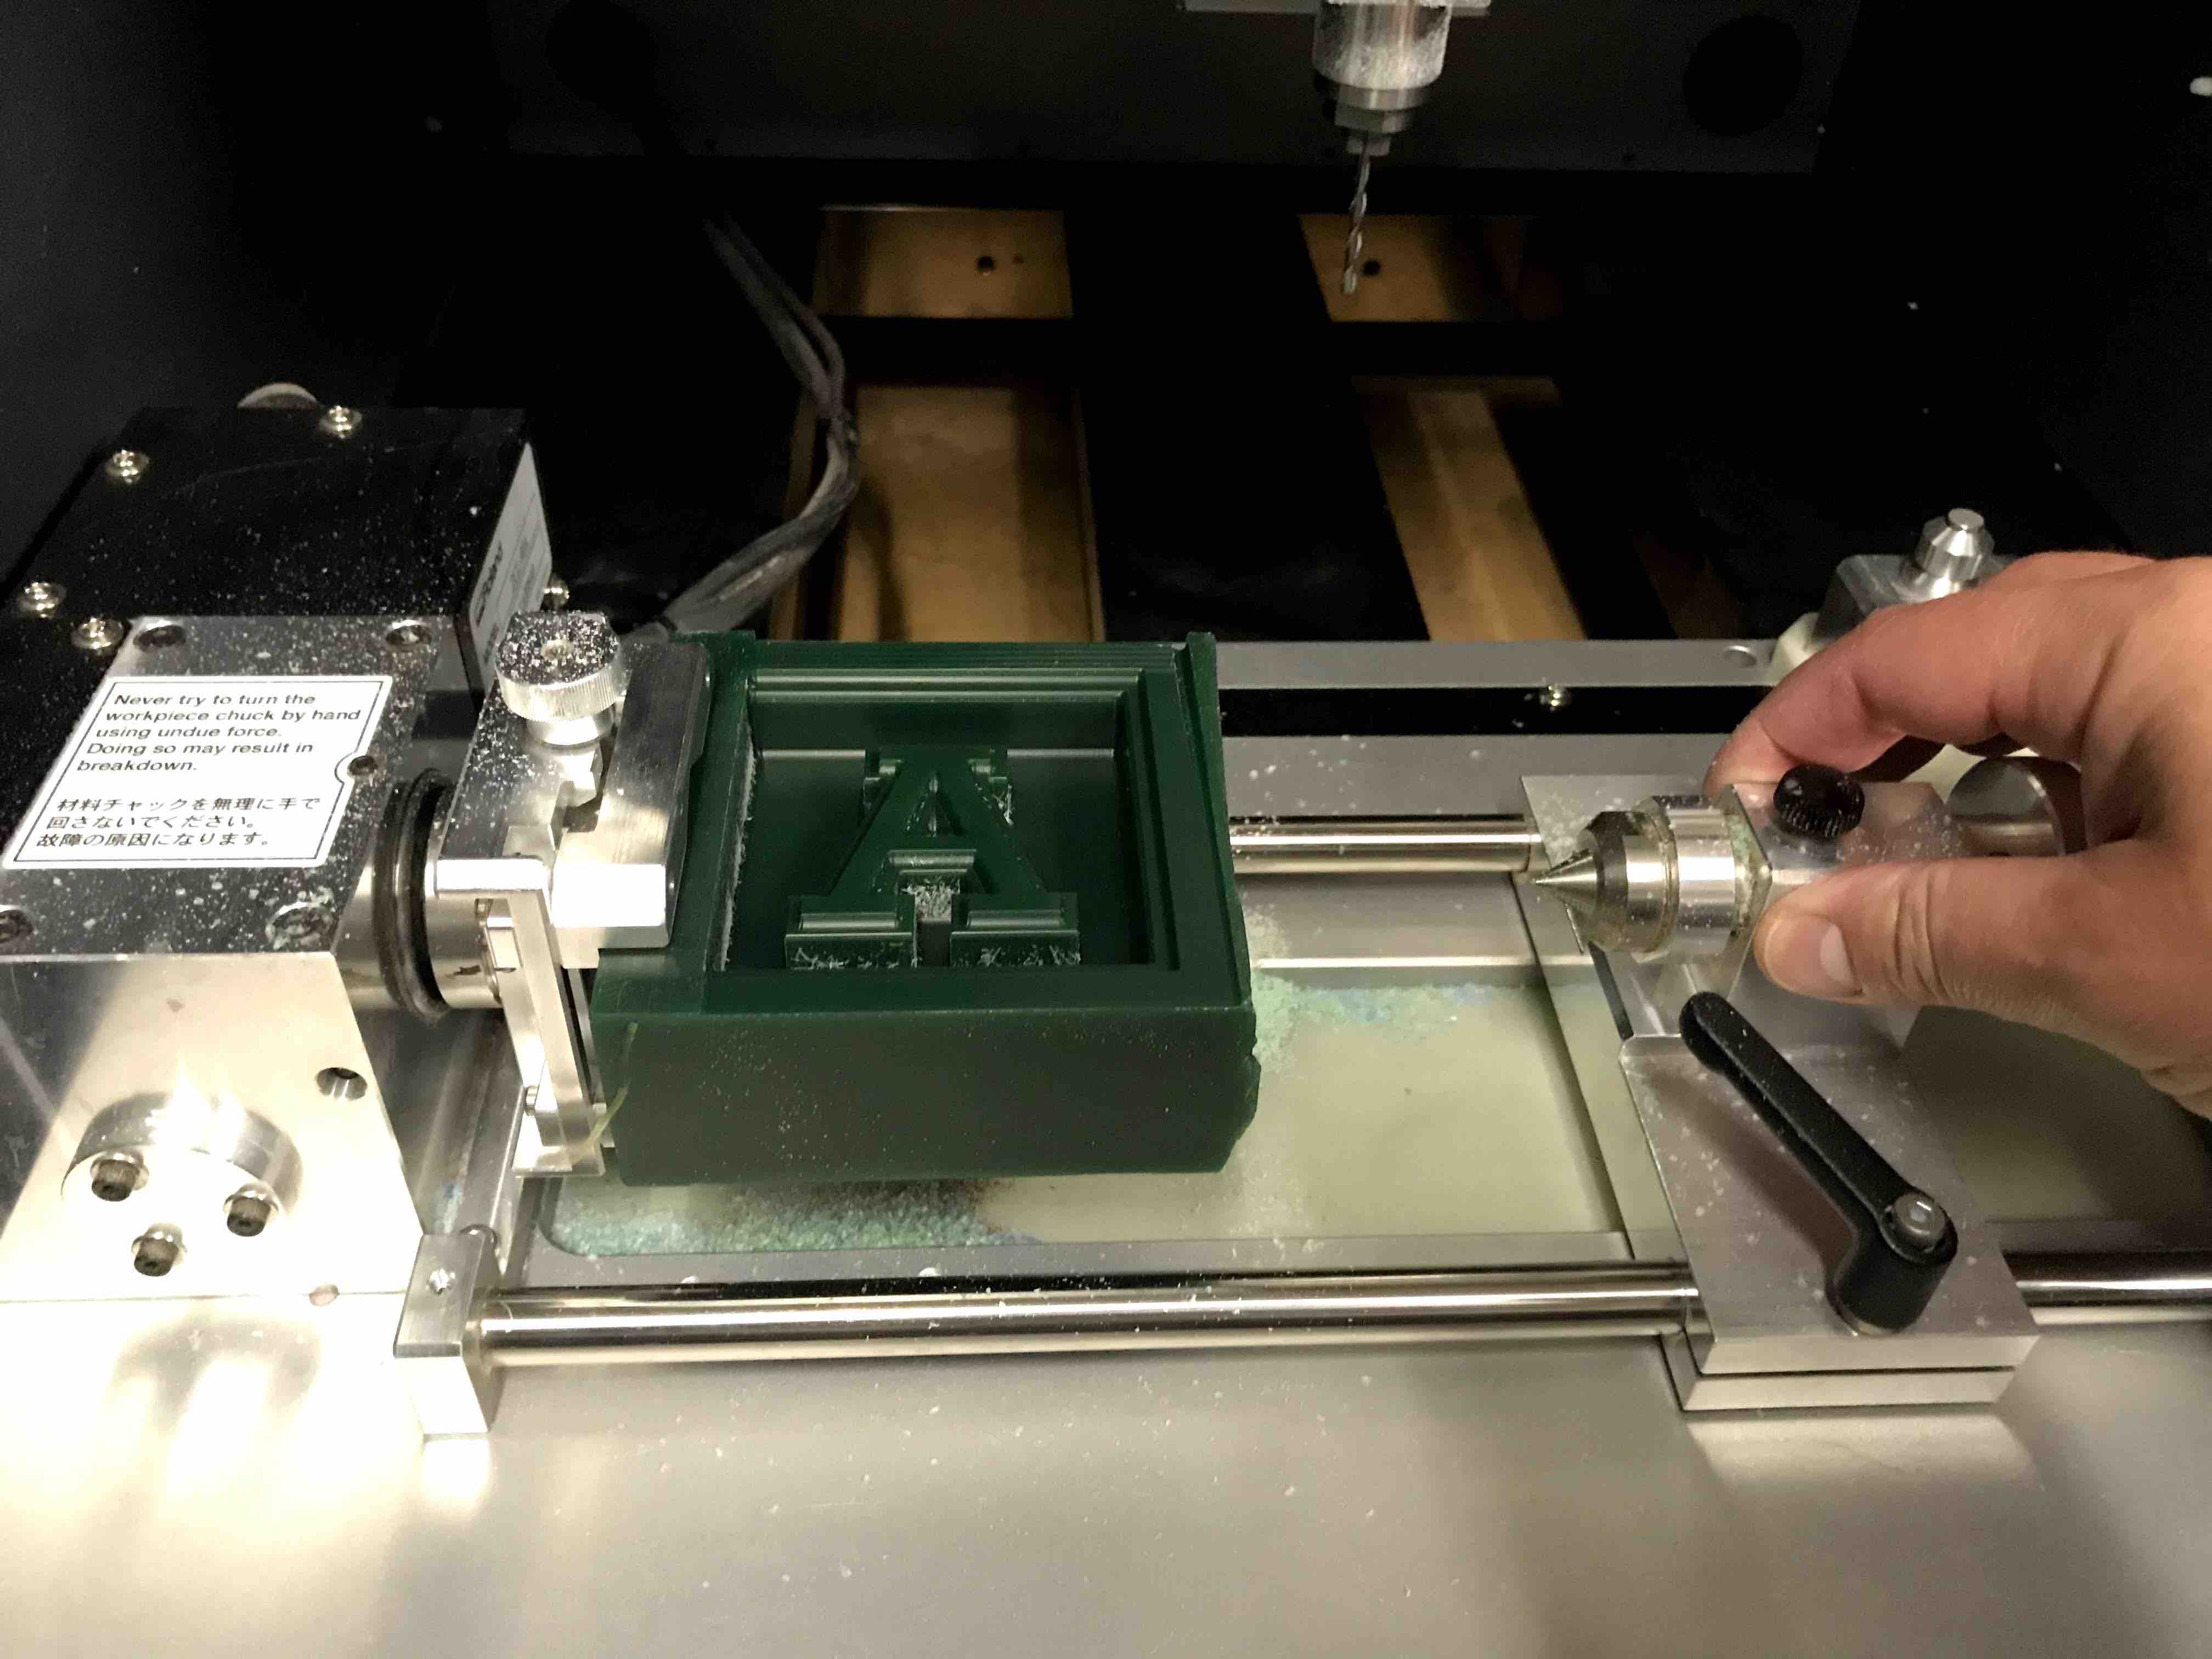
The milling
process finished.
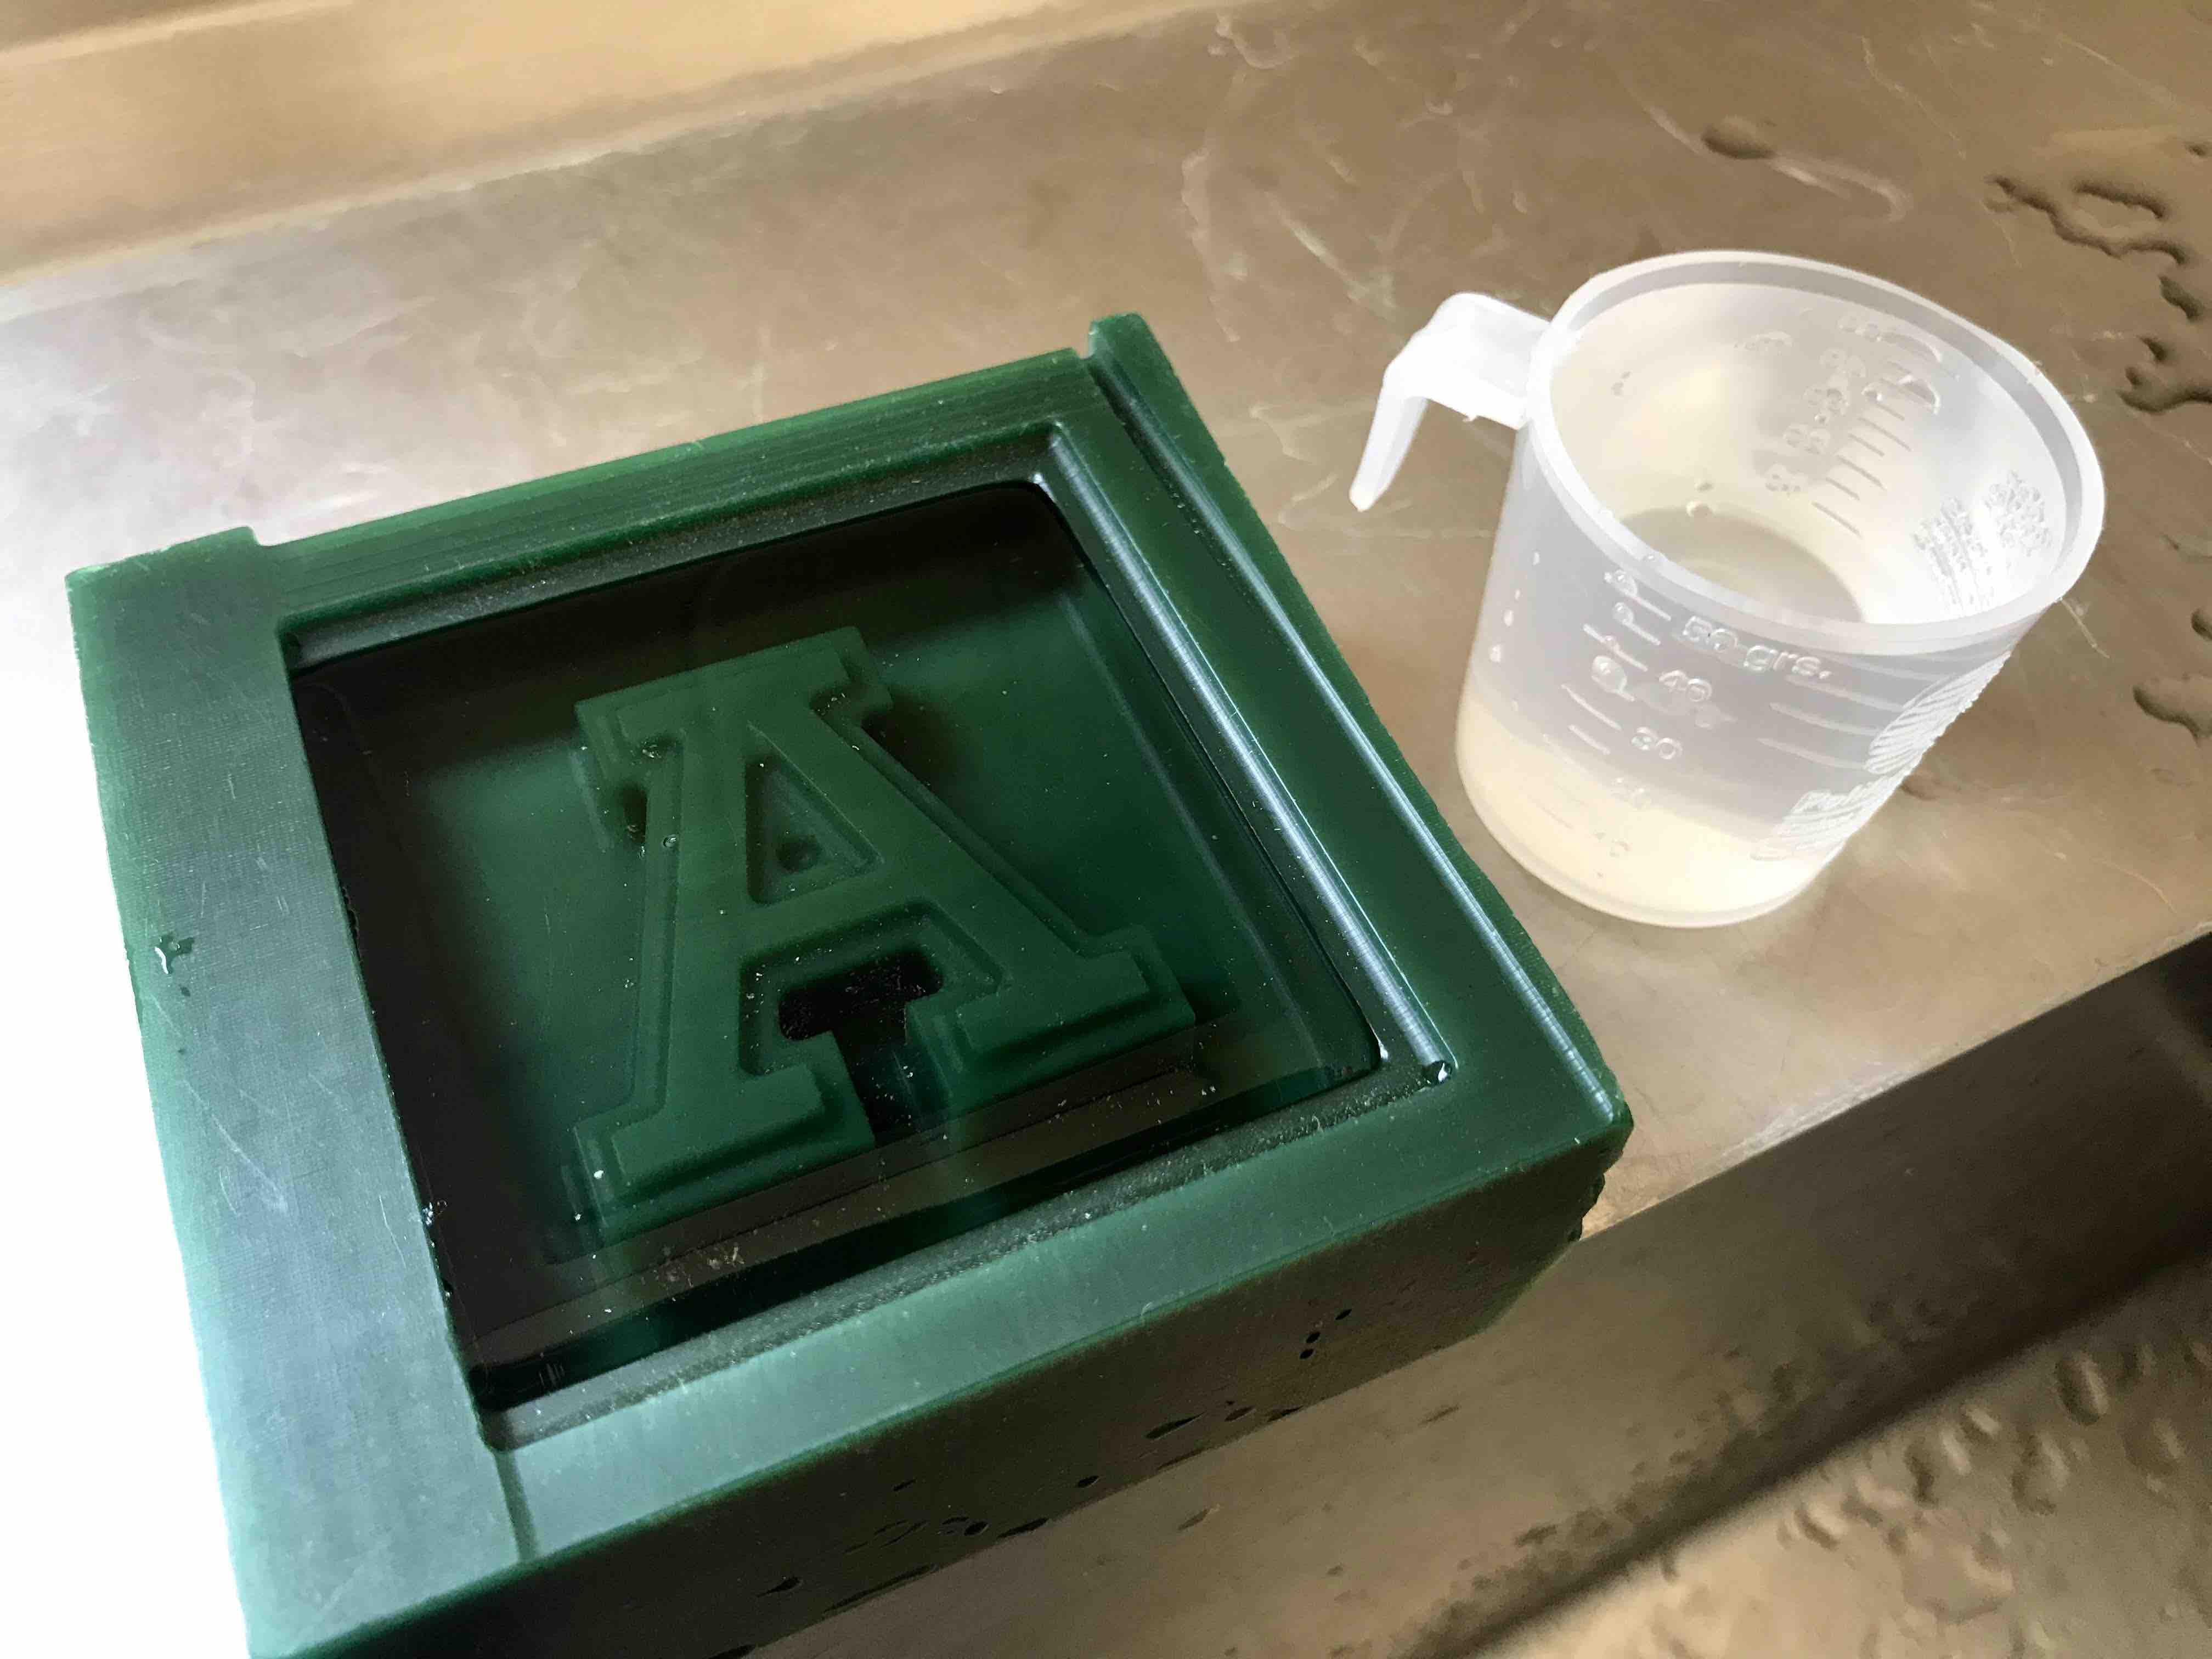
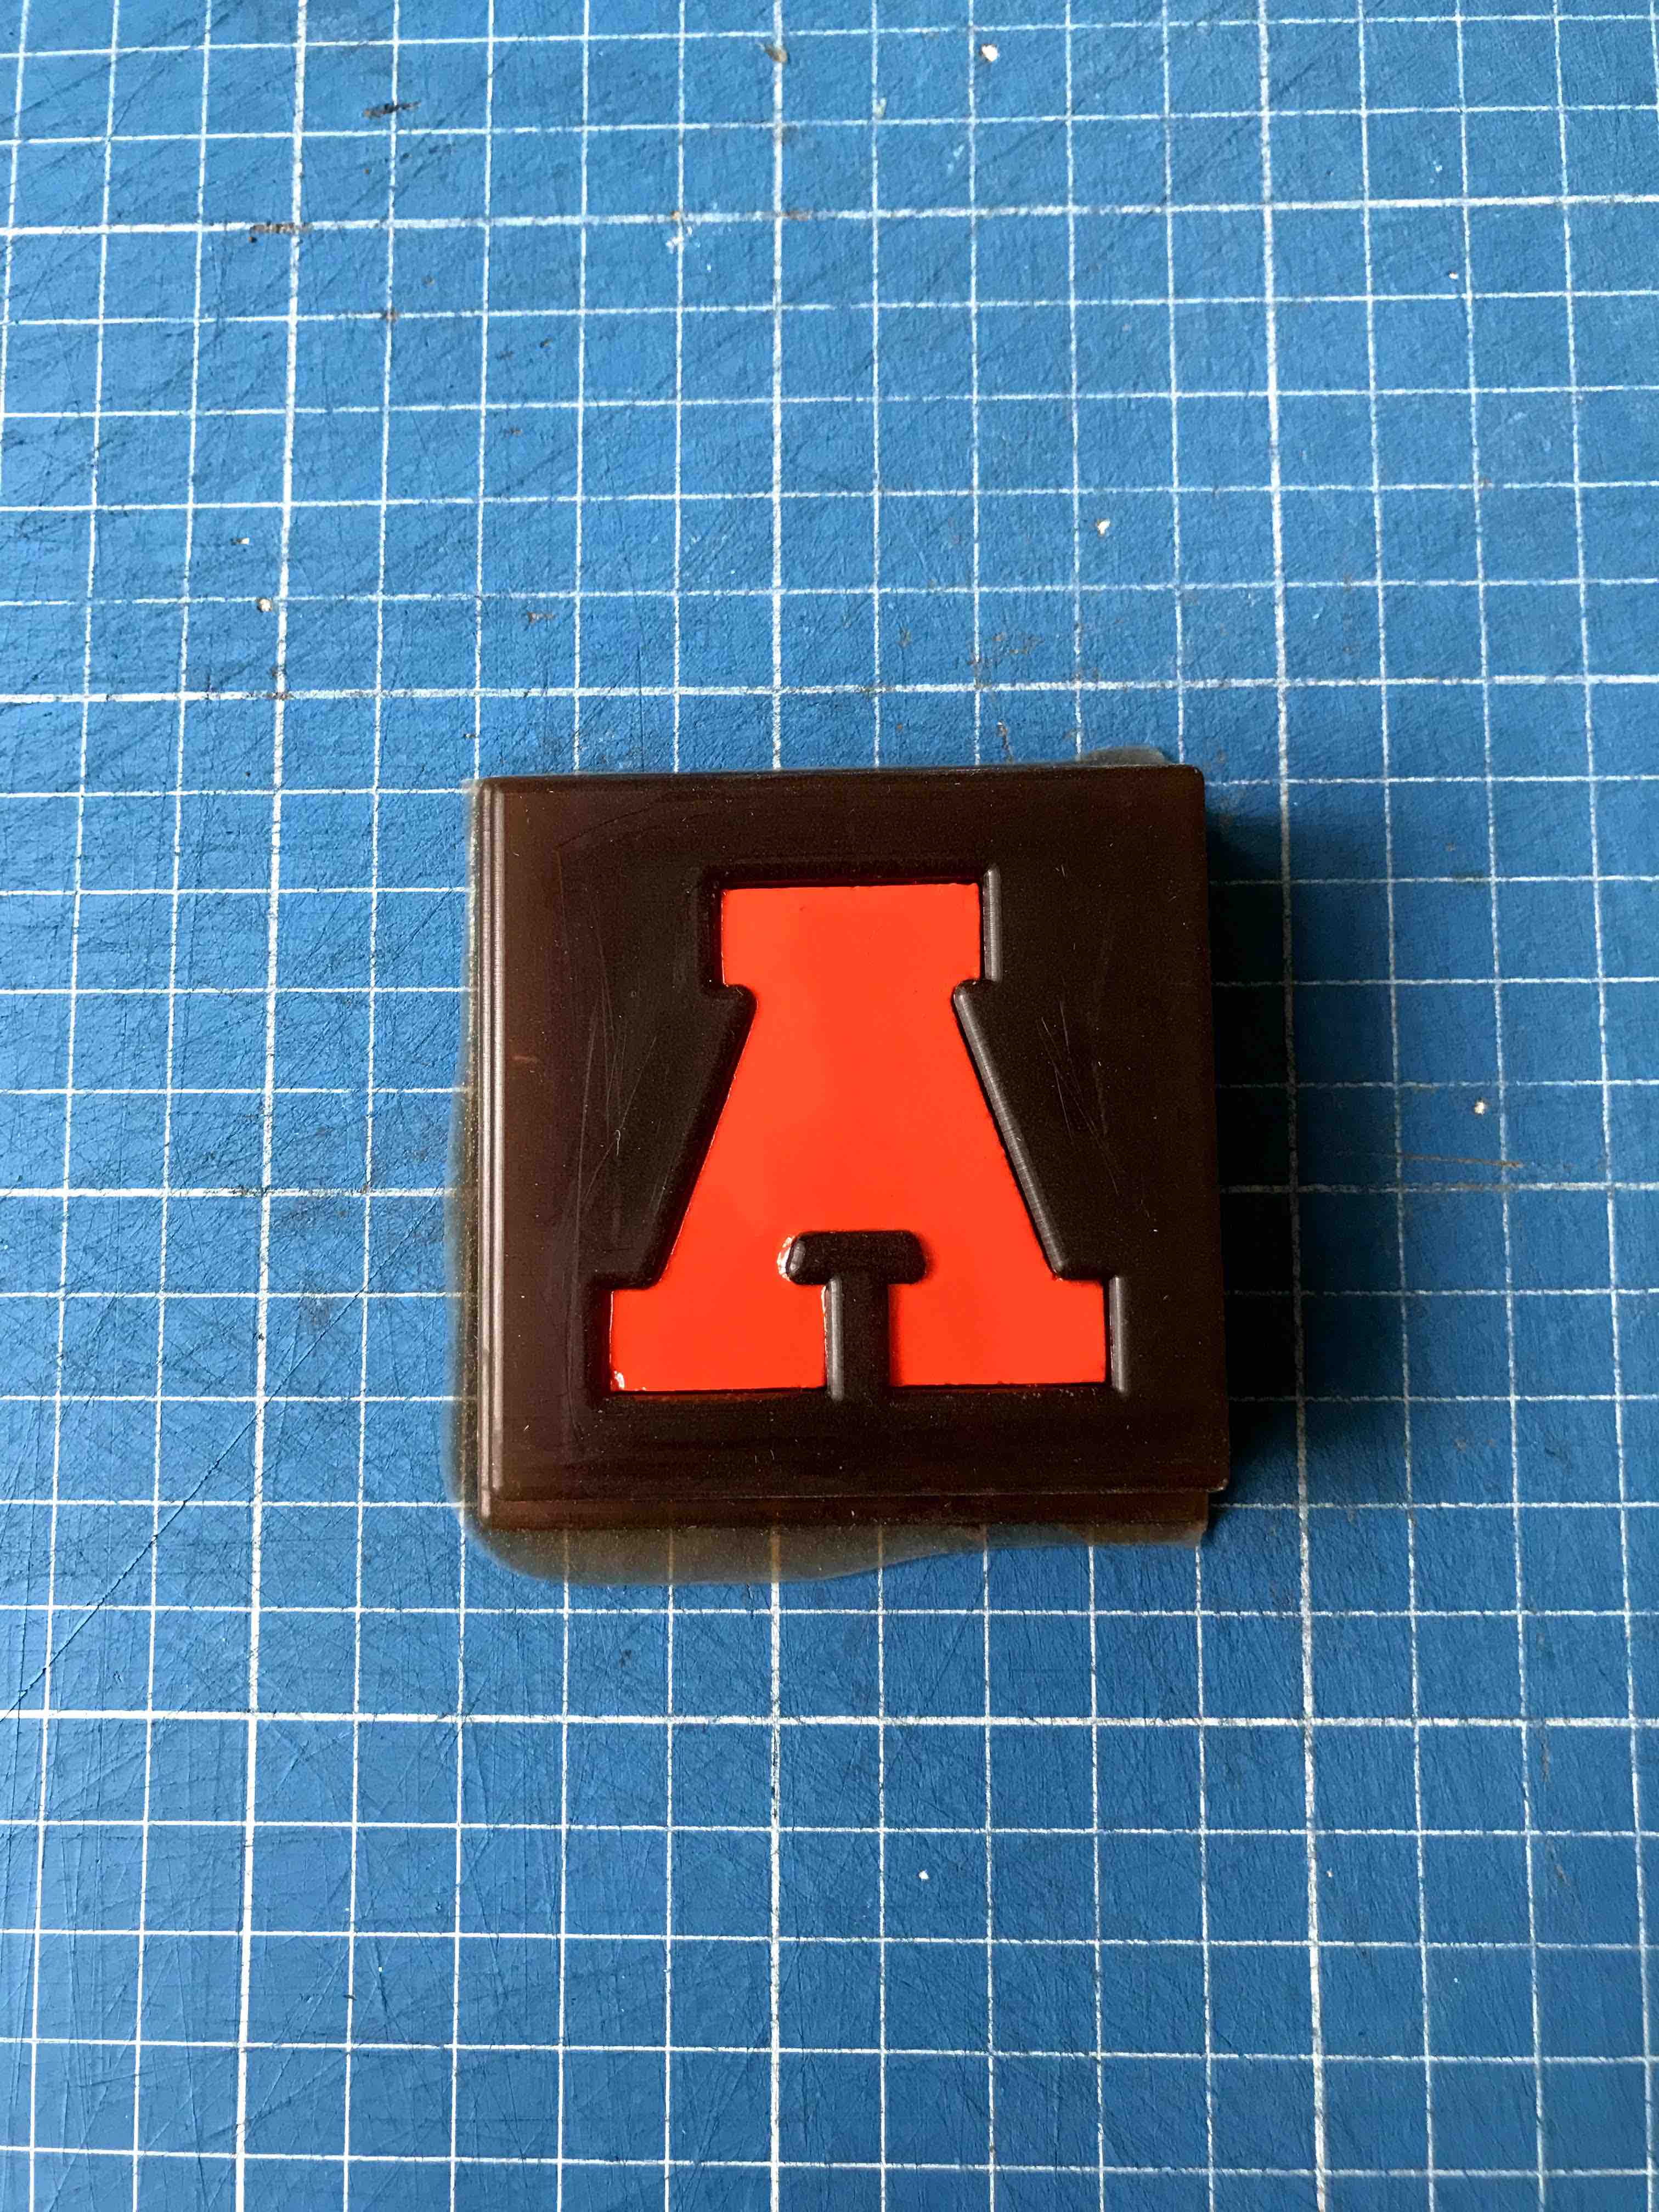
Now that I have
my positive mold I need to pour silicon to made the negative
mold,but, how silicon do I need to prepare? one option is to
pour water into the cavity so I can see the exact amount of
silicon I will need.
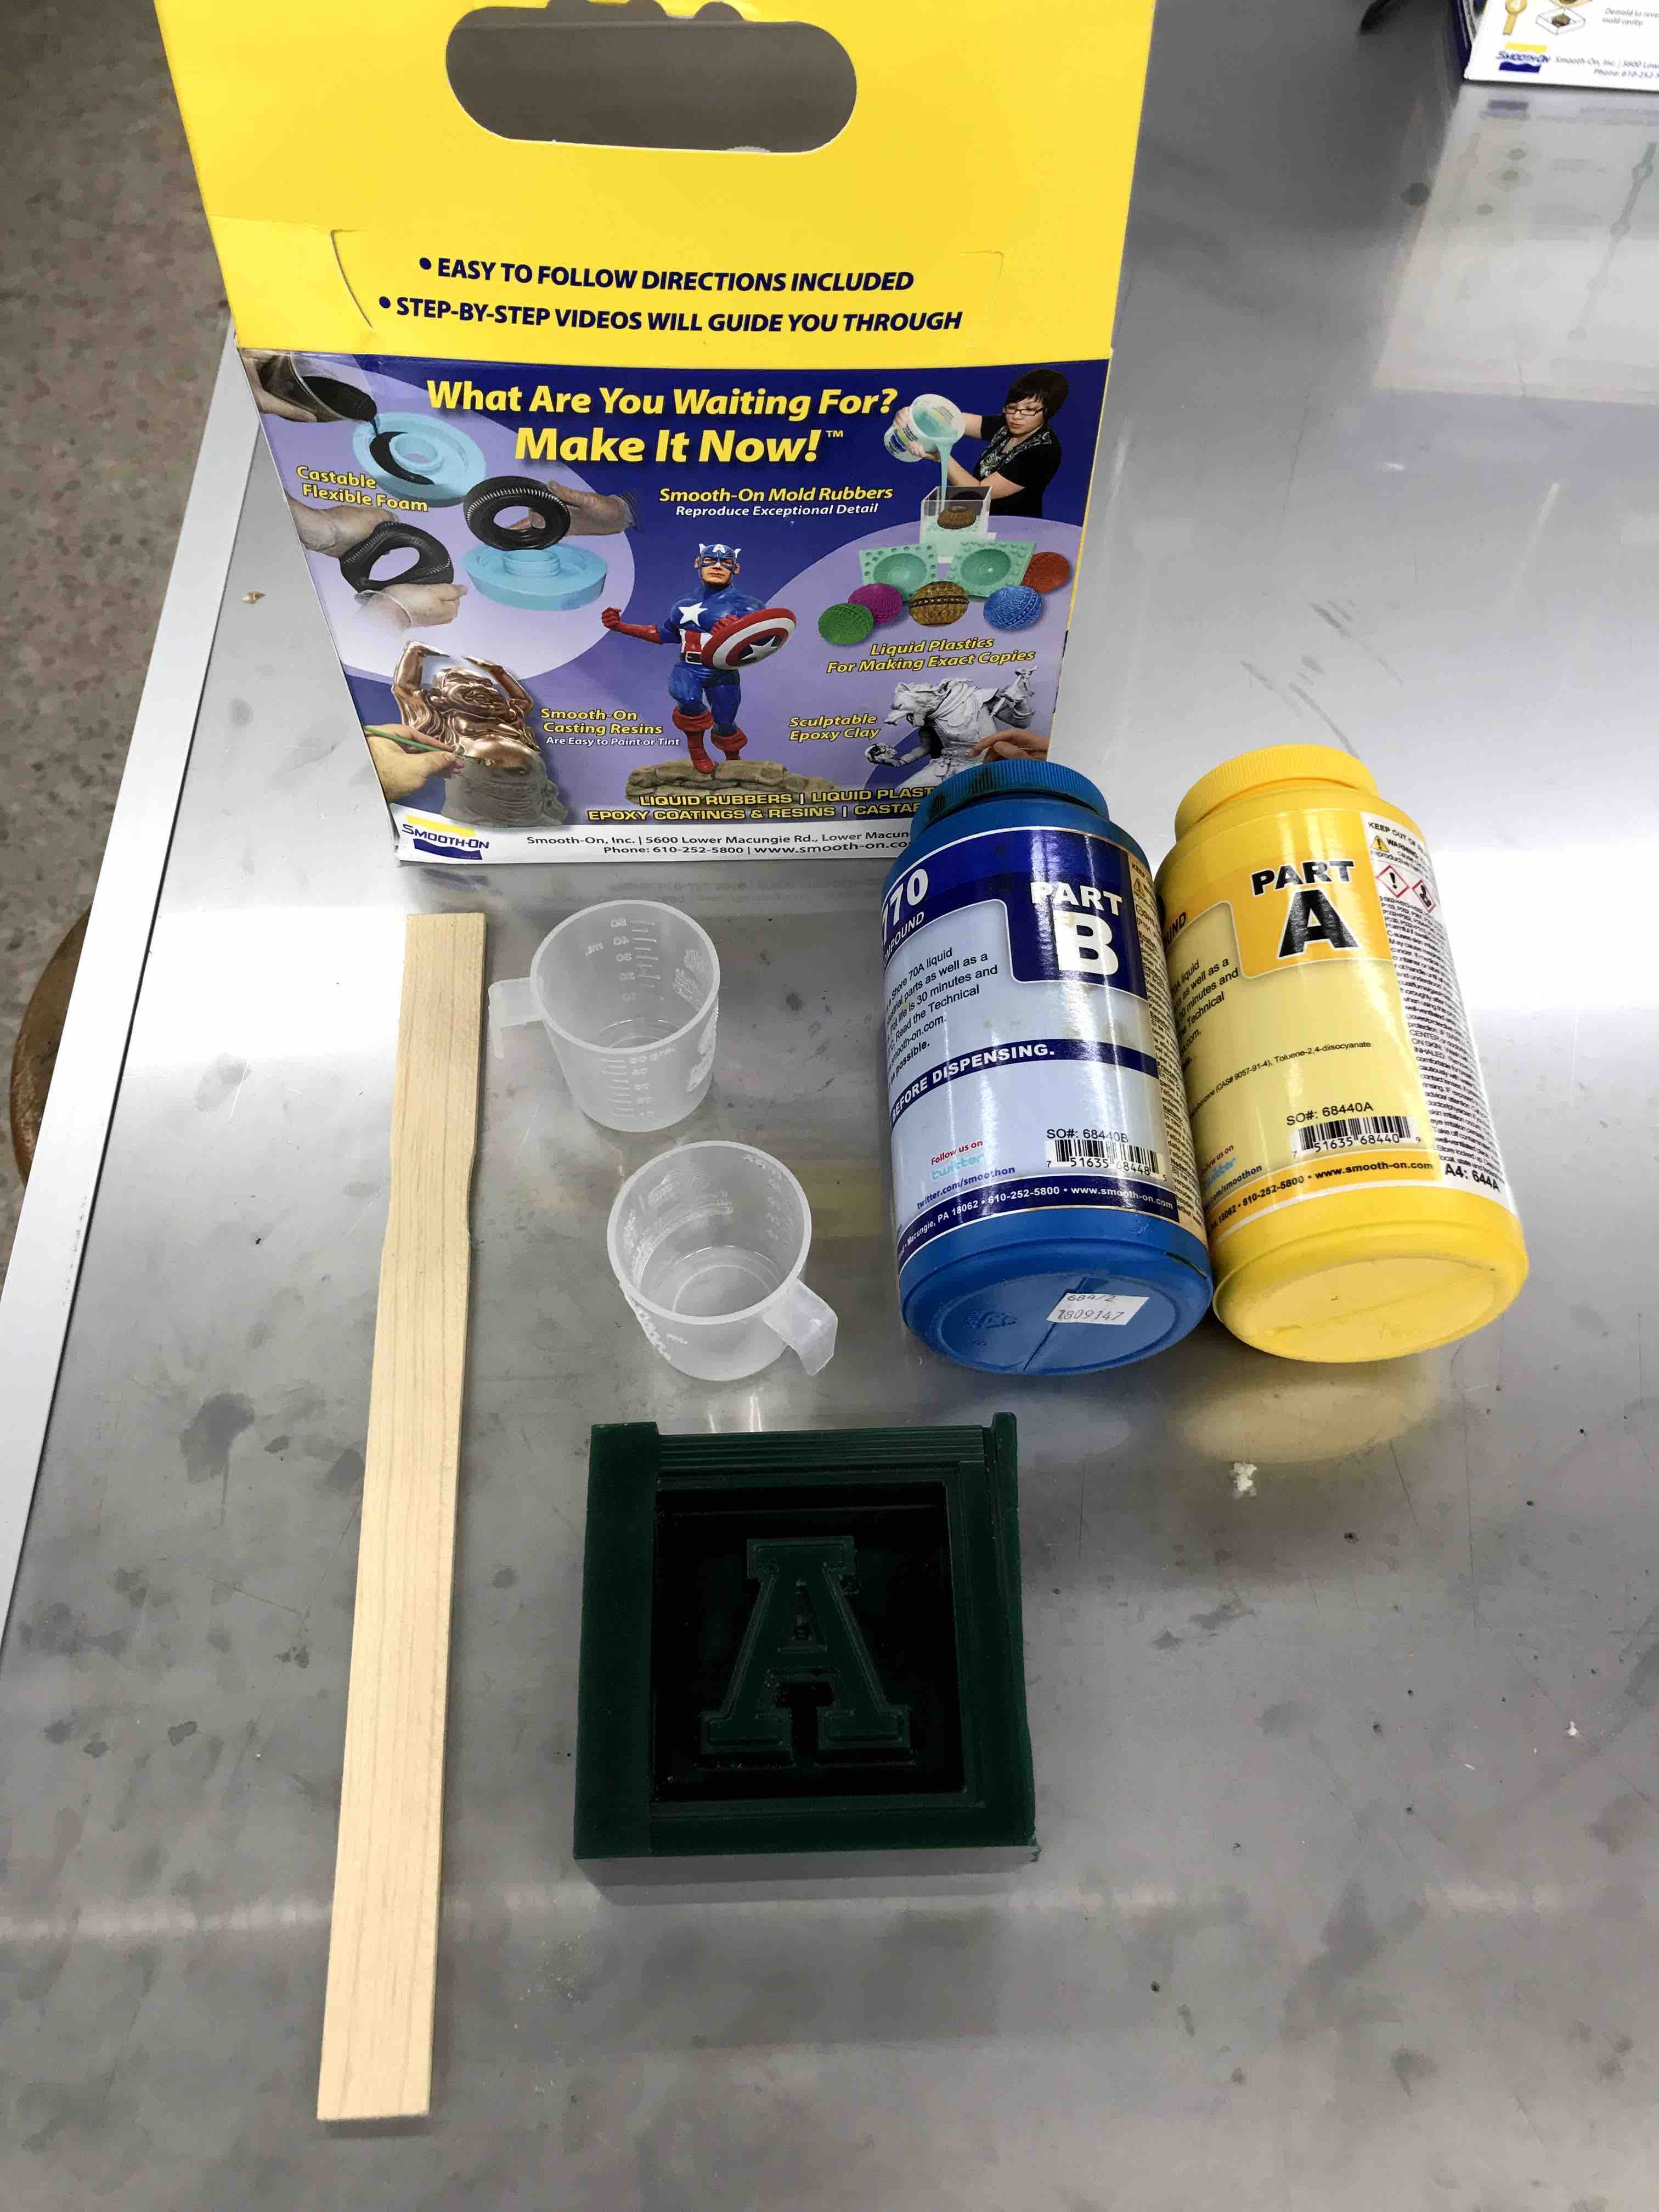
I´m going to
use this Smooth-On urethane rubber to made the negative
mold. We need to mix Part A with part B in a mix ratio of
2A:1B by Weight
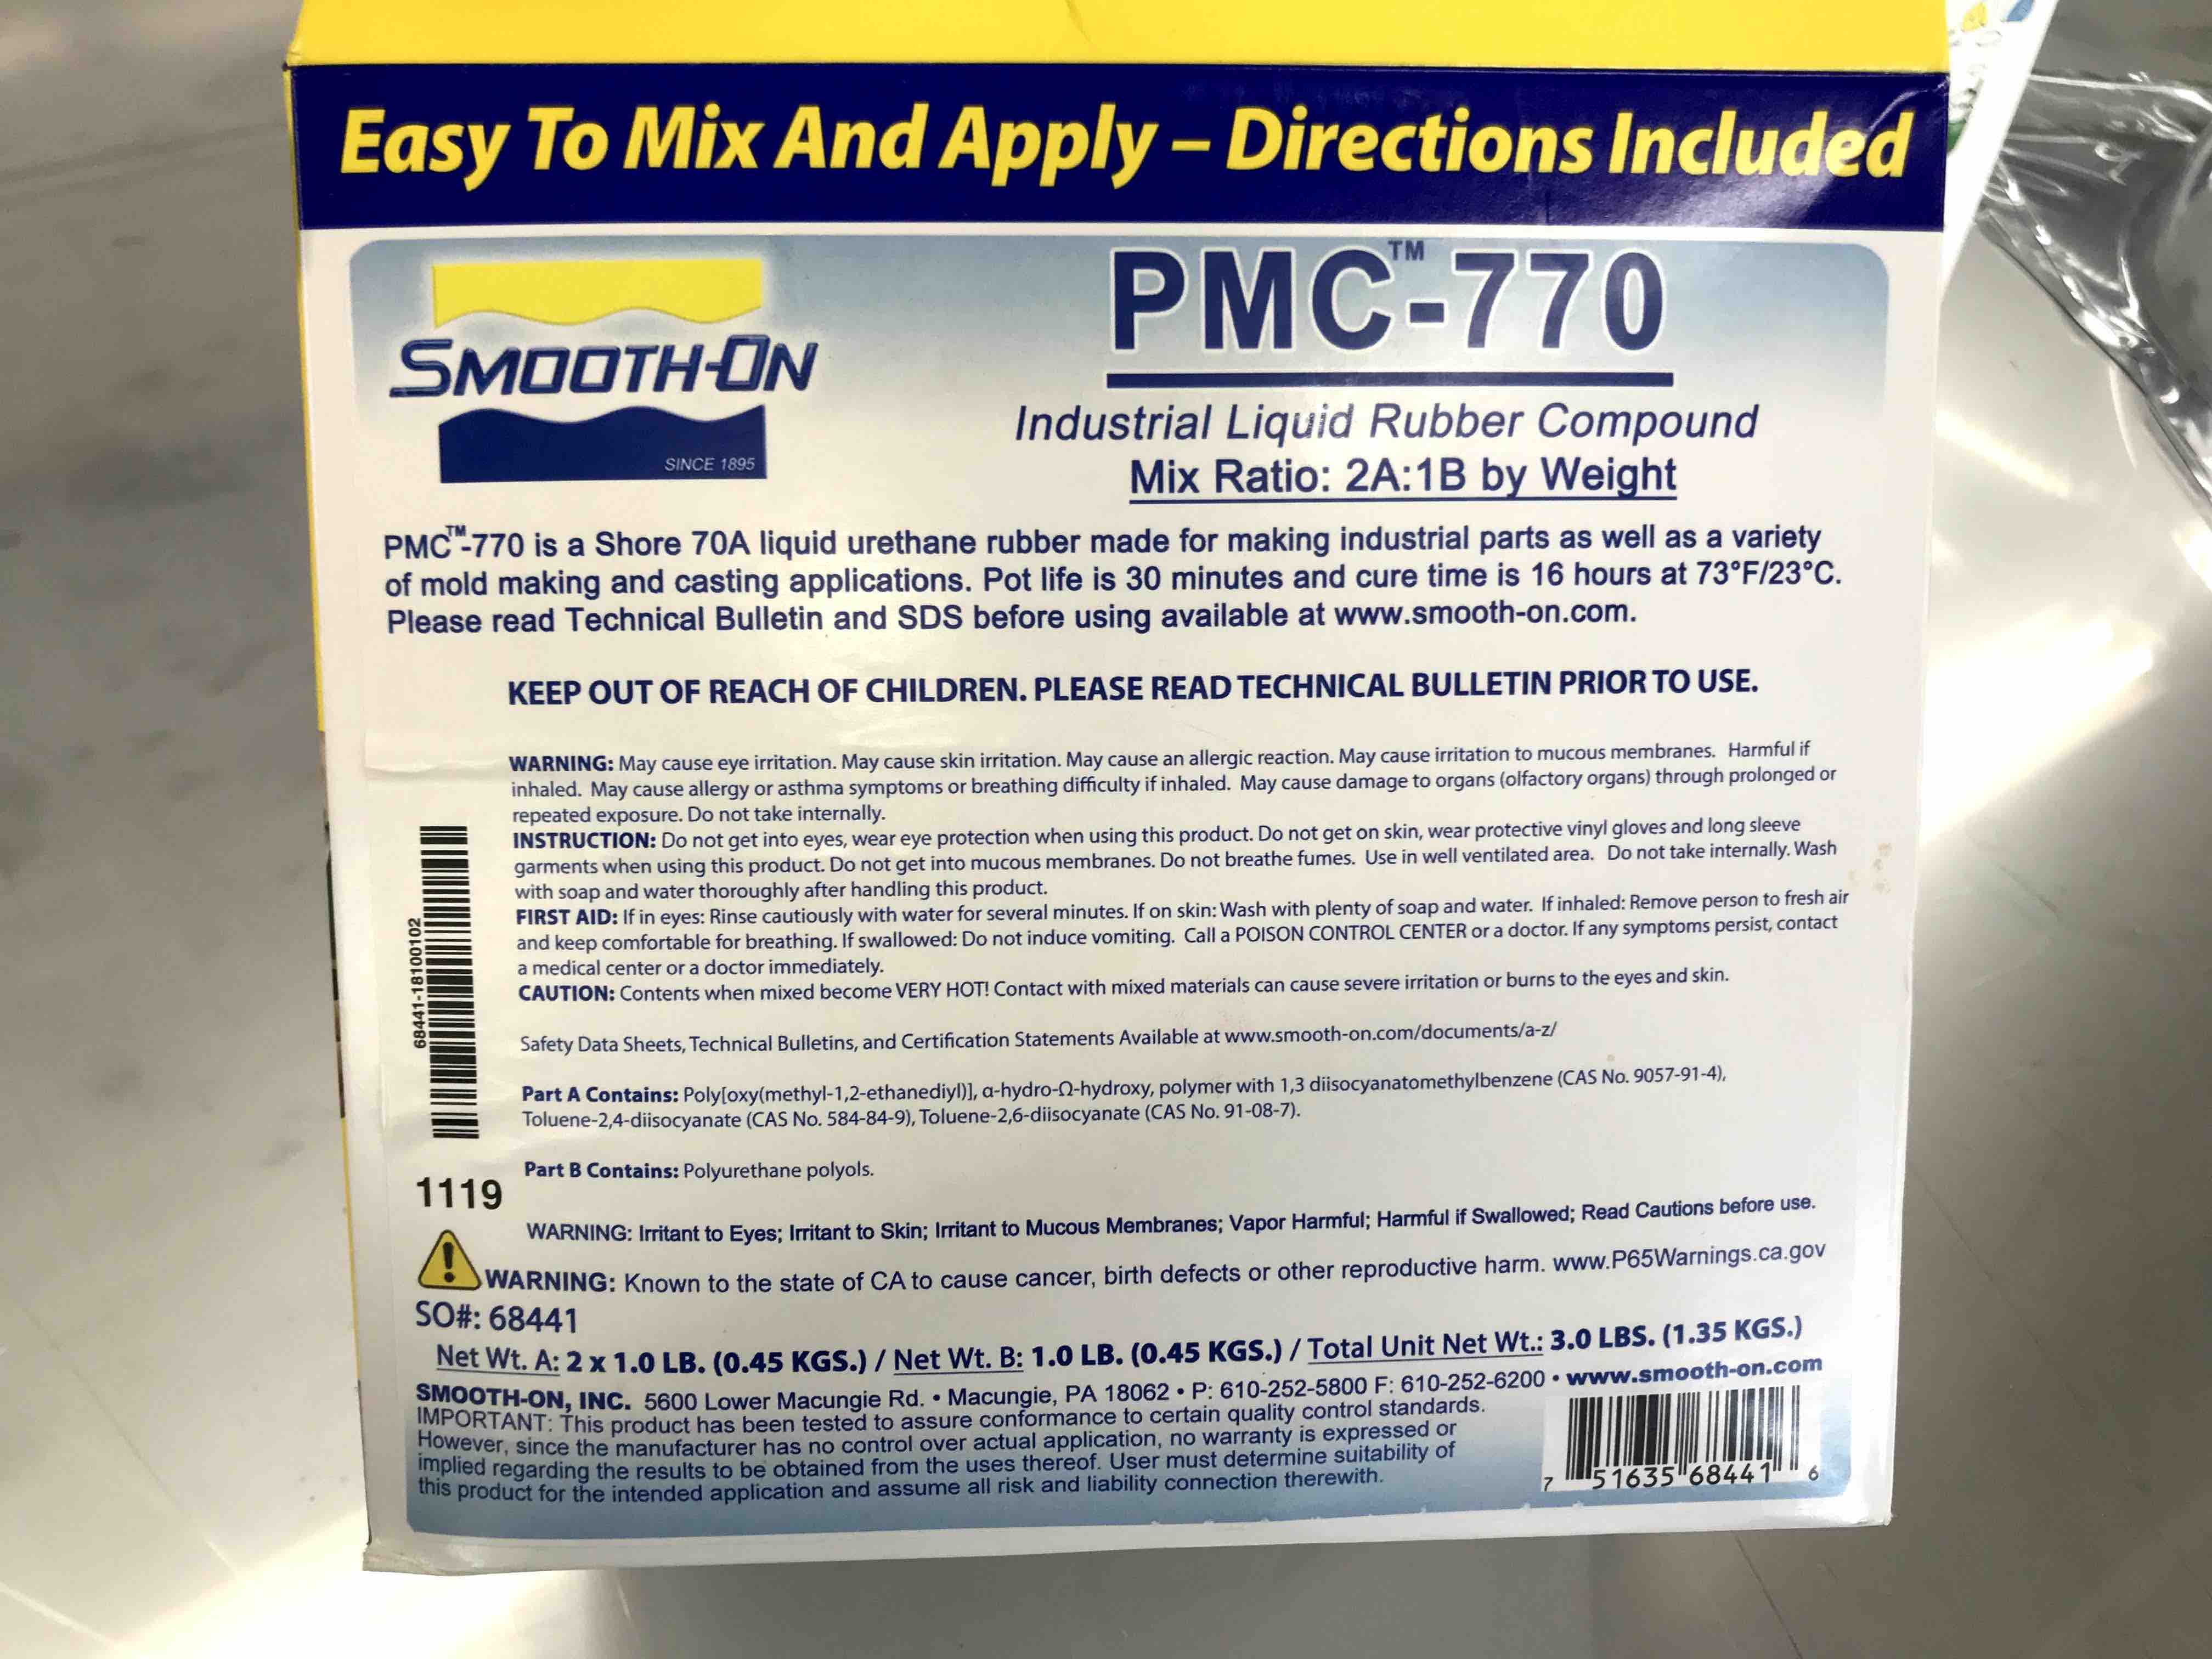
Instructions
and safety data sheet.
Here I mix and
pour the urethane rubber into the mould and then we have to
wait almost 16hours to cure
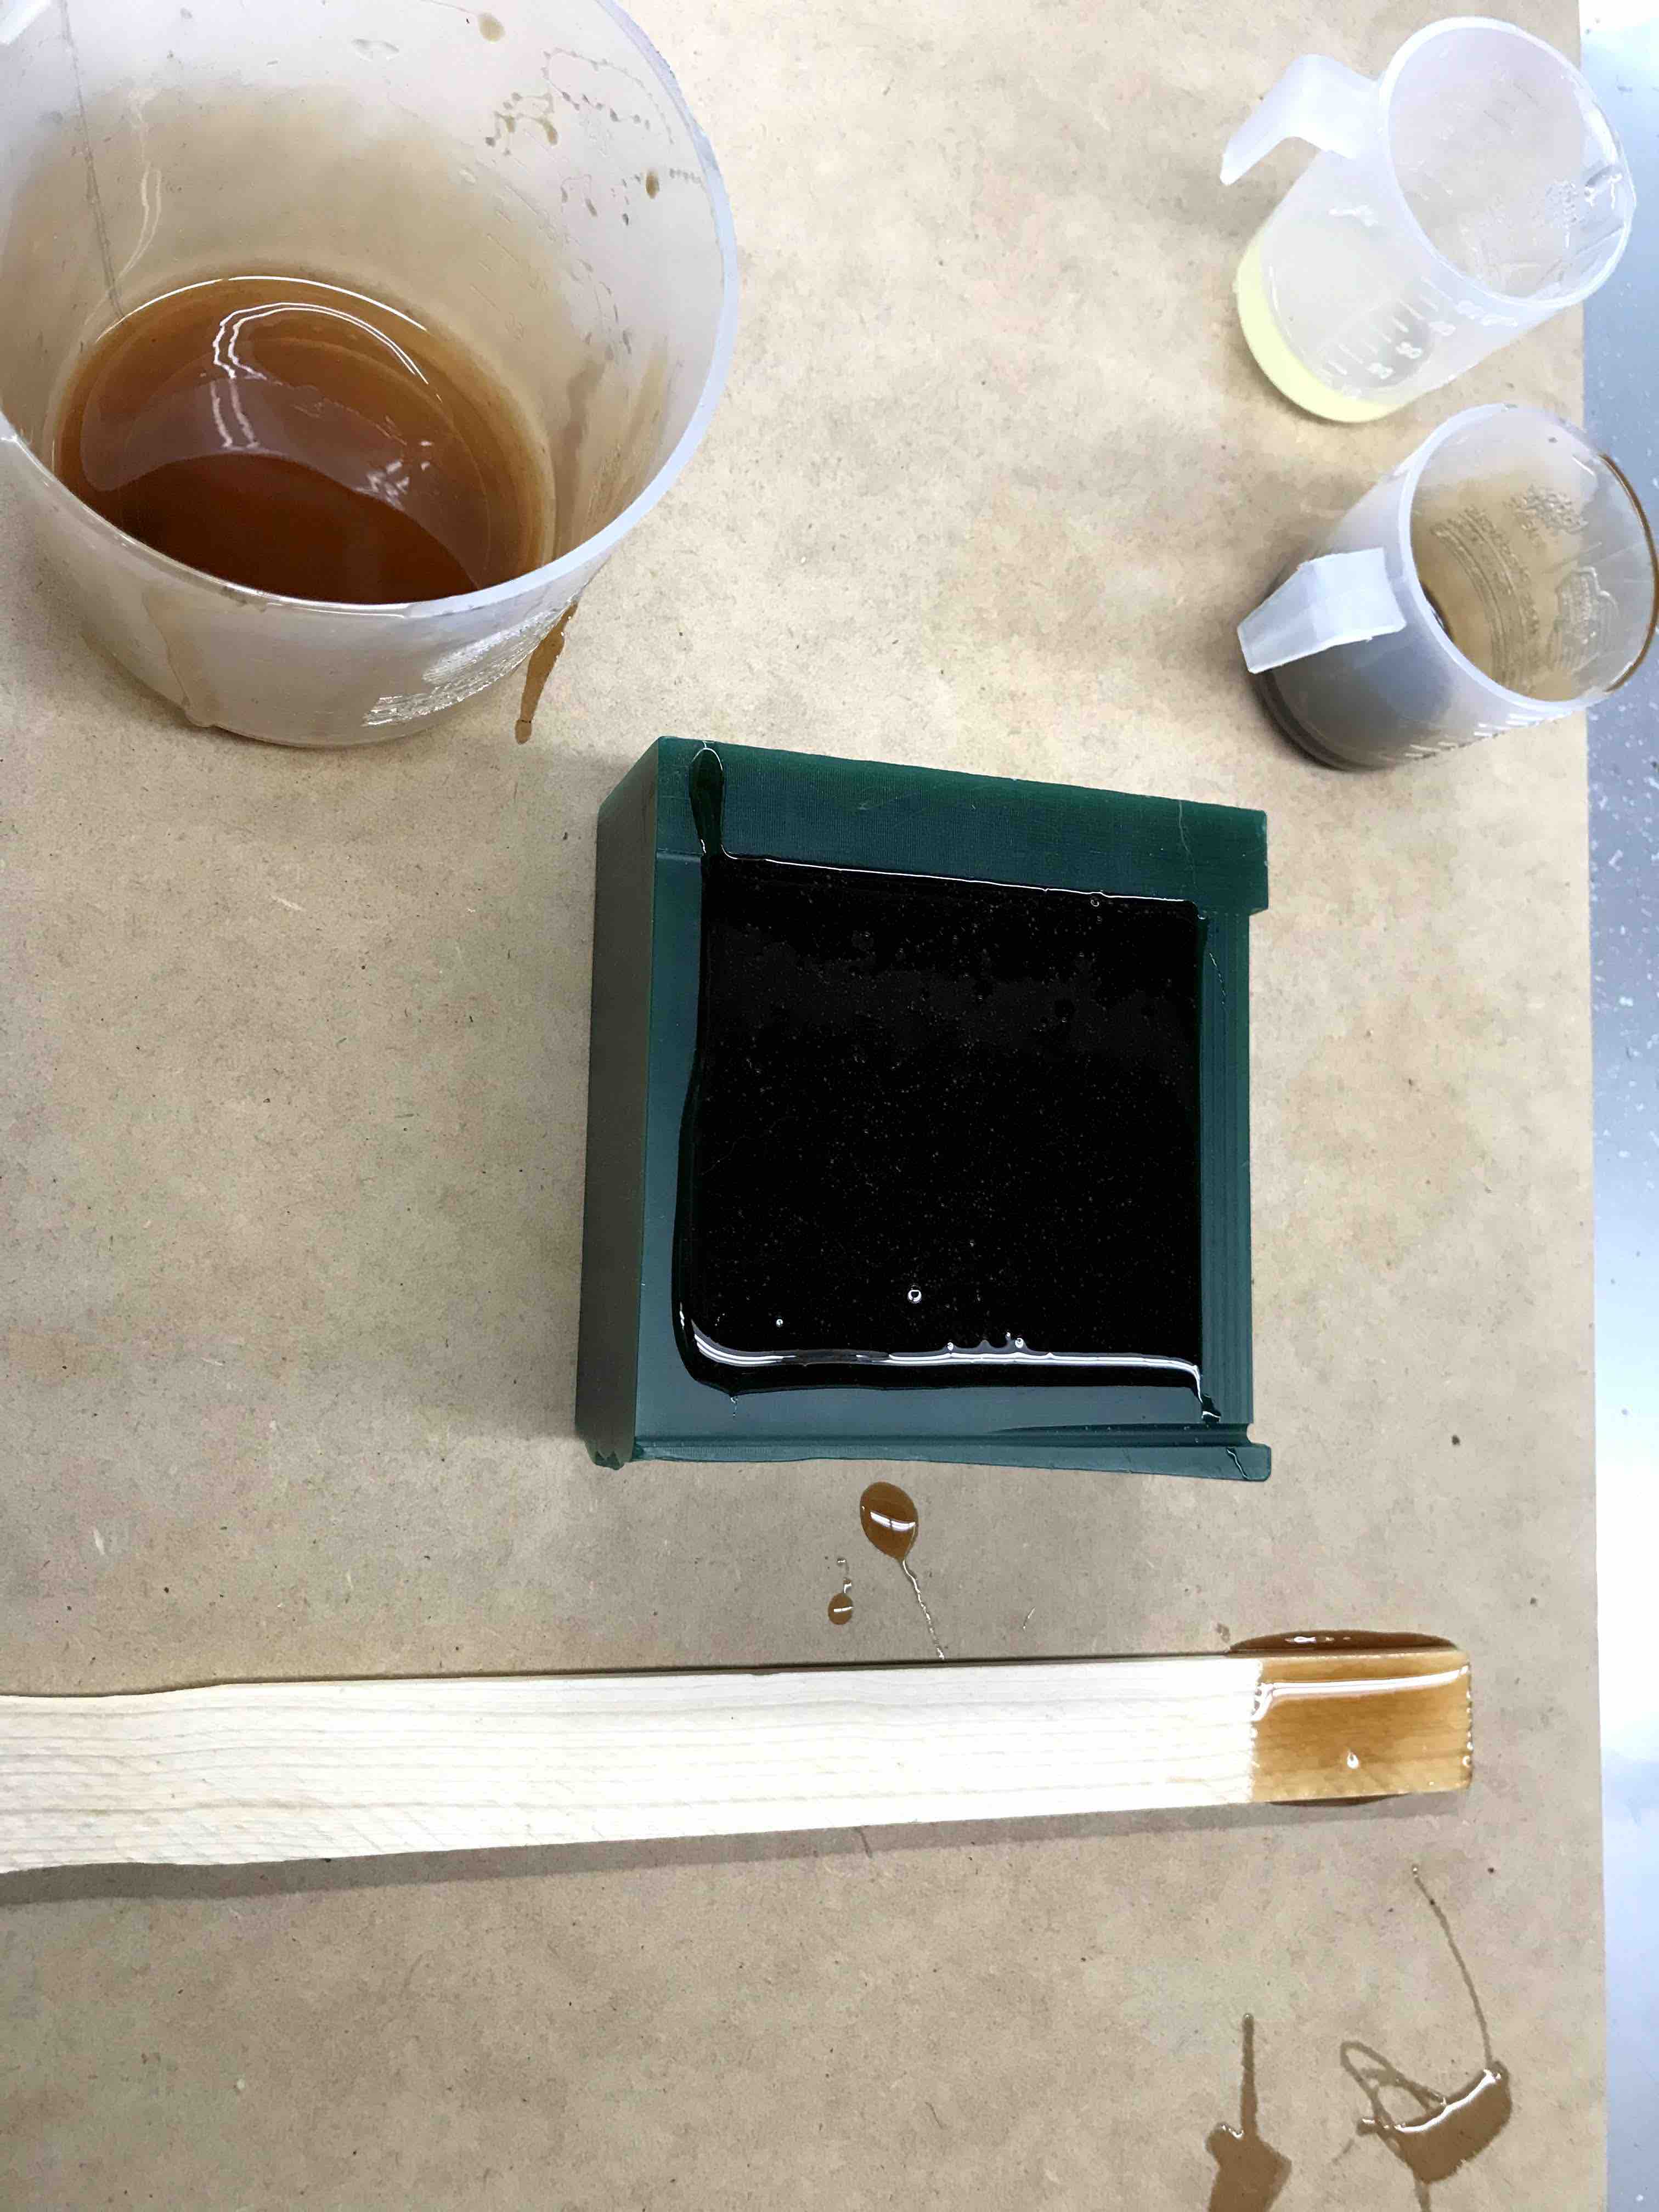
Here I mix and
pour the urethane rubber into the mould and then we have to
wait almost 16hours to cure
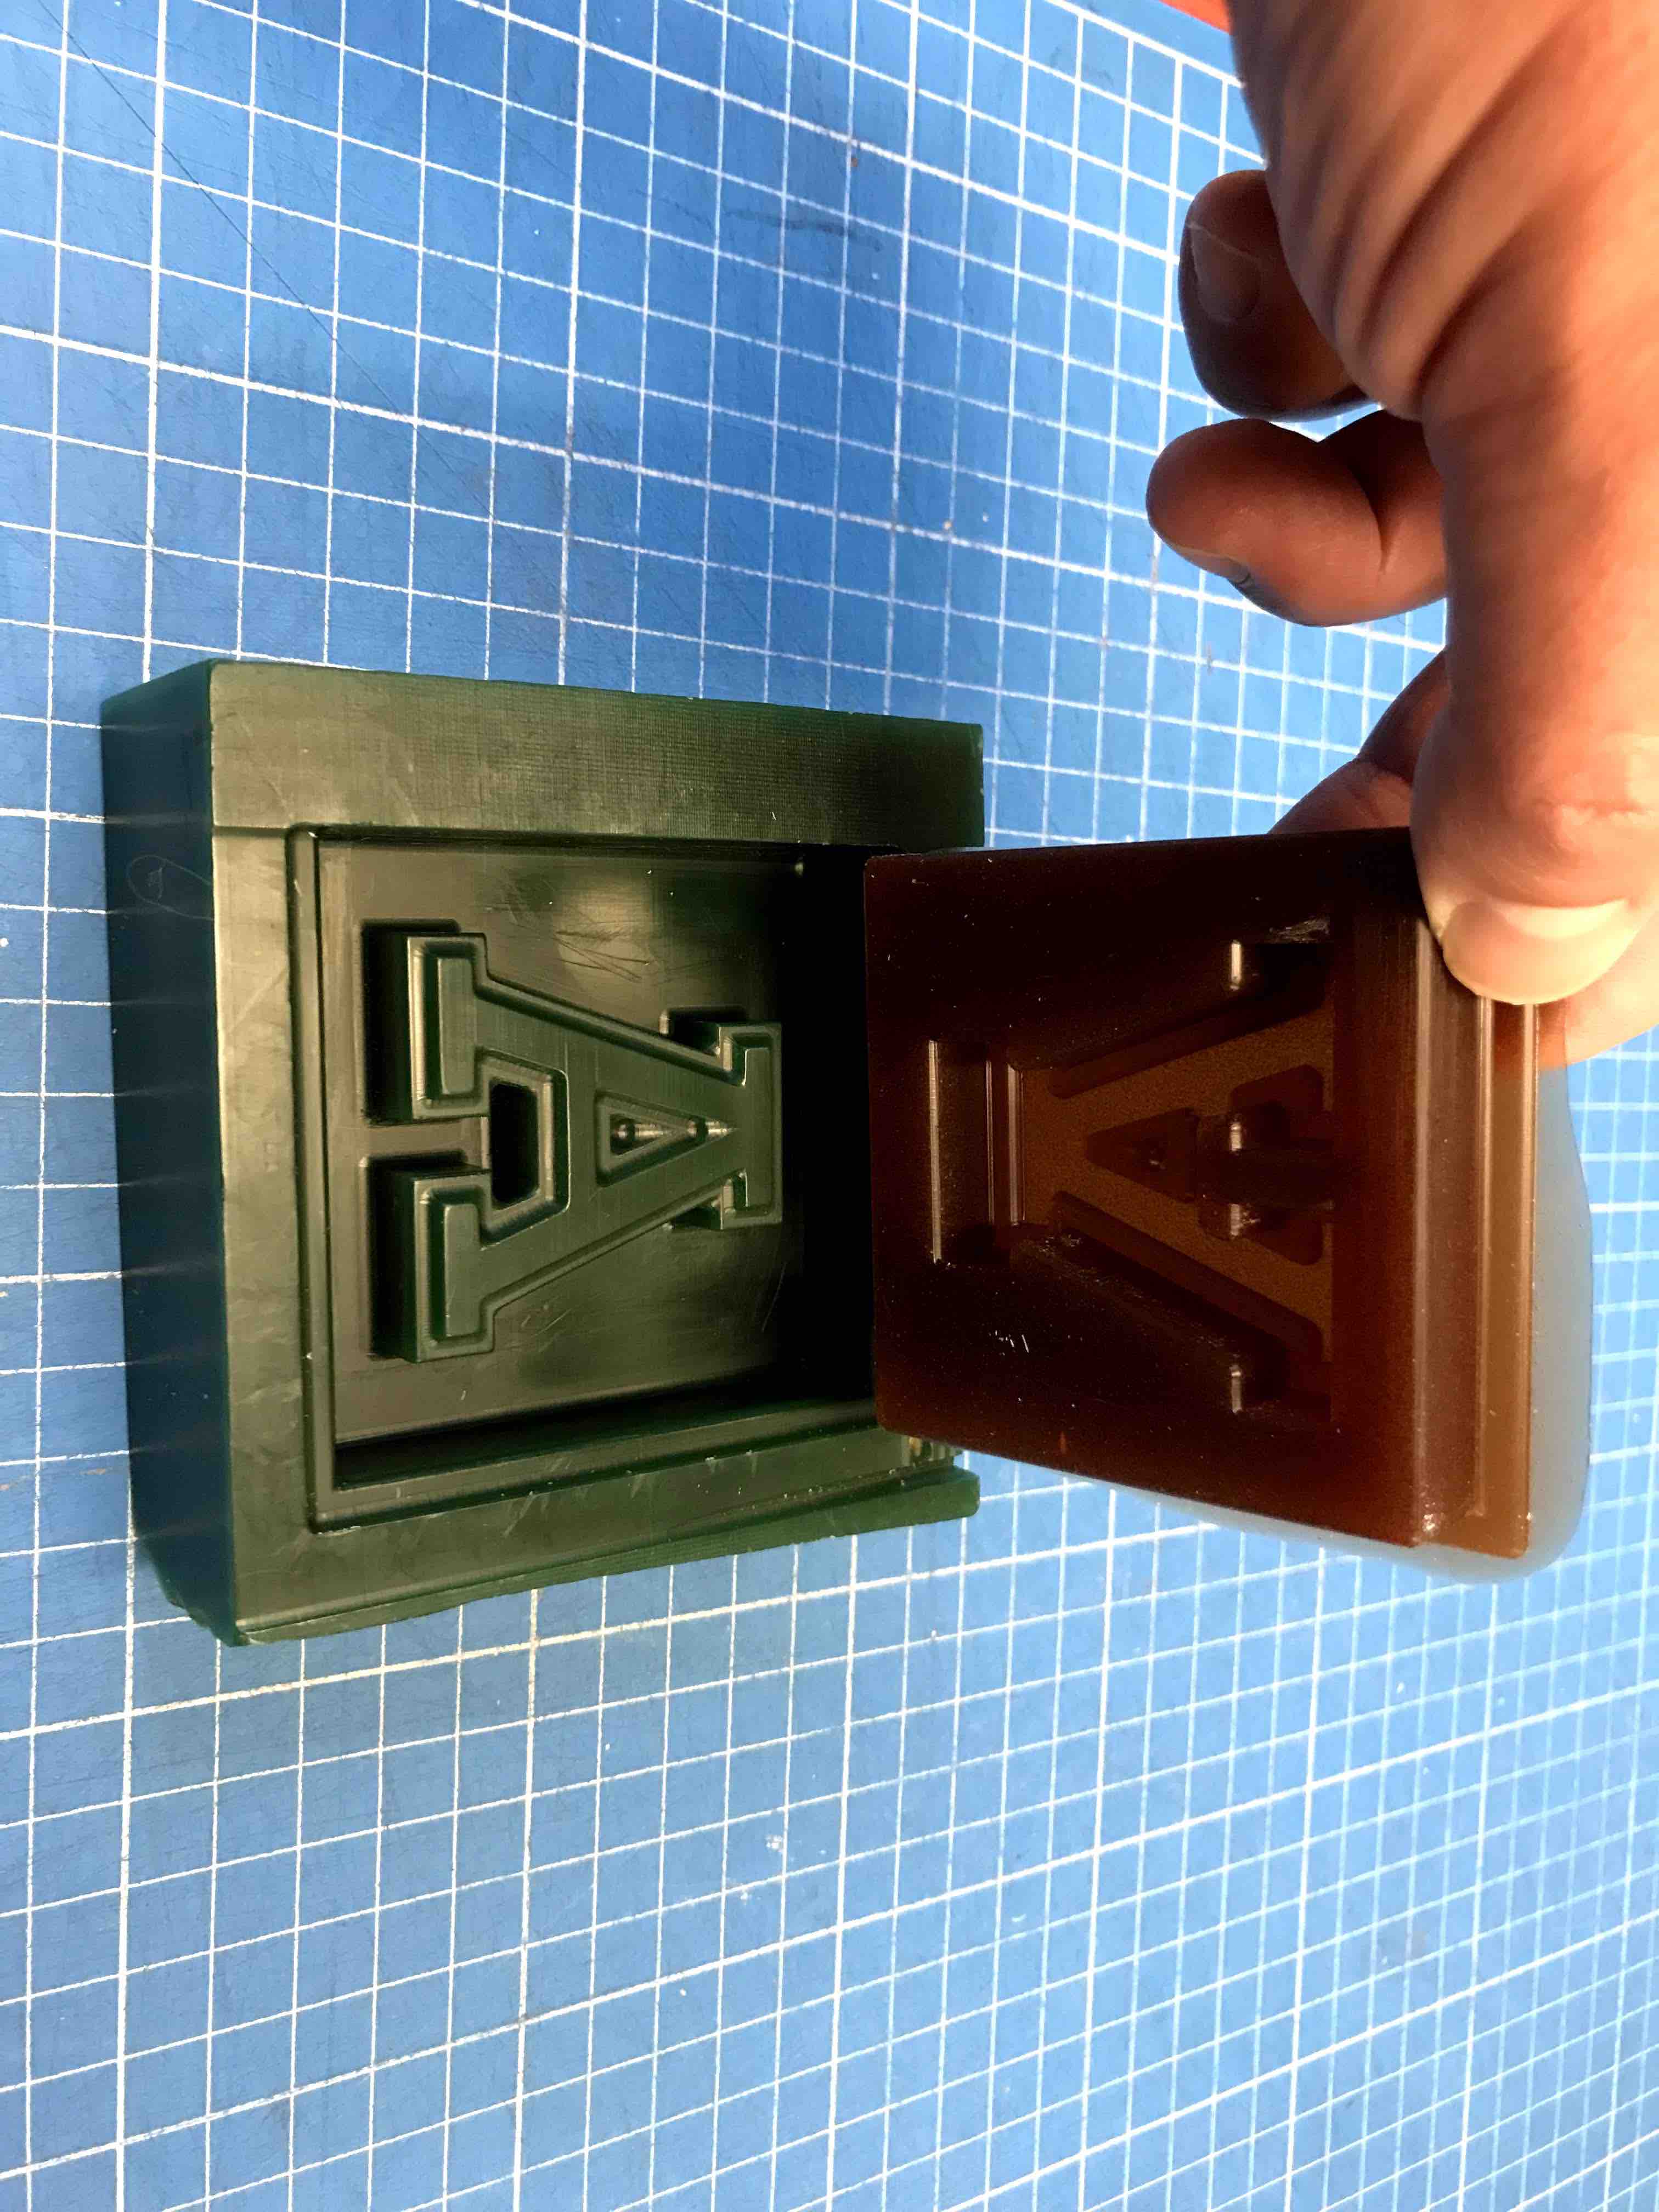
Just perfect.
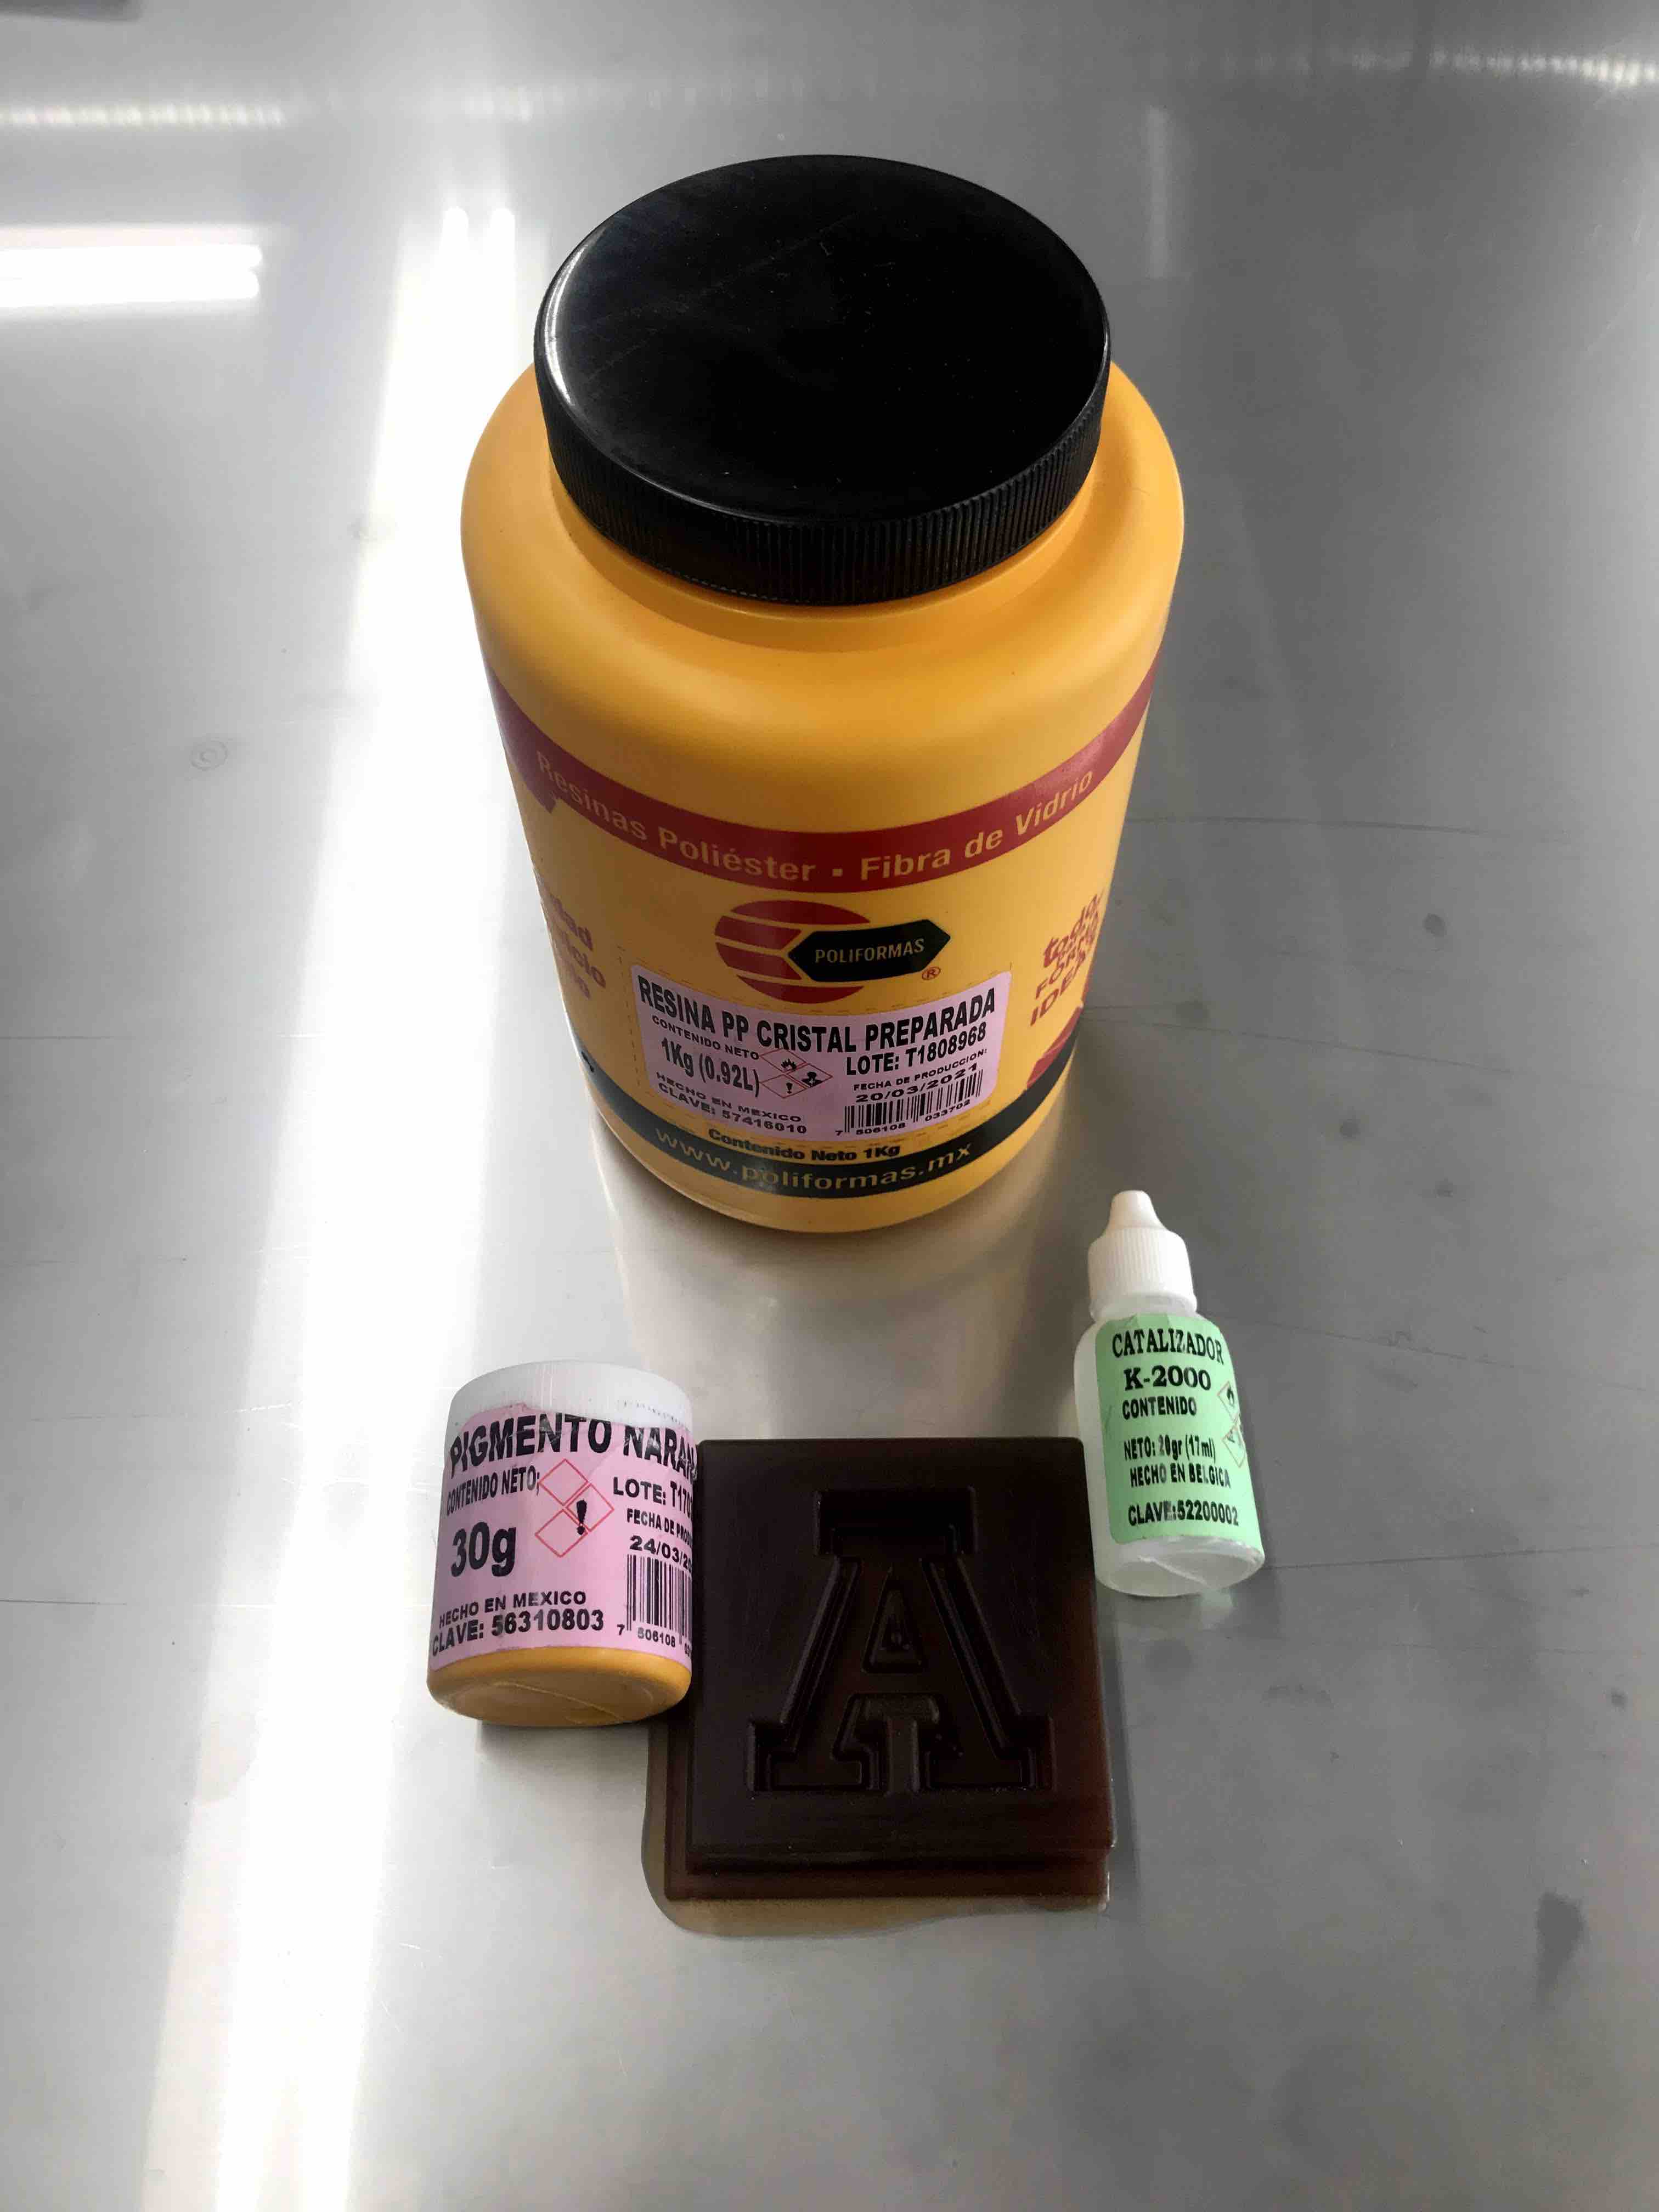
And now it´s
time to mix the cristal clear resine with orange color
aditive and the catalyst. The amount of catalyst is
40drops for 100gr of resin PP cristal, this can vary
depending of the size of the final piece, weather and
aditive if you use it.
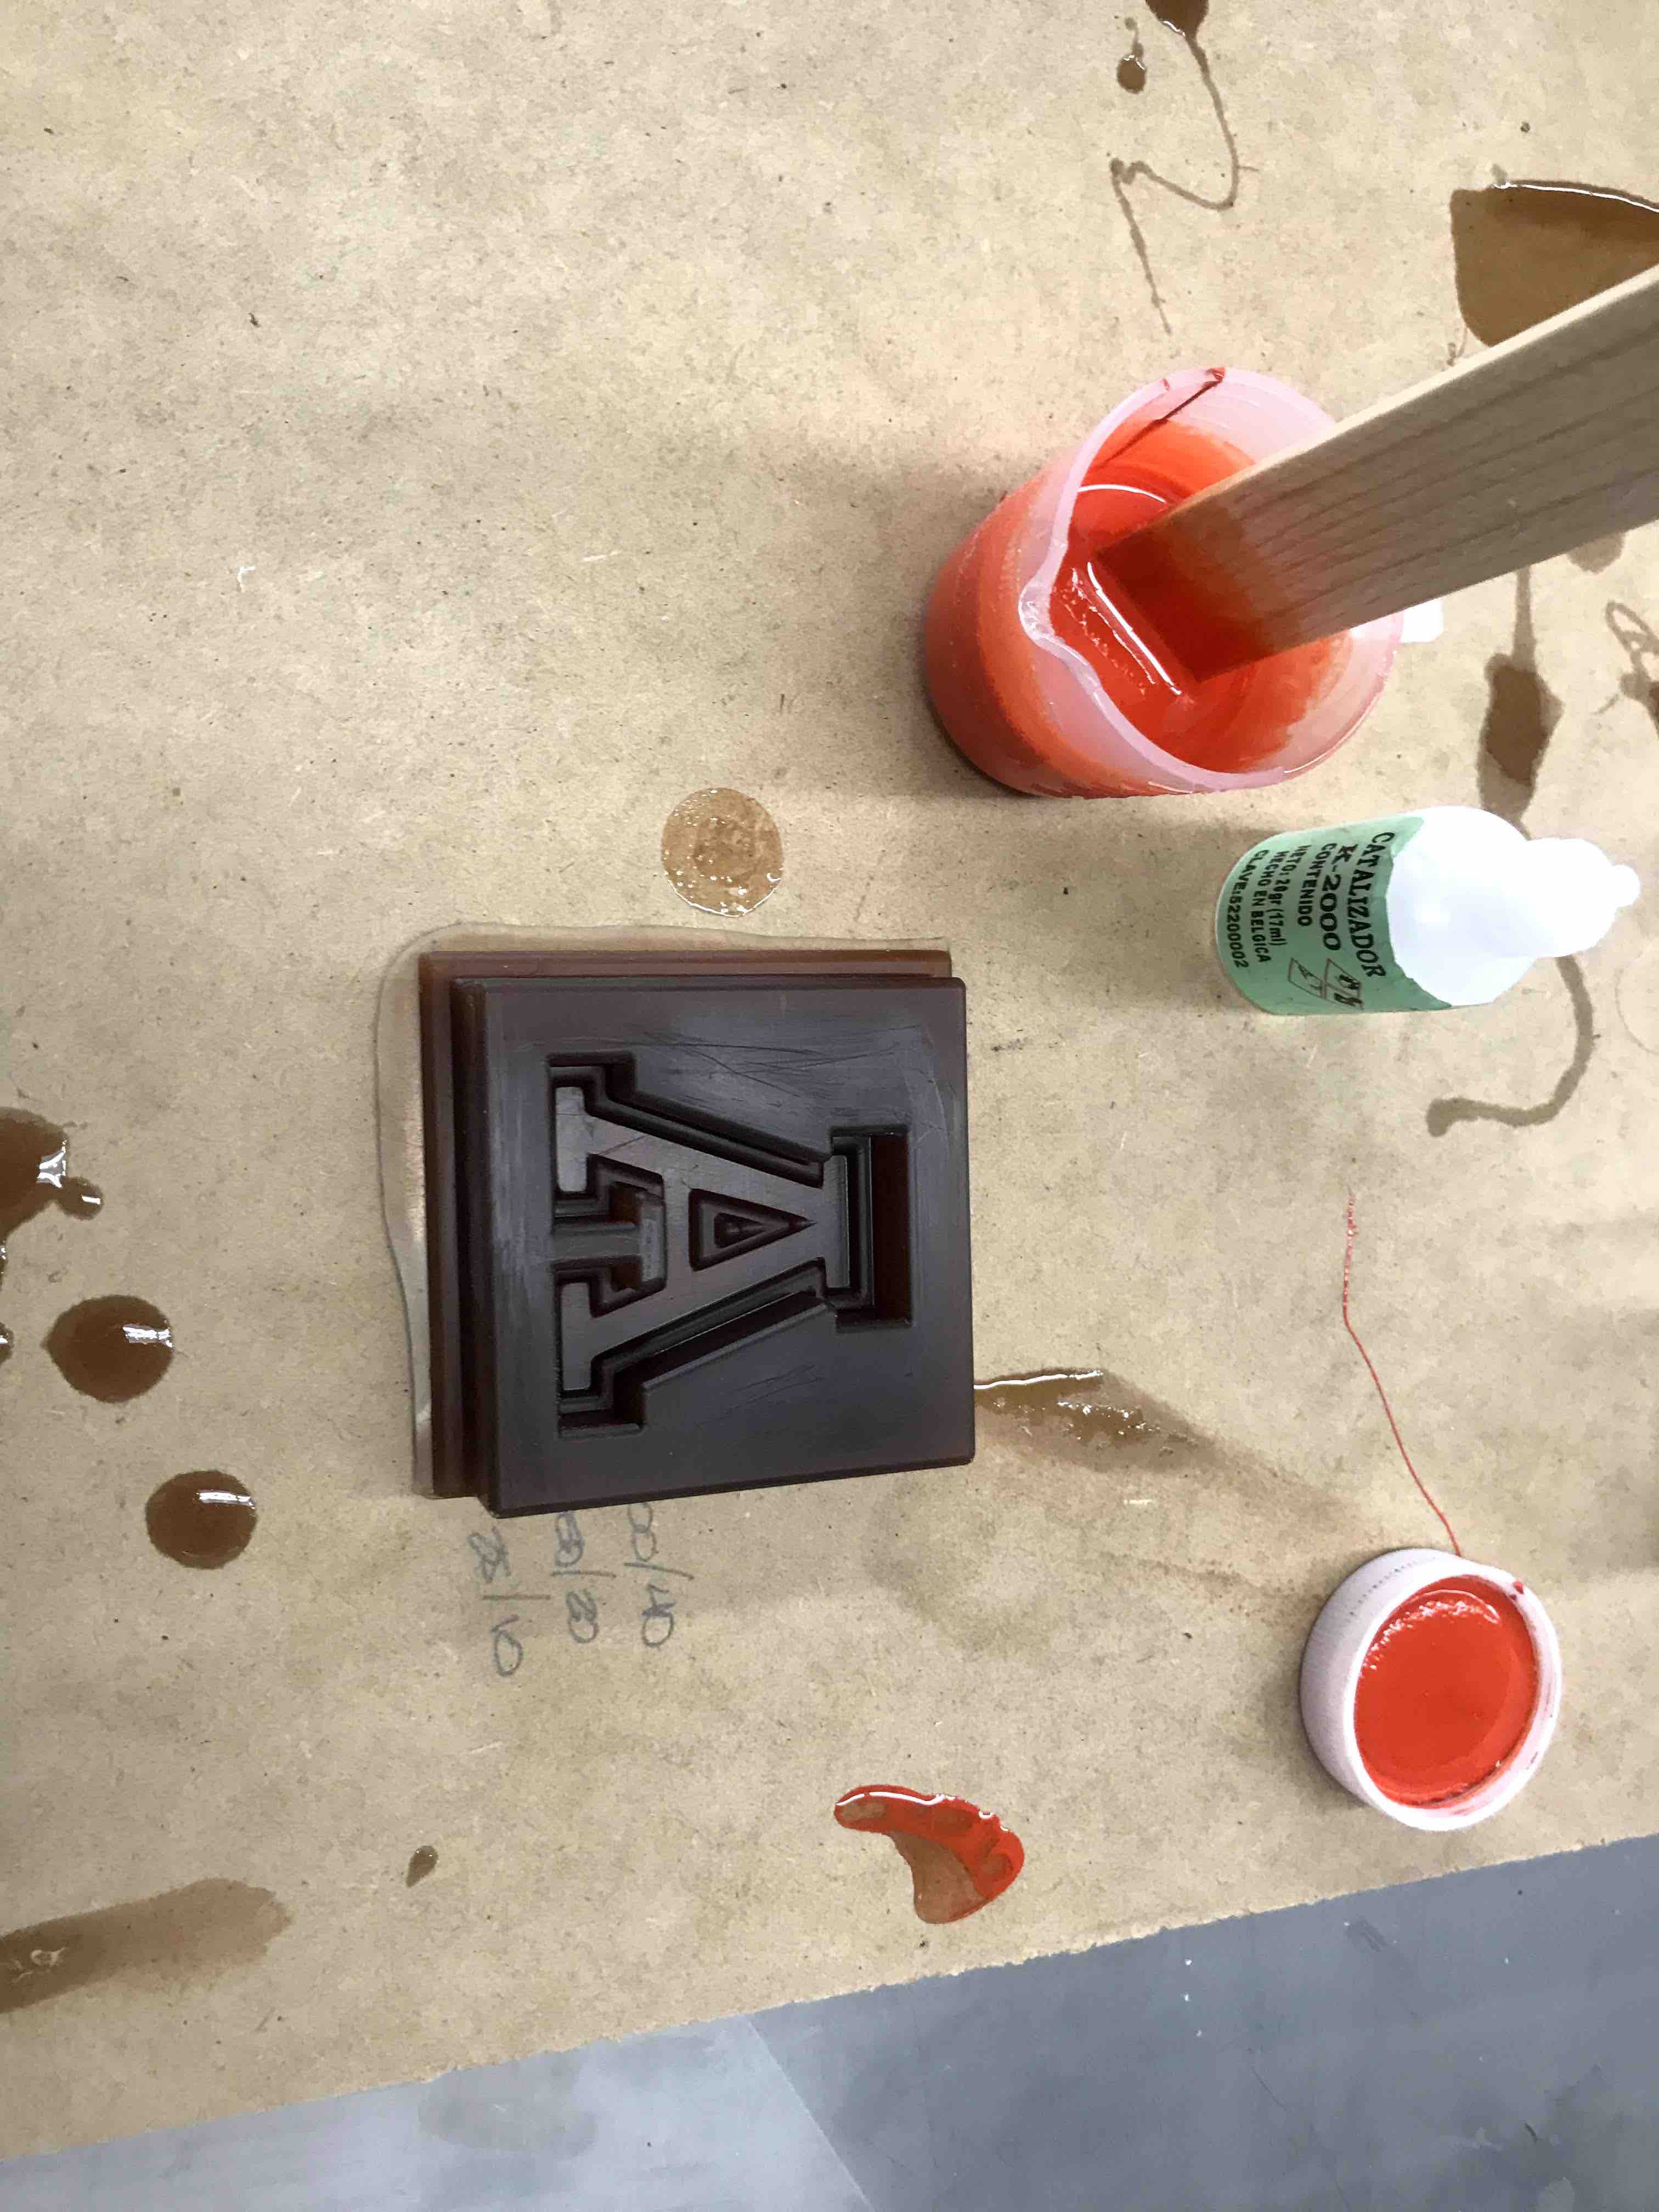
Mixing the
crystal clear resin with orange aditive, check that the
color is uniform, and without bubbles.
The resin
waiting to cure in the urethan rubber mold, just wait, be
patience, more less 72hrs before it´s completely cure.
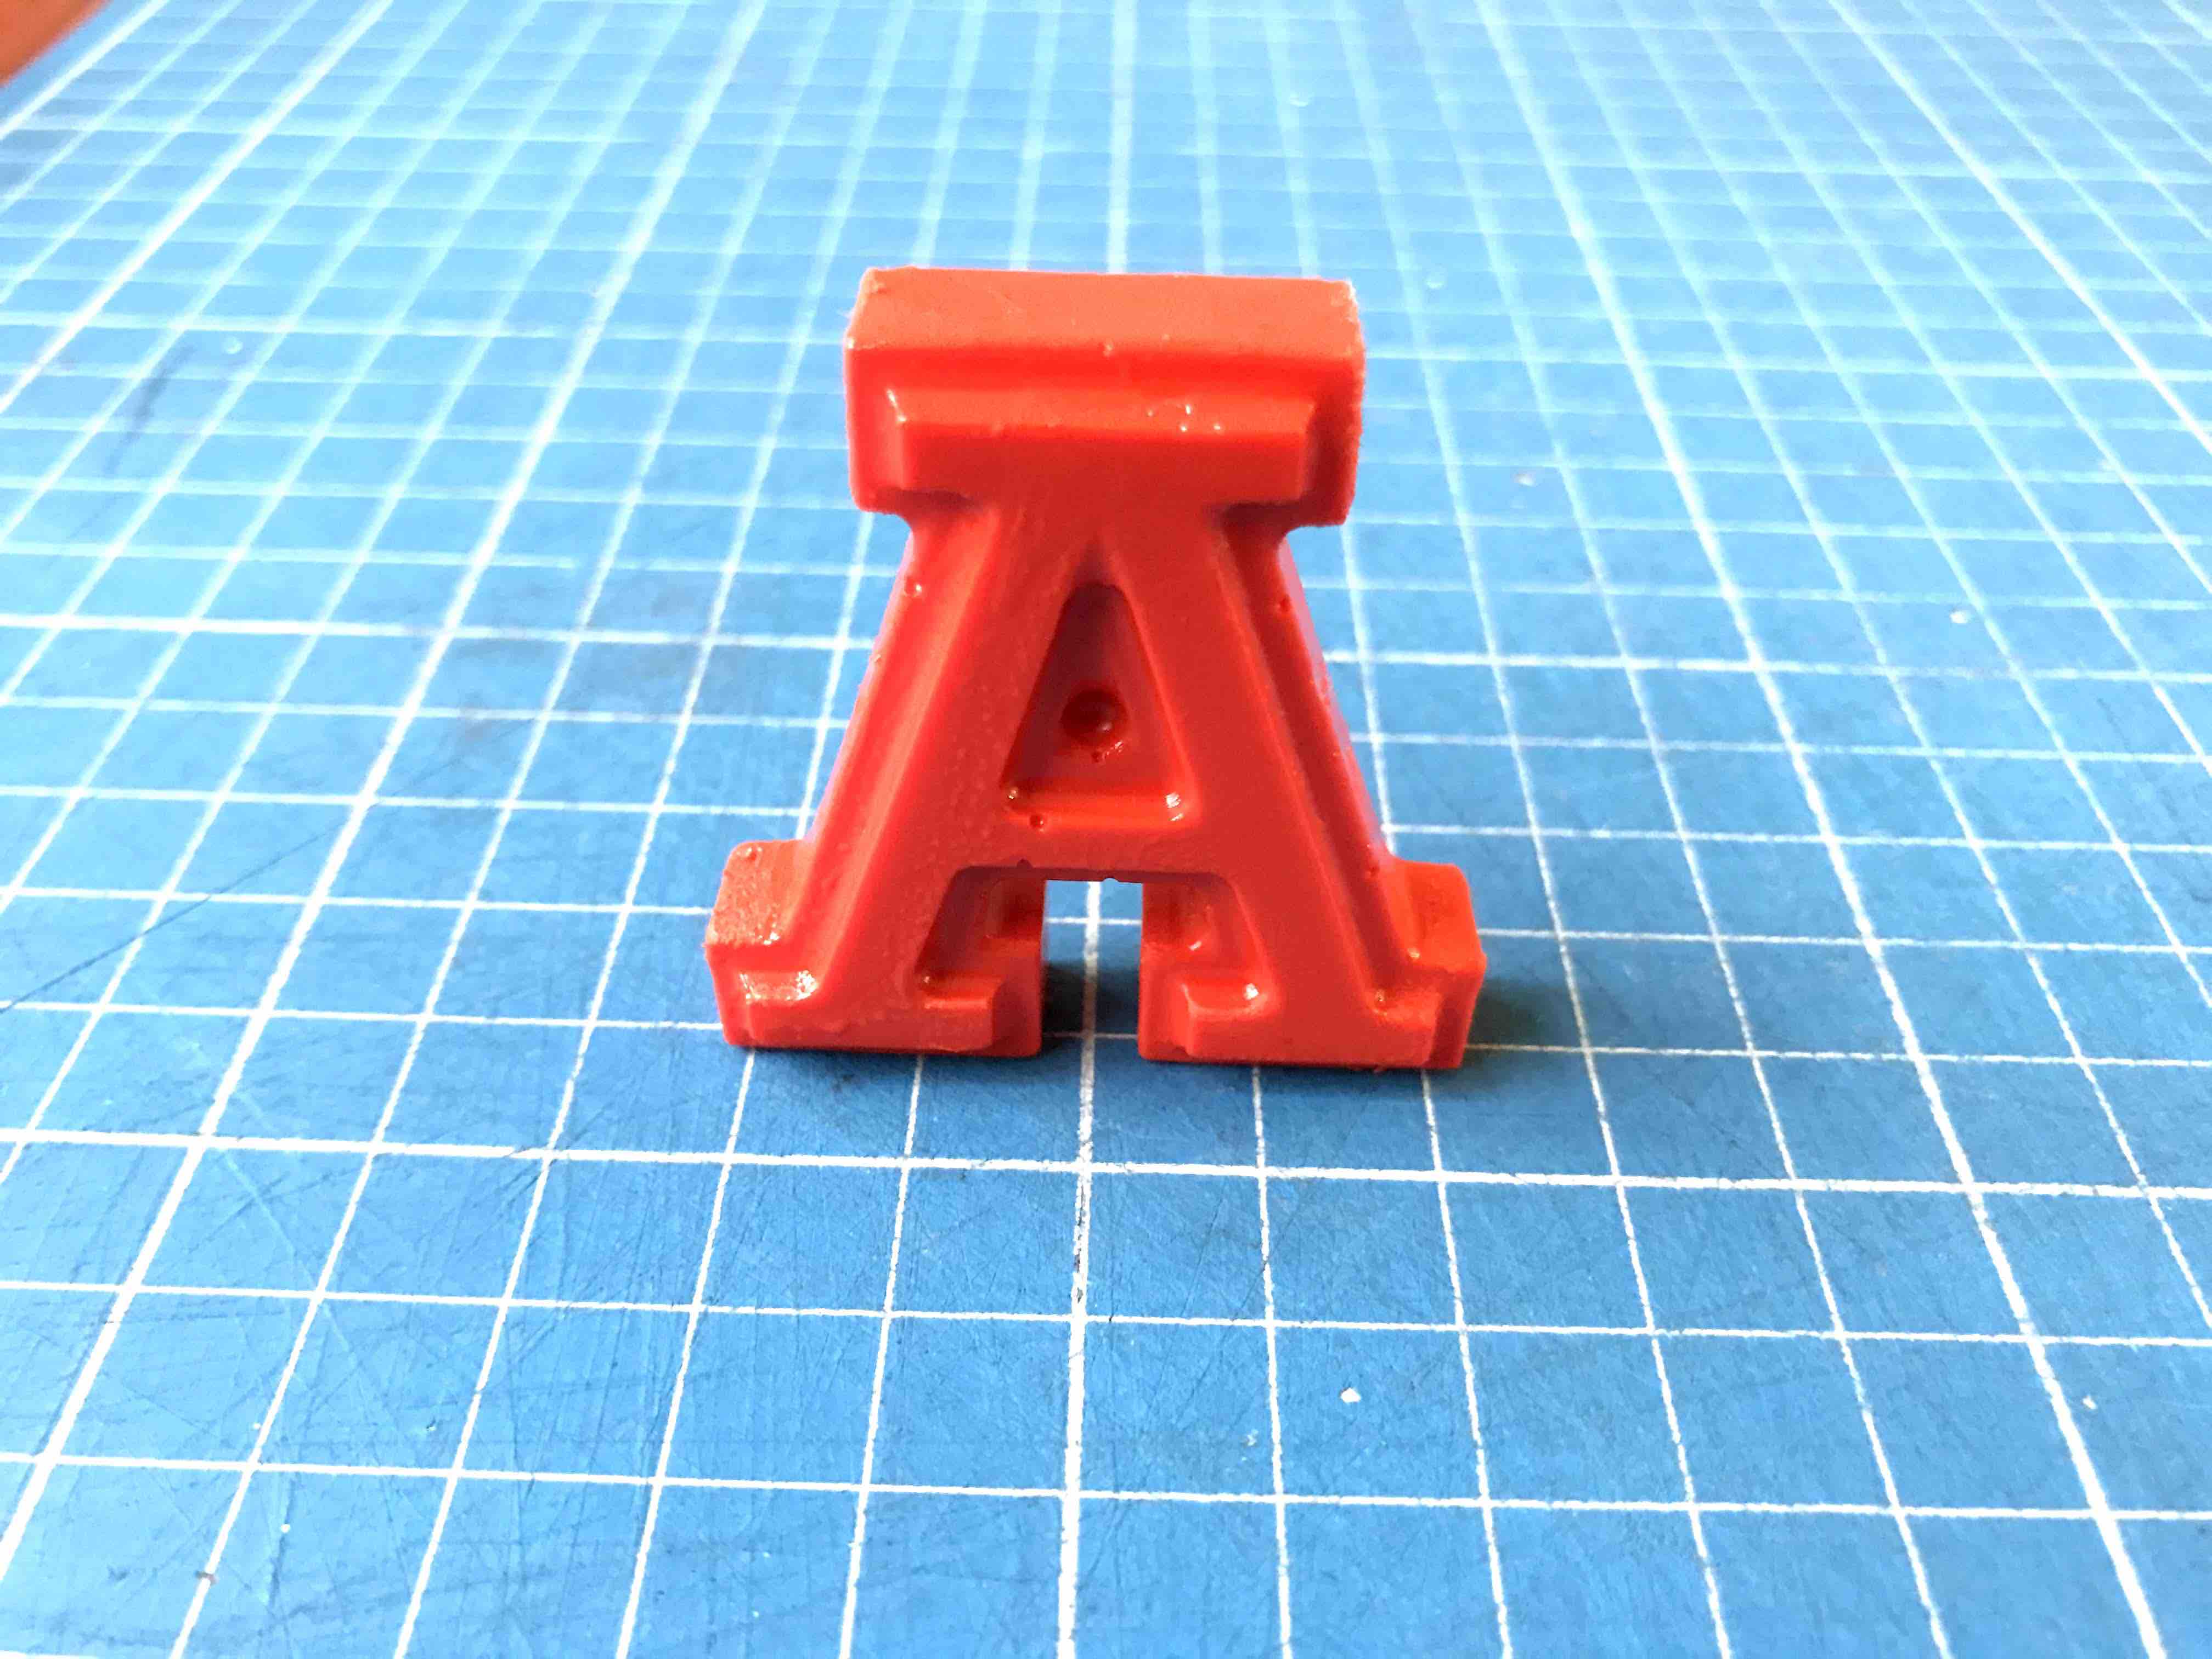
The final
piece, the A logo of the university.
the green spot
a place to re-connect